The Journal app on your iPhone is a great way to collect your thoughts each day. If you find it easier to speak your thoughts aloud instead of typing them, the Journal app has an option to record a voice memo directly from the app. Find out how to use the audio journal feature on your iPhone.
Why You’ll Love This Tip
- Record private voice memos right from your journal entries.
- Speak your mind for your journal rather than typing out your thoughts.
How to Use Audio Journaling on iPhone
System Requirements
This tip was performed on an iPhone 15 Pro running iOS 26. Find out how to update to the latest version of iOS.
If you want to keep an audio journal, you don’t need a dedicated audio journal app. Your iOS Journal app has an option to record voice memos right from the app. For more hidden iPhone tips and tricks, be sure to sign up for our free Tip of the Day newsletter. Now, here’s how to record your voice in the Journal app:
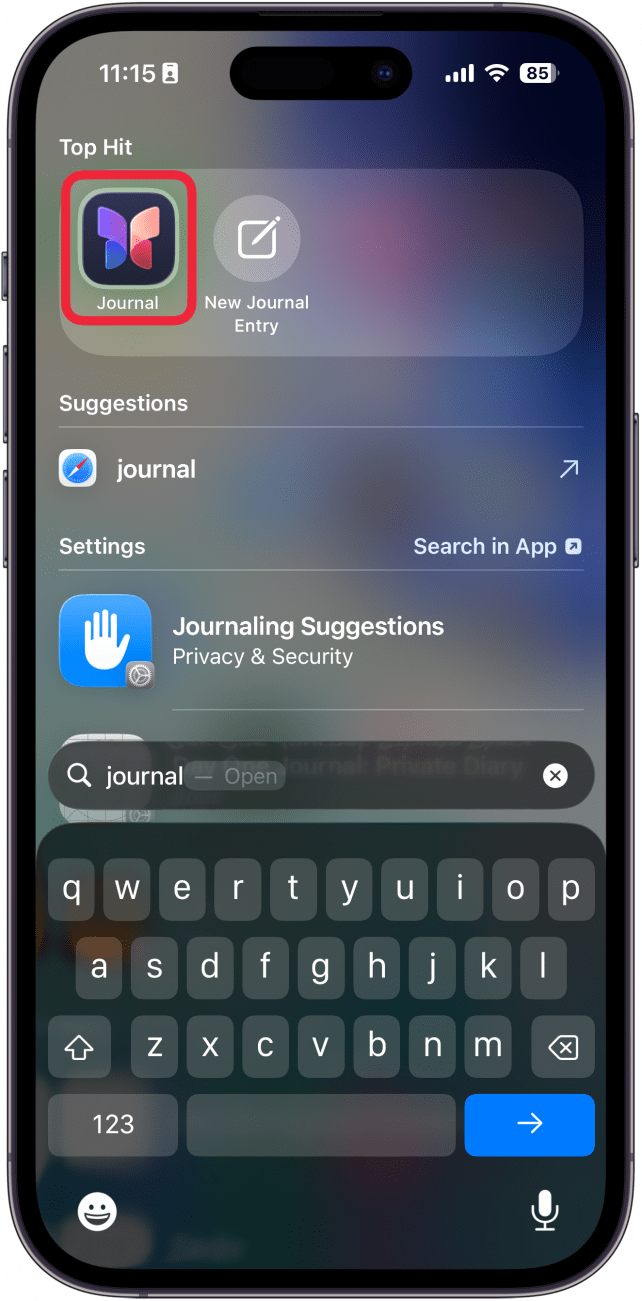
- Open the Journal app.
![a screenshot of iphone spotlight search with a red box around the journal app]()
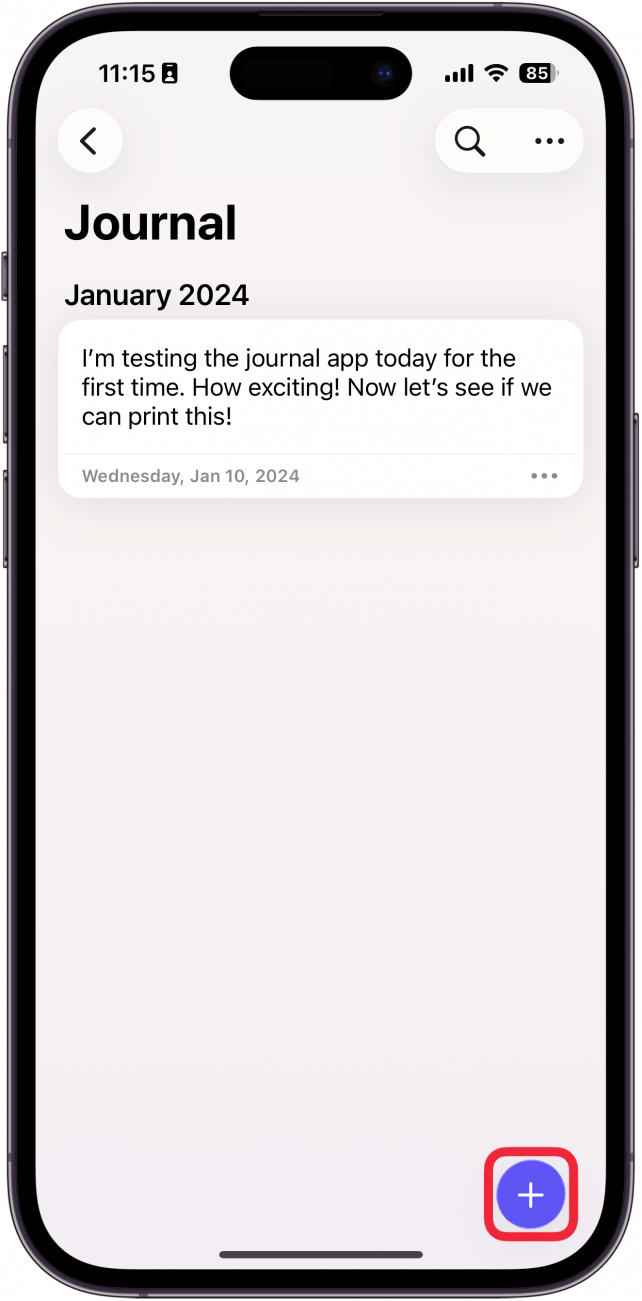
- Tap the plus icon to create a new journal entry.
![a screenshot of the iphone journal app with a red box around the plus icon]()
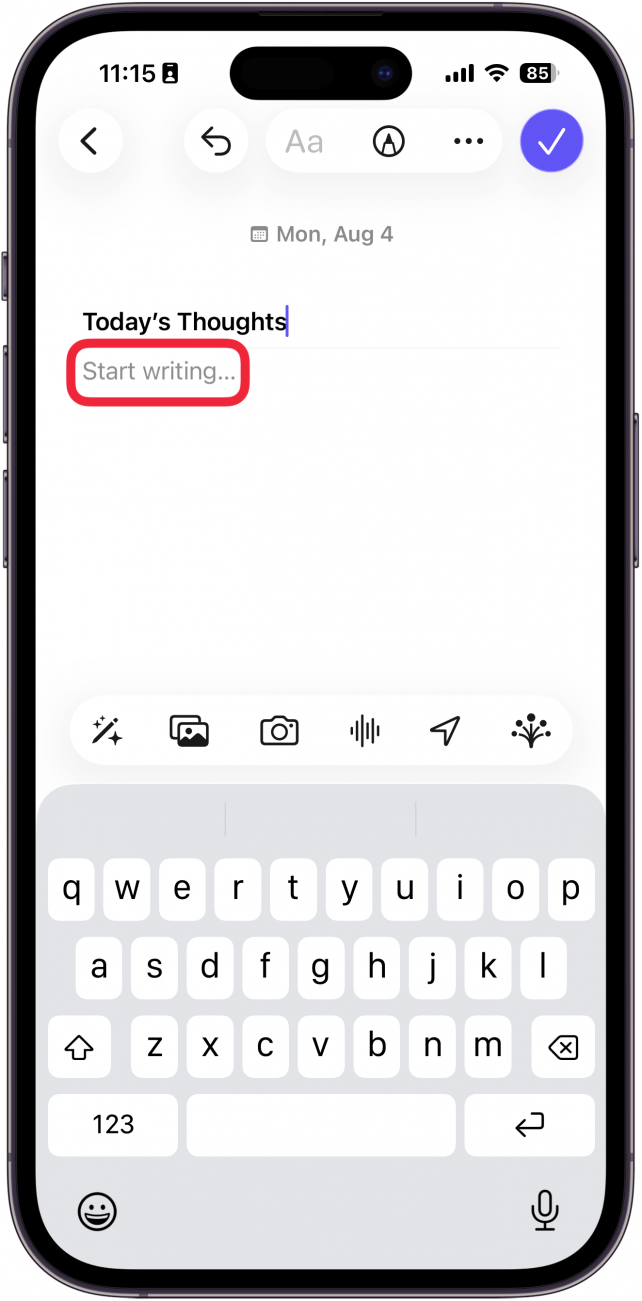
- Give your journal a title and tap the Start writing… field.
![a screenshot of a new entry in the journal app with a red box around start writing]()
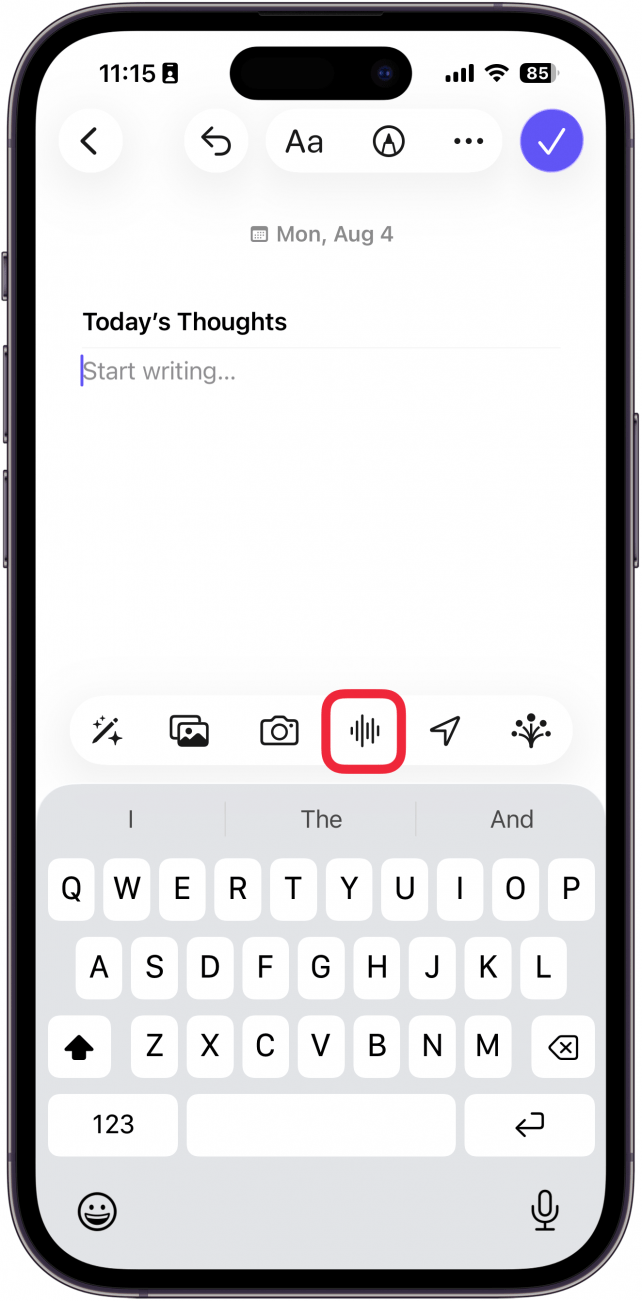
- Tap the audio recording icon.
![a screenshot of a new entry in the journal app with a red box around the voice memo button]()
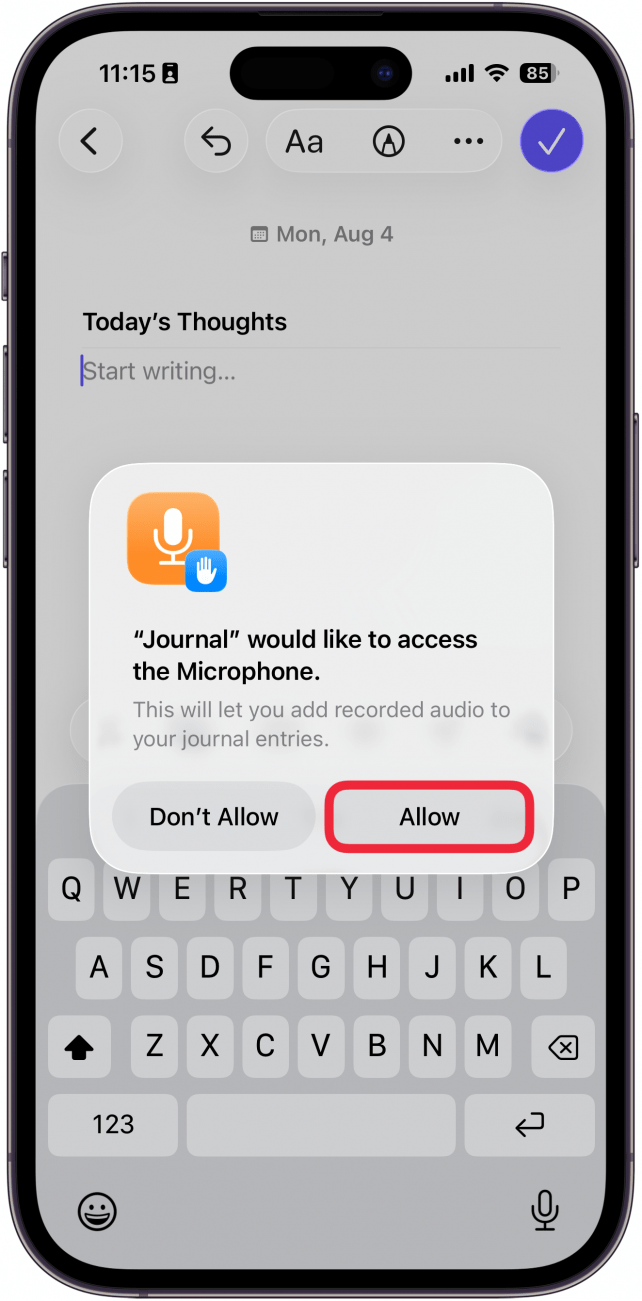
- If you are prompted to give access to your microphone, tap Allow.
![a screenshot of a new entry in the journal app displaying a pop up asking if the user would like to grant access to the microphone with a red box around the allow button]()
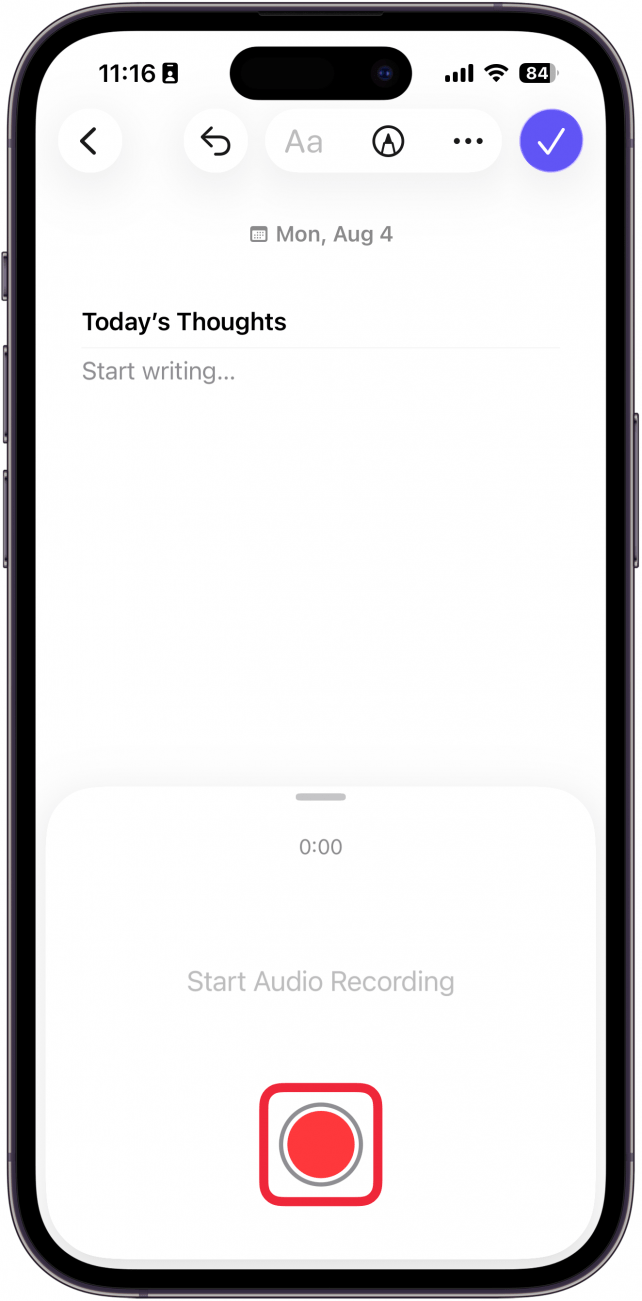
- Tap the record icon (the red circle).
![a screenshot of a new entry in the journal app displaying audio recording interface with a red box around the record button]()
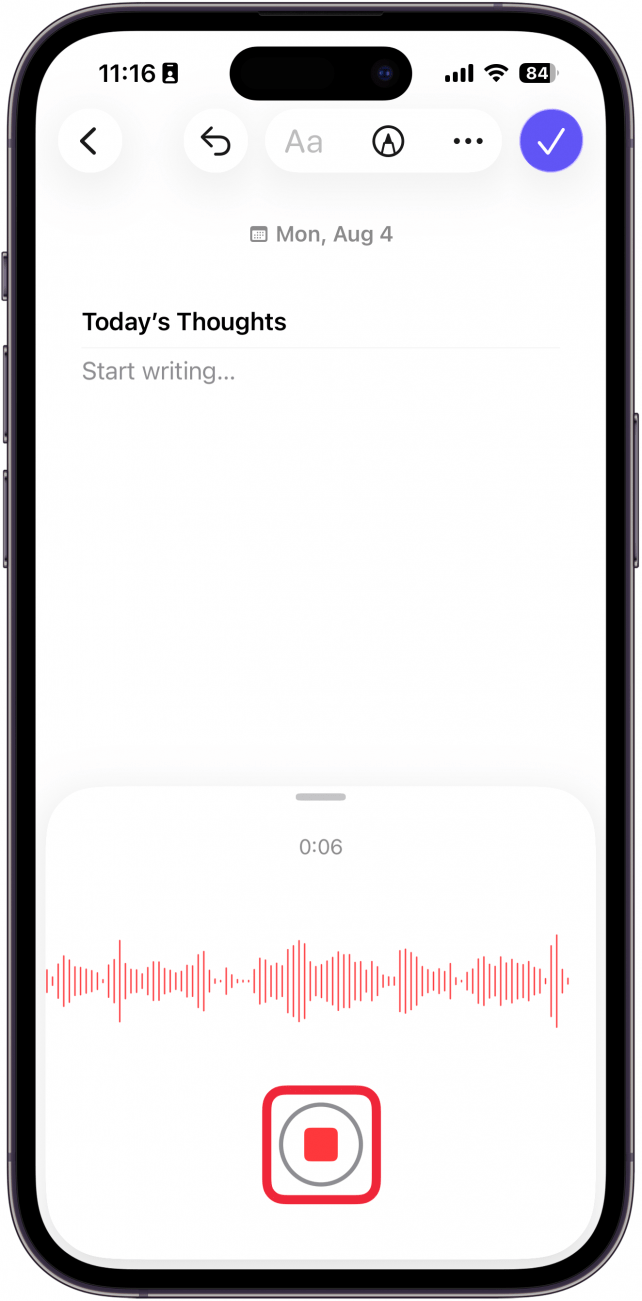
- While recording, tap the stop button (the red square) to stop recording.
![a screenshot of a new entry in the journal app displaying audio recording interface with a red box around the stop recording button]()
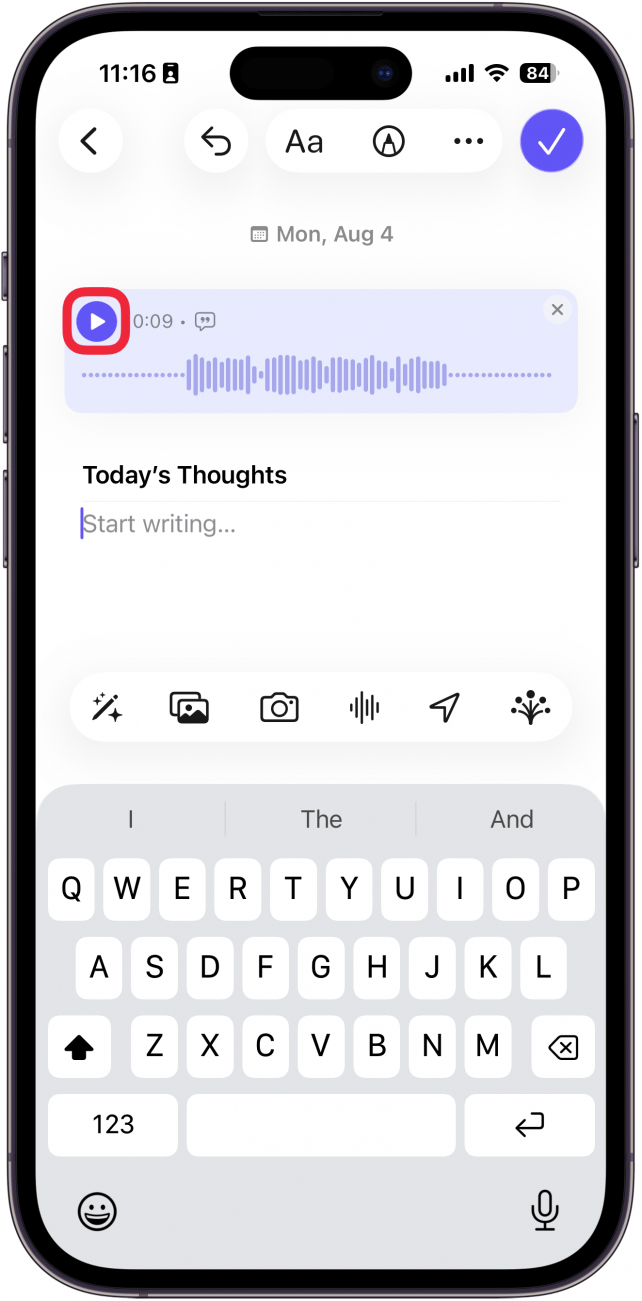
- Once your recording is added to the journal entry, you can tap the play button to listen to it.
![a screenshot of a new entry in the journal app displaying a recorded audio with a red box around the play button]()
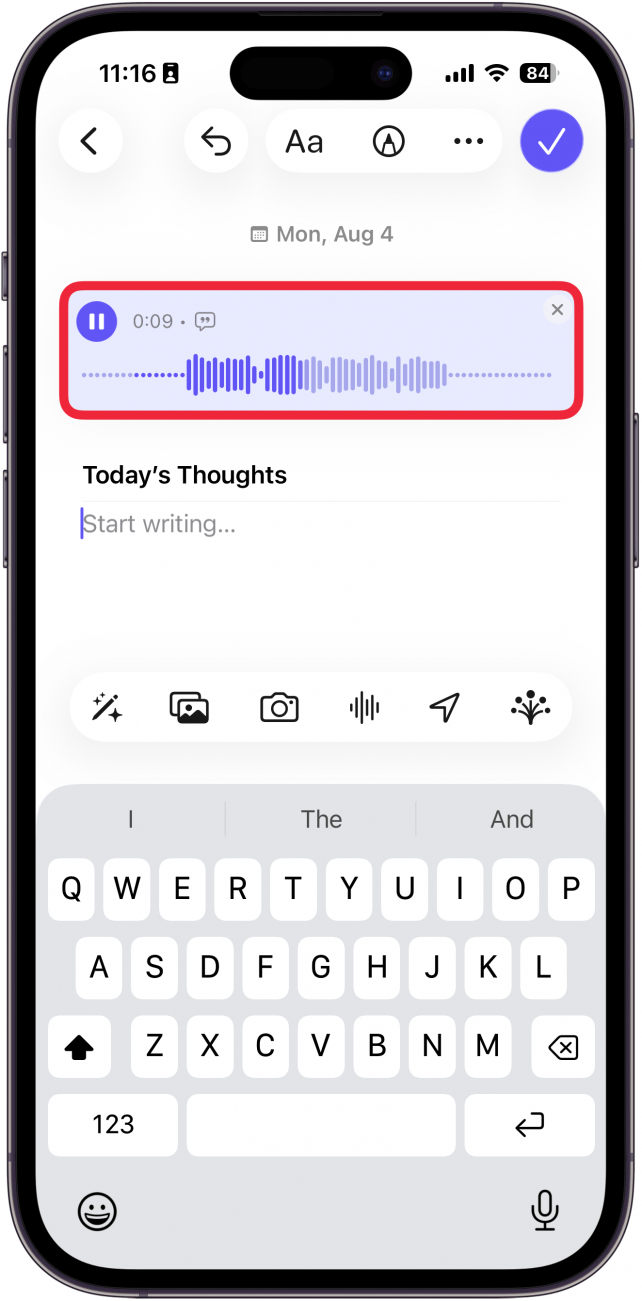
- You can also tap the audio recording itself to get some extra options.
![a screenshot of a new entry in the journal app with a red box around a recorded audio]()
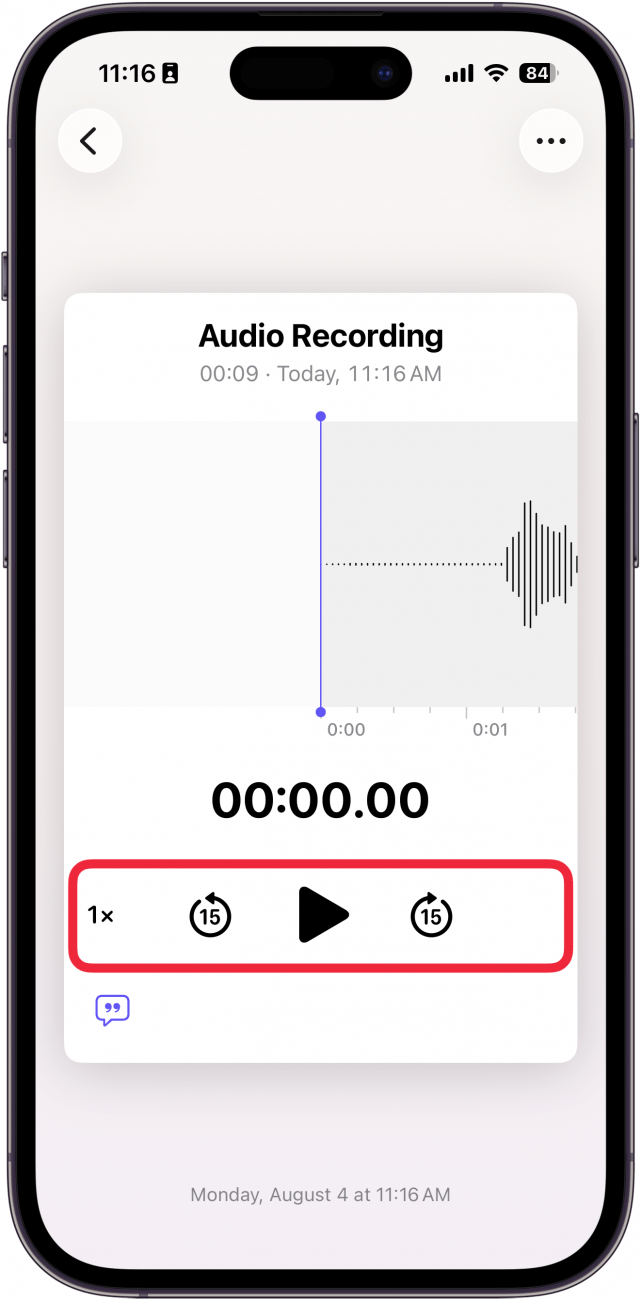
- Here, you can pause/play, rewind/advance 15 seconds, and adjust the playback speed.
![a screenshot of the iphone journal app displaying audio controls with a red box around the playback speed, pause/play, forward 15 seconds, and backward 15 seconds buttons]()
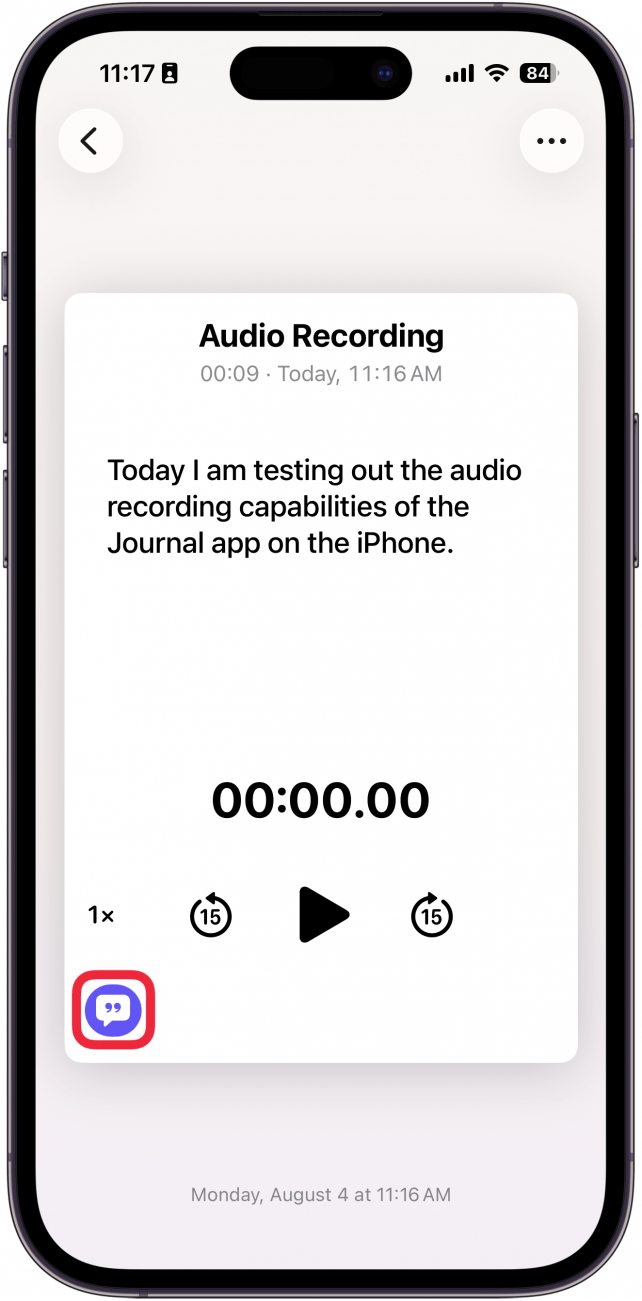
- Tap the transcription button to see a transcription of the recording.
![a screenshot of the iphone journal app displaying audio controls with a red box around the transcription button]()
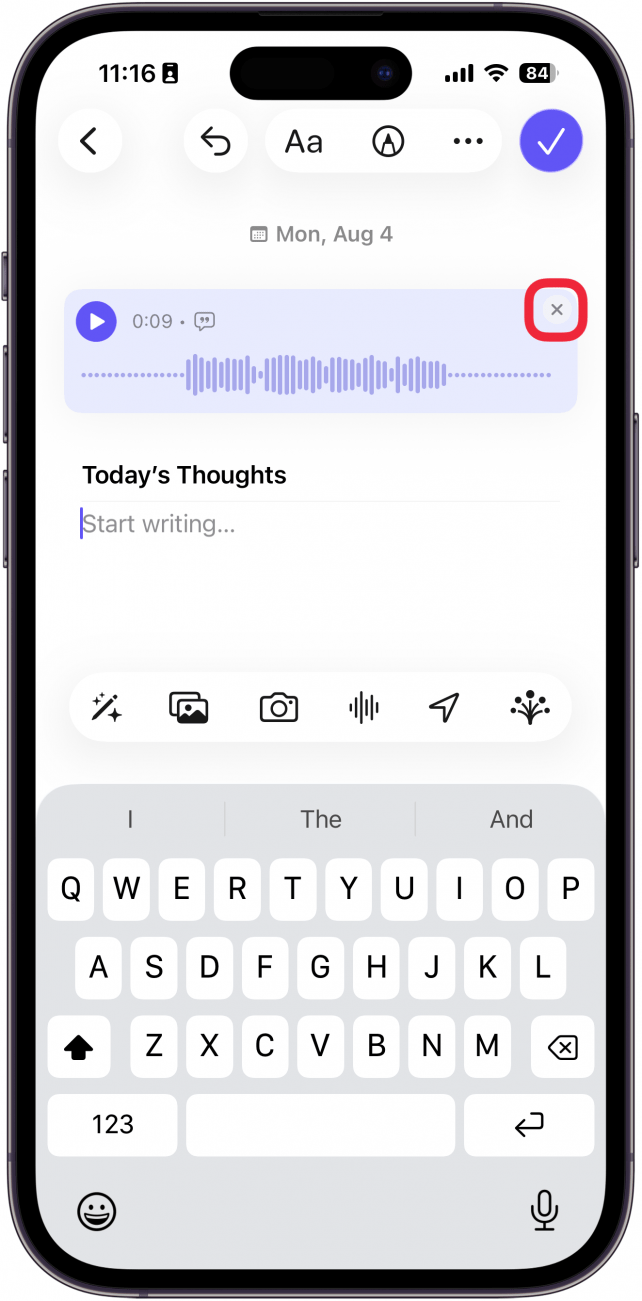
- You can also tap the x icon to delete the recording.
![a screenshot of a new entry in the journal app displaying a recorded audio with a red box around the delete button]()
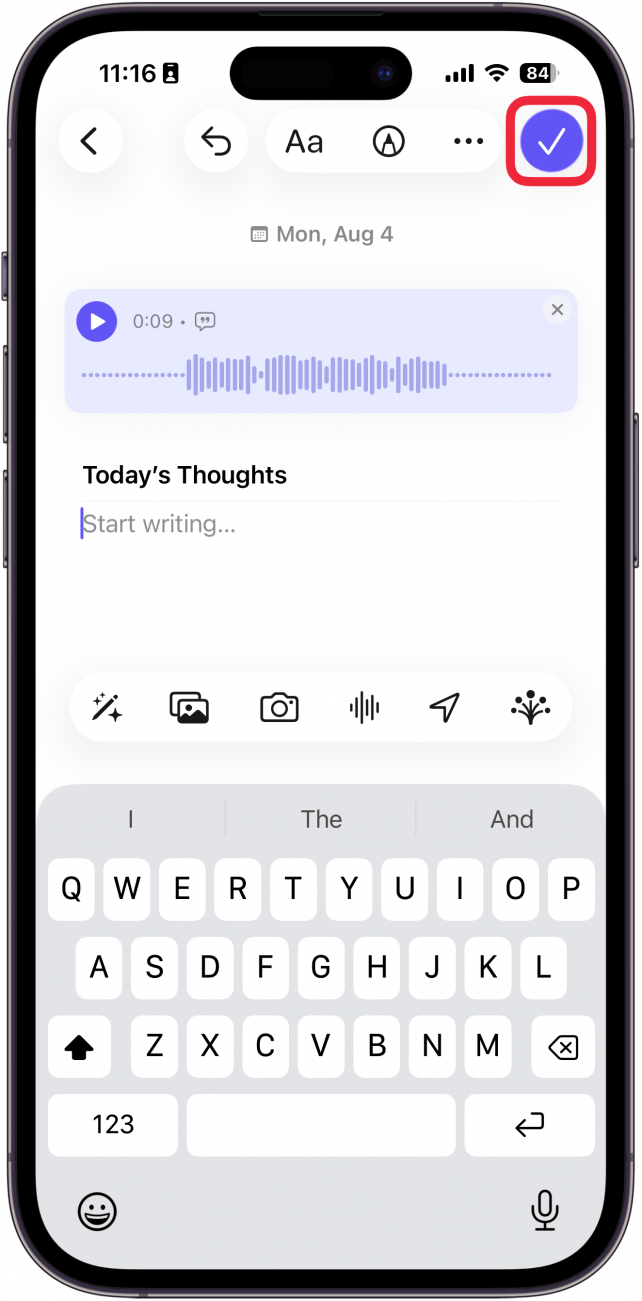
- Tap the checkmark to save your journal.
![a screenshot of a new entry in the journal app displaying a recorded audio with a red box around the done button]()
That’s how to use audio journaling on the iPhone! Thankfully, you don’t need to download any extra apps since the Journal app is native to iOS.