How to Set an iPhone Camera Timer—the Easy Way!

Rheanne has spent over a decade producing hundreds of educational videos showing people how to get the most out of their iPhones, iPads, Apple Watches, and Macs.
Learn More Rheanne has spent over a decade producing hundreds of educational videos showing people how to get the most out of their iPhones, iPads, Apple Watches, and Macs.
Learn MoreIt's easy to put yourself in the picture using the iPhone self-timer in the Camera app. The iPhone photo timer lets you choose a delay of either three, five, or ten seconds, perfect for selfies or squeezing into a group photo with friends. Here's how to use the iPhone photo timer delay.
Why You'll Love This Tip
- You can set up the perfect shot, then get in it yourself, thanks to the iPhone camera timer!
- Choose which camera delay works best to give you plenty of time to get into position.
How to Set Timer on iPhone Camera
System Requirements
This tip works on iPhones running iOS 18 or later, and was tested on an iPhone 17 Pro running iOS 26. Find out how to update to the latest version of iOS.
Your iPhone picture timer can be great for when you want to include yourself in a group shot without trying to smoosh everyone into a selfie, or for self-portraits, solo shots while traveling, and more. Here's how to use the photo timer on your iPhone or iPad:
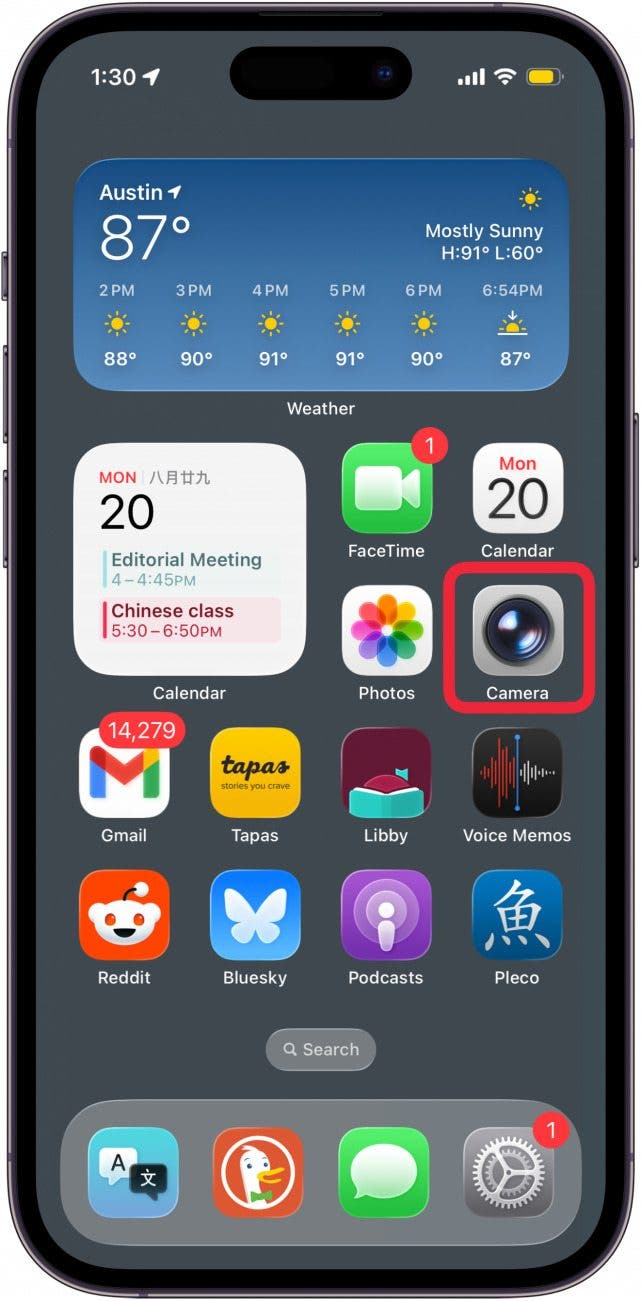
- Open the Camera app on your iPhone or iPad.
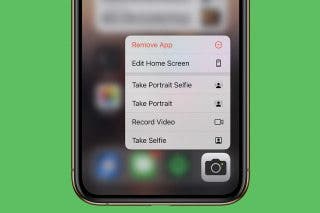
- Set up your shot, then tap the menu icon at the top of your screen.

- Tap Timer.

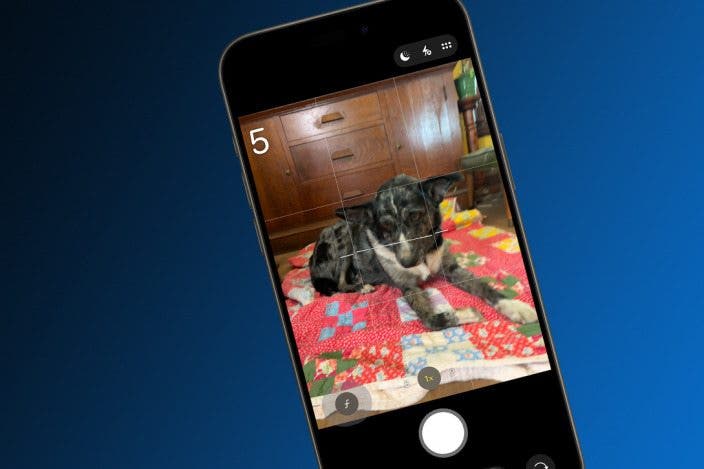
- A 3 will appear, meaning a three-second delay. Tap again to choose a five-second delay, and once more for ten seconds. I chose the 5-second timer.

- Tap the screen outside of the menu box to close it, then tap the Shutter button, and hurry into position.

- Wait for the countdown to finish (your iPhone camera's flash will blink as the timer counts down). This should allow you time to get yourself in the picture or stabilize your phone to avoid shaky images.

As you can see, Snoopy didn't cooperate for this shot! Now you know how to set a timer on an iPhone camera, and how to use the self-timer on your iPhone, and can take all the family photos you want without feeling left out ever again.
Note: Once you know how to set a timer on your iPhone camera, you can use it as an iPhone selfie timer, for outdoor landscapes, group photos, and more. Here are a few quick iPhone camera tips to get the best photos possible with your iPhone photo timer. Use these iPhone camera tricks to help you capture amazing images and make the most of the delayed photo timer on your iPhone!
- If you're using an iPhone tripod, position it at about eye level. This will usually give you the best results with the selfie timer on an iPhone, or for timed group photos. Of course, you can always mix it up if you're feeling creative!
- For outdoor photos, make sure the sun is off to one side or behind the camera. This will help you avoid glare when you're setting up your time-delayed photo.
- Use a tripod and the iPhone selfie-timer when taking night photos. This can benefit all your photos, but is especially useful for capturing crisp nighttime images. The shutter stays open longer in low-light situations, so using the iPhone camera timer can reduce the shaking and blurriness caused by pressing the shutter button.
To learn more iPhone camera tips and tricks, like how to combine side-by-side photos on your iPhone, check out our free Tip of the Day newsletter.

Every day, we send useful tips with screenshots and step-by-step instructions to over 600,000 subscribers for free. You'll be surprised what your Apple devices can really do.

Rheanne Taylor
Related Articles

 Amy Spitzfaden Both
 Rhett Intriago
Apple's Groundbreaking New Headset & Everything Else Announced at WWDC 2023

 Olena Kagui
MacBook Screen Flickering? The Easy Way to Fix It (macOS Sonoma)


How to Unlock Apple Watch without a Passcode or Resetting It

 Rachel Needell
Is Apple Watch with Cellular Worth It? We Have the Answer

 August Garry