Do you have an idea for an app but lack the programming knowledge to begin building it? In this weekly blog series, I will take you, the non-programmer, step by step through the process of creating apps for the iPhone, iPod touch, and iPad. Join me each week on this adventure and you will experience how much fun turning your ideas into reality can be! This is part 31 of the series. If you are just getting started, check out the beginning of the series here.
One of the new features that Apple added to Xcode 5 to improve the management and runtime performance of images is asset catalogs. In this post, I'll give you an overview of how asset catalogs work, and we'll add an asset catalog to the iAppsReview project so you can get hands-on experience with this new technology.

If you would like to follow along, you can get the latest version of the iAppsReview project from this link. If you get stuck along the way, you can get the finished project from this link.
Why Use Asset Catalogs?
One of the primary reasons for using asset catalogs is to make it easier to manage your app's images. If your app supports non-Retina iOS devices (older than iPhone 4), then you need to have two versions of each graphic—one for Retina displays and one for non-Retina displays, and the names of the images needed to match. For example, your main app icon for non-Retina devices would be named Icon.png and the Retina version of the image would be named Icon@2x.png. Adding the @2x suffix to the image root name makes these images a matched set and allows iOS to figure out which image to load for different devices.
With asset catalogs, you no longer need to maintain this naming convention. You can name images anything you want and pair them together in an image set by simply dragging and dropping them into an asset catalog (as you will see in just a bit). To load an image from an asset catalog, you can call the UIImage:imageNamed: method, passing the name of the set that contains the image.
A second advantage of using asset catalogs is performance. If your project has an iOS 7 deployment target, Xcode compiles your asset catalogs into a runtime binary file format that improves the speed of your app.
Types of Assets
There are three types of assets that can be included in an iOS asset catalog:
- App icons - App icon sets contain the icons that are displayed on the iOS Home screen, Spotlight search results, the Settings App, and in the App Store.
- Launch images - Launch image sets contain all the versions of the launch image displayed at startup for all of the targeted iOS devices.
- Image sets - Image sets contain all the versions of an image that are necessary to support all of the targeted iOS devices. This includes images used in table views, tab bars, image views, and so on.
Let's take a look at some of the changes for app icons and launch images in iOS 7 before we learn more about asset catalogs.
App Icon and Launch Image Changes
In iOS 7, Apple has changed the dimensions of the required app icons. Figure 1 lists the app icons you need when deploying to iOS 7.
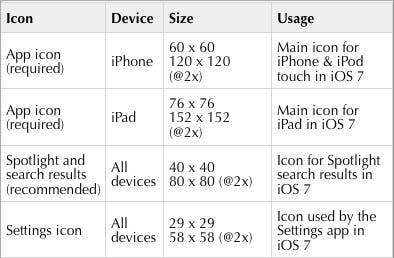 |
| Figure 1 - iOS 7 App Icons |
If your app still needs to support iOS 6.1 and earlier, you also need to provide the icon sizes shown in Figure 2.
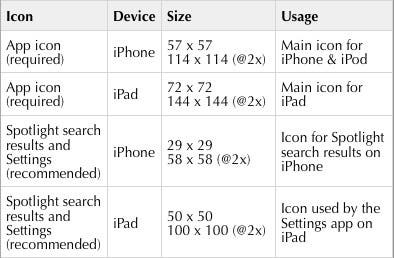 |
| Figure 2 - iOS 6.1 and earlier App Icons |
The Xcode 5 Project Editor has a section that provides a list of all app icons and launch images you need for your project. To see the Project Editor, click the very first node in the Project Navigator.
Next, you need to make sure you are viewing the Target rather than the Project, so in the list box at the top left of the Project Editor, select Targets > iAppsReview as shown in Figure 3.
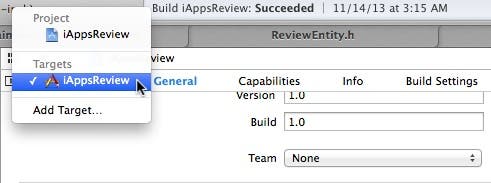 |
| Figure 3 - Select the iAppsReview target. |
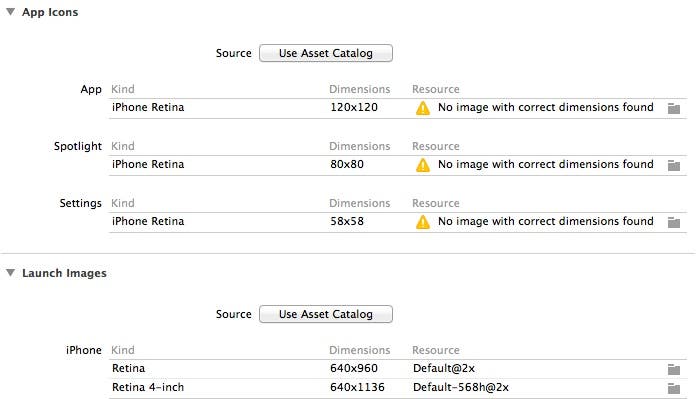
At the bottom of the Project Editor, you should see the App Icons and Launch Images section shown in Figure 4.
 |
| Figure 4 - App Icons and Launch Images |
Under App Icons, there are three sets of images—App, Spotlight, and Settings that indicate where each set of icons is used. The Kind column specifies the device and operating system for which a particular icon is used. The Dimensions column specifies the required size of the icon. The Resource column is intended to show the image included in your project that fits the criteria in the Dimensions column. The No image with correct dimensions found warning is incorrect, since our sample project does contain several of the required icons.
In the Launch Images section, there is a list of launch images for the iPhone. There are no images shown for the iPad since this is an iPhone-only project. Under the Resources column you can see that the Project Editor has correctly identified the project's launch images.
As you can see, images are shown for both iOS 6.1 and earlier, as well as iOS 7 and newer. In this case, let's say we only want to support iOS 7. To make this happen, under Deployment Info, change the Deployment Target to 7.0 as shown in Figure 5.
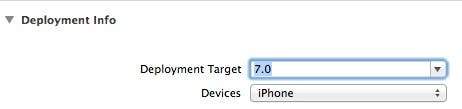 |
| Figure 5 - Set the Deployment Target to 7.0. |
When you make this change, the number of App Icons and Launch Images is reduced (Figure 6) because iOS 7 only runs on devices with a Retina display, so you only need images with Retina resolutions.
 |
| Figure 6 - iOS 7 App Icons and Launch Images |
As you can see, there are only three app icons and two launch images listed for iOS 7 on the iPhone.
Adding an Asset Catalog
Now we're ready to learn more about asset catalogs by adding one to the iAppsReview project.
- Go back to the Project Editor, and under the App Icons section, click the Use Asset Catalog button (Figure 6).
- In the confirmation dialog, leave the Also migrate launch images check box selected, and then click the Migrate button (Figure 7).
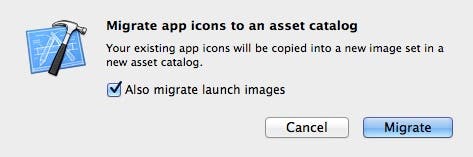 |
| Figure 7 - Migrate the app icons to the an asset catalog. |
After the migration is complete, the App Icons and Launch Images sections are changed as shown in Figure 8.
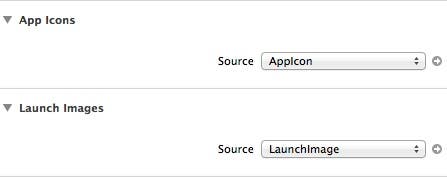 |
| Figure 8 - The App Icons and Launch Images sources |
The Source settings now show the name of the image sets that contain the app icons (AppIcon) and the launch images (LaunchImage).
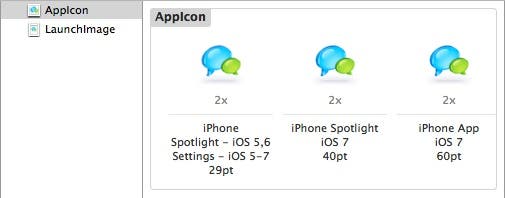
- To see the app icons in the asset catalog, click the arrow to the right of the Source list box shown in Figure 8. This displays the asset catalog as shown in Figure 9.
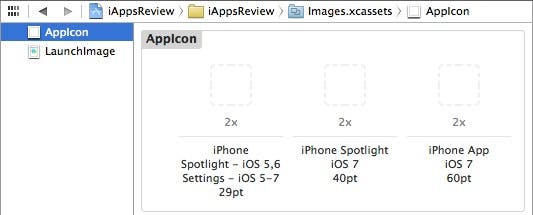 |
| Figure 9 - The AppIcon image set |
You may be surprised to see that Xcode didn't automatically set the app icons in the three appropriate slots (given that the project contains app icons that are an exact match for what's required). Since this didn't happen automatically, we'll set these icons ourselves.
- You need to be "quick on the draw" to set these icons. Basically, you need to click the icon in the Project Navigator, and then quickly drag it over to the asset catalog and drop it on AppIcon box.
To begin, click the Icon29@2x.png file in the Project Navigator, and then quickly drag it over to the slot on the left in the AppIcon section of the asset catalog shown in Figure 10.
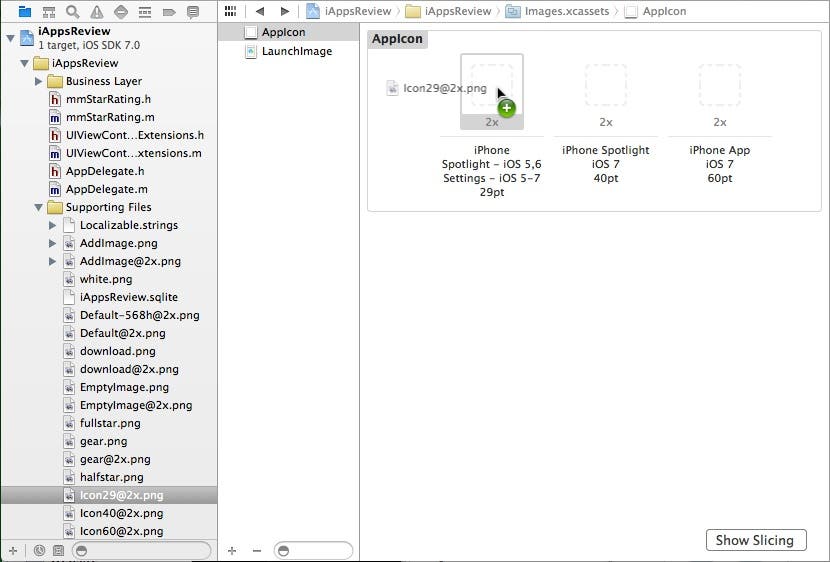 |
| Figure 10 -Drag Icon29@2x.png to the asset catalog. |
- Now drag Icon40@2x.png over to the middle slot and Icon60@2x.png over to the slot on the right in the AppIcon section of the asset catalog. When you're finished, the AppIcon section should look like Figure 11.
 |
| Figure 11 - The updated AppIcon section |
- Now let's check out the launch images. In the list on the left side of the asset catalog, click LaunchImage and you will see the images shown in Figure 12. Fortunately, Xcode had no problem correctly identifying these images.
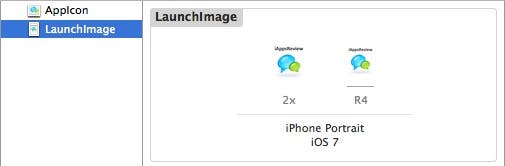 |
| Figure 12 - The launch images |
- As I already mentioned, you can also add your other app images to the asset catalog. To do this, click the plus sign at the bottom-left corner of the asset catalog (Figure 13).
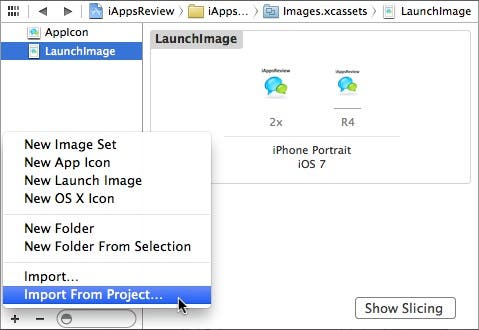 |
| Figure 13 - Import images from the project. |
- This displays a dialog that allows you to choose images to be imported. As shown in Figure 14, uncheck the following images, since we already imported them into the asset catalog:
- Default-568h@2x.png
- Default@2x.png
- Icon29@2x.png
- Icon40@2x.png
- Icon60@2x.png
 |
| Figure 14 - Choosing images to import |
- Next, click the Import button. This adds the selected images to the asset catalog (Figure 15).
 |
| Figure 15 - The images added to the asset catalog. |
Notice there is a 1x (non-Retina) and 2x (Retina) version of some images. You really only need the 2x version since you have specified that the app's deployment target is iOS 7.0, but I wanted to leave these in so you can see what they look like.
- Let's take a look at one other thing. Launch the Finder app and navigate to the iAppsReview project's root folder and drill down until you see the Images.xcassets folder shown in Figure 16.
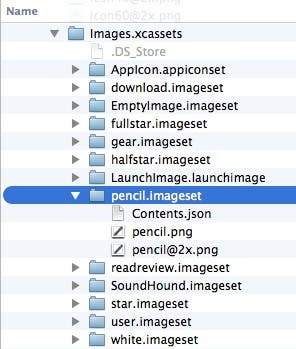 |
| Figure 16 - The asset catalog directory structure |
As you can see, each image set is stored in its own folder along with a Contents.json file that describes each image.
Conclusion
With each release of Xcode, Apple continues to make life easier for the app developer. I highly recommend you move your app images to asset catalogs and experience the improved organization and runtime performance that they bring to the plate.