Keep Your Web Browsing Activity Private

A former college writing instructor, August manages and edits all newsletters at iPhone Life and writes about technology for everyday users.
Learn More A former college writing instructor, August manages and edits all newsletters at iPhone Life and writes about technology for everyday users.
Learn MoreApple's Private Relay for iPhone is a paid feature for iCloud Plus users aimed at giving users the power to protect their own data. But what does iCloud Private Relay do? Is Private Relay a VPN? How does it work? How can you use it? In this article, we'll cover all your burning questions about this service.
Why You'll Love This Tip:
- Keep your web browsing private.
- Anonymize your location while still seeing geographically relevant search results.
- Prevent websites from tracking you and collecting your data.
How to Use Private Relay on iPhone
System Requirements
This tip was performed on an iPhone 15 Pro running iOS 18.2.1. Find out how to update to the latest version of iOS.
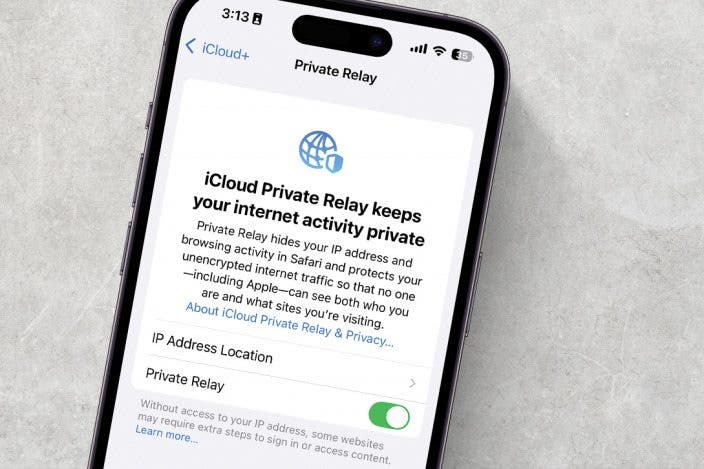
What is Private Relay on iPhone? This feature anonymizes your browsing activity and helps prevent websites from tracking you and collecting your data. While iCloud Private Relay masks your personal information while browsing the web, it is not a VPN. VPNs—or virtual private networks—are used to spoof your location, making it appear as though you are in a completely different geographic region, and route all your internet traffic through various channels to make your browsing data completely untraceable. They also mask their use of proxy servers, while iCloud Private Relay does not. If you are having trouble conducting important business while using iCloud Private Relay, you may need to temporarily disable it.
Looking for how to hide your IP address on your iPhone? Now that you know what iCloud Private Relay is, it's time to try it out. Before you turn Private Relay on, make sure you are subscribed to iCloud+; if you're not, you can upgrade easily before beginning. Now, here's how to turn on Private Relay on iPhone:
- Open the Settings app, and tap your profile.
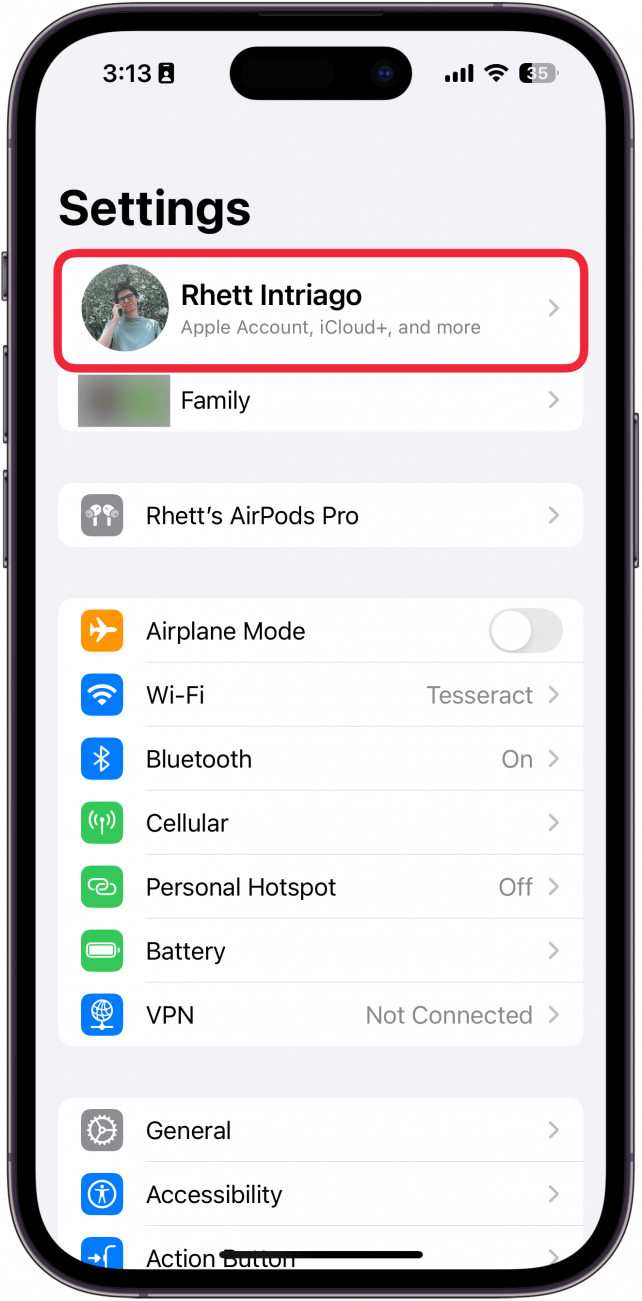
- Tap iCloud.

- Tap Private Relay.

- Toggle Private Relay on.

And that's all you have to do! If you want to know how to turn off Private Relay, simply follow the same steps above and use the toggle to switch off Private Relay. Private Relay requires no additional setup or configuration, so as soon as you toggle it on, you're ready to start browsing—privately. As with many Apple services, Private Relay aims to keep users within the Apple ecosystem, and as such, it only works with Safari. This may be a drawback if you have Chrome or Firefox set up just the way you like it. Additionally, keep in mind that Private Relay is not available in all regions, so if you don't see it as an option in your iPhone settings, you may need to wait until Apple brings it to your region. Learn about the other features of iCloud+!
More On: Private Browsing
Top image credit: Chingraph / Shutterstock.com

Every day, we send useful tips with screenshots and step-by-step instructions to over 600,000 subscribers for free. You'll be surprised what your Apple devices can really do.

August Garry
August Garry is the Newsletter Manager for iPhone Life. Formerly of Gartner and Software Advice, they have six years of experience writing about technology for everyday users, specializing in iPhones, HomePods, and Apple TV. As a former college writing instructor, they are passionate about effective, accessible communication, which is perhaps why they love helping readers master the strongest communication tools they have available: their iPhones. They have a degree in Russian Literature and Language from Reed College.
When they’re not writing for iPhone Life, they’re reading about maritime disasters, writing fiction, rock climbing, or walking their adorable dog, Moosh.
 Olena Kagui
 Rhett Intriago
 Rachel Needell


 Leanne Hays
 Amy Spitzfaden Both


 Sean Dugan

 Hal Goldstein
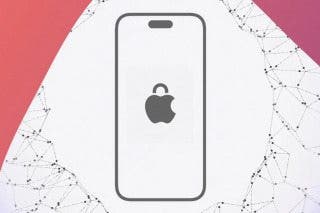
 Cullen Thomas