Apple ID Guide: How to Create, Log In, Manage, Change & Set Up Family Sharing

Leanne puts her love of troubleshooting and repair to use managing our Ask an Expert Facebook group and has authored hundreds of how-to, Apple news, and gear review articles.
Learn More Leanne puts her love of troubleshooting and repair to use managing our Ask an Expert Facebook group and has authored hundreds of how-to, Apple news, and gear review articles.
Learn MoreIf you’ve just bought your first Apple product, whether you’re switching from Android or finally cracking and purchasing your first smartphone, you’ll need to set up an Apple ID. Your Apple ID is the account that you use to access all things Apple; iTunes, the App Store, iCloud, Apple Music, iMessage, FaceTime, and more. In this guide, we’ll go over everything you need to know to create an Apple ID and make sure your account is secure, as well as where and how you can use your Apple ID. We’ll also help you troubleshoot some common problems and issues with your Apple ID including changing the ID, changing the password, what to do if you forgot your Apple ID, what to do if you get the Apple ID disabled error message, and more. Let’s dig in.
Related: Apple AirPods & AirPods 2 Guide: Charging, Pairing, Setting Up, Using, More
Apple ID Guide Table of Contents
What Is an Apple ID & Where Can I Use It?
Make Sure Your Apple ID Is Secure
Check to See Where You’re Signed in with Your Apple ID
Add a Device to Your Apple ID Account Page
Remove a Device from Your Apple ID Account Page
Apple ID Problems - How to Solve Them & What Not to Do
Add or Remove an Email Address or Phone Number from Your Apple ID
What if I Created More Than One Apple ID?
How to Delete Apple ID: Back Up to iCloud, Then Save Your Files Elsewhere
How to Use an iTunes Gift Card with Family Sharing
What is an Apple ID & Where Can I Use It?
As mentioned above, your Apple ID is the key to all your data and purchases on every Apple device you own. Your Apple ID includes an email address and password, your contact and payment information, and security questions and codes used on all your Apple accounts.
How to Create an Apple ID
You need your Apple ID for any and every Apple service and purchase. If you've purchased from or used any Apple services, you already have an Apple ID, so don't create a new one! Instead, go to the account page and enter your information to find the ID you previously created. If you haven't created an Apple ID yet, there are a few different ways to go about this.
Create Your New Apple ID When You Set Up Your Device
This is probably the easiest method for setting up your account; when you set up a new iPhone, iPad, or iPod Touch, you'll be prompted to enter your Apple ID and password. If you don't have one, your device will walk you through setting one up.
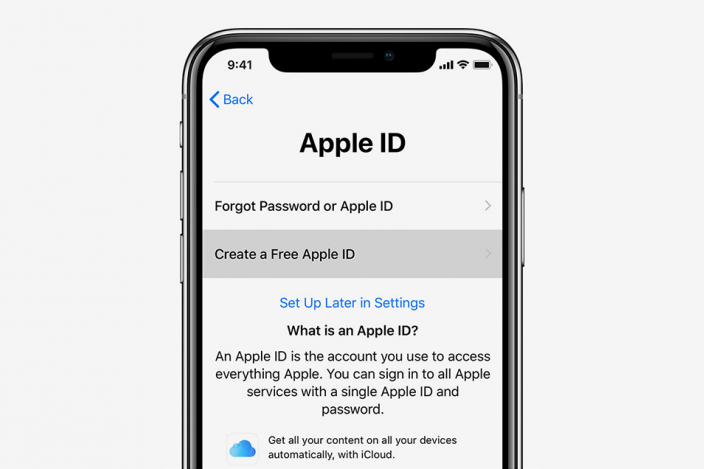
- First, tap Forgot Password or Don't Have An Apple ID.
- Next, tap Create a Free Apple ID.
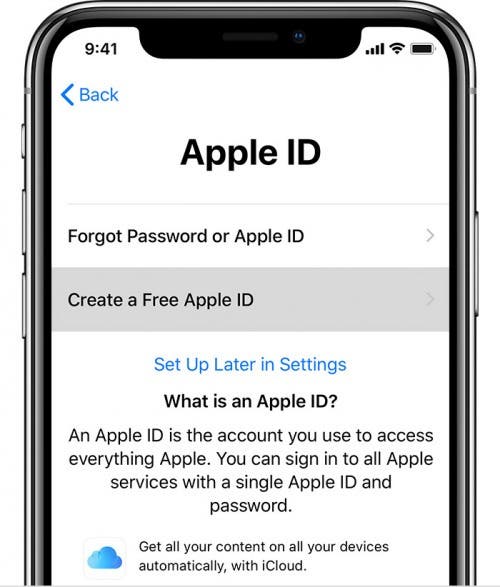
- Enter your name and birth date, then tap Next.
- Now you'll be given the option to use your existing email address, or you can set up a free iCloud address.
If you skipped this step when setting up your new device, don't worry! You can always create your Apple ID later on.
Create New Apple ID with the App Store
Another method for setting up your new Apple ID is to do so through the App Store. To accomplish this:
- Open the App Store on your iPhone, iPad, or iPod Touch, then tap Create New Apple ID.
- Enter an email address and password, then select your region or country from the list (your choice must match the billing information you'll provide in a minute).

- Tap Agree to the Terms and Conditions, then tap Next.
- Now you'll be asked to enter your name, birth date, billing, and credit or debit card information.
- Confirm your phone number and tap Next.
- Apple will send a verification email to the address you provided; check that account, and verify your email address. If you haven't set up email on your iOS device yet, now is a great time to take care of that.
* It is possible to create your Apple ID without entering a payment method, but if you want to have any Apple service subscriptions or to set up Family Sharing, you'll need to provide this information.*
Make Sure Your Apple ID is Secure
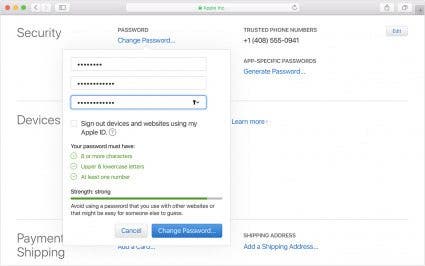
Protect Yourself from Identity Theft & Hackers with a Strong Password
We're always looking out for our readers and offering ways to keep your devices secure and protected from hackers. One simple step you can take to keep your new Apple ID secure is to create a strong password. Apple already requires that your password be at least eight characters long, and include at least one number, as well as upper and lower-case letters.
Beyond that, be sure not to use the same password you use for other accounts, or anything easily guessed or generally known like your first name, favorite football team, or the ever-popular "123456" or "Password".
Security Questions, Two-Step Verification, Two-Factor Authentication
Apple has you choose security questions to help safeguard your account when you log in online or contact Apple Support. If you choose to enable security questions, make sure they're not something easily answered or guessed. If you'd rather skip this option, Apple offers other options; two-step verification or two-factor authentication. Two-step verification is for devices that can't be updated to iOS 9 or OS X El Capitan, while two-factor authentication is for more recent devices. Both options prevent others from accessing your device, even if they have your password.
Check to See Where You’re Signed in with Your Apple ID
If you have more than one iOS device, you'll most likely use your Apple ID on all of them. If you're wondering which devices you're signed in to with your Apple ID, it's easy to find out. To begin:
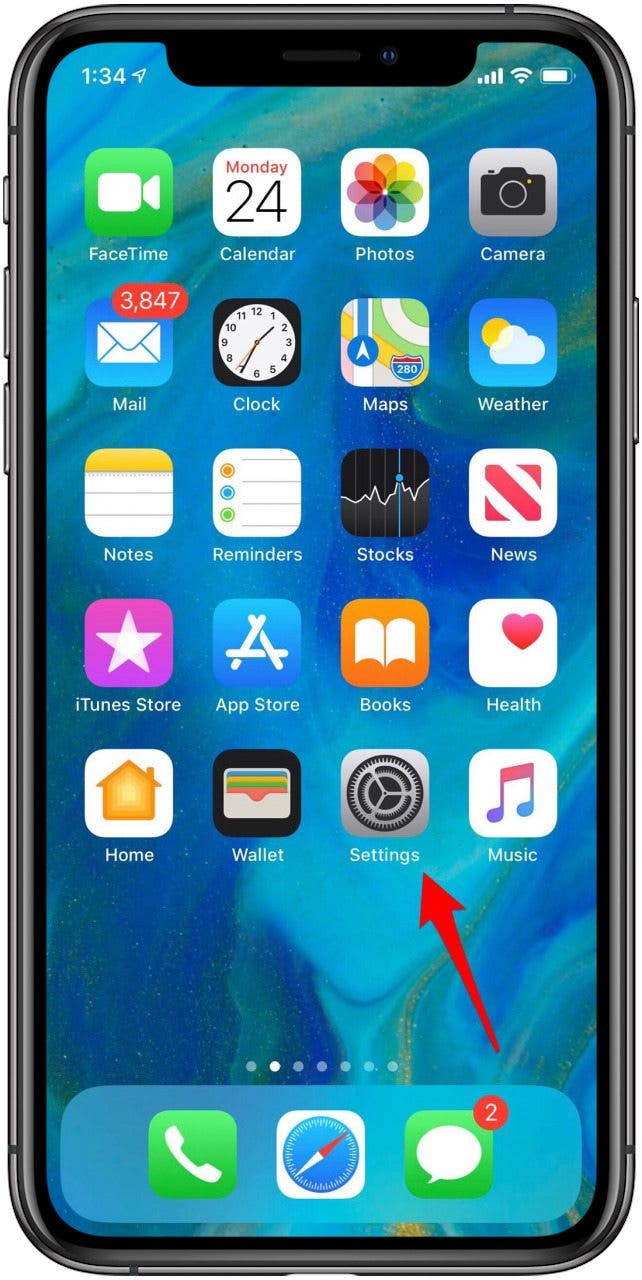
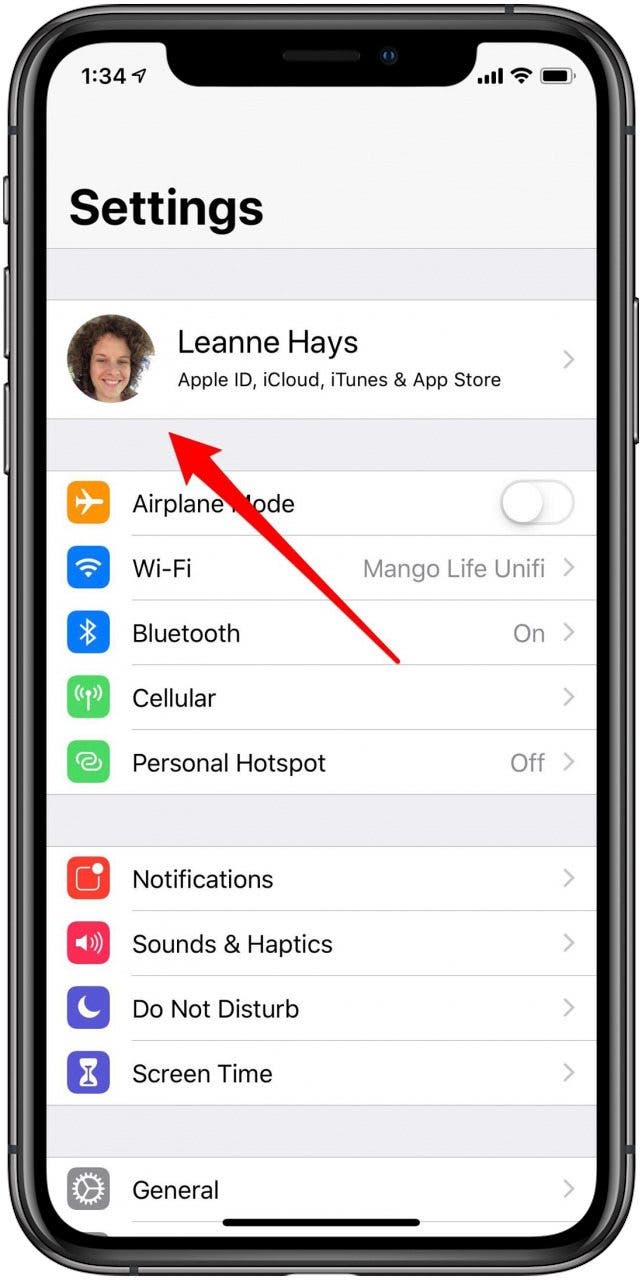
- Open the Settings app and tap the banner with your name in it at the top of the page.
- Scroll down to the bottom of this page, and you'll see a list of all the devices you're currently signed in to with your Apple ID.
- If you'd like more information about any of the devices on this list, tap on it to see the model, serial number, which software version it's running, whether or not Find My iPhone and iCloud Backup are on, and any financial information associated with the device.


Add a Device to Your Apple ID Account Page
Whenever you sign in to a new device with your Apple ID, it will automatically appear on your account page with the other devices you're signed in with.
Remove a Device from Your Apple ID Account Page
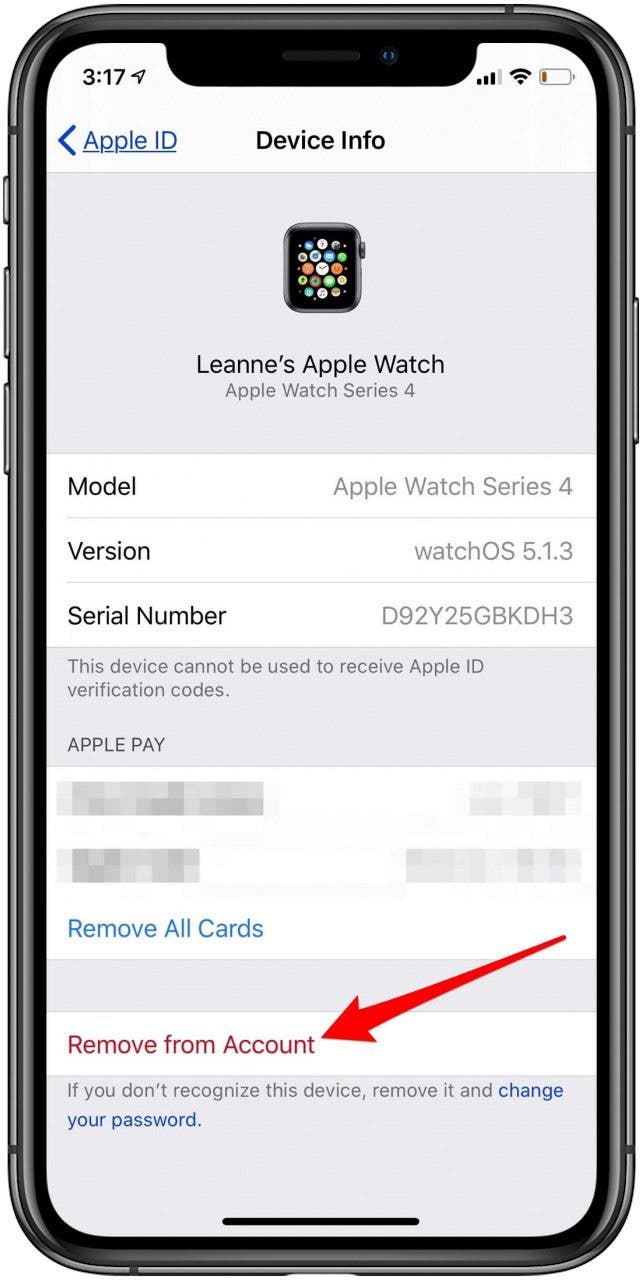
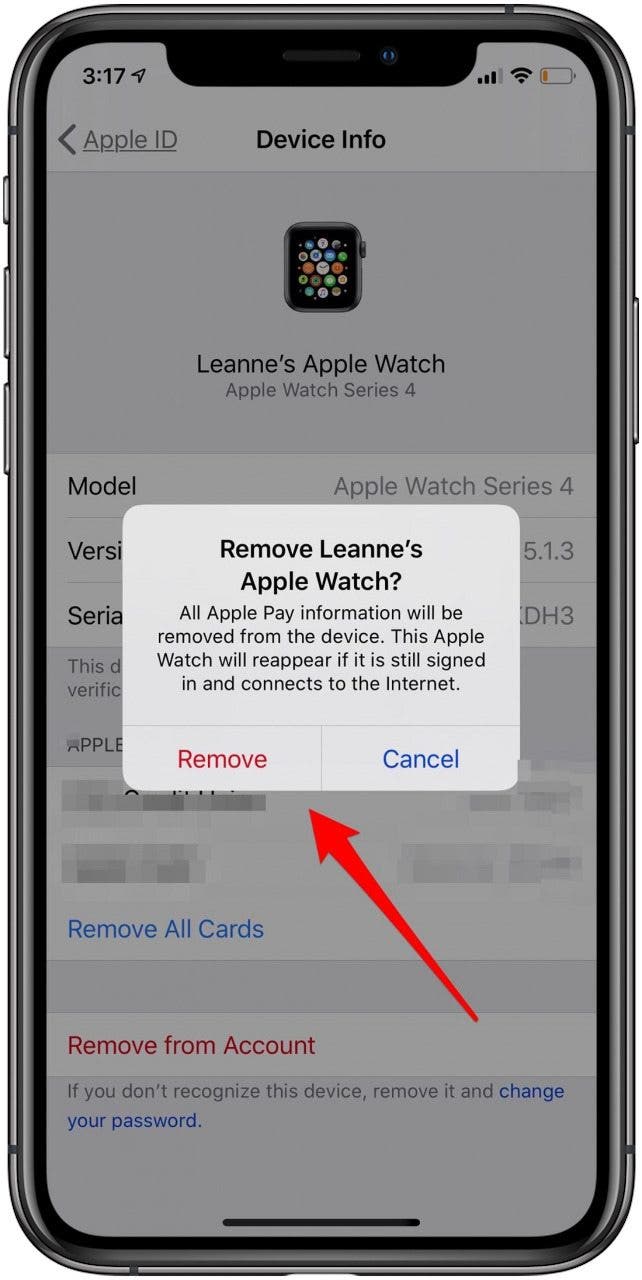
If you see a device on your account page that you don't recall signing in to with your Apple ID, if there's a device you no longer use, or if you've lost one of your devices, you'll want to remove it from your list. Removing lost, stolen, and unused devices from your account page will help you ensure that no one can see verification codes sent by two-factor authentication, or use your iCloud, iTunes, or other Apple services and accounts. To remove a device from your account page:
- Tap on the device you'd like to remove in your account page and tap Remove from Account at the bottom of the page.
- Confirm your decision by tapping Remove.
- If you haven't signed out with your Apple ID from the device, you'll see it on your account page the next time it connects to the Internet. To permanently remove this device, sign out of all Apple accounts and services. If you're selling the device, erase it with a factory reset.
Apple ID Problems: How to Solve Them & What Not to Do
Have you forgotten your login information, or are you worried that your account security has been compromised? Whether you've forgotten your Apple ID, password, or both, don't worry, it's all repairable. If you need to change your Apple ID or password due to security concerns, we'll go over this as well. Don't try to solve your problem by deleting your Apple ID and starting from scratch, because you'll lose access to the connected iCloud Mail and Drive Storage, as well as any iMessages associated with your account. All the purchases you made with the Apple ID you're deleting, including content from iTunes and Apple Books, as well as the App Store, not to mention your Apple Music Library and Playlists, will also be gone. Let's go over some less extreme options for solving Apple ID issues, then learn how to deactivate and delete an Apple ID permanently if you conclude that;s the step you need to take.
A final note before we begin: don't, whatever you do, create a new Apple ID as this will only cause more confusion down the road. If you've already created another Apple ID, we'll go over how to fix that, as well.
Forgot Your Apple ID?
Your Apple ID is the email address you used to create your Apple ID account, but since most of us have more than one email address, forgetting which one you used is understandable. The first step to finding your forgotten Apple ID is to try signing in with the other addresses you may have used when creating your account. If this doesn't work, there are a few more things to try.
Check on Your iPhone, iPad, or iPod Touch
If you have more than one Apple device, you may be signed into your Apple ID on one of them, and be able to retrieve the data you need from there. There are two different places to look for this information; the iTunes and App Store, or iCloud.
iCloud
- Open the Settings app, then tap the banner with your name at the top of the page.
- If you're signed in with your Apple ID, you'll see an email address under your name; that's your Apple ID.
If you're not signed in to iCloud, try going to iCloud.com on your phone; your Apple ID may autofill in the sign-in screen.
iTunes & App Store
- Open the Settings app and tap the banner at the top of the page as before.
- Now, tap iTunes & App Store; if you're signed in with your Apple ID, you'll see it at the top of the page.

Messages, FaceTime, Mail, Contacts, Calendar
If you still can't find your Apple ID, there are a few more places to look. Open the Settings app and tap on one of these options: Messages or FaceTime. From Messages: tap Send & Receive to find your Apple ID. Tap FaceTime you'll see your Apple ID right away if you're signed in.
Forgot Apple ID & iCloud Password
If you've forgotten your password, the quickest fix is to visit the account page, so you can reset it.
- Tap Forgot Apple ID or password.
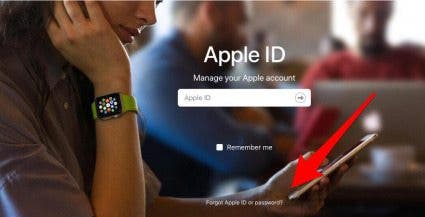
- You'll be offered the option to look up your Apple ID.
- Enter your first name, last name, and email address, select the option to reset your password, and tap Continue.
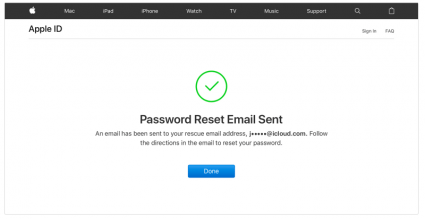
What you do now will be determined by how you set up your Apple ID. If you chose security questions, you'll need to choose Answer Security Questions and follow the prompts your device gives you. You can also choose to have Apple send you an email with a link to follow to reset your password.
If you set up two-factor authentication or two-step verification, you'll be asked for a Recovery Key. Follow the steps in this tip to use two-factor authentication to get the verification code you'll need to reset your password.
Add or Remove an Email Address or Phone Number from Your Apple ID
If you've added another email account and you'd like to include it in your Apple ID so that more people can find you on Find My Friends, FaceTime, and iMessage, it won't take but a minute. Removing a phone number or email address is just as easy. To begin:
- Sign in to Apple's Account Page as you did when you were resetting your Apple ID, password, or both.
- Tap Edit next to the Account section.

- Scroll down and click Add More in the Reachable section.
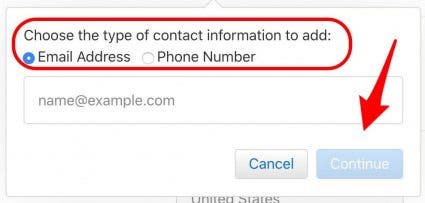
- Choose Email Address or Phone Number, enter your information, and tap Continue.
- You'll receive a verification message to the email or phone number you entered. Enter the code in the box that pops up on your Apple ID Account Page, click Verify, and your new contact information will be associated with your Apple ID.
- If you'd like to remove a phone number or email address, click on the X button next to the item you'd like to delete, then click Delete to confirm.
Change Your Apple ID
If you'd like to change your Apple ID account, the first thing to know is that if your Apple ID ends with @mac, @me, or @icloud.com, you can't change it to a third-party email address. You can, however, switch between @mac, @me, and@icloud.com addresses. Before you get started, you'll need to sign out of your Apple ID on any devices you're signed in on, (LINK TO DEVICE LIST SECTION) except the one you're using to change your ID. Next:
- Go to your Apple ID Account Page and sign in.
- Click Edit next to the Account section.
- Click Change Apple ID.

- Enter the new email address you'd like to use as your Apple ID, then click Continue.
- A verification code will be sent to the email address that you chose as your new Apple ID; enter the verification code into the field provided, and you're done.
What If I Created More Than One Apple ID?
If you've created more than one Apple ID and have decided to delete one, keep in mind that you won't be able to use the email address that you used as your Apple ID for that account as an Apple ID in the future. You won't be able to use any other email addresses associated with the Apple ID you're deleting, either. Be sure to remove these email addresses before you delete the Apple ID, so you're not blocked from using them for future Apple ID accounts.
How to Delete Apple ID: Back Up to iCloud, Then Save Your Files Elsewhere
To make sure you don't lose your documents, photos, and other files when you delete your Apple ID, you'll need to back everything up. It's easiest to do this on a Mac or iPad, so you have a larger display to work on. Back up your Mac, iPhone, and any other iDevices to the Cloud. Next:
- Sign in to your iCloud account.
- Back up your contacts, documents, emails, photos, and anything else you'd like to save from your iCloud account on an external hard drive or in non-iCloud cloud service.
Delete Apple ID: Contact Apple
Once you've removed your associated email addresses and saved everything you want from iCloud and iCloud Mail, you're ready to delete your Apple ID. To do this:
-
Have the Apple ID and password for the account you want to delete ready.
-
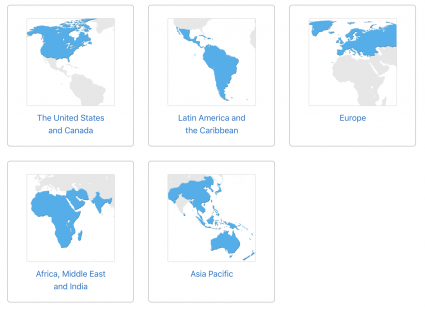
Visit the Apple support page and click on your region, then click Get support now.
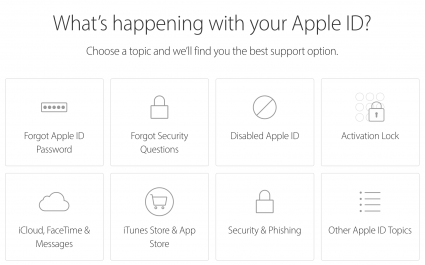
- You'll arrive at a page with a menu of topics to choose from, click on Other Apple ID Topics.
- This menu changes from time to time. Sometimes there's an option to click on Issues With Multiple Apple IDs, other times you can click Deactivate Your Apple ID Account. If possible, choose the Deactivate option, but either way, you'll be able to follow the next step.
Now it's time to call Apple Support. Verify your account information and identity, then ask to have your Apple ID deleted. Ask to speak to a supervisor if the customer service rep says they can't delete your account. Confirm that you understand you'll every purchase associated with the Apple ID you're deleting, as well as your iCloud storage and mail. Once you've confirmed your account information and identity, and that you know what will disappear once you delete your account, a manager or supervisor can delete the Apple ID as you've requested.
What If I’ve Been Sharing an Apple ID with Someone Else?
A lot of people started off sharing an Apple ID with a spouse or other family member before realizing that they'd like to have their own account. How do you go about splitting an Apple ID, though, when there are purchases that you'd both like to share, rather than having to pay for again? The answer is for one of you (flip a coin if needs be) to create a new Apple ID for themselves. Once this step is accomplished, read the section below about Family Sharing. You can create a Family Sharing Group with the person who's just created their own, new Apple ID. This way, you'll both still be able to share purchases from Game Center, iTunes, the App Store, Apple Books, and more.
Apple ID & Family Sharing
Setting up Family Sharing means that you and up to five members of your family can share purchases from Game Center, iTunes, the App Store, and Apple Books, as well as an Apple Music family plan, iCloud storage, and even a family calendar and photo album. If you'd like to set up Family Sharing and haven't done so yet, we have a tutorial to get you started. And don't worry, the Family Group you create isn't permanent. You can always leave a Family Sharing group, or invite new people as needed.
Create an Apple ID for a Child
You need to be 13 or older to use an Apple ID outside of Family Sharing, but Apple does allow parents and guardians to create an Apple ID for their children ages 12 and under since a great many of them own and use iPhones, iPads, iPods, and more. If you have a child in your family that needs an Apple ID so they can join your Family Group, it's relatively simple to make one for them.
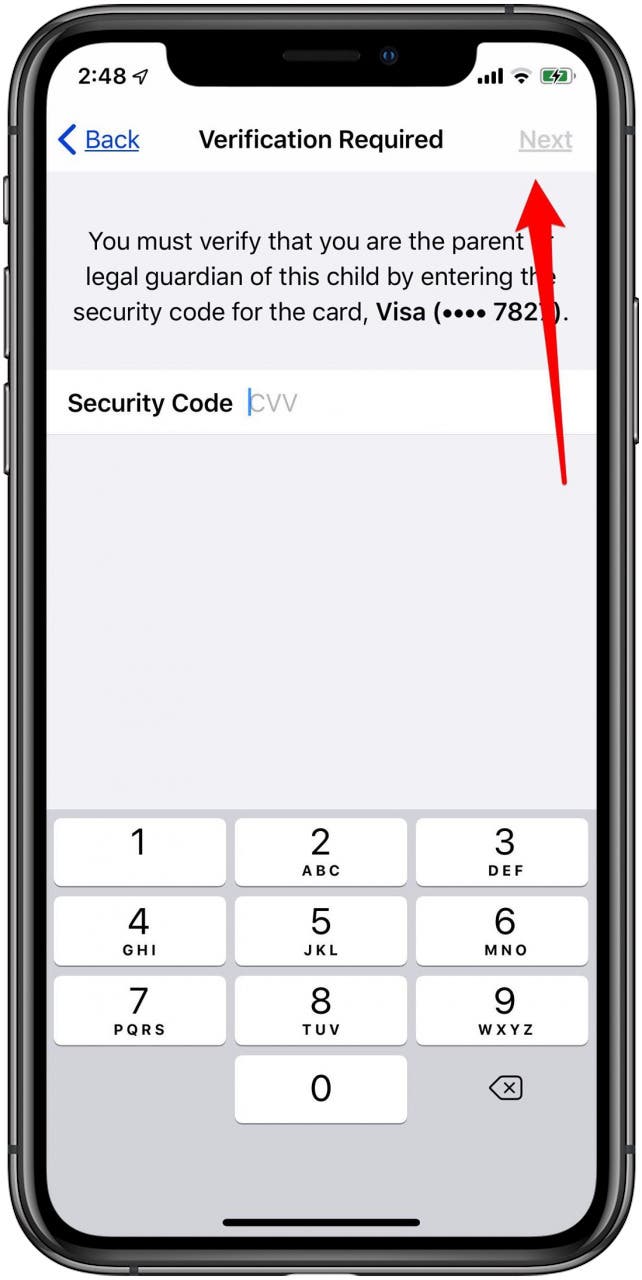
Keep in mind that to create an Apple ID for a child under thirteen, you, the Family Organizer, will need the CVV code from your credit card, debit card, or PayPal. To make sure you have your card or PayPal set up for payment before creating your child's Apple ID:
- Open the Settings app on your device, then tap the top banner.
- Now tap iTunes & App Store, then tap your Apple ID at the top of the screen.

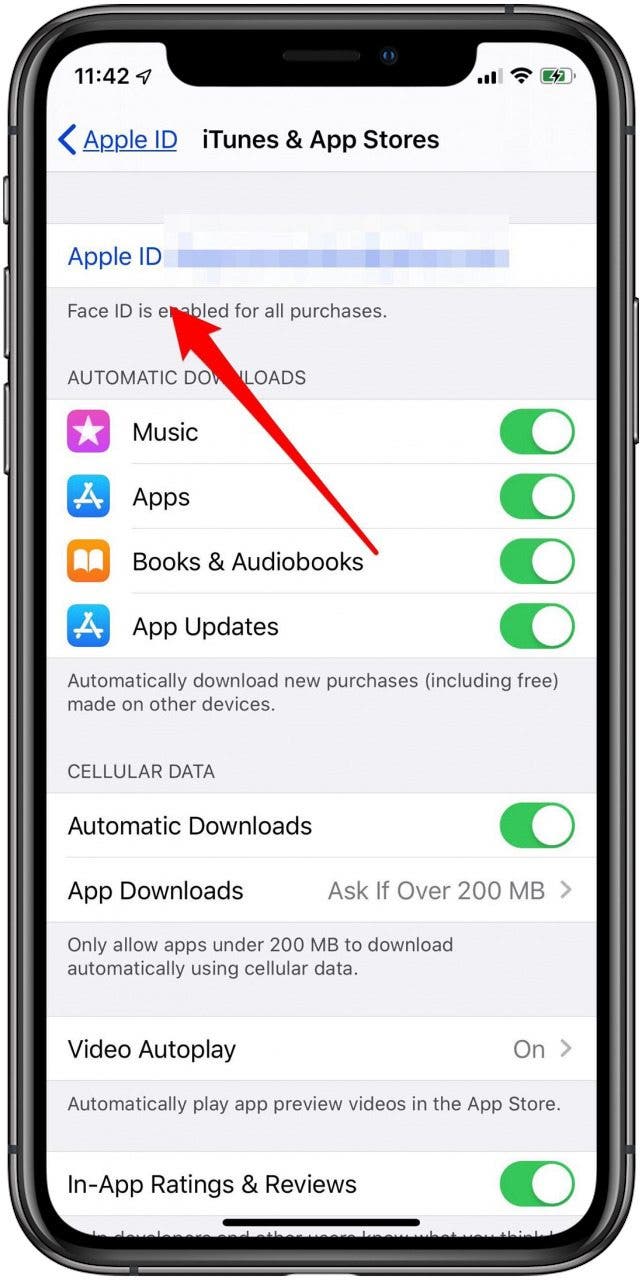
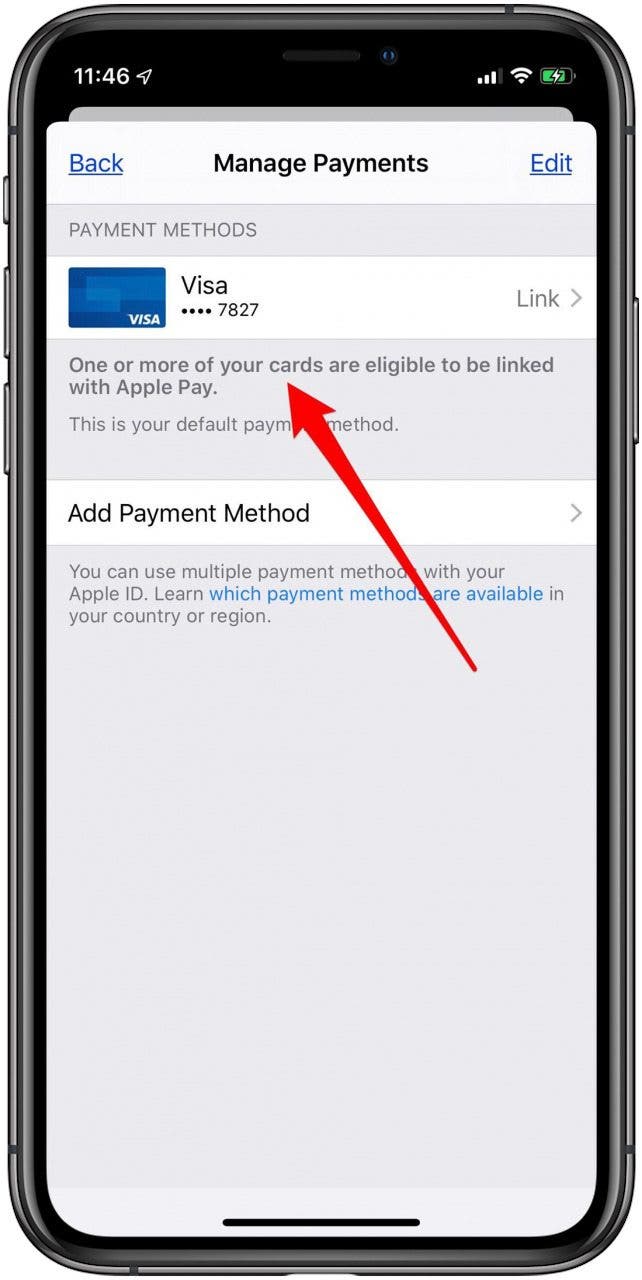
- Tap View Apple ID, then Manage Payments to view your credit or debit card, or PayPal information and make sure it's up to date.
Now you can get started creating an Apple ID for your child.
- Open the Settings app on your device and tap on the banner with your name in it at the top of the display. From here you'll tap on Family Sharing, then tap Add Family Member.
- Next, tap Create a Child Account, and tap Next.


- You'll be asked to enter your child's birthday and tap Next, then tap Agree on the Parent Privacy Disclosure.
- Enter your child's first and last name, then tap Next, then enter the Apple ID you've chosen for them and tap Next again, then tap Create.
- Now you'll be asked to choose a password, set up security questions, and set up your child's new account.
- Activate Ask to Buy if you'd like your child to request permission before making purchases in the App Store, iTunes, and iBooks.
- Next, you’ll have the option to share your child’s location with the rest of the family.
- Lastly, agree to the Terms & Conditions, and your child's Apple ID will be set up and ready to use.

Once you've created an Apple ID for your child, they won't be able to leave your Family Group until they turn 13, unless they're transferring to a different family group.
How to Use an iTunes Gift Card with Family Sharing
Once you've set up Family Sharing and have added your kids to your Family Sharing Group, you may run into a few issues with adding iTunes gift cards to your children's accounts. If you've been wondering how to allocate iTunes credit to a family member's account, and how to check their iTunes balance, we've got you covered.

Leanne Hays
Leanne Hays has over a dozen years of experience writing for online publications. As a Feature Writer for iPhone Life, she has authored hundreds of how-to, Apple news, and gear review articles, as well as a comprehensive Photos App guide. Leanne holds degrees in education and science and loves troubleshooting and repair. This combination makes her a perfect fit as manager of our Ask an Expert service, which helps iPhone Life Insiders with Apple hardware and software issues.
In off-work hours, Leanne is a mother of two, homesteader, audiobook fanatic, musician, and learning enthusiast.

 Olena Kagui

 Leanne Hays
 Rhett Intriago


 Rachel Needell

 Amy Spitzfaden Both
 Susan Misuraca