10 iPhone Security Mistakes You're Making and How to Fix Them

With 15 years of experience as a journalist, Donna oversees iPhone Life's premium content, teaching courses, producing iPhone Life magazine, and co-hosting the iPhone Life Podcast.
Learn More With 15 years of experience as a journalist, Donna oversees iPhone Life's premium content, teaching courses, producing iPhone Life magazine, and co-hosting the iPhone Life Podcast.
Learn More
Keeping personal information on our iPhones private is something we all want, yet it's not always obvious how to go about it. Here are 10 fixes to common security mistakes that can help you take your iPhone privacy to the next level.
To access our complete guide to iPhone security, sign up for a subscription to iPhone Life Insider.
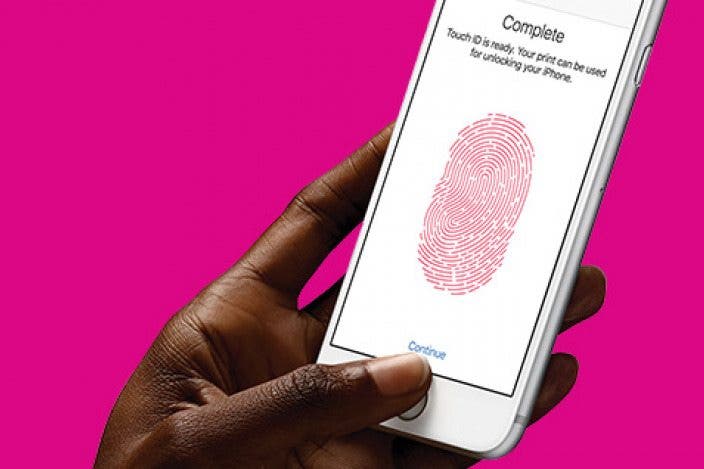
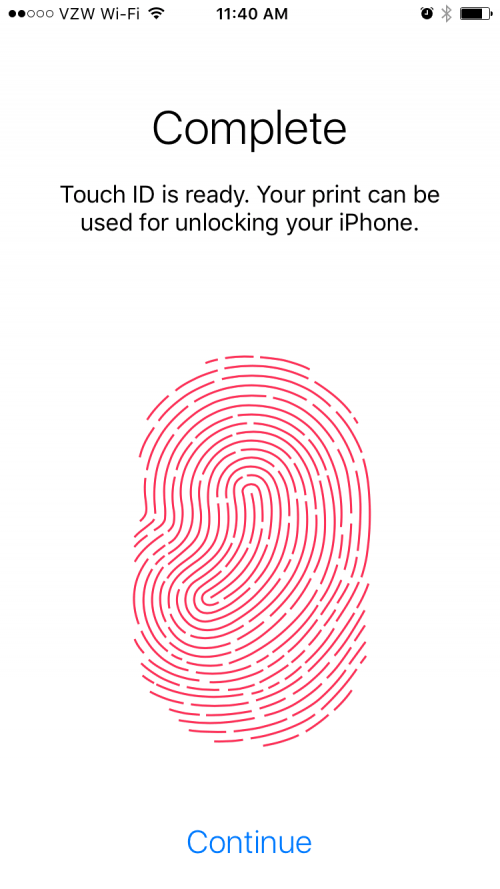
1. The Touch ID Myth
2. Guard Your Lock Screen

Siri can help you in so many ways, yet if you're not careful, your digital assistant can help others to snoop on you. It can be pretty alarming to learn the variety of personal information anyone can access from your lock screen via Siri, including your home address and calendar appointments. If you’d rather not allow strangers to ask Siri for directions to your house among other things, just go to Settings, Touch ID & Passcode, and after entering your passcode, scroll down to Allow Access When Locked, and toggle off Siri.
3. Keep Messages Private
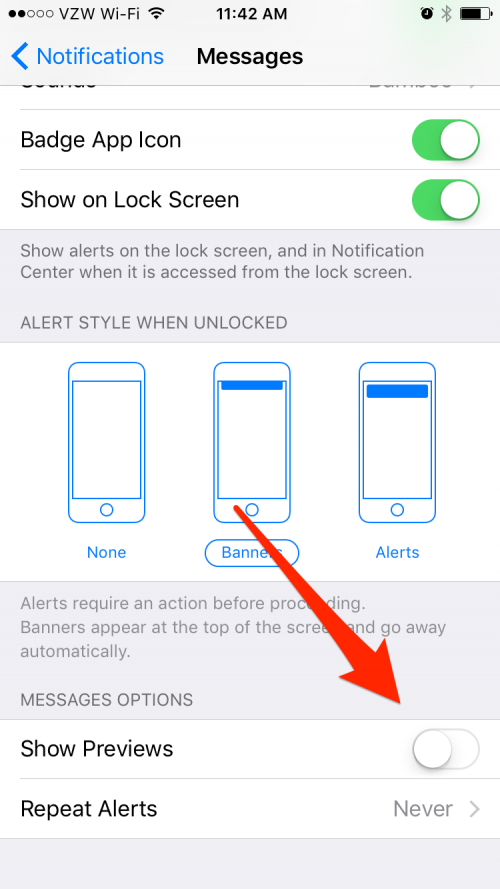

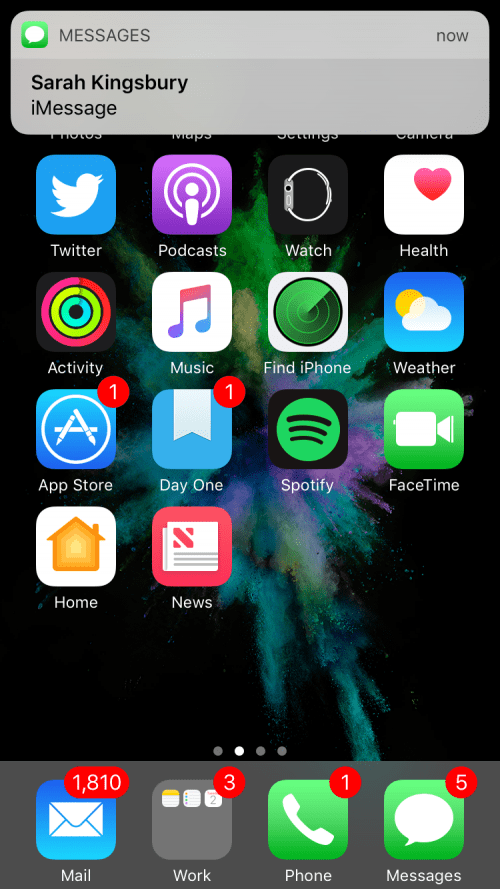 When someone sends you a text message, by default a preview of the contents of the message pops up on your screen for all to see. If you tend to keep your phone out in plain sight, that means your boss or coworkers could see messages that may not be safe for work. To avoid any awkward moments, you can simply change an iPhone security setting by going to Settings > Notifications > Messages > and toggle off Show Previews.
4. Don’t Take the Email Bait!

Ever get an email from a familiar-looking service warning that you’re overdue on a payment or need to tend to your account? Careful, that could be a phishing scam. Before you panic and click any links in emails or download attachments, instead, open a browser and visit the site independently. Sign in to your account and check your notifications to see if the email warning was real.
5. Create a Password Vault
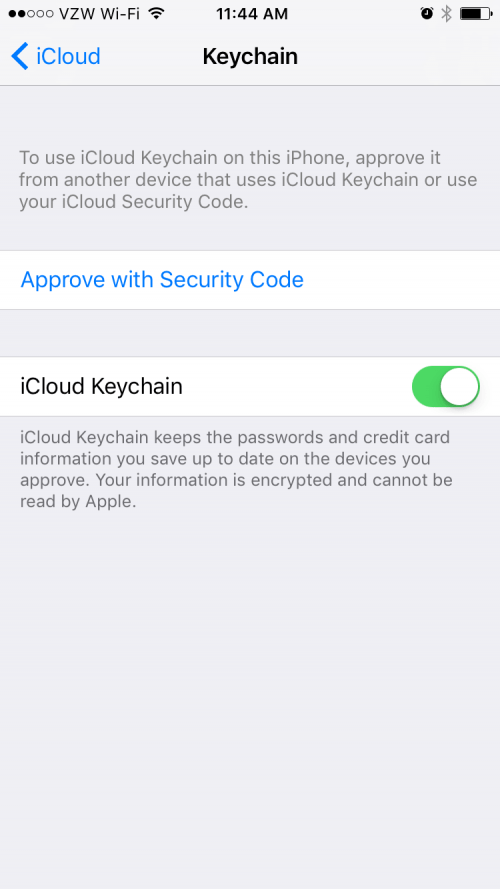

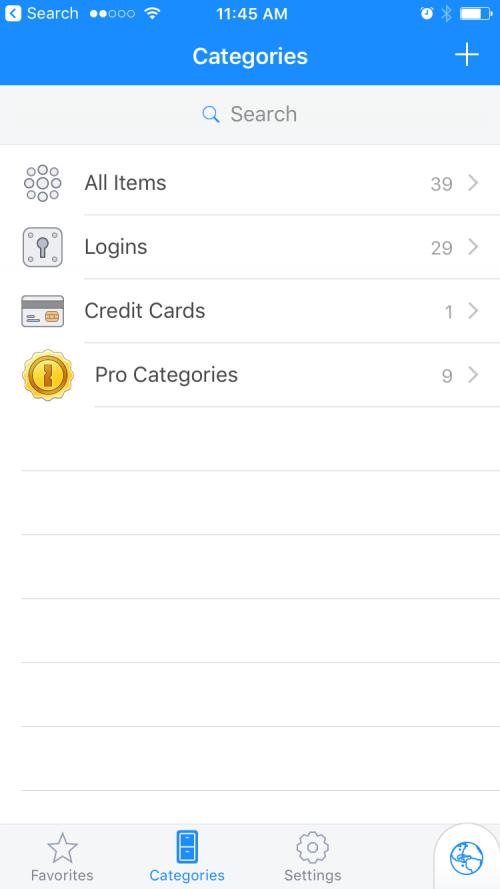
It’s common for one person to manage dozens of online accounts for everything from banking to social media to online shopping, and it’s tempting to reuse passwords to make life easier. However, if one of your accounts is hacked, then all of your accounts will be compromised. Thanks to password managers like 1Password and iCloud Keychain, you can be both lazy AND secure. Just remember your one master password and let the password manager do the work of generating complex passwords and storing them for you in one secure vault.
6. Protect Your Photos in iCloud

Remember a couple of years ago when hackers posted nude photos of celebrities stored in iCloud? While it's unlikely anyone's after your private photos, it can’t hurt to tighten up your iCloud security by enabling two-factor authentication. Two-factor authentication is Apple’s latest security feature that’s built into devices running iOS 9 or later. It limits access to your Apple ID to just devices you trust. Whenever you try to sign in on a new device, a six-digit code will be sent to a device you set up to be trusted. To set up two-factor authentication on your iPhone, go to Settings > iCloud > and tap on your account at the top. Scroll down to Passwords & Security and tap Set Up Two-Factor Authentication.
7. Restrict Kids’ Access to Your iDevices
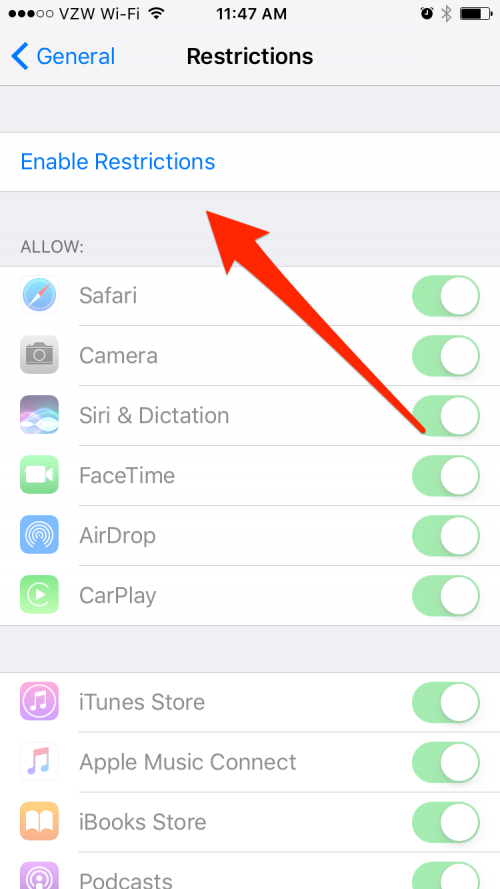
Letting your child play a game on your phone can offer some much-needed quiet time. However, you hand over a lot more than a single game when you give your child your iPhone. That’s where Restrictions come in handy, allowing you to block access to entire apps or types of content. To turn on this feature, go to Settings > General > Restrictions. You’ll be prompted to set a special four-digit passcode just for Restrictions. Make sure this is different than your iPhone passcode to minimize the chance of your child memorizing it. Here you can block access to apps as well as movies and music with adult content. Make sure not to forget your Restrictions passcode! (Or if you do, read this.)
8. Forgot About Find My iPhone?
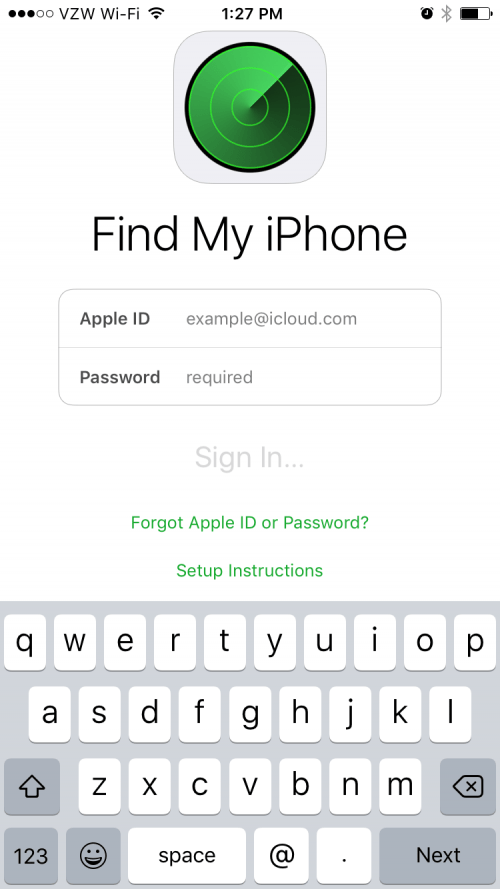

If you lose your phone, Apple has a great feature to help you track it down. The only catch is, you must have enabled Find My iPhone in your iCloud settings before you misplace your phone in order for it to work. So, if you haven’t already, head to Settings > iCloud > and toggle on Find My iPhone, and then when you sign in to iCloud.com or the Find My iPhone app with the same iCloud account, you’ll be able to see the location of all your devices right there on the map view. From there you’ll be able to play a sound on the device, lock your phone remotely, or as a last resort, erase your data and brick the device so the thief won’t be able to use it.
9. Cover Your Tracks Online

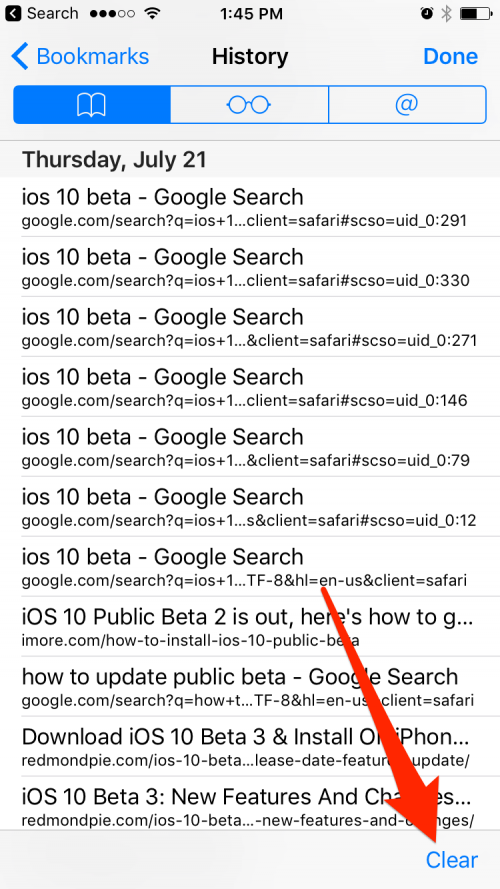
There are times when you want privacy when going online. Yet Safari tracks what you search, offering up suggestions based on past searches and showing a list of recently visited sites in Safari under the Bookmarks folder. To stop this, just go to Safari and tap the Bookmarks tab, tap History, and tap Clear. To start fresh and wipe out all past searches, choose Clear All History. To clear just specific sites, choose between last hour, today, and today and yesterday.
10. To Erase or Not to Erase?

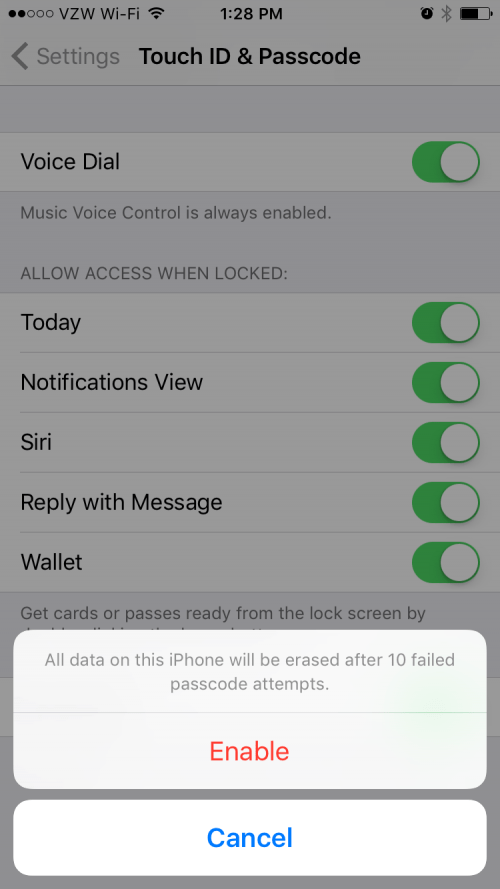
Apple created a feature that erases all data on your phone after 10 failed passcode attempts. It defends your device against brute force attacks, where software rapidly guesses passwords until it guesses the right one and breaks in. This is a setting I’d recommend enabling with two big qualifiers—that you don't have kids and that you back up your phone regularly. Children are likely to try to break in to your device and trigger this setting. If you back up your device each night, however, you’ll be able to restore the data on your device without too much trouble. To set your iPhone to erase all data after 10 failed passcode attempts, open your Settings app. Scroll down and tap Touch ID & Passcode. Enter your passcode to continue. Scroll to the very bottom of the page and turn on Erase Data.
To access our complete guide to iPhone security, sign up for a subscription to iPhone Life Insider.

Donna Schill
Donna Schill is the Editor in Chief at iPhone Life, where she oversees all multimedia content production for iPhone Life Insider, the premium educational platform for Apple enthusiasts and lifelong learners. After earning her master's degree from the University of Iowa School of Journalism & Mass Communication, Donna joined iPhone Life in 2012, where she has produced dozens of magazine issues, co-hosted hundreds of podcast episodes, and taught over 20 live online courses. When not glued to her iPhone 15 Pro Max, Donna can be found traveling, writing and podcasting (theneedle.co), or hiking the Iowa prairie where she lives with her partner and their German shepherd, Fox.
 Rachel Needell
 Olena Kagui
 Rhett Intriago
 Cullen Thomas


 Amy Spitzfaden Both


 Devala Rees
 Leanne Hays
 Ashleigh Page