The iPhone Camera App: The Ultimate Guide to Taking Photos & Videos

If you want to know everything there is to know about how to operate your iPhone’s Camera app, then you’ve come to the right place. This in-depth iOS Camera app guide will teach you everything you need to know about your iPhone camera, from hidden camera settings to standard iPhone features. Read on to learn all about the different camera icons, how to access your camera from the lock screen, and all the tips and tricks you need to get the most out of your iPhone’s camera.

Related: Phone Photography Tips: How to Use Lighting to Take More Creative Pictures

iPhone Life
Discover your iPhone's hidden features
Get a daily tip (with screenshots and clear instructions) so you can master your iPhone in just one minute a day.

The iPhone Camera App: The Ultimate Guide to Taking Photos & Videos

We've gone over how to use lighting to improve your iPhone photography and how to use HDR on your iPhone camera, as well as how to turn on the ProRaw feature on your iPhone 12 Pro and iPhone 12 Pro Max. For more great iPhone photography tutorials, check out our free Tip of the Day!

What's in this guide:

1. The Basics of Taking a Photo or Video with Your iPhone

2. Camera App Icons: What Your Camera Icons Mean & How to Use Them

3. Photo Modes: Slo-mo, Pano, Portrait, Video, More

4. How to Adjust Your iPhone Camera Settings 

1. The Basics of Taking a Photo or Video with Your iPhone

If you’ve ever fumbled to open the Camera app or missed the perfect time to press the shutter, this section will teach you how to open your iPhone camera quickly. This section will answer basic questions like how to switch between Photo and Video modes, take selfies, adjust your focus, and toggle your flash between auto and manual settings. This section covers all the basics, from zooming in and out to accessing filters to quickly snapping a photo without touching the screen.

Return to top

What's in this section:

How to Open the Camera App from Lock Screen & Control Center

Sometimes, you only have a second to capture the perfect moment on camera quickly. Fortunately, you can access your Camera app quickly from either your Lock screen or the Control Center. There's no need to navigate through your folders or various Home screens to get to the Camera app.  

To Access the Camera App from the Lock screen:

  • Raise to wake your iPhone or tap the Home or Side button.
  • From the Lock screen, swipe left.
  • The Camera app will open.
  • If you have an iPhone X or later, there is also a Camera icon in the lower right corner of your Lock screen. 
  • You can press Camera icon to open the app as well as swipe left to open the Camera app.
open camera app from iPhone x lock screen

How to Access the Camera App from the Control Center:

  • On iPhones with a Home button, navigate to the Control Center by swiping up from the bottom of the screen.
  • On iPhones without a Home button, open Control Center by swiping down from the upper right corner of the screen.
  • Tap the Camera icon to open the app.

Return to beginning of section

How to Switch Camera Modes

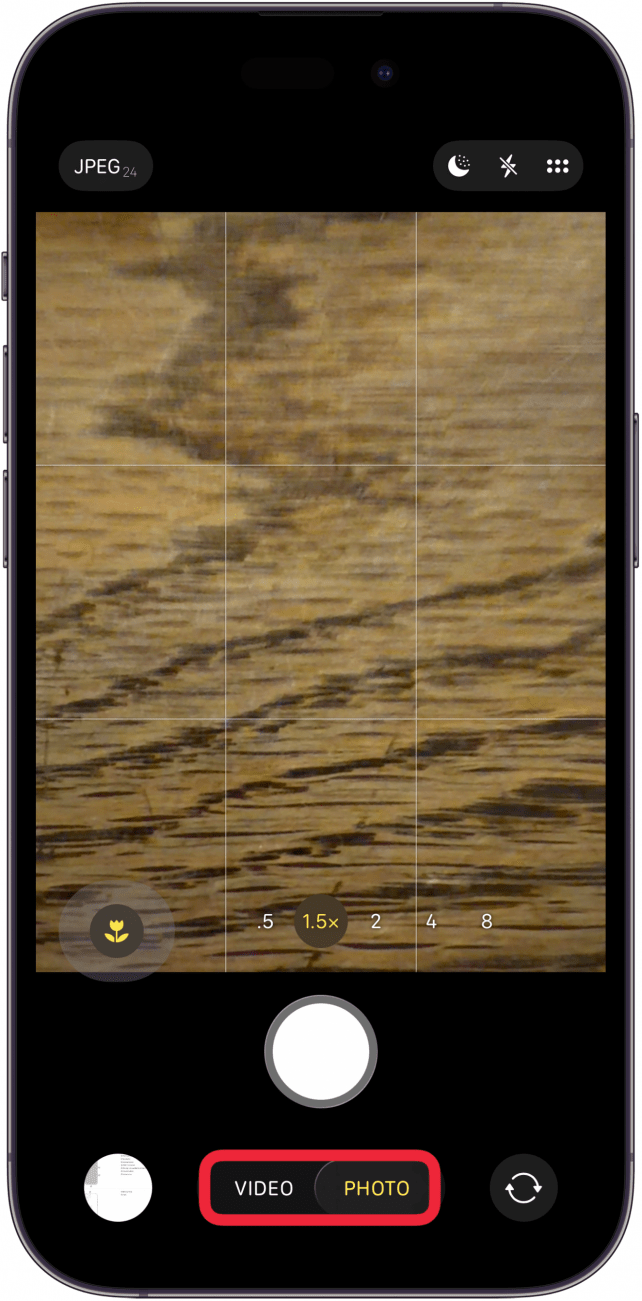
Once you open the Camera app, you will want to choose a camera mode. Your photo options are Photo, Portrait (if available on your iPhone model), Square, and Pano. Your video options are VideoSlo-Mo, and Time-Lapse.  I'll cover how to use the different camera modes in another part of this guide.

  • Using the iOS Camera app, you can quickly switch between video and photo modes to capture the perfect moment.
  • The different camera modes are available in the horizontal scrolling menu at the bottom of the Camera app.
  • By default, the Camera app will be set to Photo mode. To switch to Video or another video mode, swipe right.
  • To switch back to Photo, or to another photo mode, swipe left.

Return to beginning of section

How to Switch to the Selfie (Front-Facing) Camera

  • Front-facing selfies take the guesswork out of self-portraiture by flipping the camera so that you can see yourself while you snap the picture.
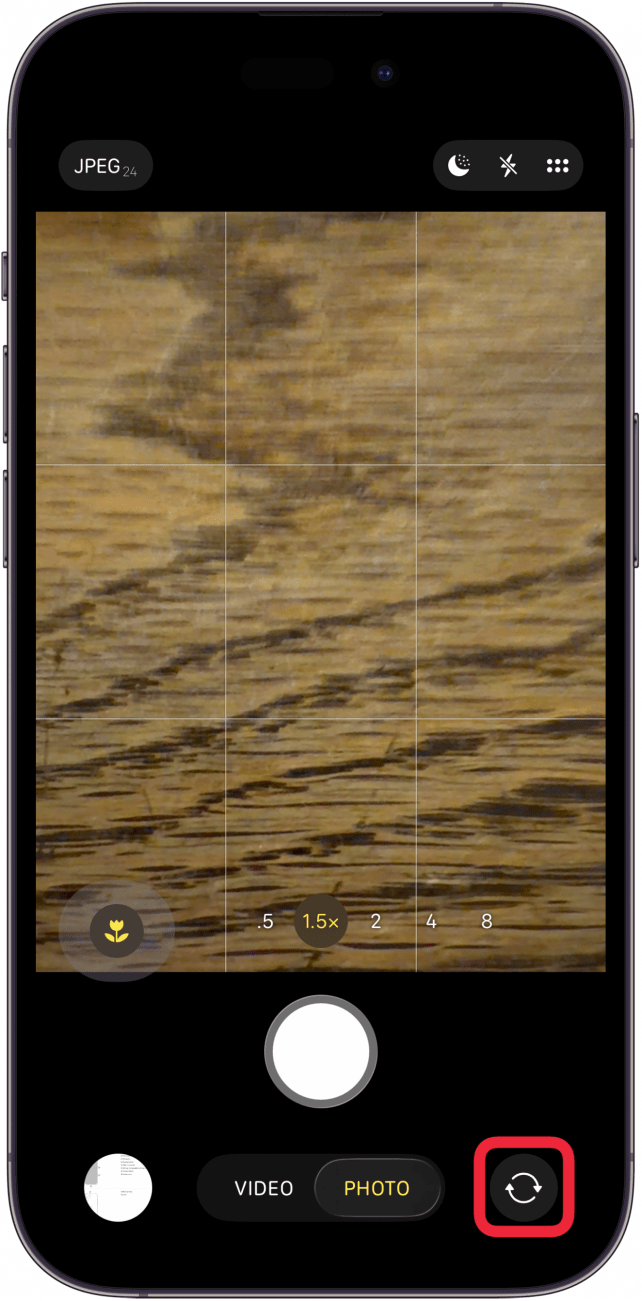
  • You can switch from your iPhone's rear-facing camera to its forward-facing camera quickly in VideoPhotoPortrait, or Square mode; but it's important to note that in Portrait mode, the forward facing option is only available on the iPhone X and later models.
  • To switch to the selfie camera, tap the front-facing camera icon (the camera icon with arrows going in a circle) at the bottom right of your screen.
tap the front-facing camera button

Return to beginning of section

How to Zoom In & Out

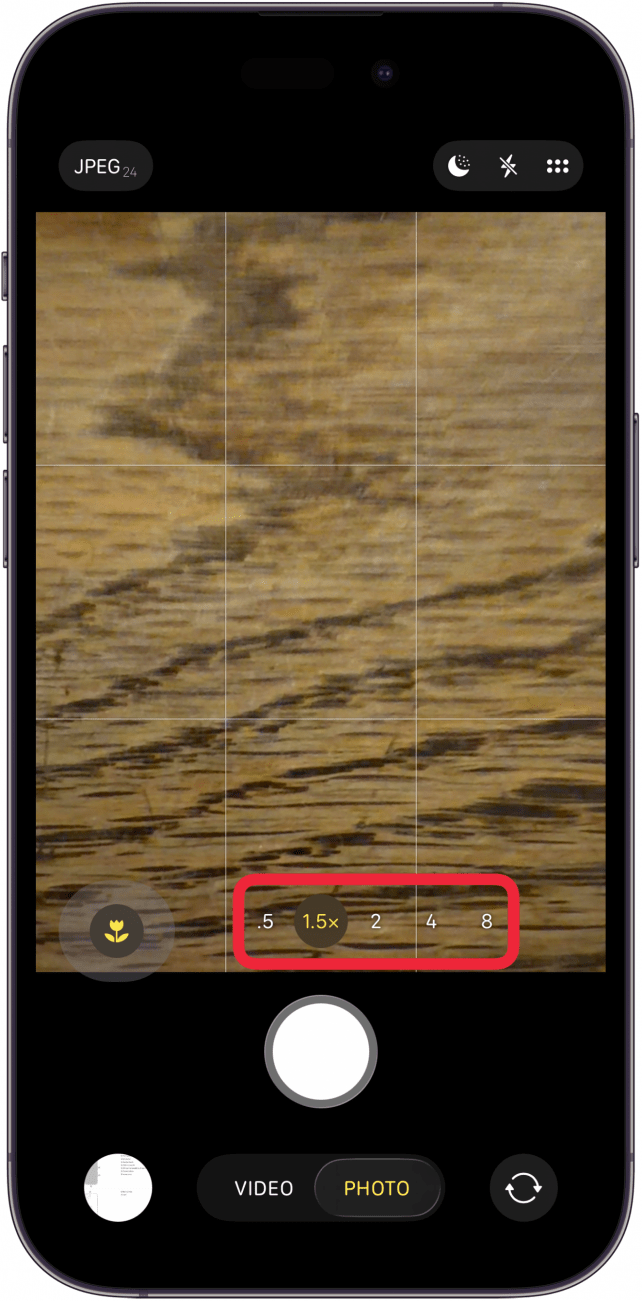
Zooming in and out on the iPhone is intuitive in the iOS Camera app. Using a pinching gesture, you can zoom in or out to frame your subject. On some iPhone models, you can skip the pinch and use the zoom button and zoom slider to quickly get to different levels of zoom. You can also do an auto zoom by adjusting your picture's aspect ratio.

How to Use the Pinching Gesture to Zoom In or Out:

  • Select Slo-MoVideoPhoto, or Square mode.
  • Put two fingers in the center of the screen.
  • Pull your fingers apart to zoom in.
  • To zoom back out, place your fingers at the edges of the screen and push your fingers to the center.

Pro tip: you can even zoom in and out while taking selfies!

How to Use the Zoom Button & Slider:

On iPhones with with 2x optical zoom and 10x digital zoom, such as the iPhone 7 Plus, 8 Plus, X, XS, and XS Max, you've got another method of zooming in and out in addition to pinching the screen.

How to Use the 2x Optical Zoom Button on Compatible iPhones:

  • In Time LapseSlo-MoVideoPhotoSquare, or Pano mode, look for the the 1x icon indicated below.
  • Tap the 1x icon to zoom in one level.
  • To zoom back out, tap the 2x icon.

How to Use the 10x Digital Zoom Slider on Compatible iPhones:

  • In Slo-MoVideoPhoto, or Square mode, press on the zoom button to open the zoom slider.
  • Slide right to zoom in, up to 10x.
  • Slide left to zoom out.
  • Tap the zoom button to return to 1x.
press the zoom button to open the zoom slider
use the zoom slider to zoom in and out

Return to beginning of section

How to Focus the iPhone Camera: Selecting Your Subject

Once you've picked your subject and zoomed in the right amount, taking pictures is a snap on the iOS Camera app. The Camera app can focus and select brightness automatically. On some model iPhones, you can select the aperture to adjust the depth of field, allowing you to control the background blur. Once you've set up your shot, you'll want to use the shutter button to snap the picture or start recording video. Here's how to operate those final crucial steps when taking a picture on the iPhone.

To focus the iPhone camera:  

  • The Camera app will automatically focus on what your iPhone thinks you want to capture, but it doesn't always select the right subject. You can change your iPhone's focus with a simple gesture.
  • Simply look at your screen and tap where you would like your camera to focus.

Return to beginning of section

How to Adjust Exposure

  • yellow square will appear over your subject. If you don't see it, tap your subject​ on the screen.
  • To make your image brighter or darker, you can adjust the exposure using the sun icon next to the yellow focus icon.​
  • Tap the yellow sun icon to make the vertical slider appear.
  • Slide up to increase the exposure (brighter) or slide down to decrease the exposure (darker).
  • When you are happy with the lighting, lift your finger.
  • Once you've selected your subject and adjusted the exposure, you can lock onto your subject using a long press in the center of the yellow square until the AE/AF Lock (Auto Exposure/Auto Focus) icon appears at the top of the screen:
  • Locking your focus will lock your current focus and brightness levels so that even if your subject moves or you accidentally jostle your iPhone, your focus and brightness settings will stay the same.
  • Once you snap a picture, AE/AF Lock remains engaged so that you can continue taking pictures at your preferred settings.
  • To disengage the AE/AF Lock, simply tap anywhere on your field of view.

Return to beginning of section

How to Adjust the Depth of Field

If you have an iPhone XR, XS, or XS Max, then you have the option to adjust the depth of the field thanks to a serious camera upgrade. The dual cameras on the XR, XS, and XS Max include both a wide angle and a telephoto lens that combine exposures and give you control of the depth of field. In other words, you can control how fuzzy your background looks when you’re in Portrait mode.

To adjust the depth of field in Portrait mode:

  • In the Camera app, choose Portrait mode.
  • Tap the f in the top-right corner of the screen to bring up the Depth Control slider.
  • Dragging the slider to the right increases the background blur.
  • Dragging the slider to the left decreases the background blur.

Return to beginning of section

How to Operate Auto & Manual Flash

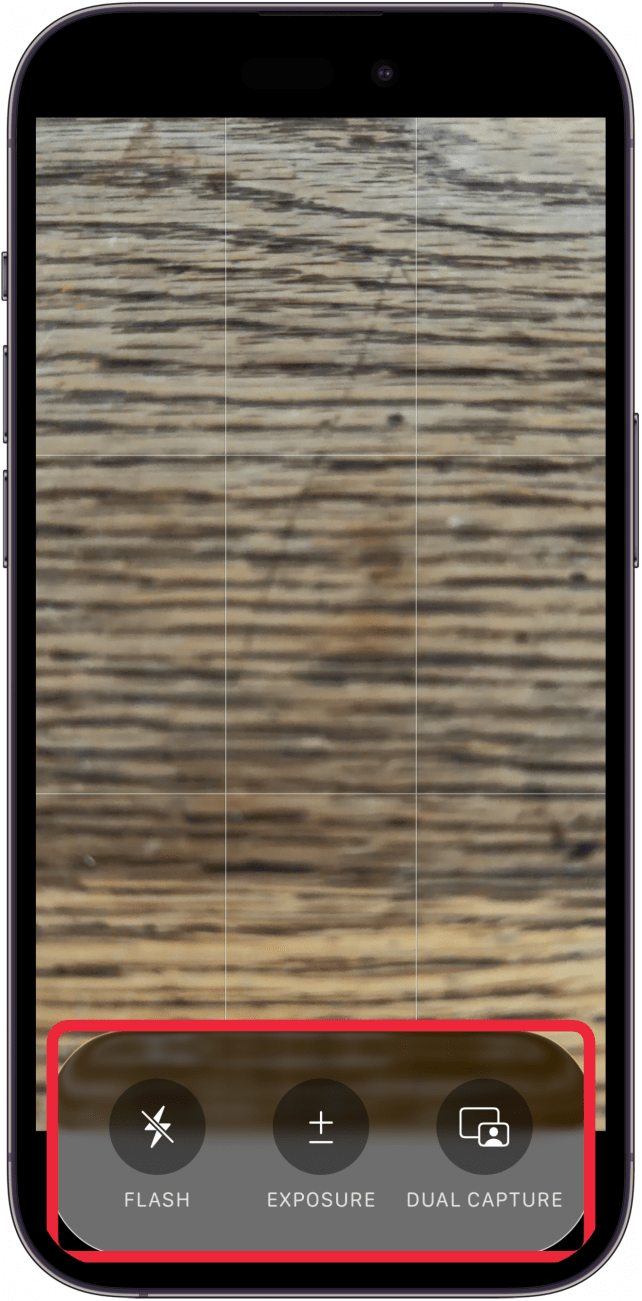
  • You can switch between Auto and manual flash directly from your Camera app.
  • Auto Flash will detect the brightness of an environment and decide for you whether or not flash will result in the optimal image, but you can turn Auto Flash off if you want more control over your image.
  • To change your Flash settings, tap the Flash (lightning bolt) icon on the top left.
  • To enable automatic flash, tap Auto.
  • To turn your flash on, tap On.
  • To turn your flash off, tap Off.

Return to beginning of section

How to Operate Your iPhone's Shutter

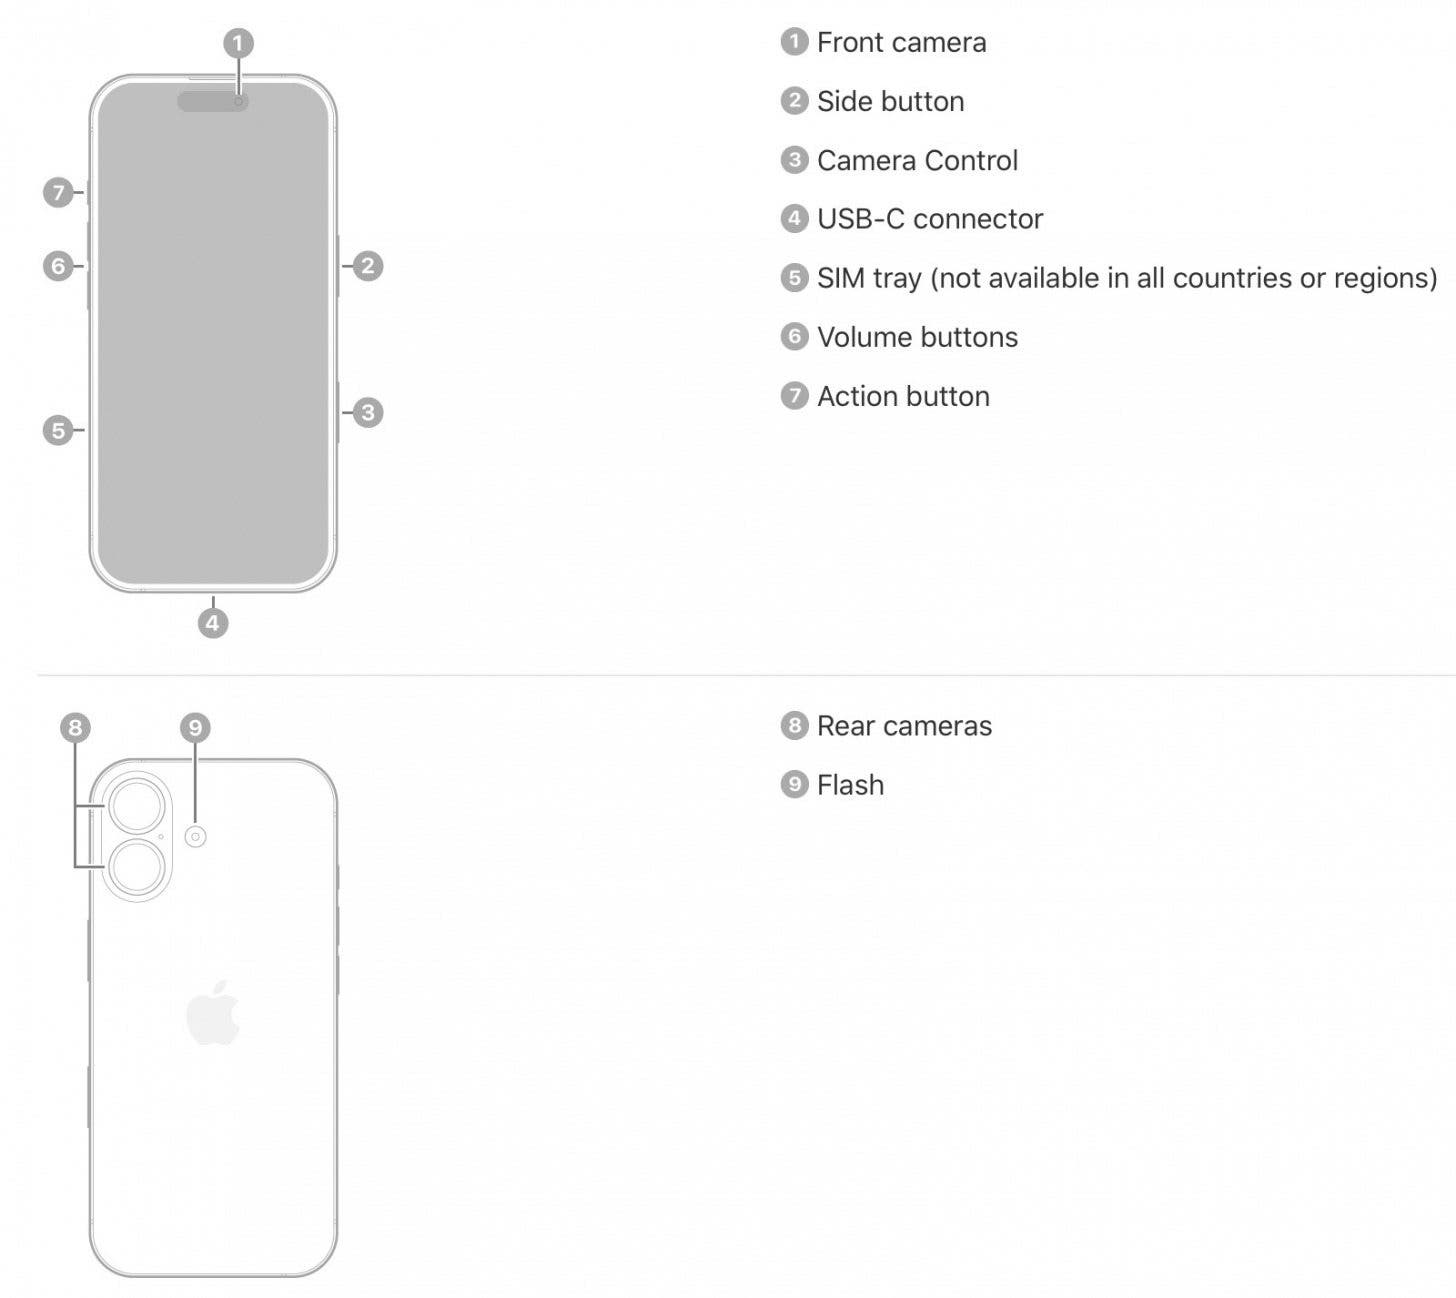
When you're finally ready to capture your subject, you have two options in terms of the shutter function. When capturing a photo or video on the iPhone, you can use either the volume buttons on the side of your iPhone or the Shutter icon within the Camera app.

  • To snap a picture or record a video using the volume buttons, frame your picture or video and press either volume up or volume down to capture the image or start and stop recording.
  • To snap a picture using the shutter button, frame your picture and tap the white circle at the bottom of the screen. 
  • To record a video using the shutter button, frame your video and tap the red button at the bottom of the screen. The circle will turn white. Tap again to stop recording.

You can also use the shutter to take a Burst photo. Burst photos are a series of photos taken in quick succession. This method is perfect for sports photography.

  • To take a burst photo, press and hold the shutter using either a volume button or the shutter Button on your screen.
  • Hold the shutter button down for several seconds, then release.
  • You can find the collection of burst photos in your Photos app.
  • From there, you can select the images you want to keep and discard the rest.

Return to beginning of section

How to View the Picture You Just Took

Now that you've captured your image or video, you'll want to check it to make sure it looks just right.

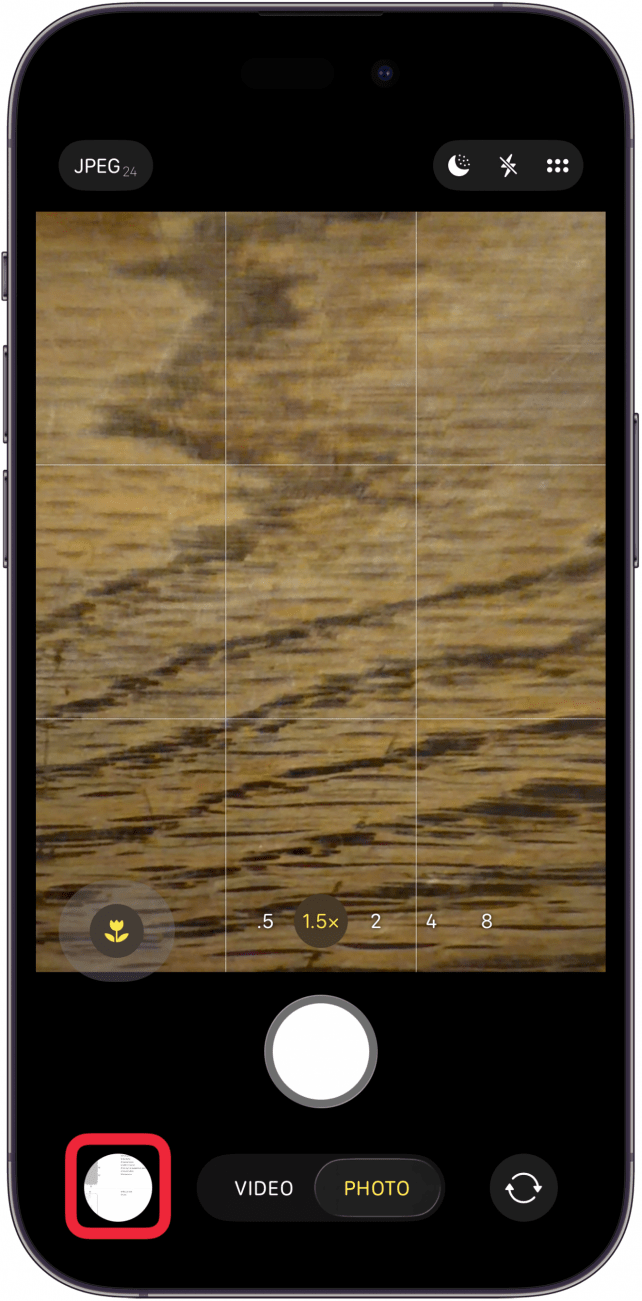
  • You can view all of your photos and videos by exiting out of the Camera app and navigating to the Photos app, but did you know that you can also switch over to the Photos app from within the Camera app?
  • To view your recent photos and videos quickly, just tap on the tiny thumbnail of your most recent photo or video on the bottom left of the screen.

Return to beginning of section

2. Camera App Icons: What Your Camera Icons Mean, & How to Use Them

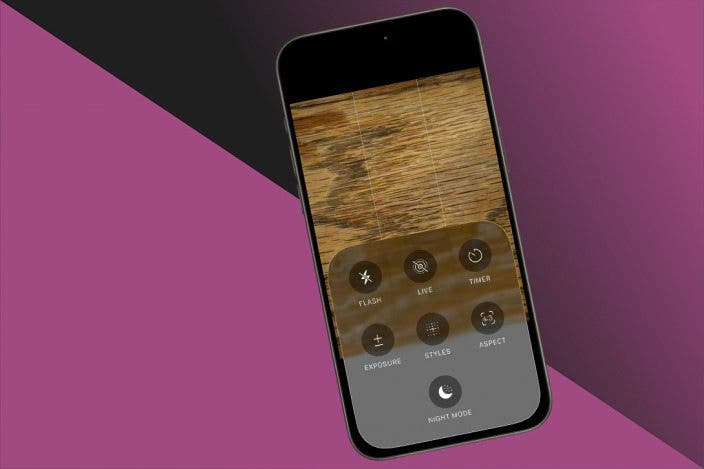
Making use of the icons on the screen can help a photo session go more smoothly, but why isn't there a guide to what each icon and symbol means to make the camera easier to operate? This section breaks down what each icon and symbol means in the camera app, such as the Live Photos, Timer, and HDR icons, and explains how to use those functions. 

Return to top

What's in this section:

Live Photos

The Live Photo icon is located at the top of your screen and can be toggled on or off to enable or disable Live Photos. A Live Photo is like a GIF; your camera captures several seconds of video and audio to create a short animation. You can turn Live Photo off or on even after you've taken a picture, but turning the function off before you snap the photo will save you some data storage.

Return to beginning of section

HDR

HDR stands for High Dynamic Range. You can use the HDR icon on the top of your screen to toggle HDR on or off for a specific shot. If you are in a darker environment, HDR is your best option. Because HDR takes up more storage space than non-HDR, you might want to turn the function off from time to time, especially when the conditions are just right for a non-HDR image. For example, if you're shooting in a brighter environment, non-HDR will result in better color depth.

Return to beginning of section

Timer

The Timer icon at the top of the screen allows you to set a timer for either 3 or 10 seconds. This function is ideal if you want to set up a shot on a tripod and jump quickly into the frame.

Return to beginning of section

Shutter

The Shutter icon, which appears at the bottom center of your field of view, will have a different appearance in different modes, but in every mode, the basic function remains the same; if you tap the shutter icon, an image, or several images, will be added to your Photos app.

Return to beginning of section

Filters

The Filters icon appears at the top right of the screen. You can use the iPhone's built-in filters to add color effects such as Vivid and Dramatic in cool or warm tones, or Mono, Silvertone, or Noir to your picture. Scroll through the filters to find an effect that you like before snapping your photo.

Return to beginning of section

Flash

The Flash icon appears at the top left of your screen. This icon opens up a menu that allows you to either turn on Auto flash or toggle your manual flash on and off between shots.

Return to beginning of section

3. Camera Modes: How to Switch Between & Use Camera Modes

Like Photo and Video mode, your camera's other modes are all available on the horizontal menu at the bottom of your Camera app. Time-Lapse, Slo-Mo, Square, Pano, Video, Portrait, and Photo modes all offer different ways to capture the world around you. While some modes, like Video and Photo, might sound straightforward, the other modes can look intimidating if you don't know what the labels mean. This section will explain how each mode works and provide instructions for capturing the right kind of moment for each mode. 

Return to top

What's in this section:

How to Use Time-Lapse Mode

In nature photography, time-lapse photos are how scientists observe things like the life cycle of a plant, but you don't have to watch the grass grow to get cool results in Time-Lapse mode. Time-Lapse mode is great if you want to film anything that moves slowly, like clouds or a flickering campfire, and play that footage back at a higher speed for a dynamic visual effect. For best results, this mode pairs well with a tripod so that your image remains focused and steady.

Because time-lapse mode handles most settings automatically, you won't have access to your flash or different brightness options in this mode. However, you can still adjust the focus as you would in Photo mode. Because time-lapse mode handles most settings automatically, you won't find the different brightness options in this mode. The AE/AF lock is perfect for this mode.

To begin a time-lapse recording:

  • Swipe right on the mode selection menu bar until Time-Lapse mode is highlighted in yellow.
  • Tap the red shutter button.

In this mode, you'll see a dashed white wheel around the outside of the shutter button. This white wheel represents a timer. For each complete rotation of the timer, a total of 4 seconds, your iPhone takes one picture. So, if you leave your iPhone recording a time-lapse video for 40-minutes, you'll wind up with 20-seconds of footage.

Back to beginning of section

How to Use Slo-Mo Mode

Slo-mo mode is the opposite of Time-Lapse. Located right next to Time-Lapse mode on the menu bar, Slo-Mo mode takes fast images to create a slowed down recording of a dynamic scene.

Think of it as a play-by-play in sports; in Slo-Mo mode, you can see everything that rushed by in minute detail. Similar to Time-Lapse mode, Slo-Mo mode recordings can suffer from an unsteady shot. However, because Slo-Mo recordings are usually taken so quickly, the risk of jostling the camera is lower.

As with Time-Lapse mode, your brightness options have been removed in favor of automatic settings. However, in Slo-Mo mode you once again have access to your camera's flash. The AE/AF lock remains available and is still your best friend in Slo-Mo mode. With AE/AF engaged, you can easily follow a fast-moving subject and capture multiple recordings without having to readjust your settings.

Once you've framed your shot, tap the red shutter button to begin recording.

Back to beginning of section

How to Use Video Mode, Plus Taking Photos While Recording

Next up is the Video mode. Again, because video involves recording in dynamic environments, the brightness options have been removed; but your camera's flash, as well as the AE/AF lock, remain available.

  • To shoot a video, adjust your flash to auto or manual.
  • Select the subject you want the camera to focus on.
  • Tap the red circle to begin recording.
  • The red circle will switch to a red square to indicate that you are recording.
  • You can adjust your focus at any time during a recording session by tapping the field of view. Tapping and holding will engage the AE/AF lock.
  • The timer at the top of your screen indicates how long you have been recording.

How to Take Photos While Recording a Video:

  • If something photo-worthy happens while you're recording, you don't have to switch over to Photo mode.
  • Just tap the white shutter button next to the red square.

Back to beginning of section

How to Use Photo Mode

Photo mode is the default mode for your iOS Camera app. In Photo Mode, you can change the brightness, set the flash to Auto or turn it on and off manually, lock your focus on a subject with AE/AF Lock, toggle HDR and Live Photo on or off, and take burst photos of dynamic scenes. The Photo mode offers the most versatility within the Camera app.

Back to beginning of section

How to Use Square Mode

Square mode adjusts your field of view from a rectangle to a square on both vertical and horizontal orientations. Square mode is a useful way to change things up without resorting to cropping your images later. Not every scene looks right when framed by a rectangle. And some some social media sites will automatically crop your photos to a square when you upload it.

Switching over to square mode can change the way you see your subject. In all other respects, square mode is identical to photo mode. That means you can take Burst photos, Live photos, toggle HDR mode on and off, add filters, and set a timer, all within a square frame.

Back to beginning of section

How to Use Pano Mode

Panoramic photos are fun to attempt and hard to get right. Choosing the right subject for a panoramic photo is the key to getting the perfect vertical or horizontal image in Pano mode. Just do a quick web search for "panoramic dogs," and you'll get all sorts of hilarious results like squashed heads or multiple exposures of the same dog's hindquarters. Pano mode works best if you are taking a picture of a calm scene without a lot of motion. While you might be tempted to get a panoramic shot of a football stadium mid-game, don't be surprised if the results are less than optimal.

Once you do find the perfect subject and begin taking your picture you'll find that Pano mode, like Time-Lapse and Slo-Mo, is stripped of most of the bells and whistles you're used to in favor of automatic settings. Because panoramic photos require multiple exposures in quick succession, a steady hand (or a good tripod) are important.

  • When you're ready to capture your panoramic image, orient your camera.
  • Holding your phone vertically will allow you to take a horizontal panoramic image. Holding your phone horizontally will give you a vertical panoramic image.
  • For a vertical image, start at the very edge, either right or left, of the scene you want to capture. For a horizontal image, start at either the top or bottom of the scene you want to capture.
  • When you are ready, tap the shutter and move your camera either to the side for a horizontal image or up or down for a vertical image.
  • For both a horizontal and vertical panoramic picture, be sure to keep the arrow as close to the yellow guide line as possible.
  • When you are finished, tap the white square.

Back to beginning of section

How to Use Portrait Mode

If you've seen iPhone selfies on Instagram or Facebook with a fuzzy background and wondered how the photographer managed that effect (called the Bokeh effect), the answer is Portrait mode. In general, Portrait mode sharpens your subject and blurs the background to give a high-contrast image that makes your subject pop. The iPhone 8 Plus and iPhone X and later also include a feature called Portrait Lighting. Different from brightness settings, the lighting effects can auto-detect facial features to add contour, drop the lighting in the background to make the subject pop even more, or render a classic black-and-white photo with sharpened image resolution that adds visual texture to your subject.

Portrait mode is available on all model iPhones with dual rear-facing cameras (iPhone 7 and 8 Plus and iPhone X and later). Portrait mode selfies are available on all iPhones with a forward-facing TrueDepth camera (iPhone X and later). 

Pro Tip: You can now take videos that blur the background just like Portrait mode photos! Learn more about Cinematic Mode and how to use it here.

How to Use Portrait Mode Using the Rear-Facing Camera:

  • Select Portrait from the mode selection menu.

  • Adjust Flash, HDR, Timer, and Filters as desired.
  • Line up your subject.
  • You may have to back up or move closer to your subject for the image to render properly. Follow the instructions on your screen to optimize your distance from the subject.
  • If you have an iPhone XR, XS, or XS Max, tap f to manually change the depth of field.
  • If you have iPhone 8 Plus or iPhone X you can also select your Portrait Lighting effect.
  • Swipe along the Portrait Lighting dial to test the different effects.
  • When you are ready, tap the shutter button to capture the image.

How to Take Selfies Using the Front Facing TrueDepth Camera:

  • While all currently available iPhones have a forward-facing selfie camera, the iPhone X and later models can take selfies in Portrait mode with the front-facing TrueDepth camera.
  • Swipe through the camera Modes to select Portrait.
  • Tap the front-facing camera icon to the right of your shutter button
  • Select any desired filter and lighting effect.
  • Tap the shutter button or press a volume button to capture the image.

Back to beginning of section

How to Adjust Your iPhone Camera Settings

Adjusting your camera settings is a great way to make sure that your iPhone is ready for your next photo shoot. In Settings, you can toggle the grid on or off, enable Scan QR Codes, select your video quality and photo formats, and even set how many versions of an individual photo are saved to iCloud.

Return to top

What's in this section:

How to Access the iPhone Camera Settings

  • Open the Settings app.
  • Scroll down and select Camera.

Back to beginning of section

How to Preserve Your Camera Settings

By default, whenever you open the Camera app opens, the camera is in Photo mode, Filters are turned off, and Live Photo is on. You can choose instead to return the last settings you had enabled when you last used the Camera app, by enabling Preserve Settings. 

You can turn off the default settings in Camera settings:

  • Tap Preserve Settings.
  • Toggle Camera Mode to green if you want your camera to open on your last used mode, such as Video or Pano, instead of Photo.
  • To preserve your last used filter setting, toggle Filter to green.
  • Toggling Live Photo to on will cause the camera to always take Live Photos by default. You will have to turn the feature off manually in the Camera app every time you open the app and don't want to take a Live Photo.
  • To turn Live Photos on and off manually every time, toggle Live Photo to off.

Back to beginning of section

How to Enable or Disable the On-Screen Grid

The Camera Grid feature super-imposes a 3x3 grid on your viewfinder to help line up and frame the perfect shot. You can turn on the Camera Grid on your iPhone in the Camera settings. In the Camera settings, toggle Grid to green to turn on your camera’s grid.​

Enabling the Grid adds a leveling tool for overhead photography. Say you want to take an overhead photo of a painting lying flat on a table, and you want your plane of view to be level with the table top. With the Camera Grid turned on, you can line up the perfect overhead shot by following these instructions:

  • Open your Camera app and select either PhotoSquare, or Portrait mode.
  • Hold your iPhone horizontal to the table.
  • At the center of the 3x3 grid, you’ll see a yellow crosshair and a white crosshair.
  • Adjust the angle of your iPhone until the crosshairs line up (they will both turn yellow), then tap the shutter button.

Back to beginning of section

How to Enable or Disable the Scan QR Code Function

Now and then, you might find yourself in a situation in which you need to scan or present a QR code for things like tickets, getting contact information like emails and phone numbers, and cataloging purchases made from your bank or credit card. More and more, interactions with technology require users to scan QR codes, either to complete a purchase or to engage in an AR experience.

  • You can enable the QR code function by toggling Scan QR Codes to green. ​

Back to beginning of section

How to Adjust Video Quality

Depending on which model iPhone you own, you can adjust your video quality anywhere from 720p HD (4k) up to 4K. The higher the resolution (4K), the more space taken up by the video (170 MB per minute of footage). The default for your iPhone camera will be set to 1080p HD, which clocks in at 60 MB per minute. Of course, storage space is always an important consideration, but there are some events, like weddings or special birthday parties, that call for the highest possible quality.

To raise or lower your video quality from the default:

  • Go to Camera settings.
  • Tap Record Video.
  • Select your desired resolution.

Back to beginning of section

How to Adjust Video Quality for Slo-Mo

As with Record Video, you can adjust the resolution for the Record Slo-Mo feature. The higher the resolution of your Slo-Mo video, the better the quality and the more space the video will take up in your storage. As with regular video, Slo-Mo's default is 1080p.

To raise or lower the resolution for your Slo-Mo footage:

  • Go to Camera settings.
  • Tap Record Slo-Mo.
  • Select your desired resolution.

Back to beginning of section

How to Enable Manual or Auto HDR

If storage space is an issue, you might want to turn off HDR (High Dynamic Range). Auto HDR, when toggled on, combines three exposures, from lightest to darkest, into a single photo. Like many of the Camera app's most exciting features, HDR takes up more storage than non-HDR photography. The good news is that HDR is not always the best option. For example, when photographing movement or capturing brightly colored images in a low-light setting, non-HDR will result in a crisper image with more vibrant colors. However, in brightly lit spaces, HDR works better because there is a broader range of light to shadow for your iPhone to capture. With Auto HDR toggled off, you can select HDR as needed for each photo you take. With Auto HDR toggled on, all your images will be taken and saved as HDR images.

If you have an iPhone 8 or later, Auto HDR will be enabled by default with the controls nested inside your Camera settings. To learn how to toggle HDR on or off on earlier model iPhones, go to the section about HDR in the Camera app icons section.

  • To adjust Auto HDR on the iPhone 8 or later models, open the Camera settings and toggle Auto HDR on or off.

You can also adjust a subsetting under Auto HDR that either stores or trashes non-HDR versions of your HDR images. This toggle is available in the Camera settings for all HDR capable iPhones, including the iPhone 7.

  • Saving the non HDR version of a photo means that if you take a shot in HDR that doesn't turn out well, you can still access the untouched version of the image.
  • Trashing the non HDR version allows you maximize photo storage by not saving multiple versions of the same photo.
  • To turn Keep Normal Photo on, go to Camera settings and toggle Keep Normal Photo to green.

Back to beginning of section

Back to top

Finally, part of mastering the Camera app is knowing how to troubleshoot. Solve common issues like blurry photos or shaking camera for good!

Master your iPhone in one minute a day: Sign up here to get our FREE Tip of the Day delivered right to your inbox.

Topics

Author Details

Tamlin Day's picture

Author Details

Tamlin Day

Tamlin Day is a feature web writer for iPhone Life and a regular contributor to iPhone Life magazine. A prolific writer of tips, reviews, and in-depth guides, Tamlin has written hundreds of articles for iPhone Life. From iPhone settings to recommendations for the best iPhone-compatible gear to the latest Apple news, Tamlin's expertise covers a broad spectrum. 

Before joining iPhone Life, Tamlin received his BFA in Media & Communications as well as a BA in Graphic Design from Maharishi International University (MIU), where he edited MIU's literary journal, Meta-fore. With a passion for teaching, Tamlin has instructed young adults, college students, and adult learners on topics ranging from spoken word poetry to taking the perfect group selfie. Tamlin's first computer, a Radioshack Color Computer III, was given to him by his father. At 13, Tamlin built his first PC from spare parts. He is proud to put his passion for teaching and tech into practice as a writer and educator at iPhone Life.