How to Adjust Exposure in the iPhone Camera App
There are two ways to adjust exposure in your iPhone Camera app, and both are super easy! Learn how to quickly adjust your exposure and get the perfect shot.

Cullen has over a decade’s experience as a tech educator teaching subjects ranging from camera hardware to game design and specializes in Apple privacy and security.
Learn More Cullen has over a decade’s experience as a tech educator teaching subjects ranging from camera hardware to game design and specializes in Apple privacy and security.
Learn MoreDid you know you can brighten and darken your iPhone camera shots before you even take them? You can do this by setting the exposure, and it's as easy as sliding your finger up or down. Adjusting exposure is a way to make the darks a little darker or the lights a little lighter. We'll show you how to change the exposure on your iPhone camera and create the image you want every time.
Related: Live Photos: The Complete Guide to iPhone Live Images (2022)
Why You'll Love This Tip
- Turn the exposure up or down on your iPhone camera with a simple swiping gesture.
- Always get the perfect picture and avoid taking photos that are either too dark or too bright.
How to Adjust Exposure in the iPhone Camera App
As of iOS 14, there are two ways you can adjust exposure in your iPhone camera app, either on the image display or in the menu below. Let's learn both. For more iPhone photography tutorials, check out our Tip of the Day. To further up your photography game, check out our article for the best new camera accessories. Now, let's get started.
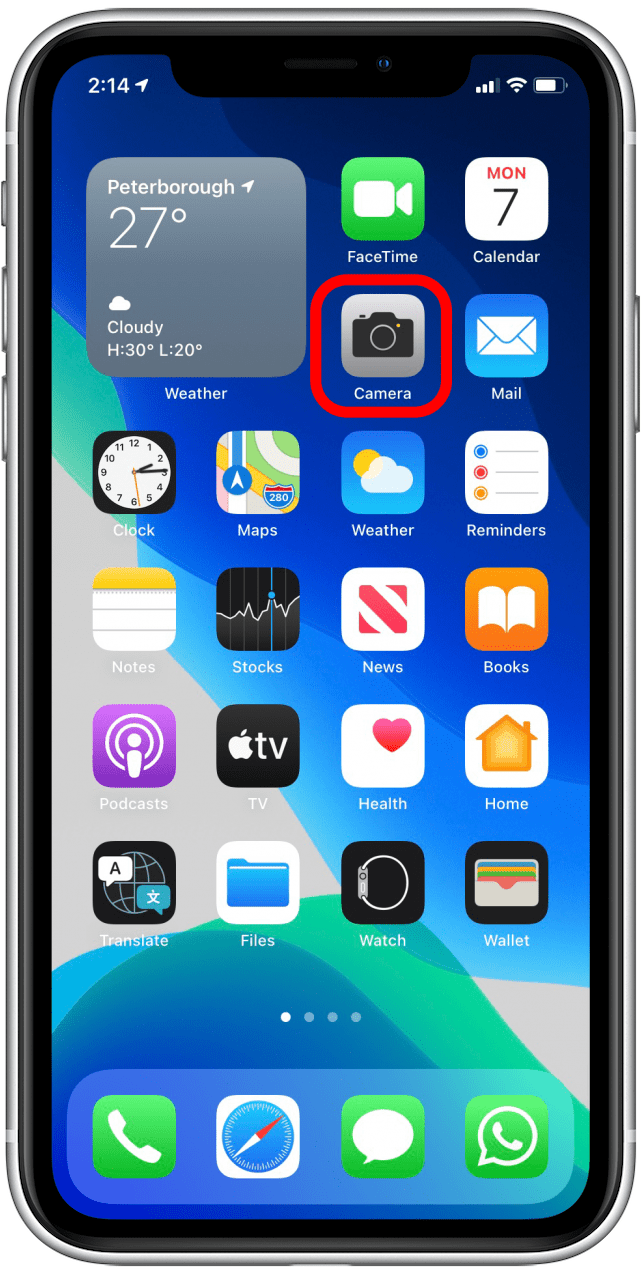
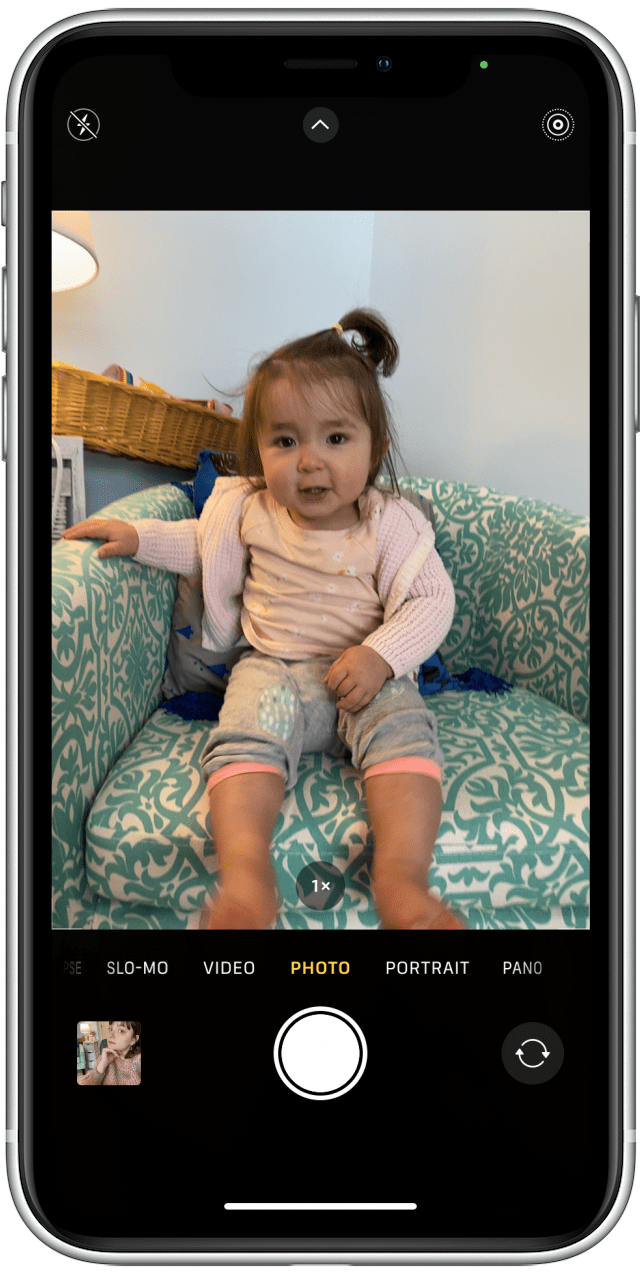
- Open your Camera app.
- Frame the shot you want to take.
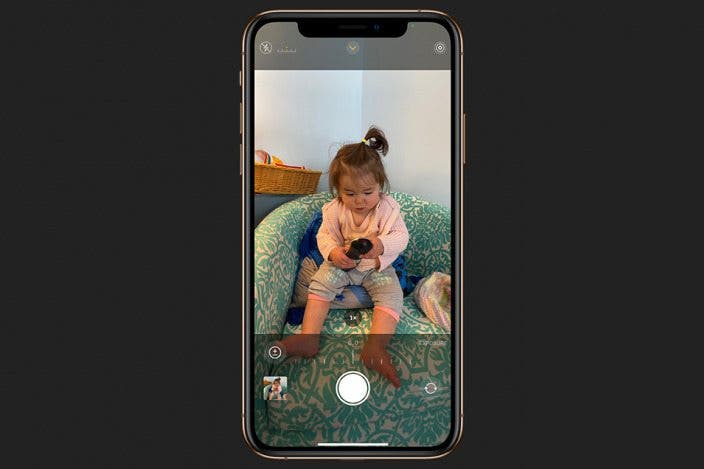
- Tap the point in the photo you want to focus on. A yellow box will appear around that point.
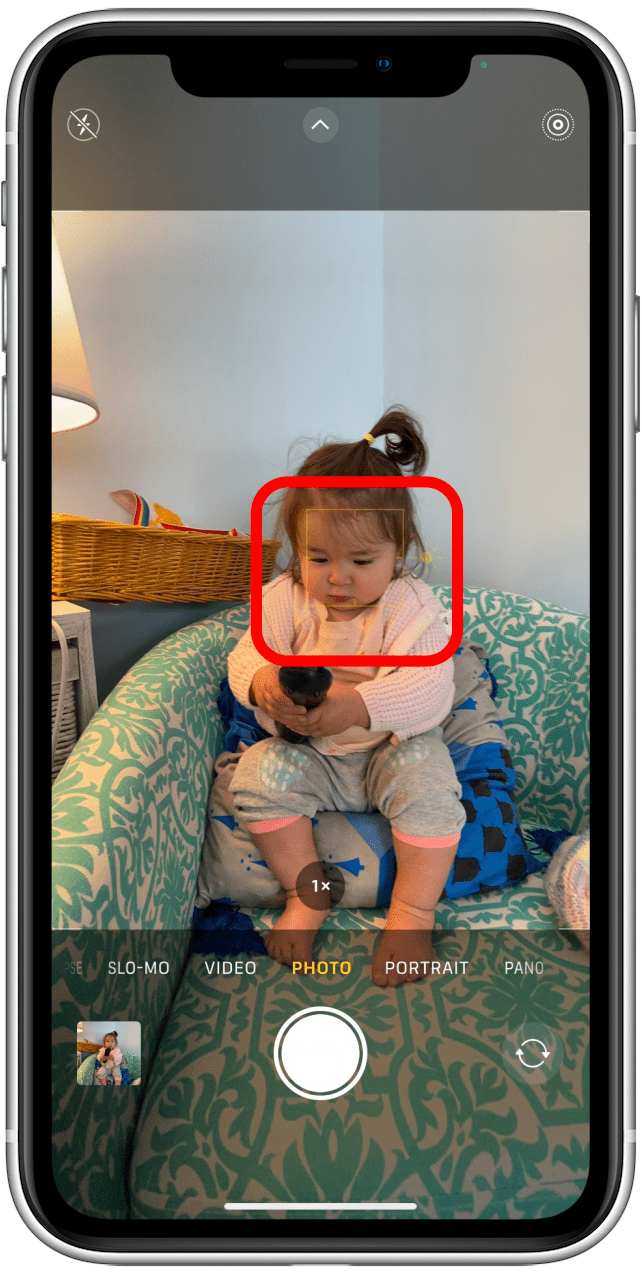
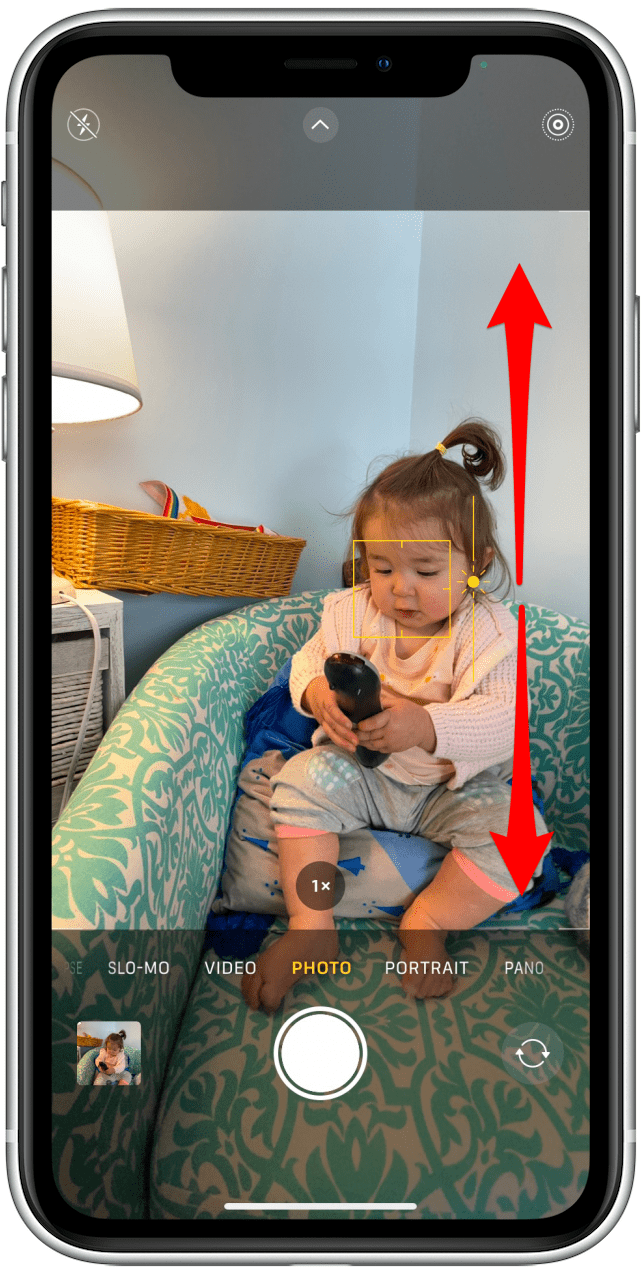
- One way to adjust exposure is to slide your finger up and down on the sun icon next to the yellow box. Sliding up will make the photo lighter, sliding down will make it darker. Note: This yellow slider may appear faintly on your screen; you may have to look very closely to see it.
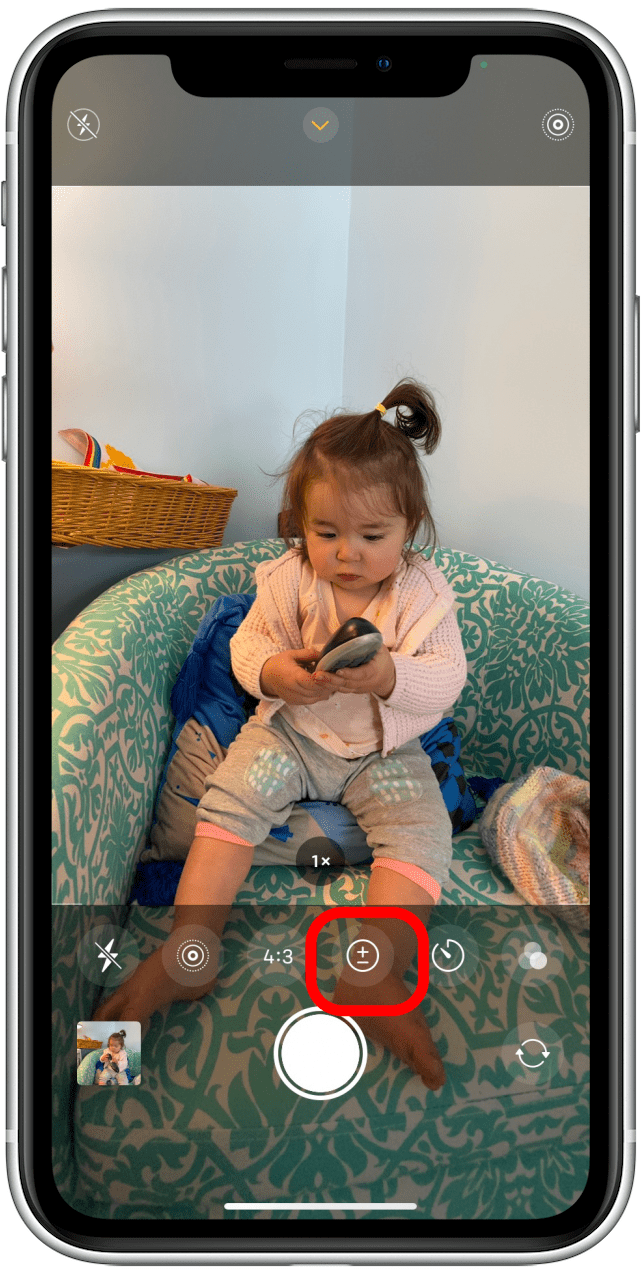
- For a more precise adjustment, tap the caret at the top of your screen.
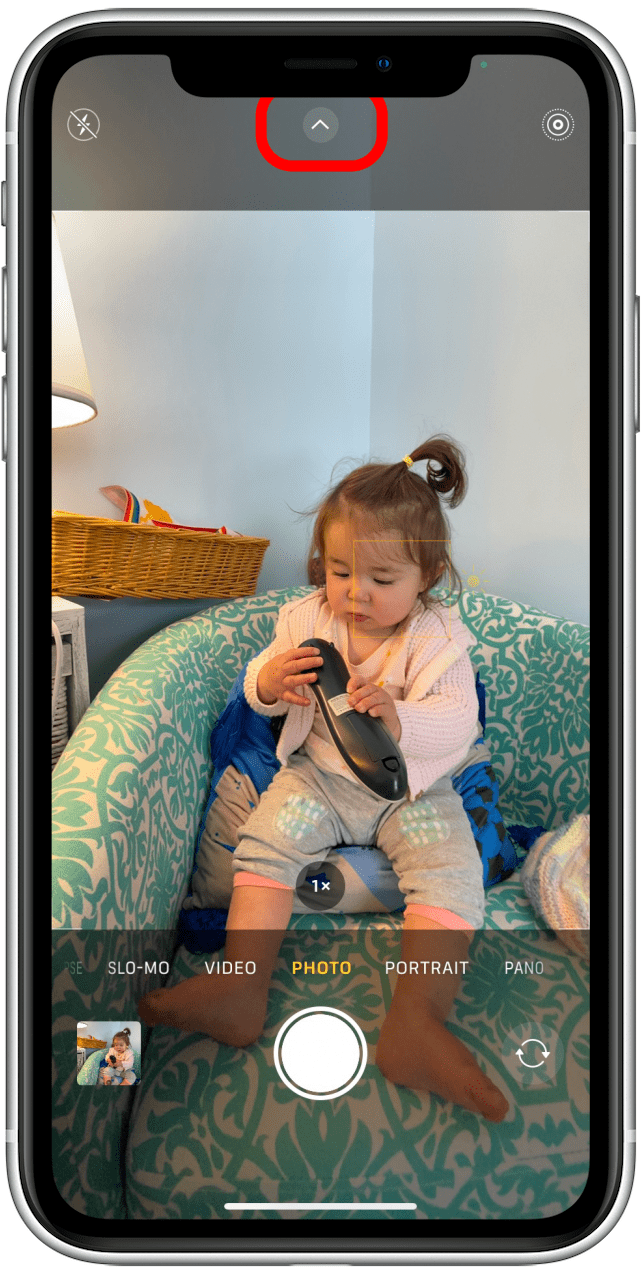
- A menu will appear below your Shutter button. Tap the plus and minus icon.
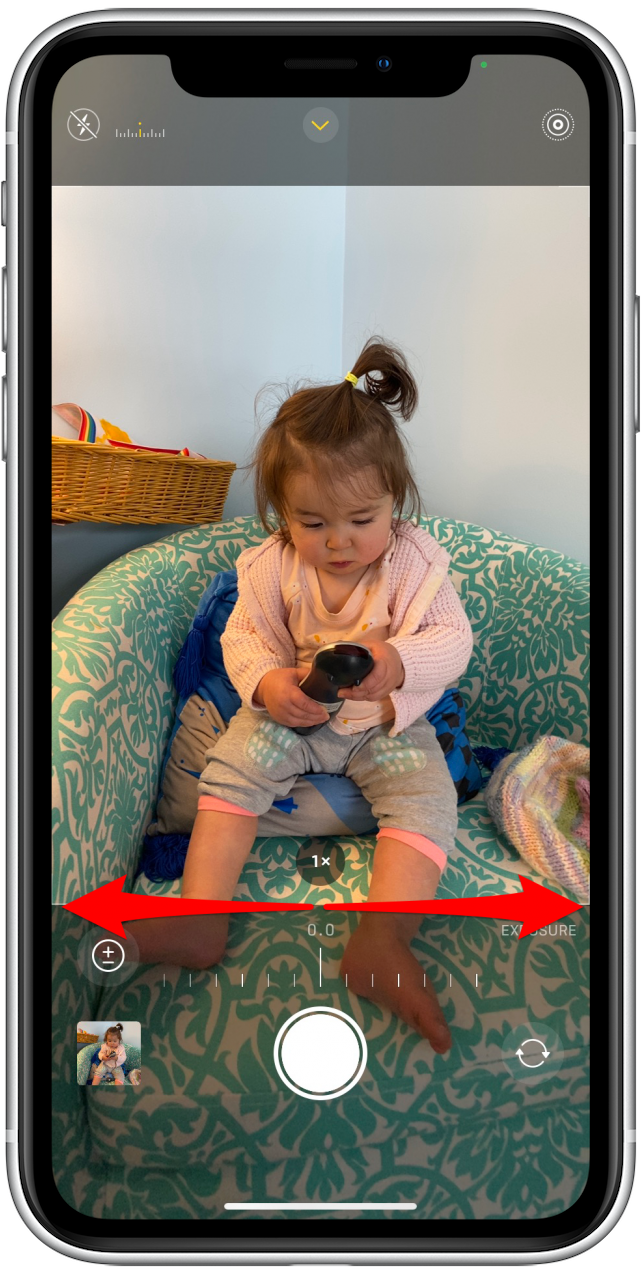
- Swipe left and right to adjust exposure. Swiping to the left will make your photo brighter, swiping right will make it darker.
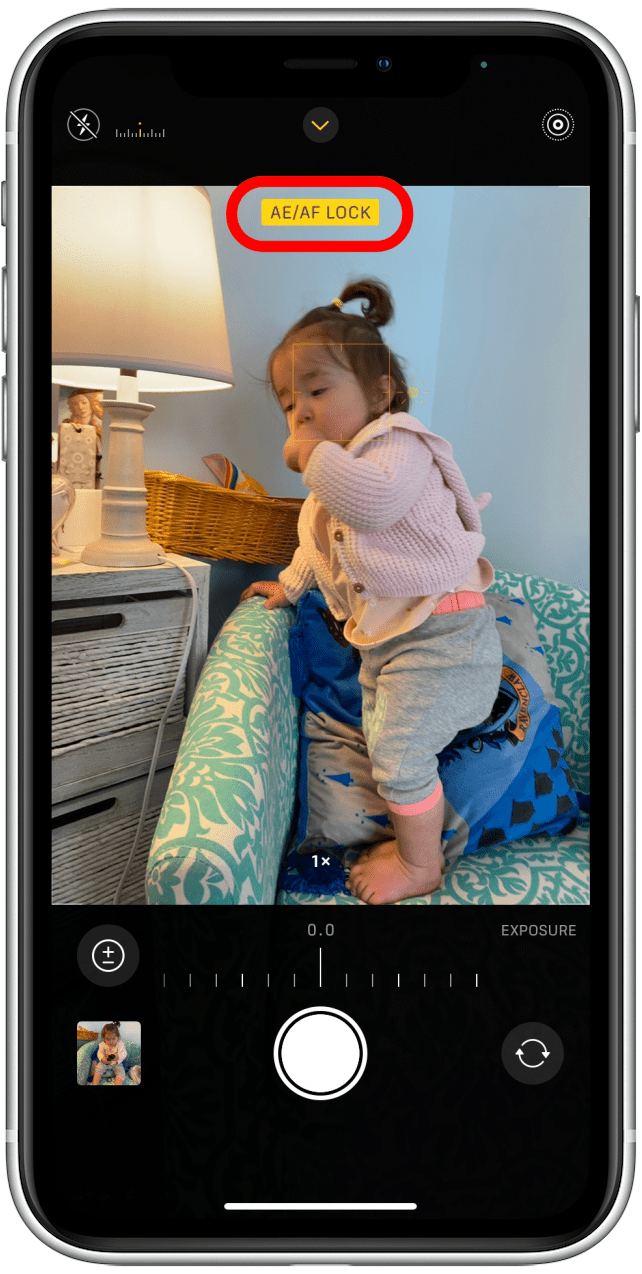
- If you want to make sure your exposure and focus stay how you set them and don't auto-adjust with light changes or movement, long press on the yellow box around the focus of your shot. AE/AF LOCK will appear at the top of your screen, letting you know those settings are locked. To undo this, tap anywhere else on the screen.
Now you know how to adjust the exposure on your iPhone. This is such a useful feature when taking photos in dark places or with a bright light source somewhere in the frame, like taking a photo in front of a window, in a dark restaurant, or on a super sunny day! Try it out for yourself! Next, learn how to troubleshoot a common problem and find out why your iPhone camera is shaking and how to fix it.

Every day, we send useful tips with screenshots and step-by-step instructions to over 600,000 subscribers for free. You'll be surprised what your Apple devices can really do.
Cullen Thomas
Cullen Thomas is a senior instructor at iPhone Life. For ten years as faculty at Maharishi University, Cullen taught subjects ranging from camera and audio hardware to game design. Cullen applies a passion for gadgetry to answer questions about iPhones, iPads, Macs, and Apple cloud services; to teach live classes; and to specialize in the privacy and security aspects of the Apple ecosystem. Cullen has dual degrees in Media & Communications and Literature, and a Masters degree from the David Lynch Graduate School of Cinematic Arts.
Offline, Cullen designs videogames with Thought Spike Games, writes fiction, and studies new nerdery.
Mastodon: @CullenWritesTech@infosec.exchange
Email: cullen@iphonelife.com
 Amy Spitzfaden Both
 Rhett Intriago
 Cullen Thomas
 Susan Misuraca
 Olena Kagui


 Nicholas Naioti

 Rachel Needell