How to Crop a Live Photo by Removing Frames
Learn how to shorten Live Photos by trimming out frames you don't want.


An iPhone Live Photo captures 1.5 seconds before and after a shot is taken, making it easy to accidentally catch the blur from lowering your phone, or worse, something you don’t want anyone to see. The solution is simple, as you can just trim out unwanted frames. Here’s how to edit Live Photos on your iPhone.
Related: Live Photos: The Complete Guide to iPhone's Moving Pictures
Why You'll Love This Tip
- Remove frames that show you lowering your phone or accidentally capturing a messy background.
- Shorten the length of your Live Photo to pinpoint exactly what you want to showcase.
How to Trim a Live Photo on iPhone
To learn more about your Photos app and iPhone features, consider signing up for our free Tip of the Day. While we're only removing unwanted frames in this article, you can also crop a live photo to resize it, just as you would for a regular image. Now, here's how to trim a Live Photo by removing image frames.
- Open the Photos app.
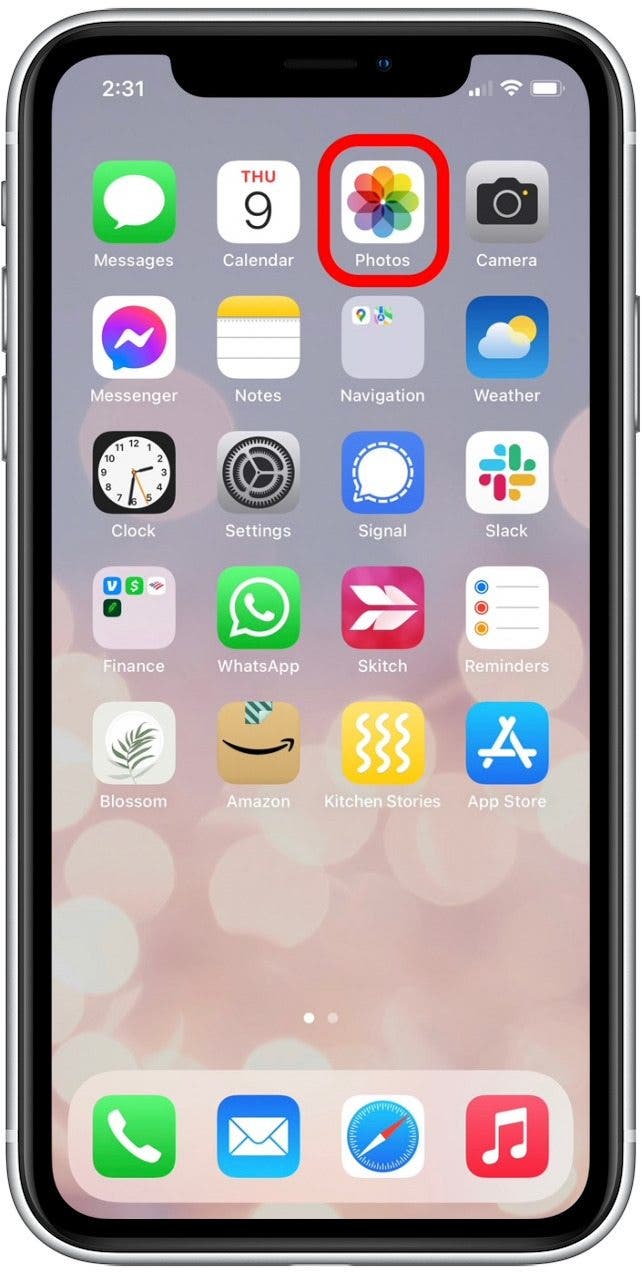
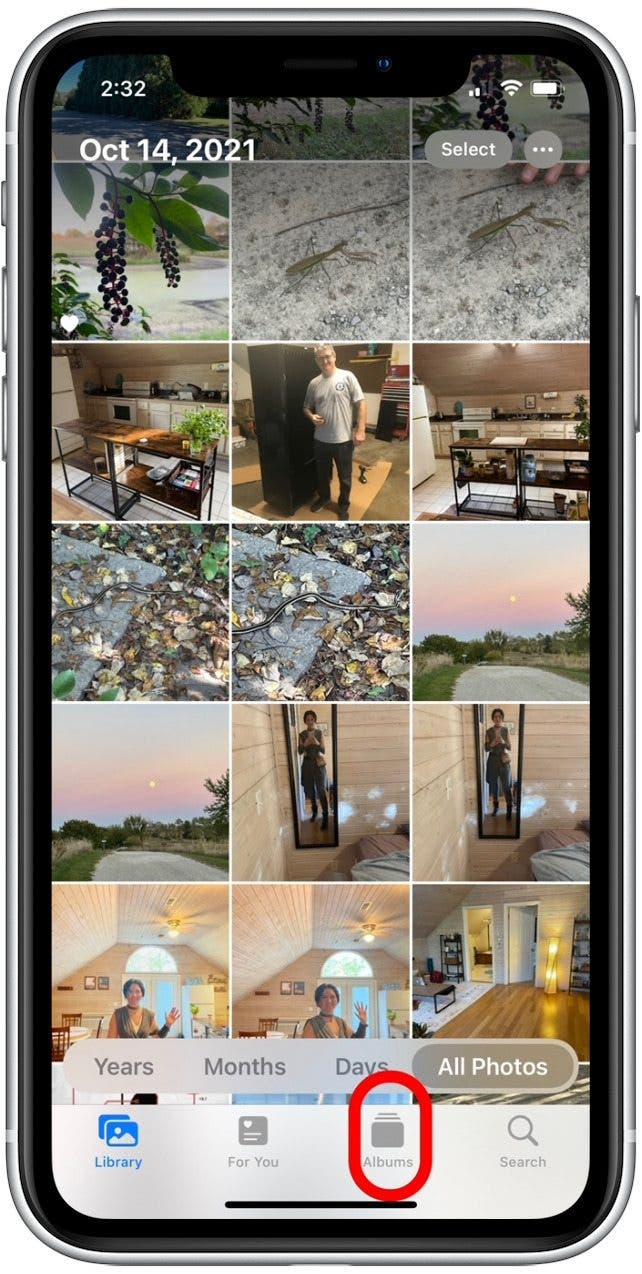
- Tap the Albums tab.
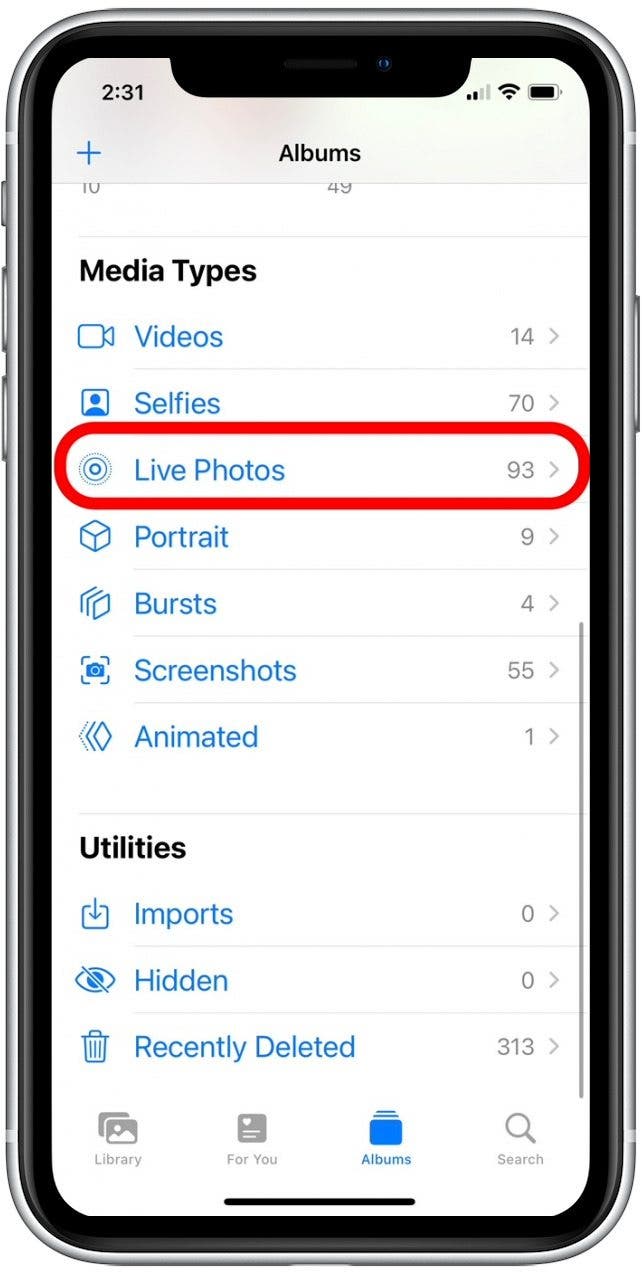
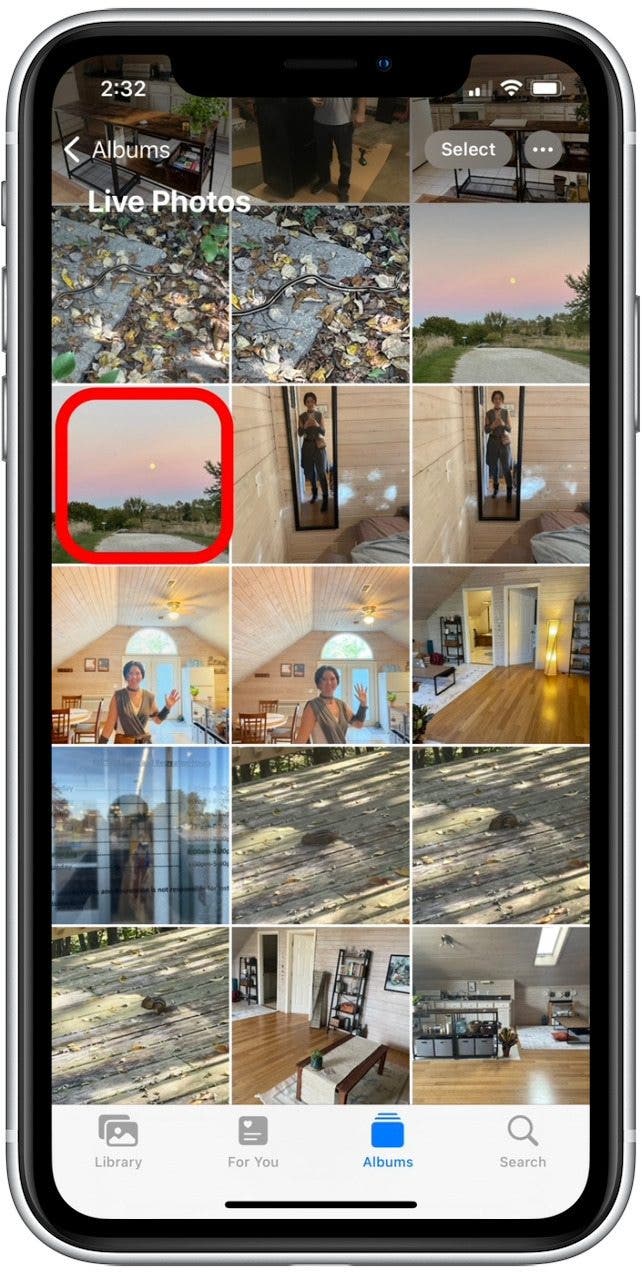
- Swipe to the bottom and tap Live Photos.
- Select the Live Photo you'd like to trim.
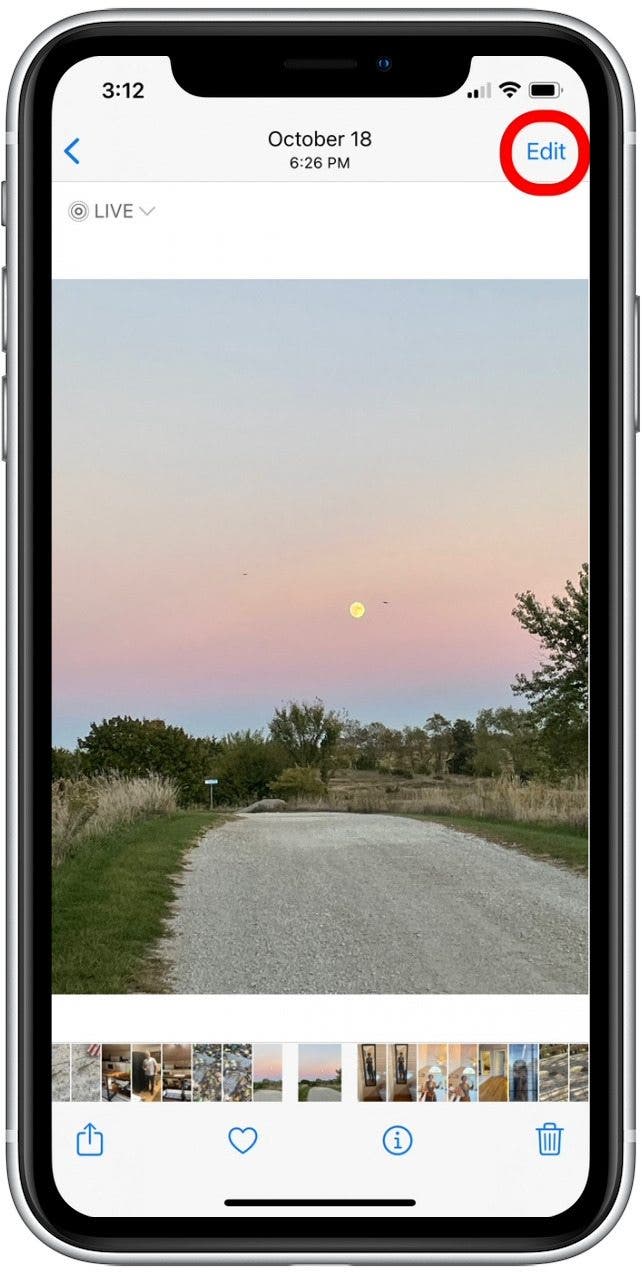
- Tap Edit.
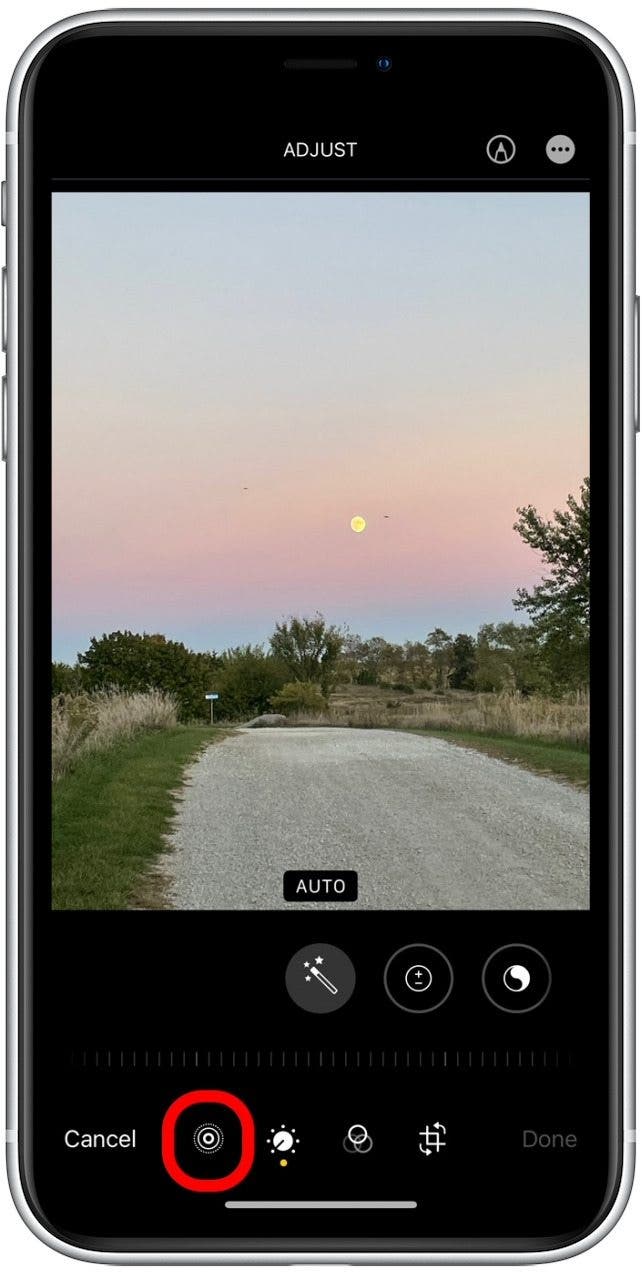
- Tap the Live Photo icon.
- You’ll see each frame of the Live Photo individually placed side by side. A rectangle with arrows on either side frames the images.
- Long press and drag the right or left arrow. The rectangle you touch will turn yellow and highlight the section of Live Photo that you're keeping.
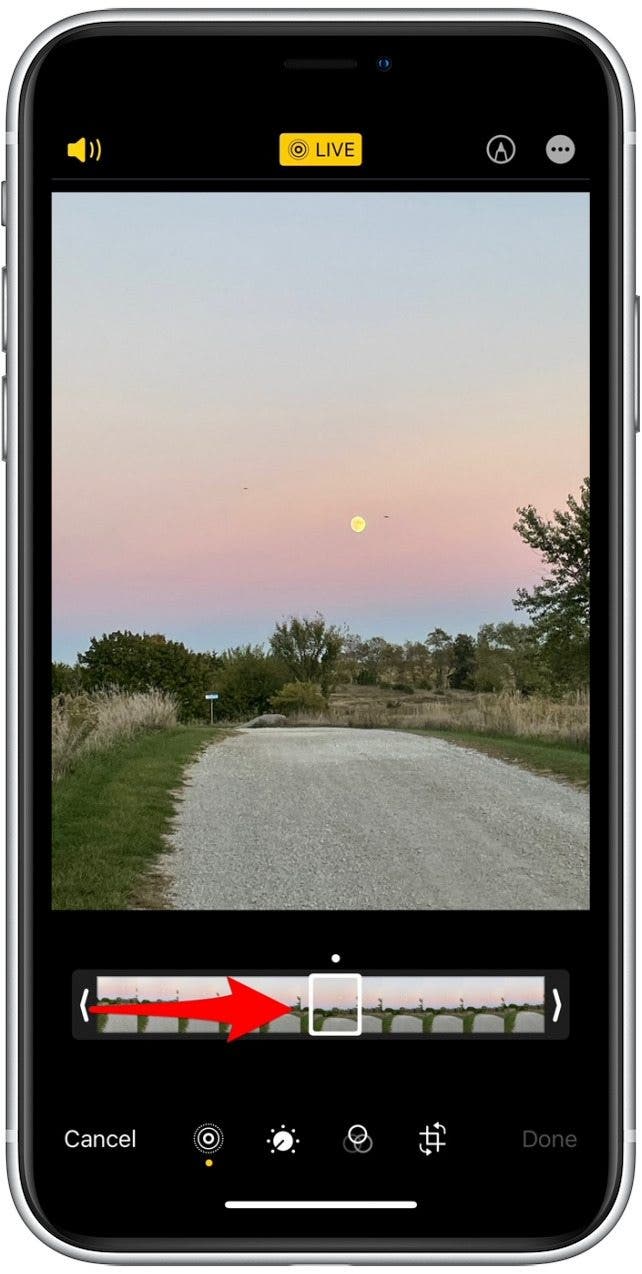
- Tap Done to save the trimmed Live Photo.
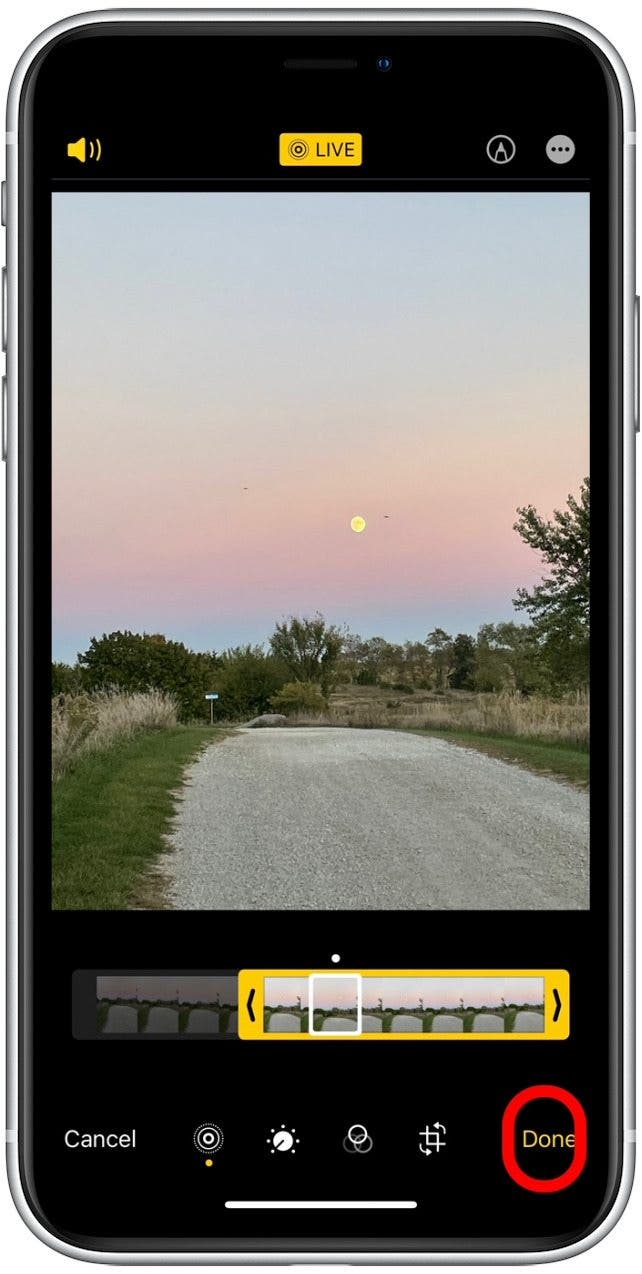
If you trimmed your Live Photo incorrectly, don’t worry. Regardless of what edits you've made, you can easily revert back to the original Live Photo.
Every day, we send useful tips with screenshots and step-by-step instructions to over 600,000 subscribers for free. You'll be surprised what your Apple devices can really do.

Conner Carey
Conner Carey's writing can be found at conpoet.com. She is currently writing a book, creating lots of content, and writing poetry via @conpoet on Instagram. She lives in an RV full-time with her mom, Jan and dog, Jodi as they slow-travel around the country.

 Rachel Needell
 Rhett Intriago

 Amy Spitzfaden Both

 Leanne Hays
 Linda Ruth

 Olena Kagui





 Hal Goldstein