 With the launch of the iPhone 3GS earlier this year, we now have a much improved and very capable iPhone camera. It even lets us shoot video with the very same camera application we’ve always used! They say the best camera is the one you have with you and if you’re anything like me, your iPhone is ALWAYS with you—so I thought it might be worthwhile sharing a couple of tips that will help you get the most out of the pictures that you took with your iPhone.
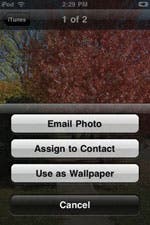
When you e-mail a picture from the Photos app (left), it reduces the resolution of the image. To send a full resolution version of the photo, copy it to the clipboard (middle) and paste it into the body of an e-mail message (right).
Tip 1: E-mail full resolution (highest quality) photos
It’s fun showing off your photos on the iPhone itself, but most of the time we end up doing so via e-mail or online sharing methods. 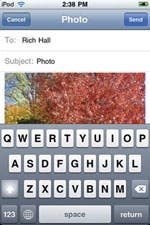 By default, when you send an iPhone photo through e-mail, the image quality is watered down. Images are sent at 800x600 pixel resolution. You can send your photos at full resolution (2048x1536 on the iPhone 3GS or 1600x1200 on the original and 3G iPhones) by simply copying and pasting them into an e-mail. Here’s how you do it:

- Open the Camera app and go to your Camera Roll. Tap on a thumbnail to view an individual photo, and then tap and hold on the photo and select “Copy” from the pop-up menu. You can also select and copy images using one of these methods:
- Open the Picture app and select Camera Roll or Photo Library. Tap and hold on a single photo’s thumbnail and select “Copy.”
- Open Camera Roll or Photo Library, tap on the Share icon (the envelope at bottom left), then select multiple thumbnails in the Select Photos view and tap “Copy” at the bottom of the screen.
- Go the Mail app and open a new e-mail. Press and hold in the body text area of the new e-mail and select “Paste” from the pop-up menu.
That’s it. Your single photo, or multiple photos, will be pasted in at full resolution, and will be sent out that way.
Note that full-resolution photos have larger file sizes. Because of this, you may want to be careful how many images you attach to a single e-mail. Messages with many large attachments can take longer to reach their recipients, or some basic e-mail services may even block them.
Tip 2: Quickly transfer iPhone videos to your Mac or Windows PC
The iPhone 3GS lets you capture video using its beefed-up camera app. You can share videos through e-mail or by posting them directly to YouTube. If you want to do substantial editing of your video, you’ll have to transfer it to your Mac or PC and use a more feature-rich video-editing program to make the changes. Here’s a quick way to move iPhone videos over to your Mac or PC:
 Connect iPhone to Mac using its USB (sync) cable
- Launch the Image Capture app on your Mac. Once launched, Image Capture should almost immediately display a dialog box; the iPhone icon indicates that it is attached to the Mac. The “Download To:” field lets you choose where the videos and/or photos will be saved. The “Options” button lets you modify a number of choices, including whether or not the originals on the iPhone are deleted after the download is complete.
- Once you’ve made your selections, click on the “Download Some” button if you want to specify which videos or photos you want to download; click on “Download All” if you want them all copied over.
Use Image Capture on the Mac to copy photos and videos from your iPhone to your desktop.
 I tested Image Capture with a number of 30 to 60-second videos; they all zoomed over to the Mac quite nicely. You can also import 3GS videos to the Mac with the iPhoto app, but I’ve found that the load time and responsiveness for iPhoto are substantially longer and I much prefer the simpler, faster, Image Capture app.
Use the Scanners and Cameras app on your Windows PC to select and transfer videos and photos from your iPhone to your PC.
- Connect your iPhone or iPod touch to your PC using the sync cable.
- Click on the Scanners and Cameras app icon located in the Windows Control Panel folder.
- Hit the “Next” button until you are presented with the “Choose Pictures to Copy” screen.
- By default, all of the photos and videos on your iPhone are selected for transfer. If you want to select specific items, click on the “Clear All” button and then click on the check box next to the desired video(s) or photo(s).
- Hit the “Next” button and specify the file folder you want the items transferred to. (Check the box labeled “Delete pictures…” if you want them deleted after download.)
- Hit the “Next” button one last time to transfer the files.
The iPhone’s video files are saved in the .MOV file format, so you’ll need a viewer and video editor that handles that format.
Happy snapping
I hope these two tips are helpful when you’re handling your latest iPhone photo and video masterpieces. Happy snapping!

