How to Use Procreate 101: iPad Drawing with Apple Pencil
I will teach you how to use the Procreate art app to create digital art! This tutorial is full of Procreate tips on how to draw as a beginner.

In the last 10 years, Olena has been published in dozens of publications internationally and written hundreds of how-to articles and complex guides about Apple products, software, and apps.
Learn More In the last 10 years, Olena has been published in dozens of publications internationally and written hundreds of how-to articles and complex guides about Apple products, software, and apps.
Learn MoreLearn everything you need to know to start drawing on Procreate or learn new tips and tricks. This article will cover everything from the list of iPads that work with Procreate to how to use the blending brush, trace existing art, export your image, and more.
How to Use Procreate on iPad: Step by Step Tutorial
Digital art can be intimidating because there is a lot to learn just to get started. However, in general, many find digital drawing easier than on paper because you can undo mistakes, can change the size and style of your brush, and have access to any color with a click. I can barely draw a stick figure using a pen and pencil, but I can draw almost anything in Procreate. Here’s how to use Procreate ($9.99) on iPad:
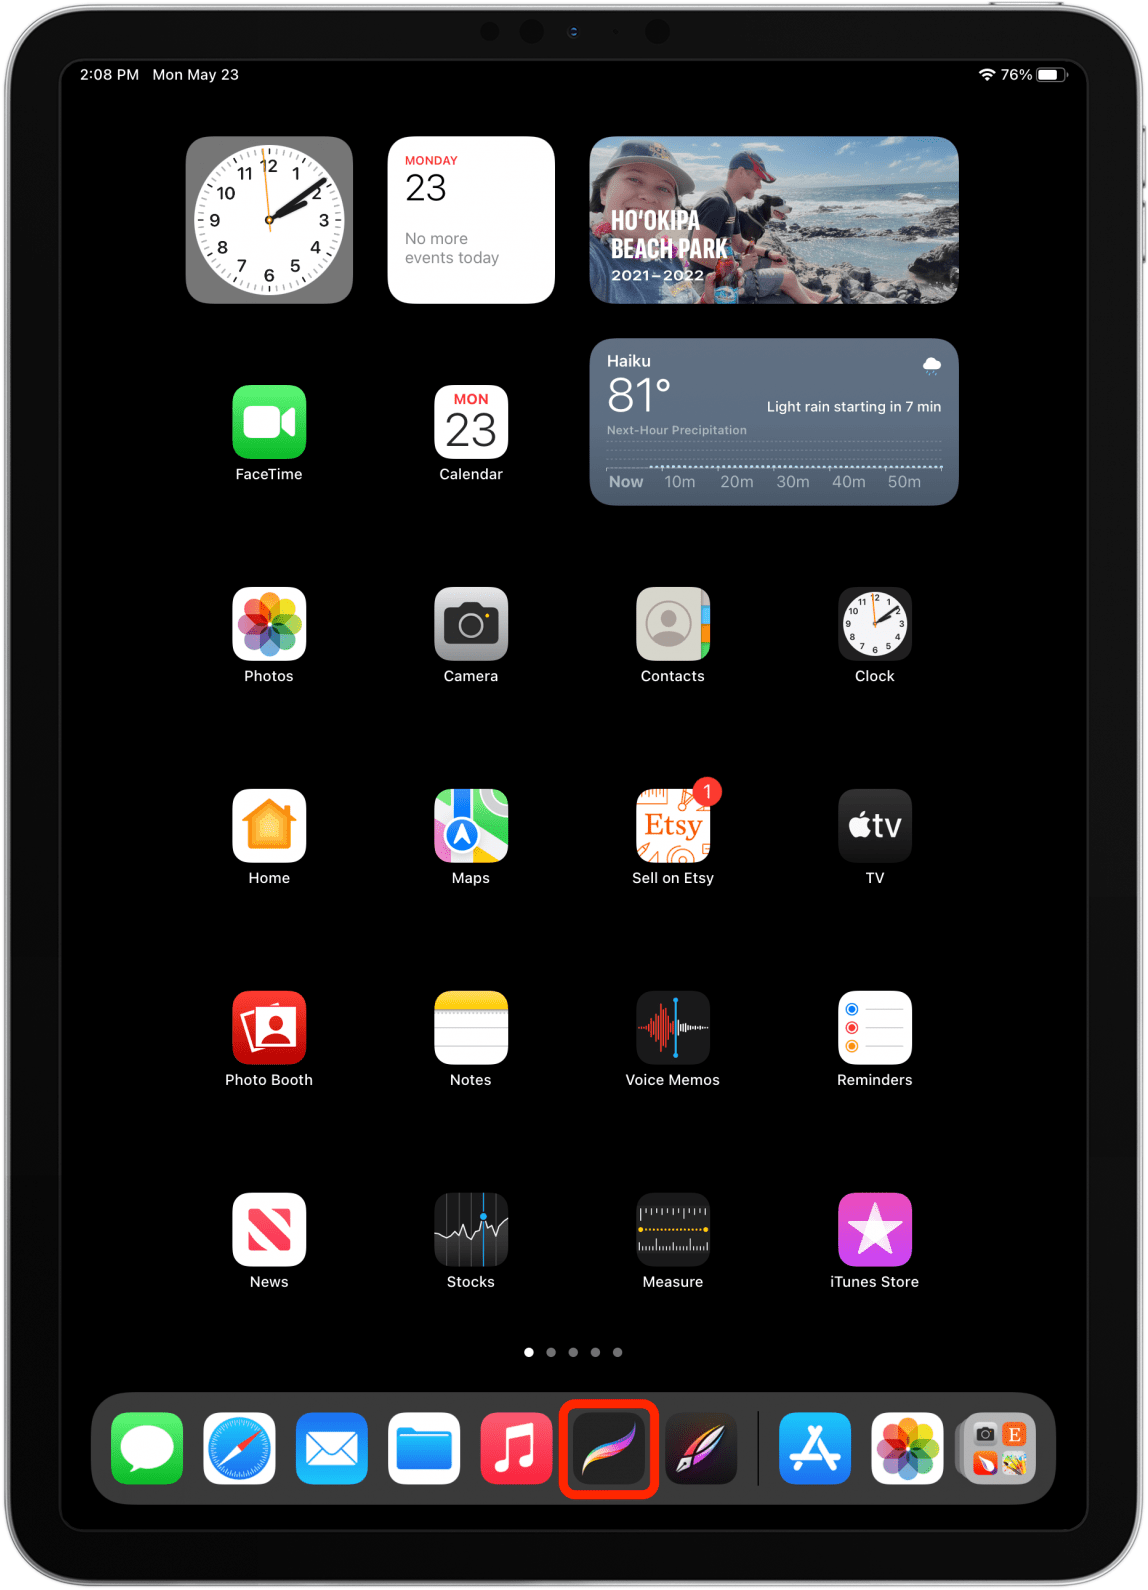
- Open Procreate.
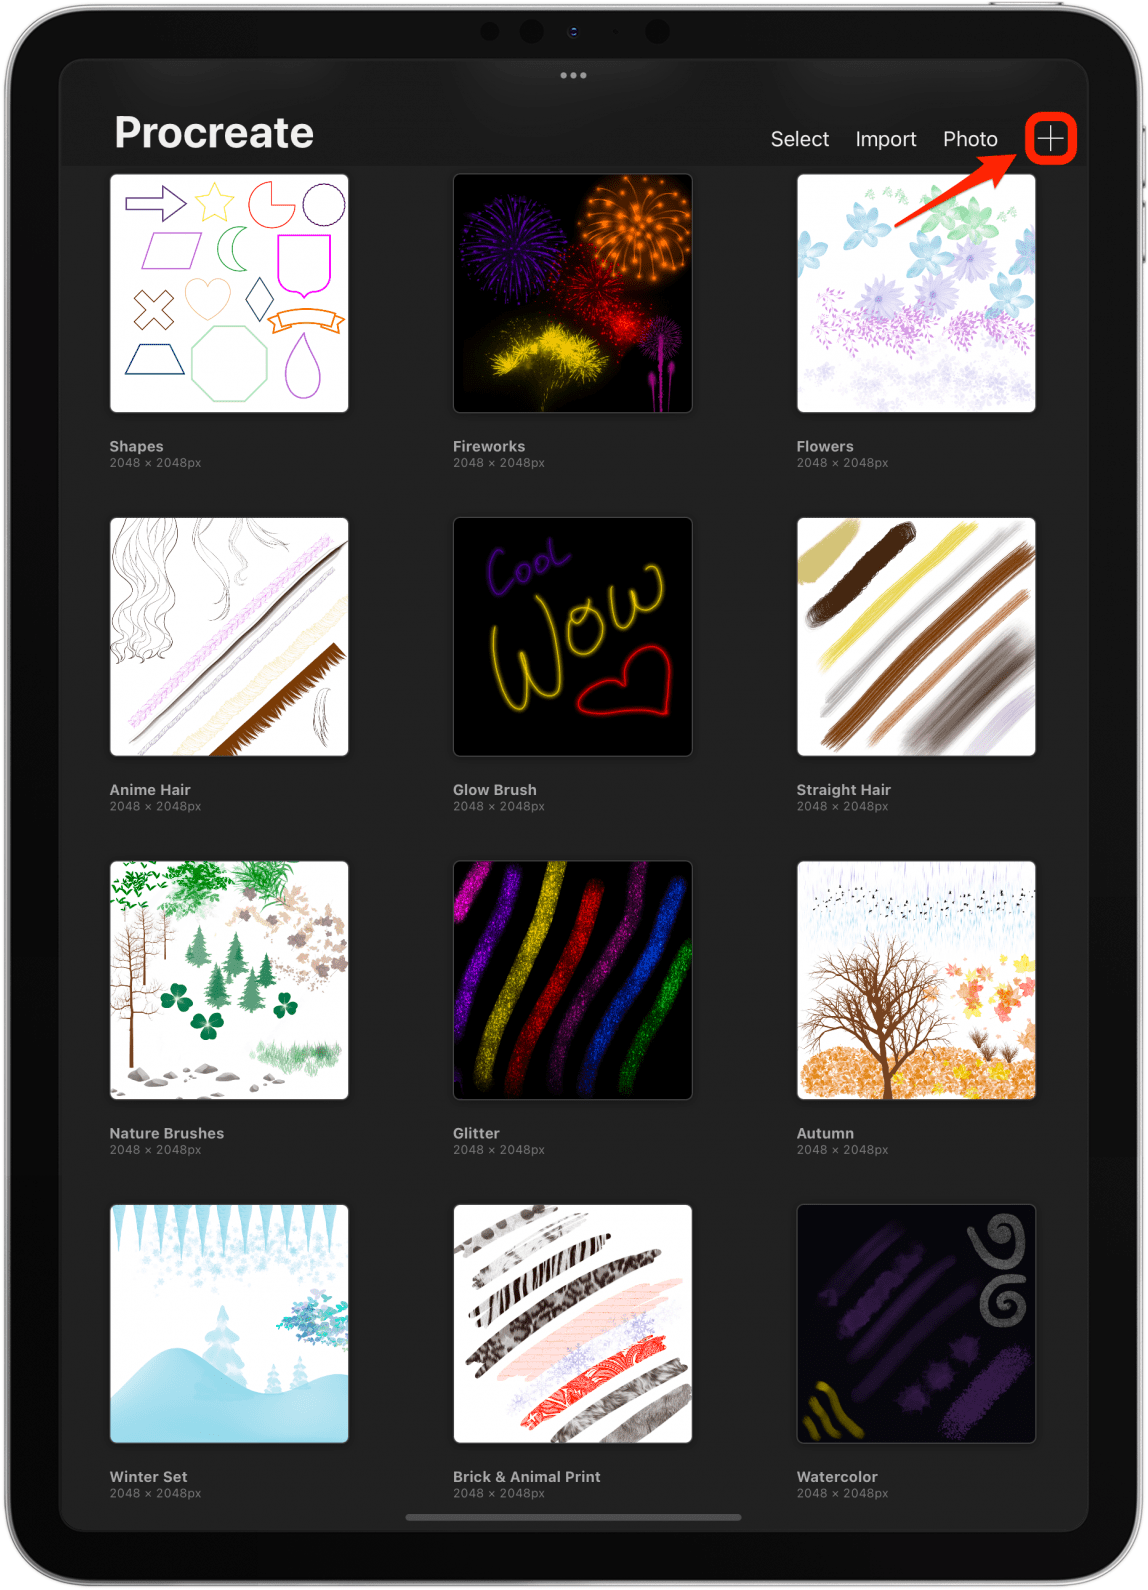
- The start screen is known as Gallery View. From here, you can see all your projects and can start a new one. Tap + to start a new project.
- Tap Screen Size. I cover Canvas sizing in a Procreate article linked below.

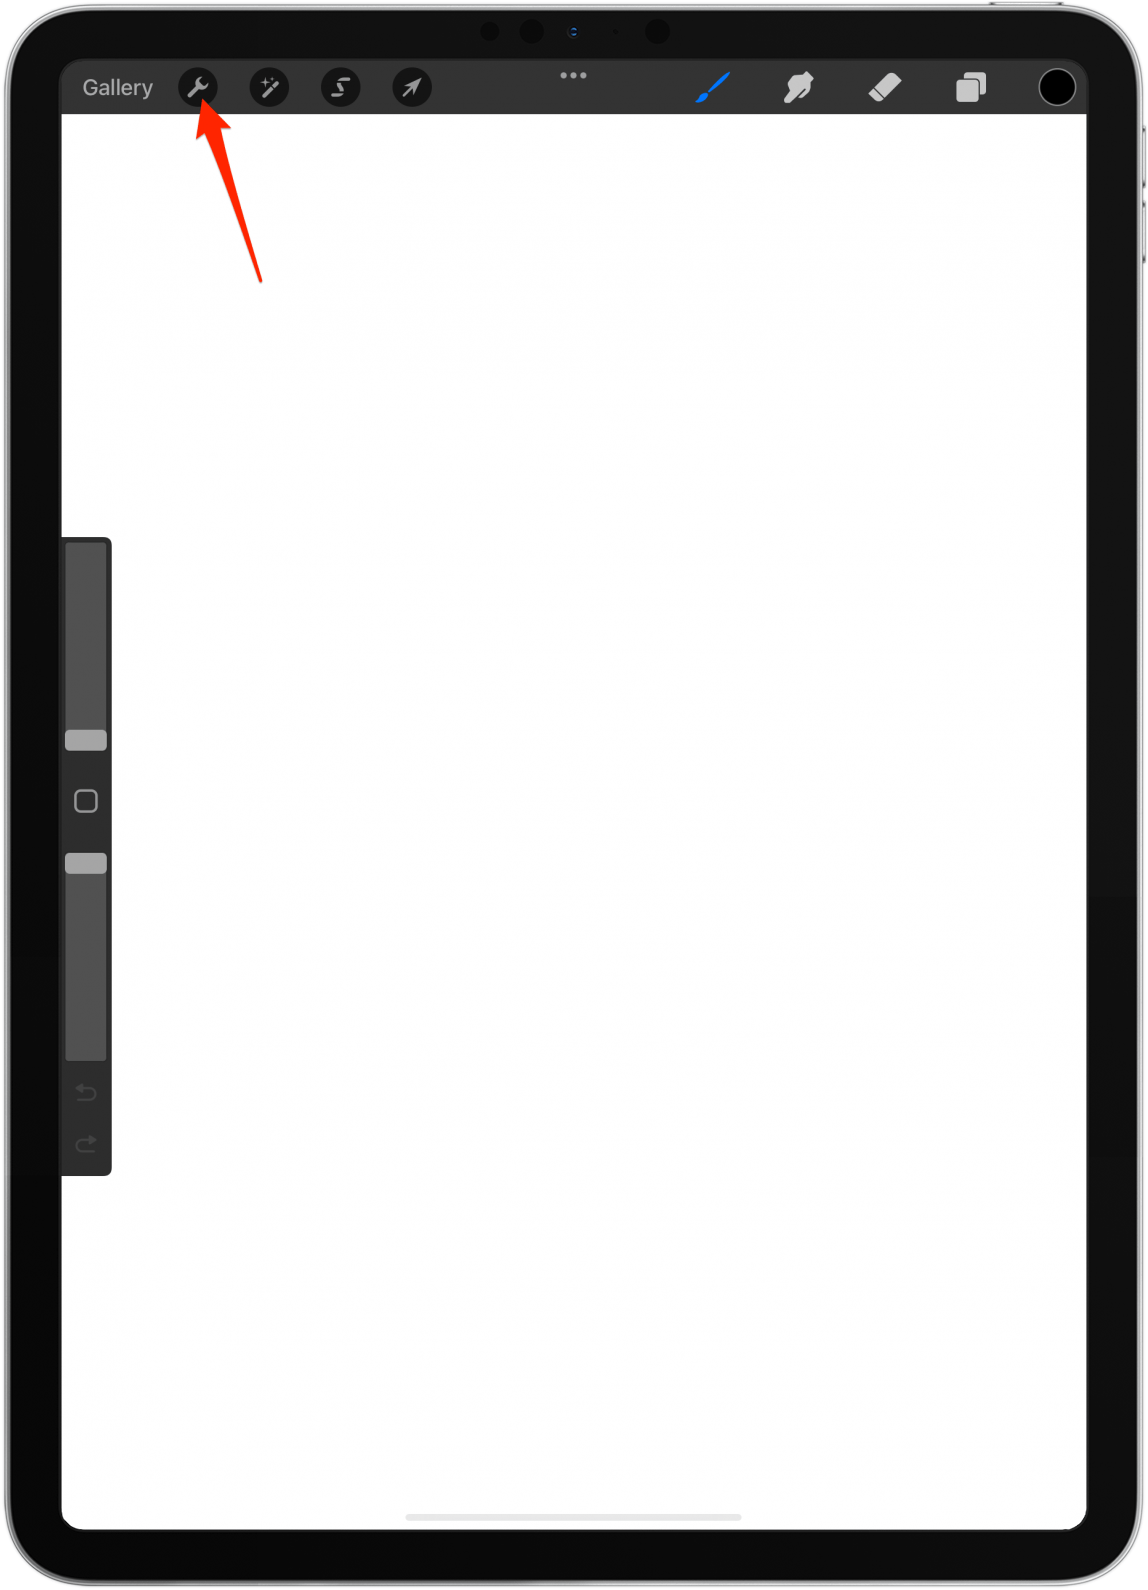
- I find it easiest to draw by tracing existing art or photos. To insert an image, tap the wrench icon.
- Make sure Add is selected then tap Insert a photo.

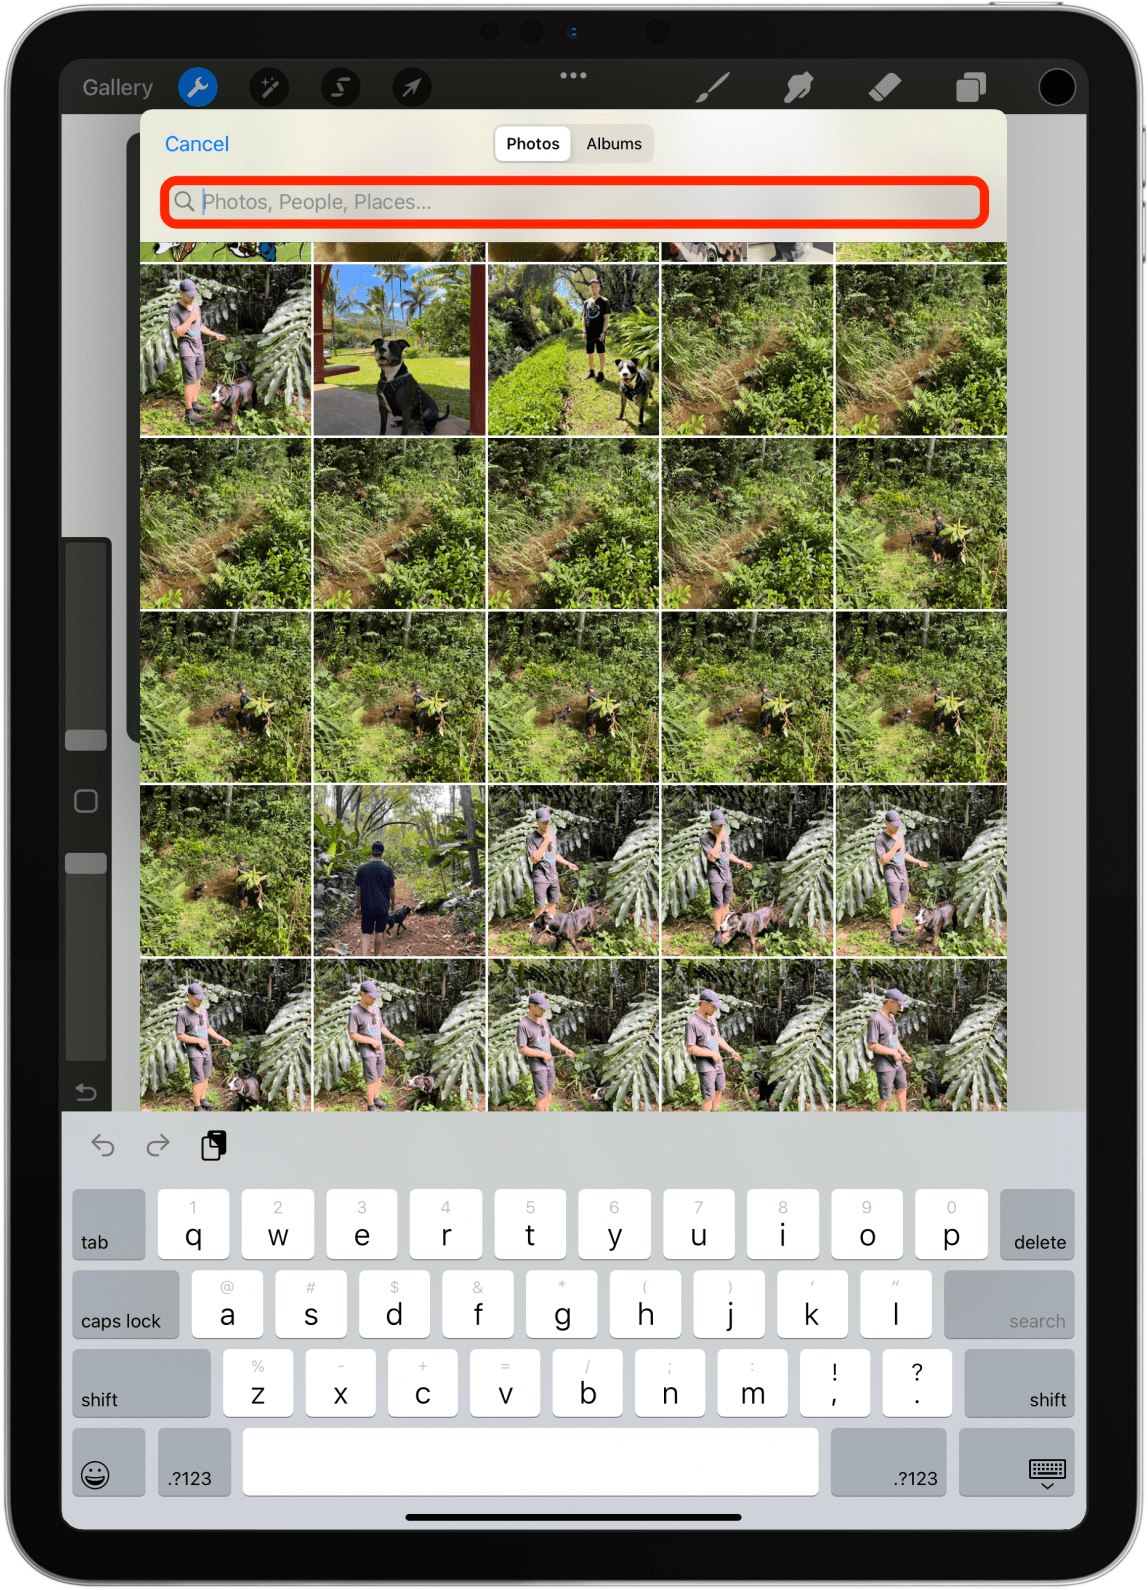
- You can use the search bar to search for photos in the Photos app and use the keyboard to type your search word(s).
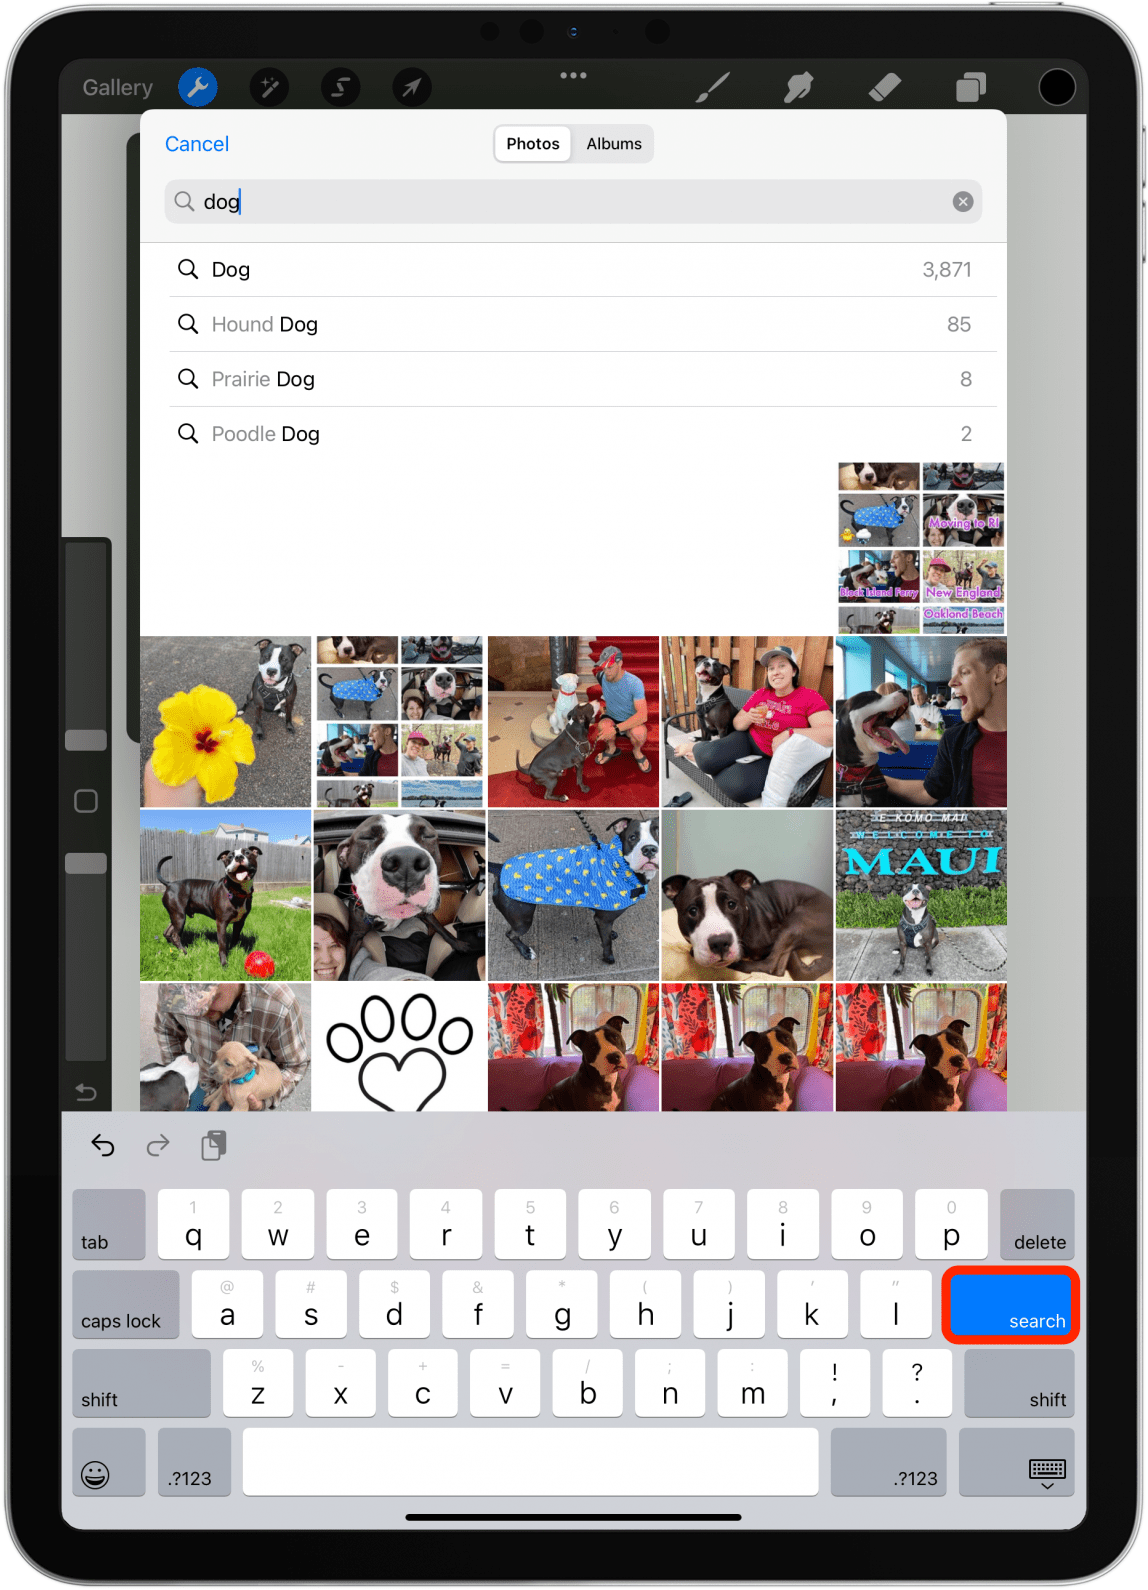
- Tap search.
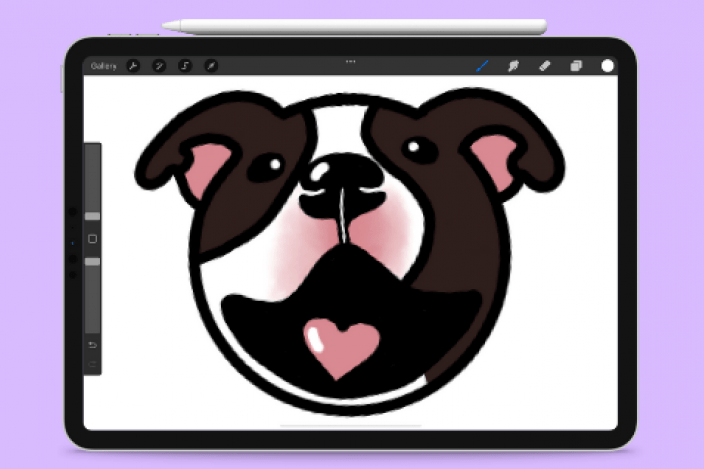
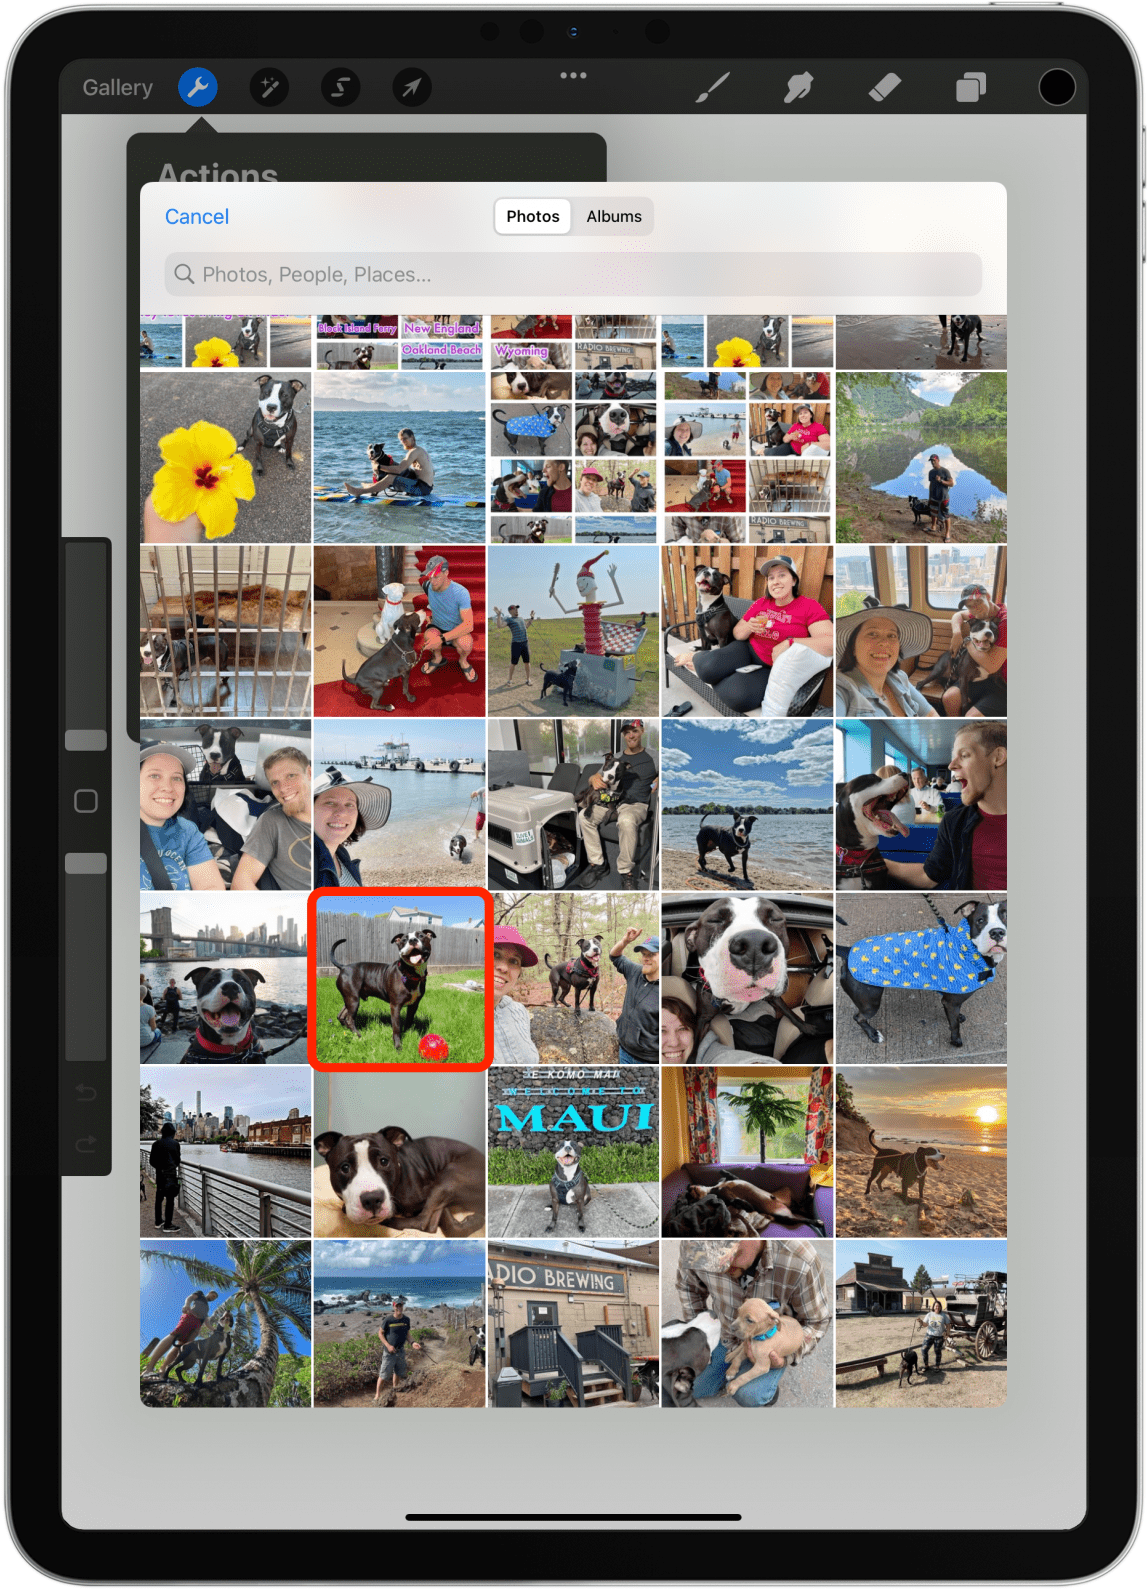
- I’m going to draw my dog Smiley, so I’ll select a photo of him.
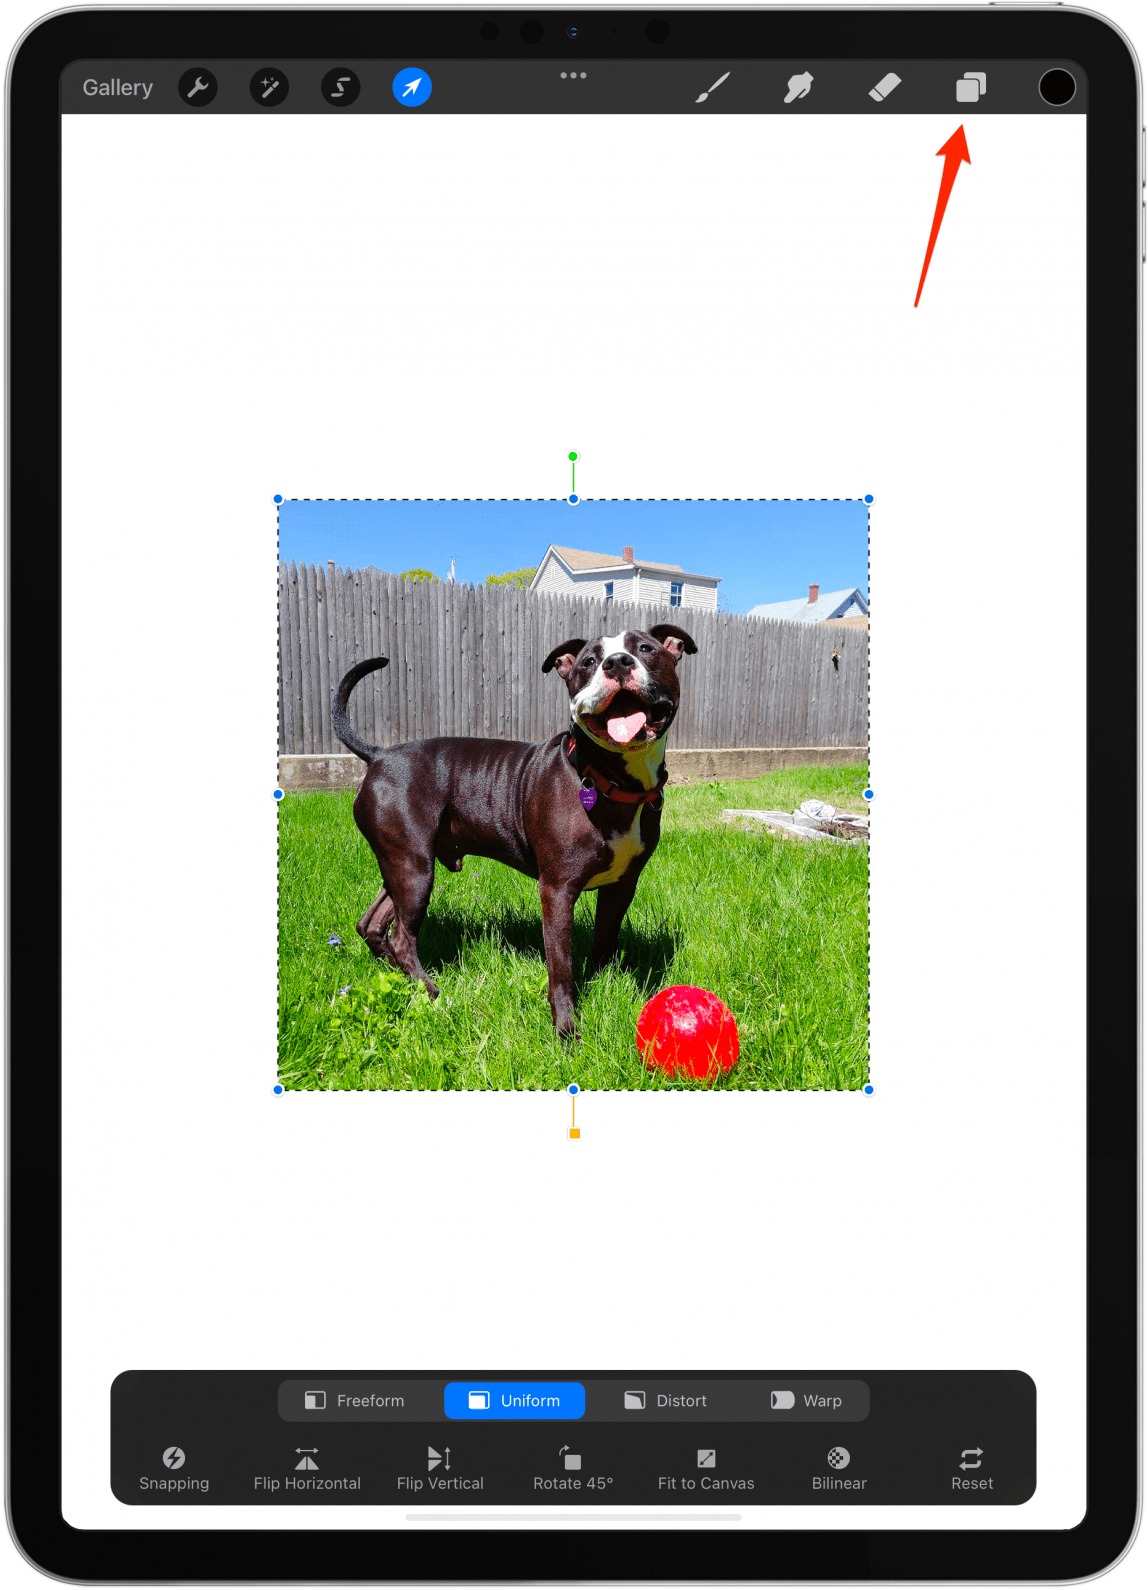
- Tap the layer icon.
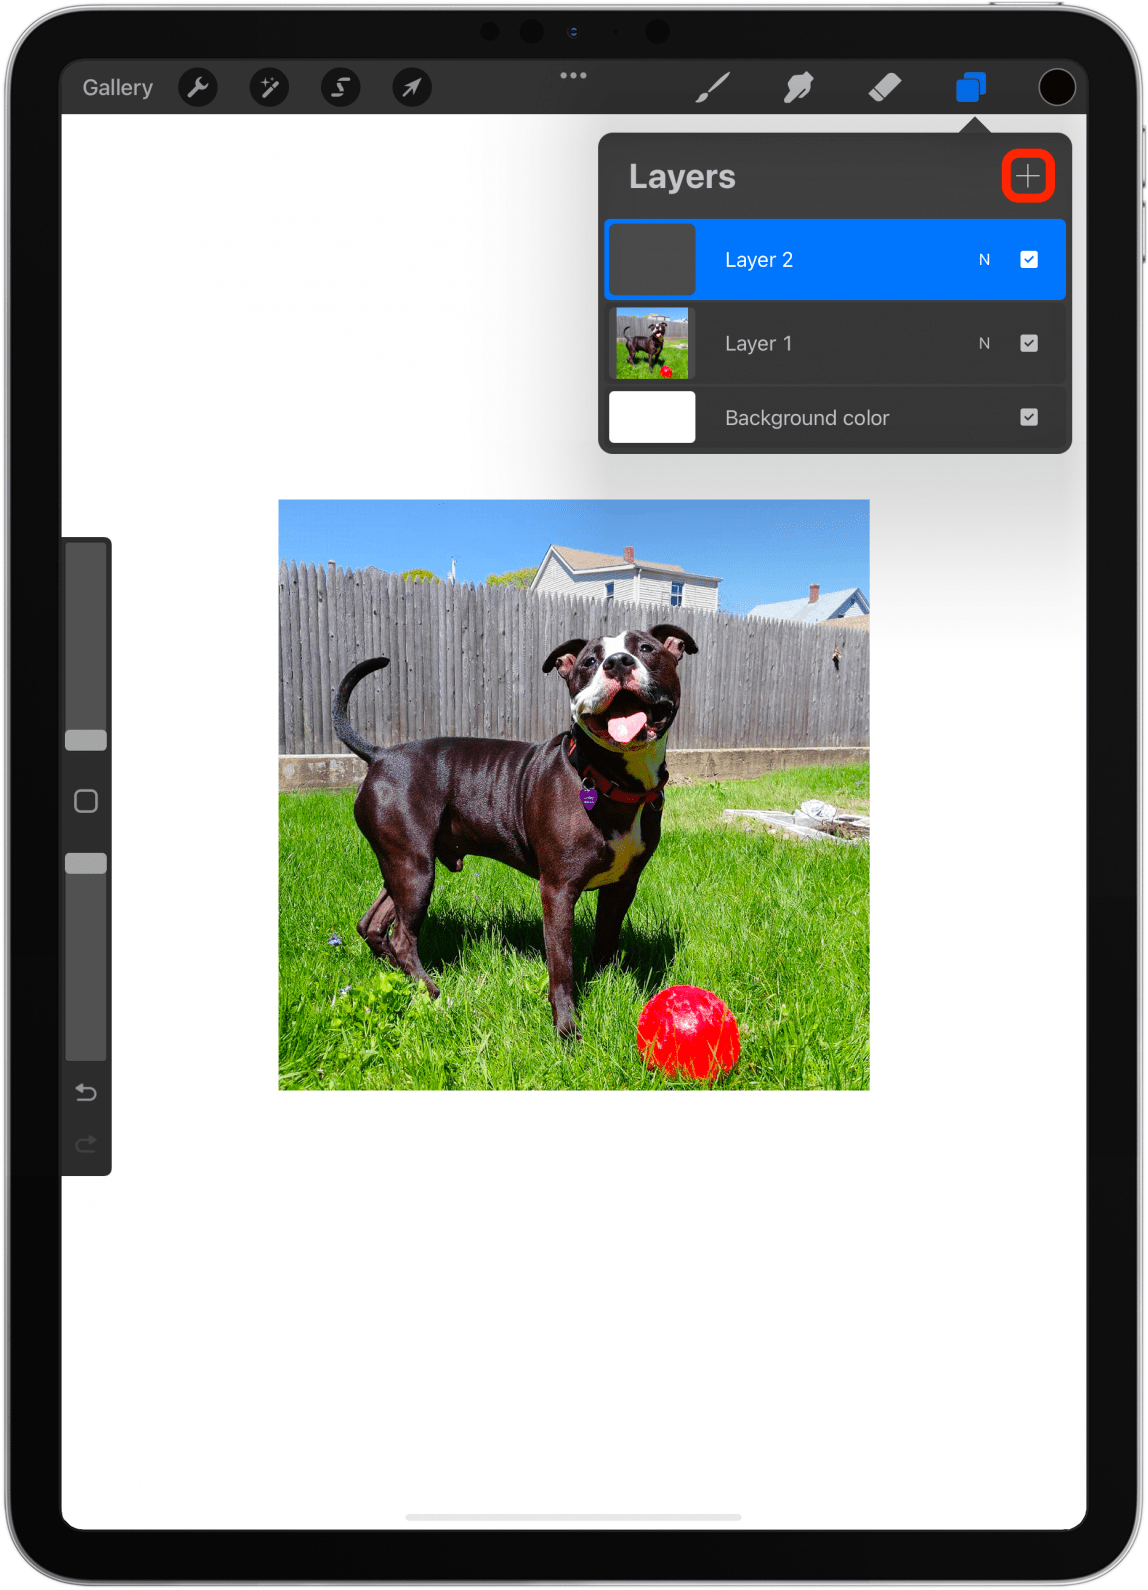
- Tap the + icon to add a new layer. Make sure it is above the layer with your photo; you can drag it to reposition.
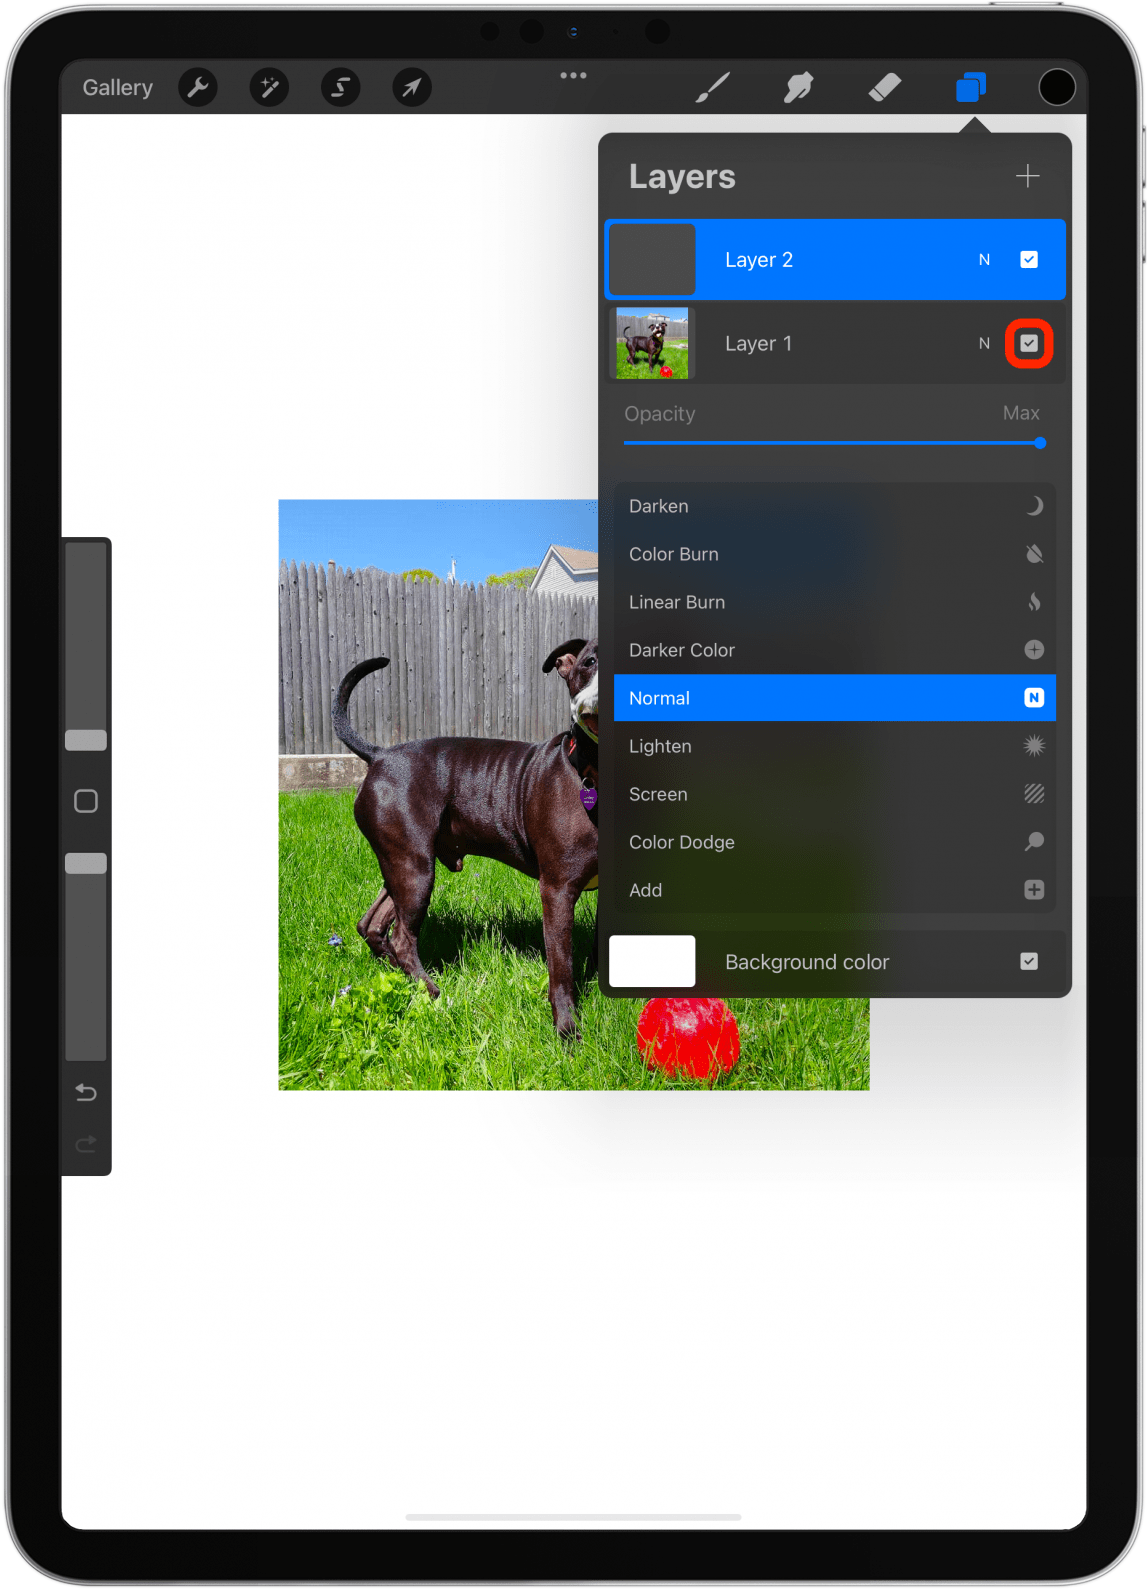
- Next, tap on the N in the layer with the photo.
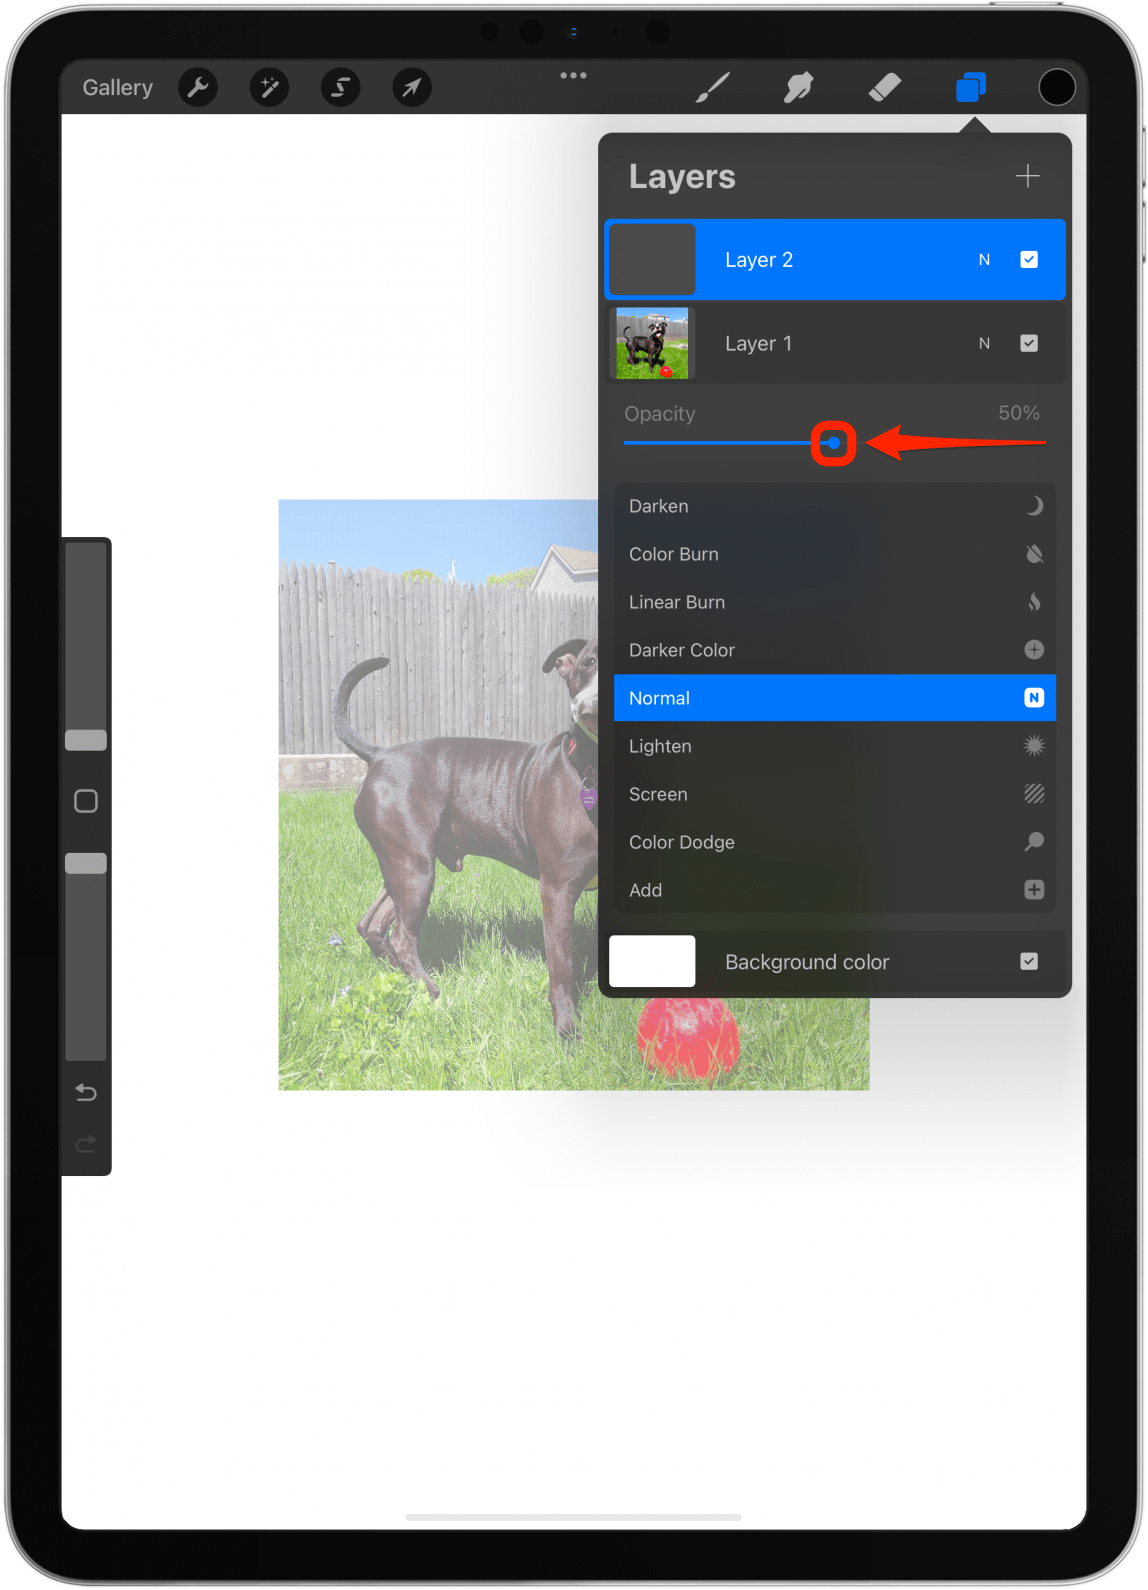
- Under opacity, drag the blue dot to 50%. This will let you still see the photo and anything you draw over it.
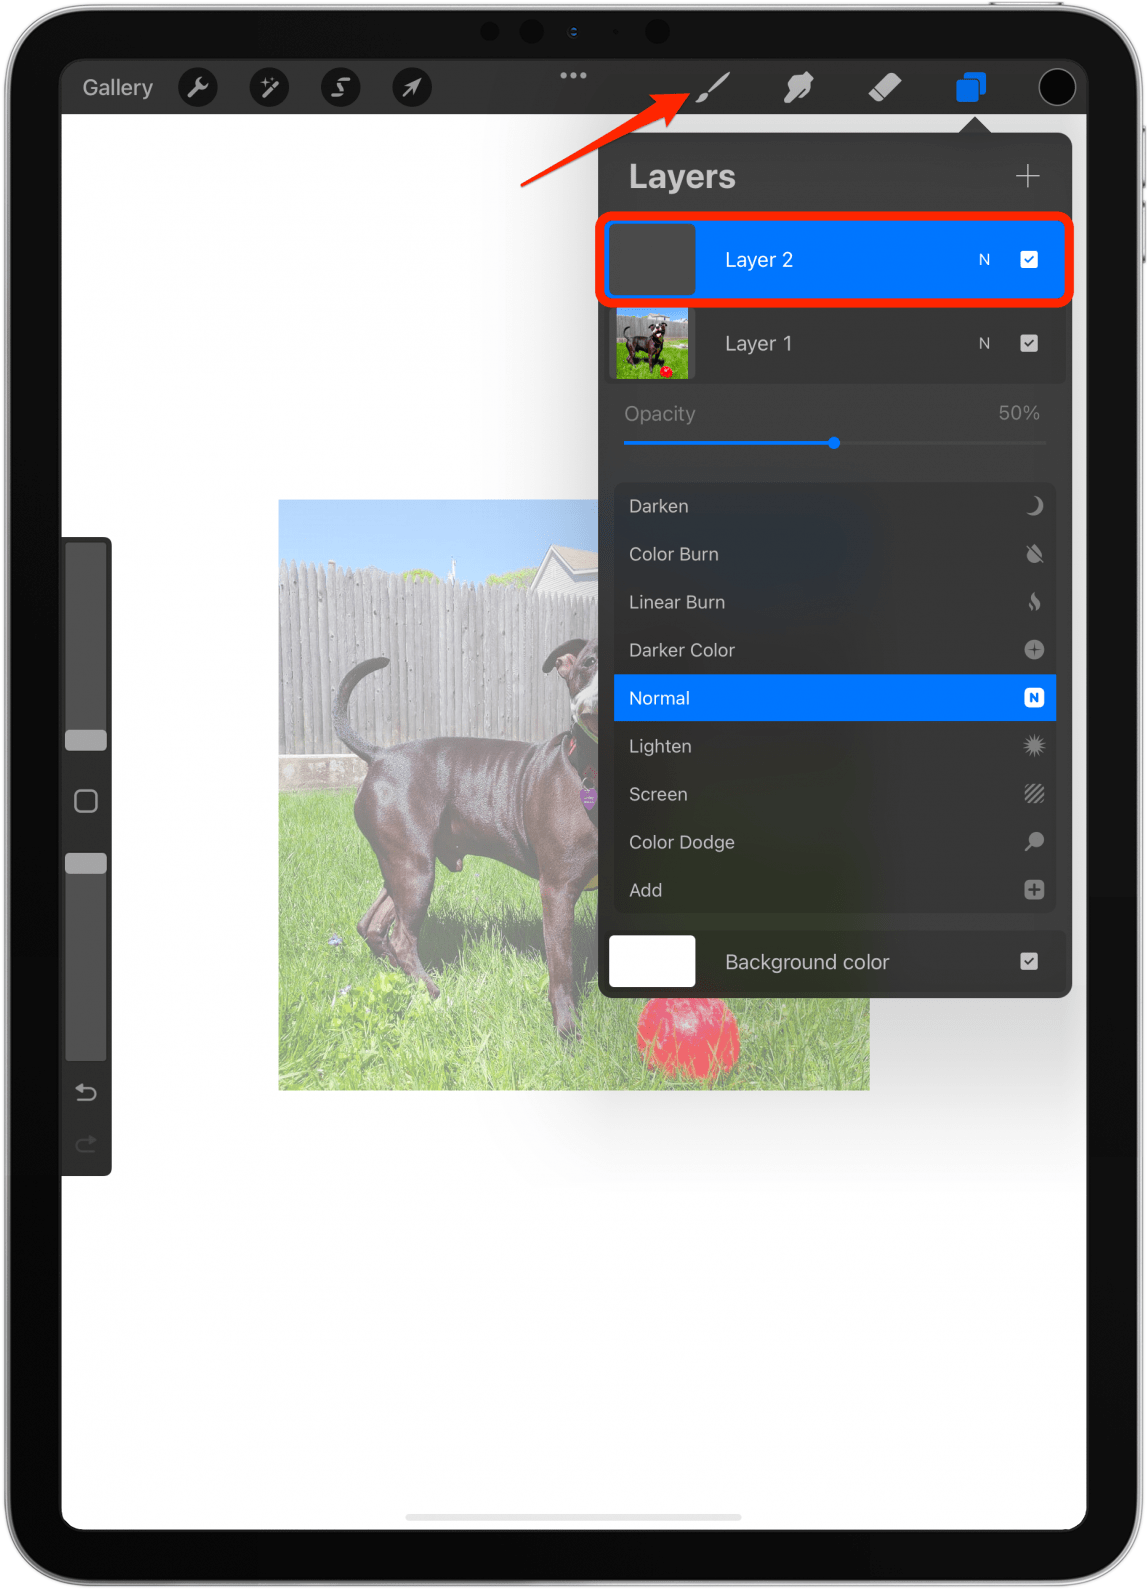
- Make sure the blank layer is selected and tap the paintbrush icon.
- Here you’ll see a wide selection of default brushes. I have many extra downloaded brushes that you won’t see in your Brush Library. Some brushes are easier to work with than others. The easiest one for even lines can be found in Calligraphy.
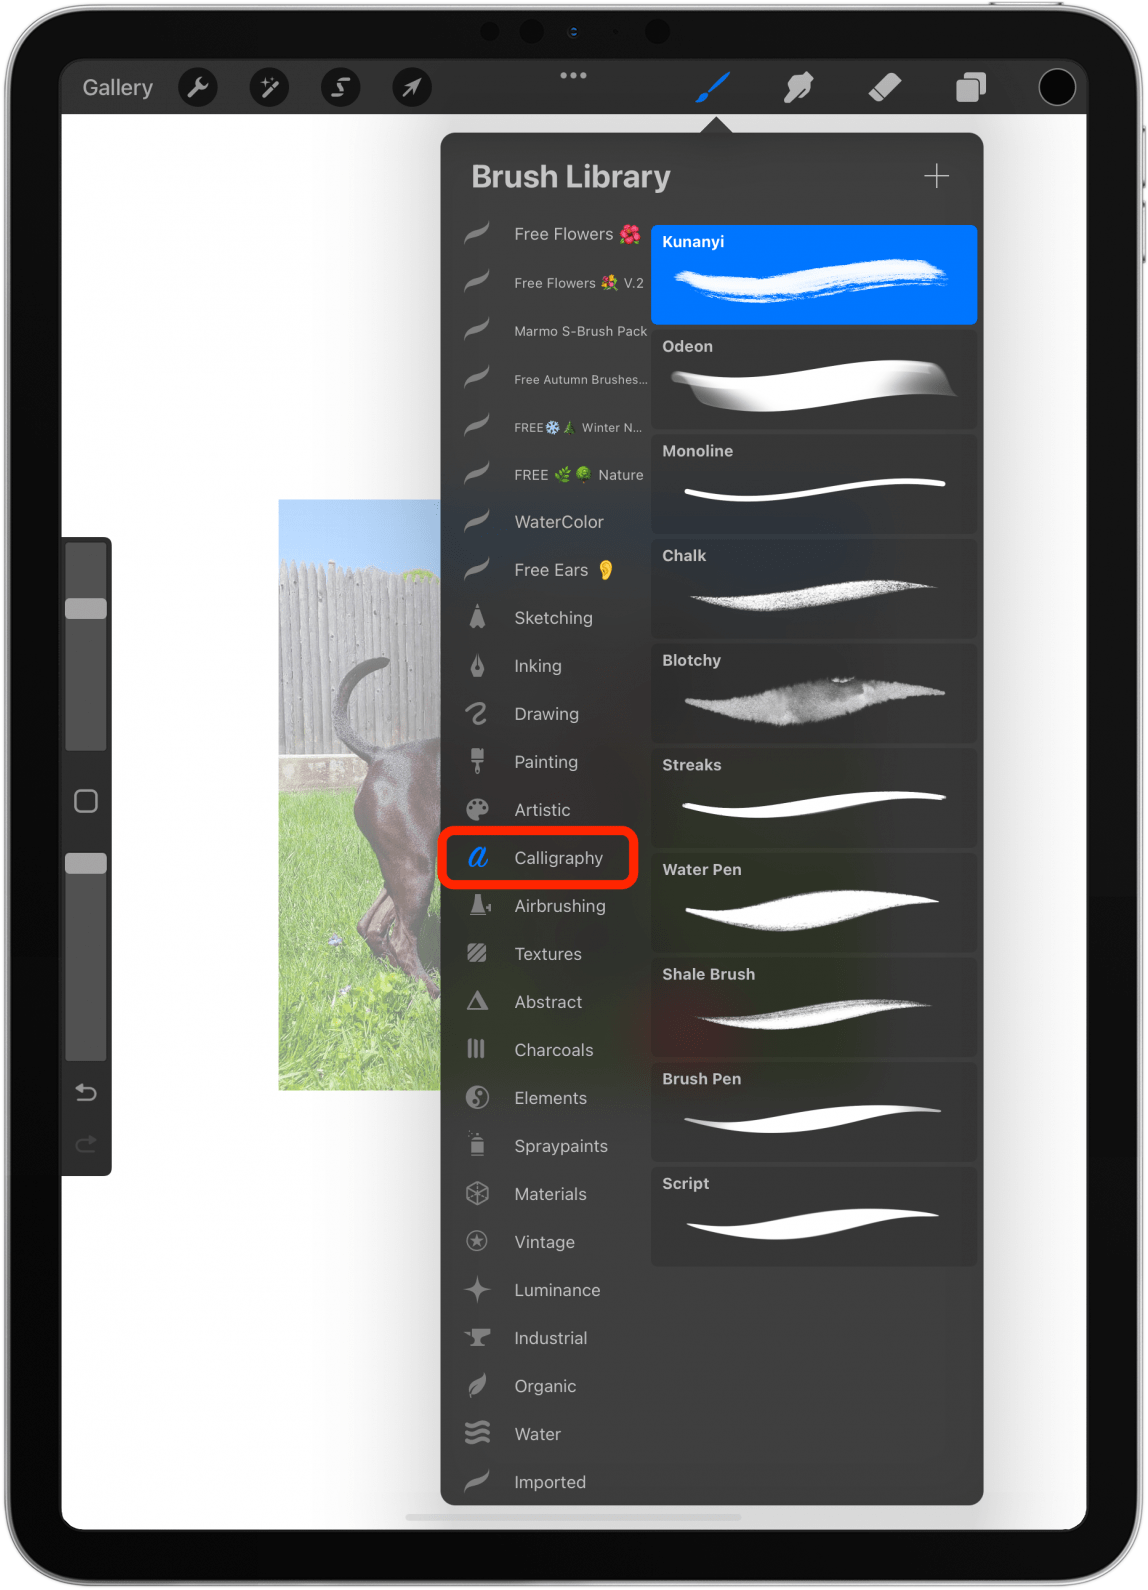
- Tap Monoline. This is a great brush to get you started because it is easy to use. Keep in mind that it won’t be appropriate for all types of artwork.

- Tap your canvas to close the Brush Library.

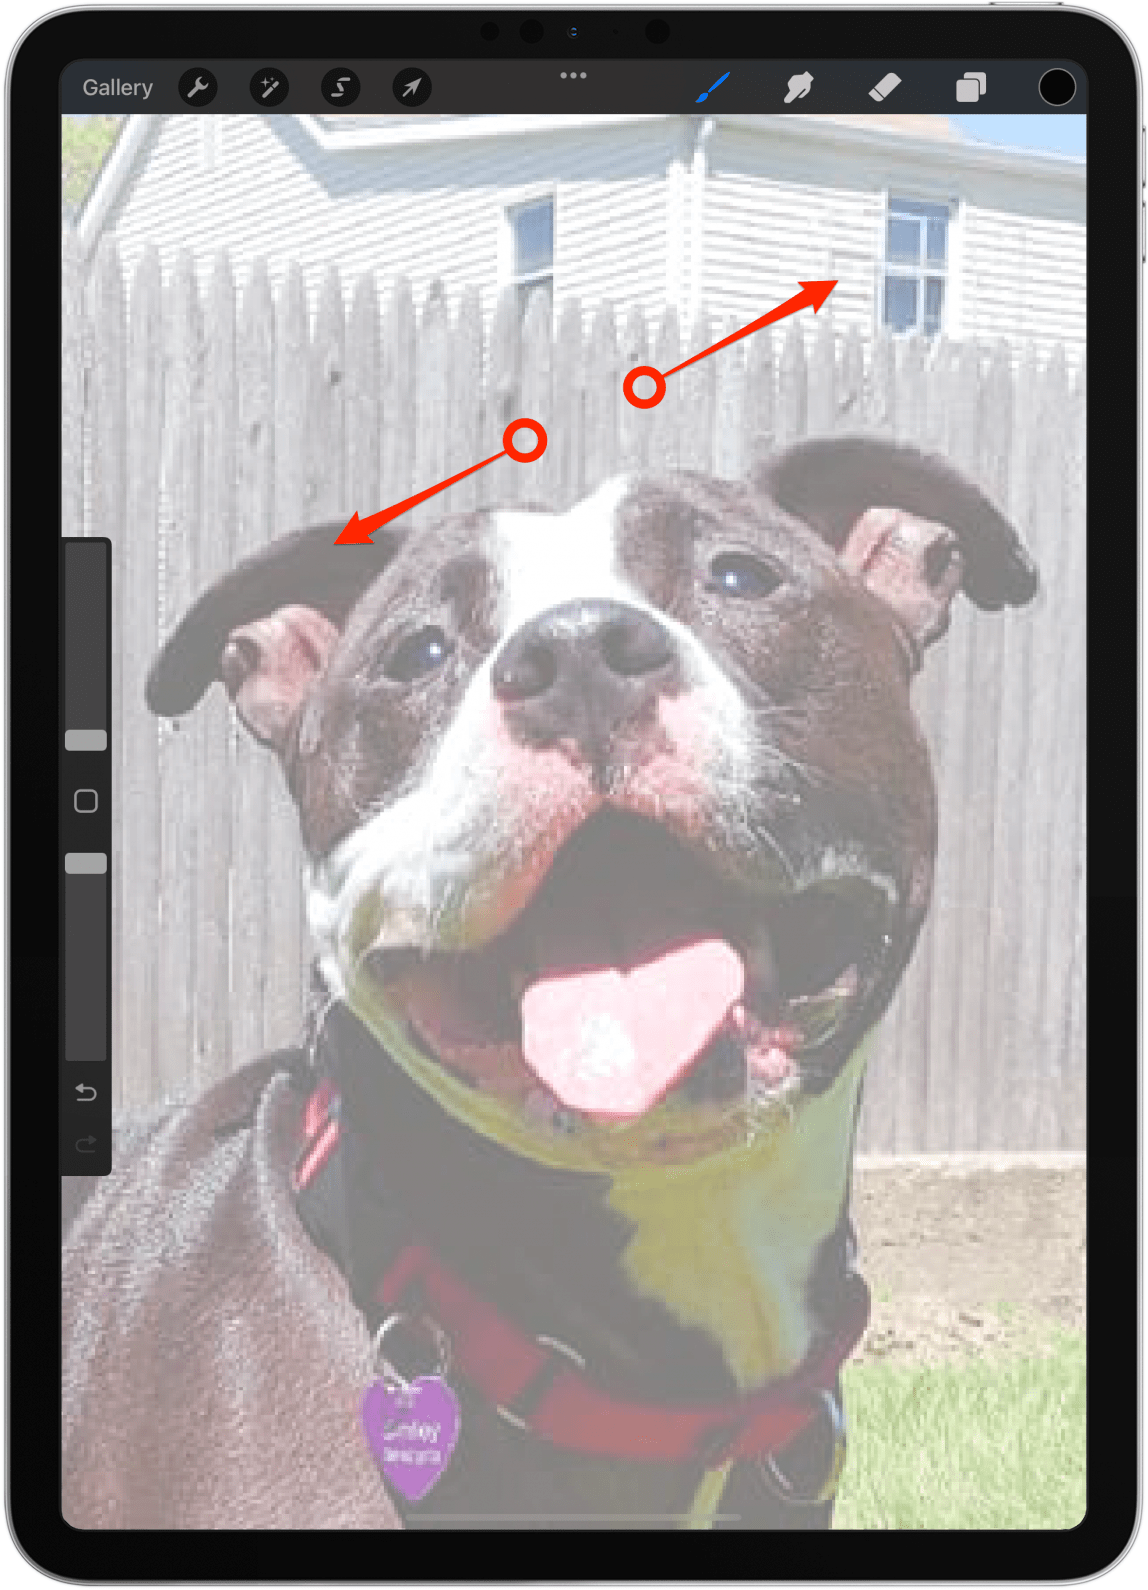
- Zoom in by placing two fingers close together on the canvas and moving them apart.
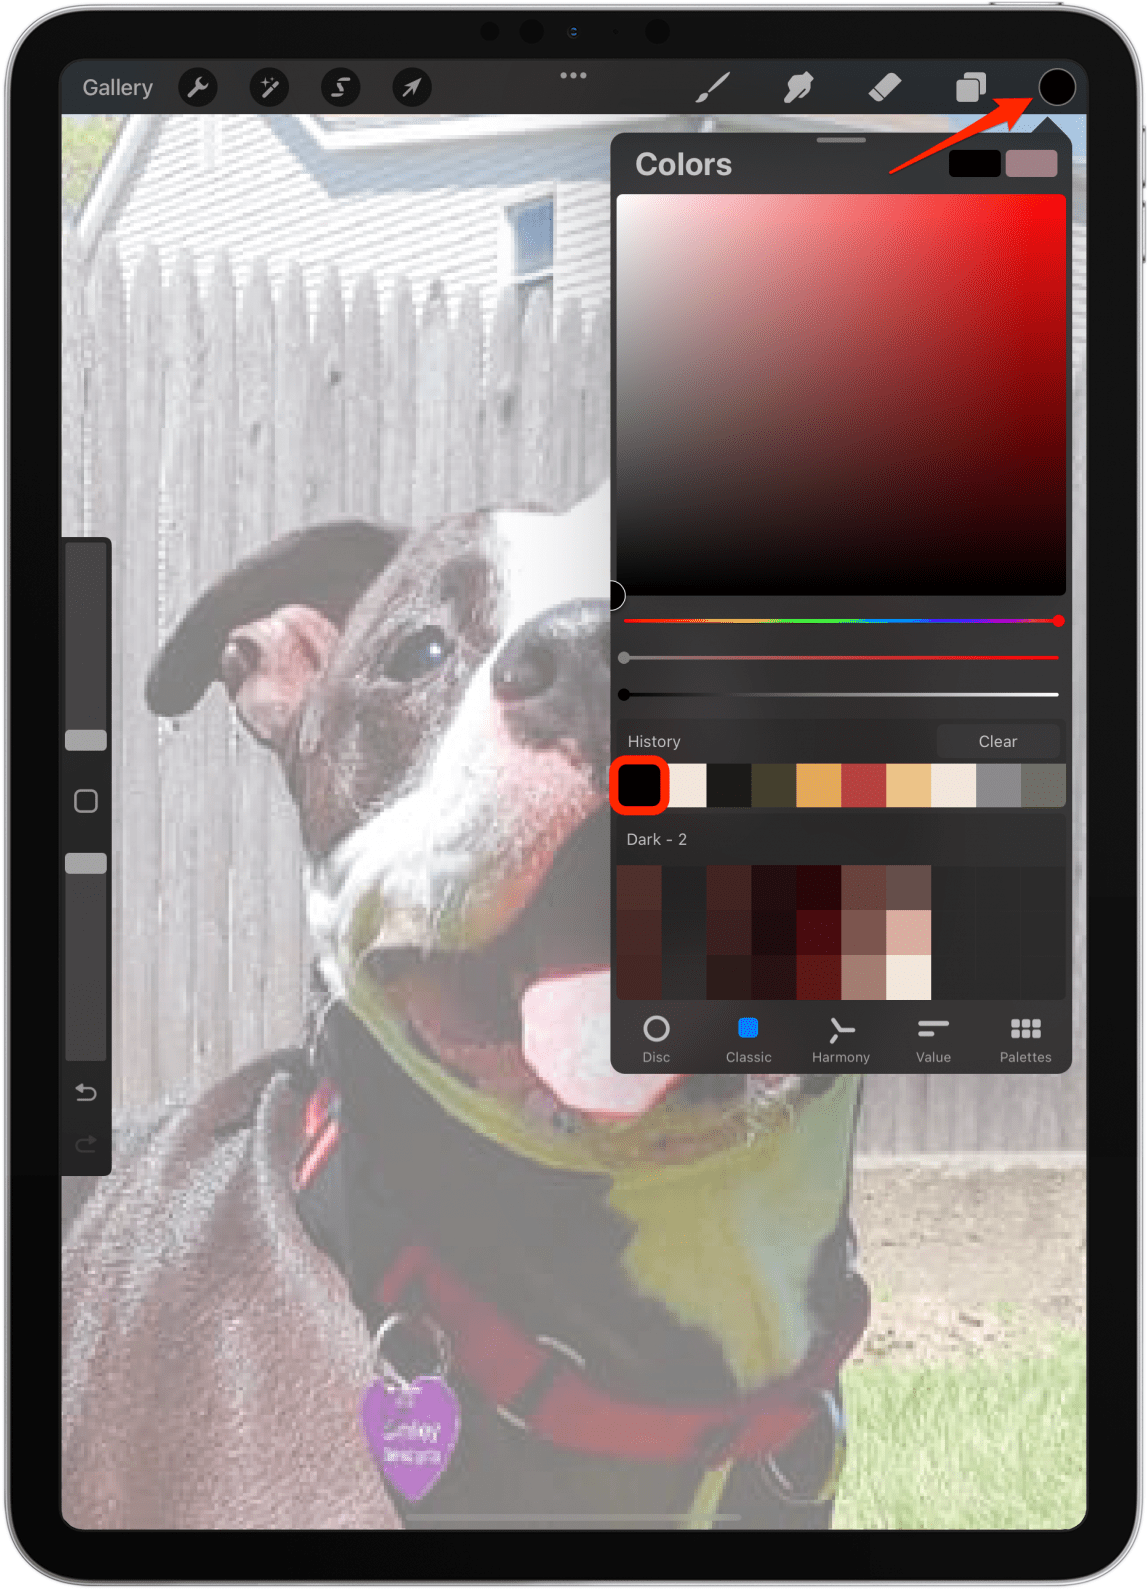
- Tap the color circle to pick a color to draw with. I'll stick with black, but I cover more tips about colors in another article linked below. Tap the color you wish to use.
- Tap the canvas.

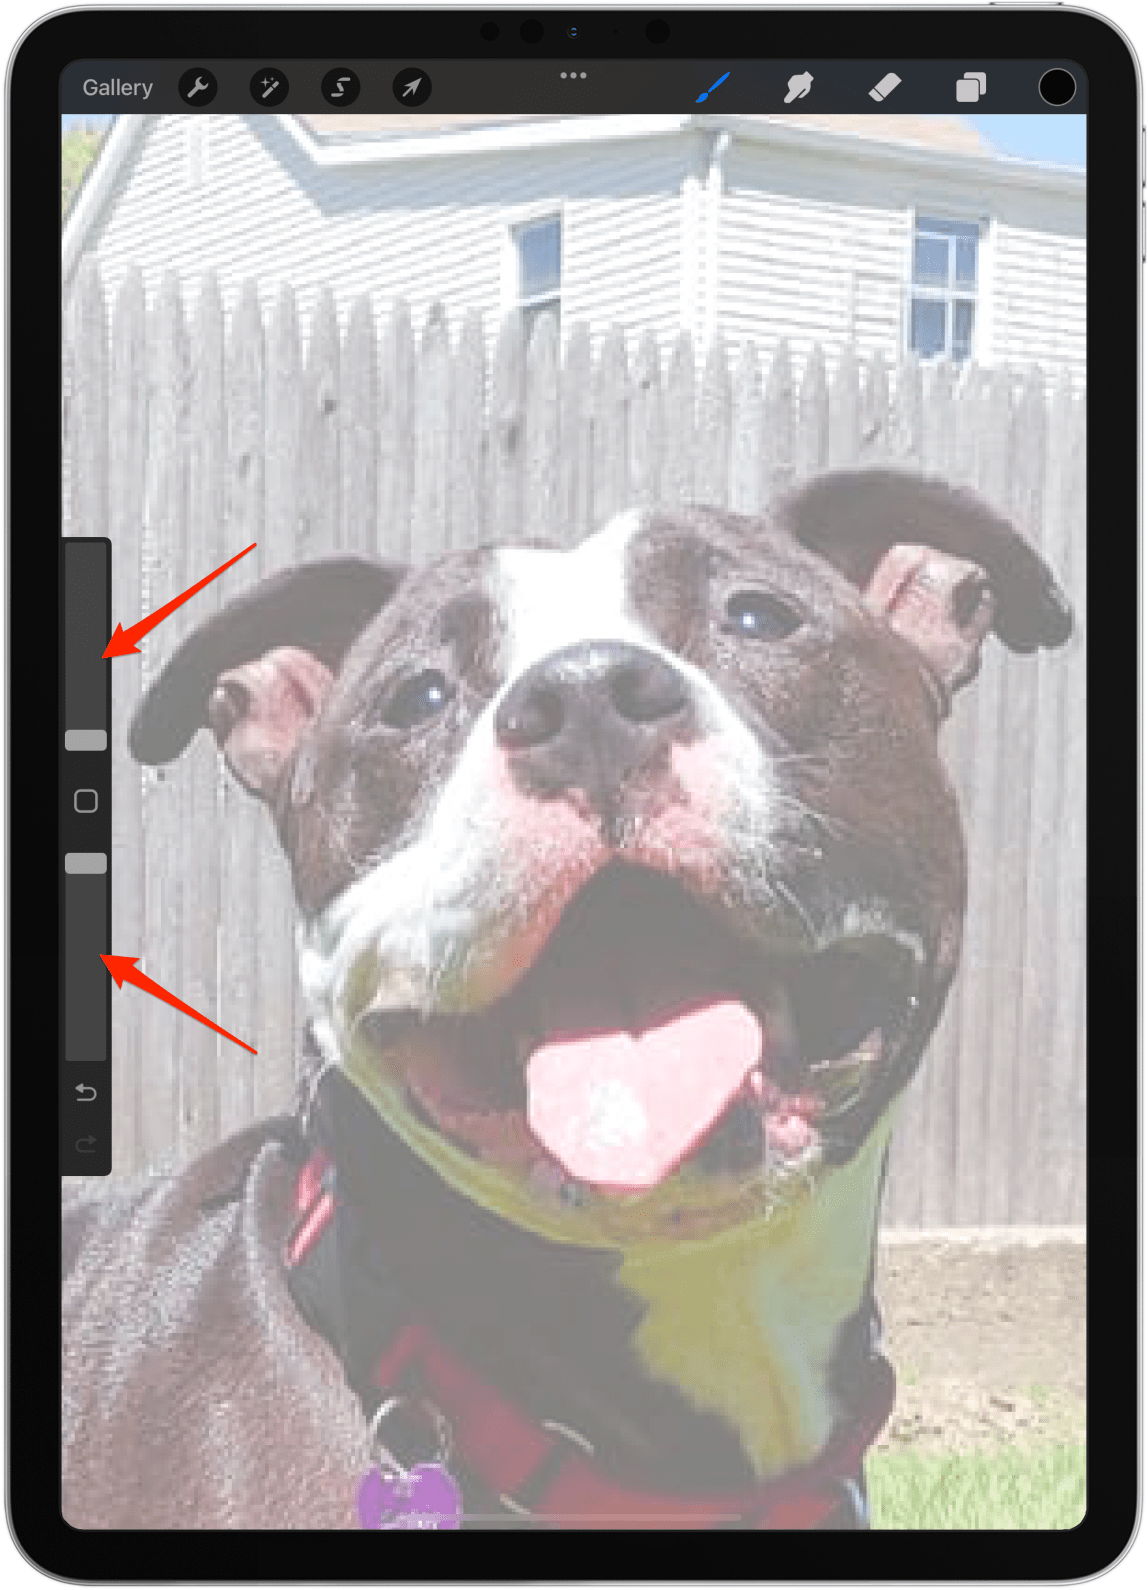
- Make sure your brush is the right size and opacity by adjusting them in the menu on the left. For now, I'll use the smallest size and highest opacity.
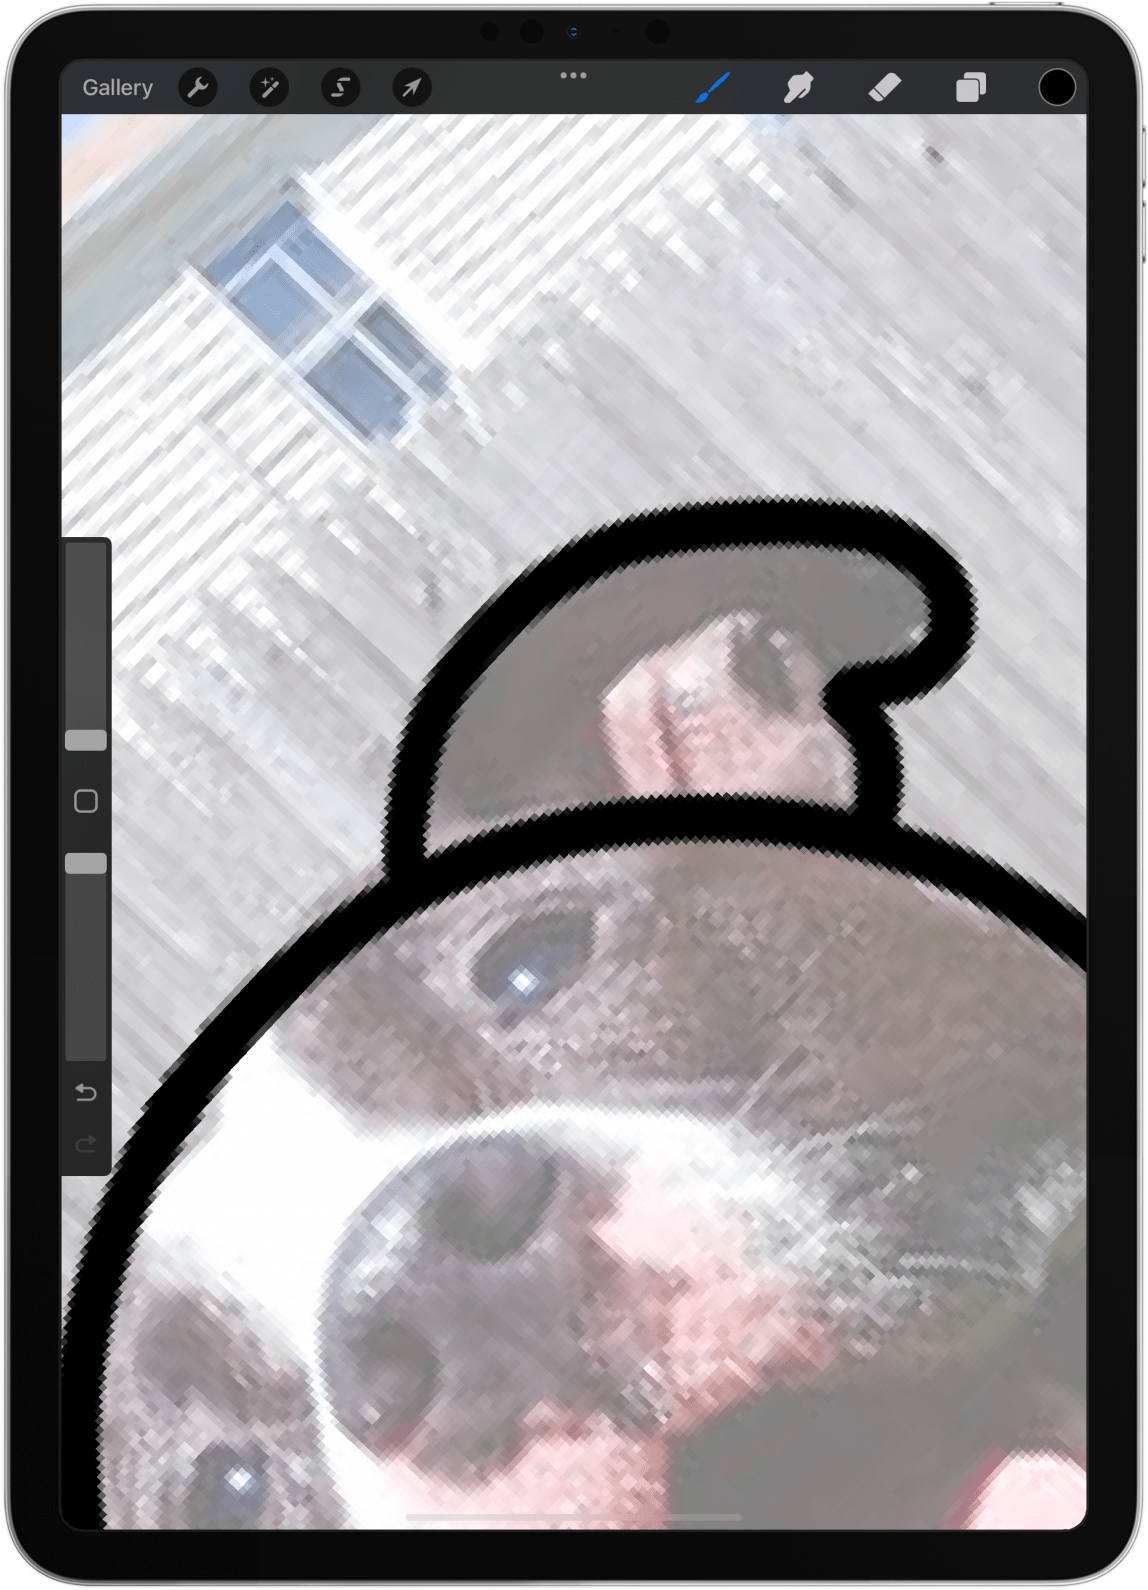
- Smiley has a really round face in this photo, so I'll start by drawing a circle. To do this, use your Apple Pencil to draw a circle as best as you can in one motion without removing your pencil tip from the display; make sure the ends meet.
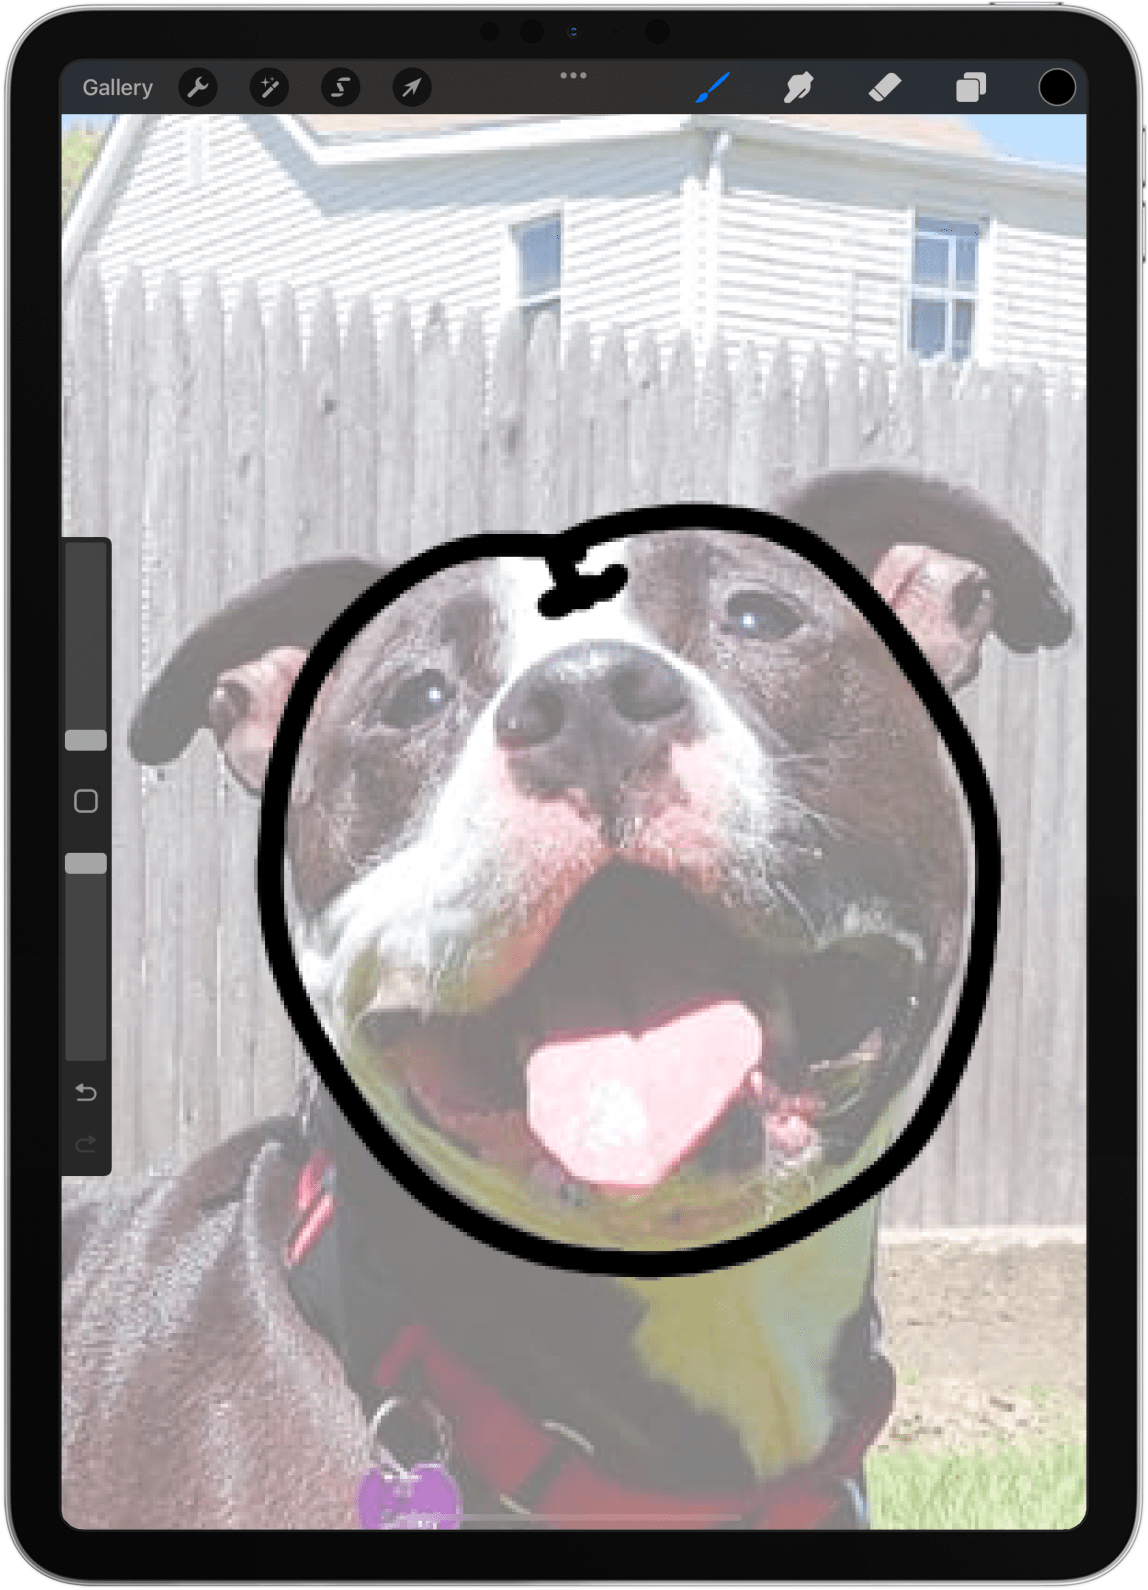
- If you wait for a second or two without moving your pencil, a shape will automatically appear, even if you butchered your original shape. Tap Edit shape.

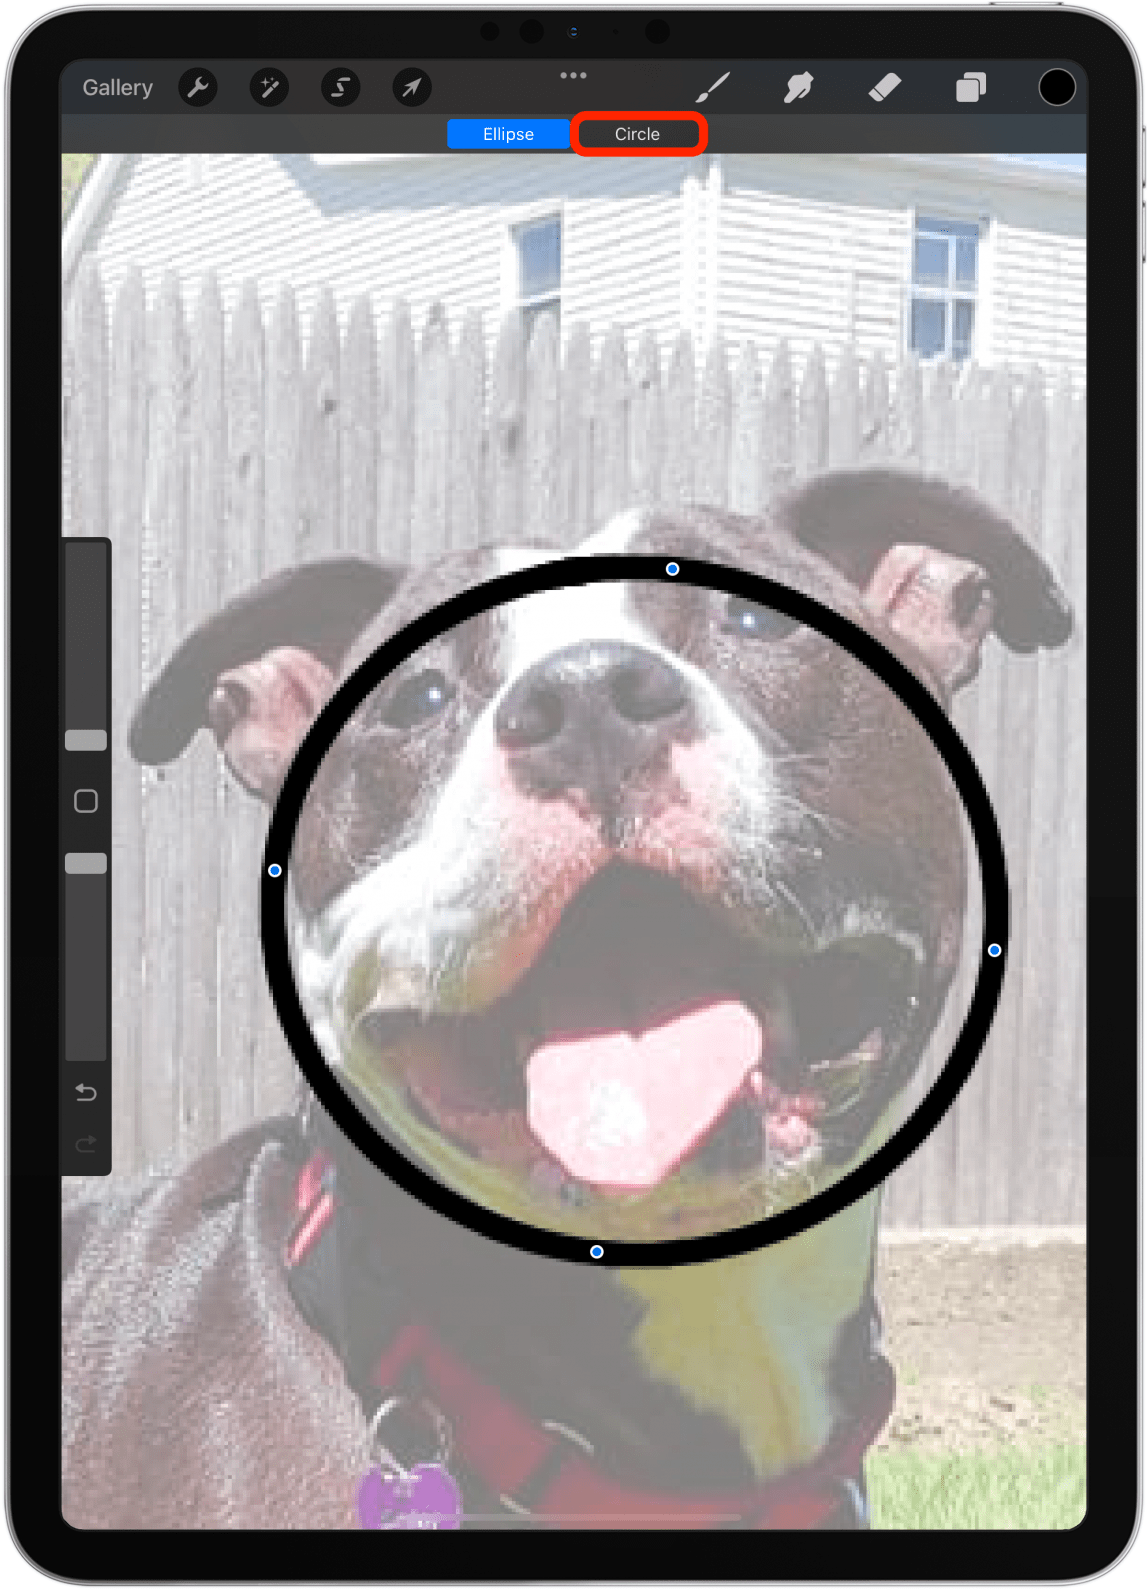
- Depending on the shape you attempt, you may see several options. I’ll tap Circle because my goal is a simple cartoon drawing of Smiley.
- To reposition the shape, drag the blue points in place. I'll teach you another way to move objects in another Procreate article linked below.
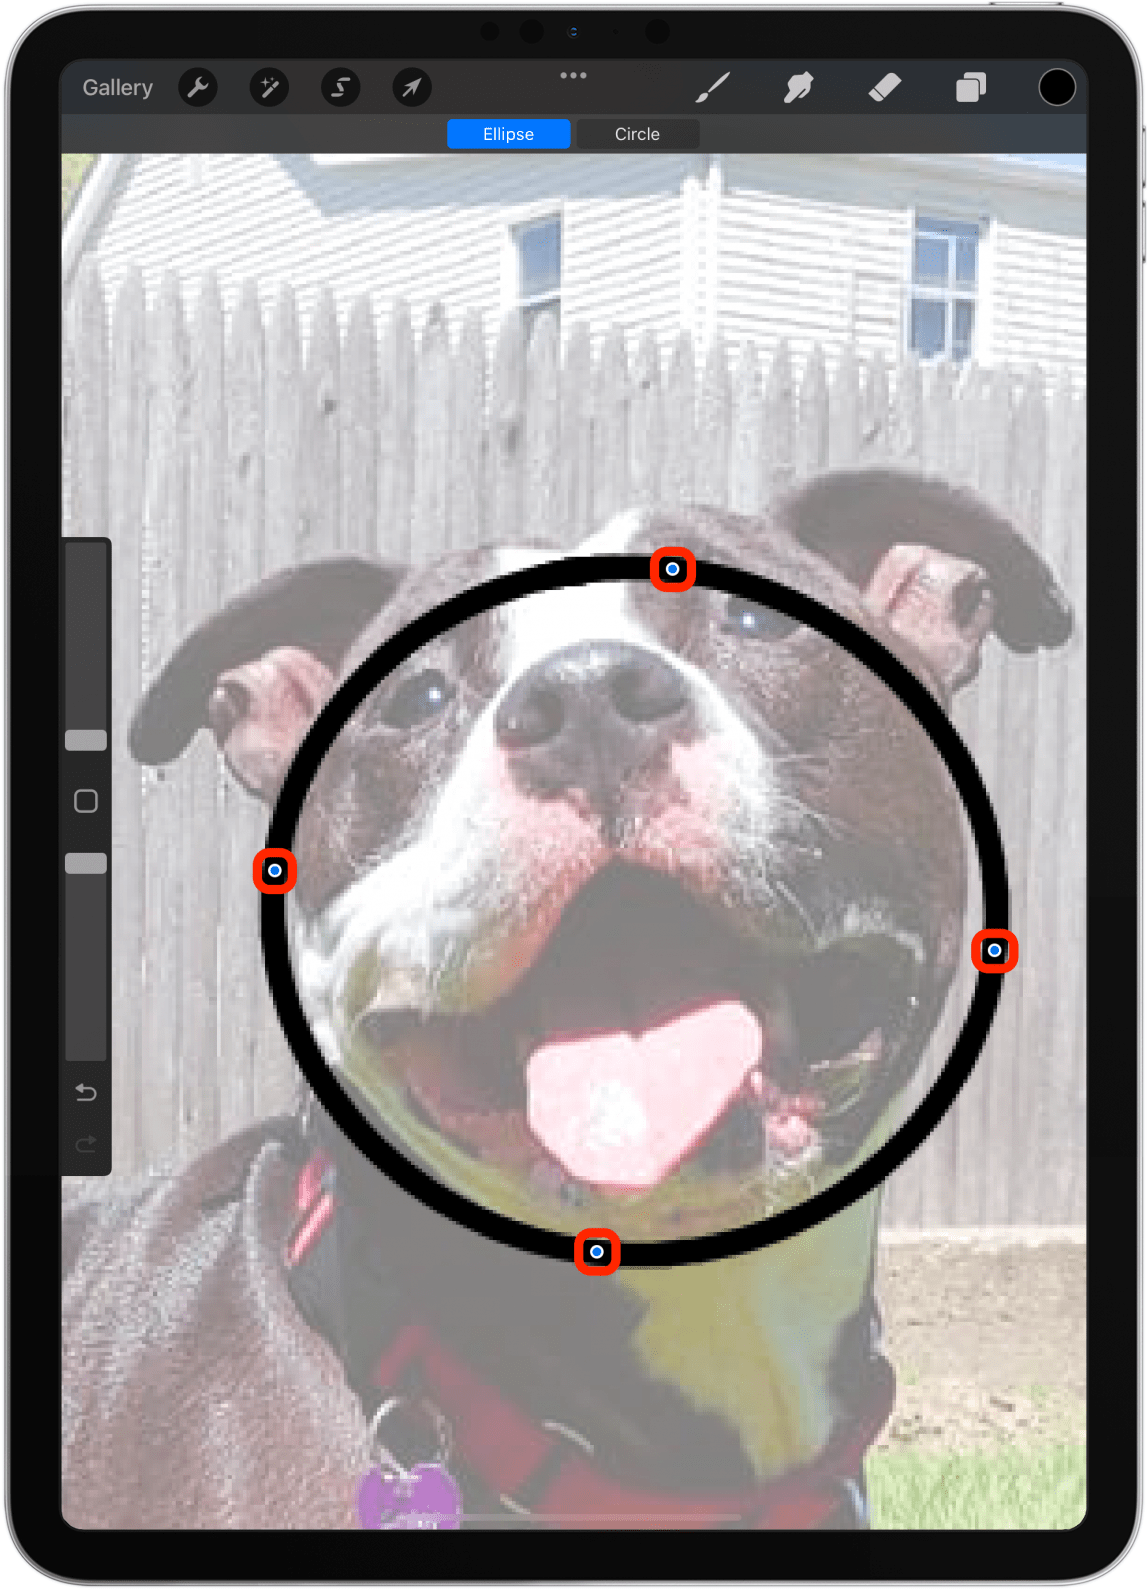
- When you are satisfied, tap the canvas. You won't be able to edit the shape once you do this.
- Next, I'll create a second layer just like I did in step 10, and I'll do my best to draw the ears around the circle. I like to constantly reposition my image by dragging the image with two fingers. You'll learn what works best the more you practice.
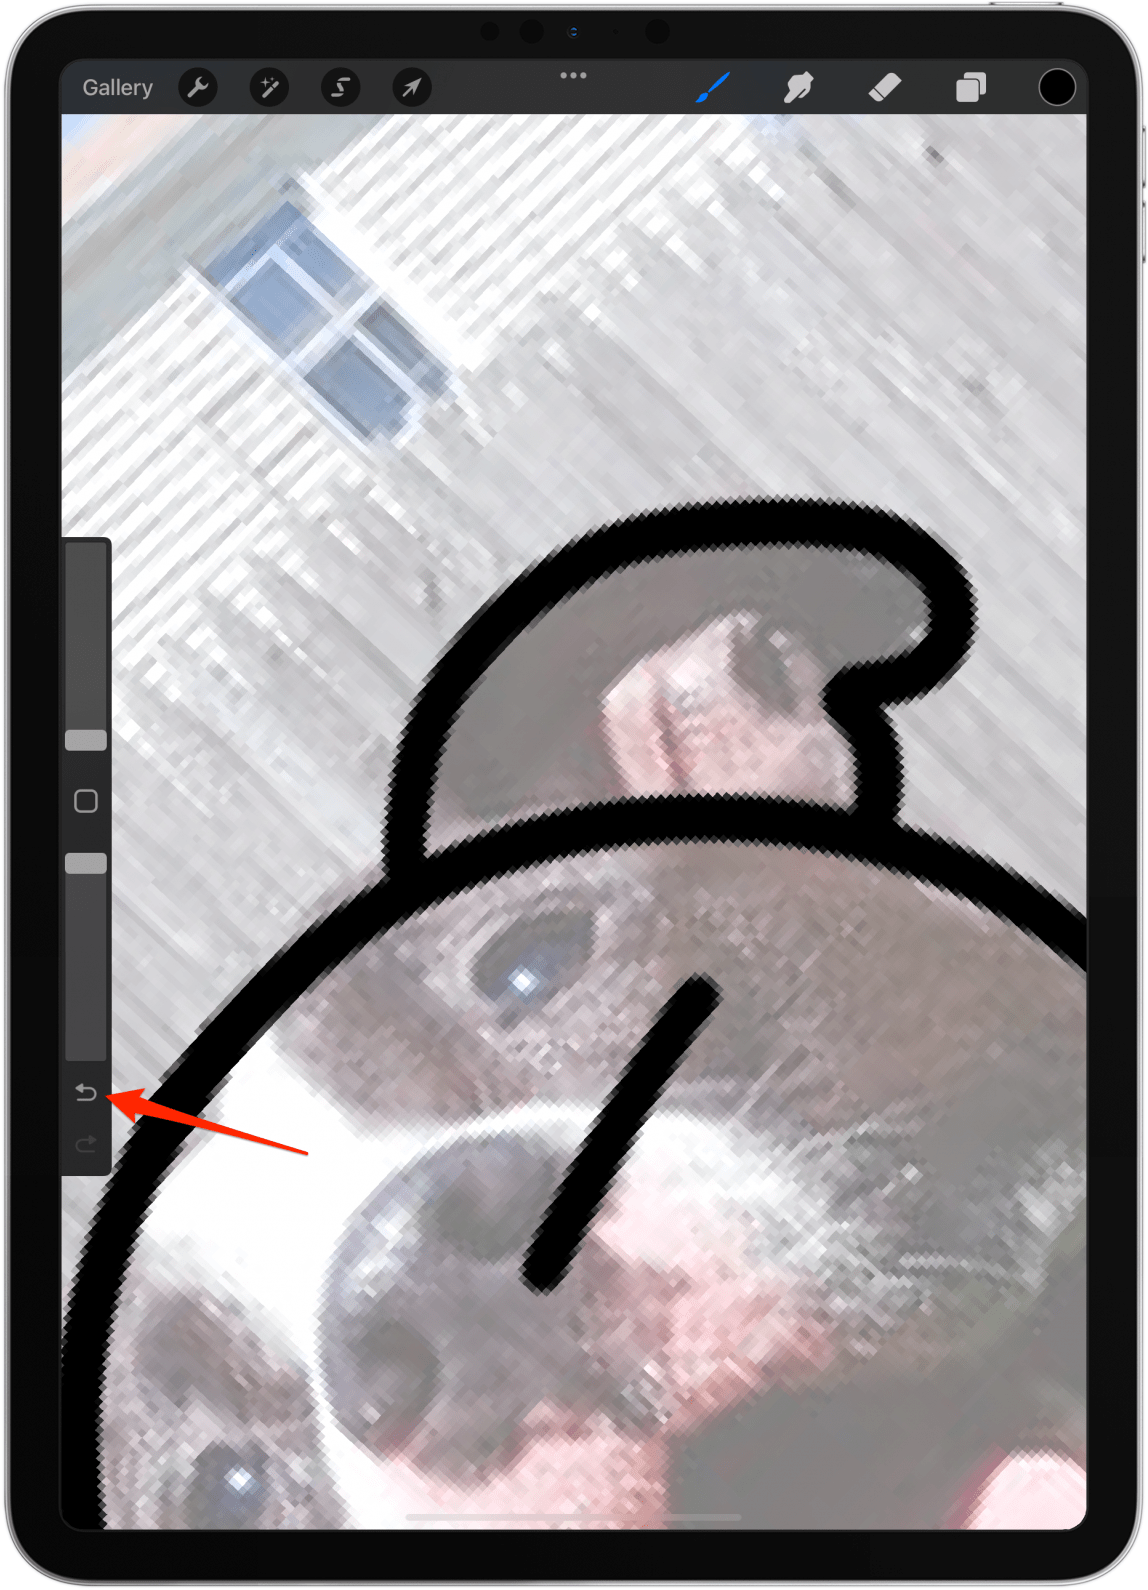
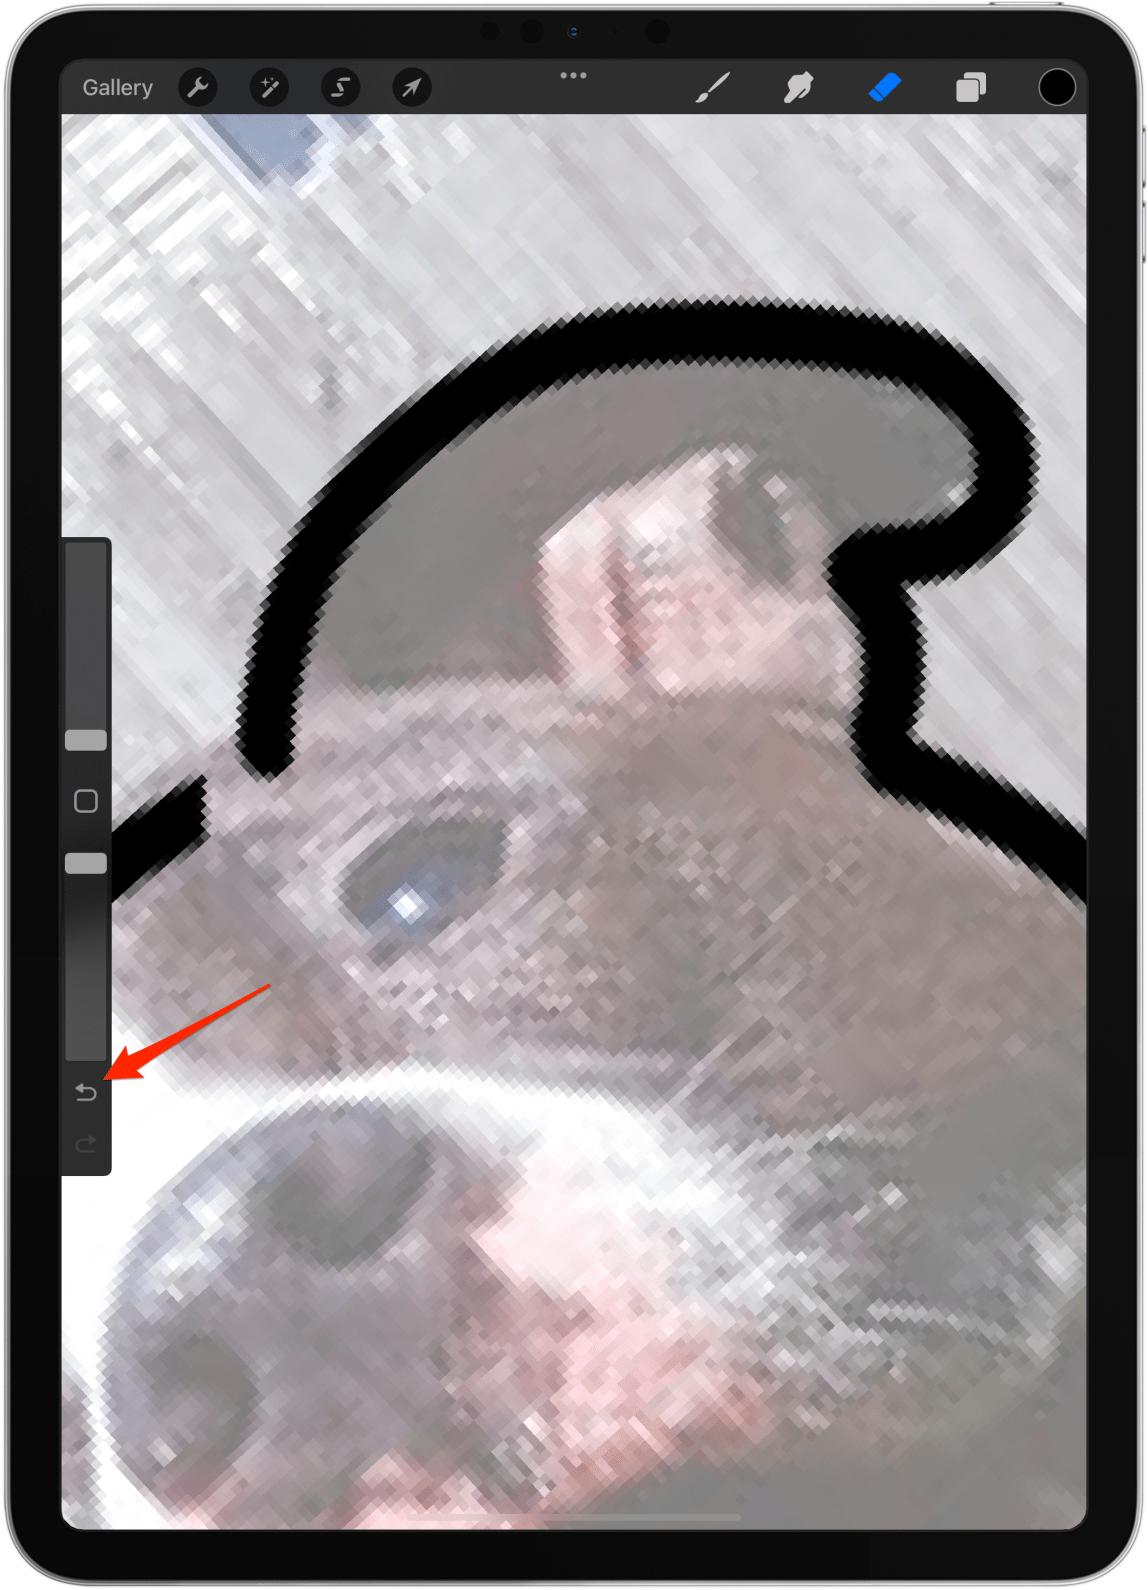
- If you make a mistake, just tap the undo button or tap the screen with two fingers.
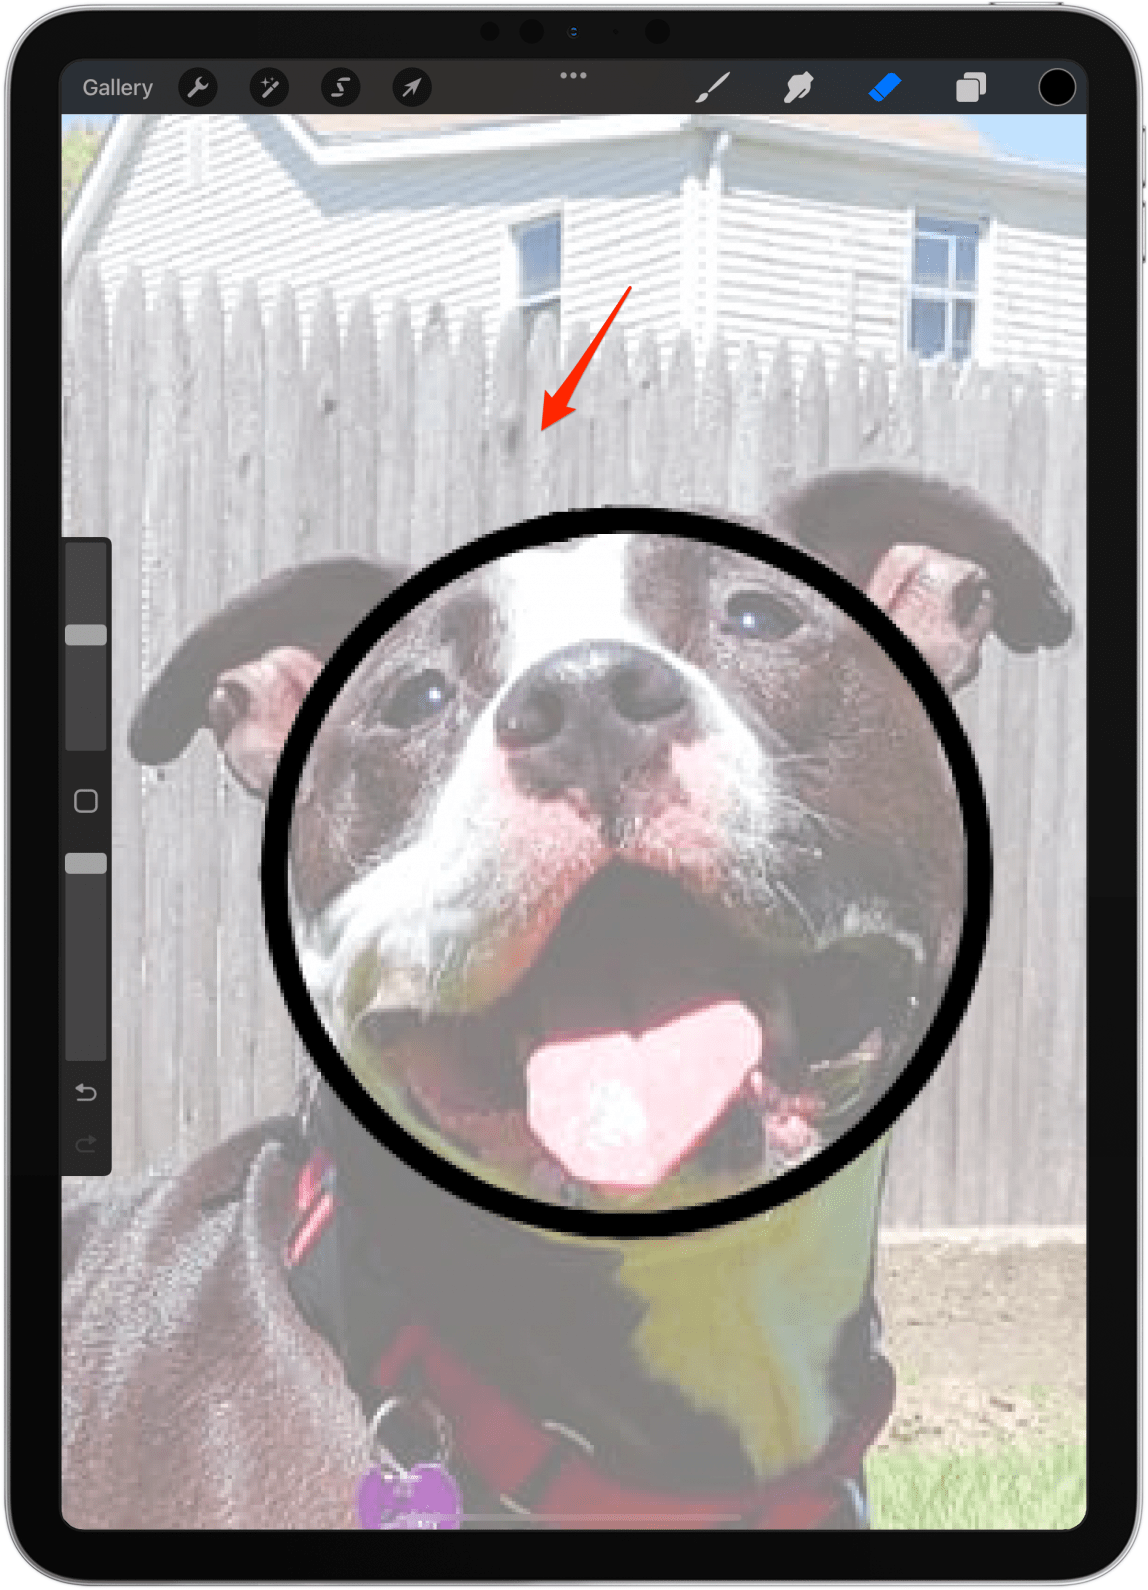
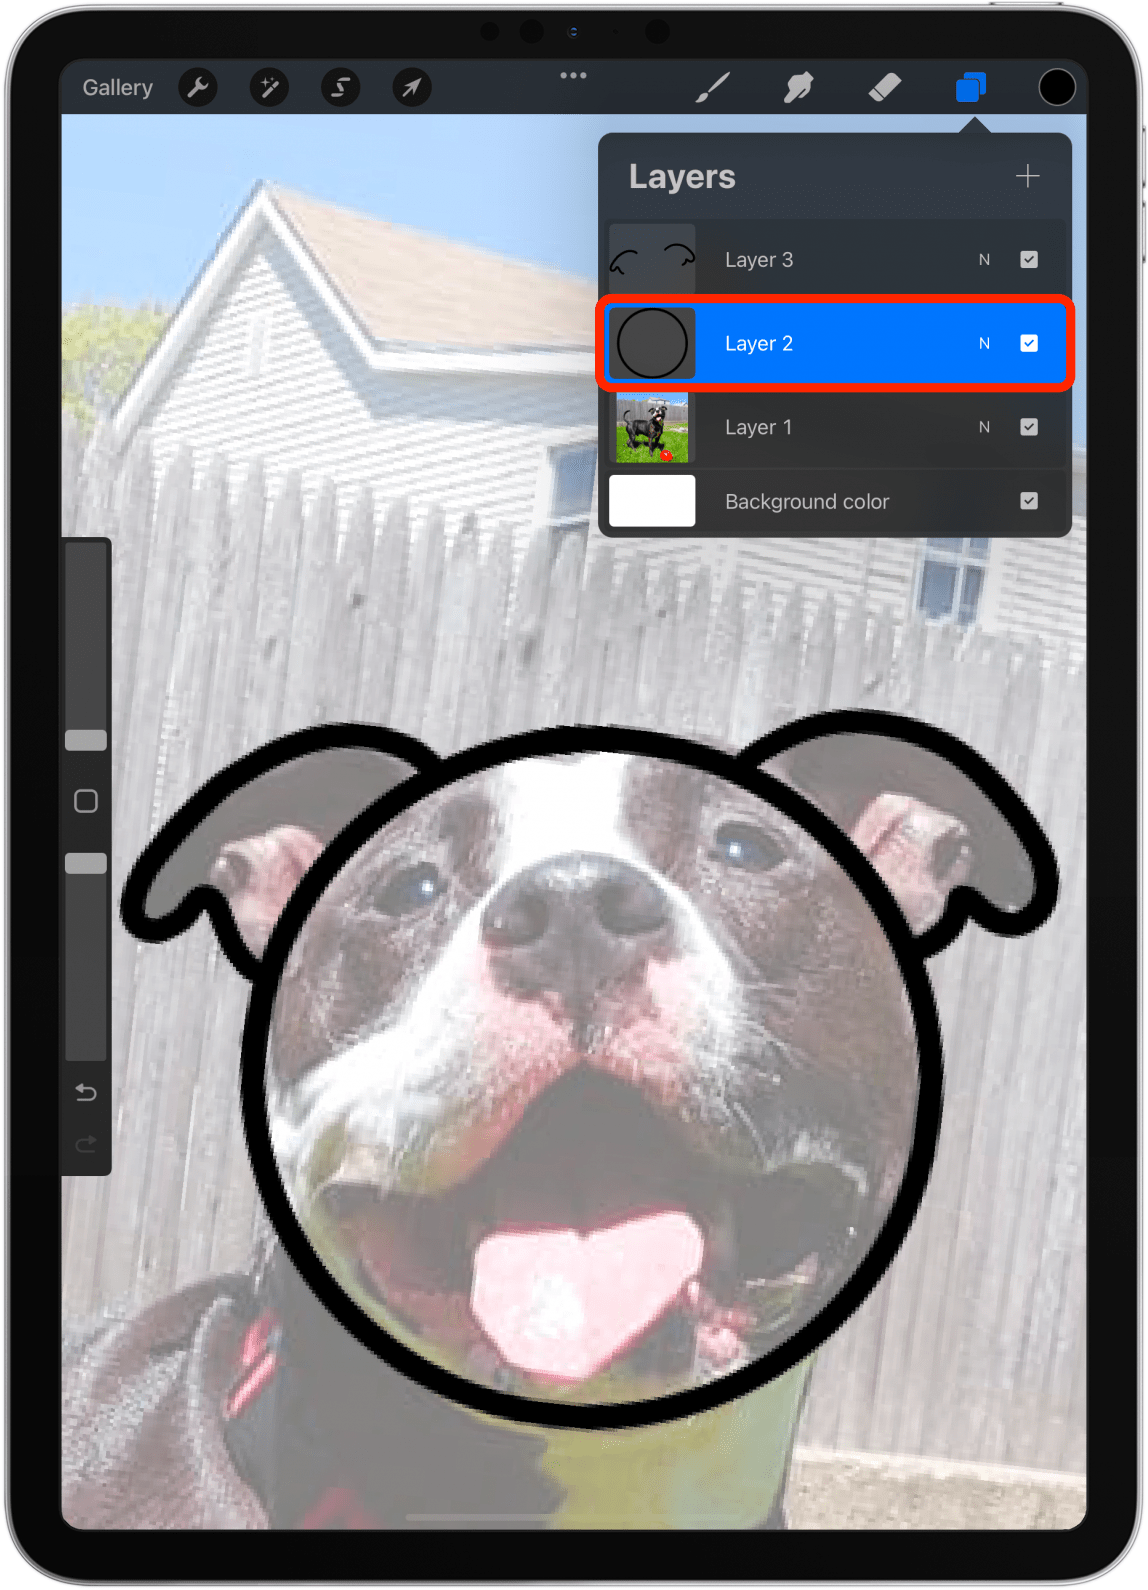
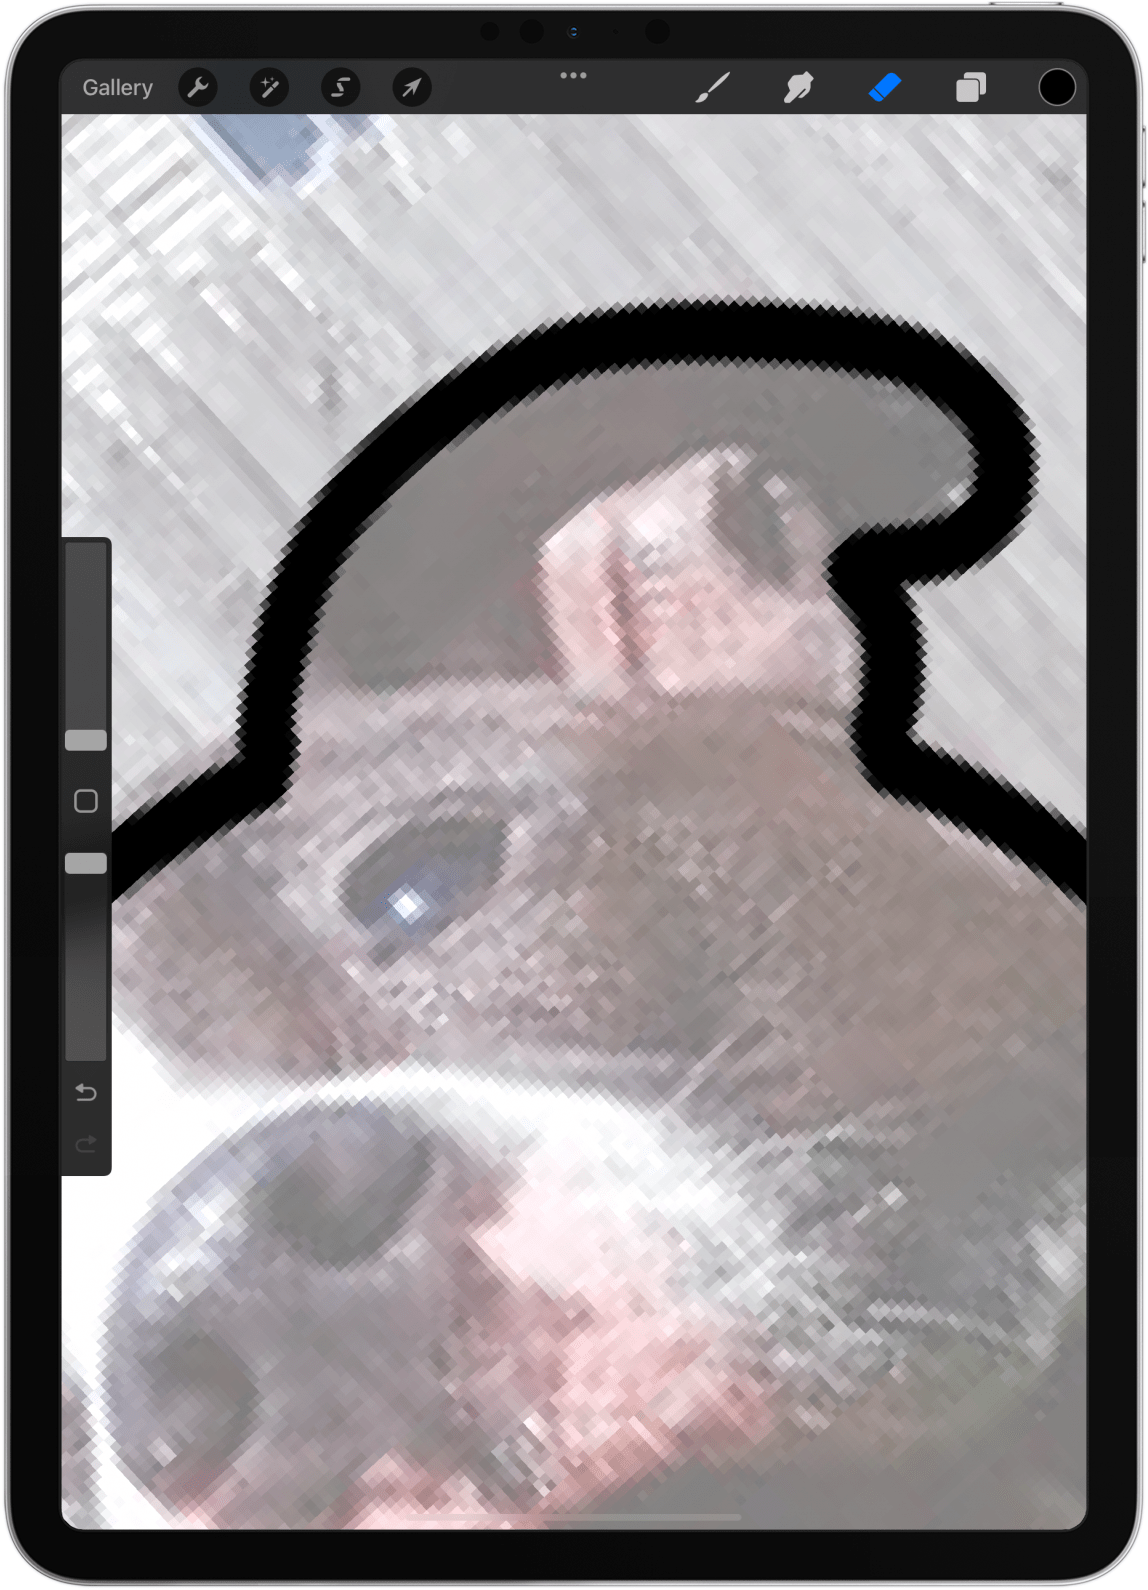
- Next, we will select the layer with the circle to erase the lines within the ears.
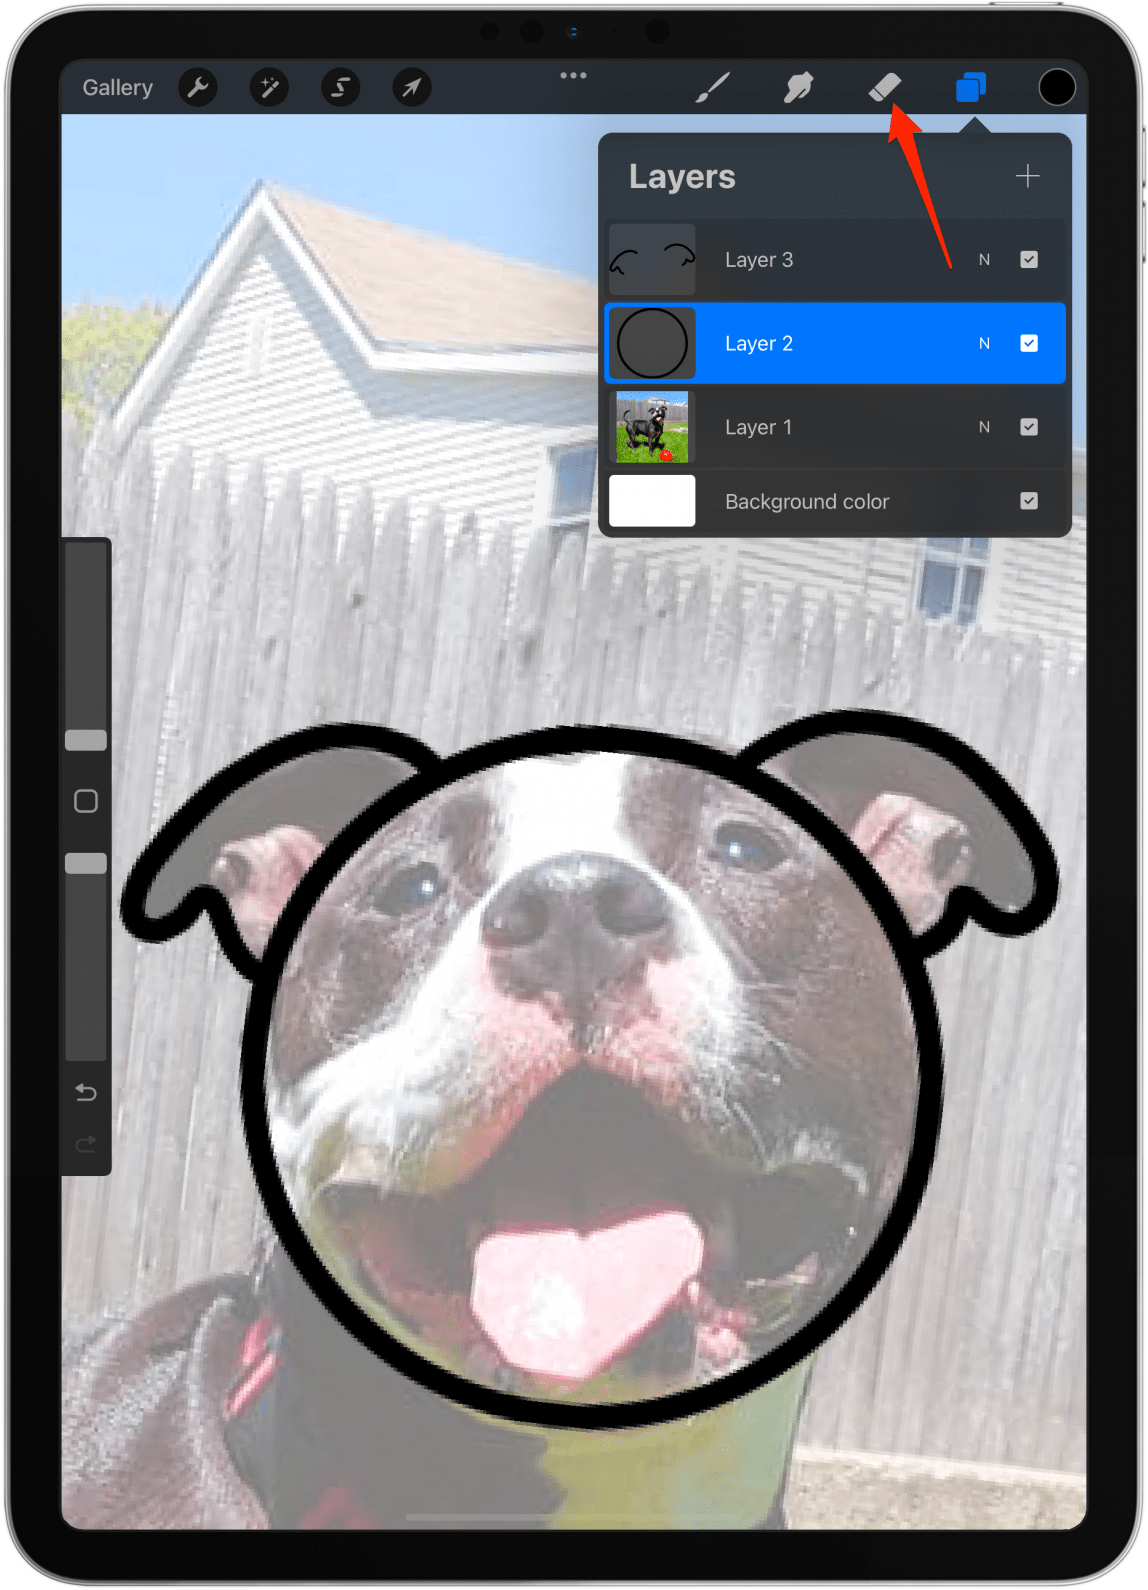
- Tap the eraser icon and adjust the size and opacity. I’ll stick to 1% size and 100% opacity.
- Carefully erase any lines you no longer need.
- If you erase too much, just tap the undo button or tap the screen with two fingers.
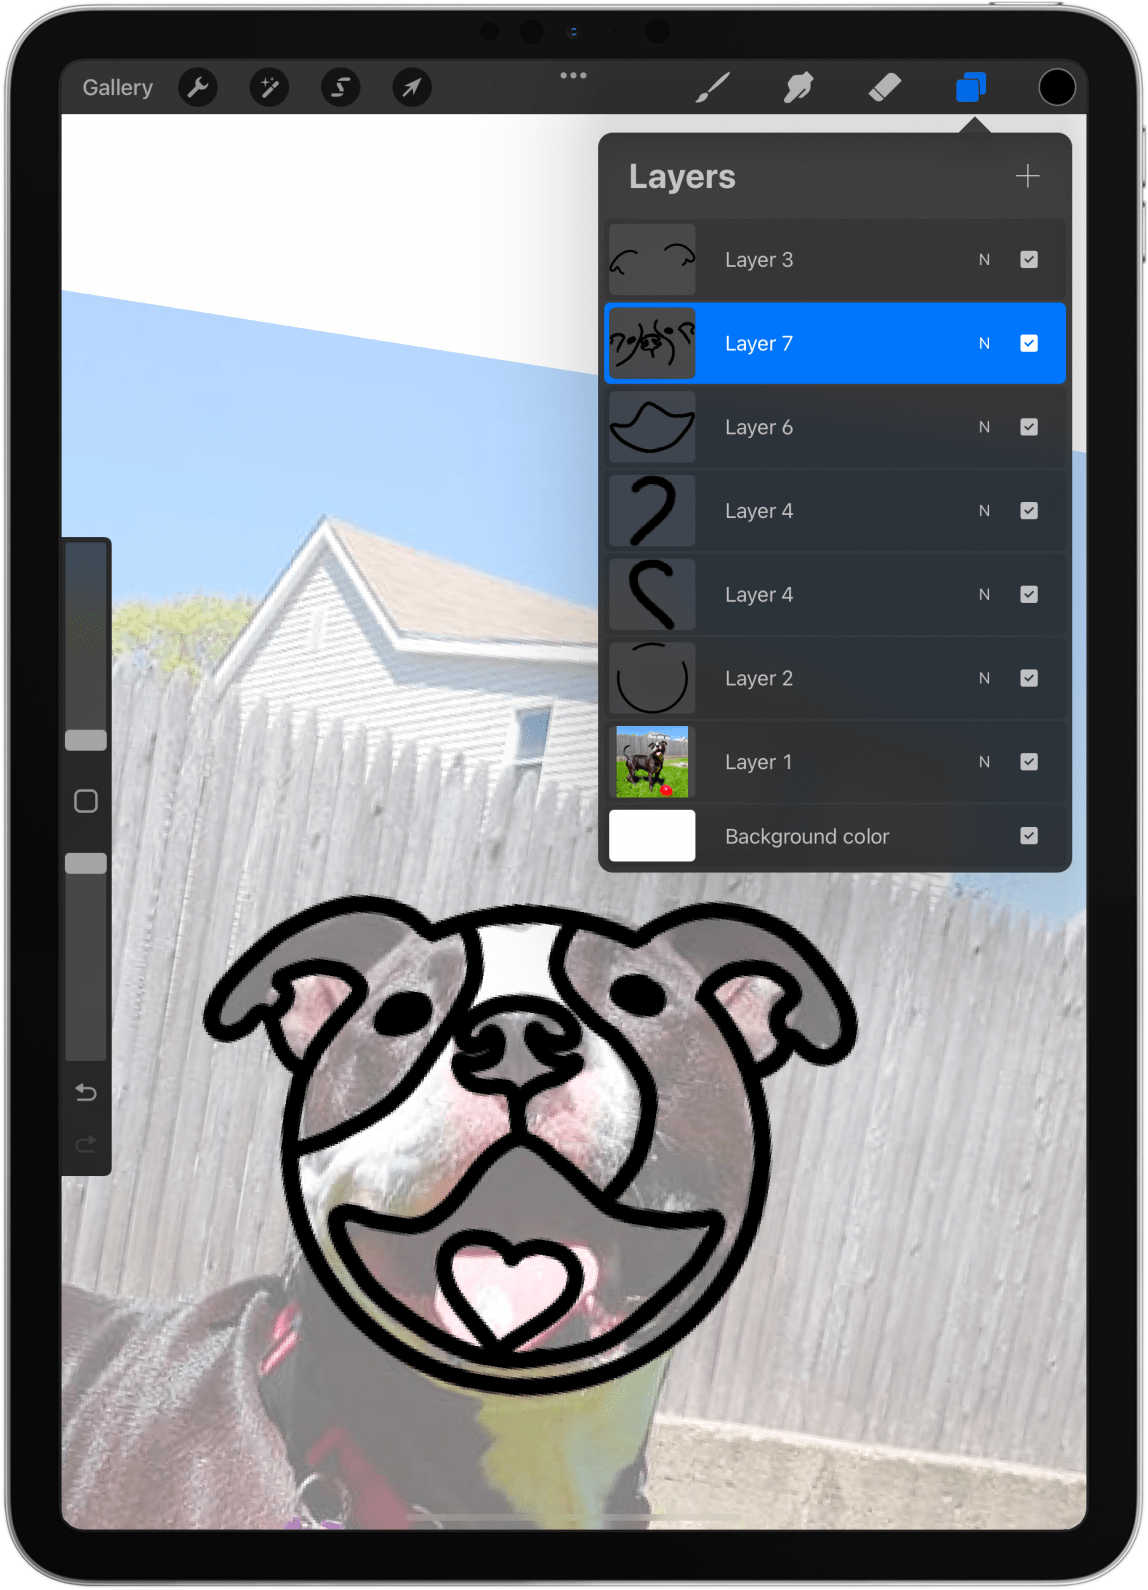
- I’ll keep creating layers to draw different shapes on Smiley’s face. I like to use a lot of layers to make it easier to change or erase something without ruining what I’m already happy with.
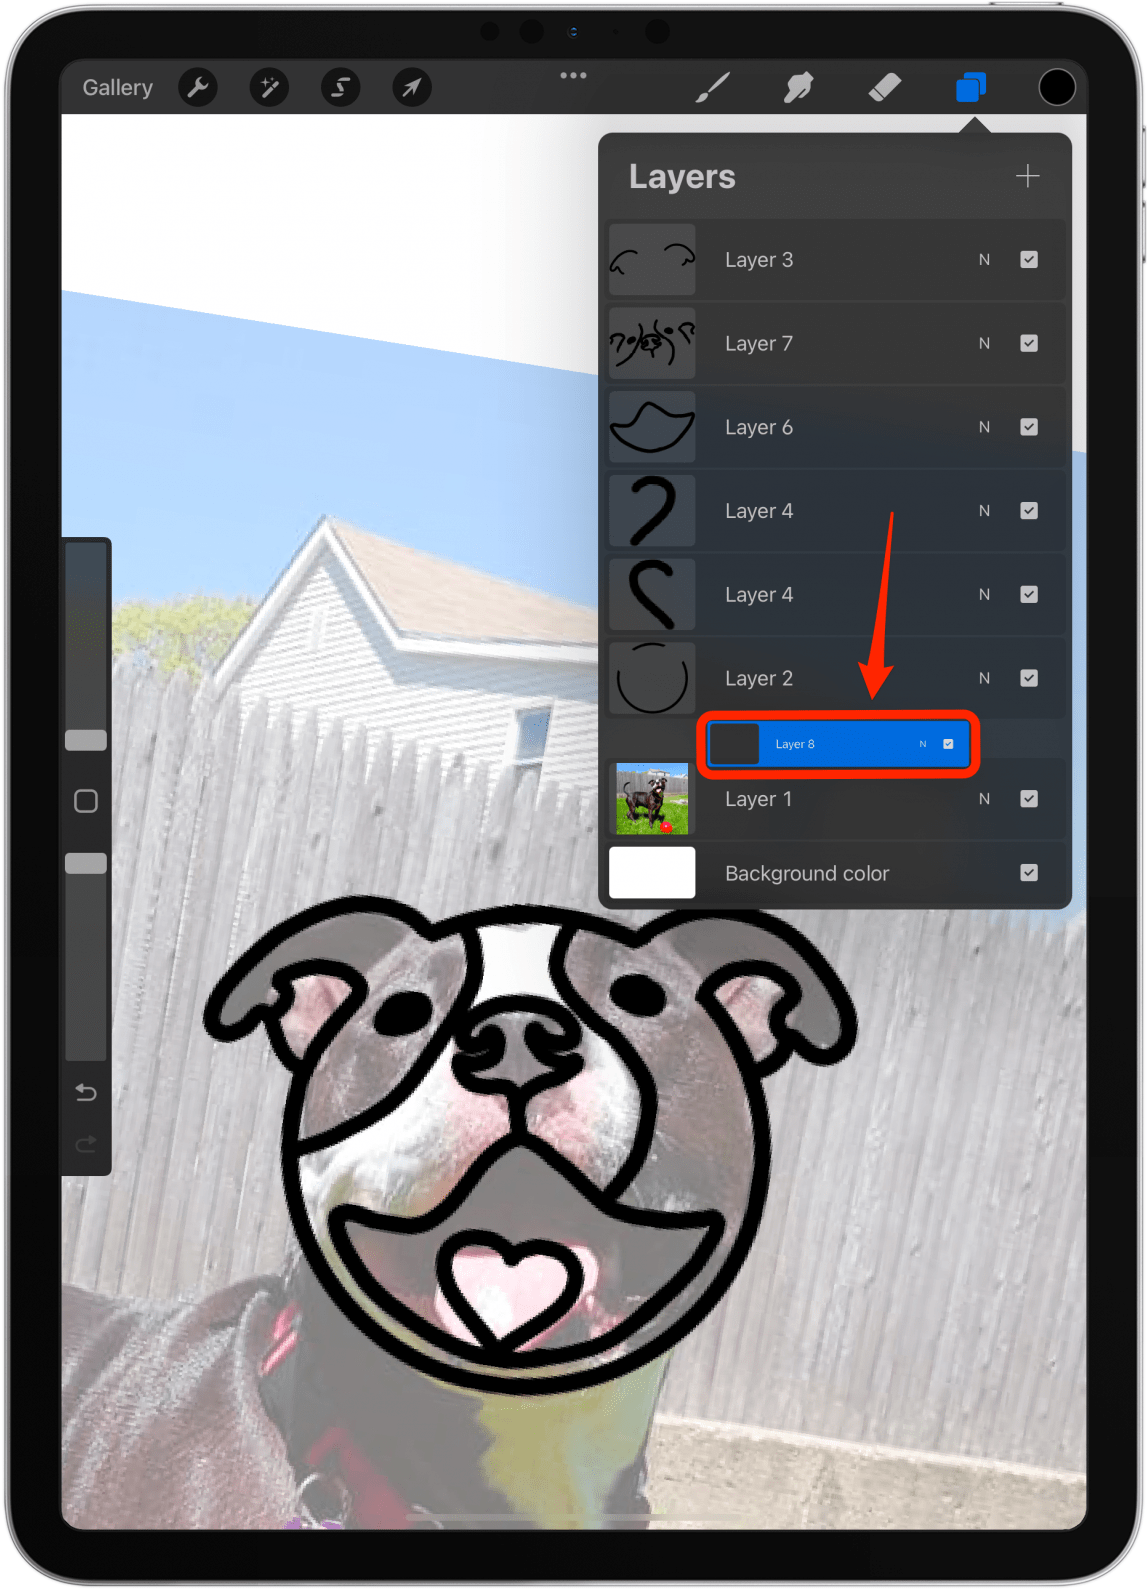
- Next, we’ll do some coloring! I like to create a new layer for every color. Make sure to drag the layer to the very bottom right above the photo layer so that it doesn’t cover the lines.
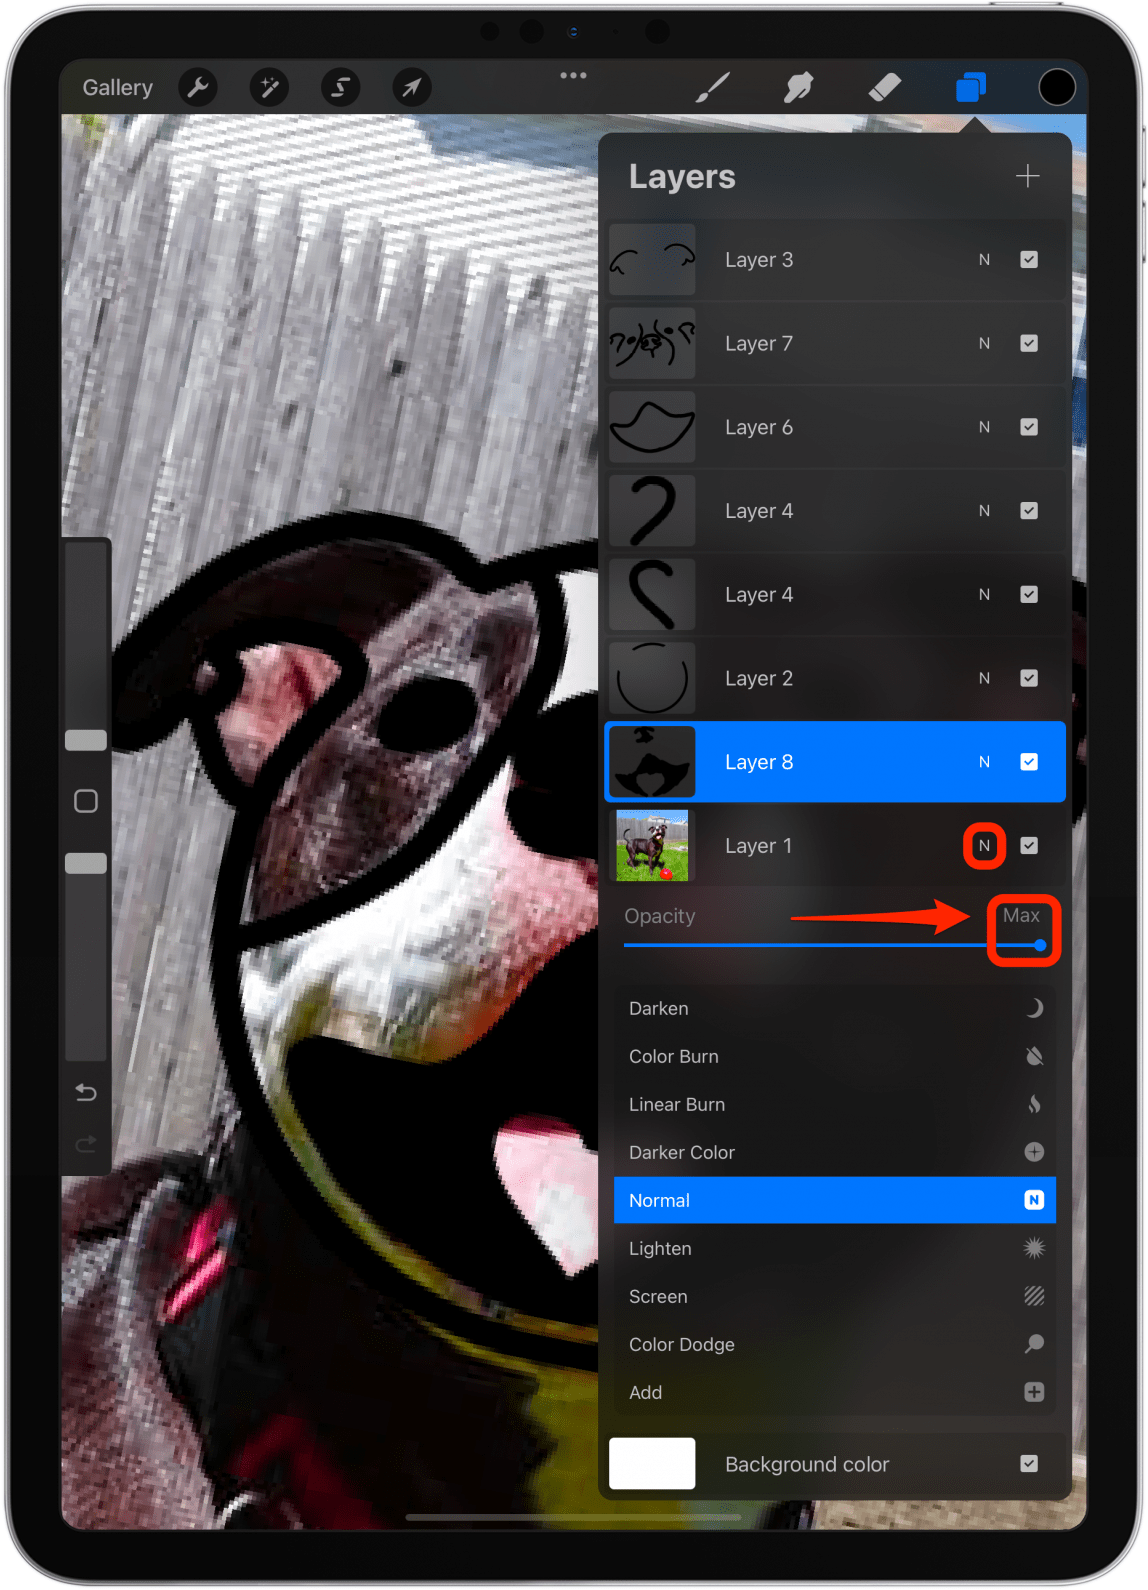
- I’ll start coloring in the blacks in a new layer. You can adjust the paintbrush size or switch to a different brush if you wish. I’ll keep using the same one for this example. To copy and use a color from the original image, tap the N of the layer with the photo and drag opacity back to max.
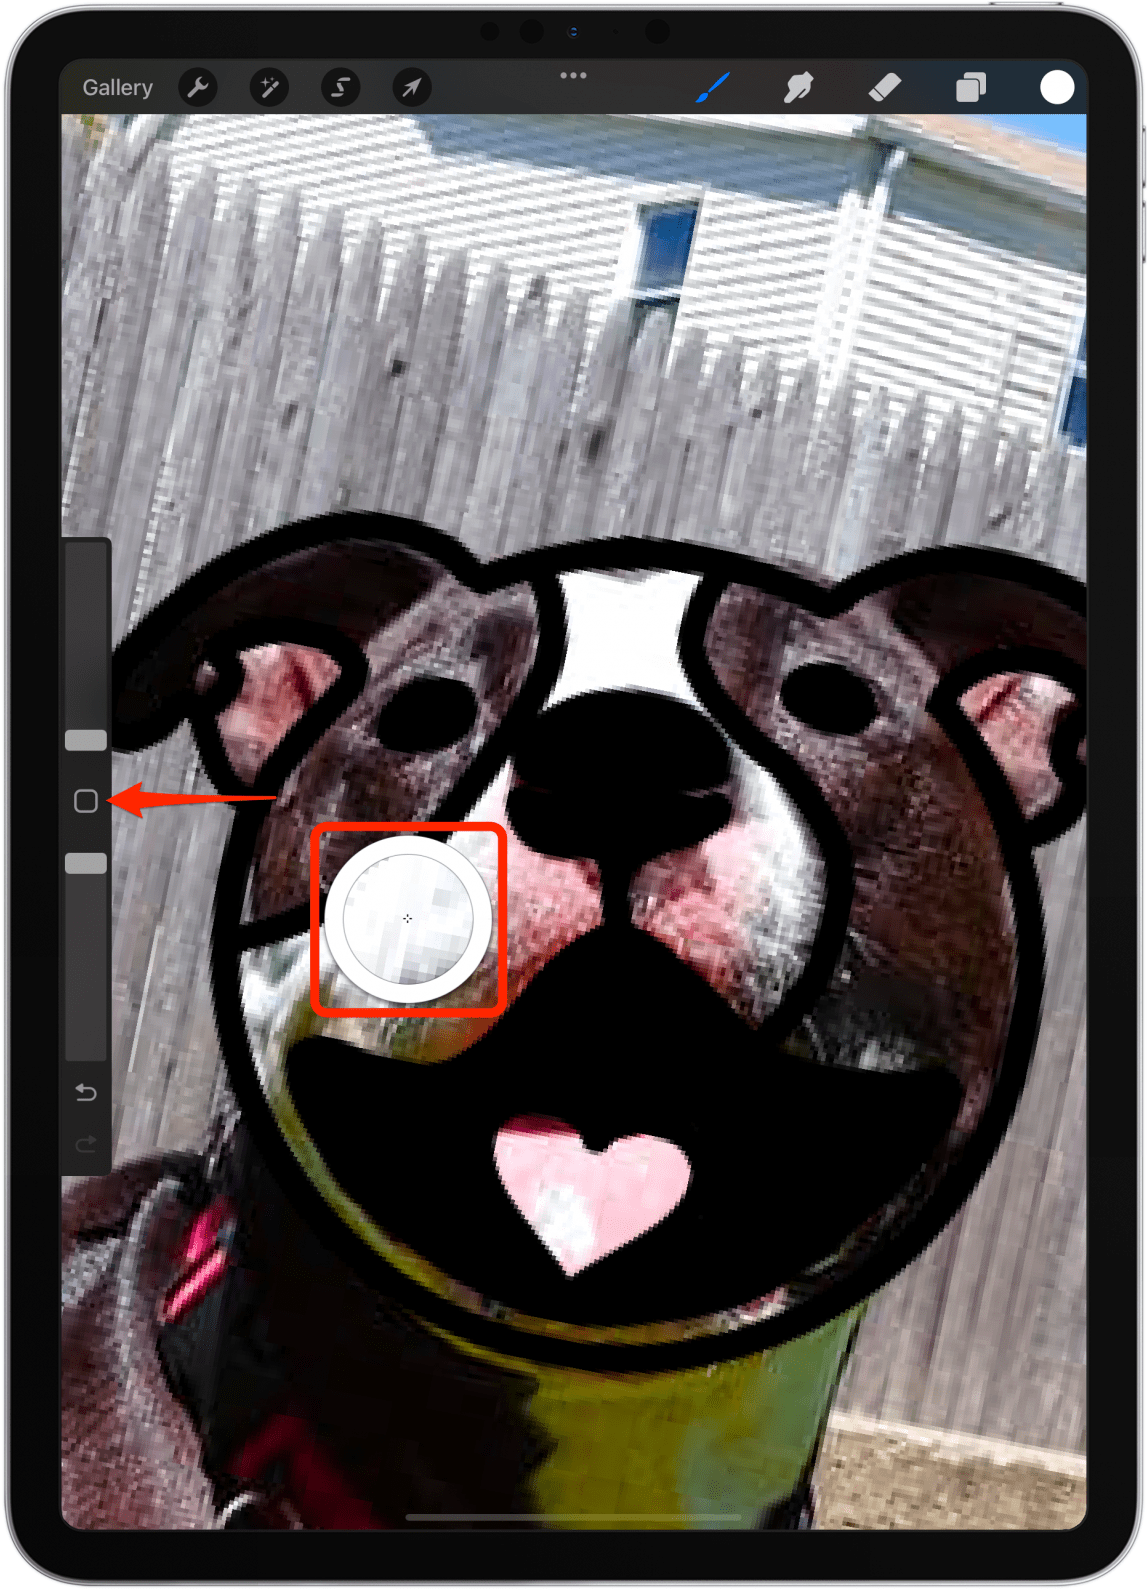
- Tap the canvas to return to it. Then tap the little square on the left. A circle will appear on your display. Drag it until you see the color you like. When you release, the color will be selected. If you released it accidentally, just tap the square again and keep searching.
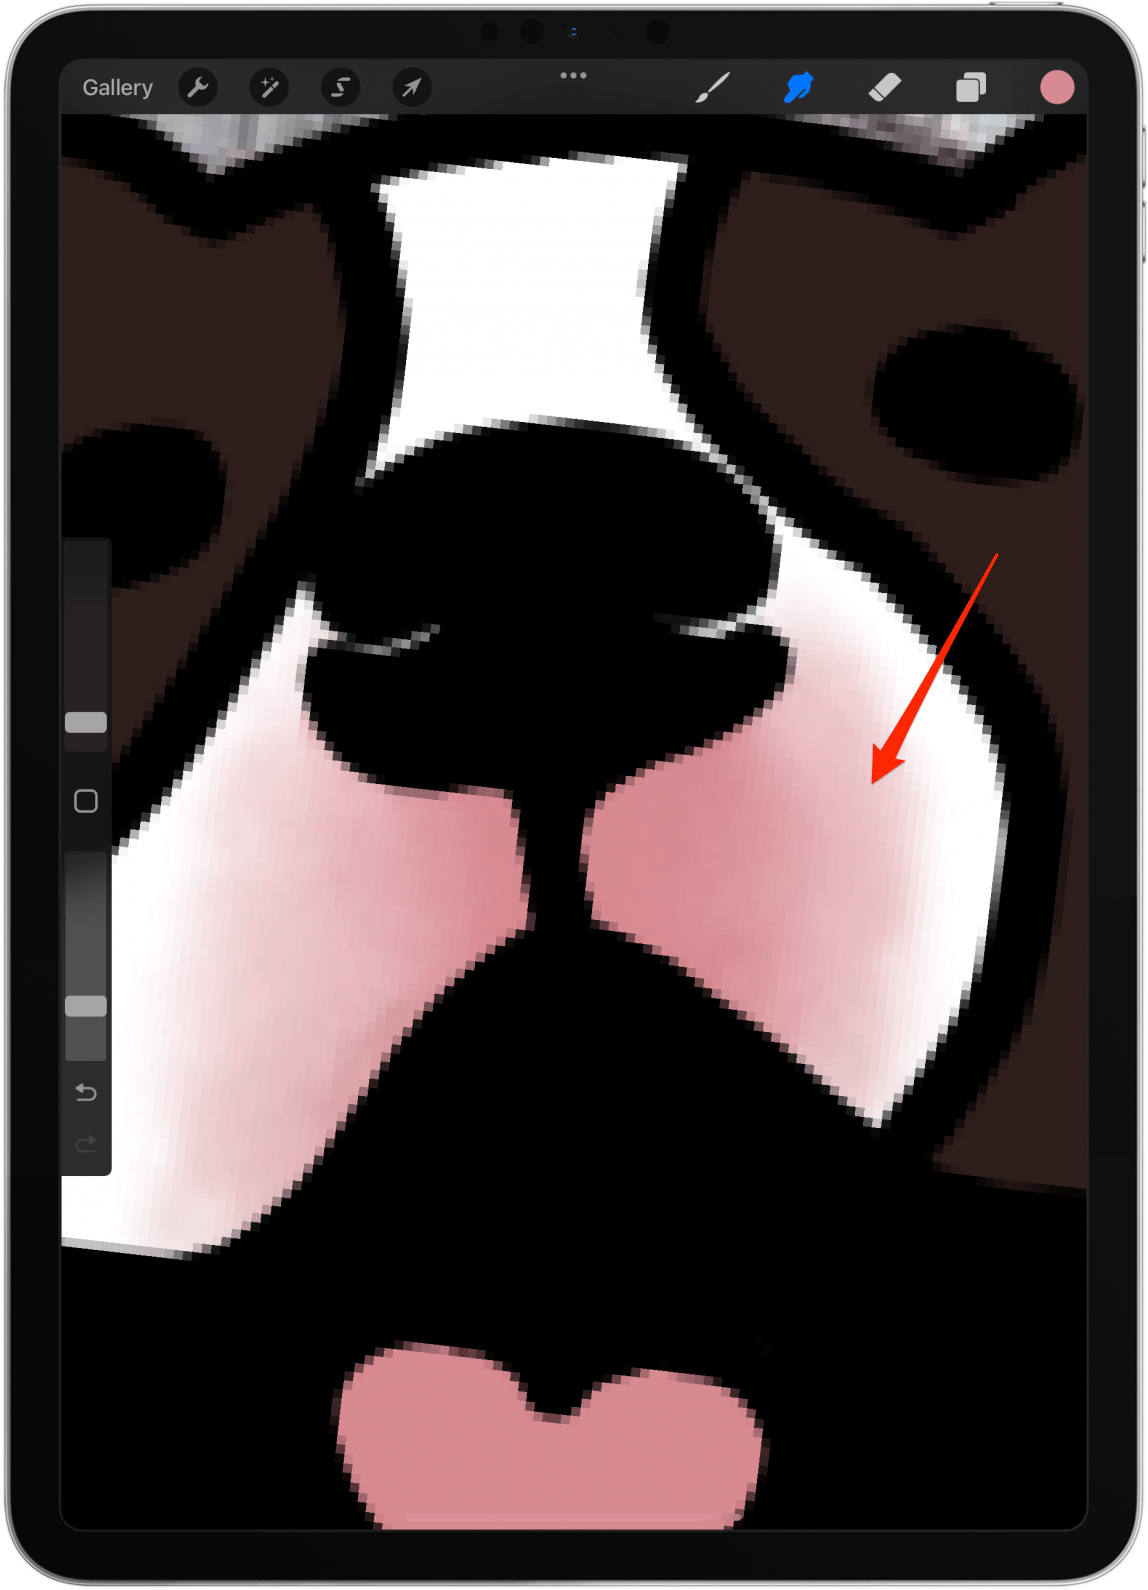
- If there are any areas where two colors meet, you can try blending them if you are feeling adventurous! To do this, both colors need to be in the same layer. First, add the two colors side by side; I'll keep the photo layer at full opacity for this.
- Next, tap the smudge tool to select it. I will select 2% for size and 25% for opacity.

- Now I’ll drag my Apple Pencil between the colors I want to smudge. It can take a while for it to start to look the way you want it to.
- Don’t forget to zoom out every once in a while to see what it really looks like. It can be easy to get obsessed with little details and individual pixels that won’t be visible when you aren’t zoomed in.
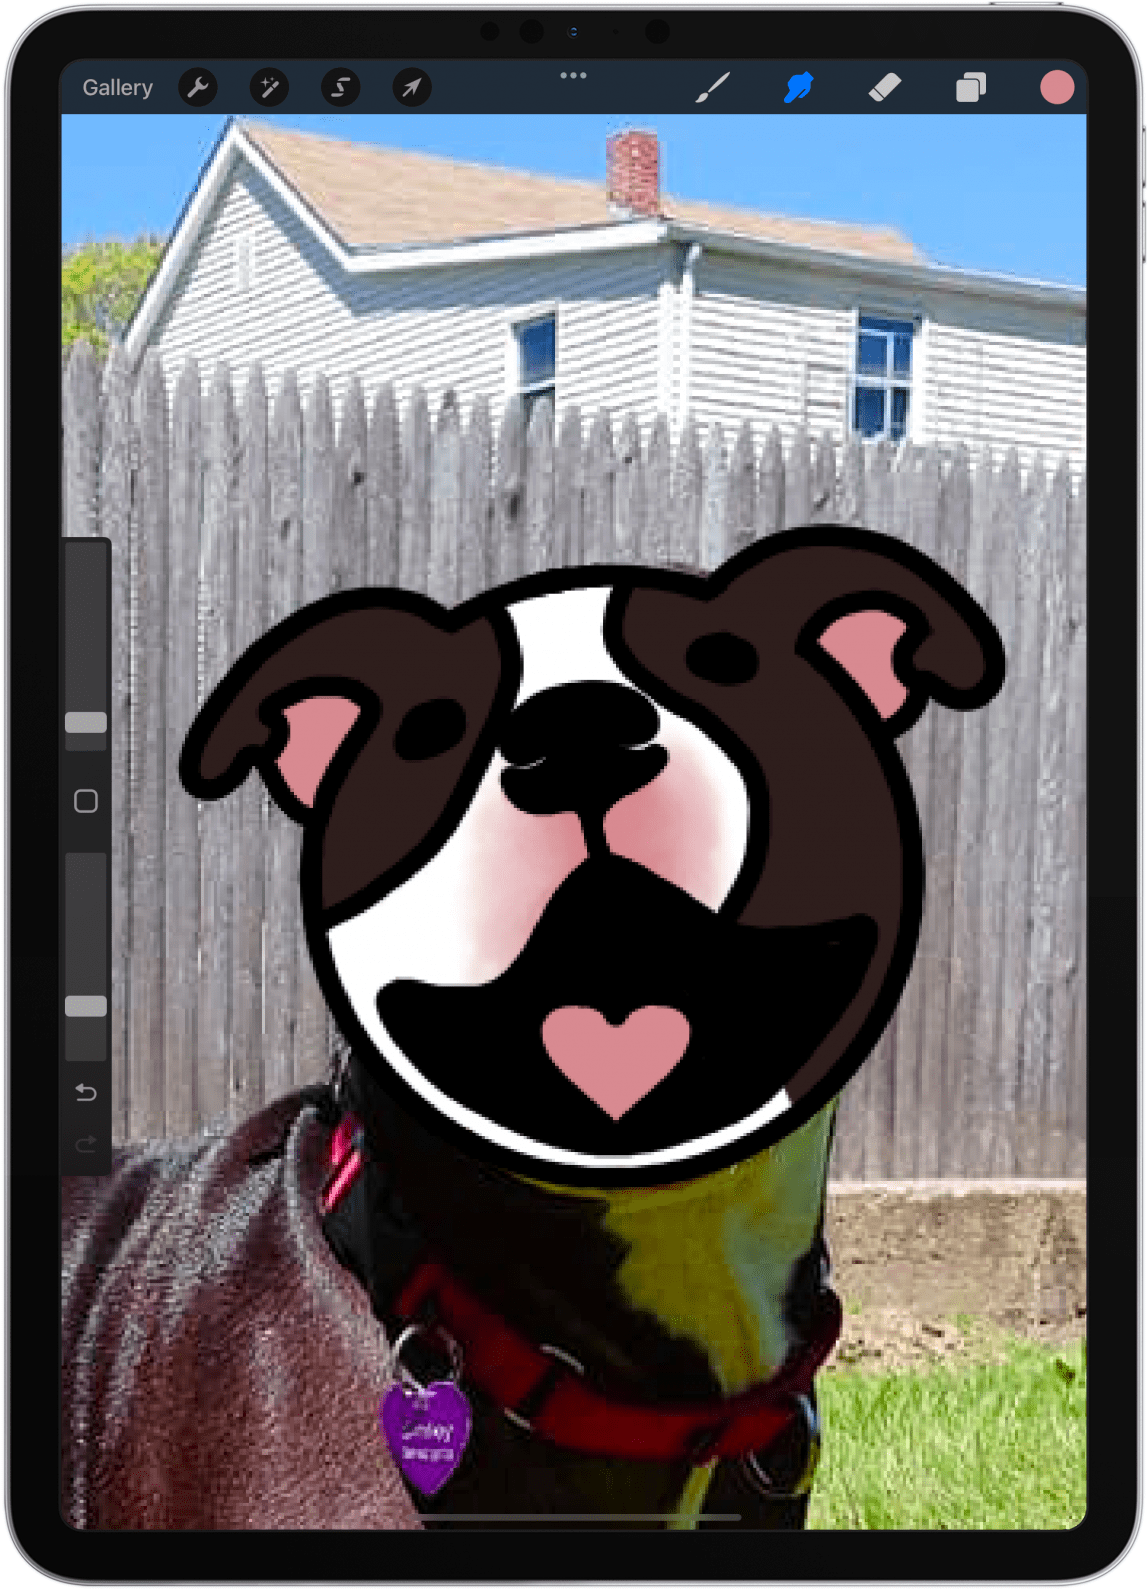
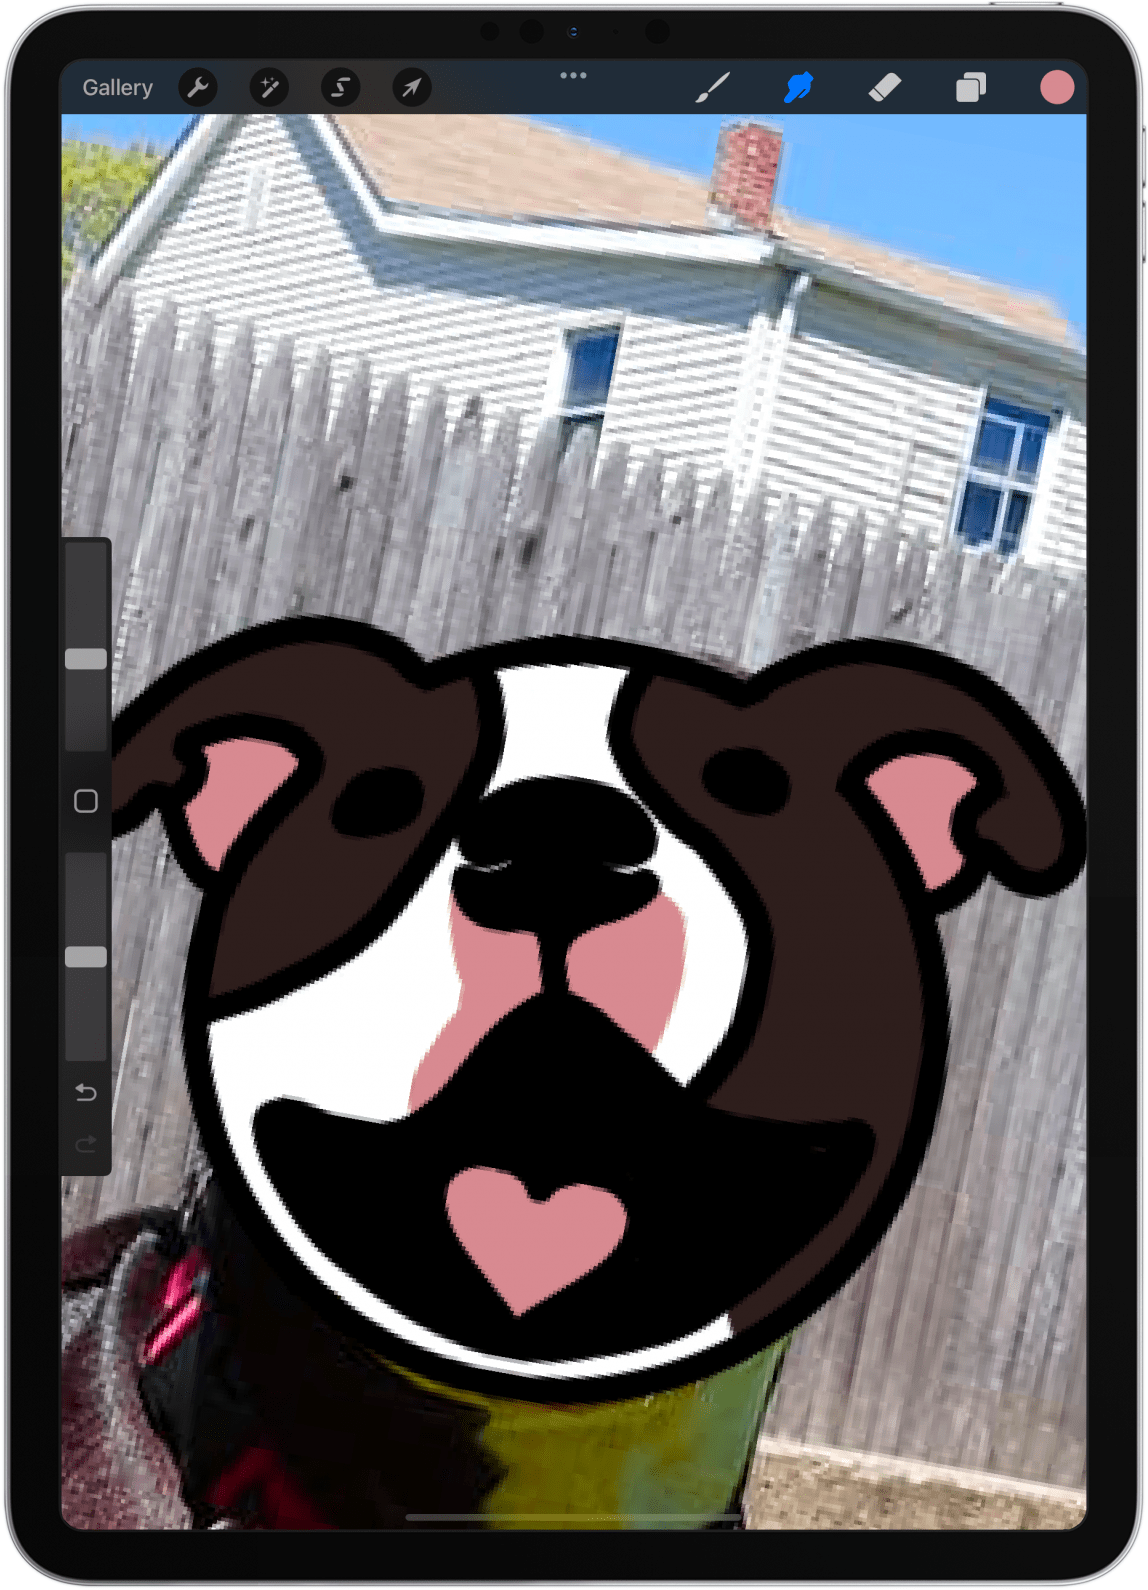
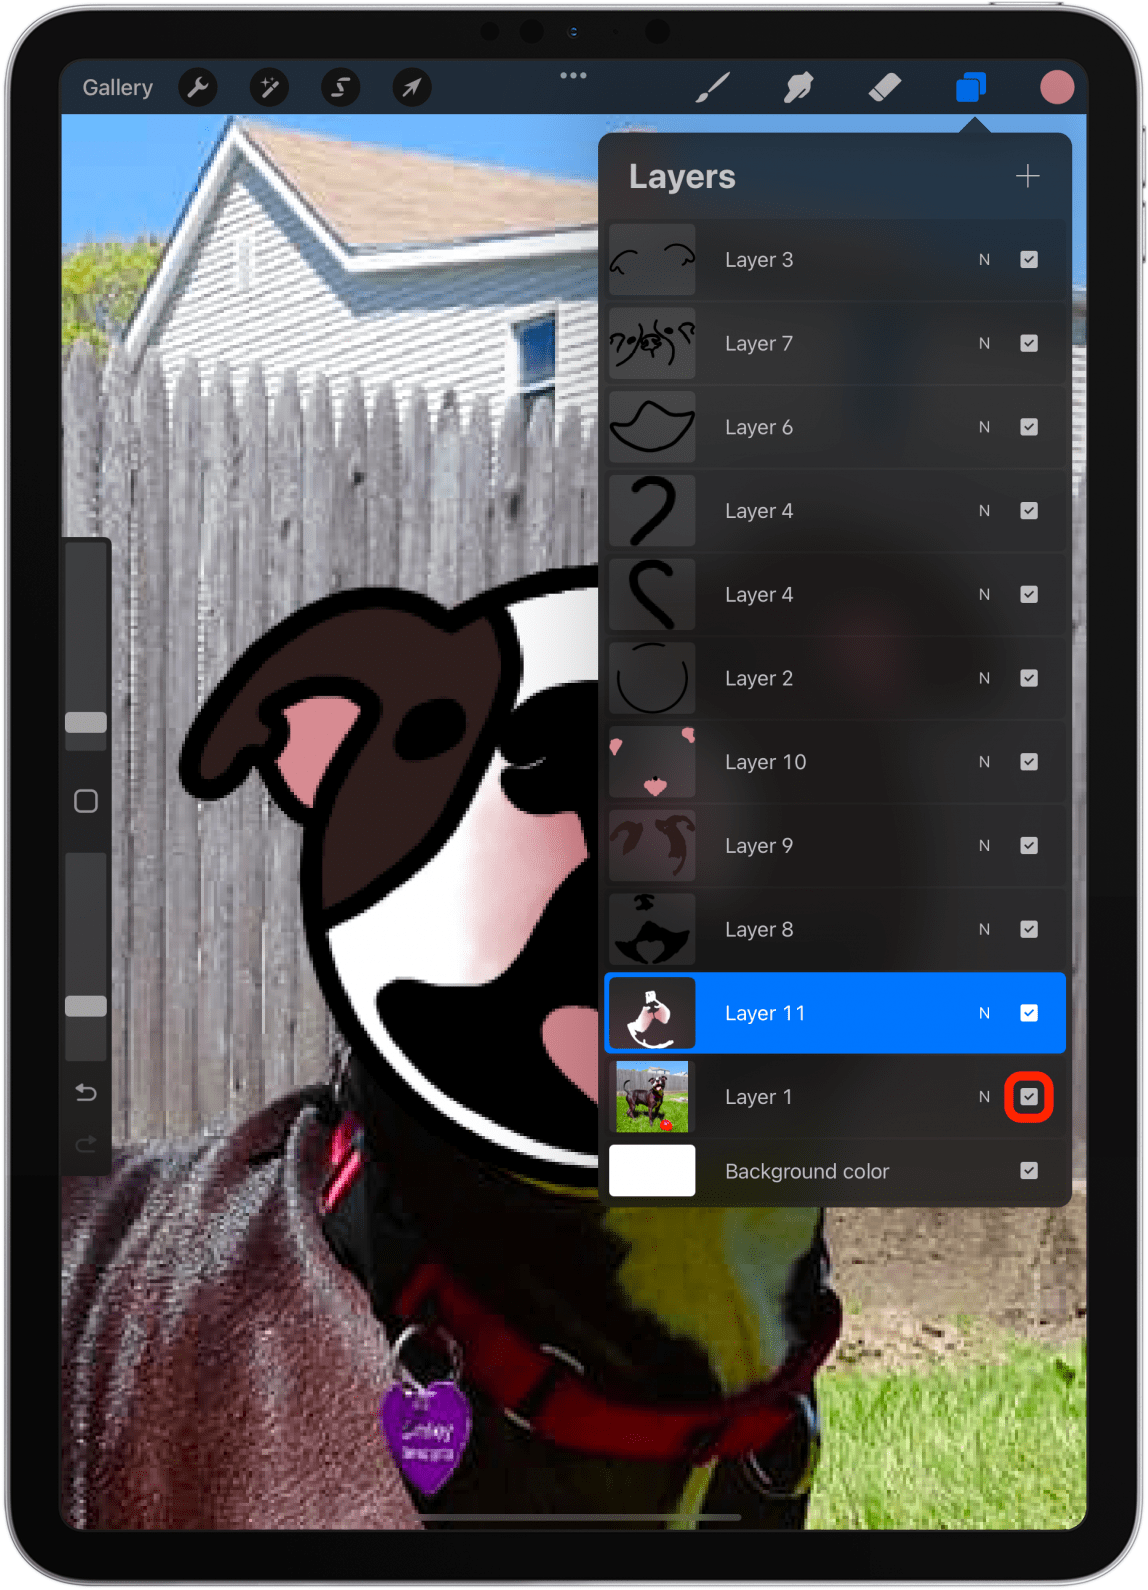
- When you’re ready to hide the original image, just hide it by tapping the checkmark in the square next to the N.
- You may notice that you need some touch-ups; you can make them within each layer or create a new layer at the very bottom to fix them quickly.
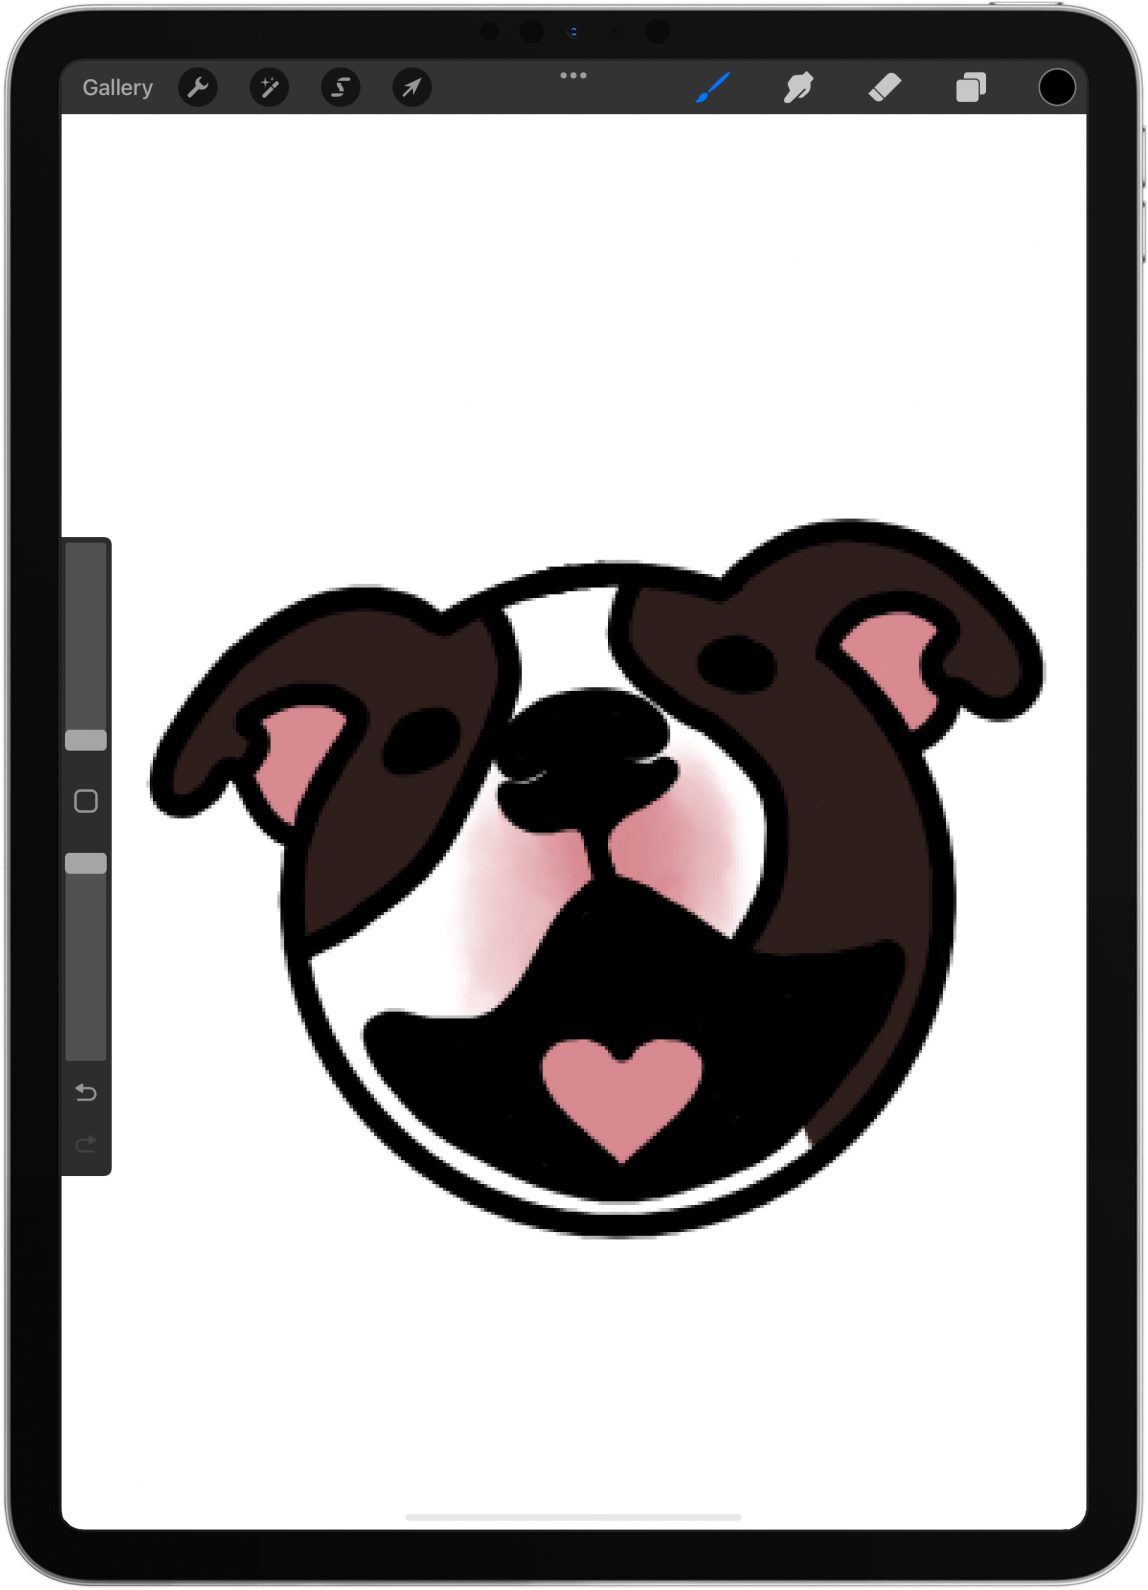
- There is a lot more you can do; any artist will tell you that it's hard to judge when a project is complete. My one tip for drawing cartoon pets or people is to add a little twinkle in the eye to make it come alive. I do this by creating a new layer at the very top and tapping gently in the eyes, sometimes the nose, and potentially the tongue as well. This all depends on your creative preference!

- When you are done, tap Gallery.
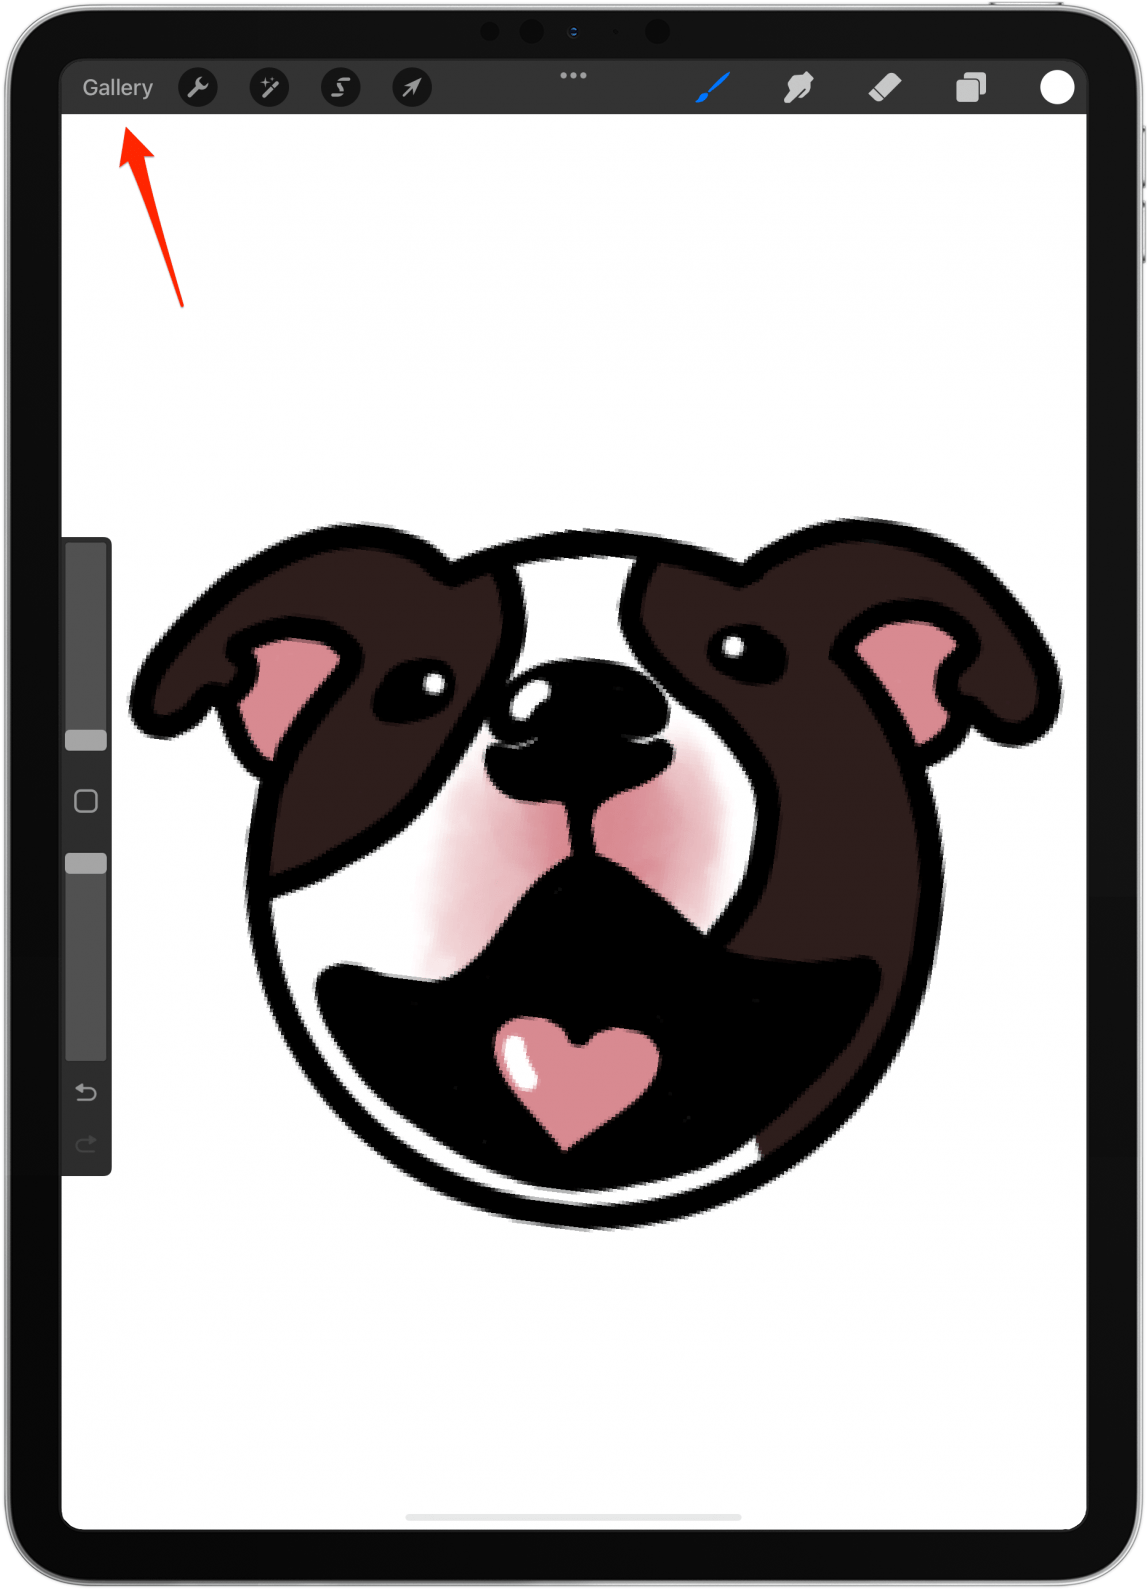
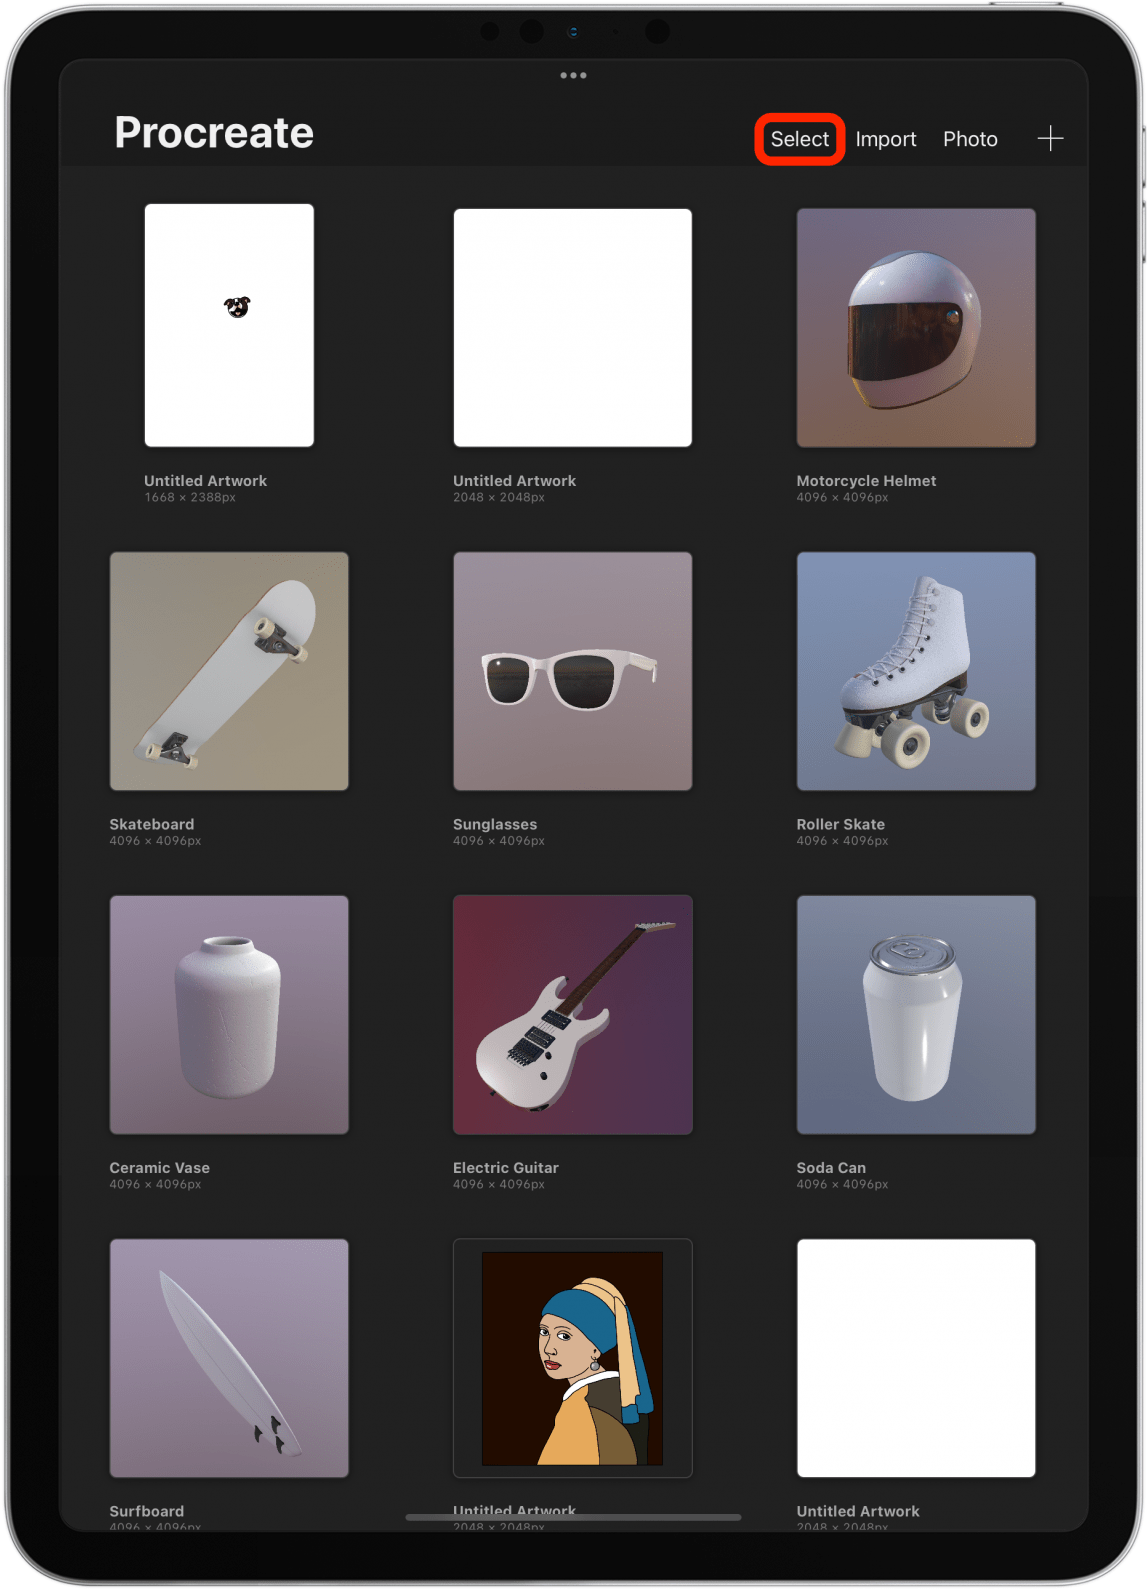
- As you can see, Smiley's head looks tiny. I cover canvas resizing in the article linked below. For now, we will tap Select.
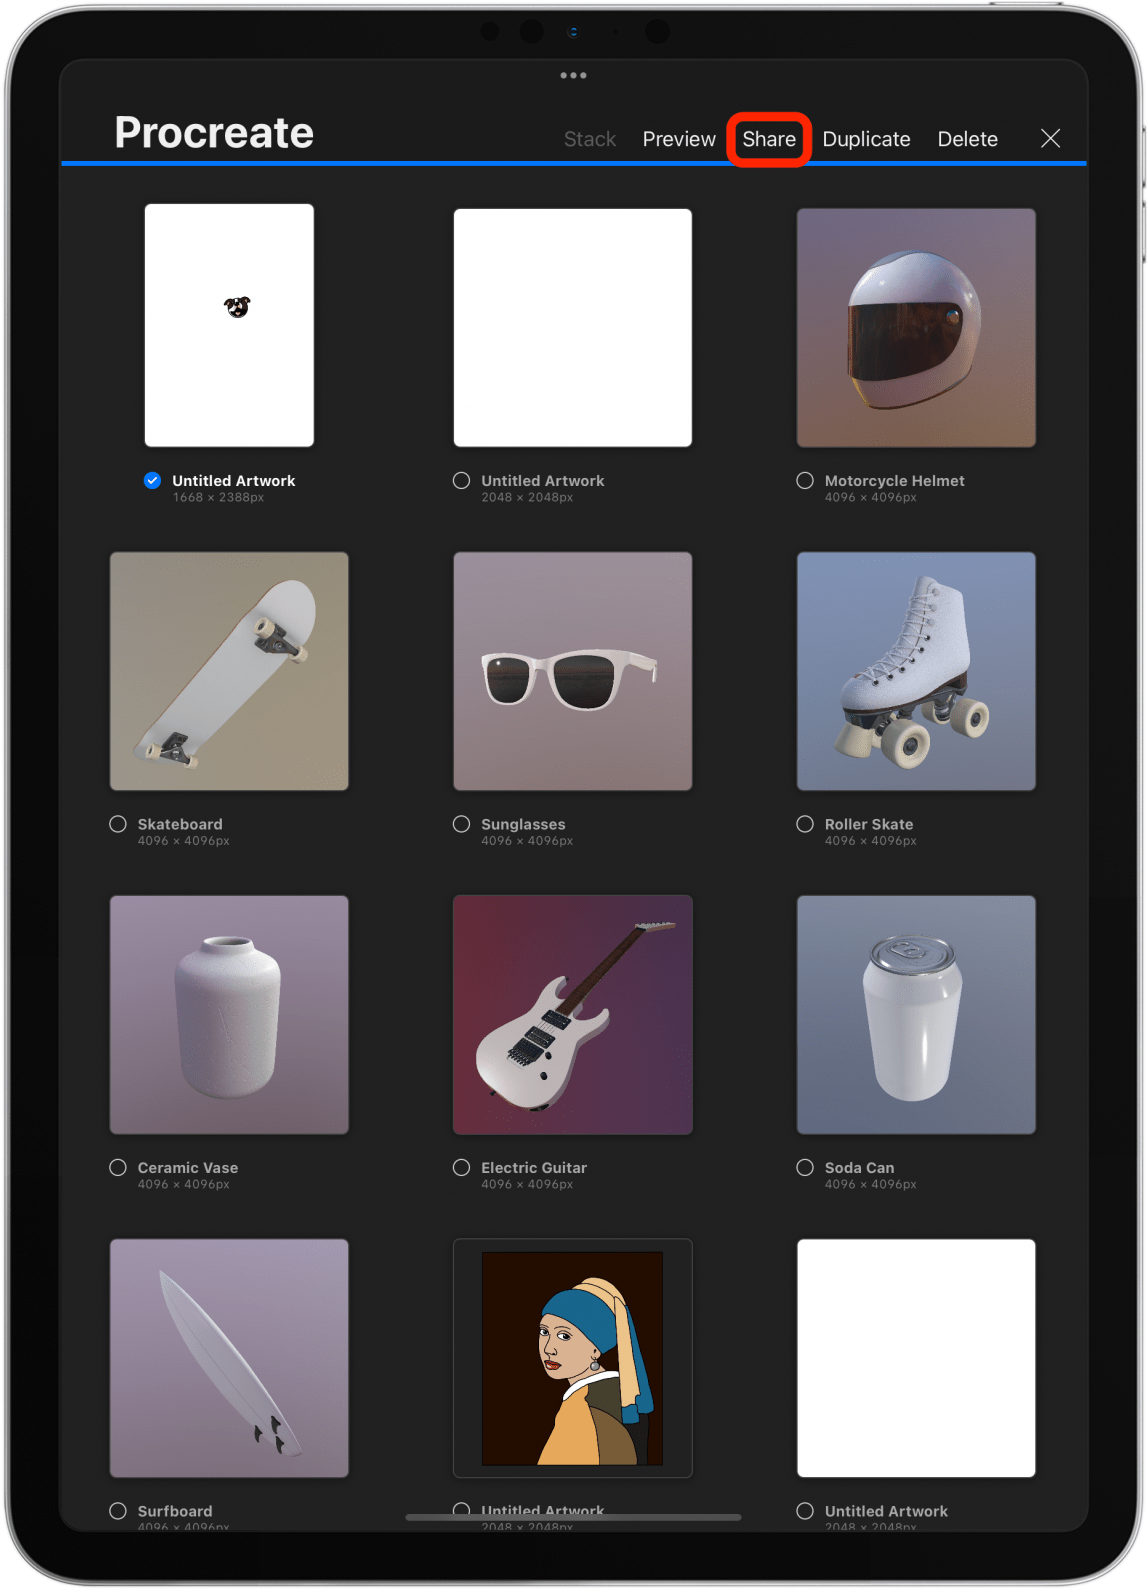
- Tap the artwork you just created.

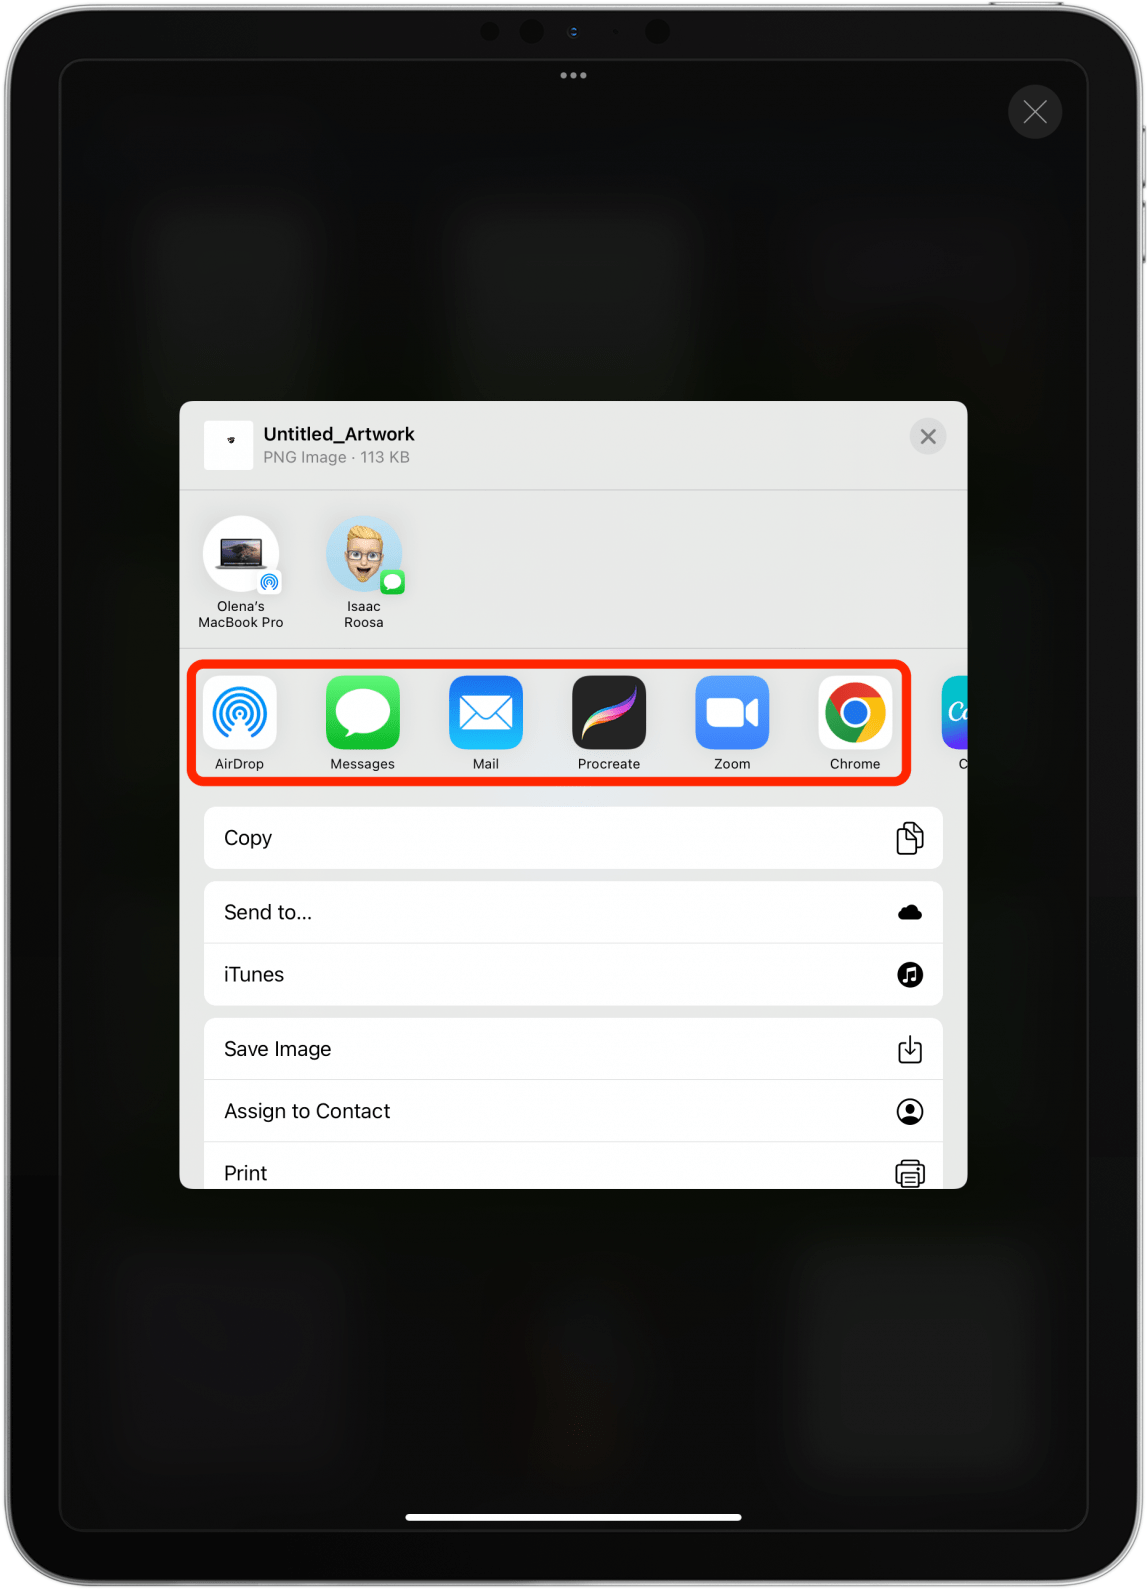
- Tap Share.
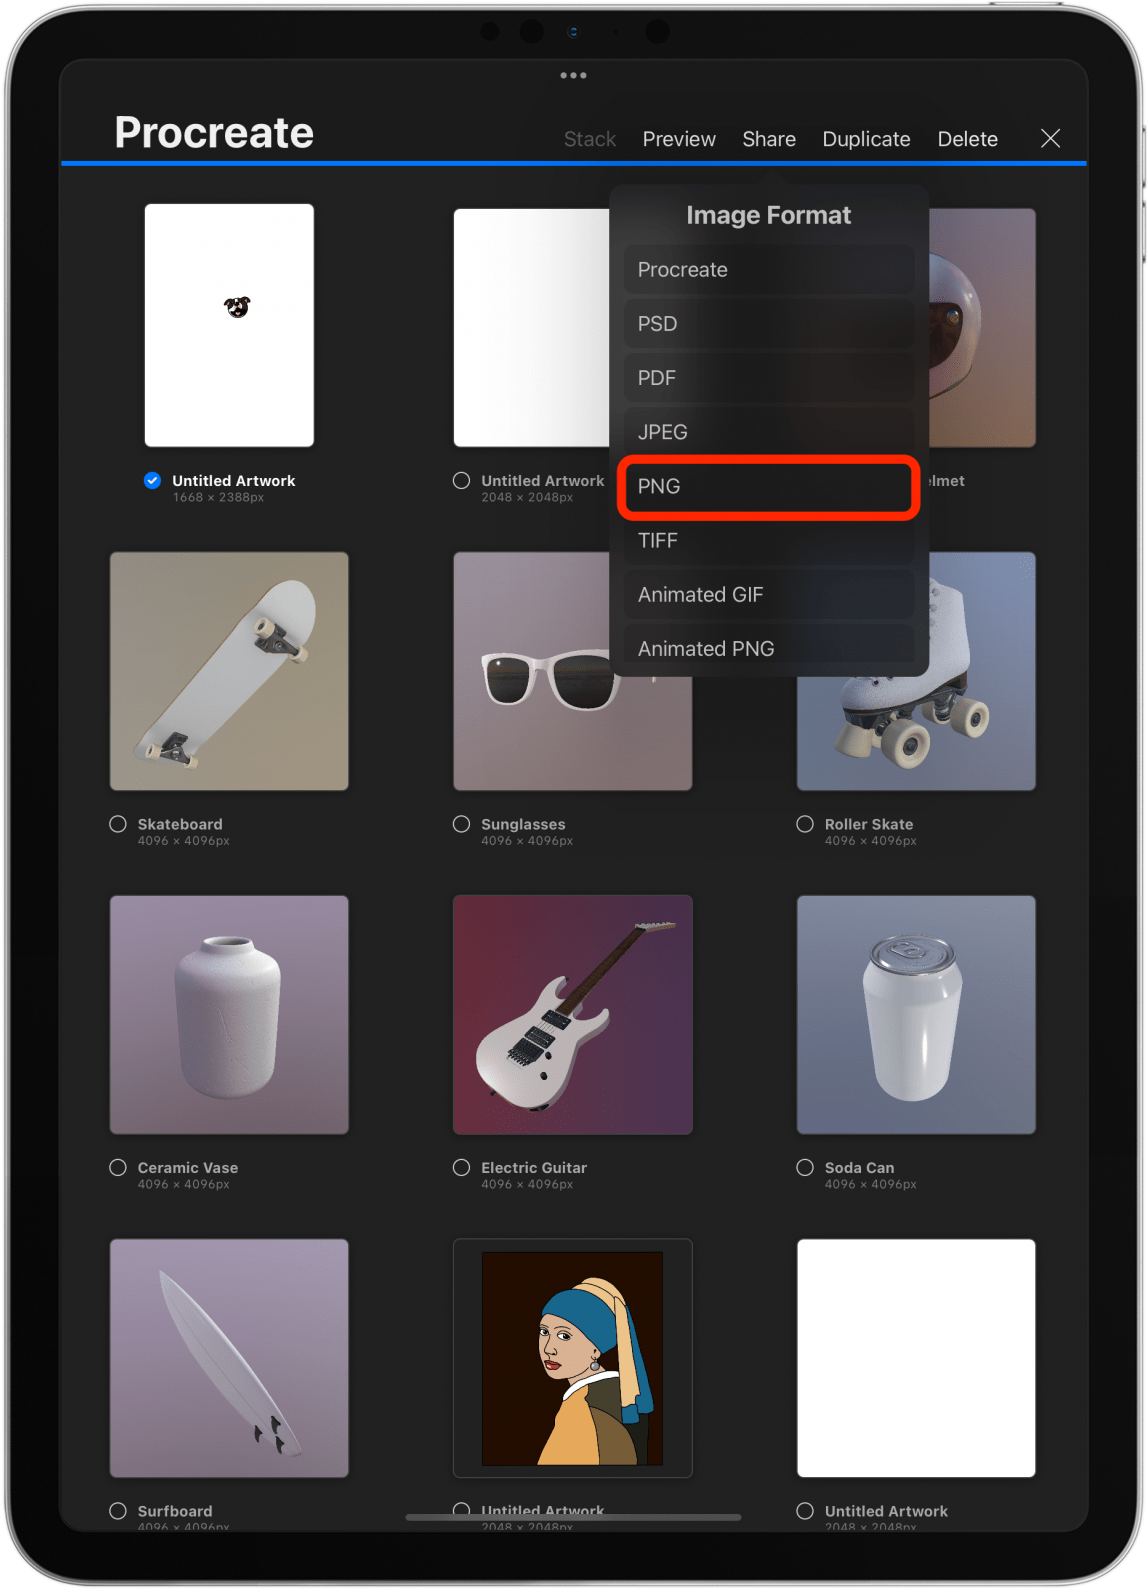
- Select an image format; JPEG and PNG are the most common.
- To save to your Photos app, tap Save Image.
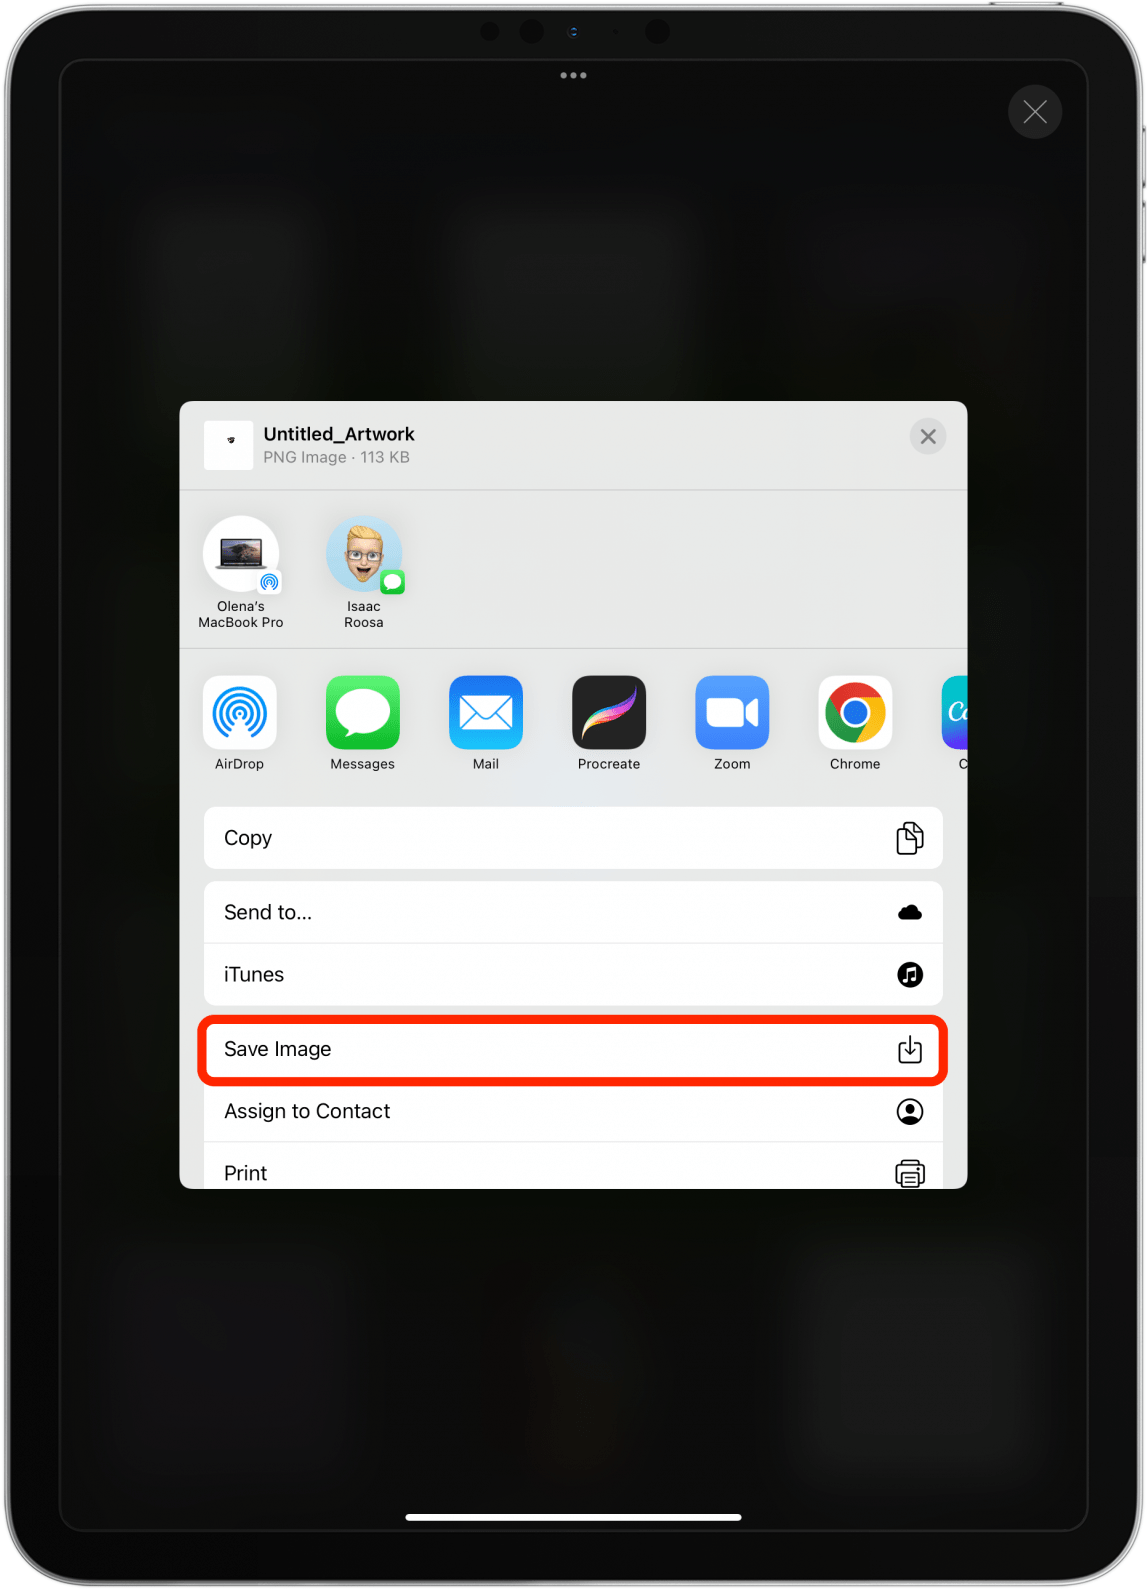
- Or you can share it by selecting an app, a contact, or AirDrop.
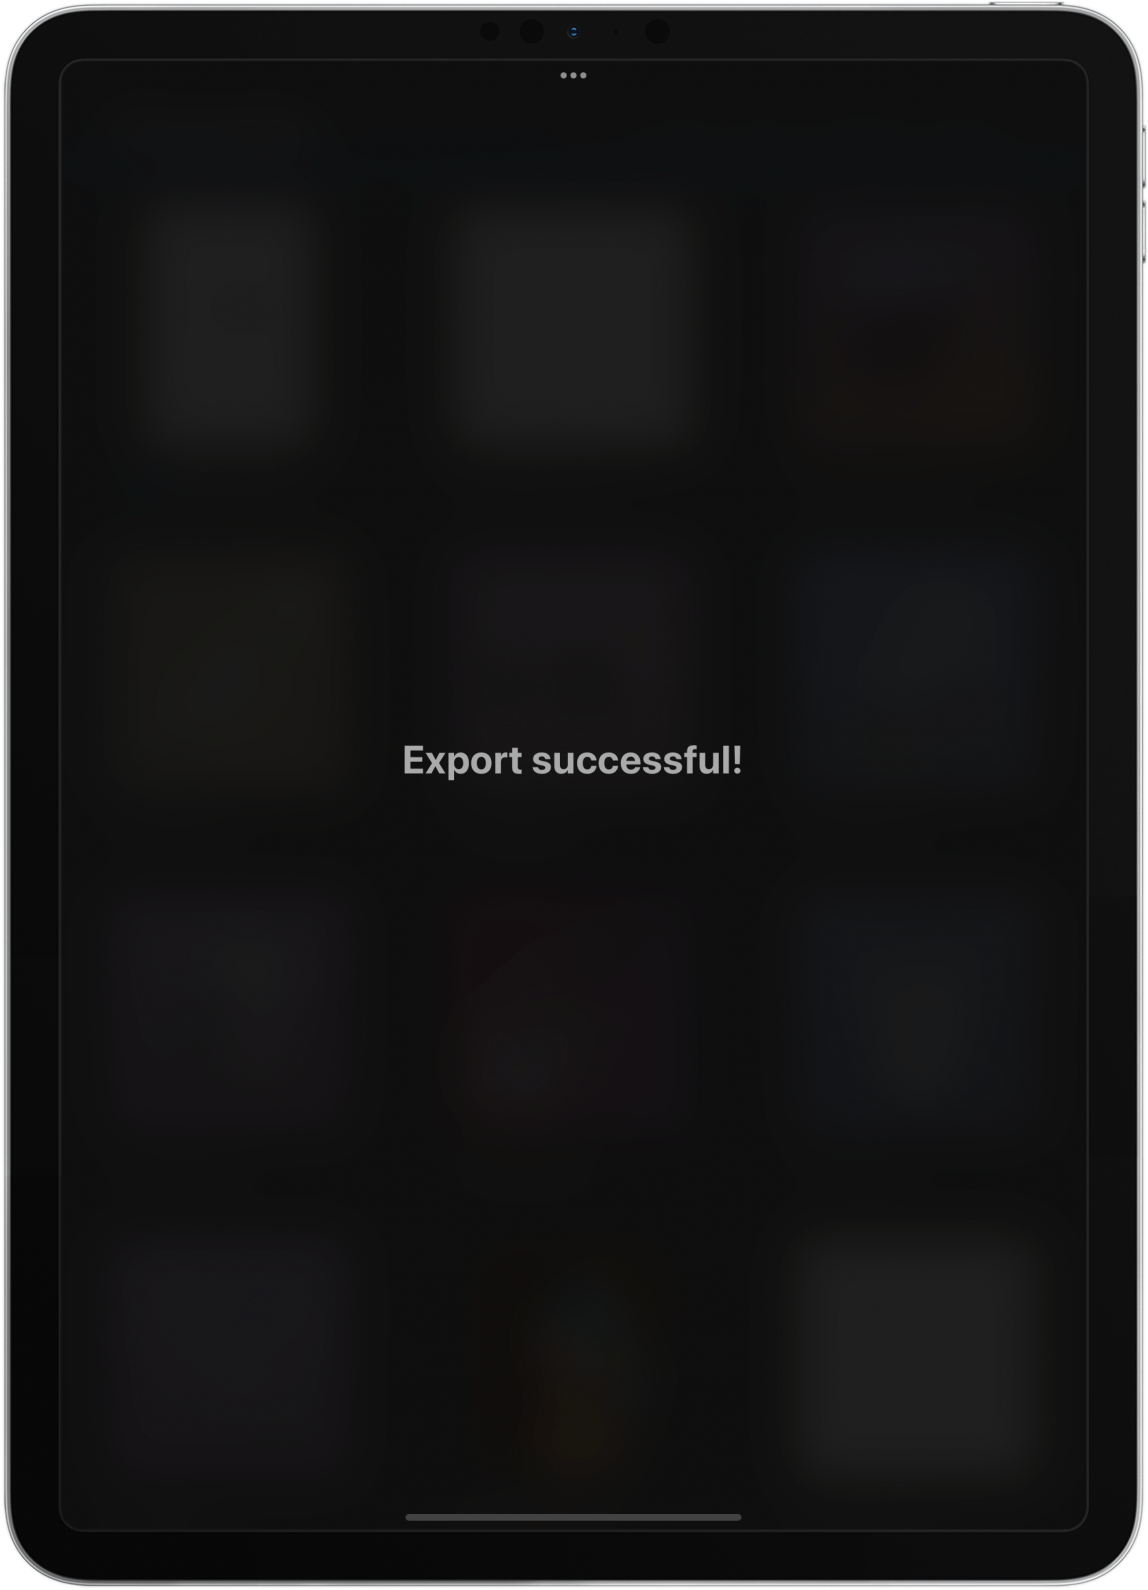
- Voila, you’ve created your very own artwork in Procreate!
For more tips on using Procreate to draw and improve your skills, make sure to read How to Use Procreate on iPad: 25 Procreate Tips 2022 next. Here I describe how to use all the features and teach you more advanced Procreate tips and tricks! Did you know that some people use Procreate to create NFT crypto artworks?
Best iPad for Procreate & App Compatibility
According to Procreate’s website, the models of iPad listed below are compatible with the current version of Procreate. The best one depends on your needs and preference. I use the 2nd generation 11-inch iPad Pro and find it to be the perfect size and weight for me. Some may prefer a larger, smaller, or newer iPad model.
- 12.9-inch iPad Pro (1st, 2nd, 3rd, 4th, and 5th generation)
- 11-inch iPad Pro (1st, 2nd, and 3rd generation)
- 10.5-inch iPad Pro
- 9.7-inch iPad Pro
- iPad (9th generation)
- iPad (8th generation)
- iPad (7th generation)
- iPad (6th generation)
- iPad (5th generation)
- iPad mini (6th generation)
- iPad mini (5th generation)
- iPad mini 4
- iPad Air (5th generation)
- iPad Air (4th generation)
- iPad Air (3rd generation)
- iPad Air 2
You can use any Apple Pencil compatible with your iPad to draw in Procreate. You can also draw with your finger, but most artists prefer using a stylus. An iPhone version of Procreate exists called Procreate Pocket ($4.99 one-time fee). It is great for quick sketches and optimized for iPhone users but with fewer features.
People often ask, "Is Procreate free?" No, it isn't, and even if you've already paid for Procreate, you'll still have to pay to download and use Procreate Pocket. However, the fees are one-time only, and they include any updates to the app! Next, learn how to replace your Apple Pencil tip for best drawing results!

Olena Kagui
Olena Kagui is a Feature Writer at iPhone Life. In the last 10 years, she has been published in dozens of publications internationally and won an excellence award. Since joining iPhone Life in 2020, she has written how-to articles as well as complex guides about Apple products, software, and apps. Olena grew up using Macs and exploring all the latest tech. Her Maui home is the epitome of an Apple ecosystem, full of compatible smart gear to boot. Olena’s favorite device is the Apple Watch Ultra because it can survive all her adventures and travels, and even her furbabies.

 Leanne Hays
 Rachel Needell
 Rhett Intriago

 Susan Misuraca
 Amy Spitzfaden Both
 Olena Kagui