How to Use Procreate on iPad: 10 Procreate Tips
Take your Procreate drawings to the next level by learning about Procreate palettes, adding text, customizing brushes, tailoring settings, and more.

In the last 10 years, Olena has been published in dozens of publications internationally and written hundreds of how-to articles and complex guides about Apple products, software, and apps.
Learn More In the last 10 years, Olena has been published in dozens of publications internationally and written hundreds of how-to articles and complex guides about Apple products, software, and apps.
Learn MoreWant to learn how to use Procreate opacity of layer features, how to curve text in Procreate, and how to use the blending tool in Procreate? I'll teach you all that and more in this Procreate tutorial! With these ten tips under your belt, you'll be able to take your digital art to the next level.
10 Tips to Learn How to Draw on iPad with Apple Pencil
If you’re a complete beginner, make sure to read this article on how to use Procreate. It shows the step-by-step process of creating digital art and covers all the basics. I hope these Procreate art app tips will inspire you to draw, design, and have fun! Some of these tips may even give you ideas for new things to draw on Procreate. To learn more ways to use your iPad, sign up for our free Tip of the Day newsletter.
1. How to Resize the Canvas in Procreate
The first thing you do when you start a new project is select your canvas size. While it is best to pick the right settings from the start, it is possible to change them later on. To change your canvas size:
- Open a project in Procreate.

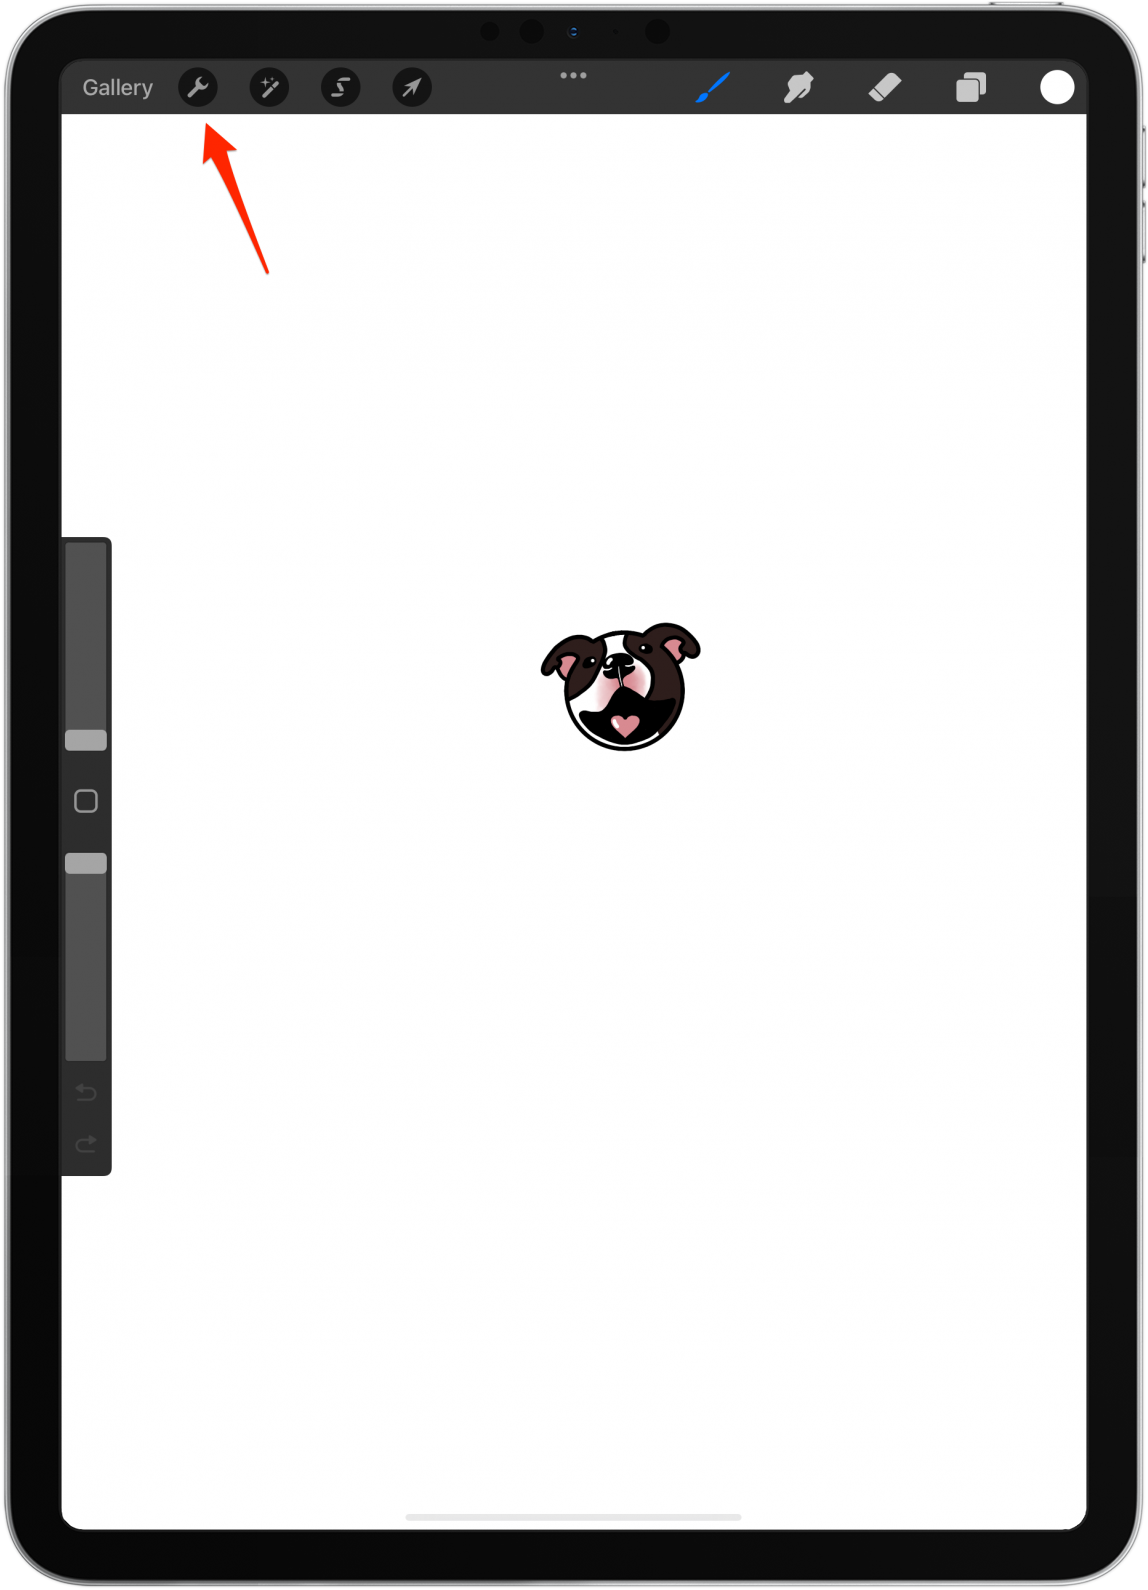
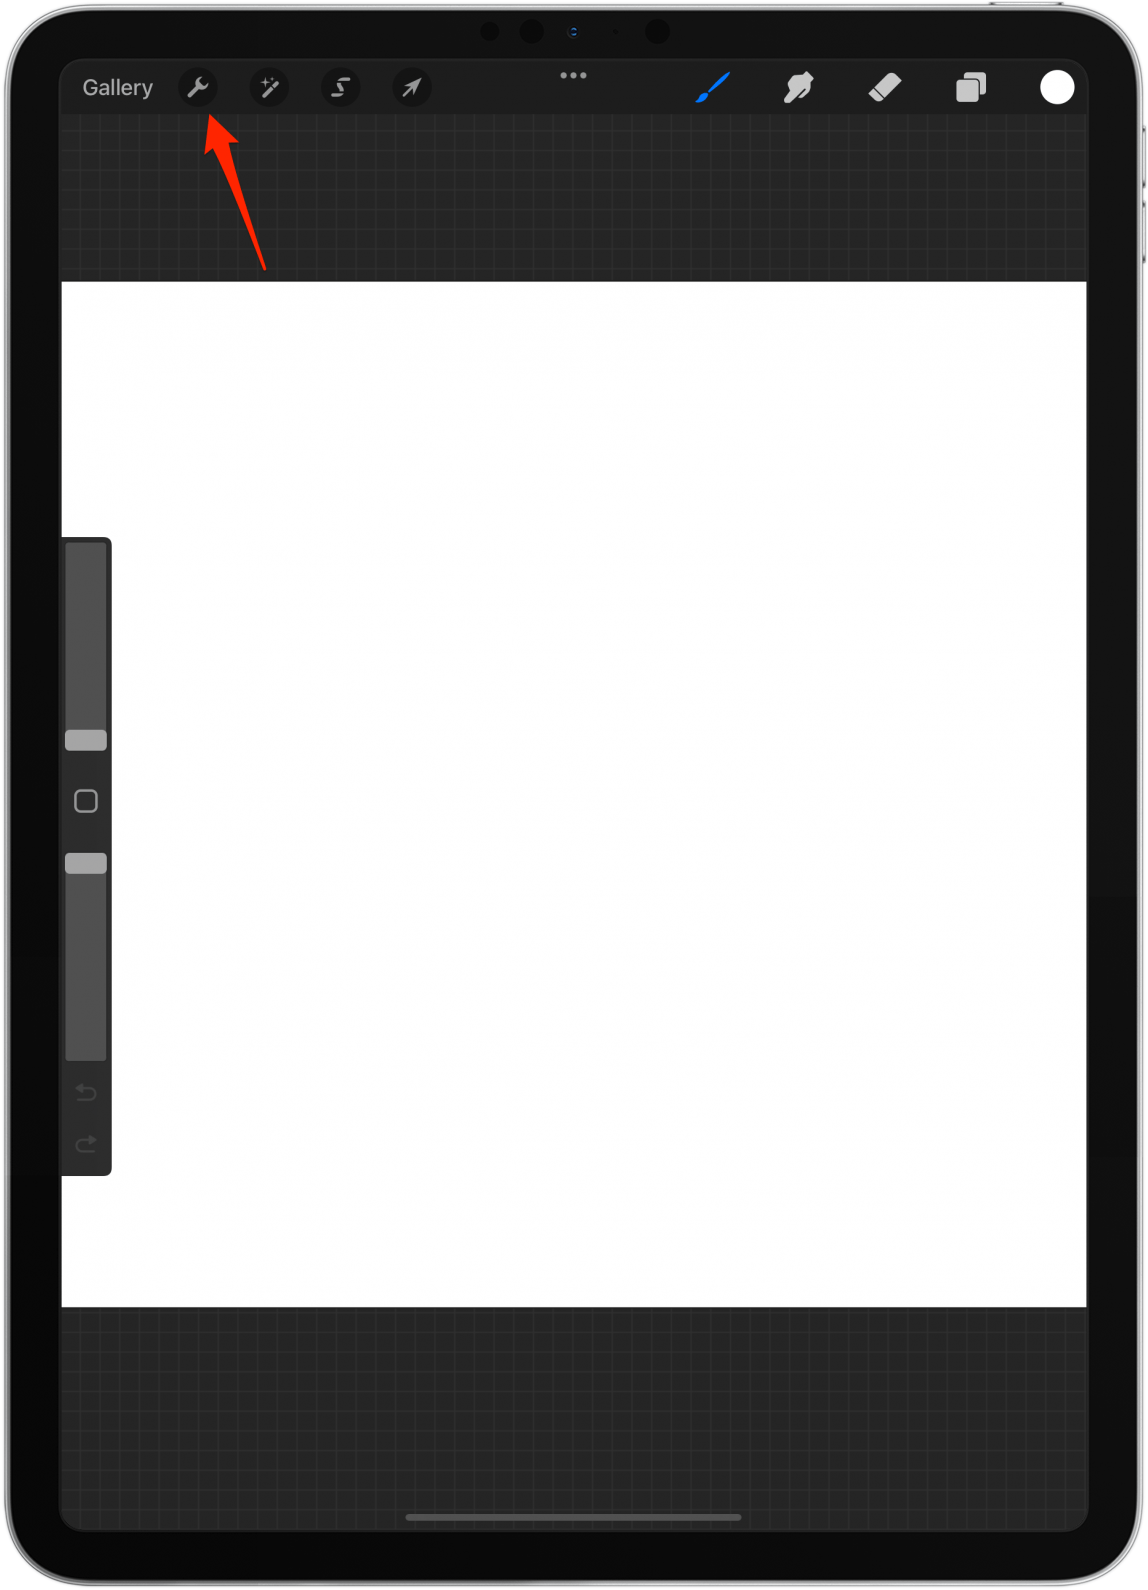
- Tap the wrench tool.
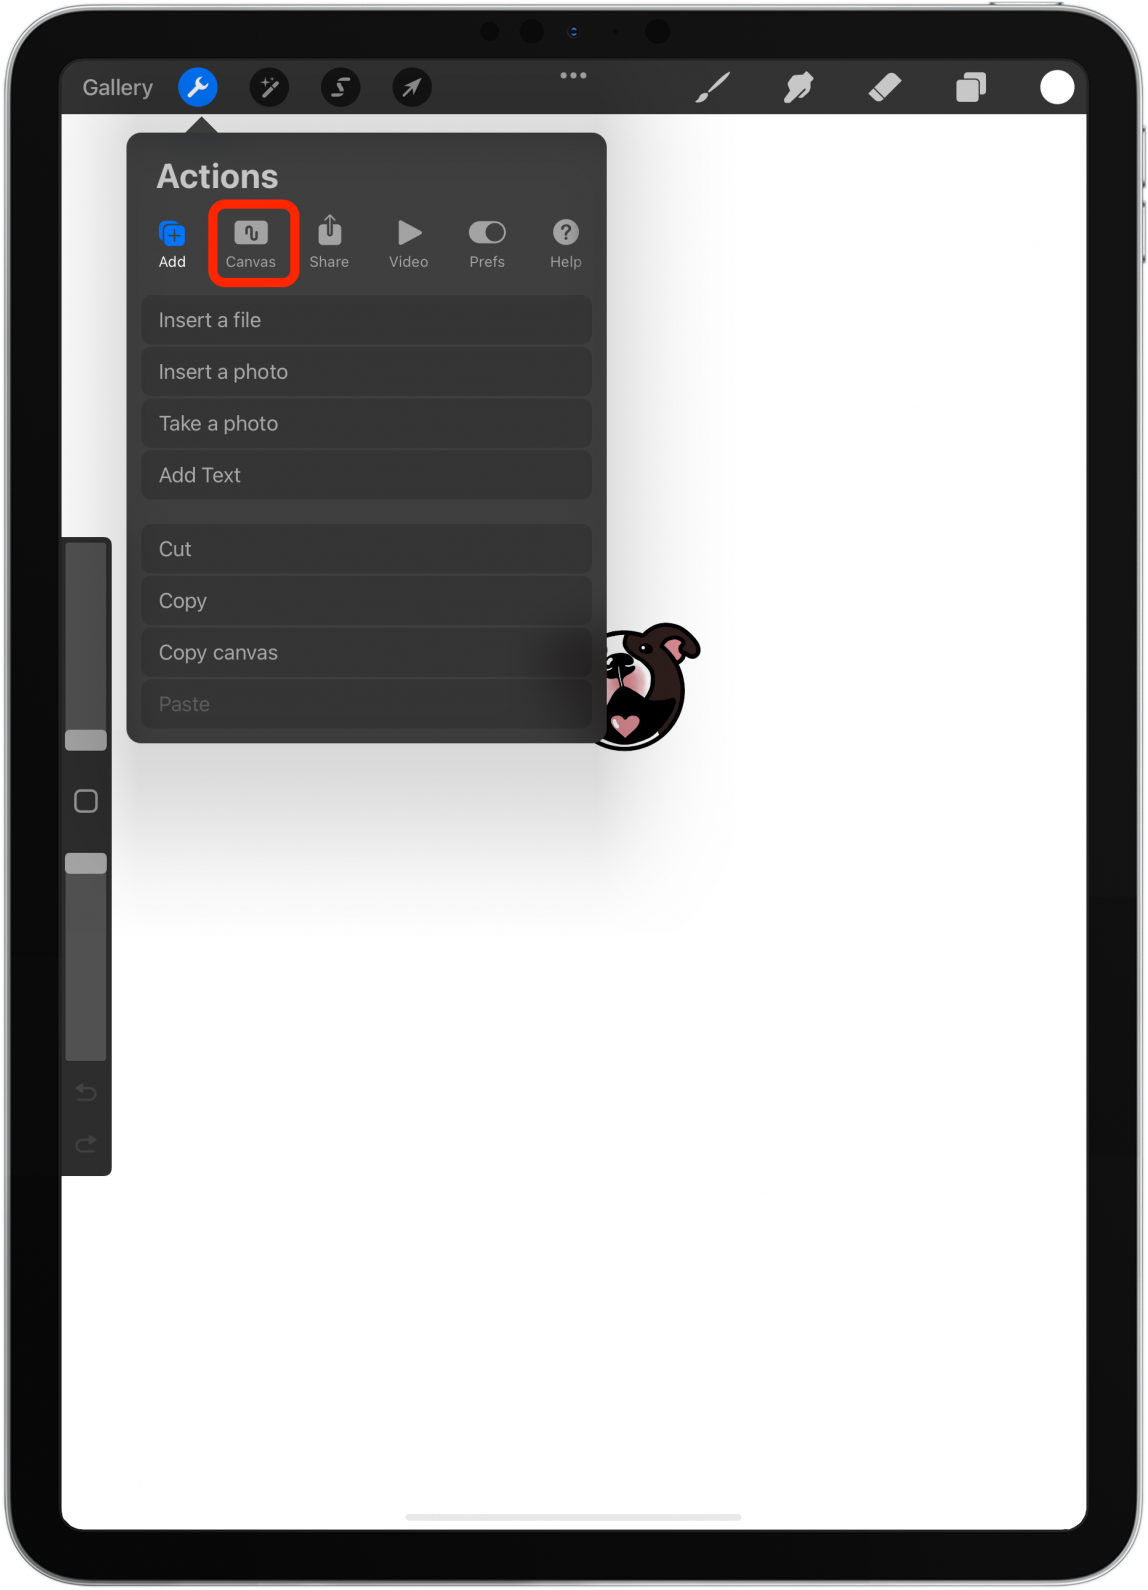
- Tap Canvas.
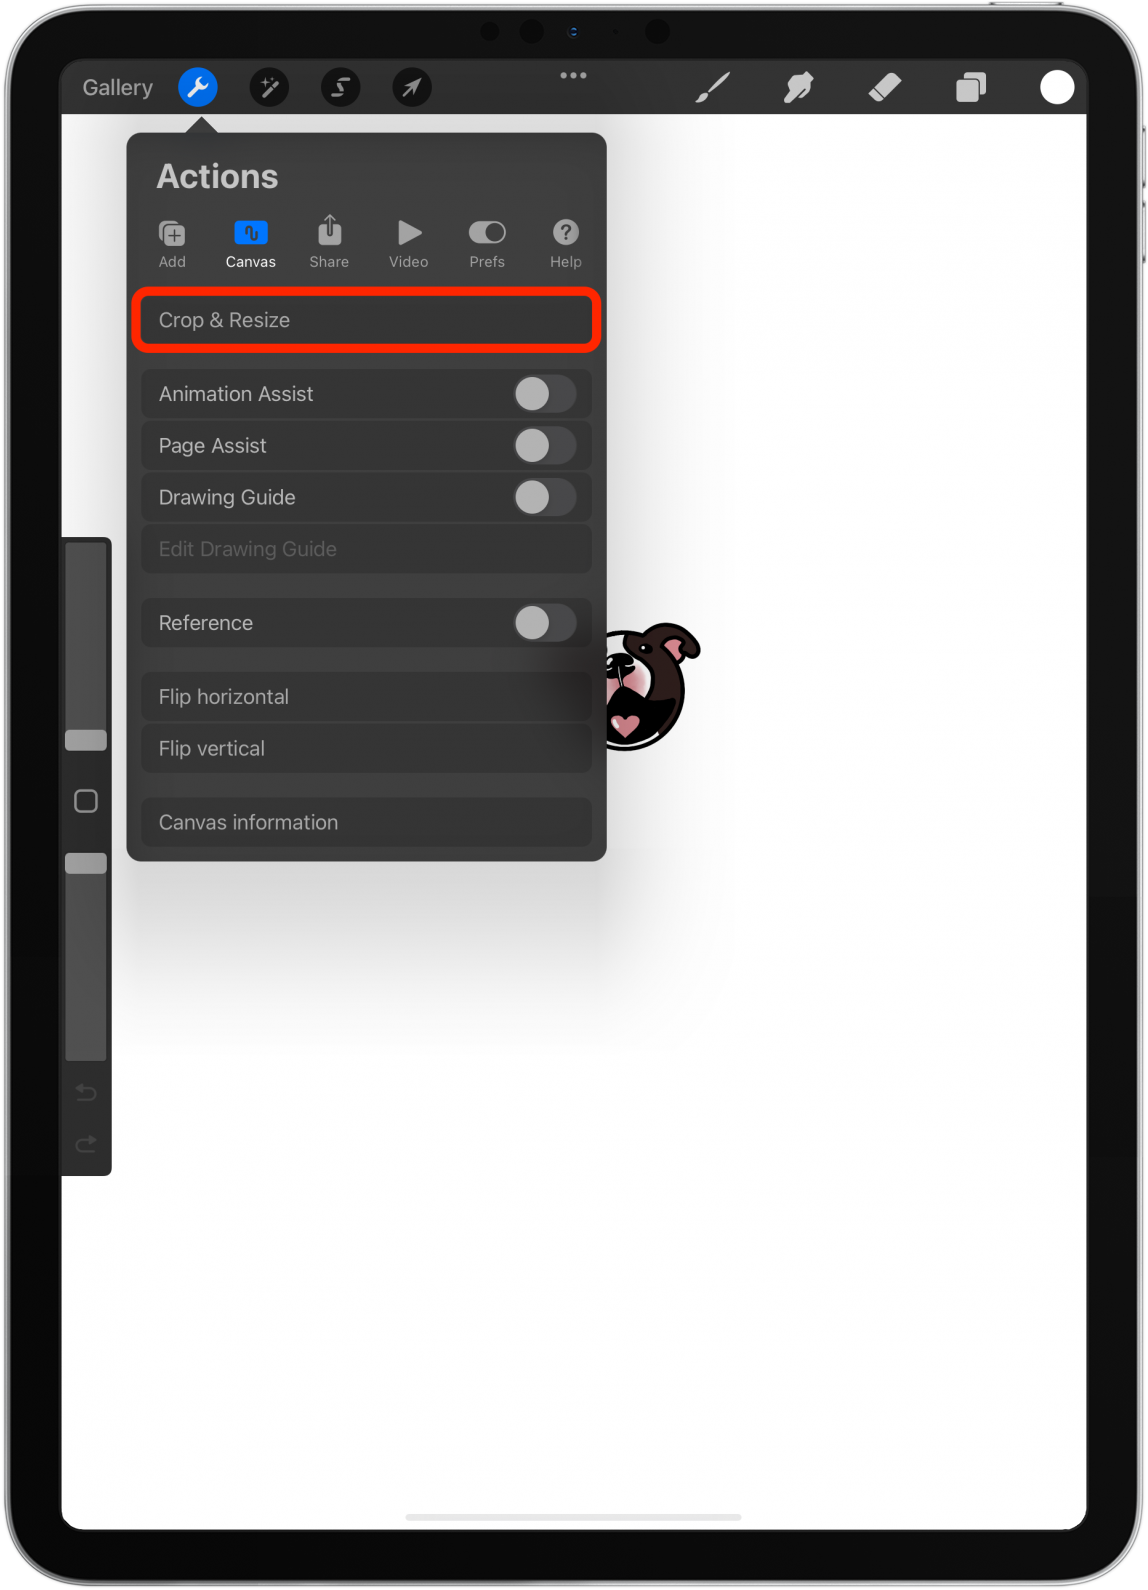
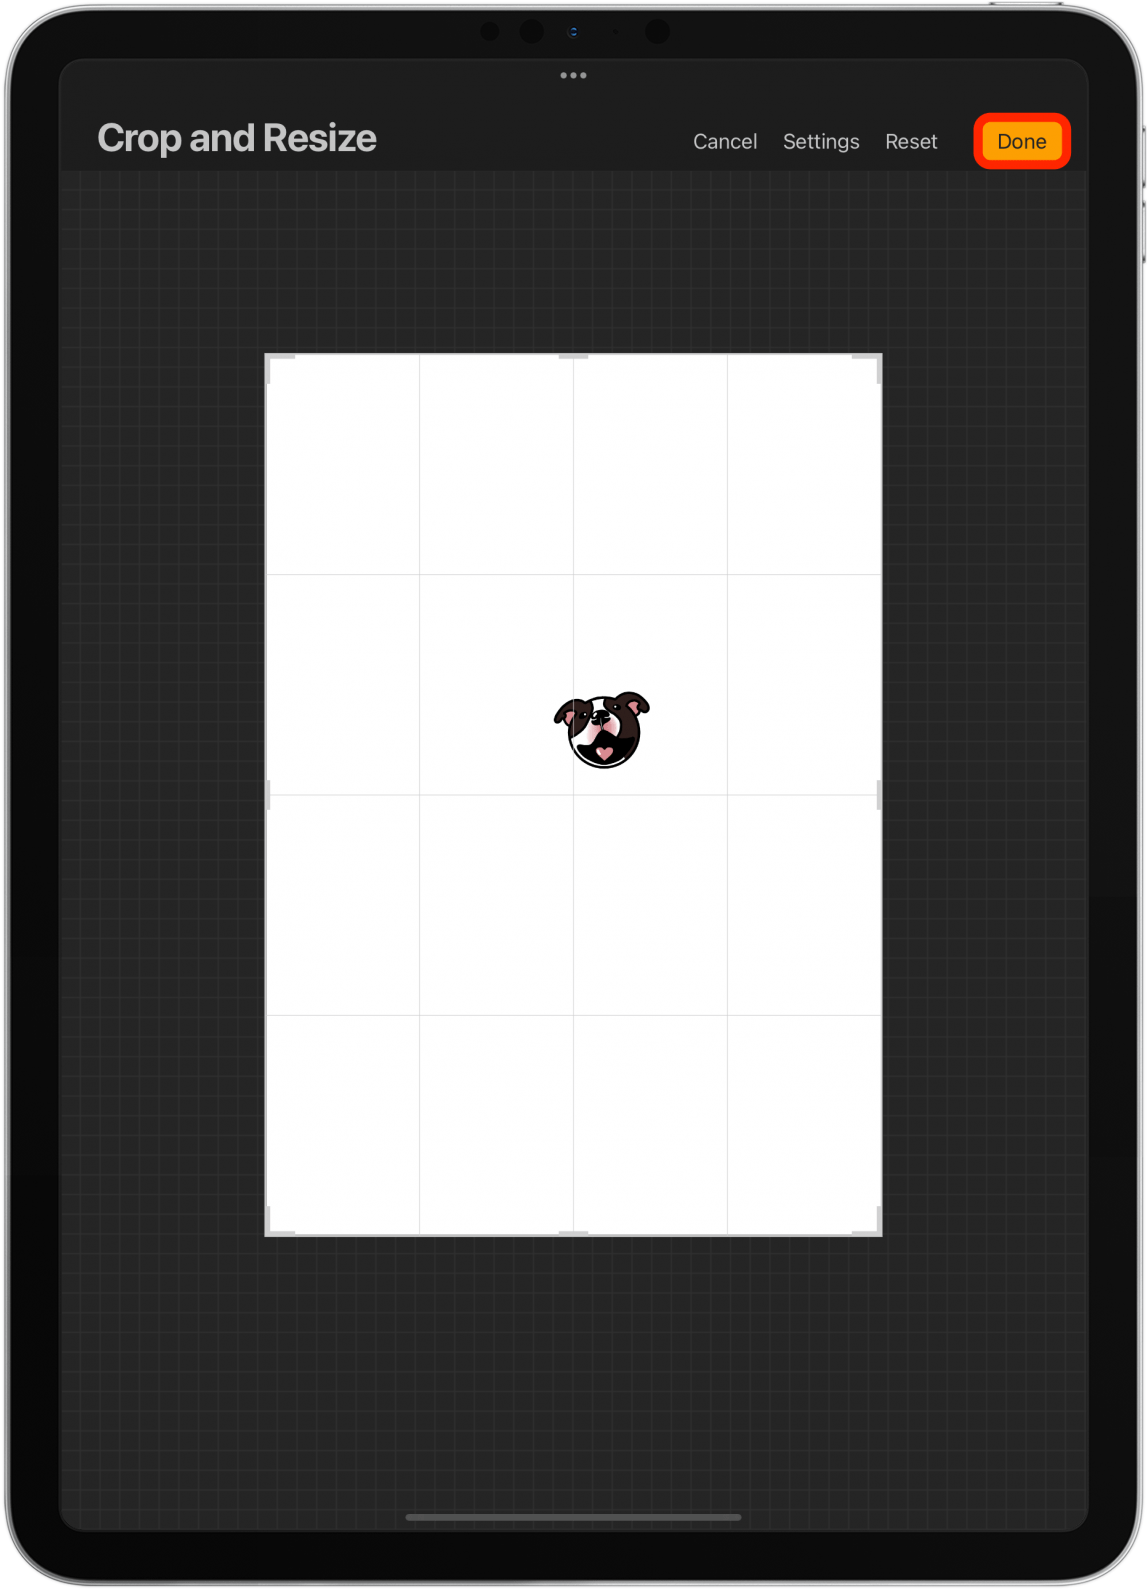
- Select Crop & Resize.
- Drag the corners and sides as necessary.

- Next, tap Settings.
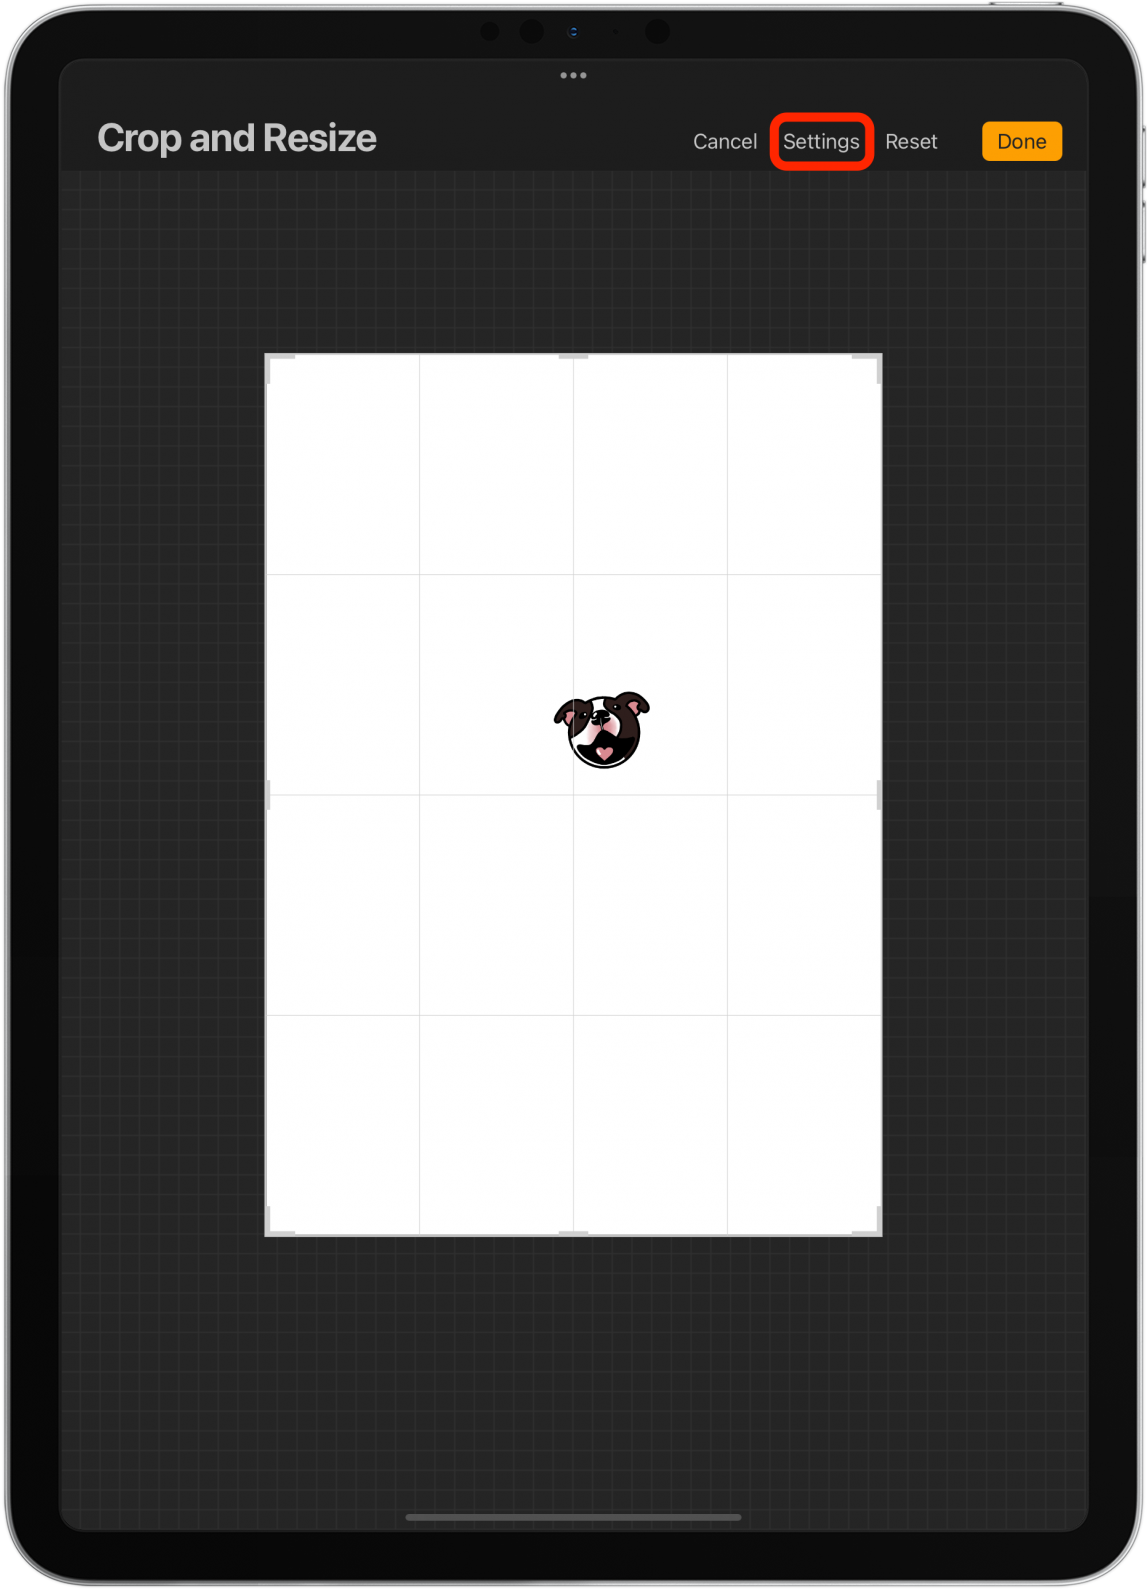
- Here you can manually enter the pixels and DPI.

- Tap Done when you are satisfied.
2. How to Create a Custom Procreate Template
Resizing the canvas after you’ve drawn something isn’t always ideal. It is best to start off with the correct canvas settings. If you don’t see an option you like from the pre-existing templates, you can create your own.
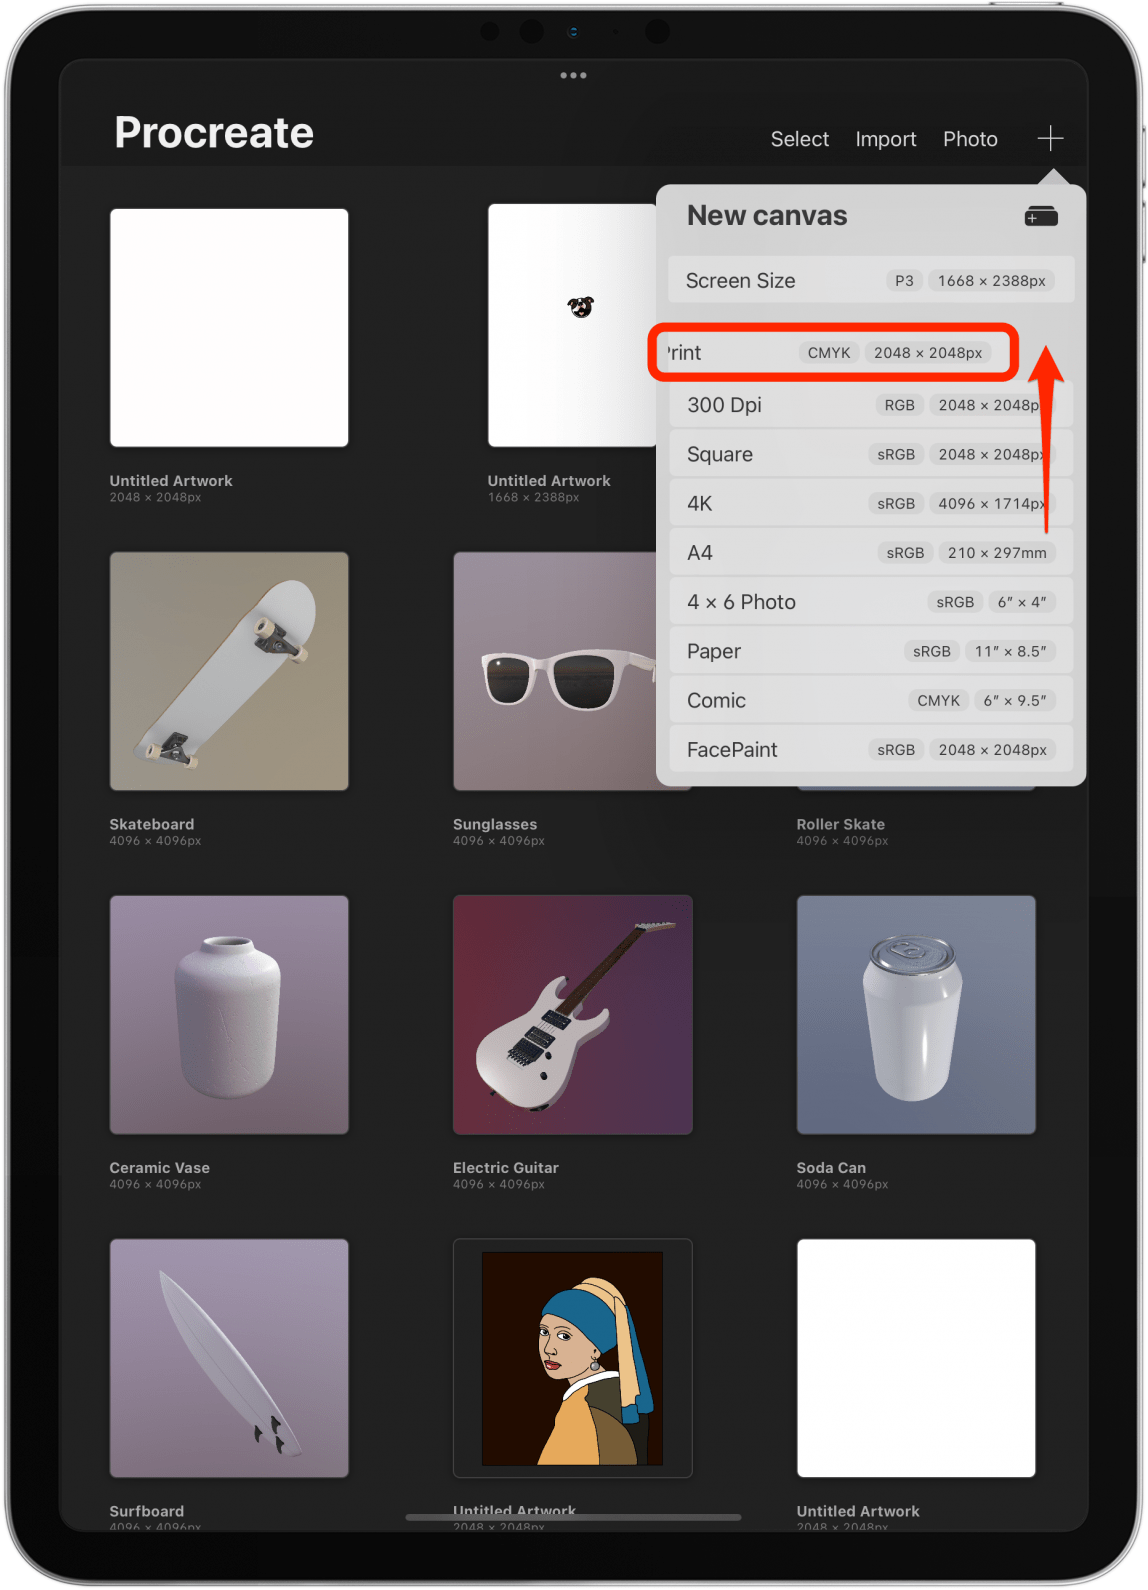
- Open Procreate and tap the + icon.
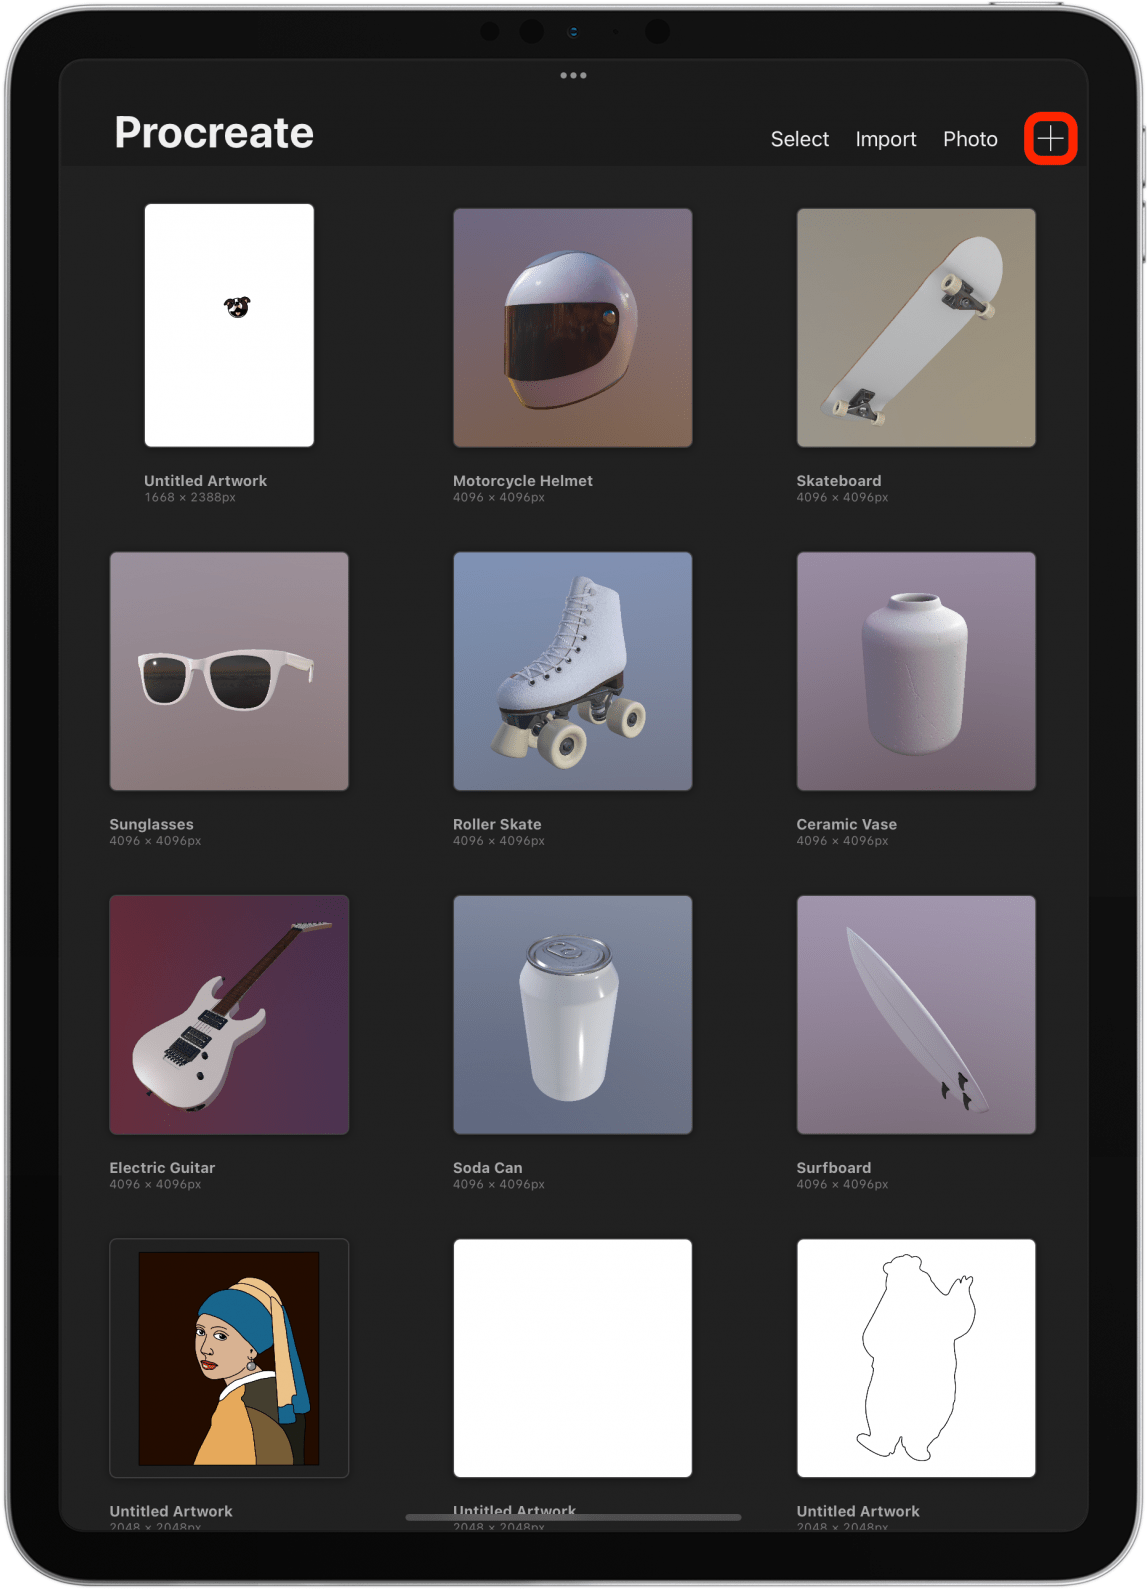
- Tap the smaller + icon.
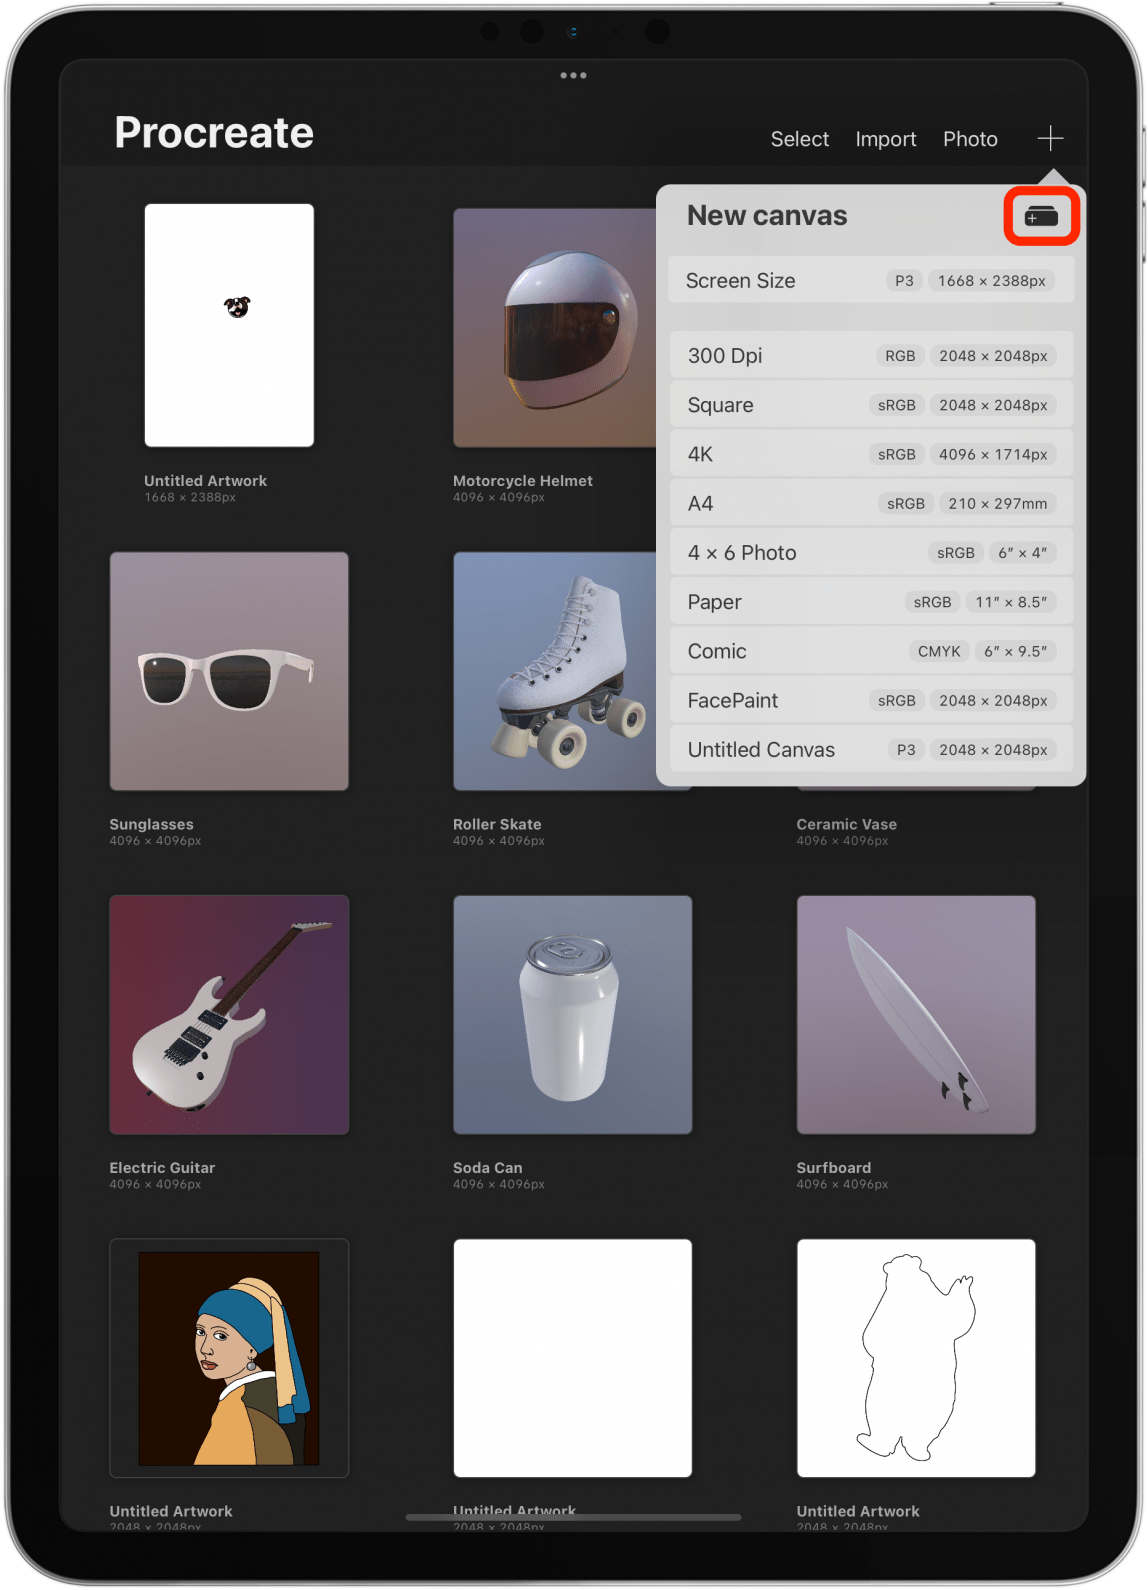
- Here you can title your canvas.
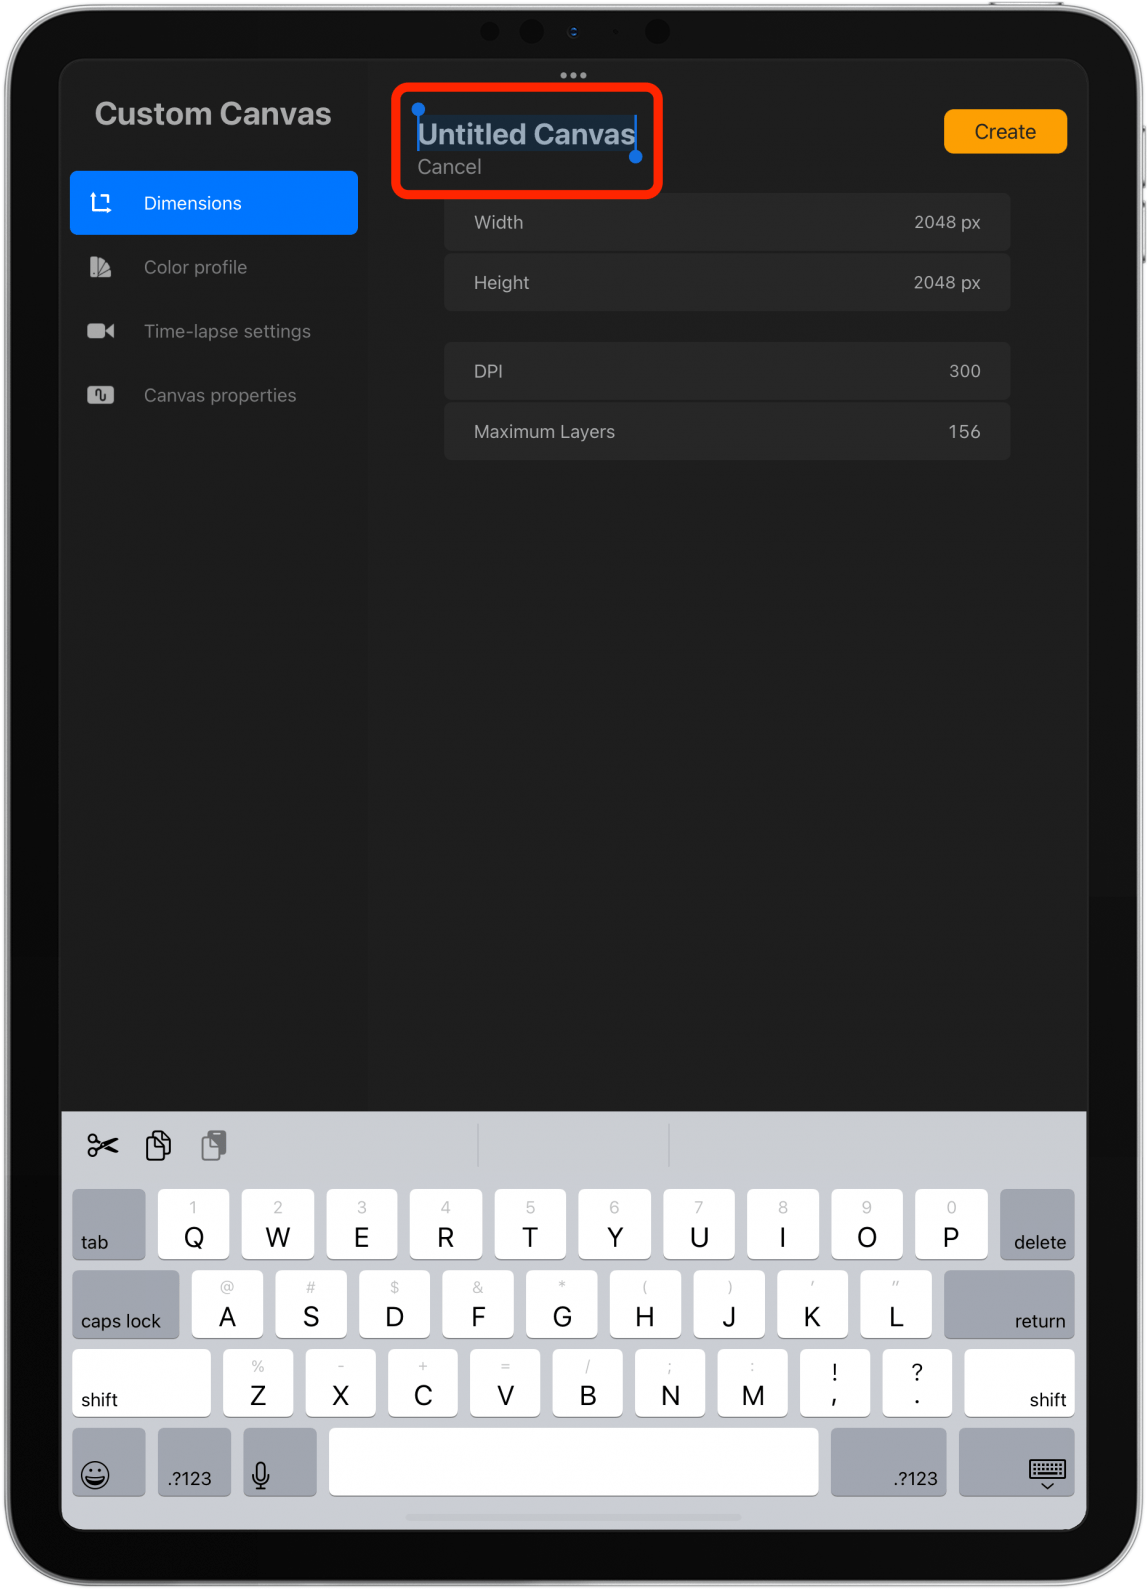
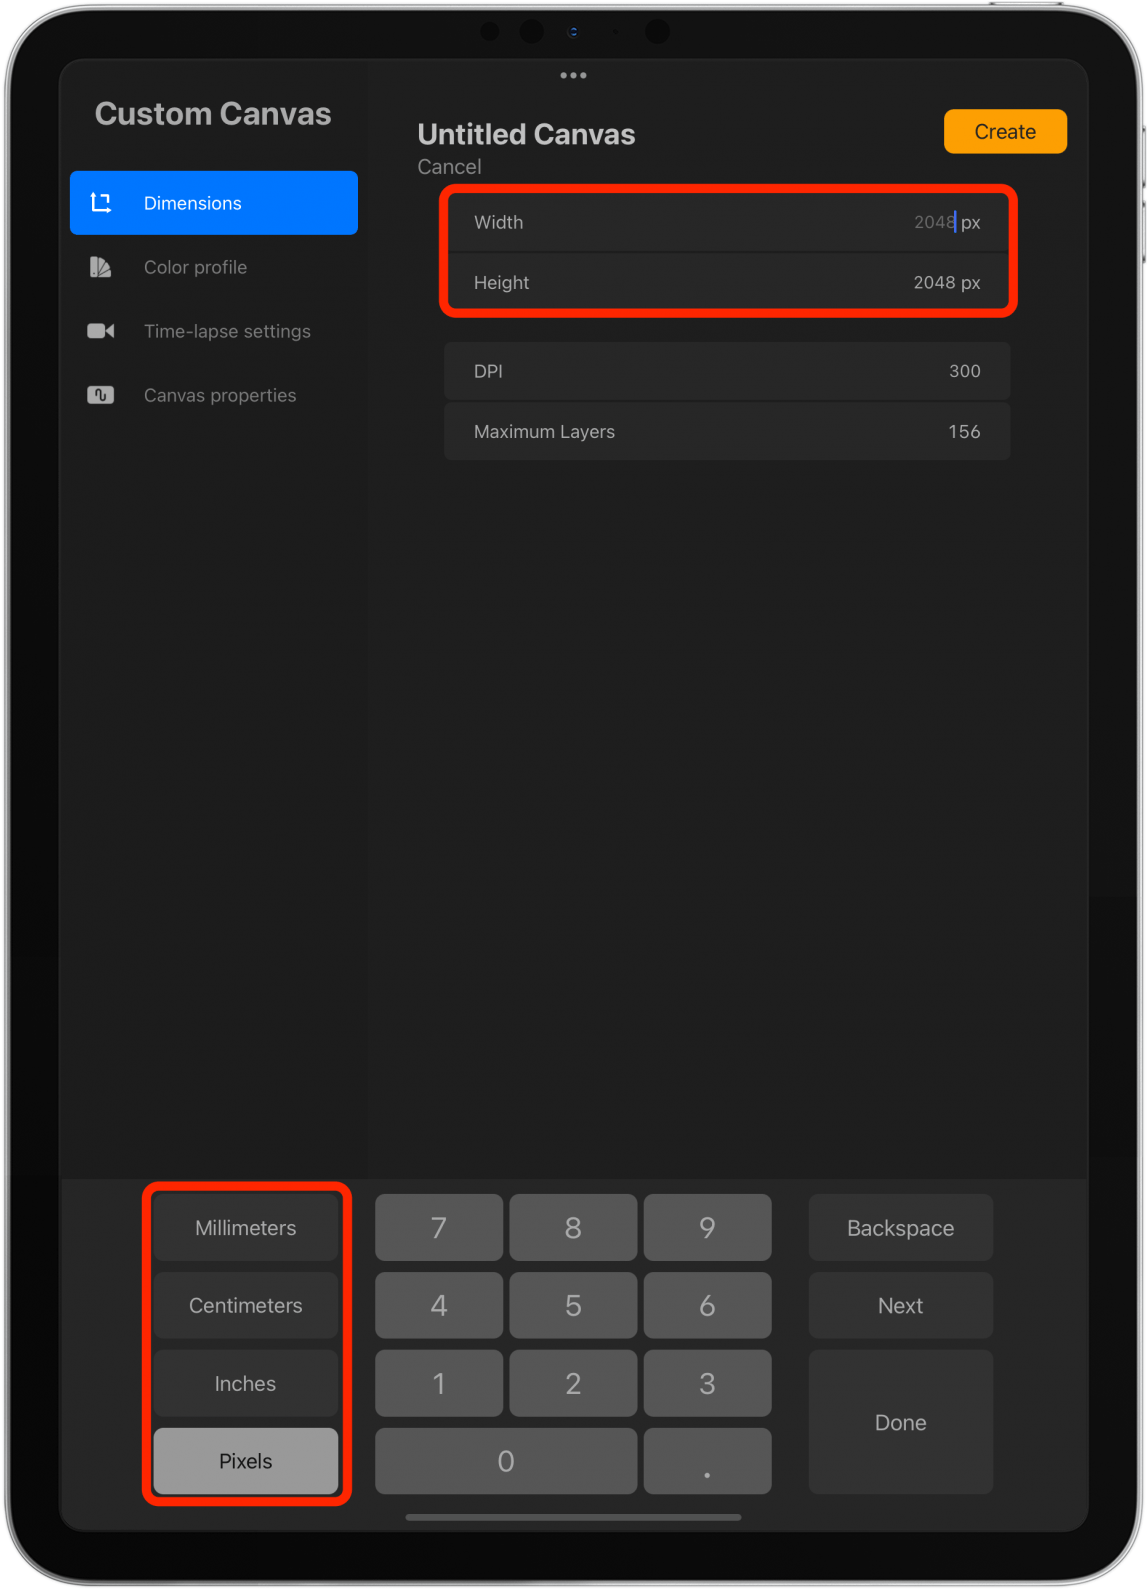
- Edit the Width and Height in pixels, inches, centimeters, or millimeters.
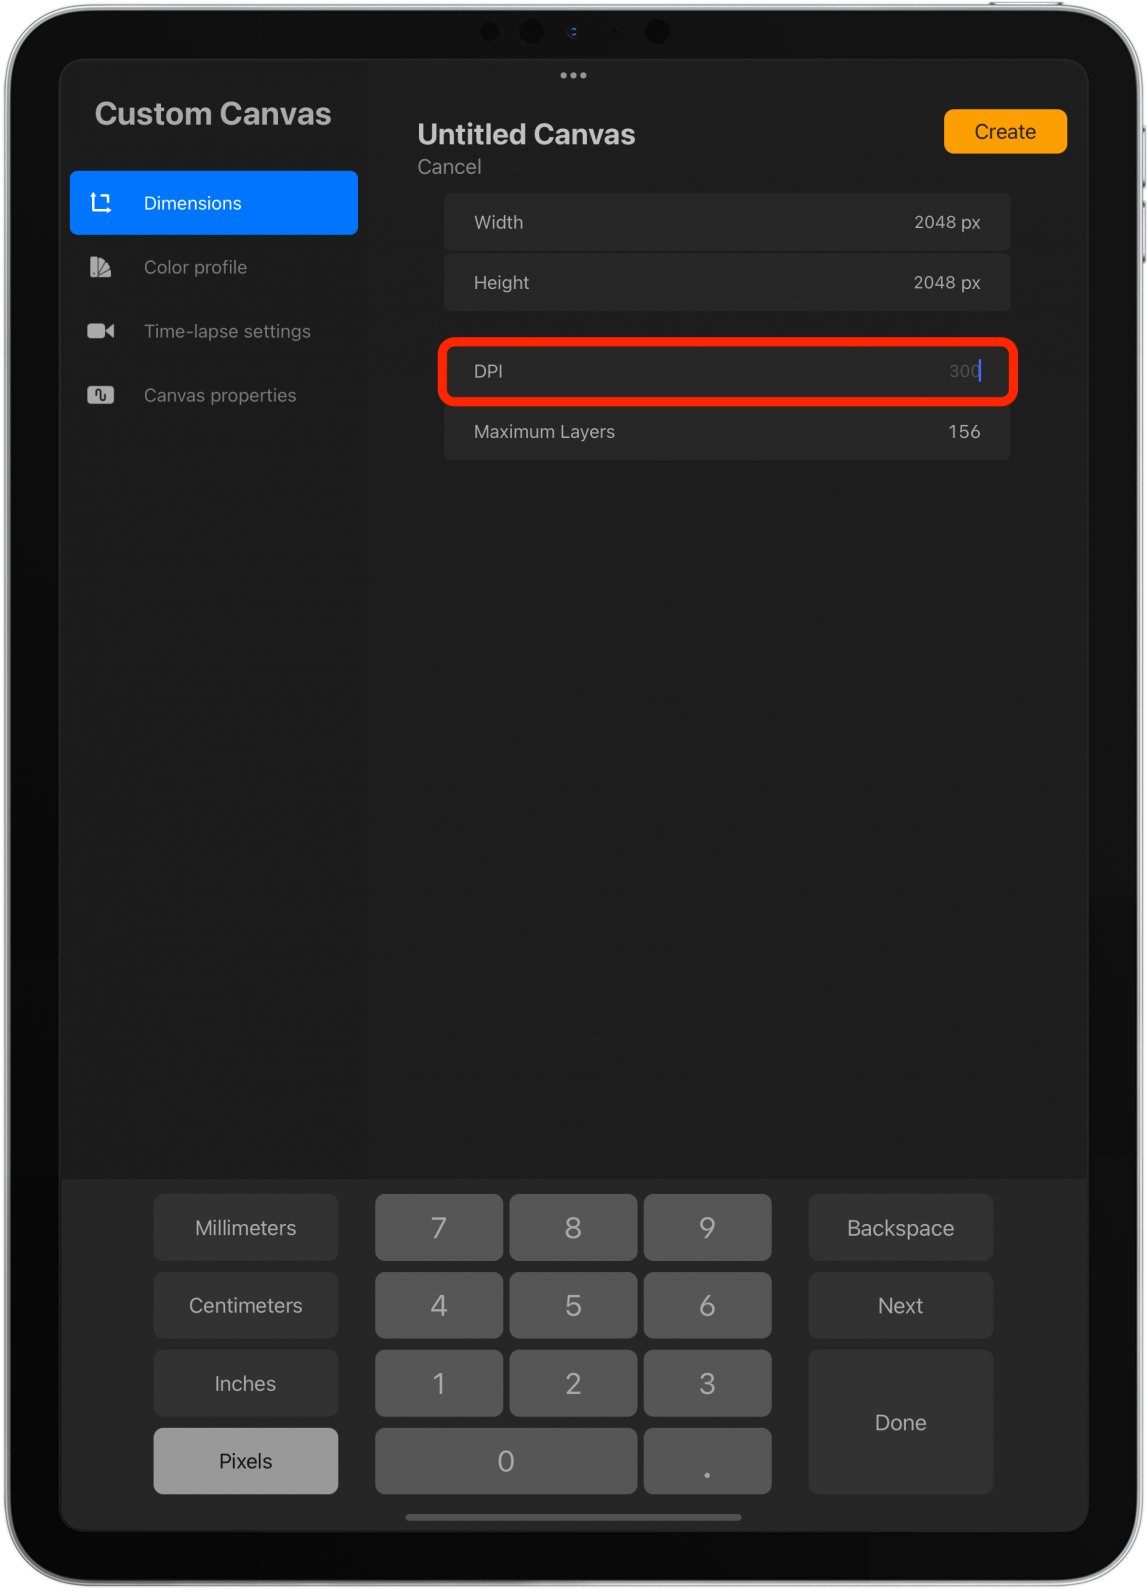
- Next, you can edit the DPI. 300 is the preferred DPI for digital art.
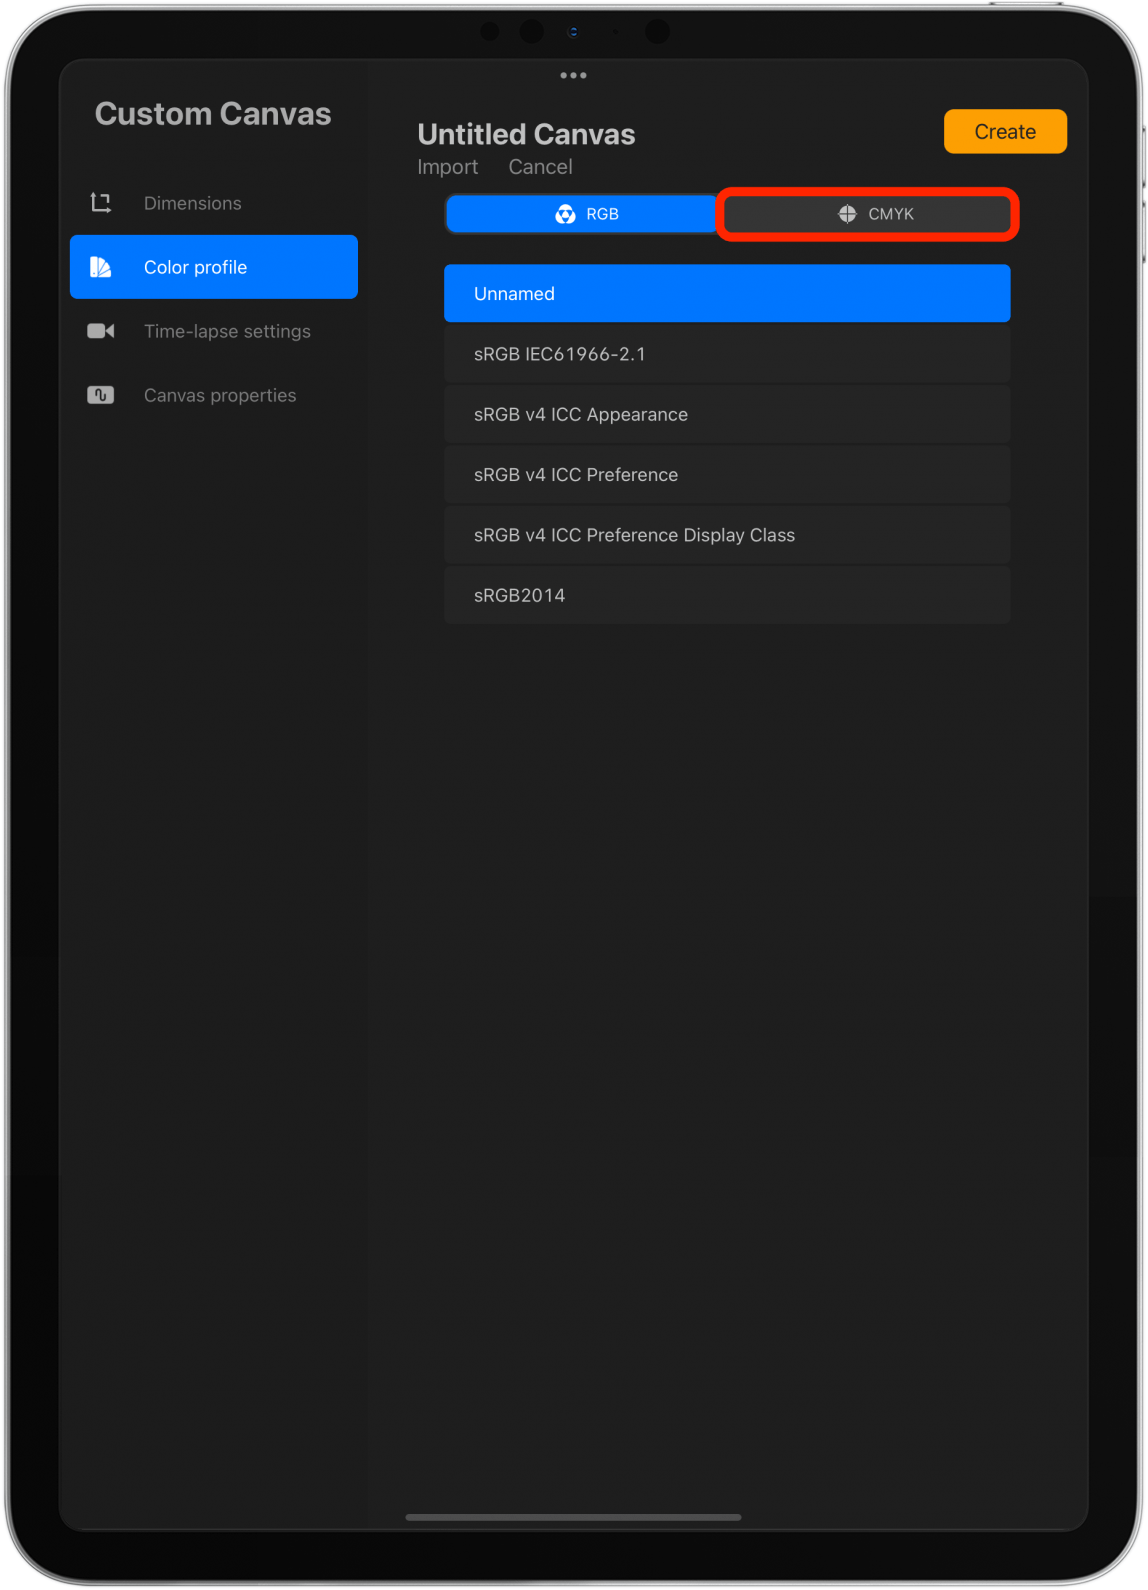
- Tap Color profile.
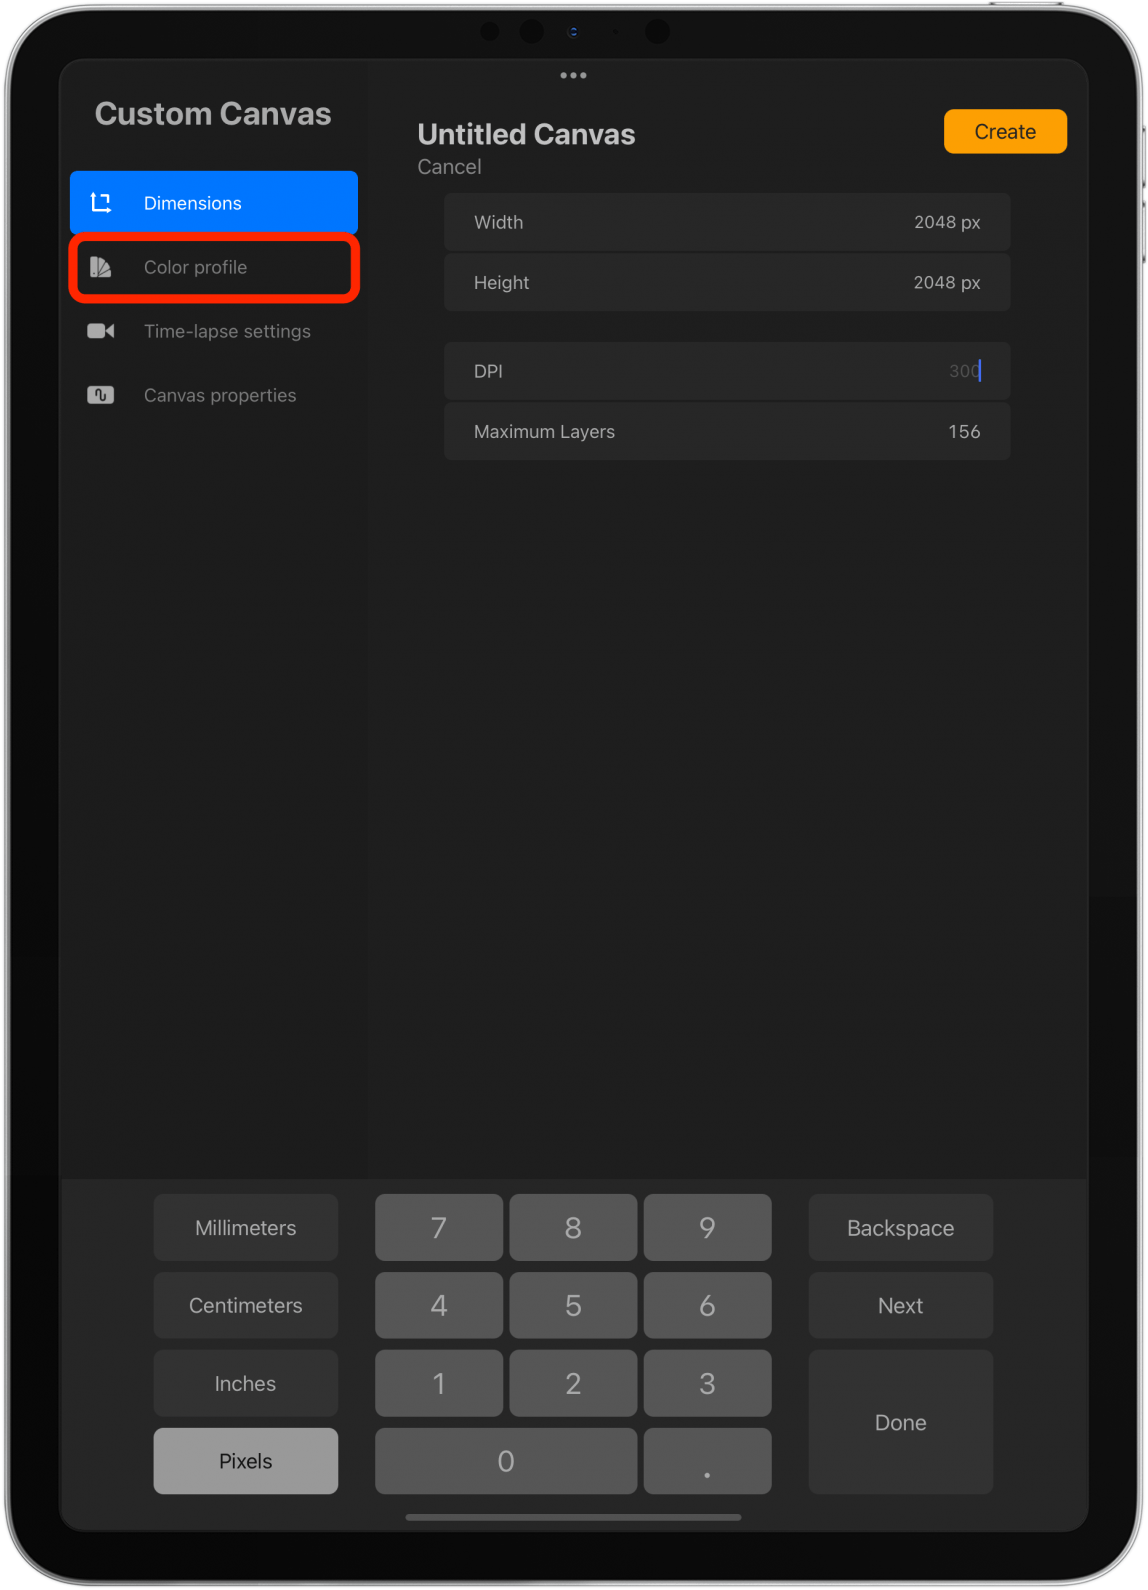
- If you plan on printing your artwork, CMYK is generally better, while RGB works better for websites and digital content.
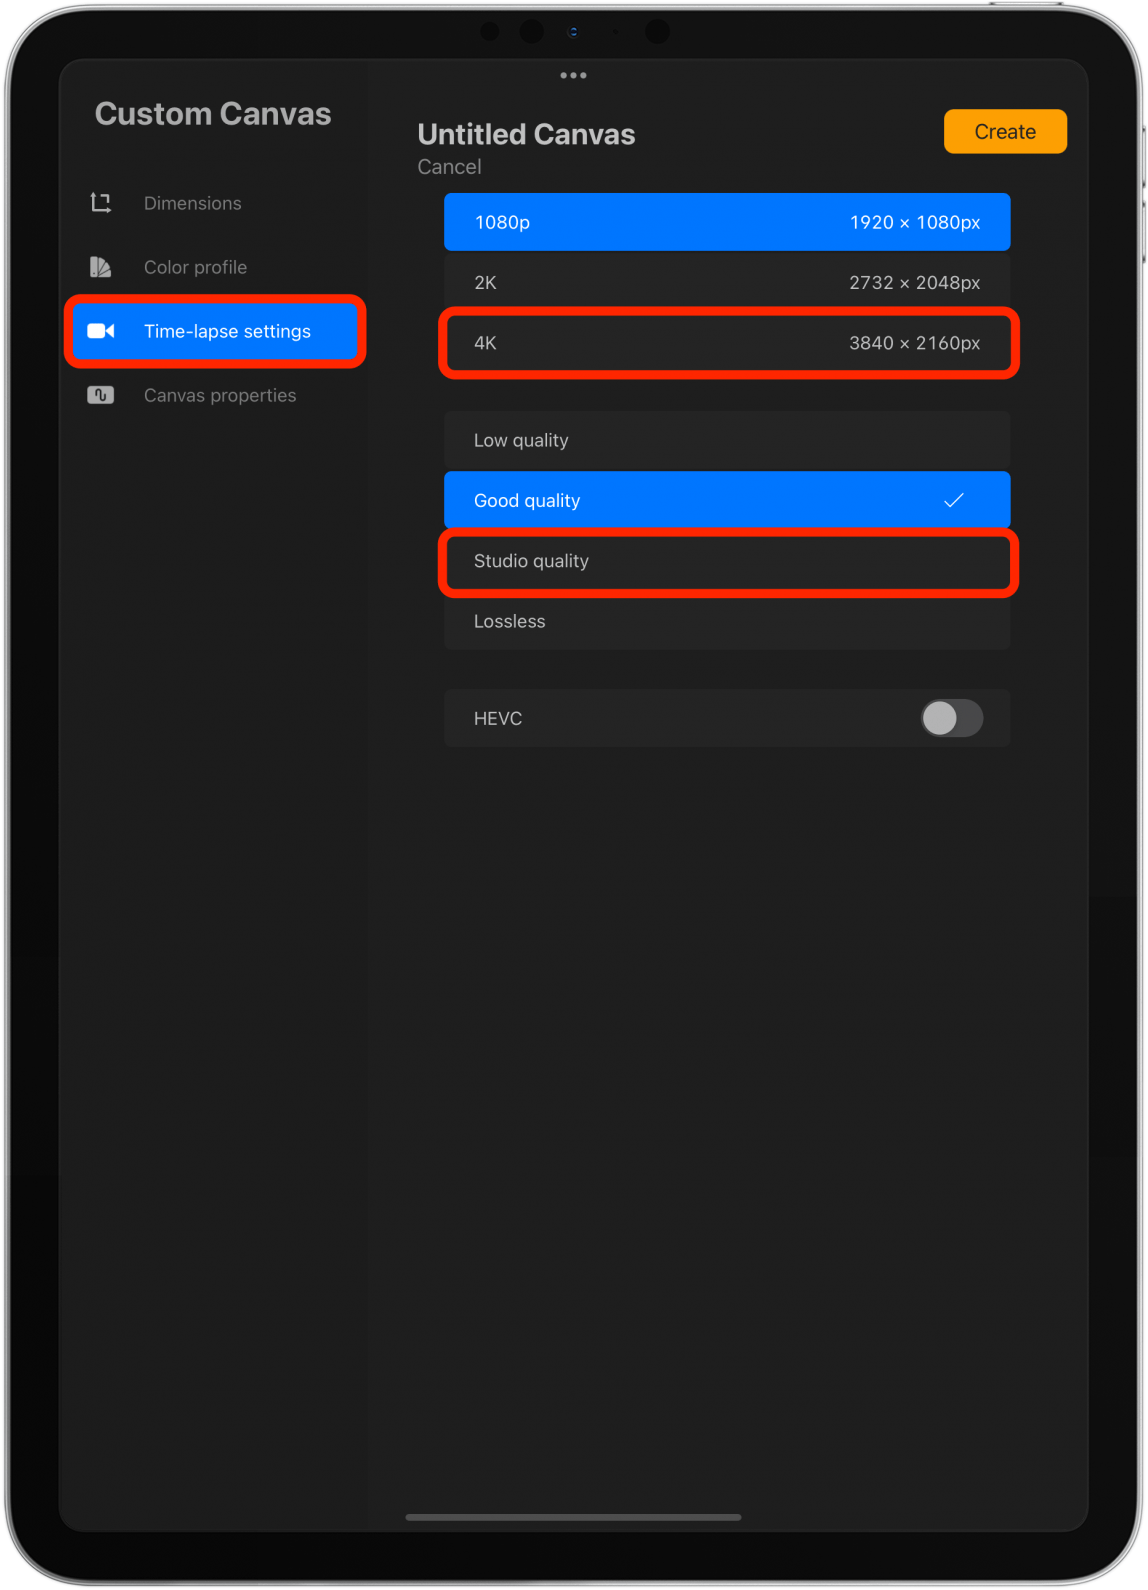
- If you tap Time-Lapse settings, you'll be able to select how you want your video playback will look. Since I may want to publish mine on social media and maybe YouTube, I'll select 4K and Studio Quality. You can always opt out of recording before you start your project to save space on your iPad.
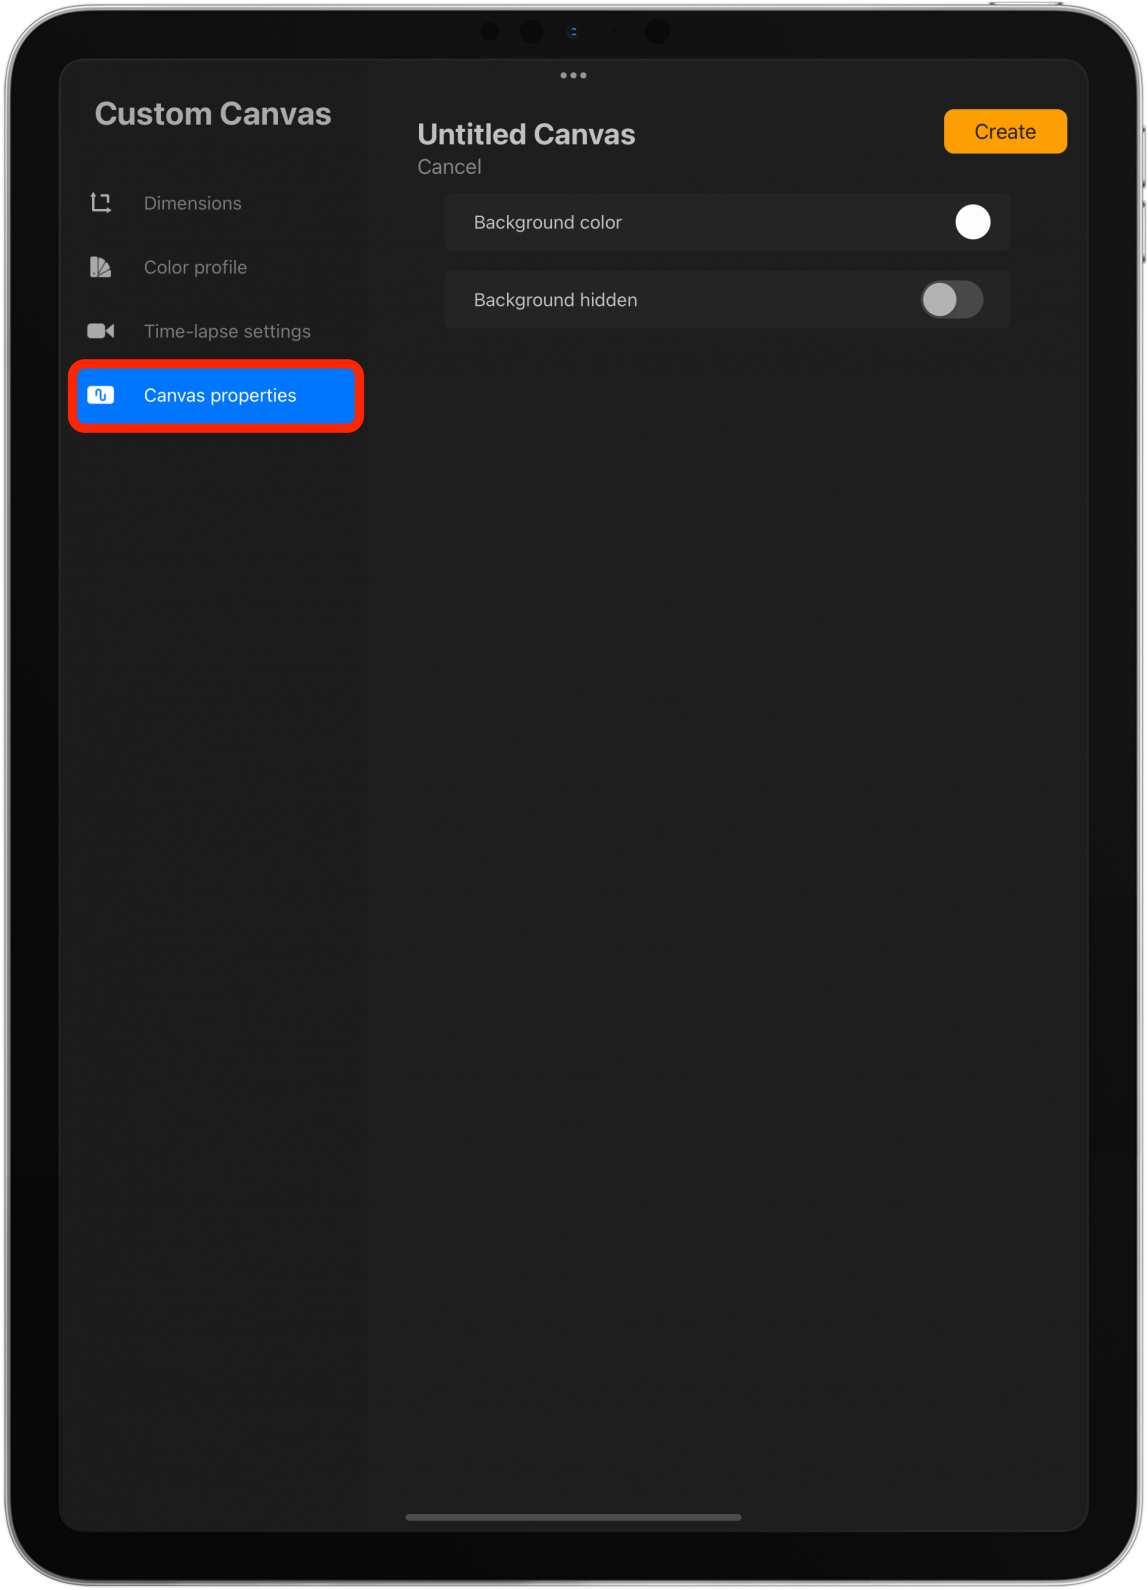
- Finally, tap Canvas properties. Here you can select the background color or hide the background. Both can be done later on, so I prefer not to change these.
- Tap Create. You'll be taken to your canvas.
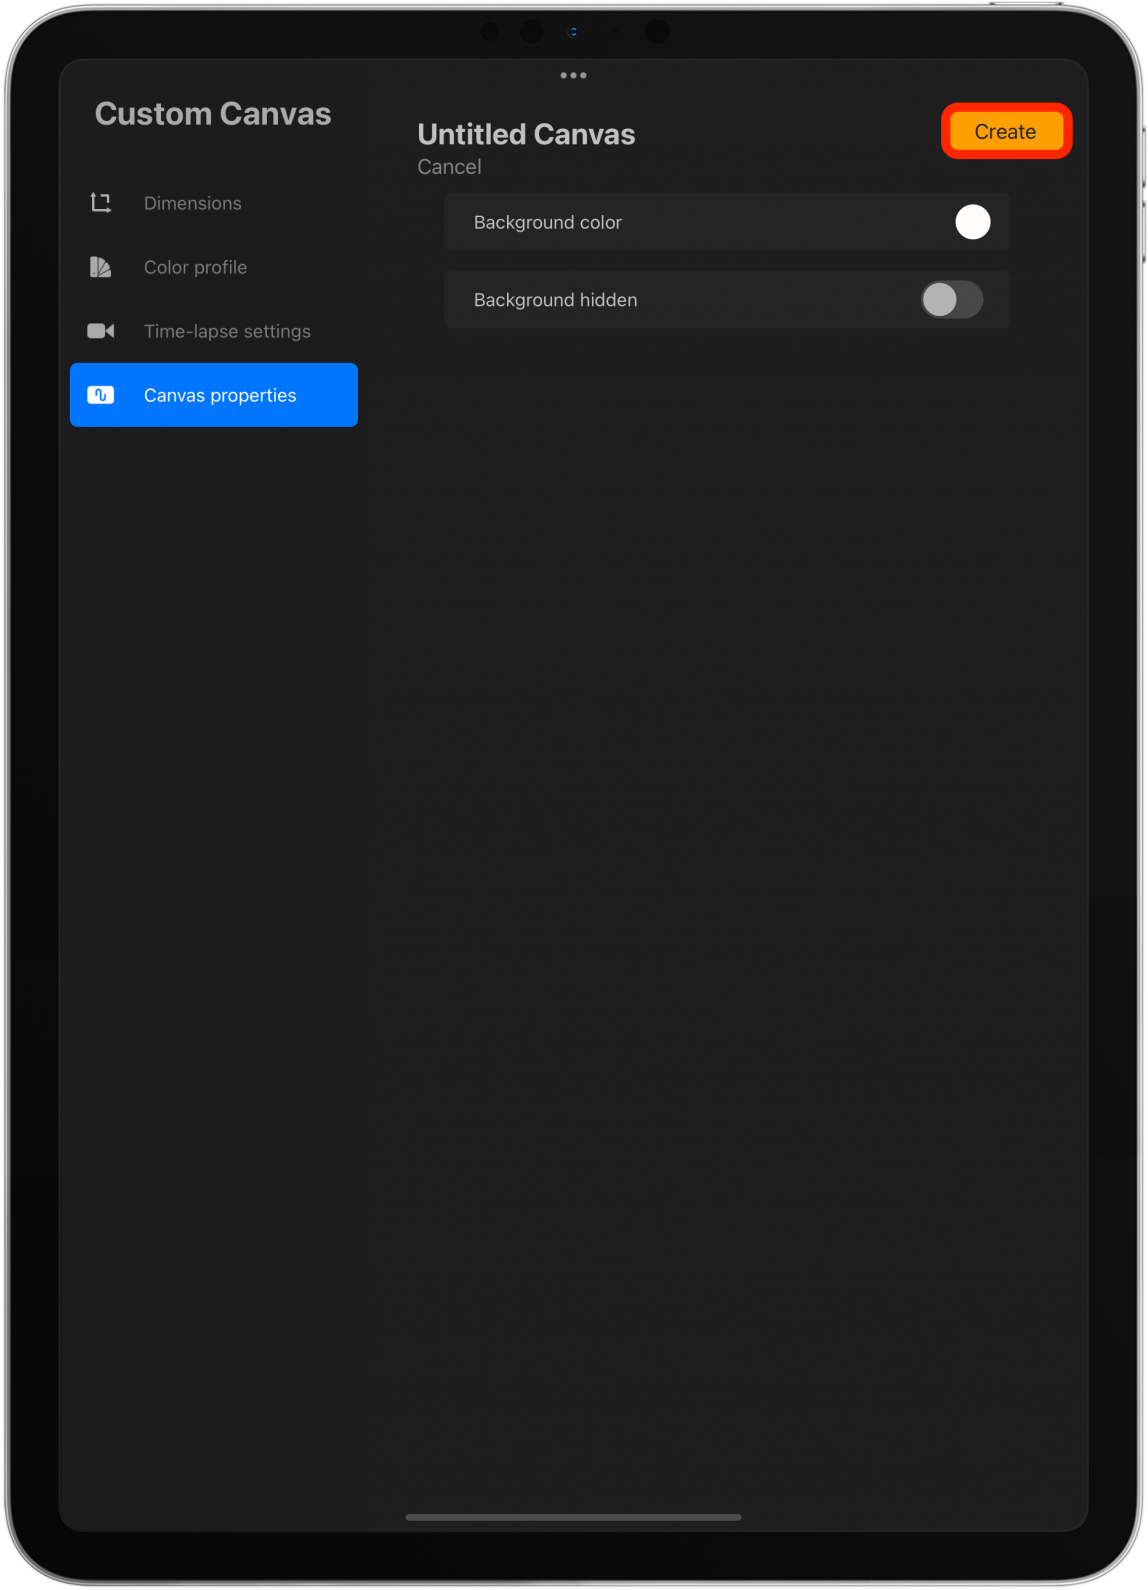
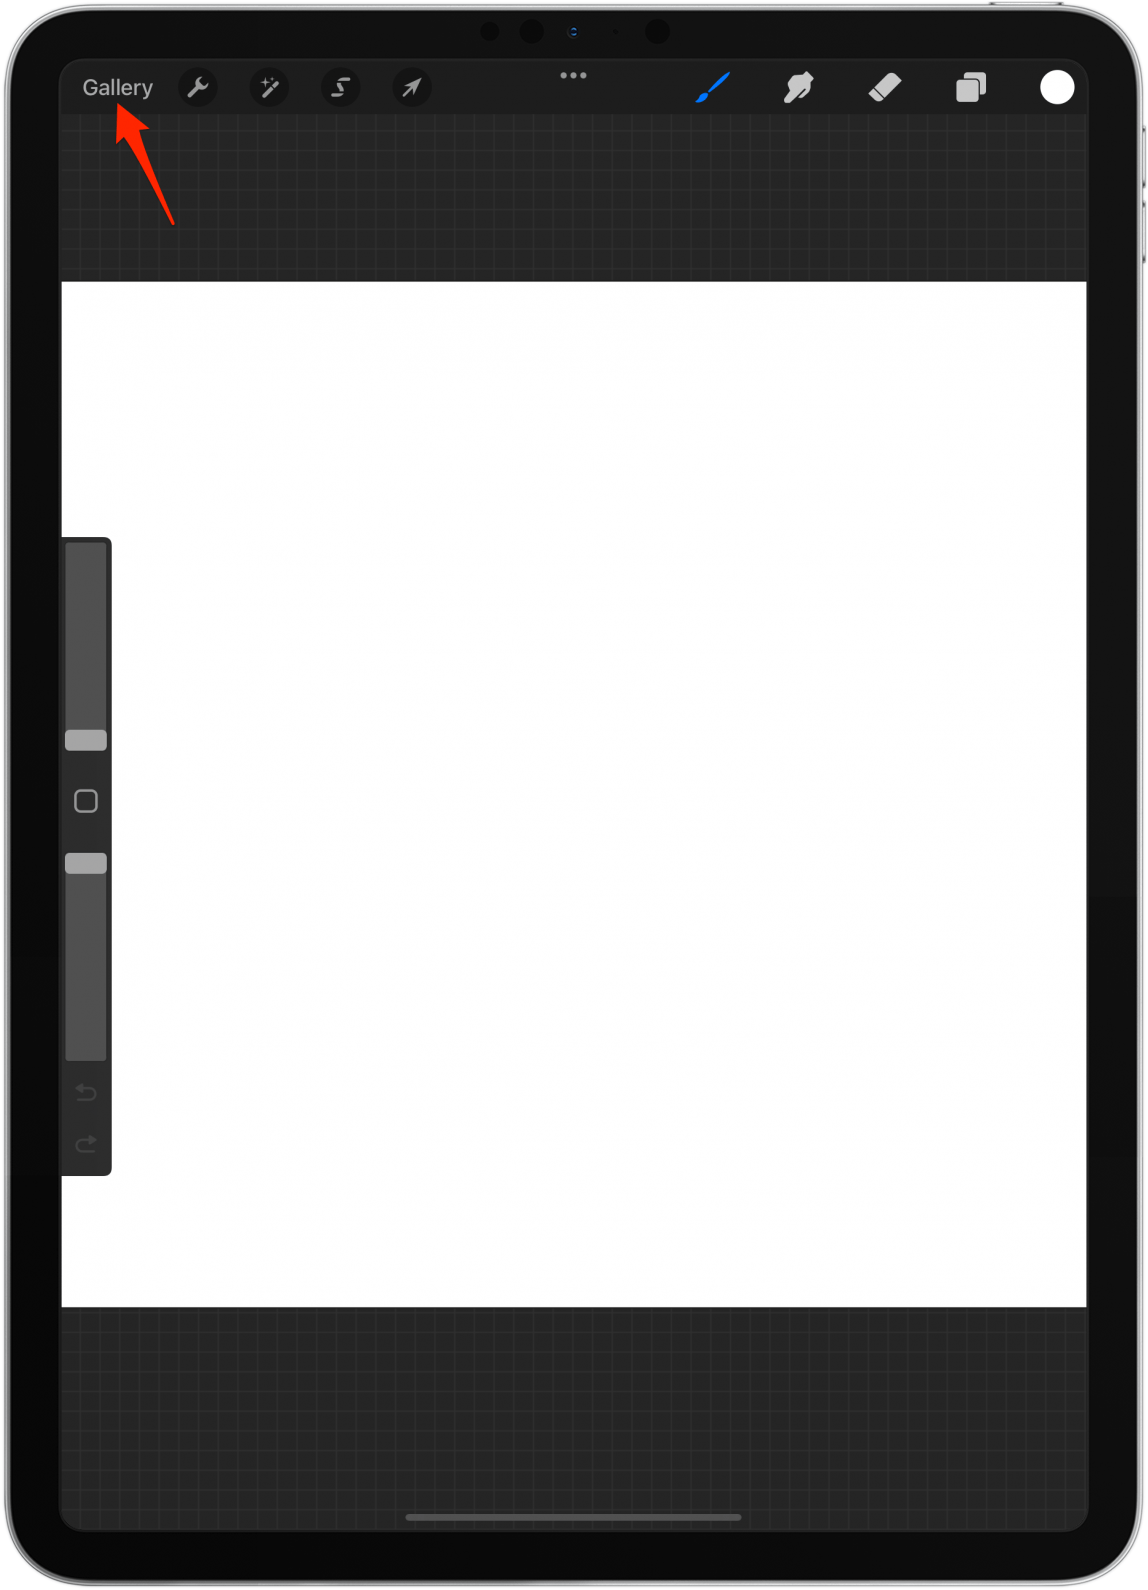
- If you tap Gallery, you’ll go back to Gallery View.
- If you tap +, you’ll see your new template at the bottom of the list. You can drag the templates to reorder them.
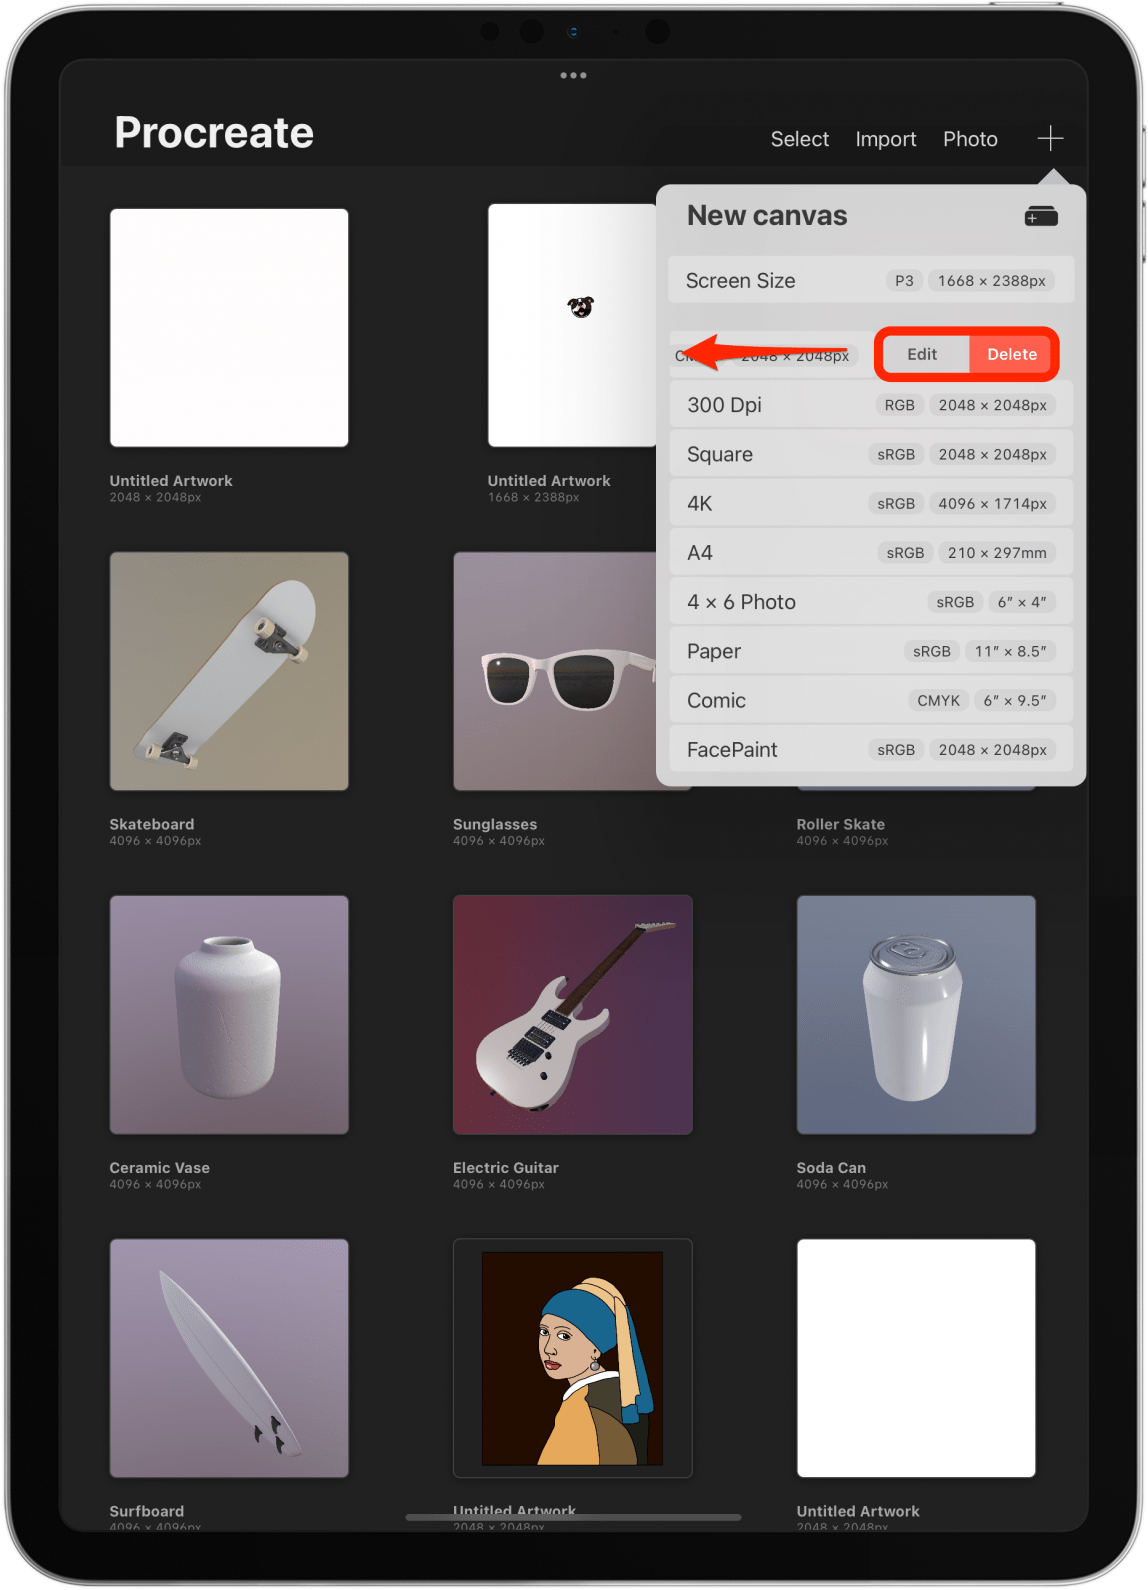
- If you swipe left over it, you can Edit or Delete it.
3. How to Resize or Move Multiple Layers at Once
Often if you resize your canvas, you may need to resize what you’ve drawn. There are also many instances when you may want to resize or move multiple layers simultaneously to leave your artwork intact. To do this:
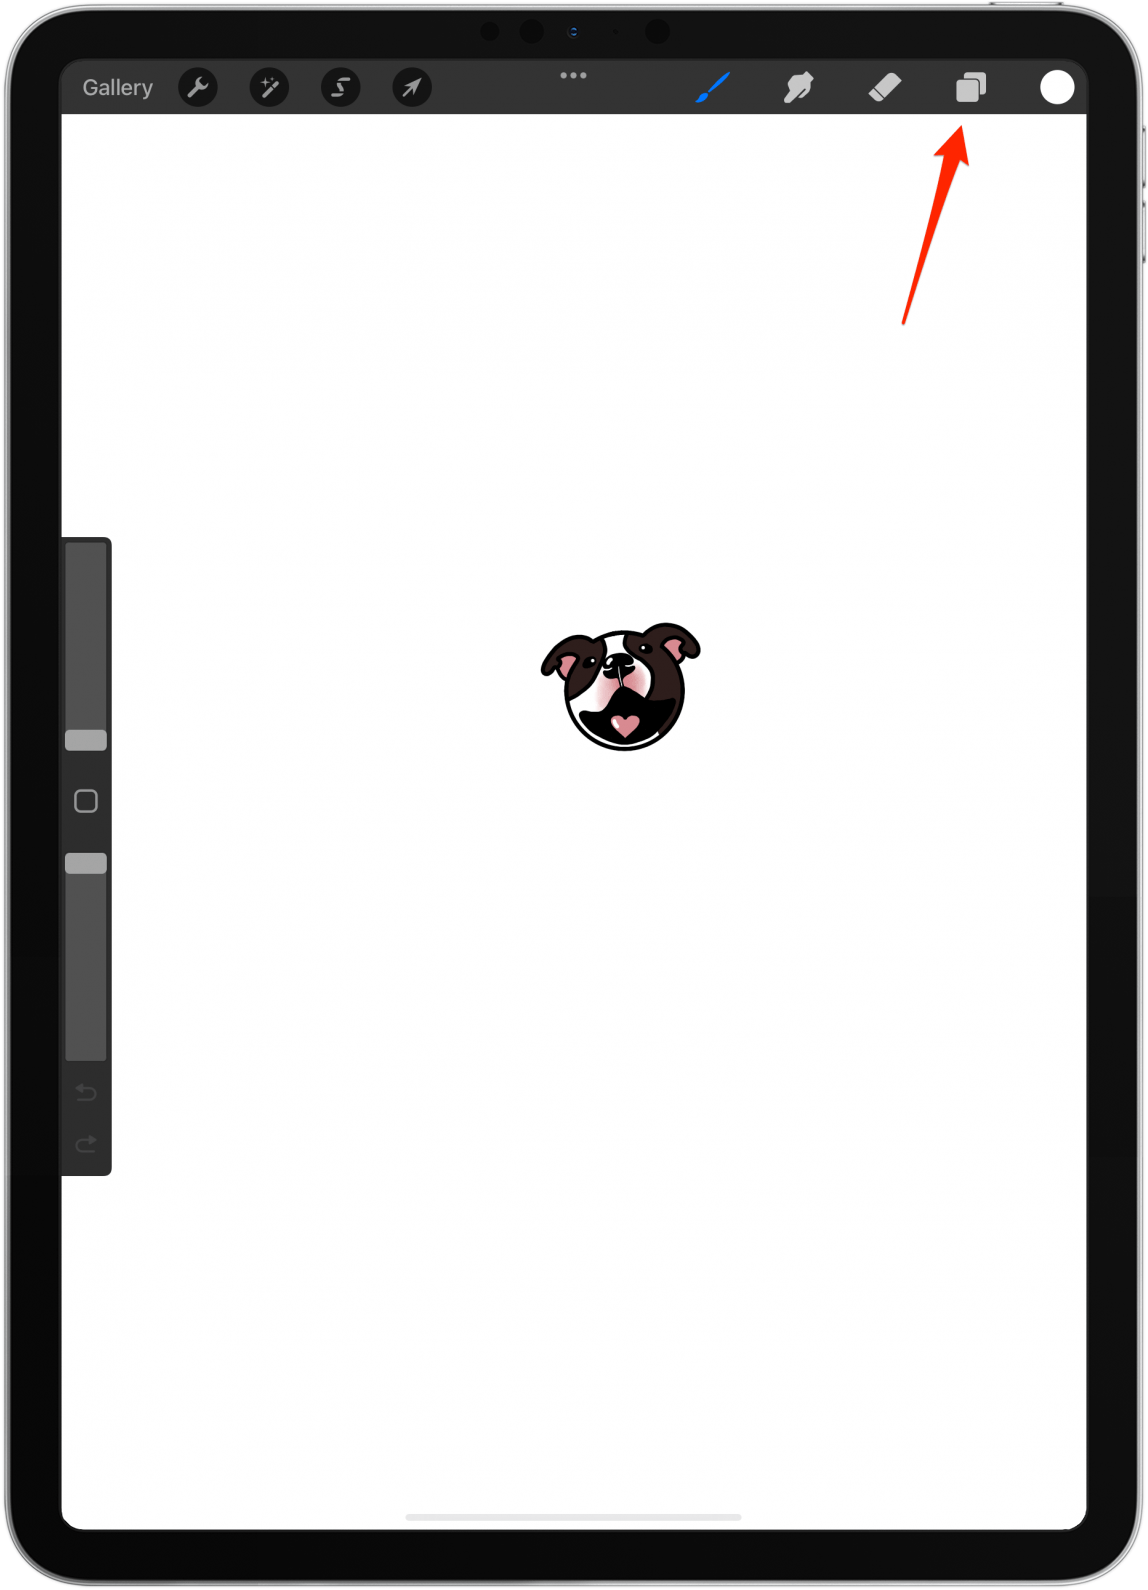
- Open the project and tap the layers icon.
- Drag the layer below the top on into it.

- A new group will appear, and one of the layers will be indented.
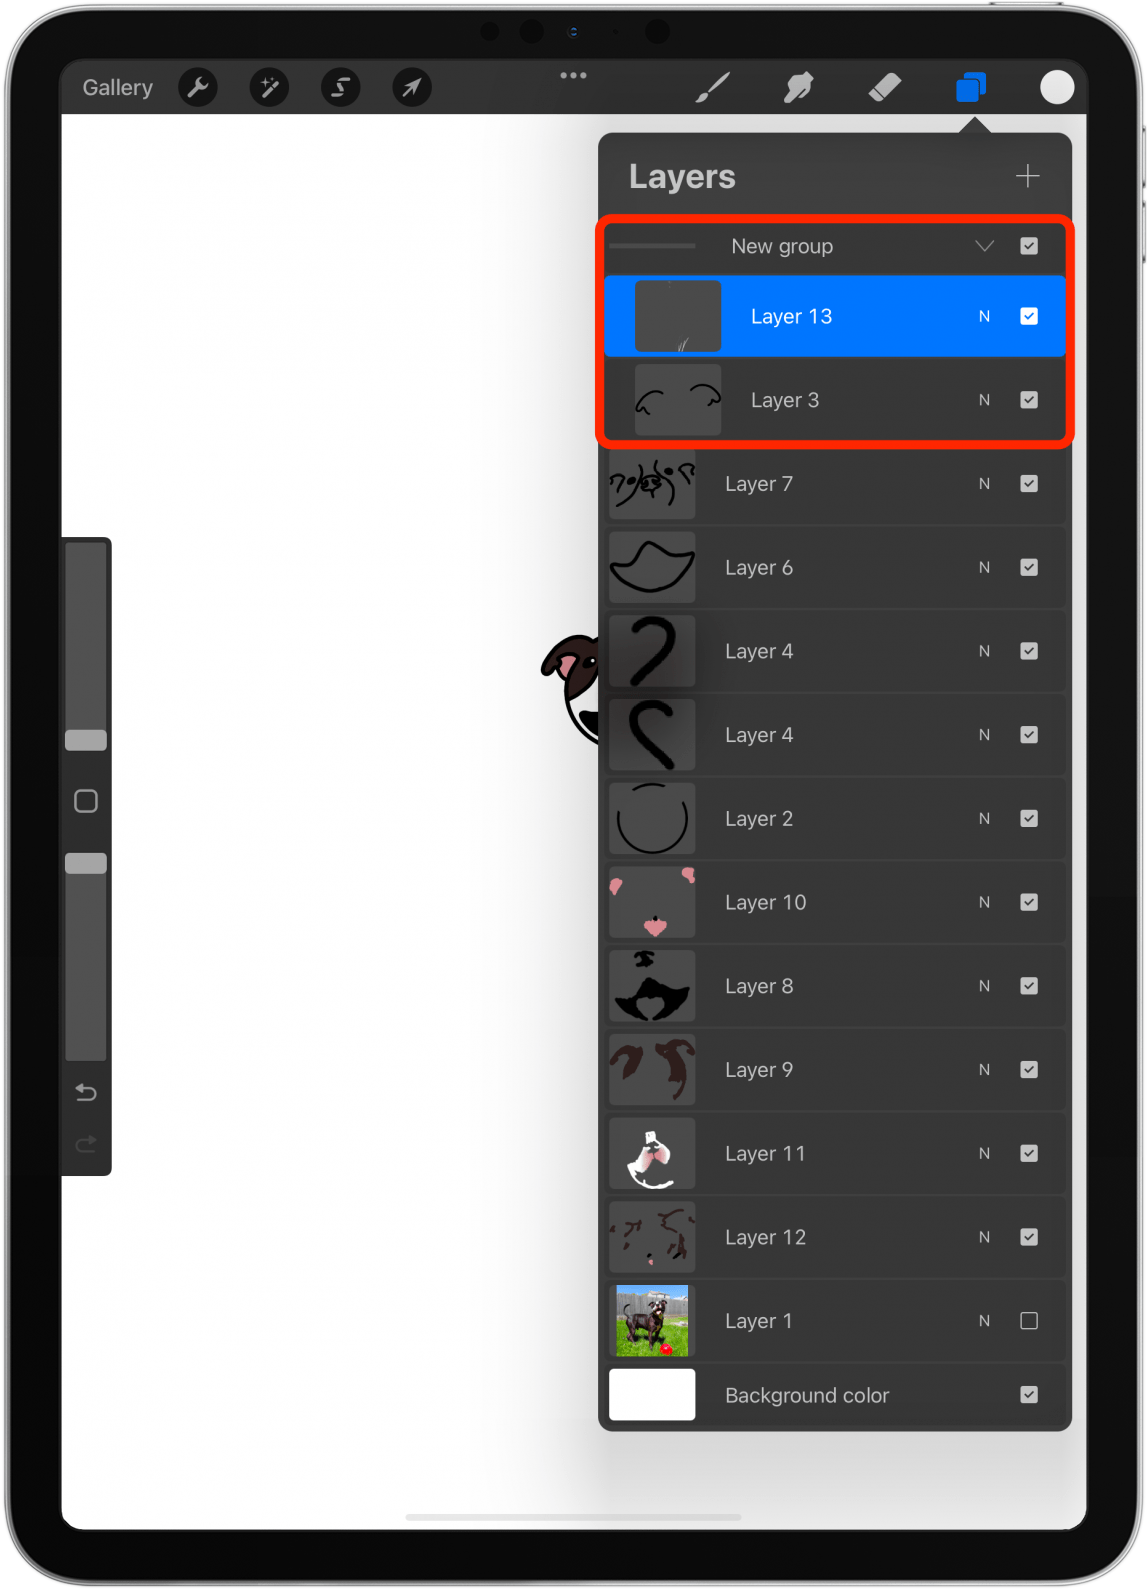
- Keep dragging the layers into the group one by one while maintaining the order they were initially in.
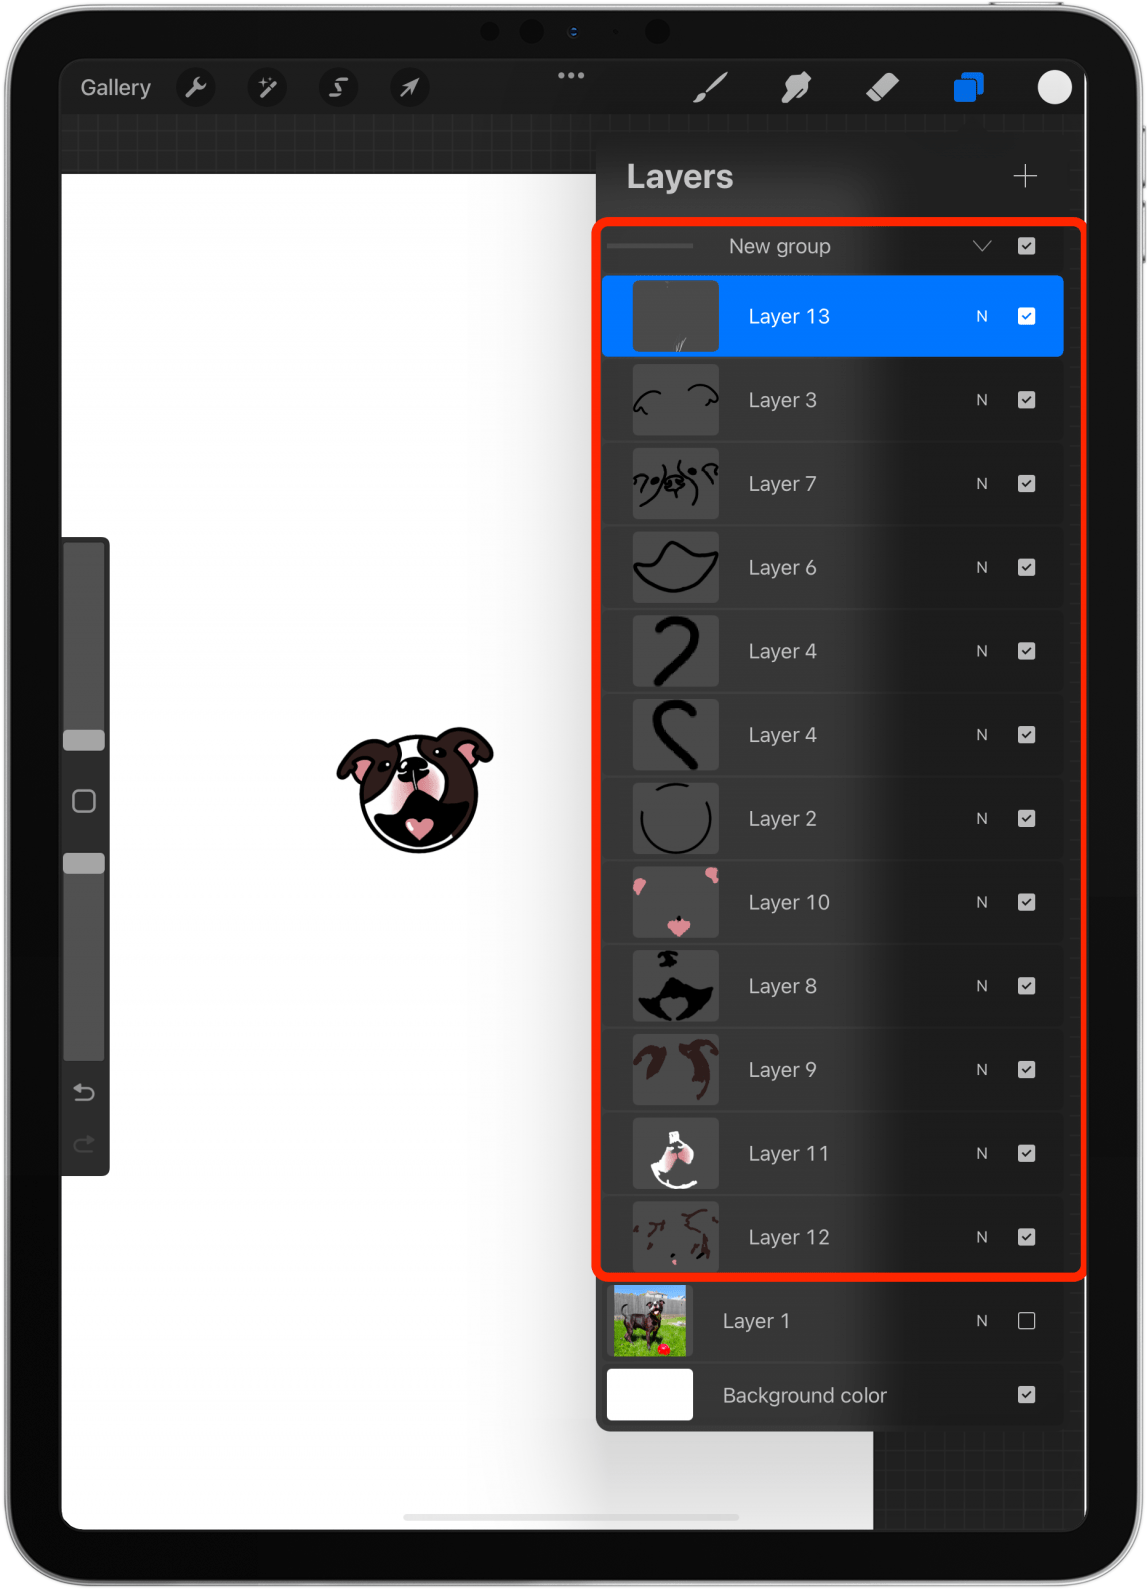
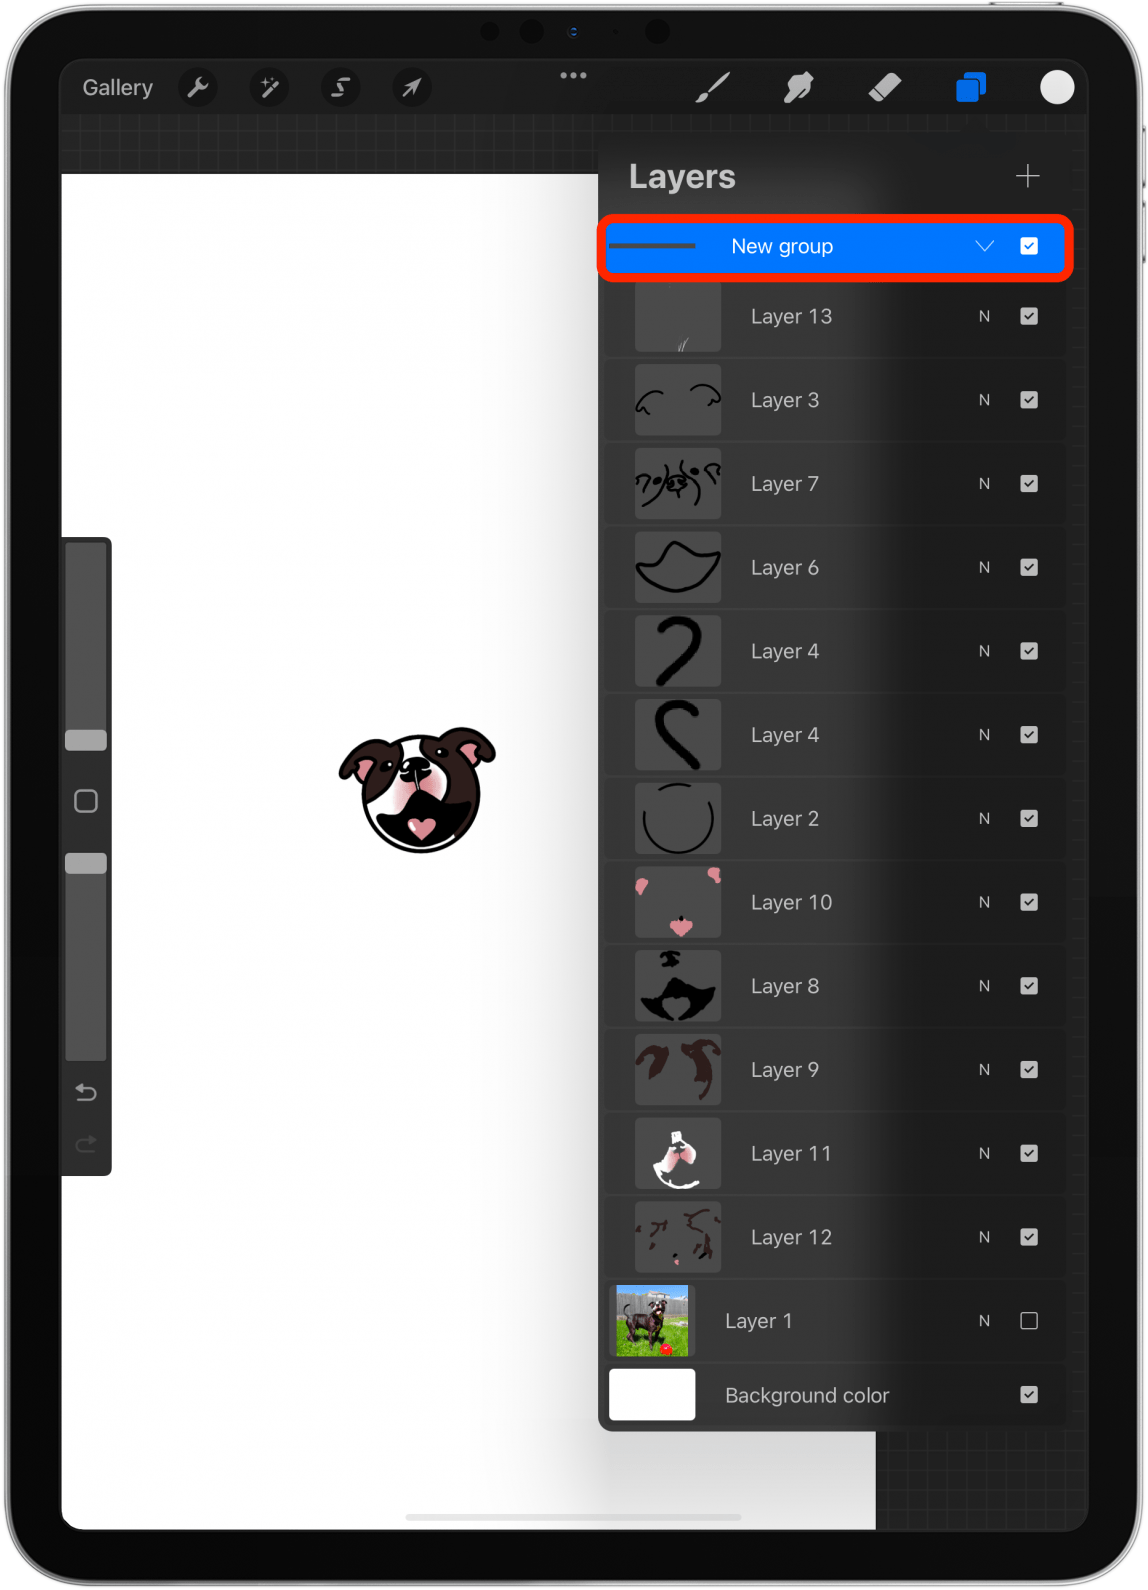
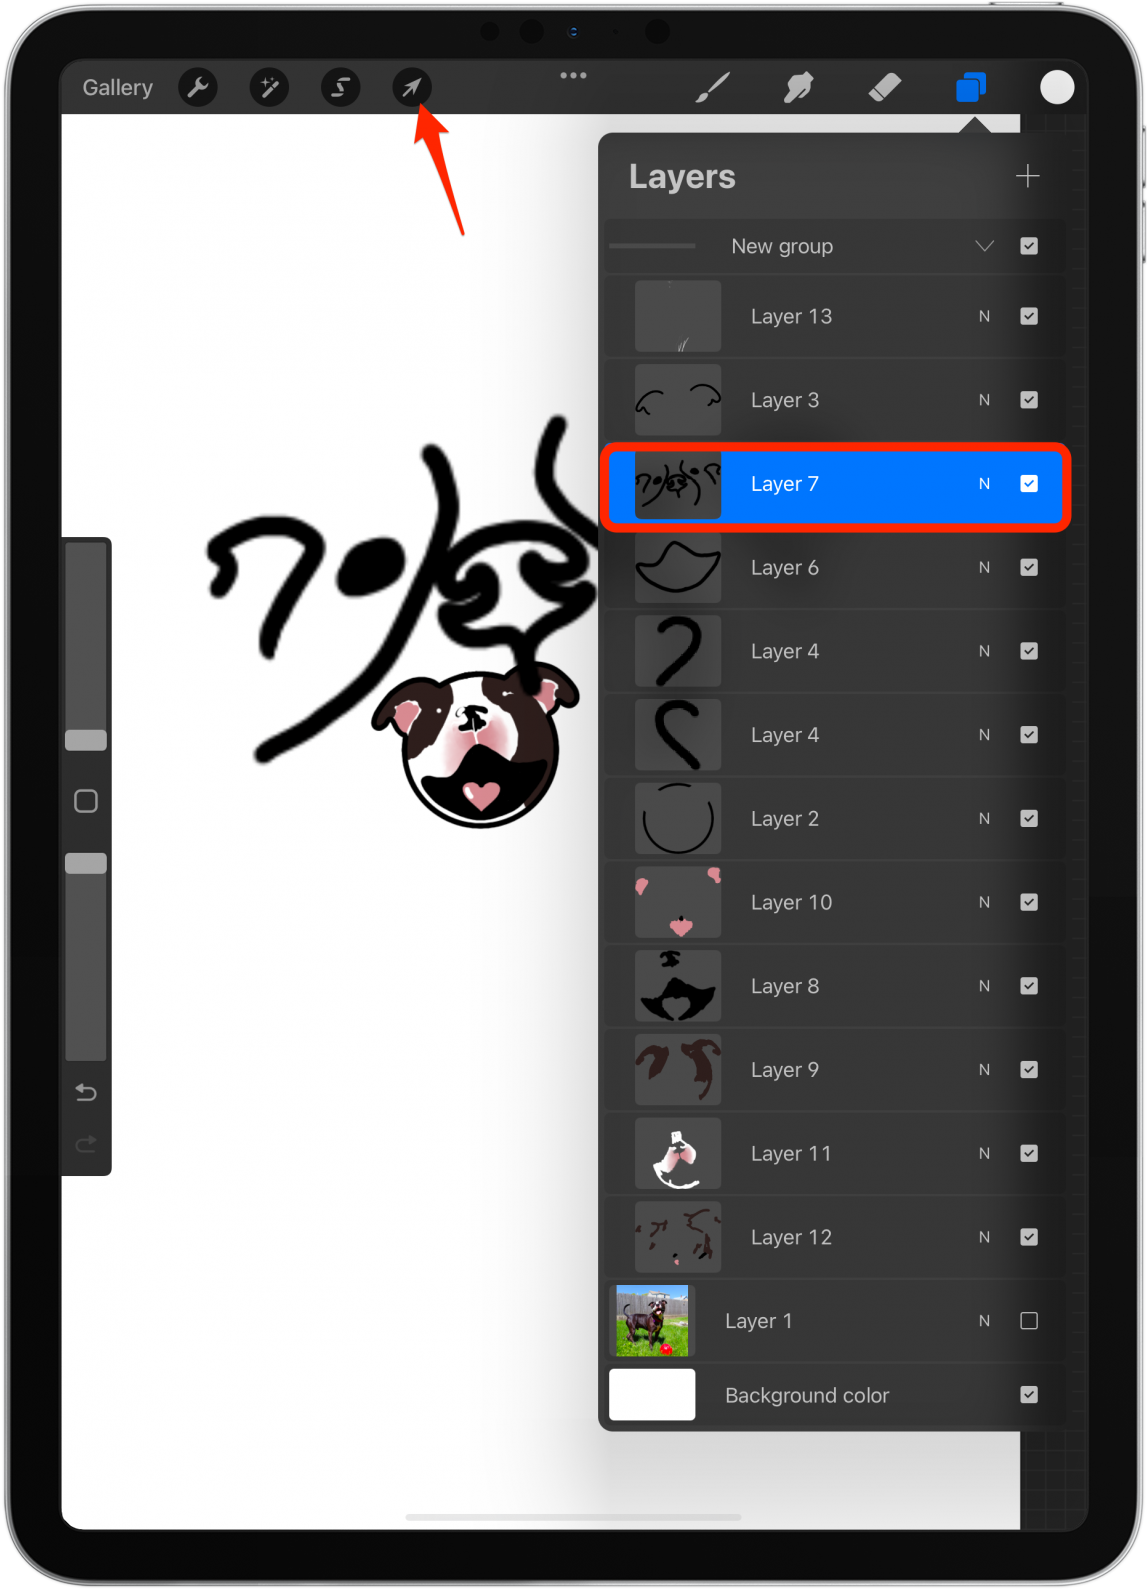
- Tap on New group; this will select all the layers in the group.
- Tap the arrow icon.
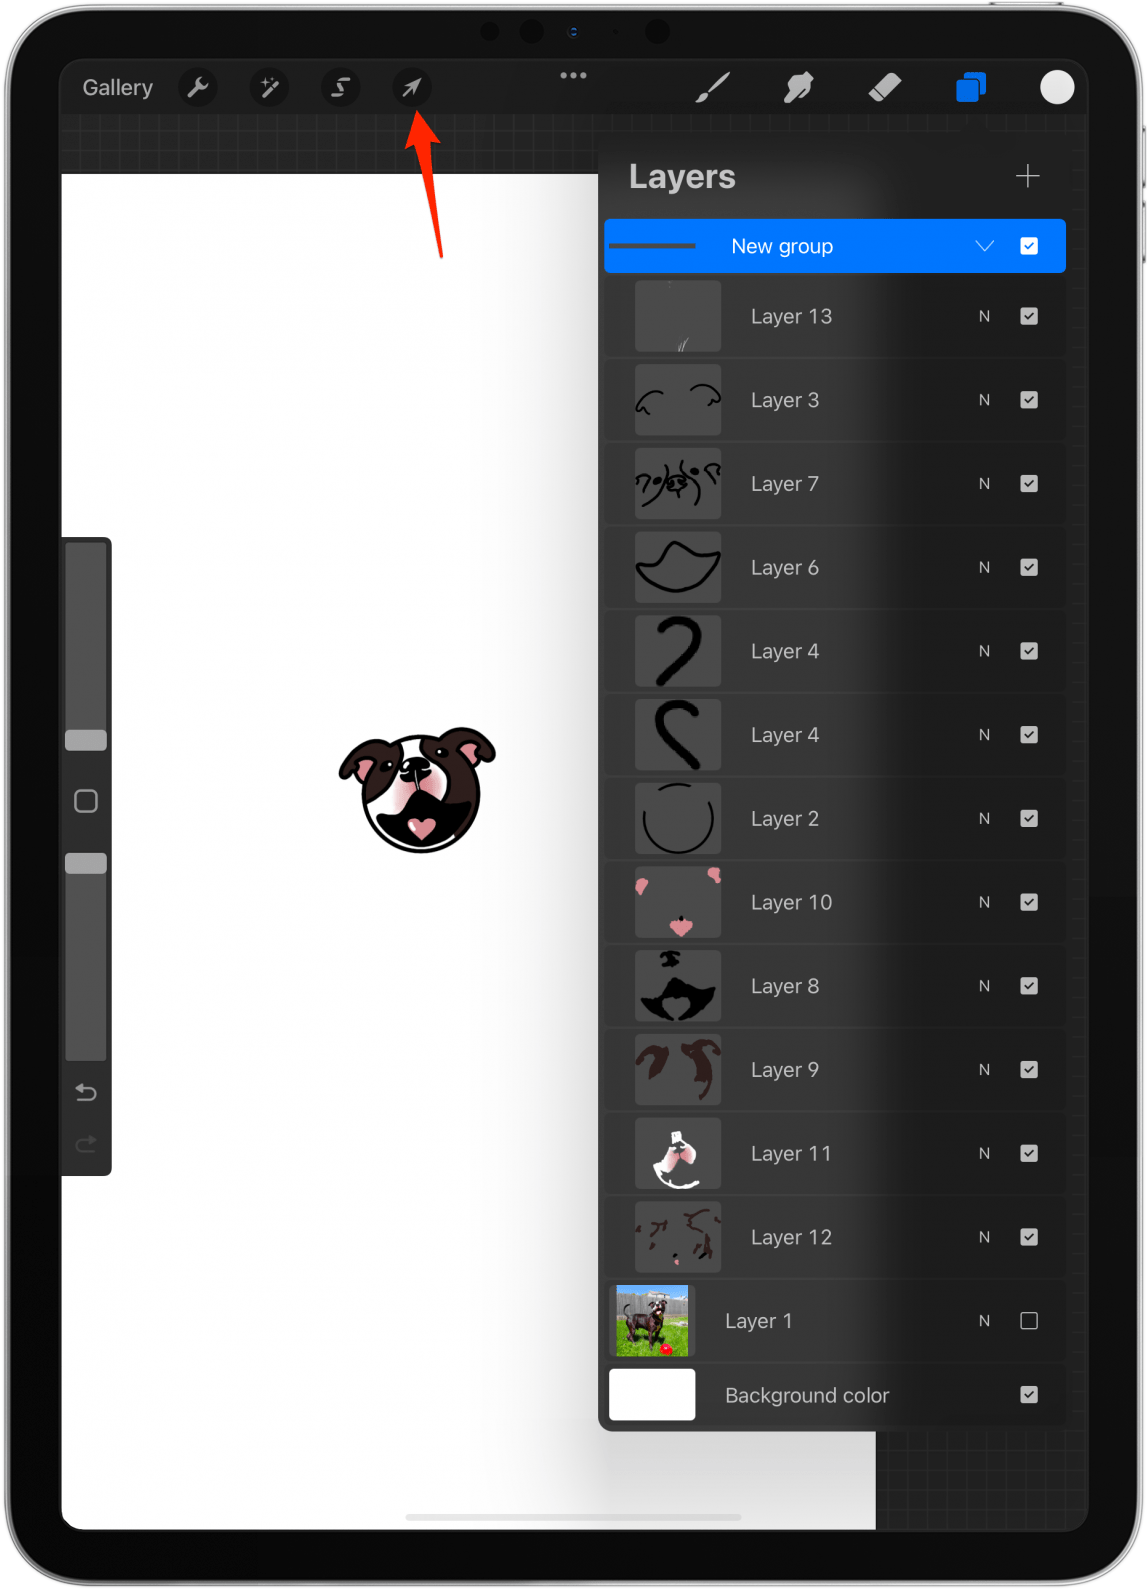
- To move the design, use your Apple Pencil or finger and tap outside of the selected area, and drag to move the image.
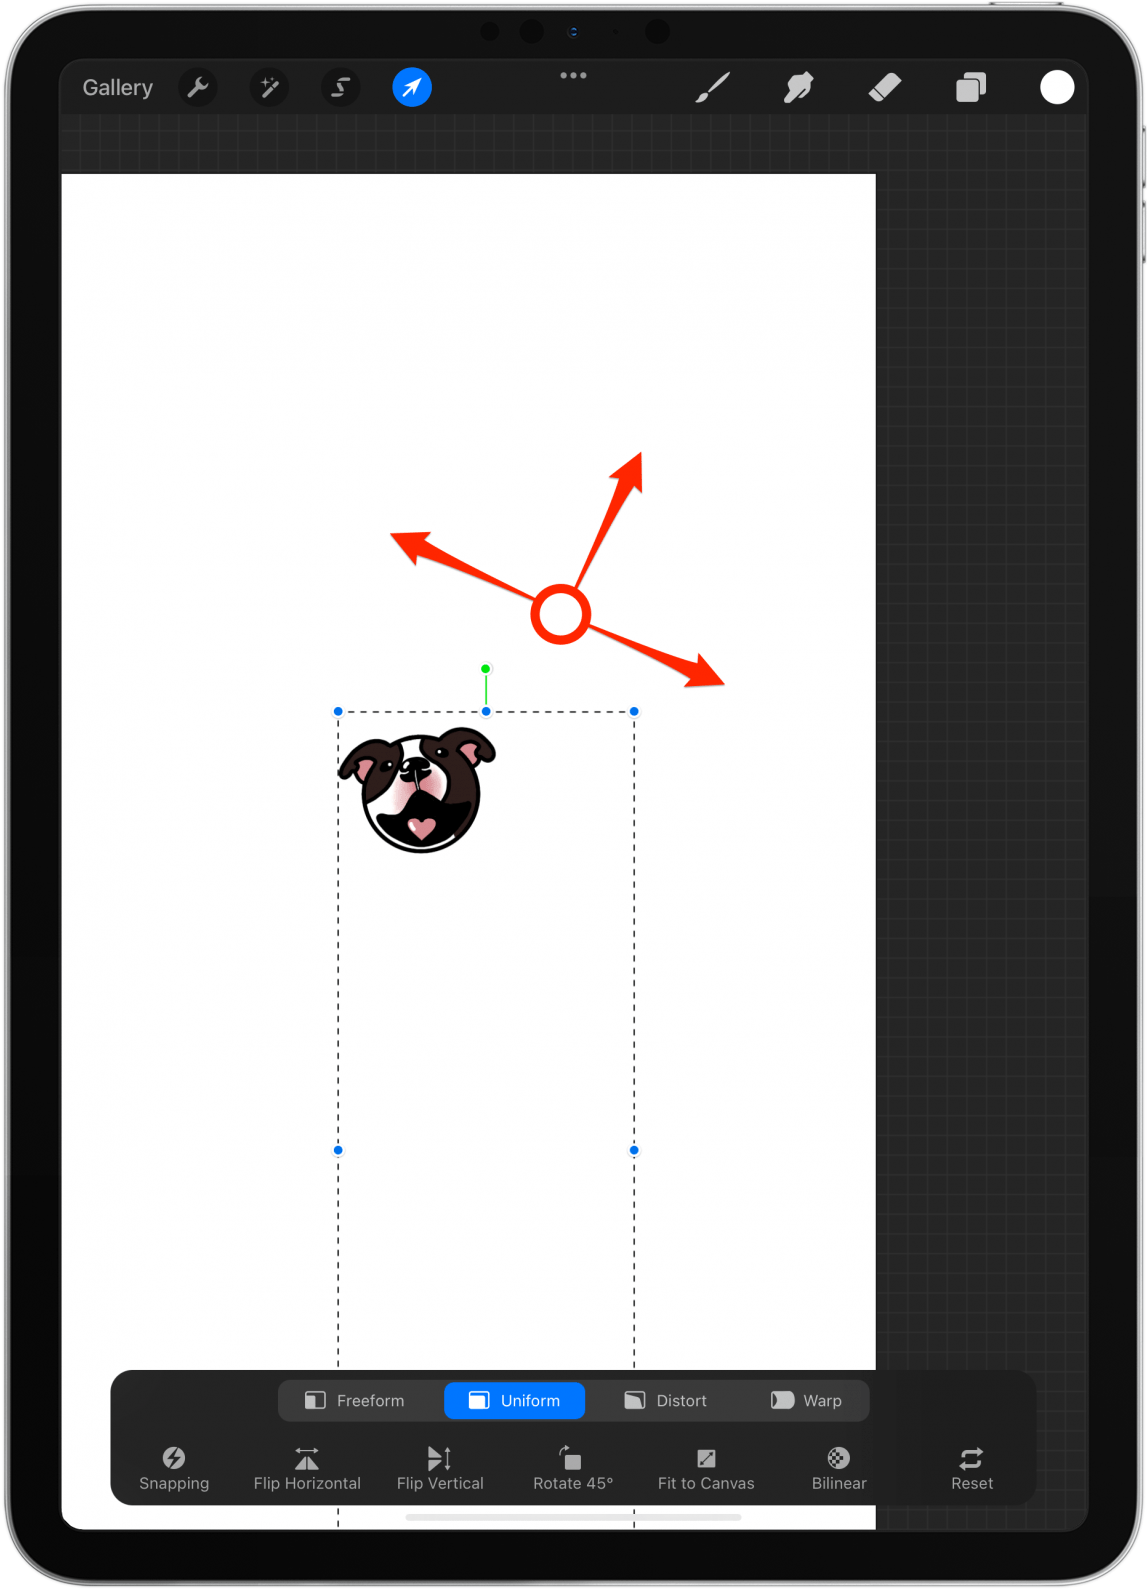
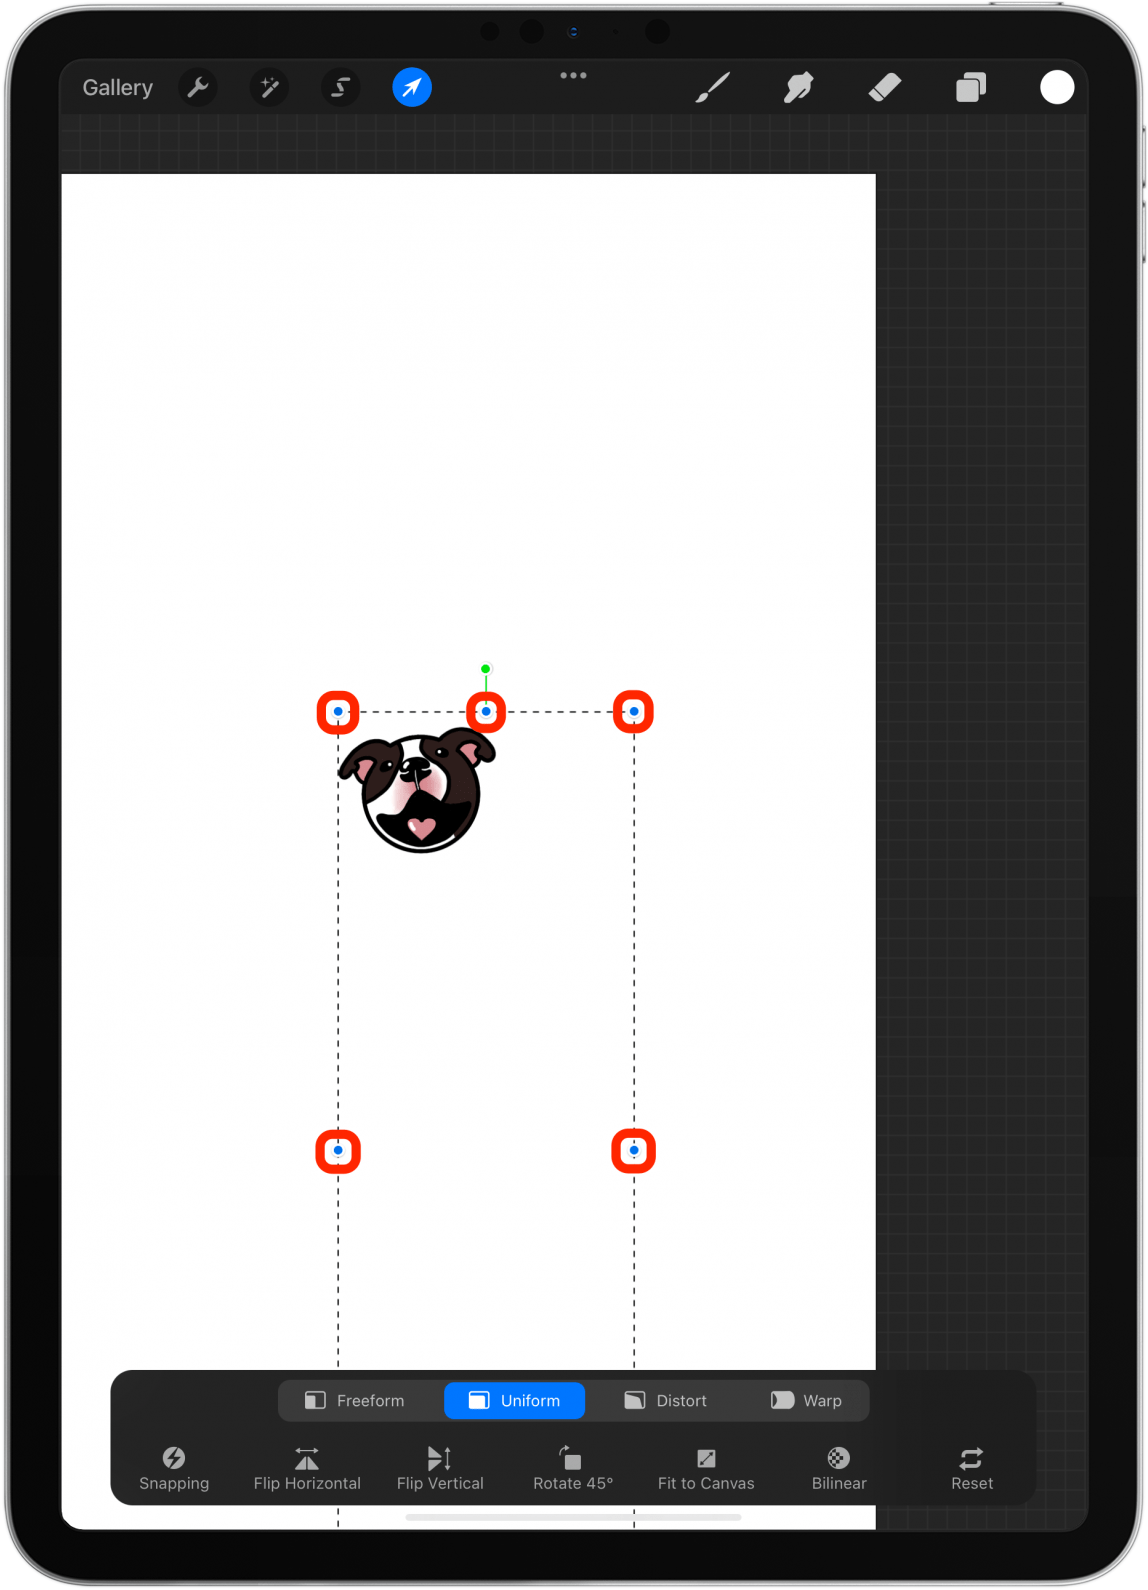
- You can also tap and drag one of the blue dots to make the image larger.
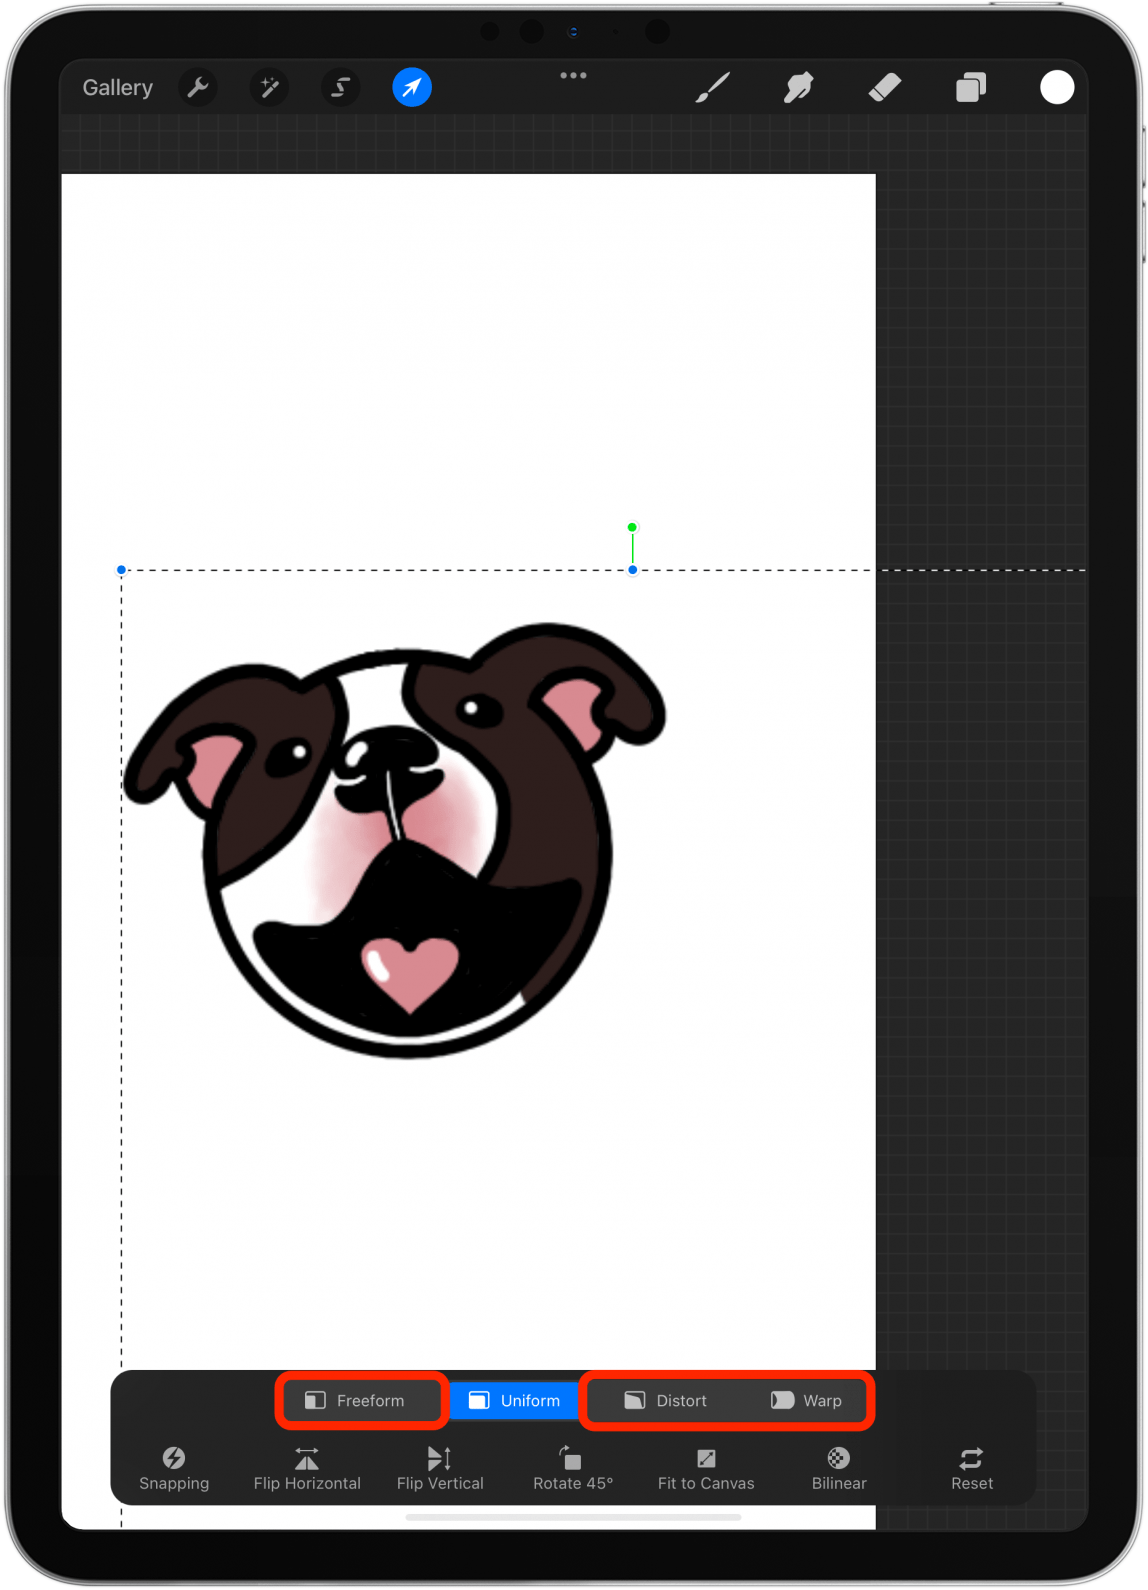
- At the bottom, you will see a menu where you can select Freeform, Distort, or Warp to change the shape in a way that isn't uniform. This is useful for reshaping the image.
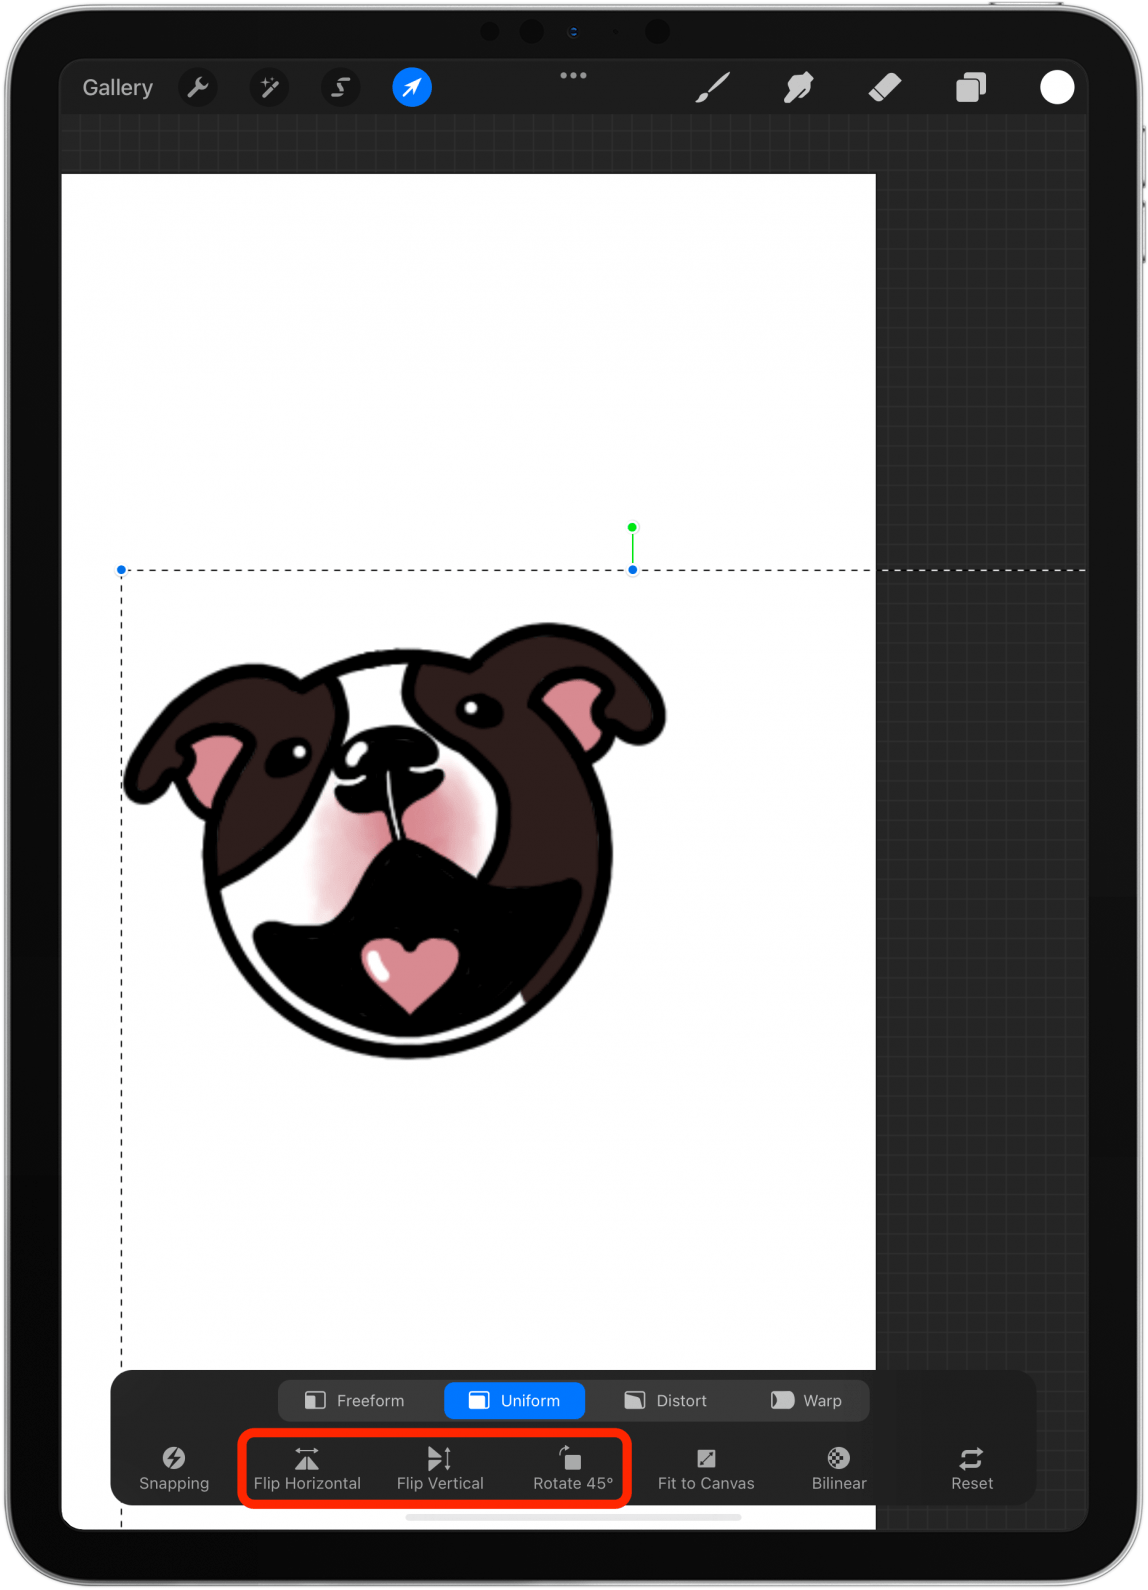
- You can also select Flip Horizontal or Flip Vertical to flip the image or rotate 45° to rotate it.
- This can also be done to individual layers.
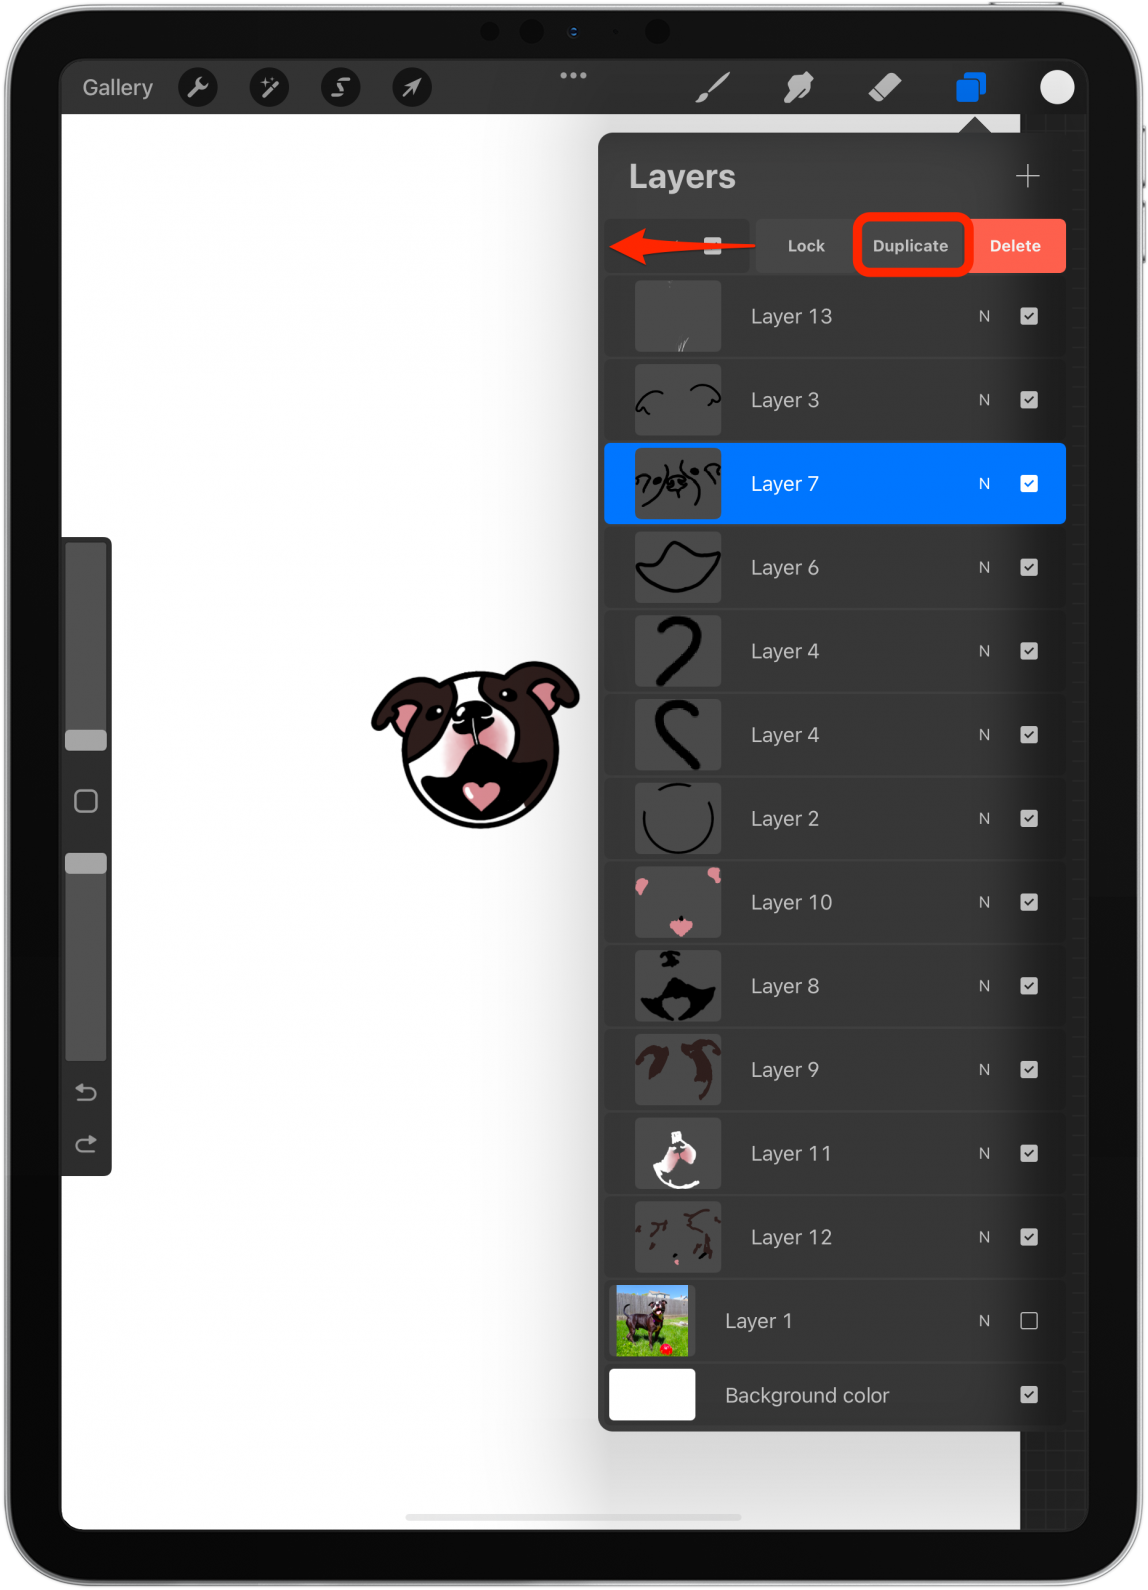
- If you want to experiment but are worried about making a hard-to-fix mistake, return to the layer group, swipe left, and tap Duplicate.
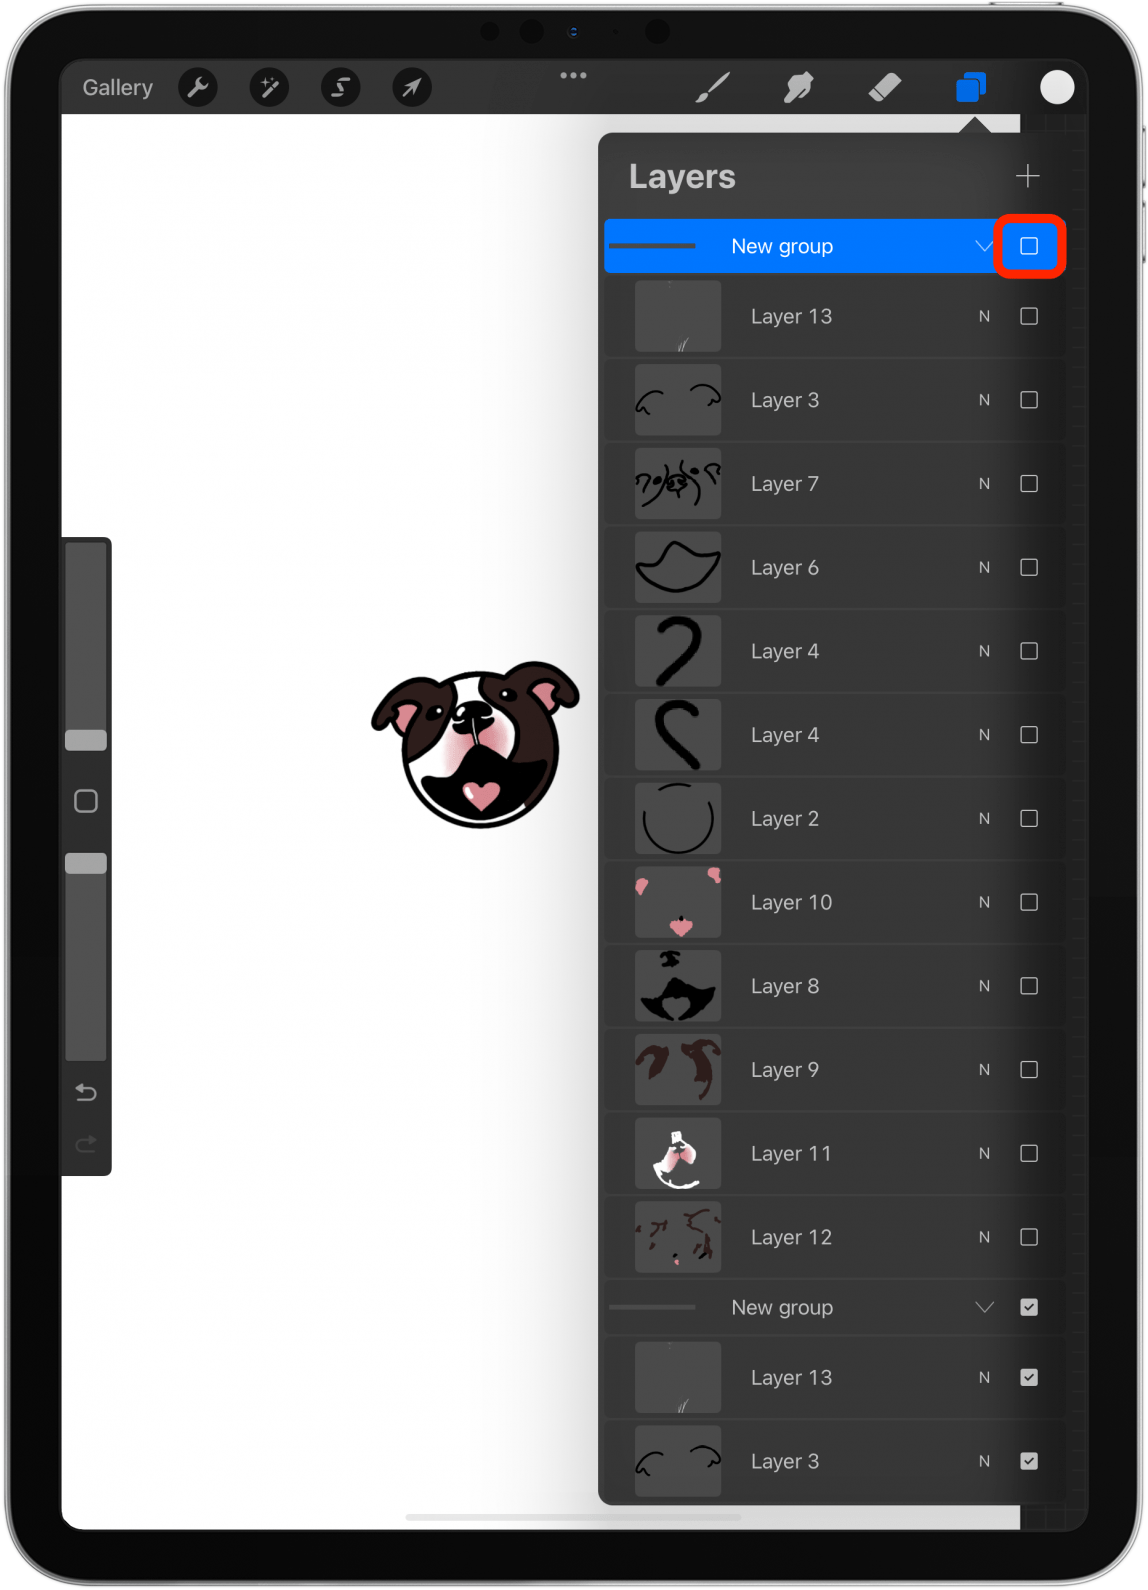
- You can then hide it by tapping the square on the right of the layer group.
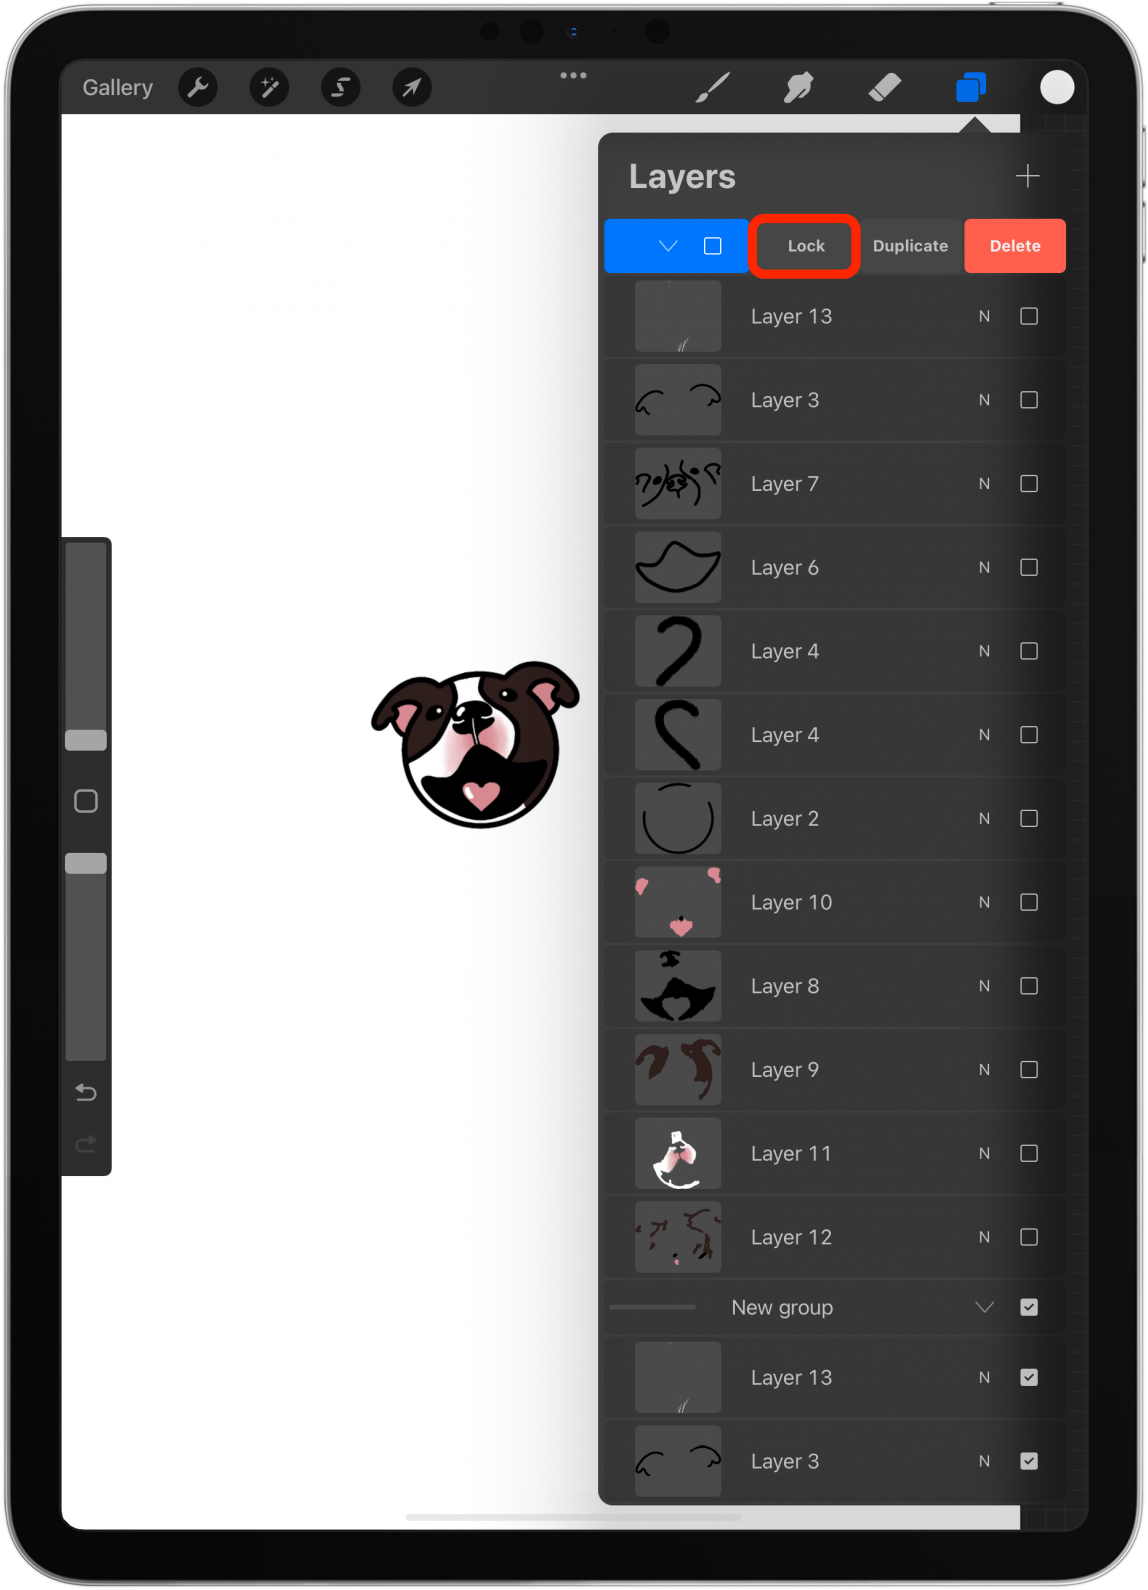
- You can also swipe left over the group and select Lock to protect the layer.
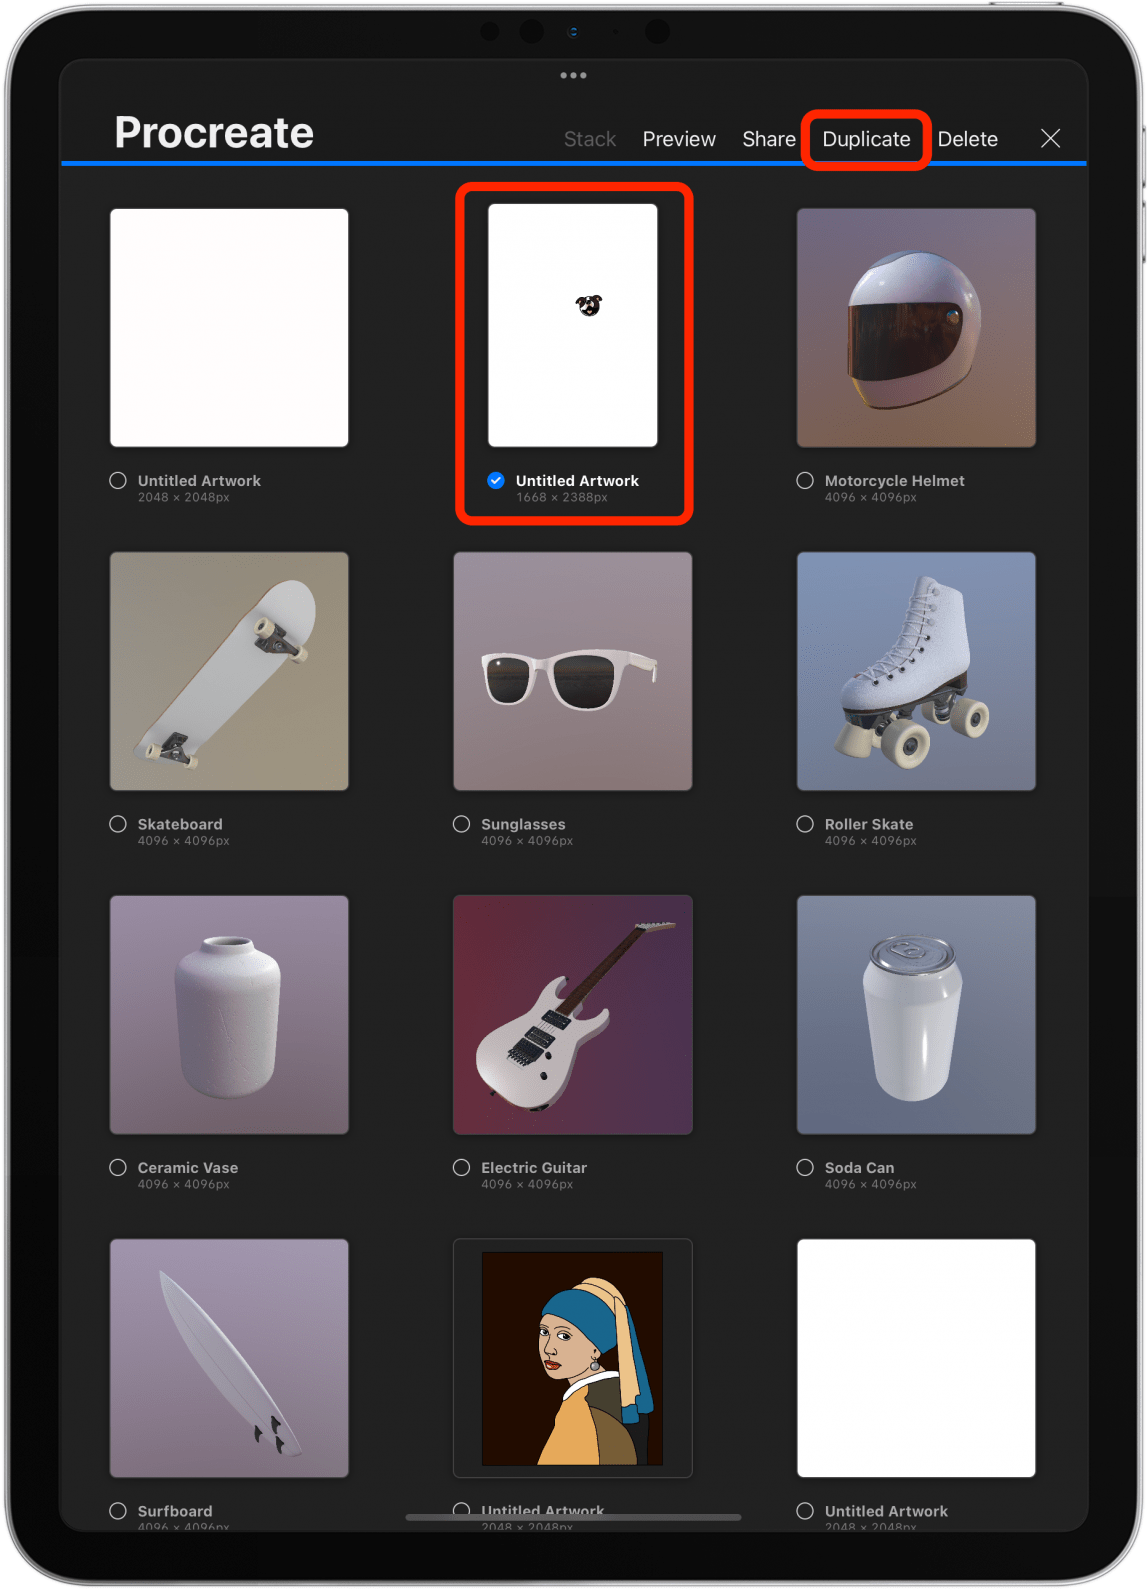
- Another option to secure your project is to return to the Gallery View, tap Select, tap the artwork, and select Duplicate.
Pro Tip: Any changes you make when the arrow is selected are considered one action. If you make several changes, then tap undo, and all of them will be changed back. If you tap the canvas and select the arrow again before making more changes, you'll be able to have several steps to undo/redo in case you make a mistake.
4. Disable Finger Touch Actions if You Use Apple Pencil
If you use an Apple Pencil to draw, which I highly recommend, you may want to change your settings to avoid accidental touches on your canvas. To do this:
- Tap the wrench icon.
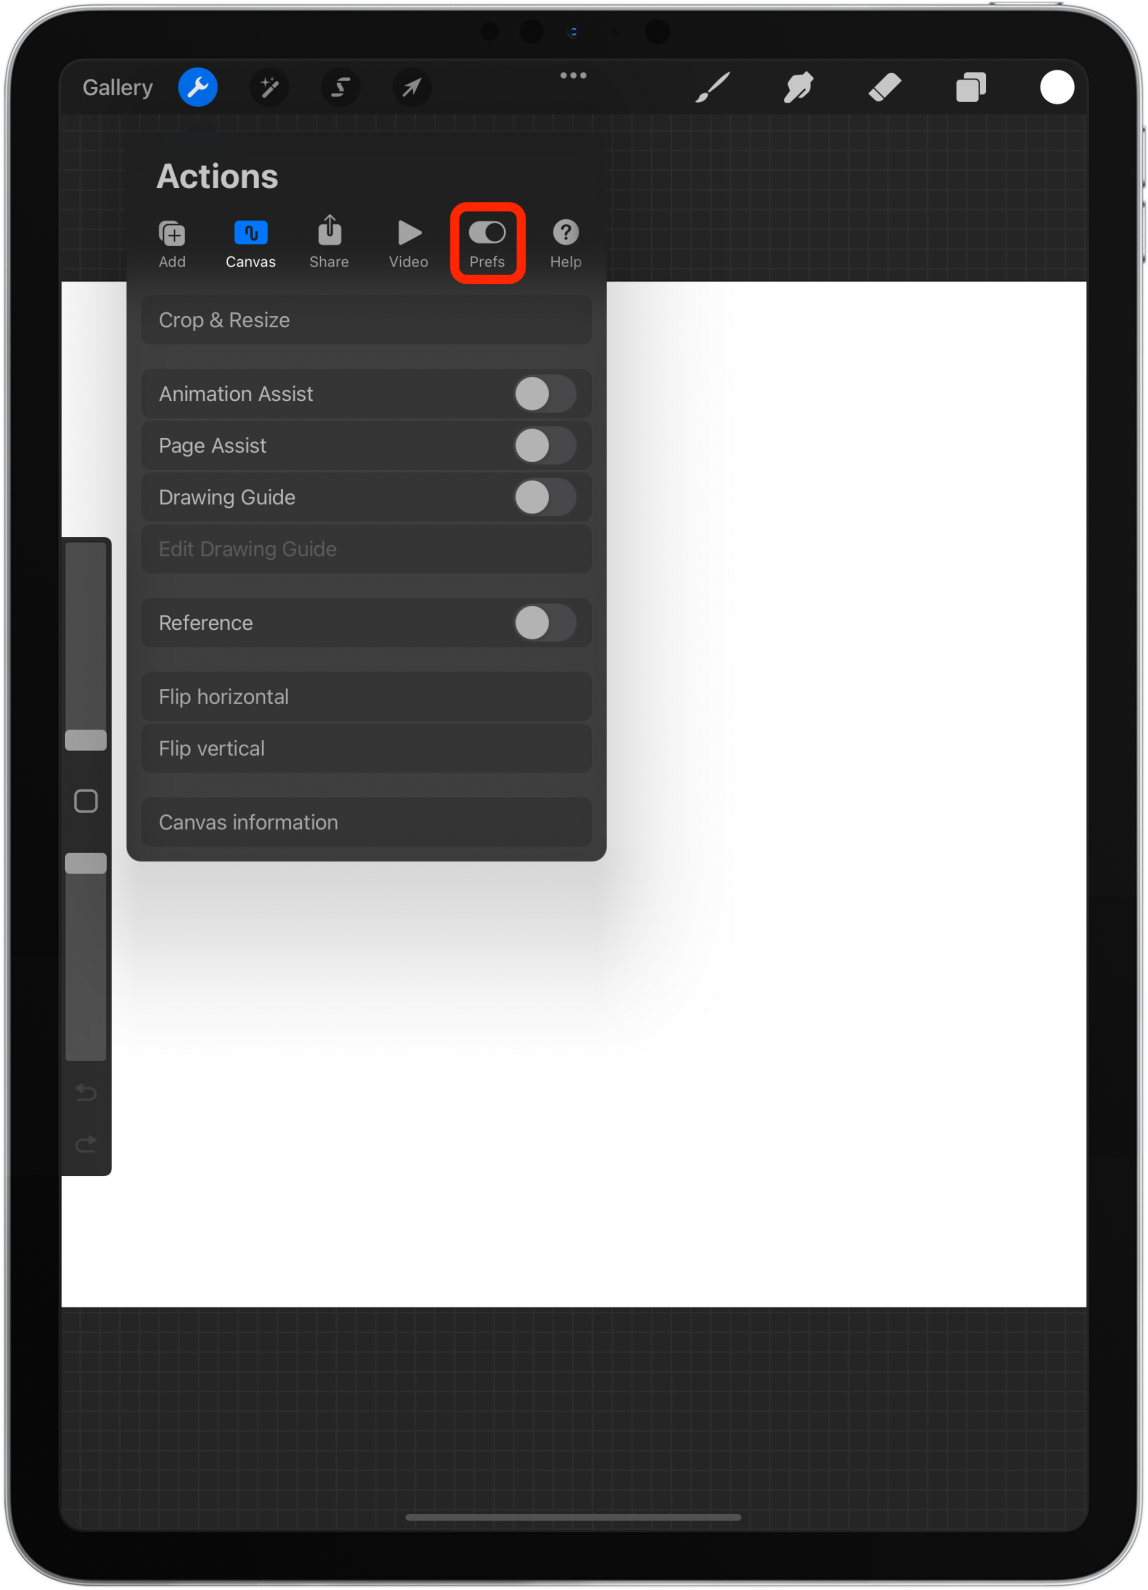
- Open the Prefs tab.
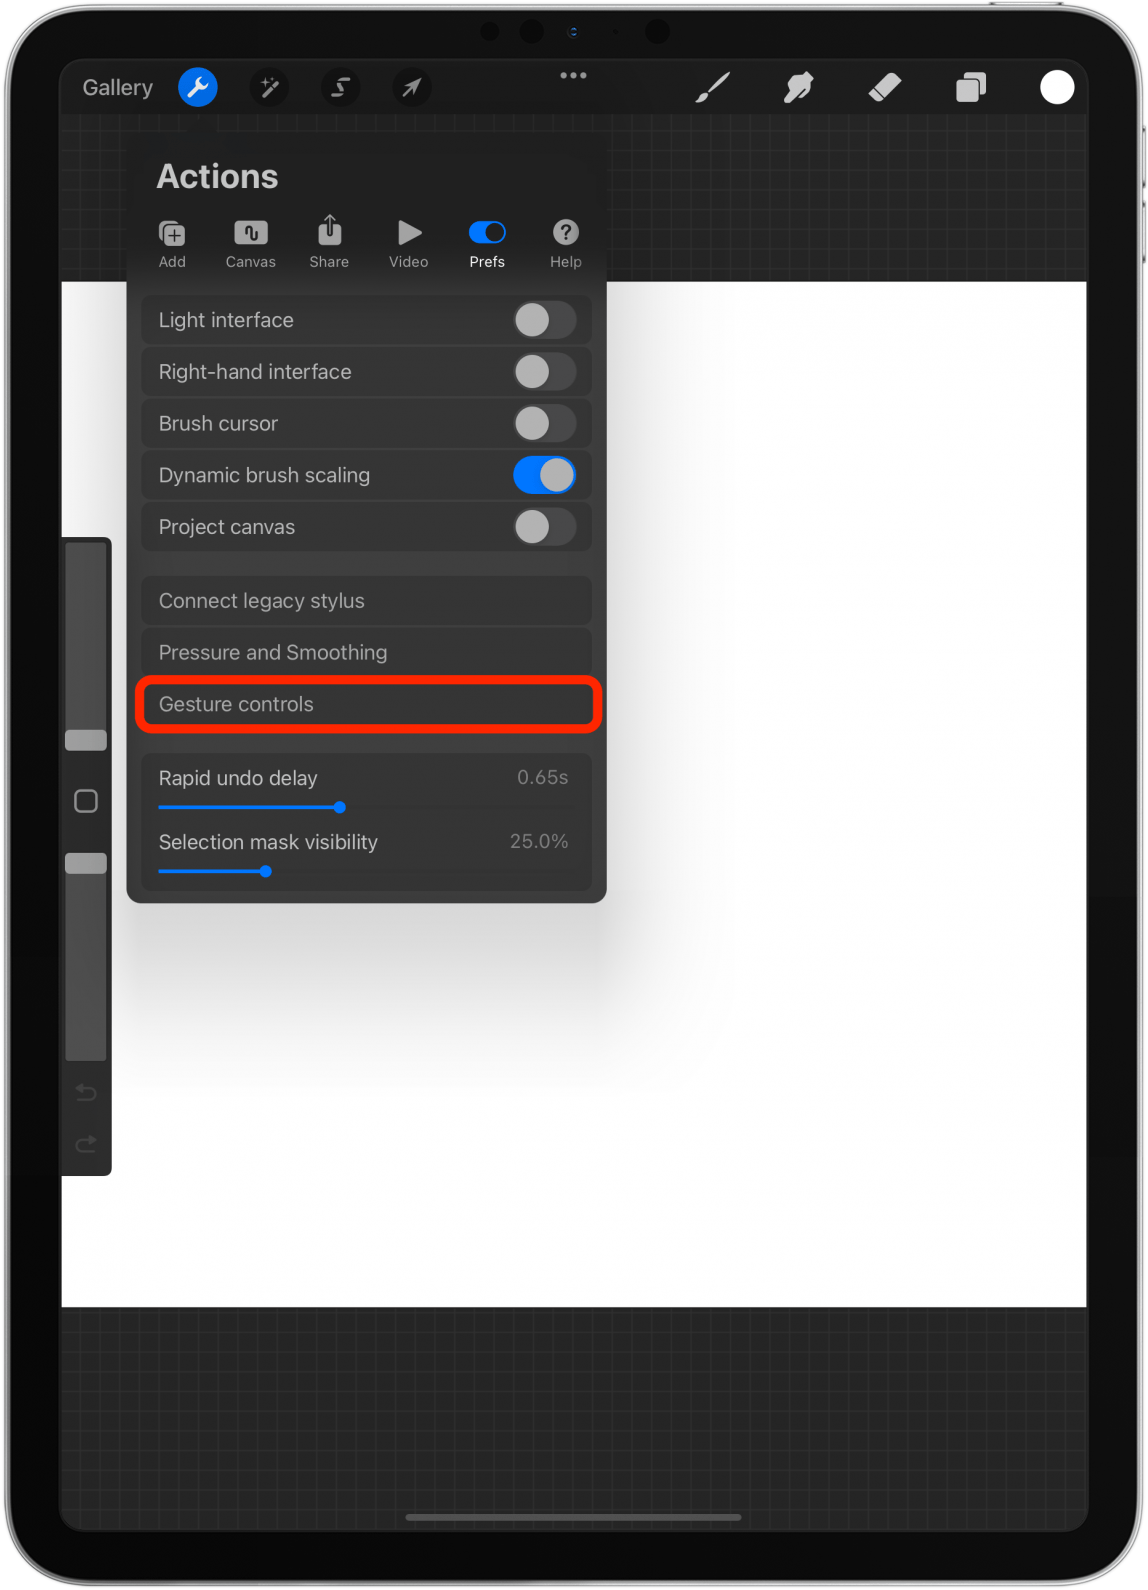
- Select Gesture controls.
- Tap General.

- Toggle on Disable Touch actions.
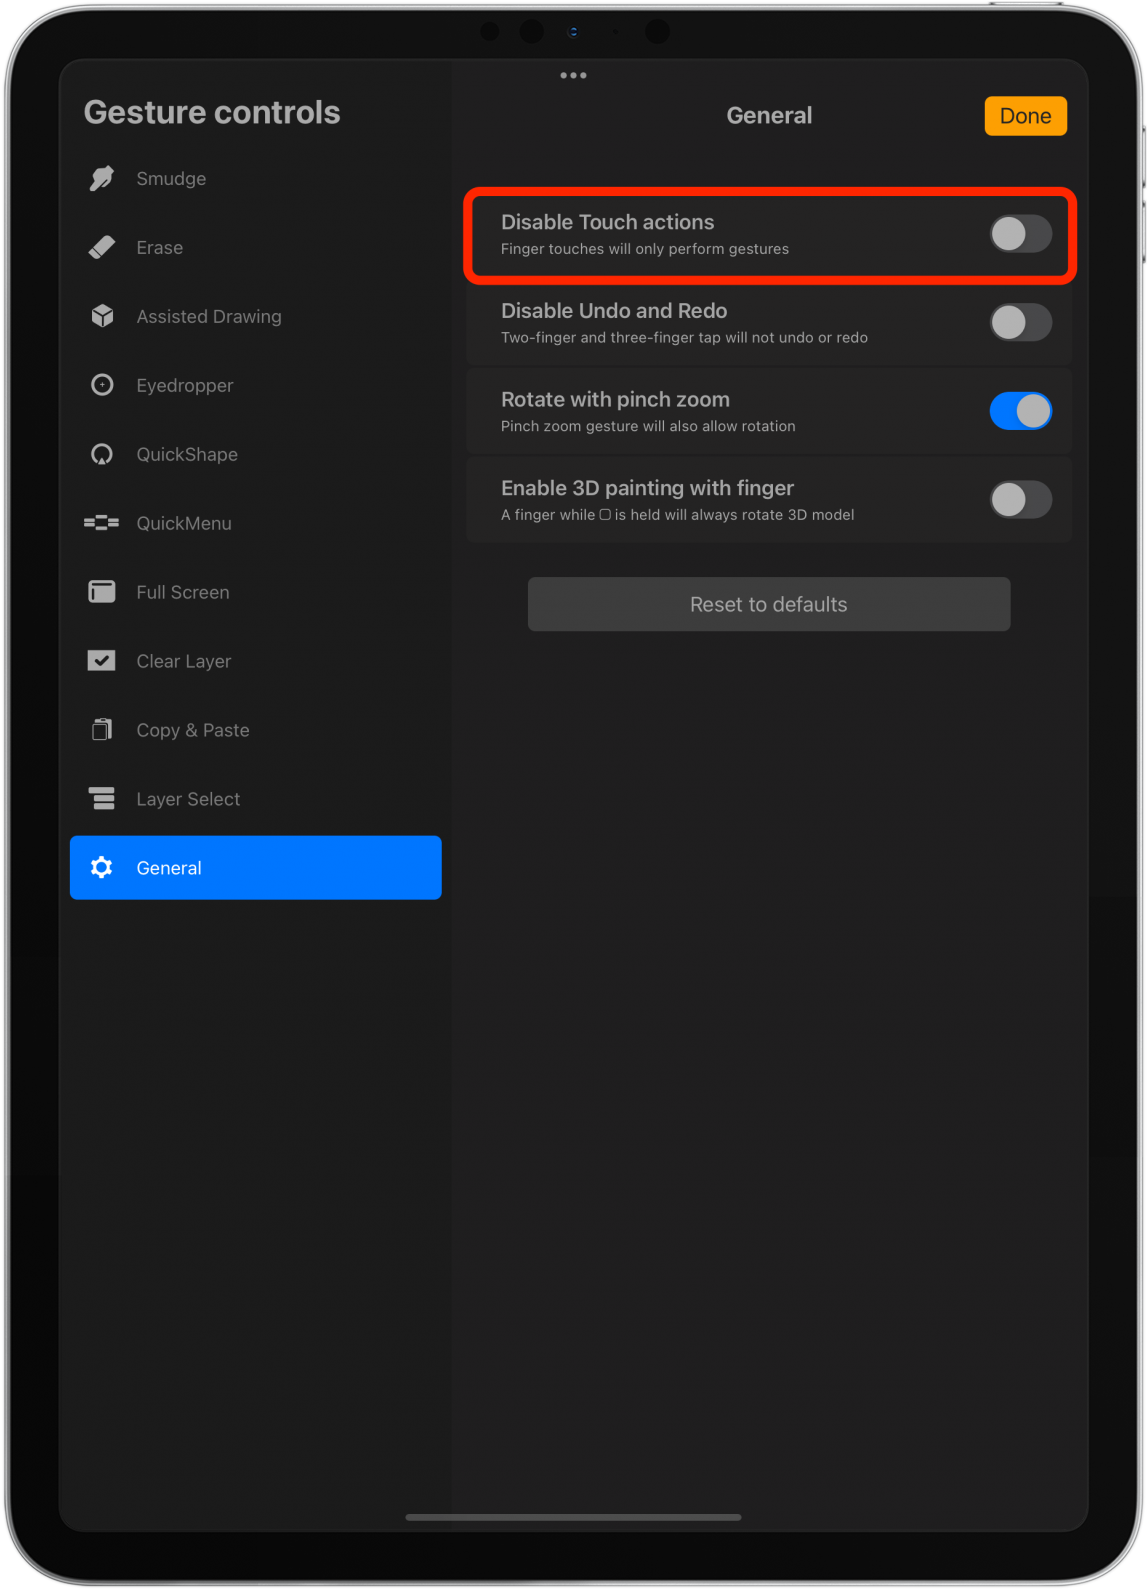
You may want to explore the other settings here. I like to toggle on Disable Undo and Redo because I tend to accidentally undo steps just by touching the display. People often wonder how to copy and paste on Procreate. If you tap Copy & Paste in General controls, you can customize this feature to your liking.
5. How to Enable a Grid, Perspective Guide, & Symmetry Feature
Sometimes we all need a little help, and Procreate has some valuable tools to guide you as you draw. Here’s how to enable these features:
- Tap the wrench icon.

- Under the Cavas tab, toggle on Drawing Guide.
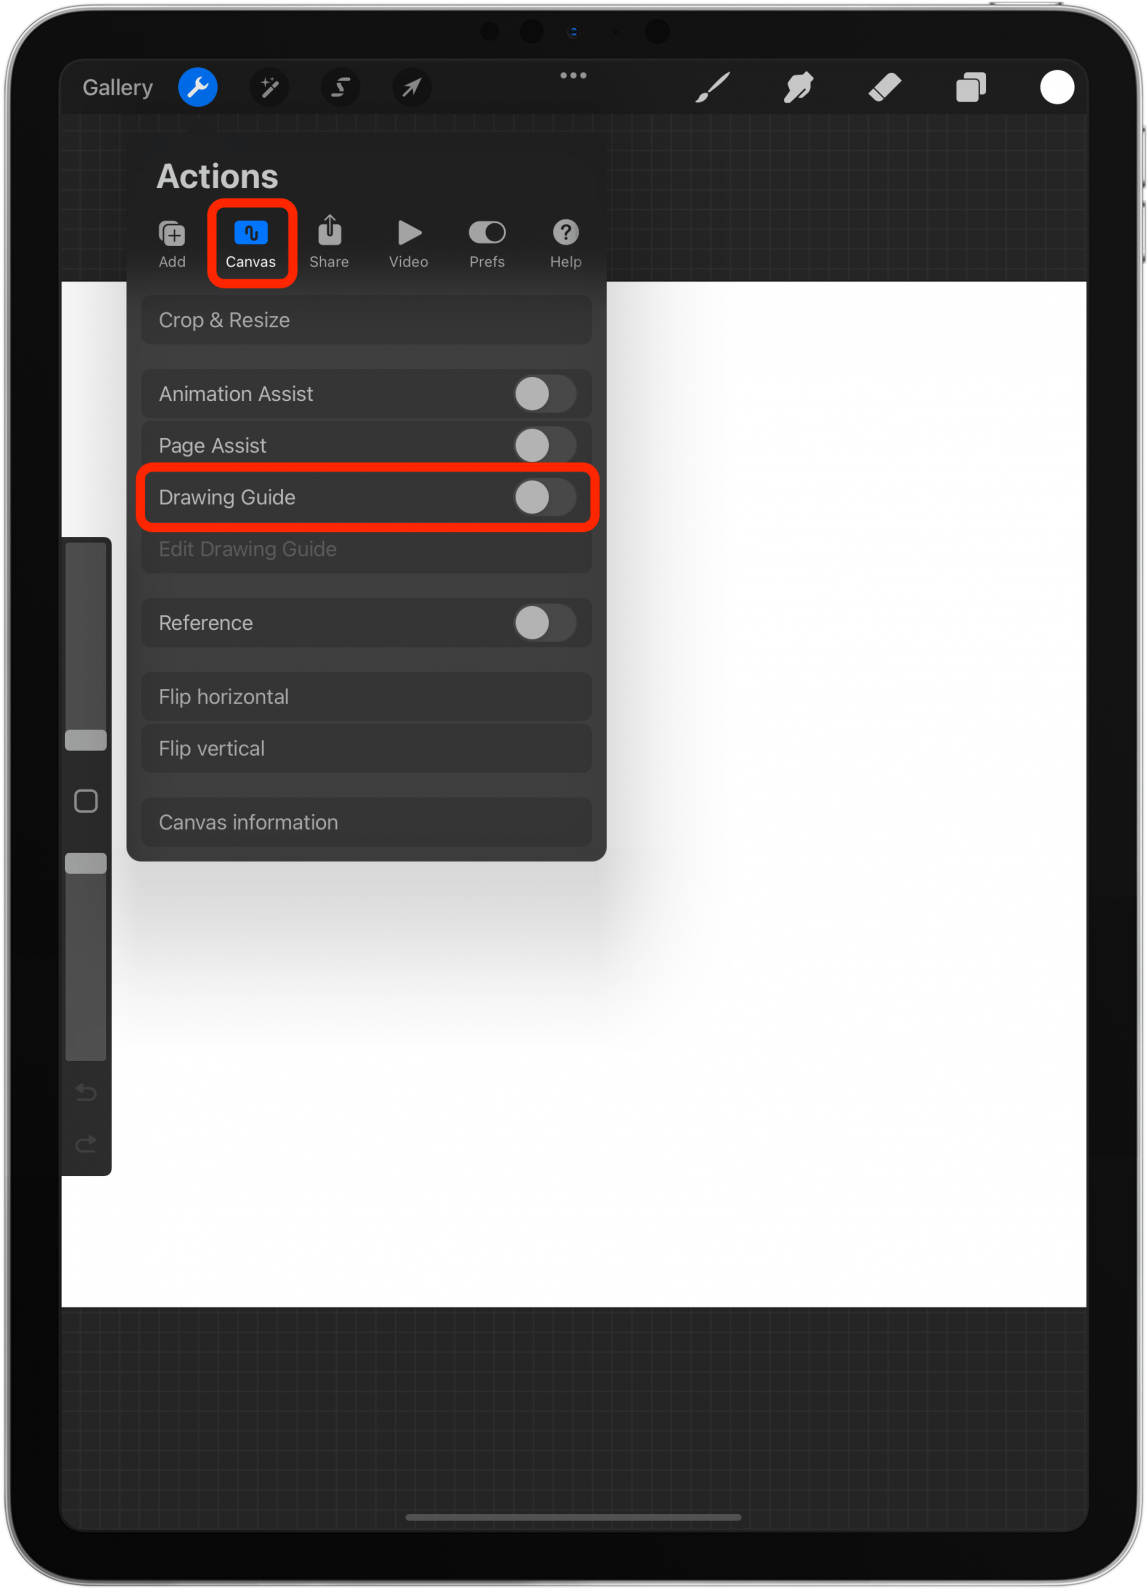
- Tap Edit Drawing Guide.
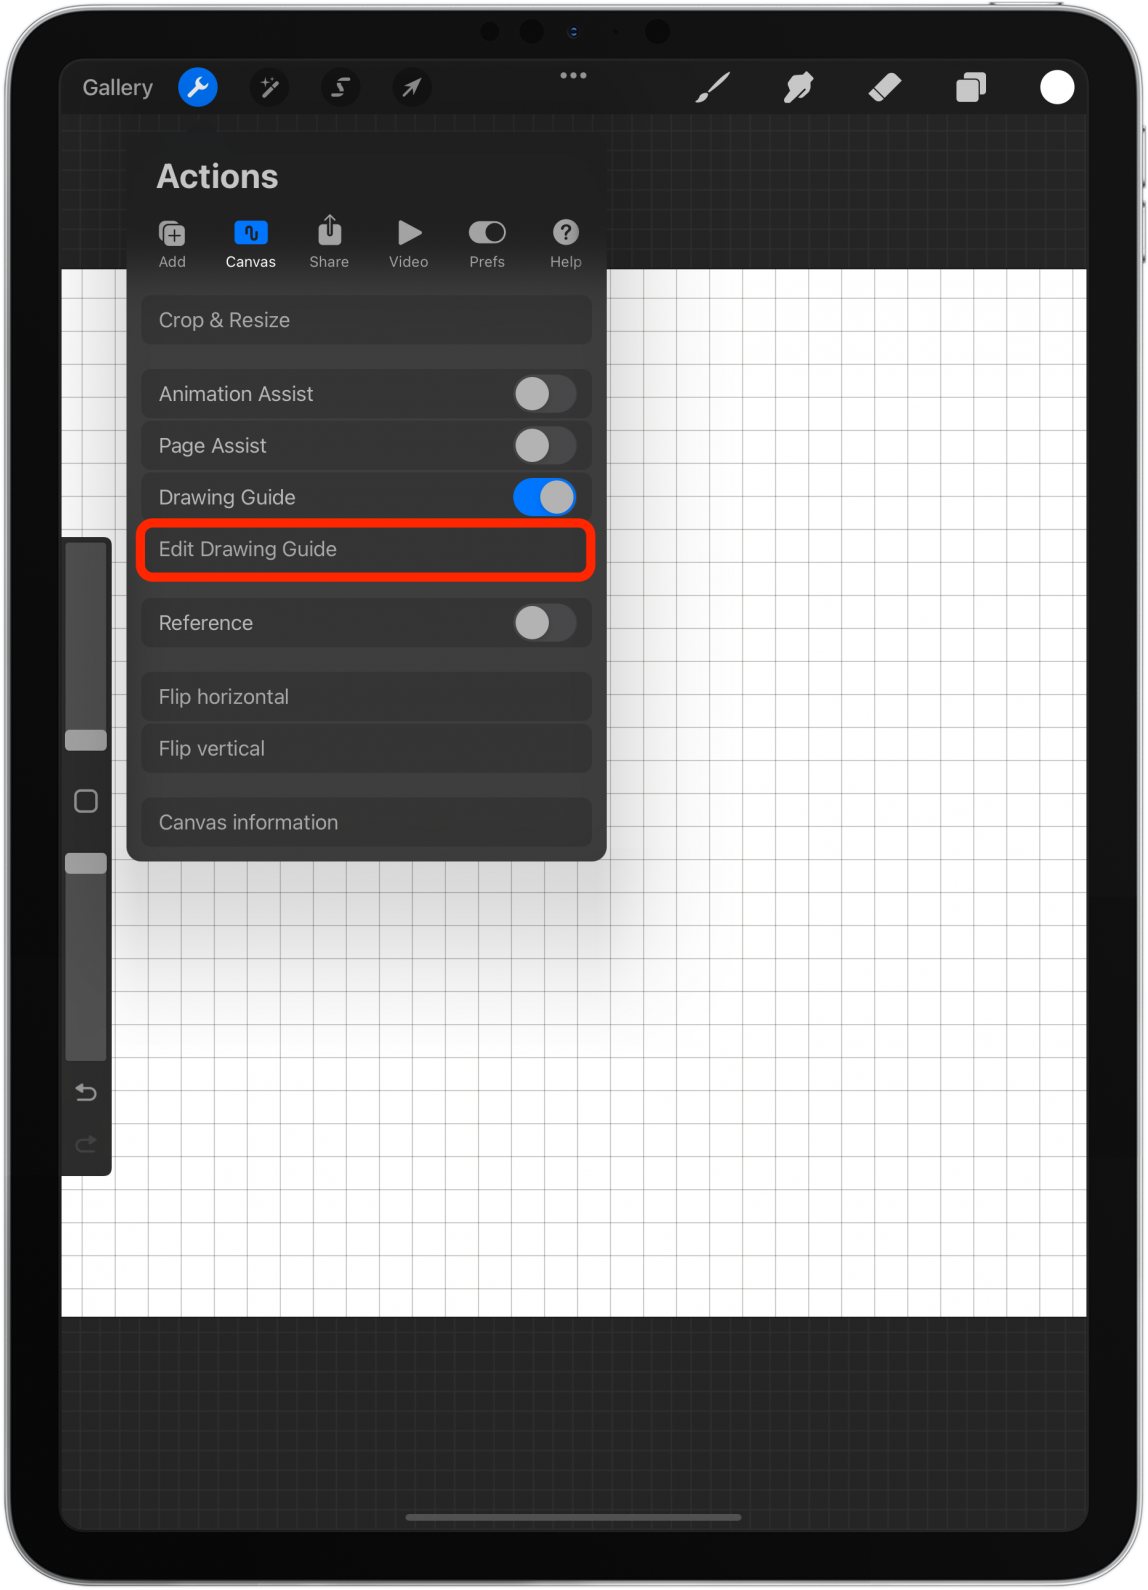
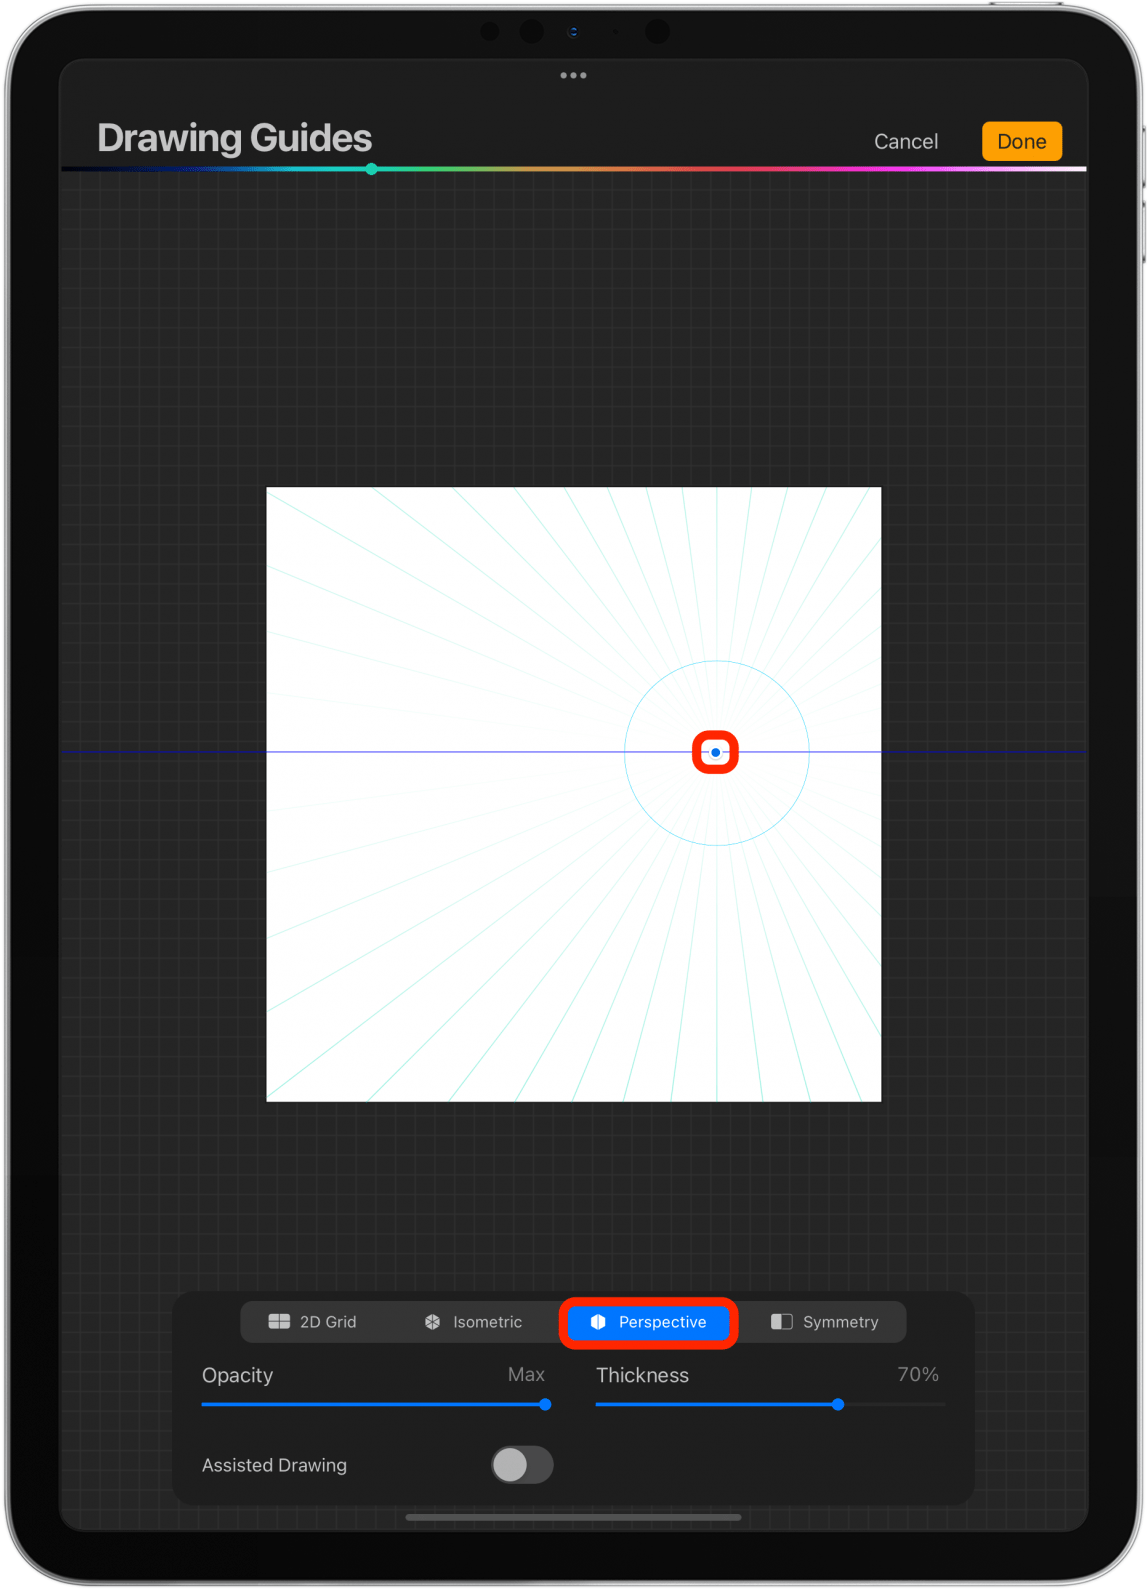
- Here you can pick between 2D Grid, Isometric, Perspective, and Symmetry.

- On top, you can select a color for the lines.
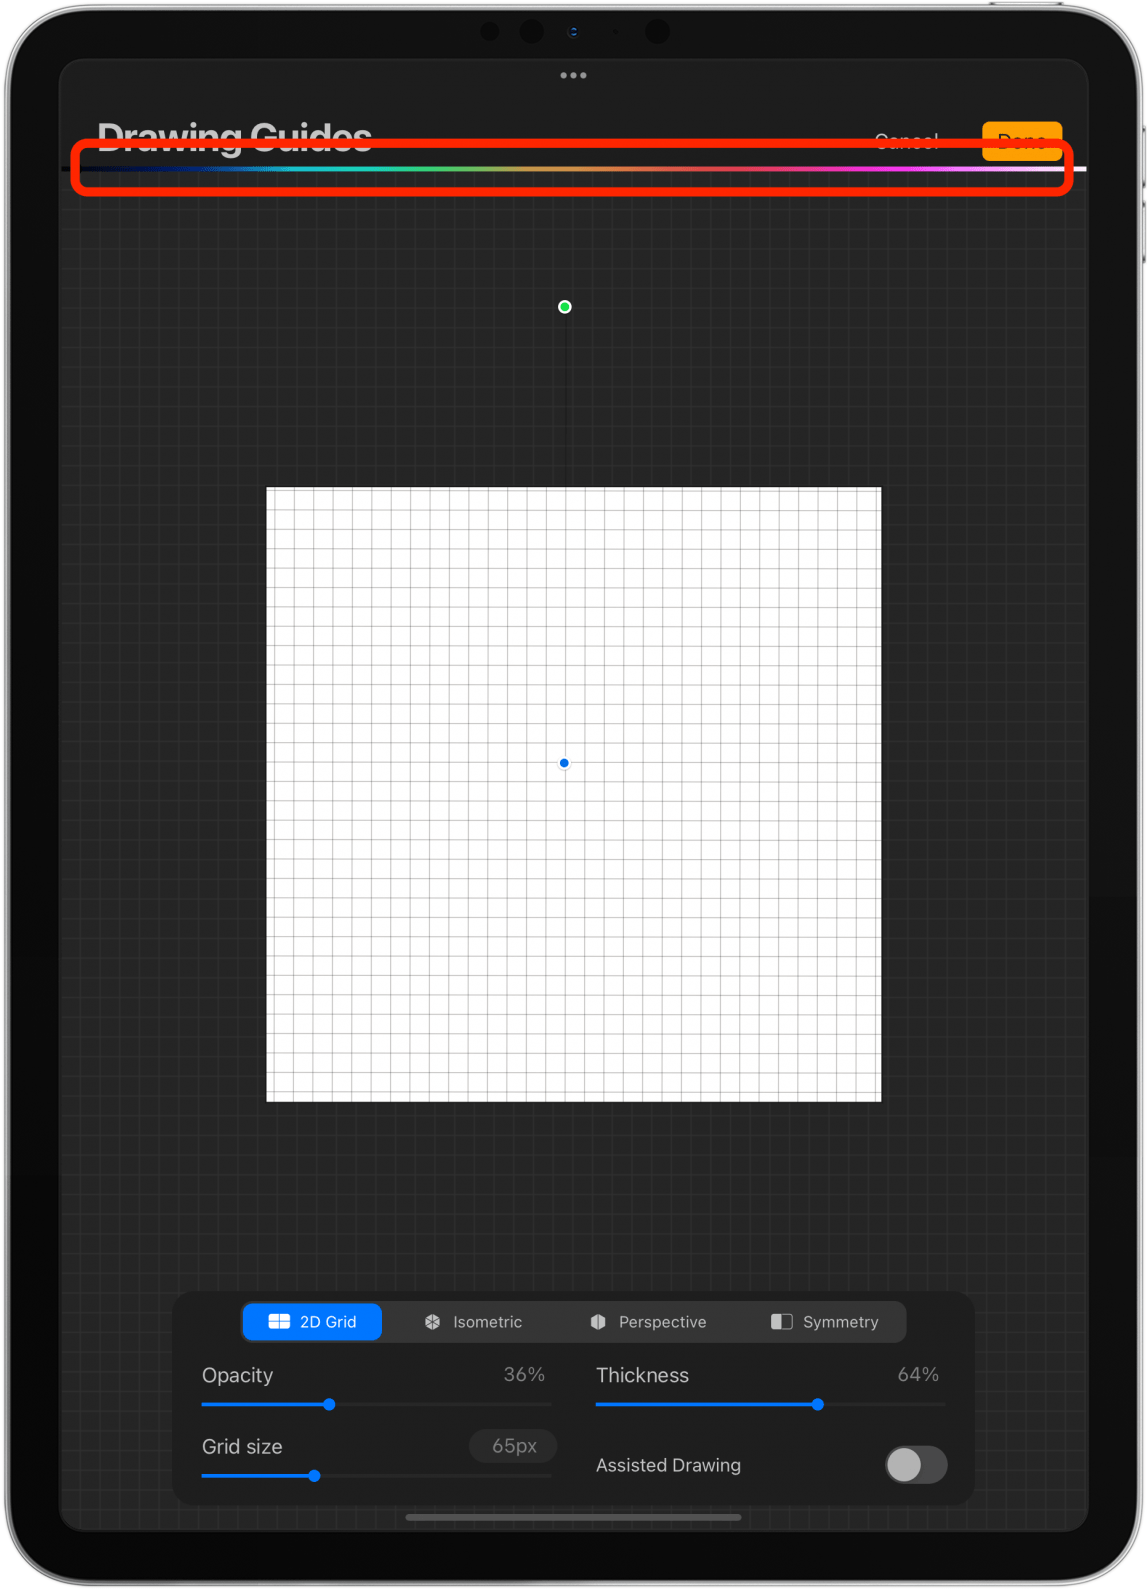
- 2D Grid shows you a simple grid that you can move by dragging the blue dot and rotate by dragging the green dot.
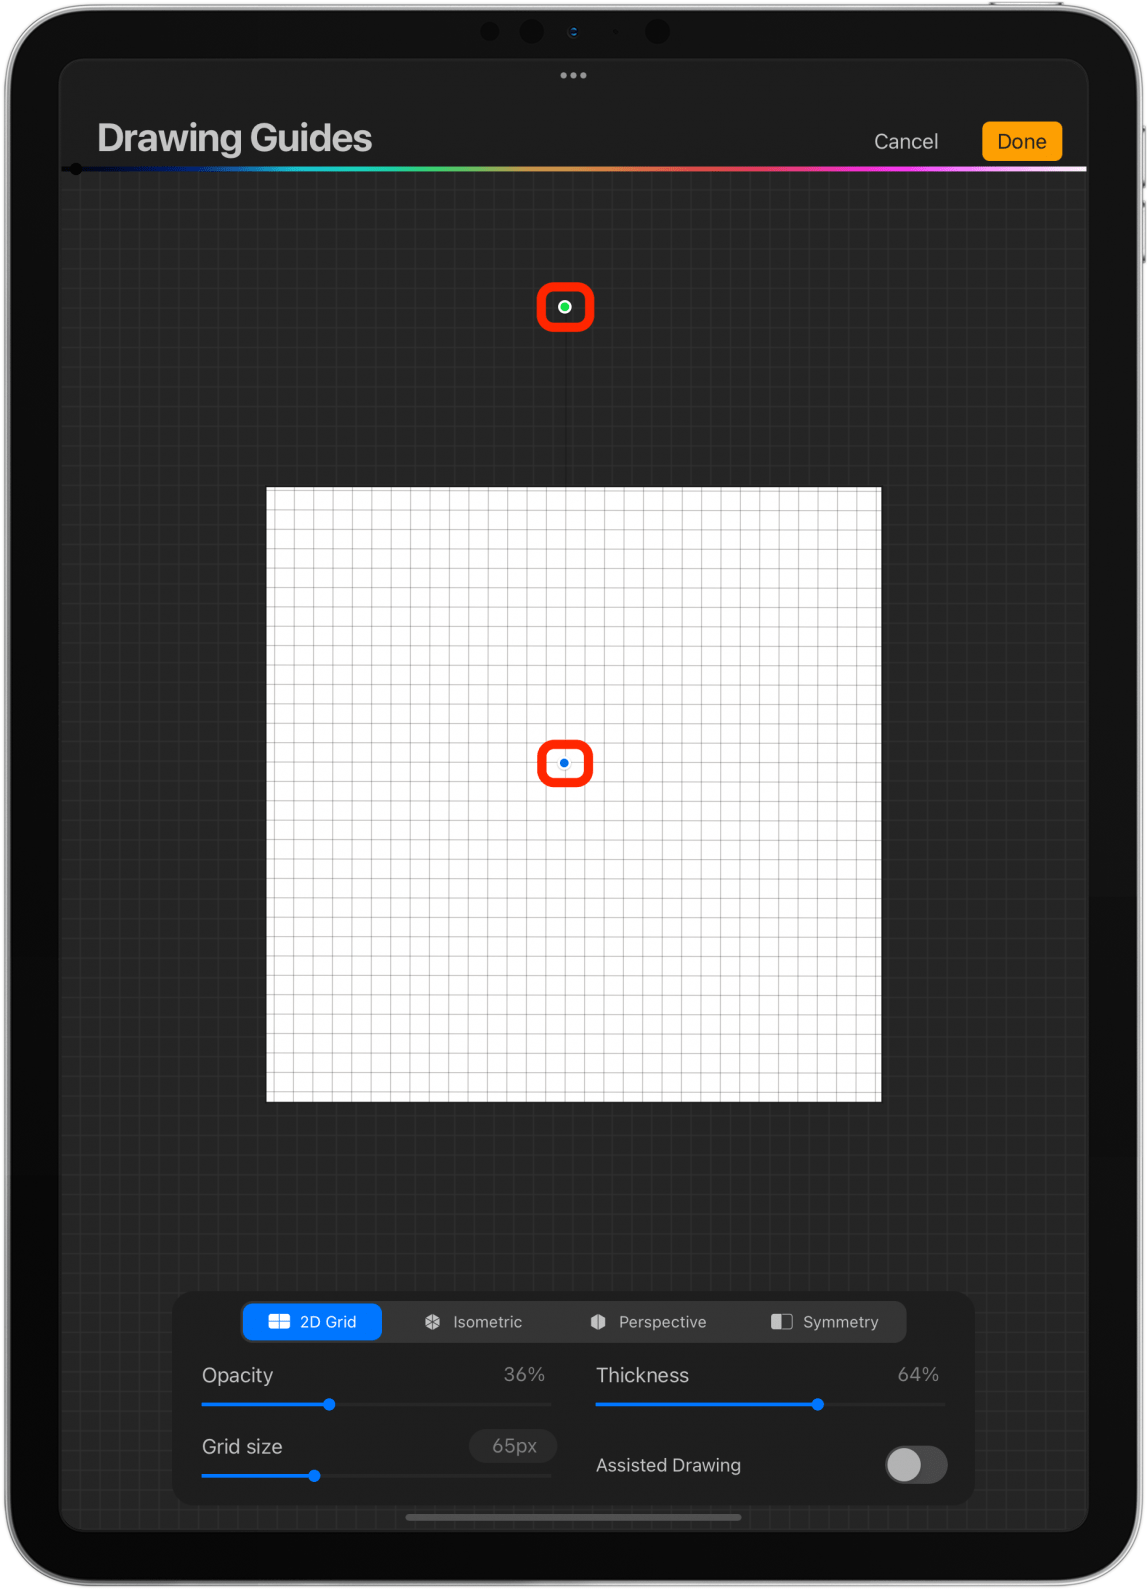
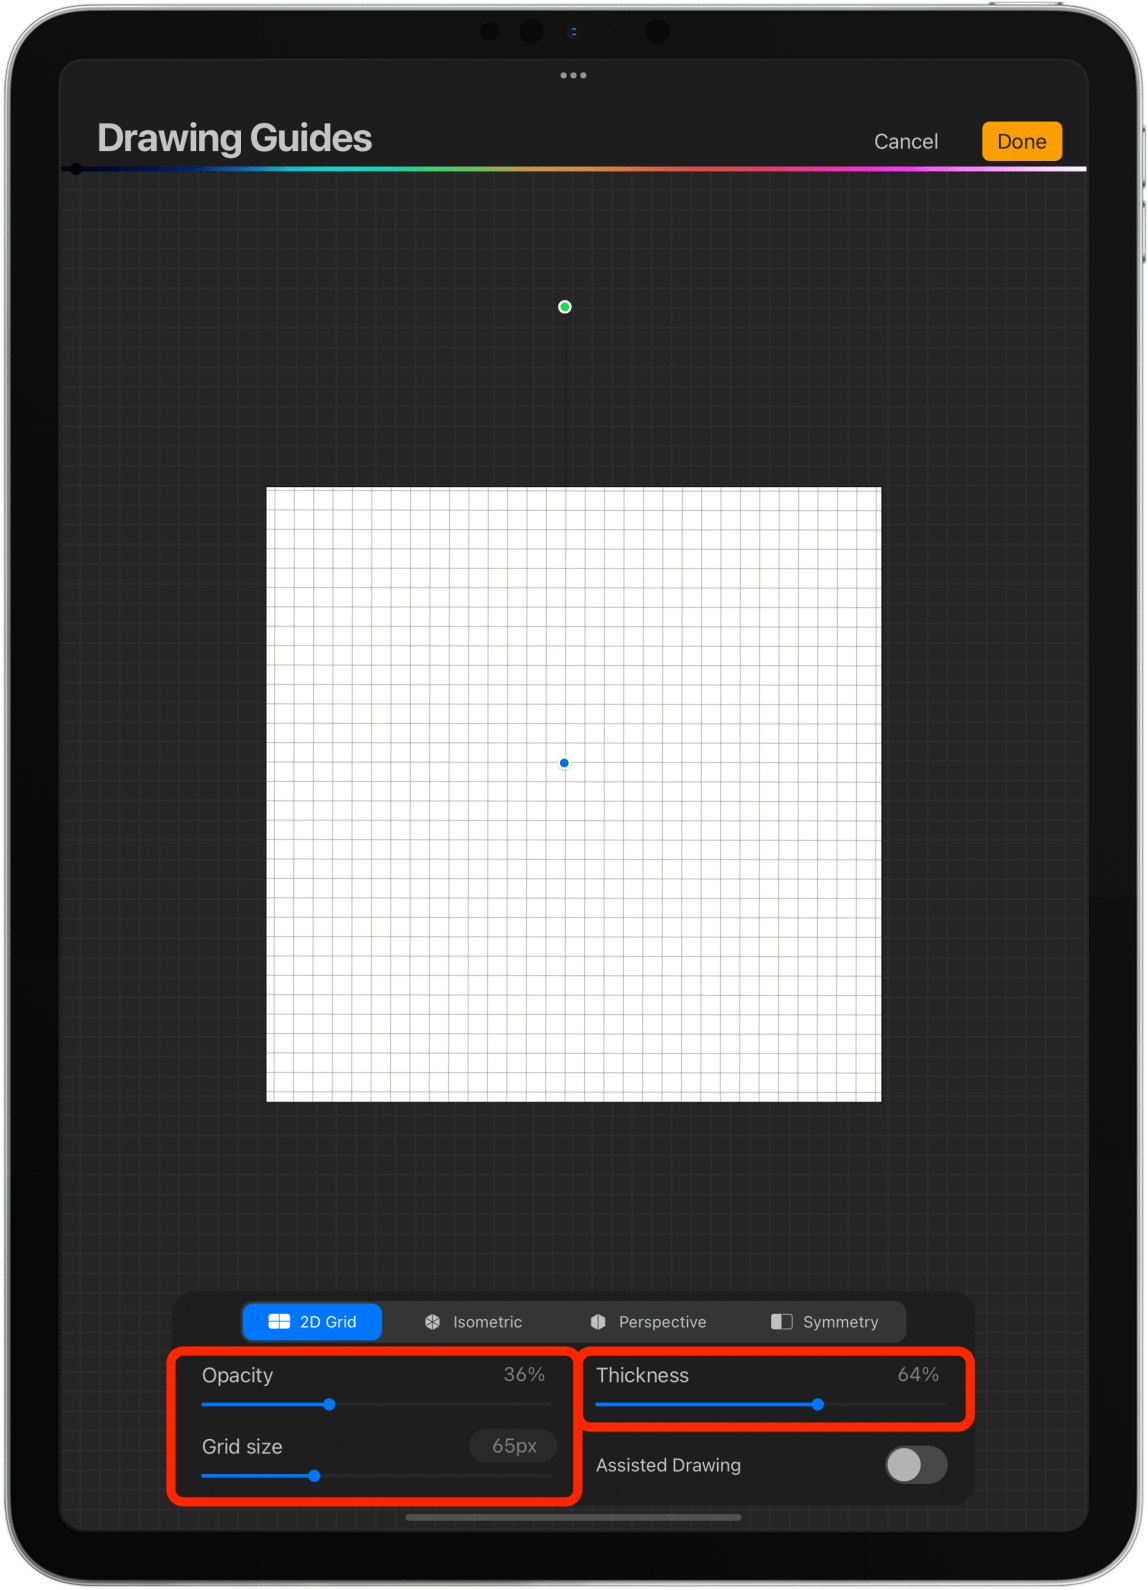
- You can also alter the grid by adjusting the opacity, thickness, and size.
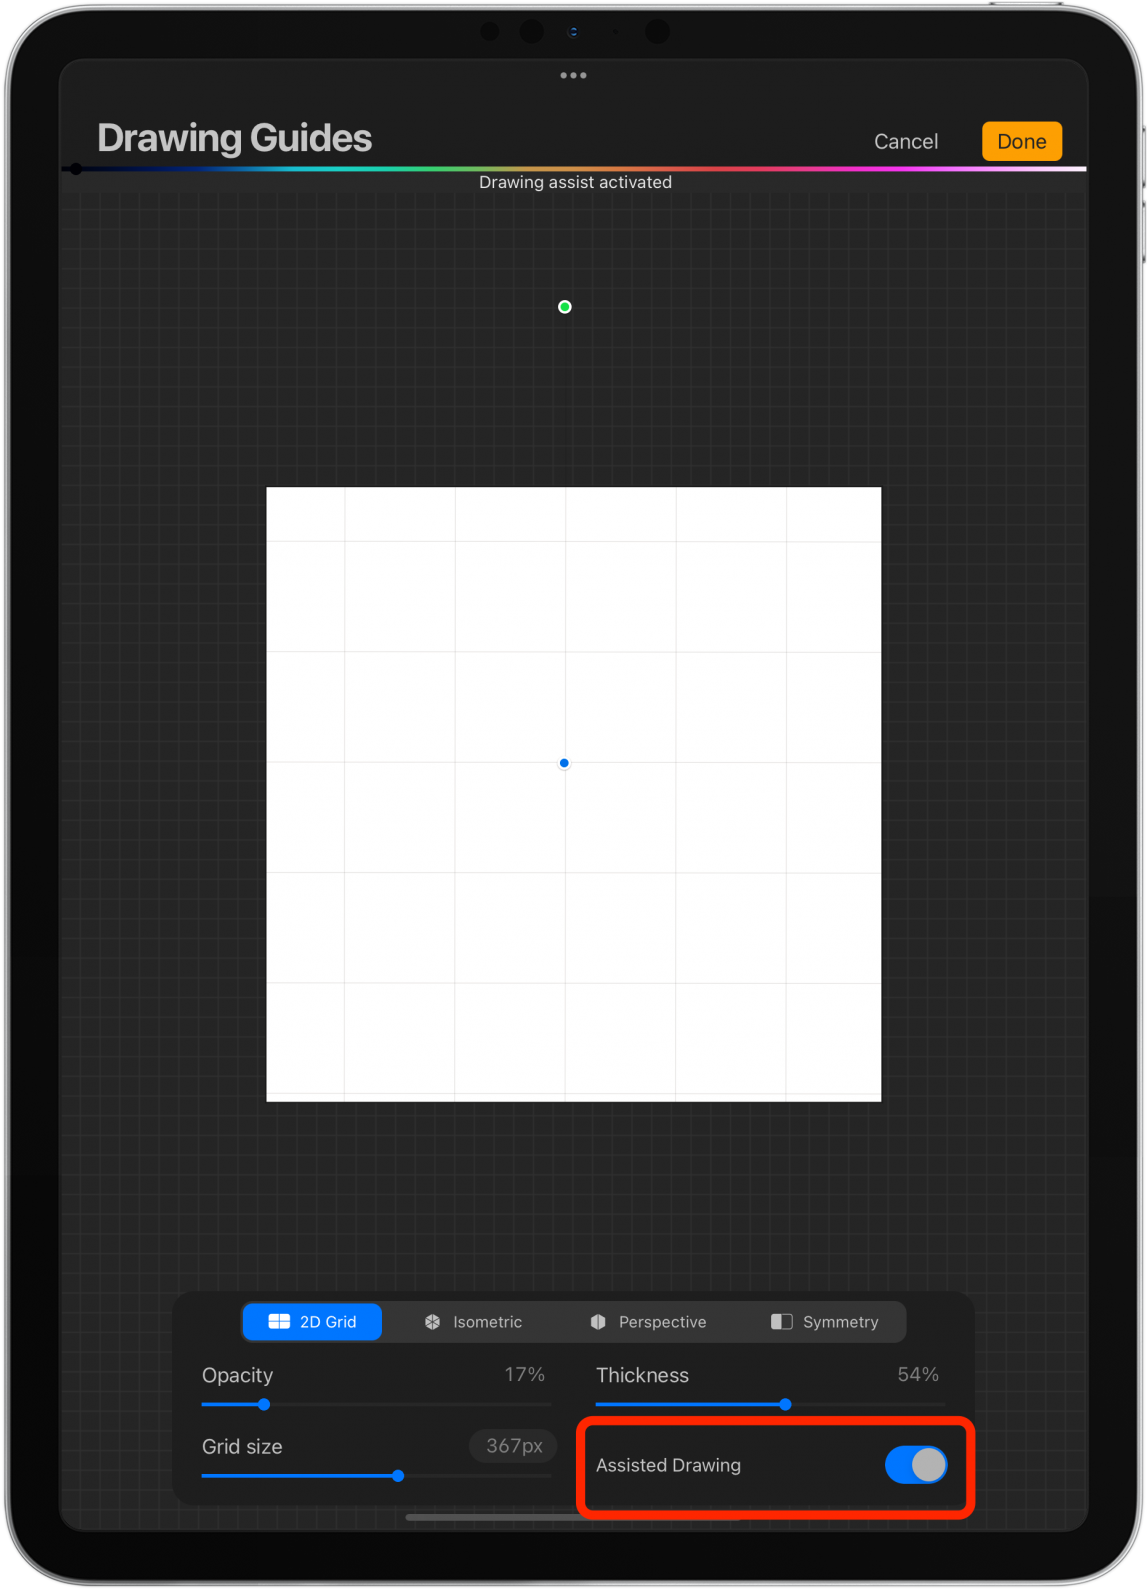
- If you toggle on Assisted Drawing, whatever you draw on one section of your canvas will be automatically illustrated in other sections to create perfect symmetry.
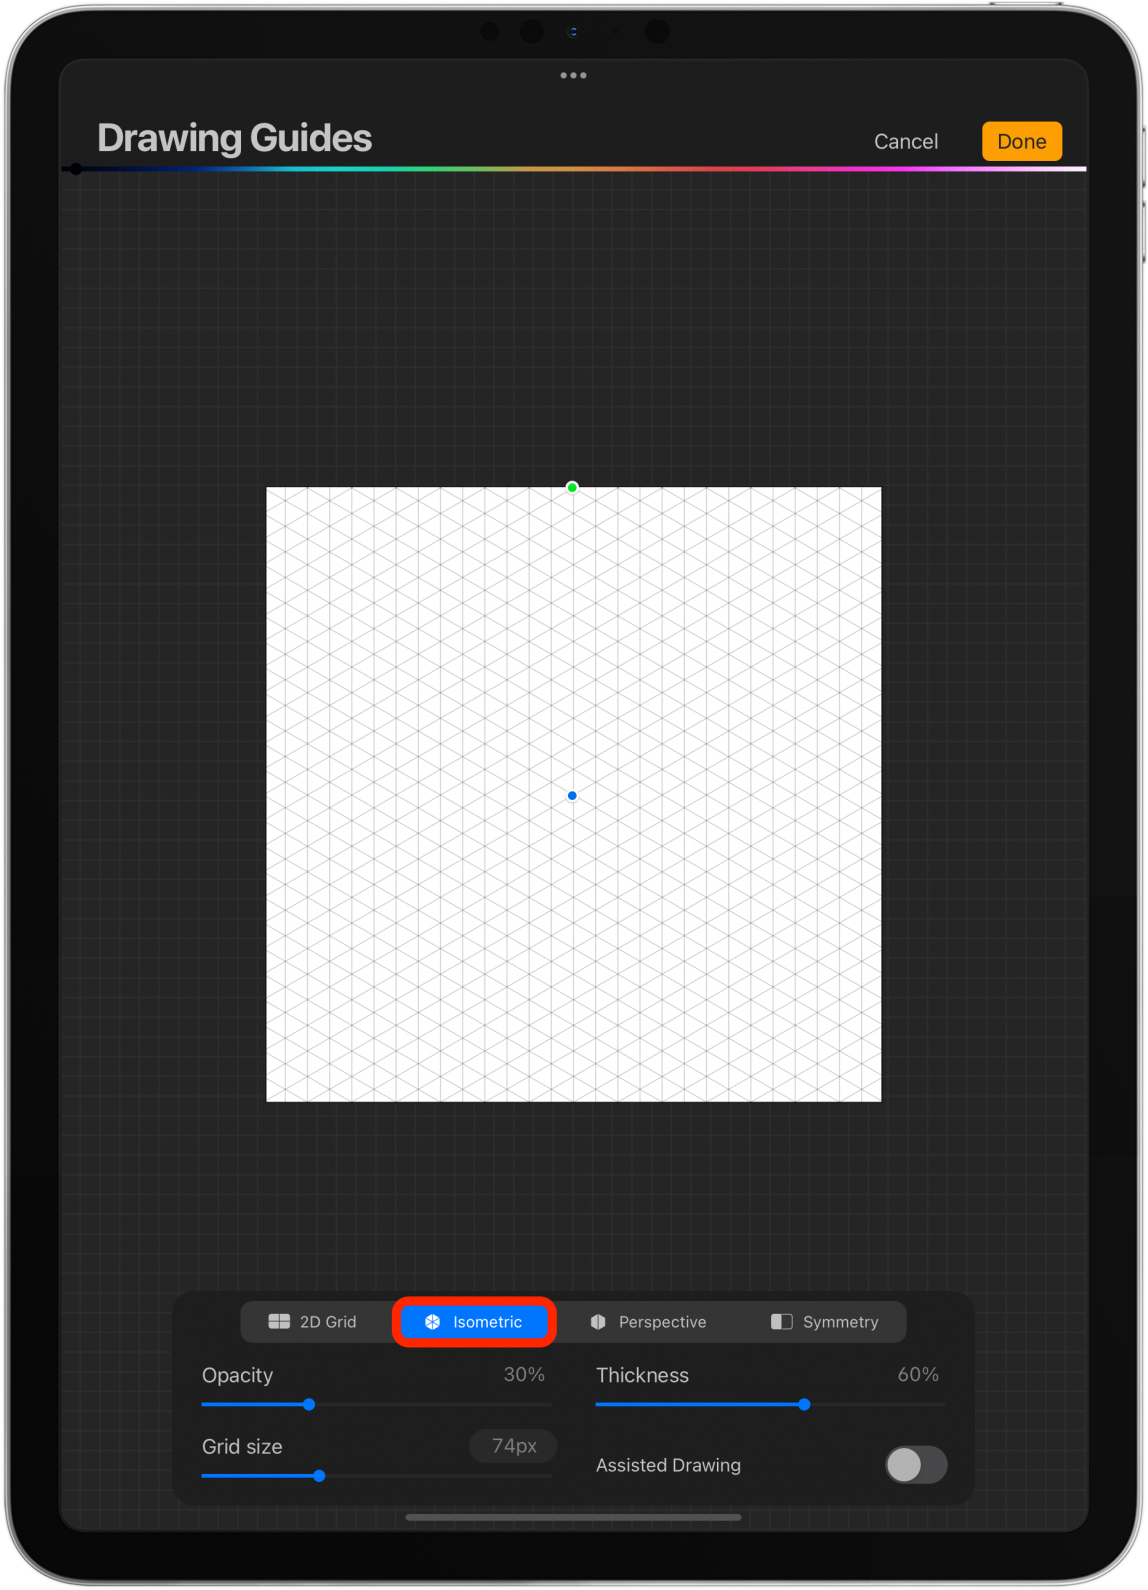
- If you select Isometric, you will see this grid and will be able to make adjustments and opt for Assisted Drawing.
- If you select Perspective, you will need to create a vanishing point. You can then adjust it and toggle on Assisted Drawing if you wish.
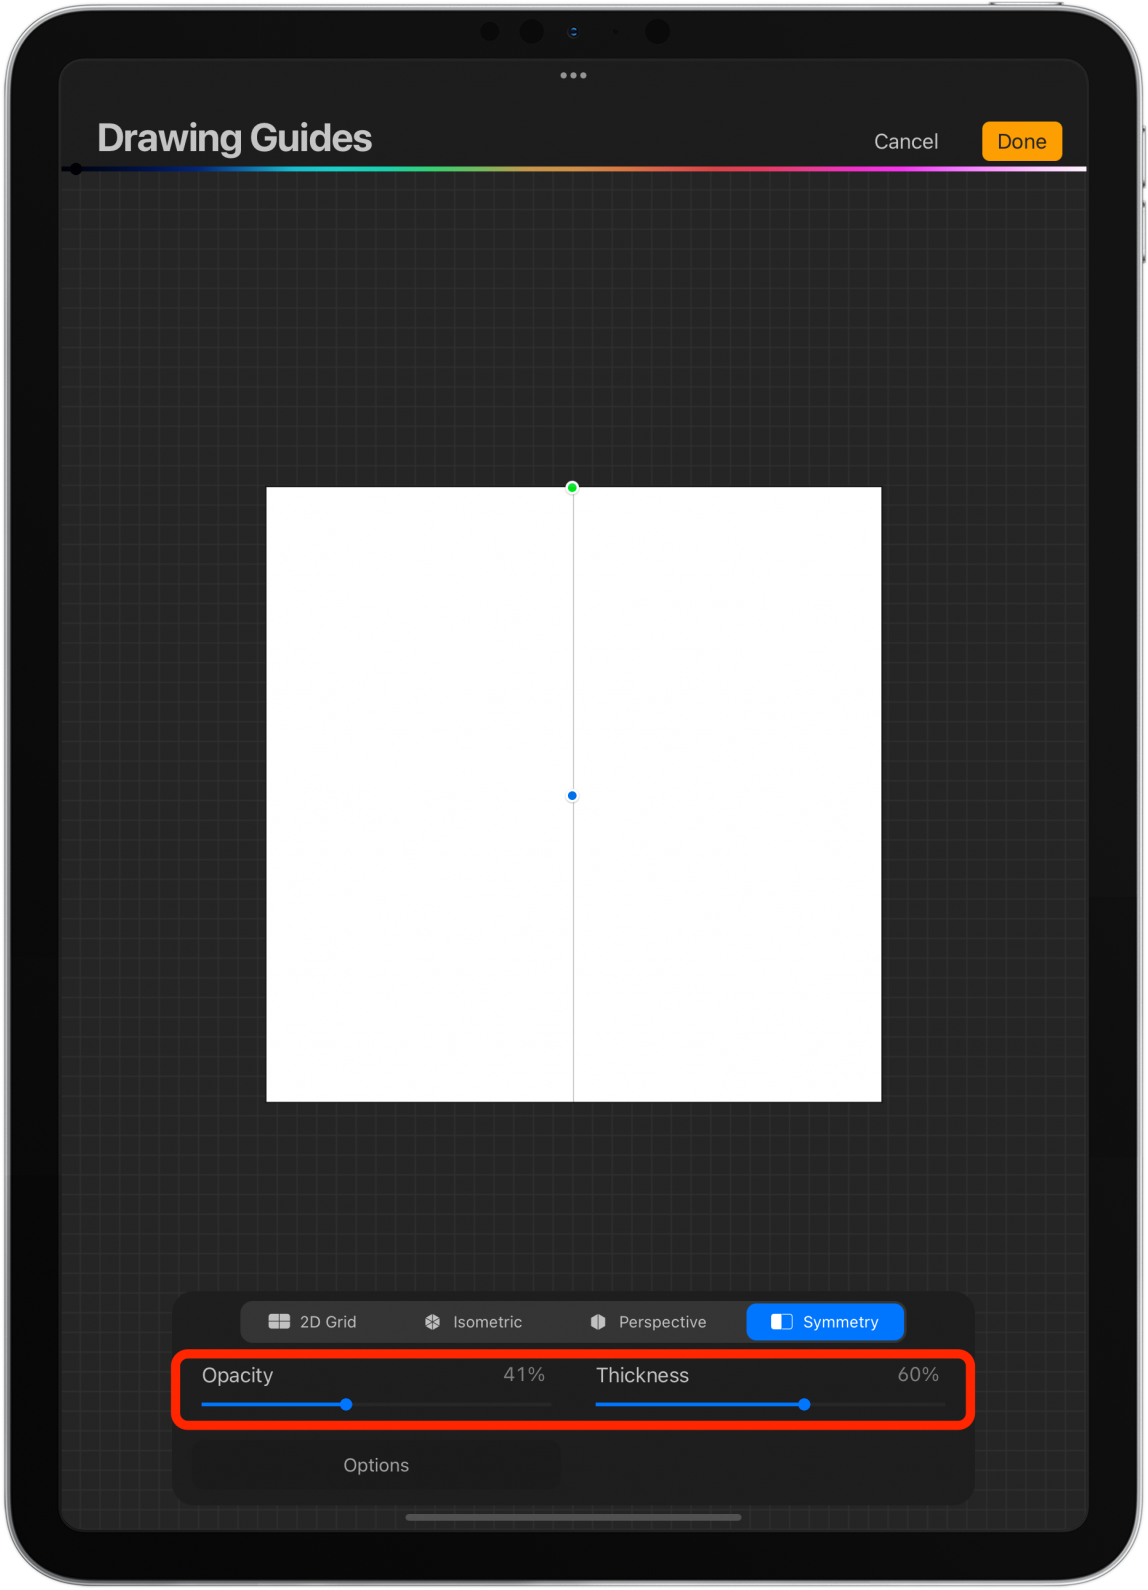
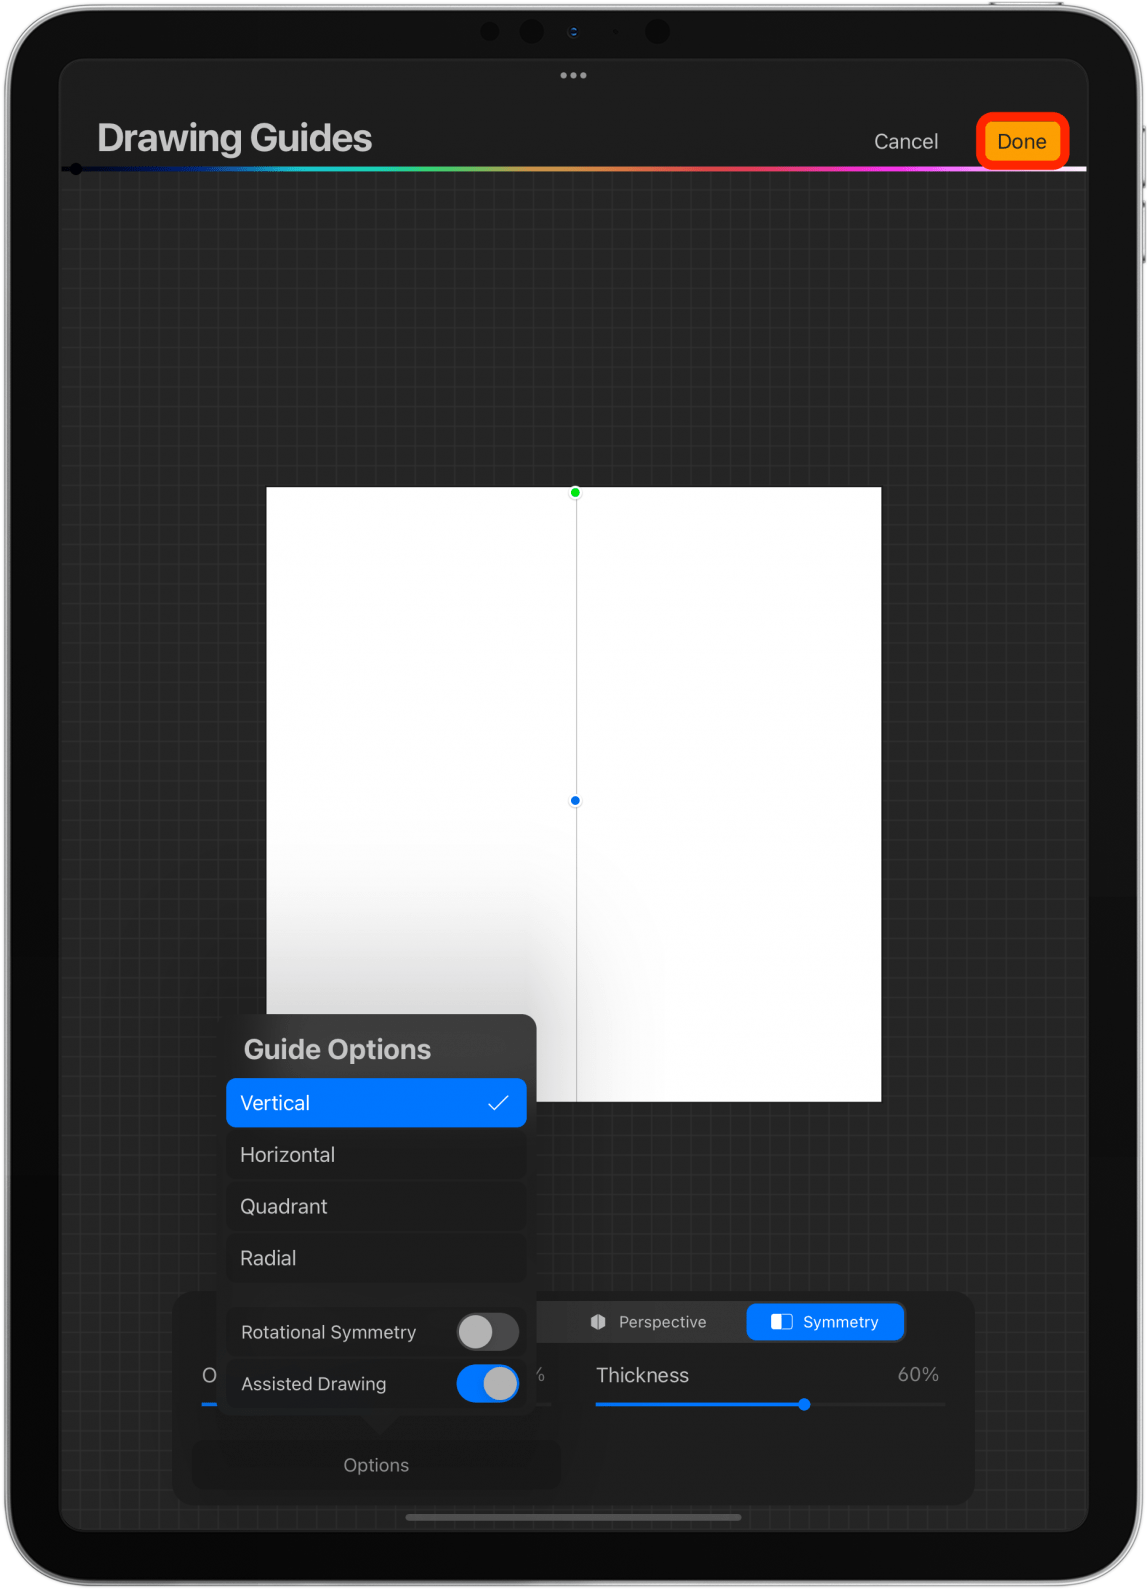
- Finally, if you select Symmetry, you will see a line going through your canvas. You can move it by dragging the blue dot and rotate it by dragging the green dot.
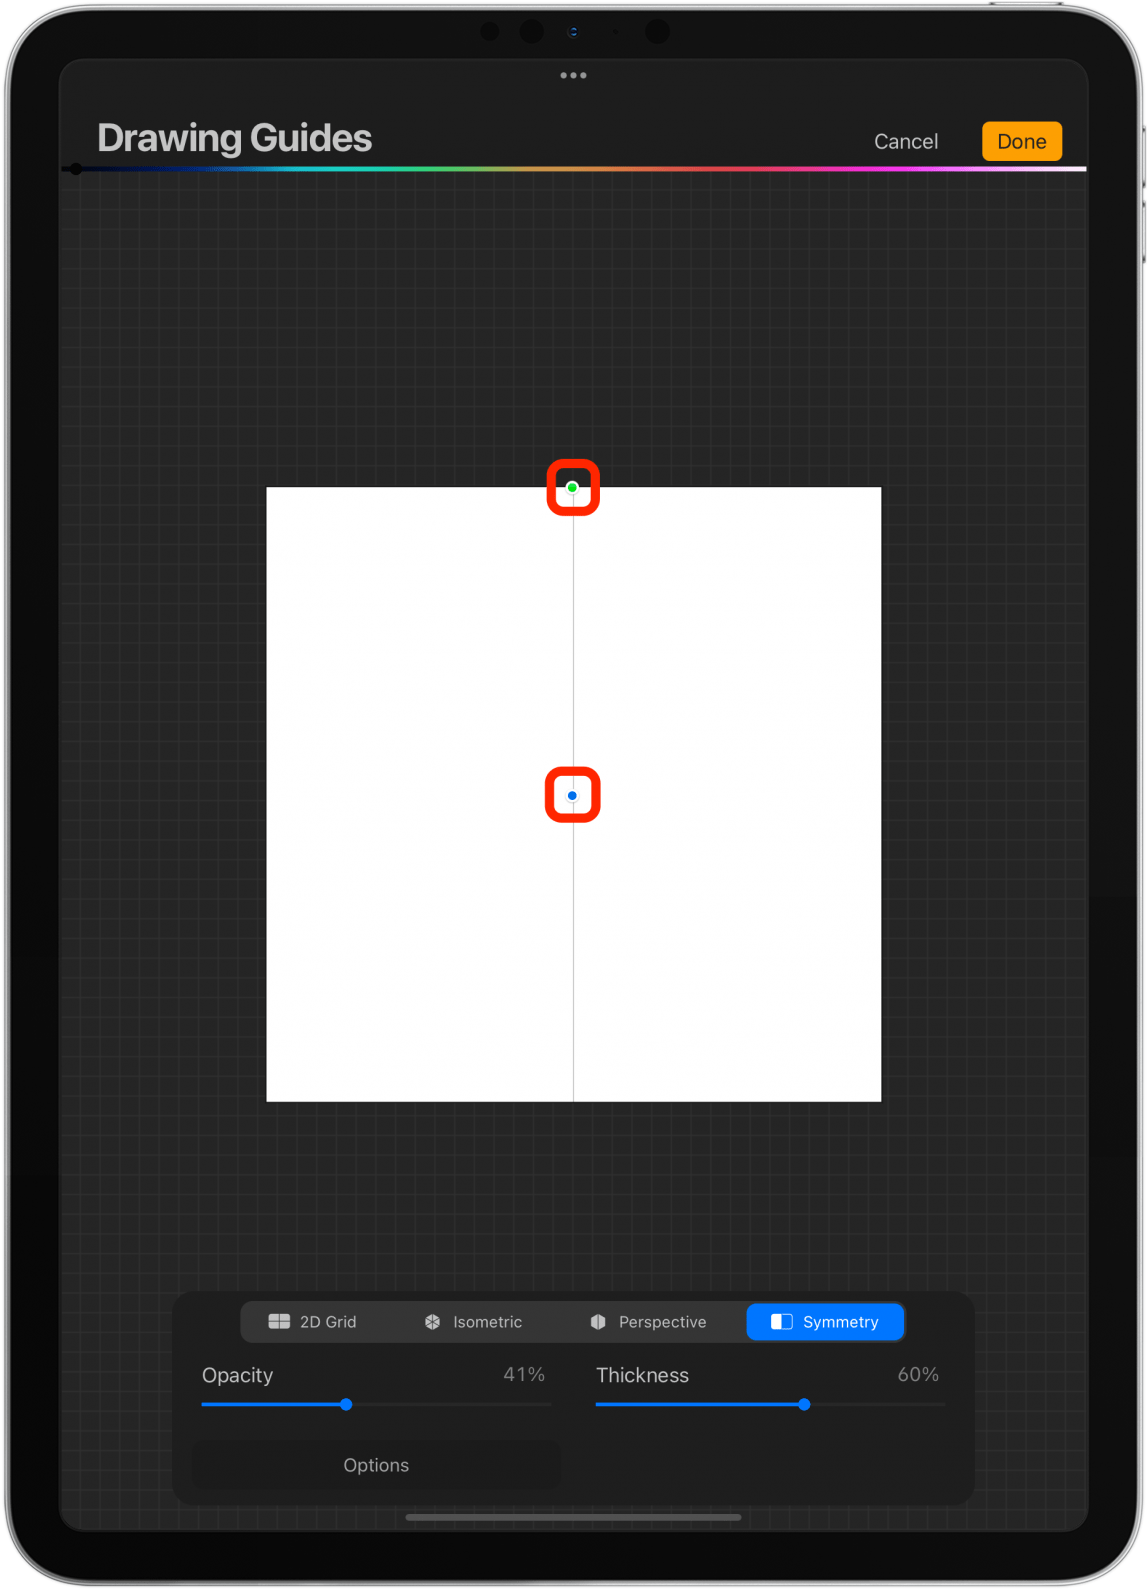
- You can also adjust opacity and thickness. Assisted Drawing is automatically selected.
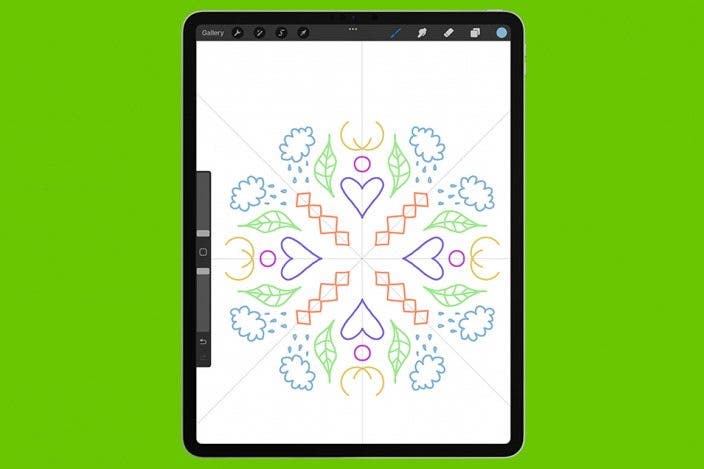
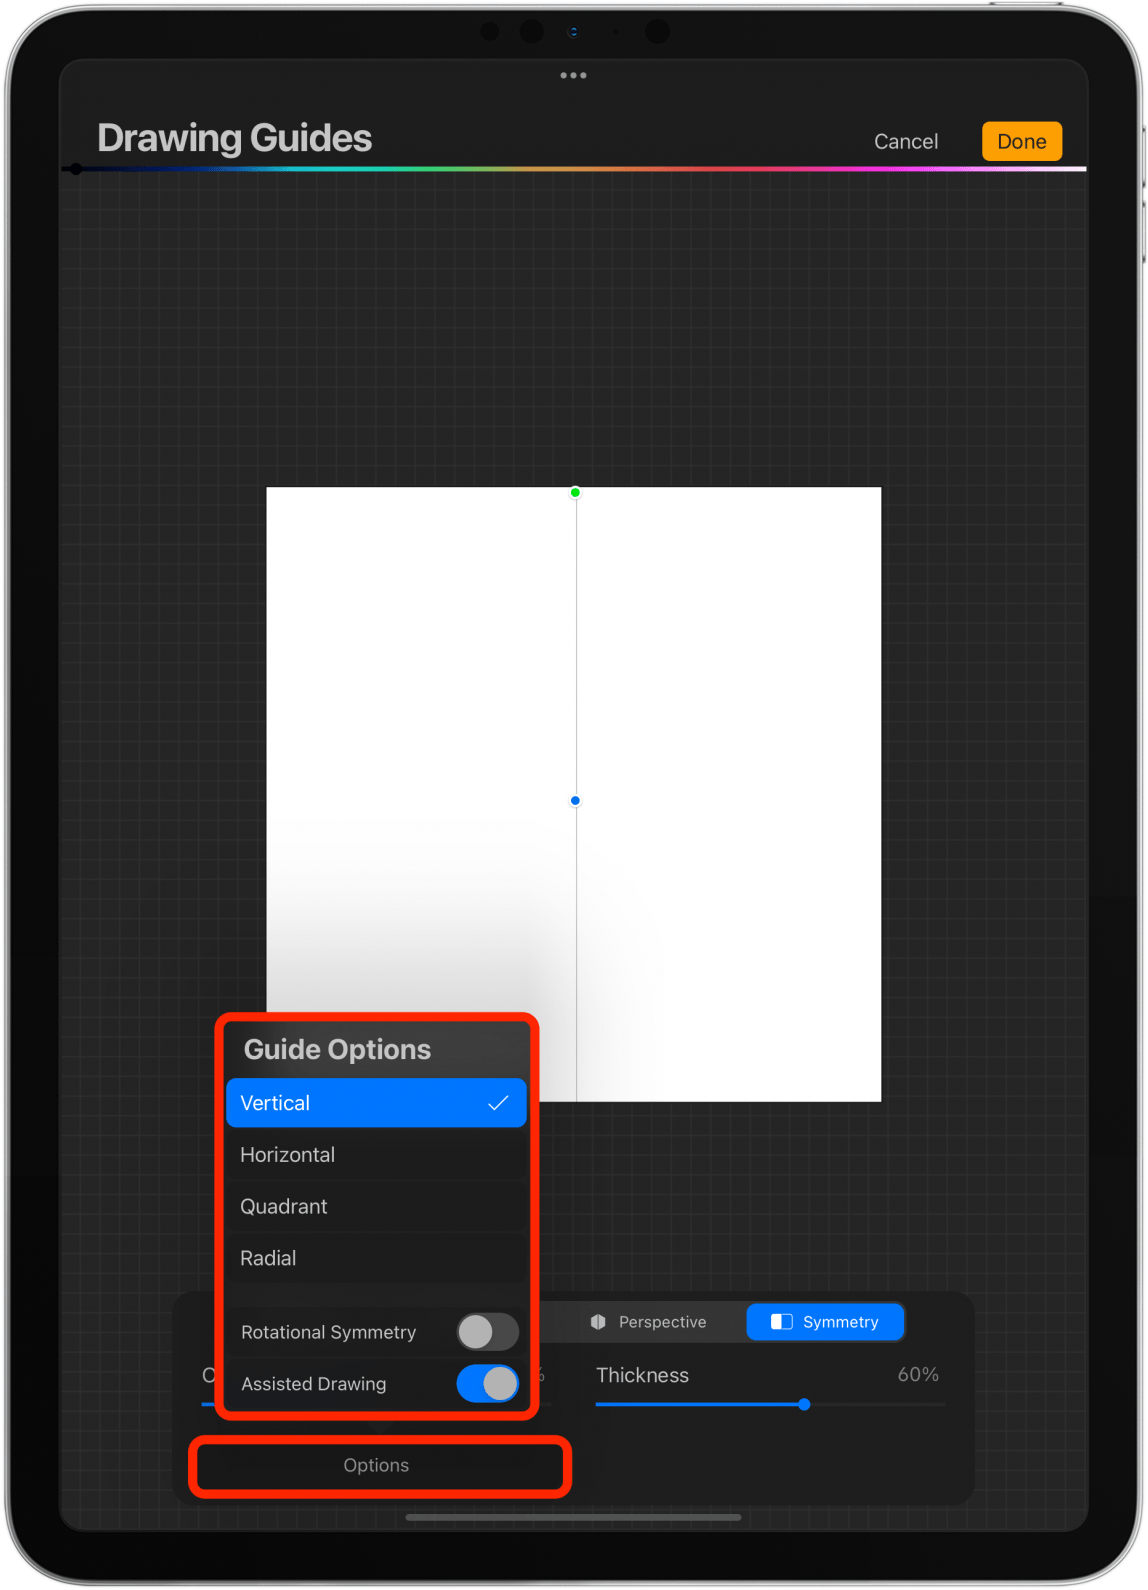
- If you tap Options, you will be able to pick between vertical, horizontal, quadrant, or radial symmetry. You can also toggle Rotational Symmetry and Assisted Drawing on and off. Rotational Symmetry means that your stroke is replicated and flipped both horizontally and vertically at the same time.
- Tap Done when you are ready to draw.
- Here’s how radial rotational symmetry looks. It is great for drawing mandalas!

6. Using QuickLine & QuickShape for Perfect Shapes & Straight Lines
Drawing straight lines and crisp shapes is a hard challenge for many. Since Procreate works with pixels rather than vectors, it becomes a lot more obvious if a line or shape isn’t perfect. Luckily, there’s a quick fix:
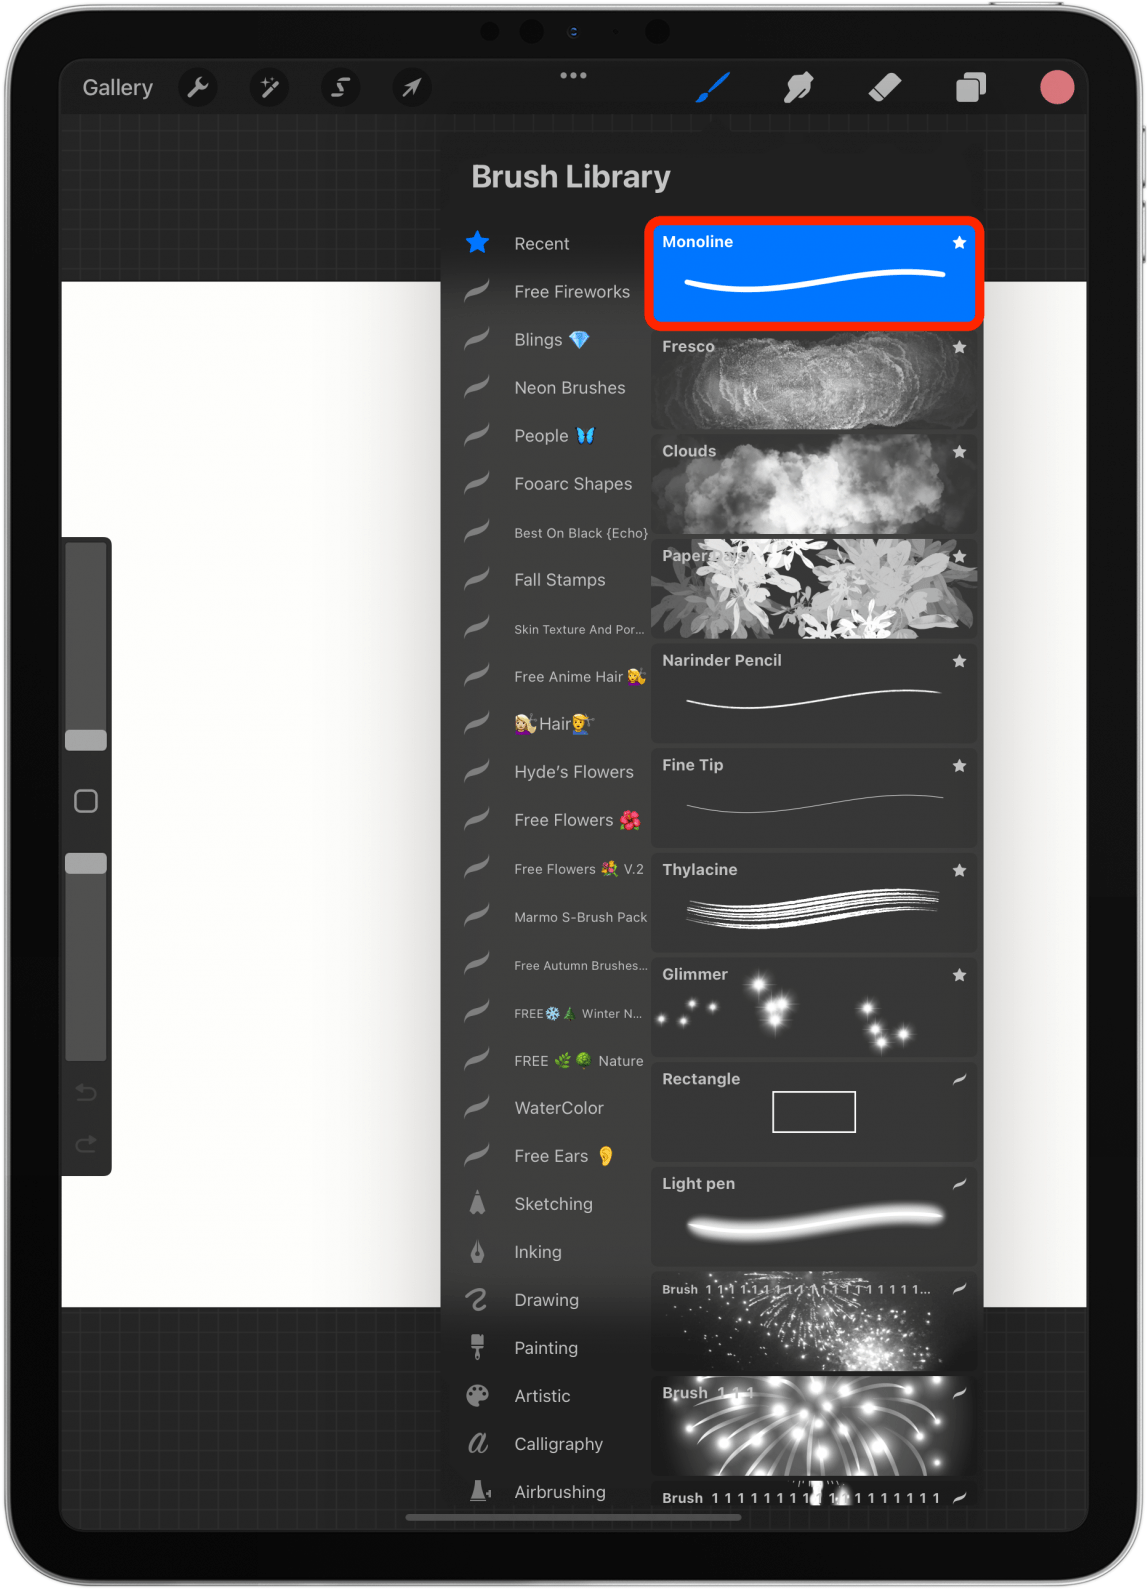
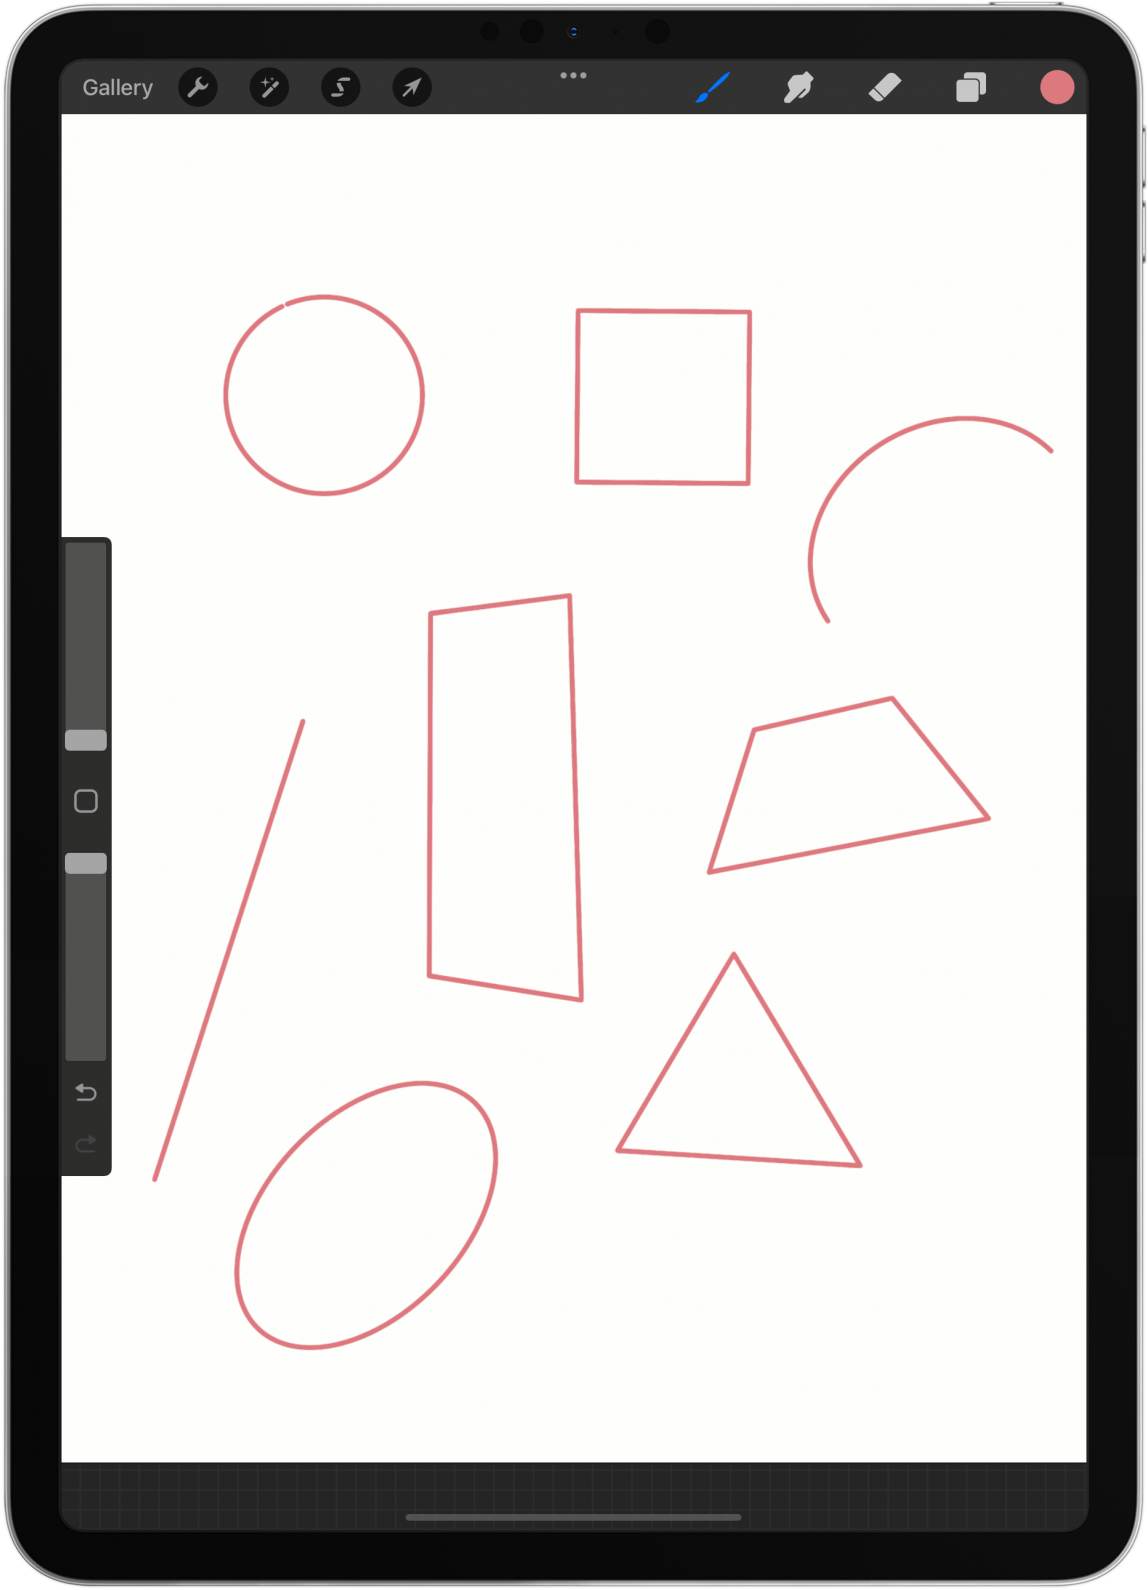
- Open a new project and pick the brush of your choice. Monoline is an awesome choice for this.
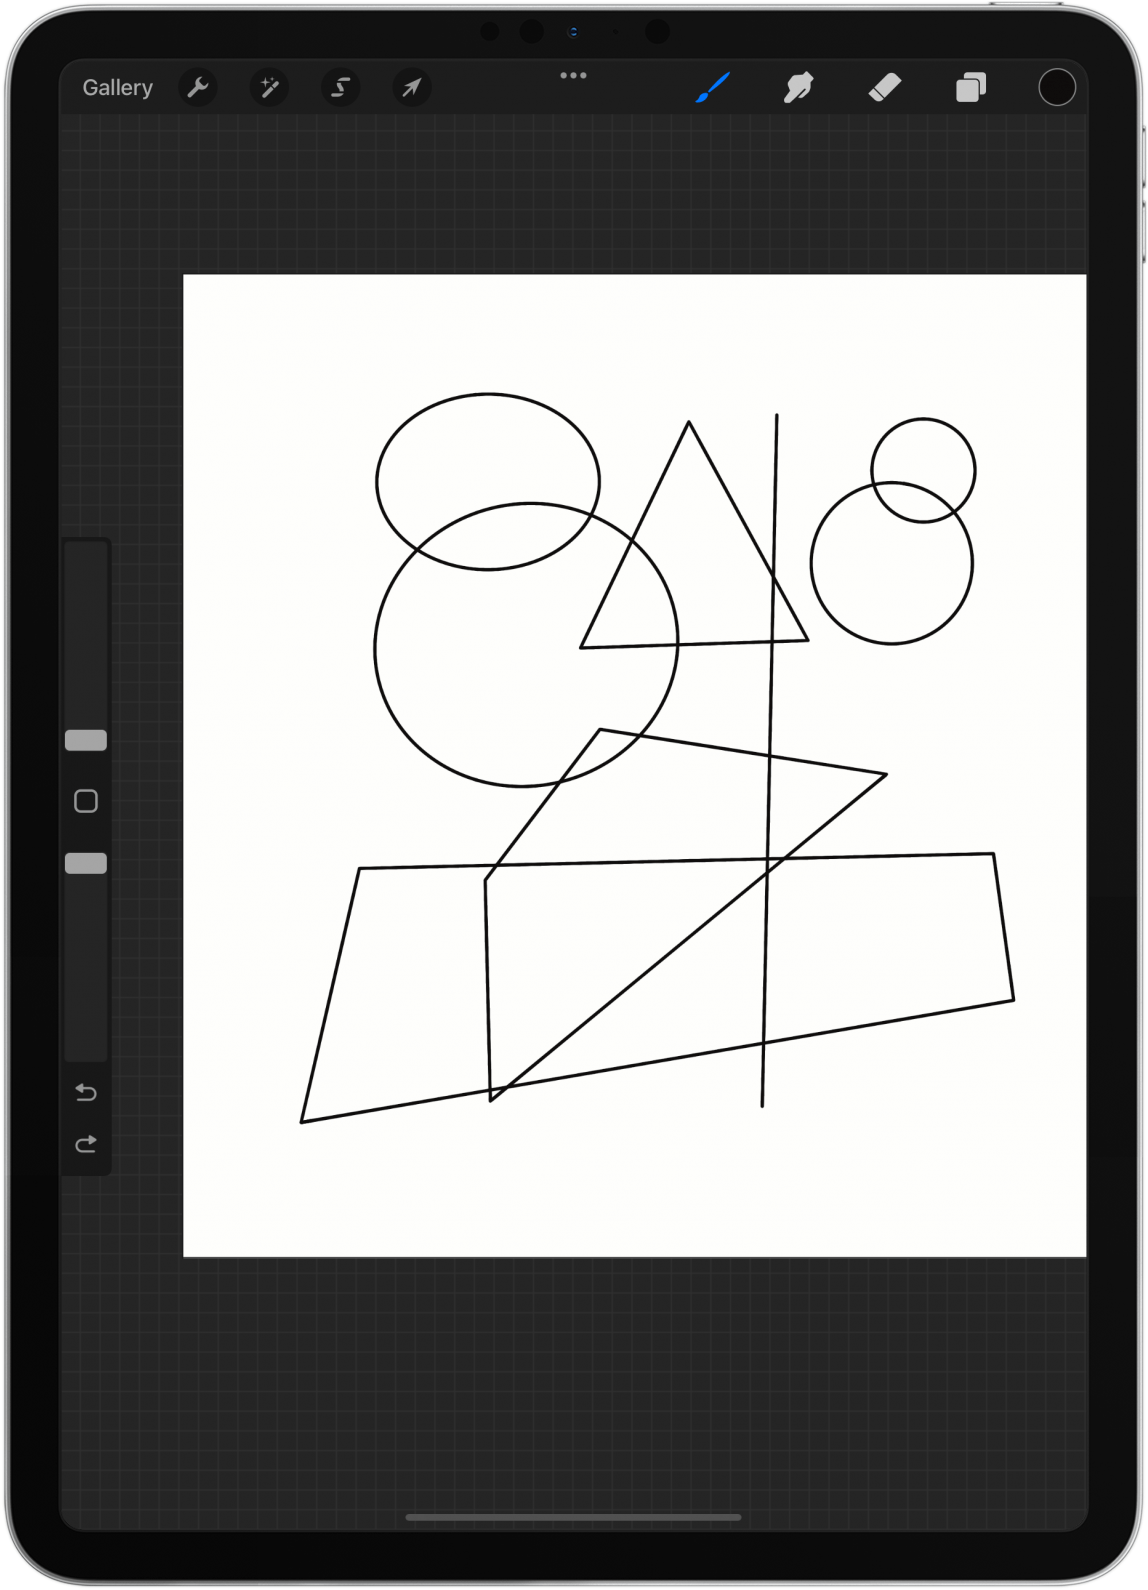
- Draw a shape as best as you can in one stroke without raising your Apple Pencil tip from the display.
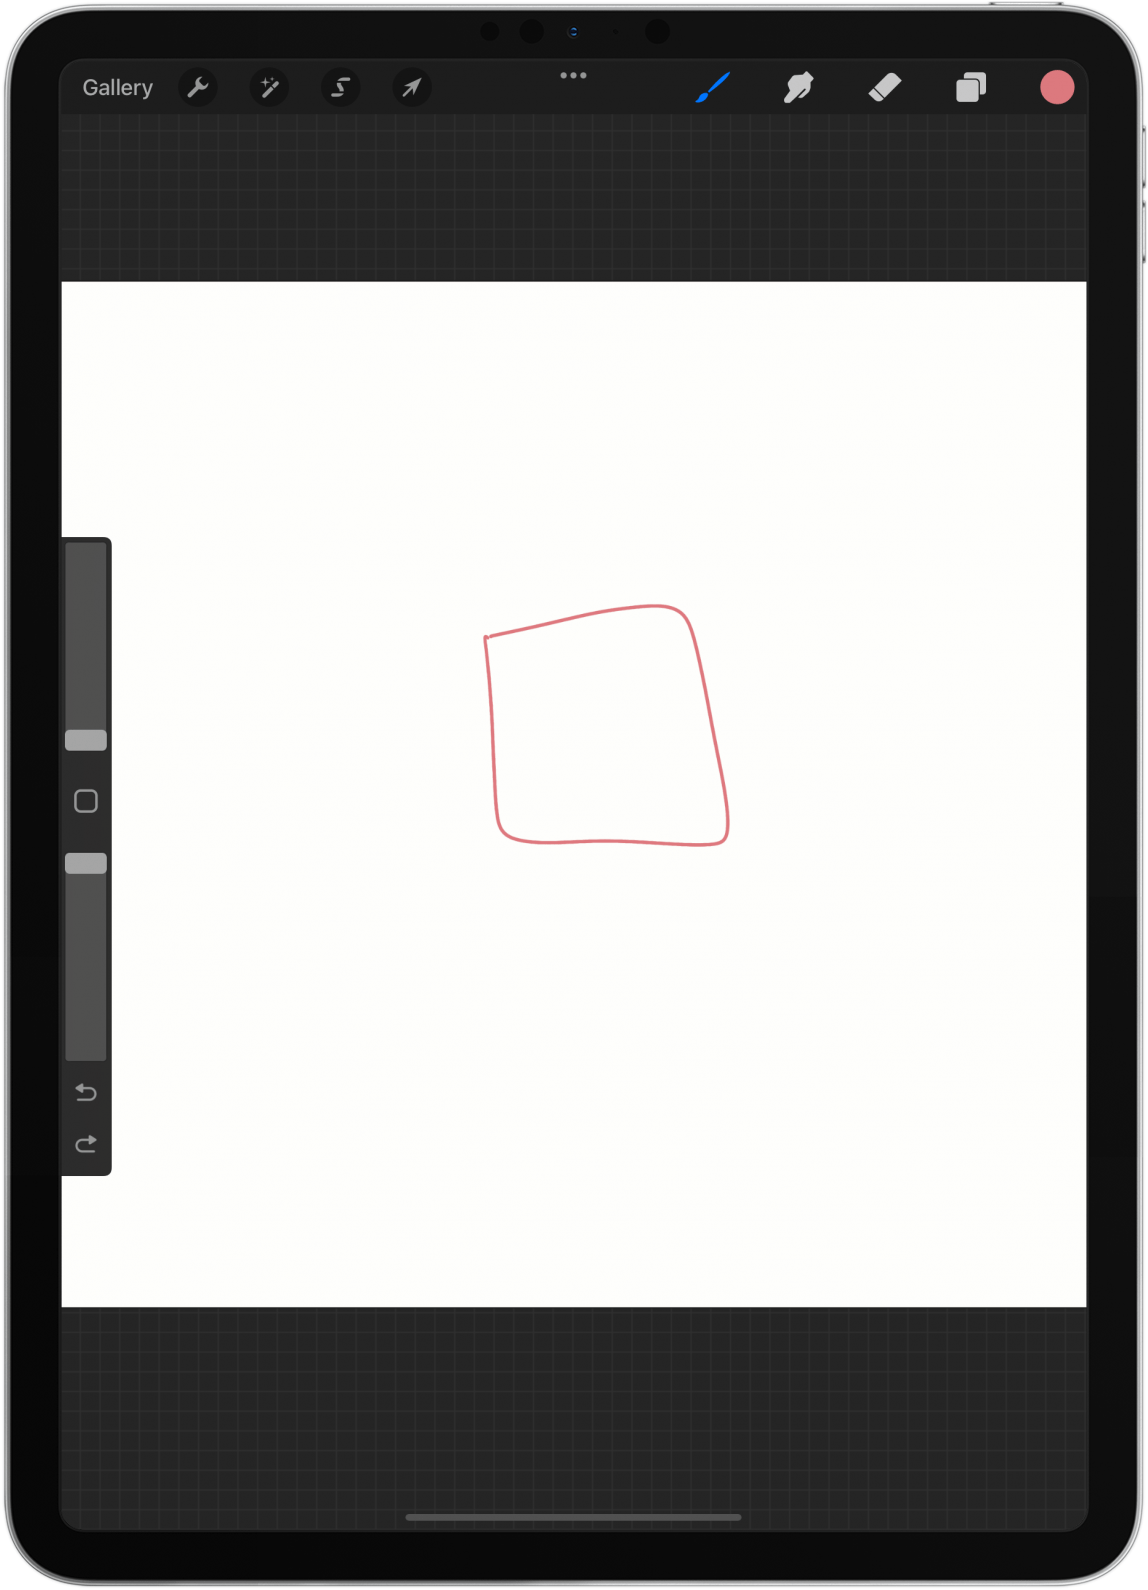
- Wait a few seconds without moving your Apple Pencil until it snaps into a shape.
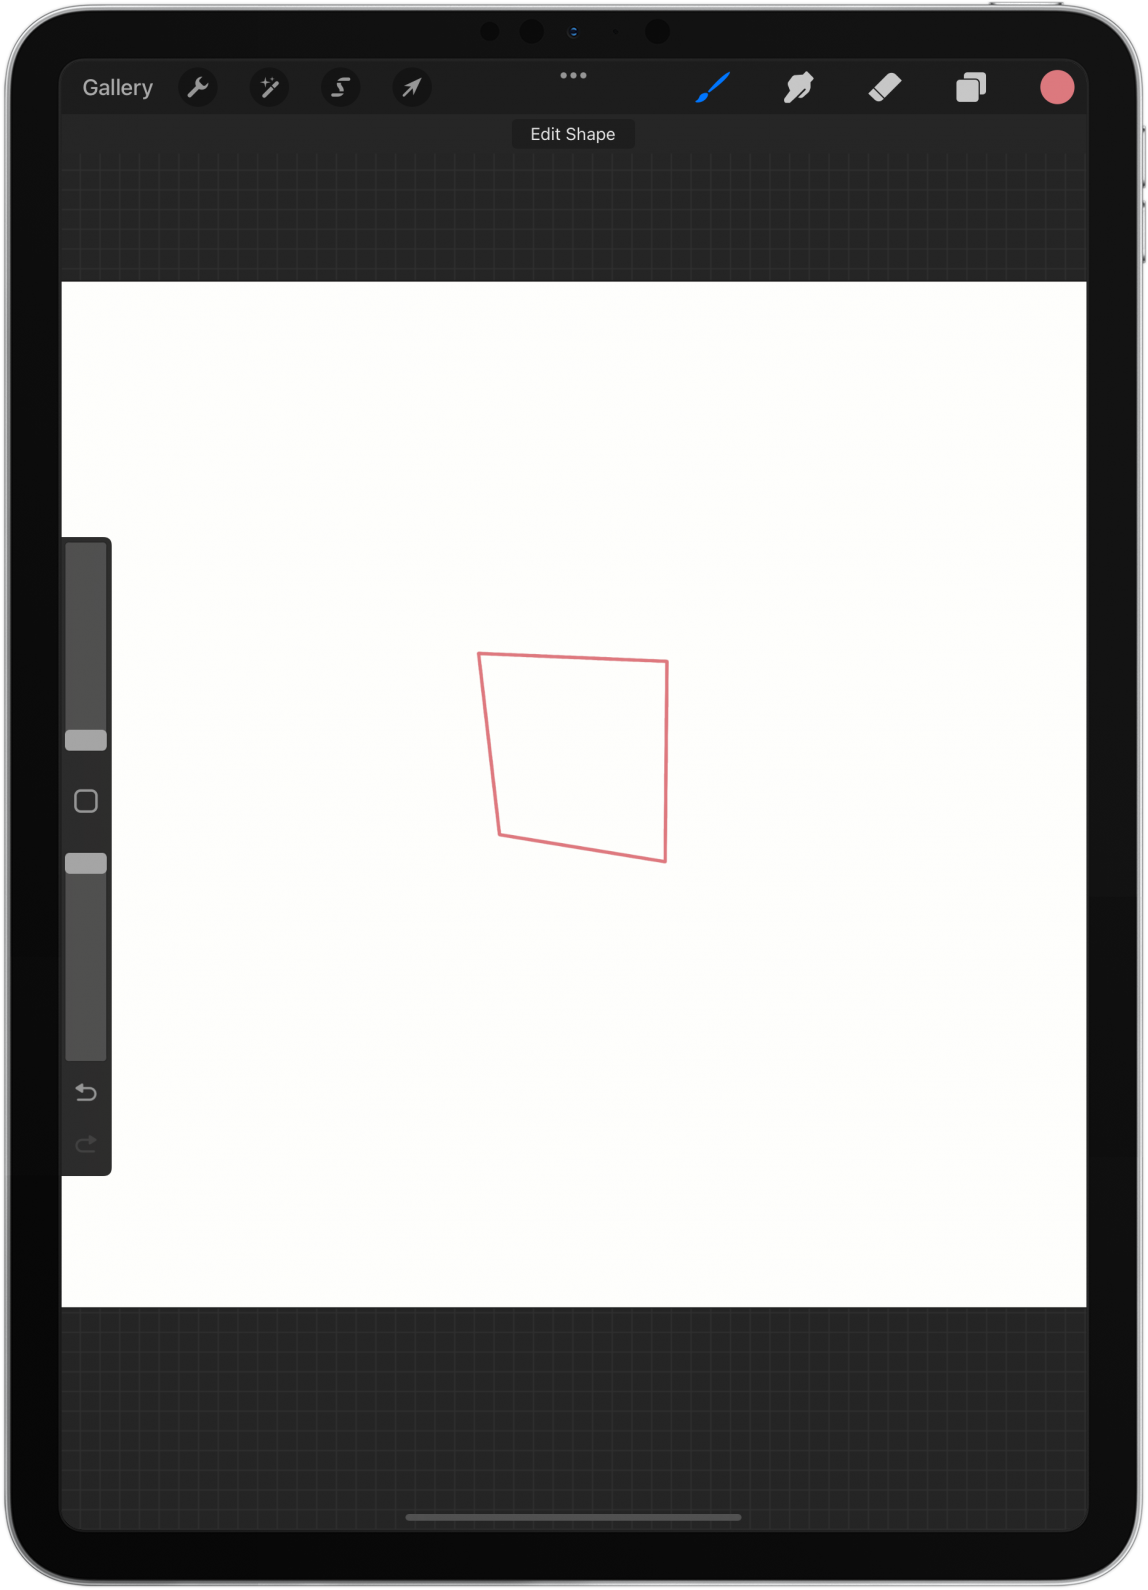
- Tap Edit Shape.
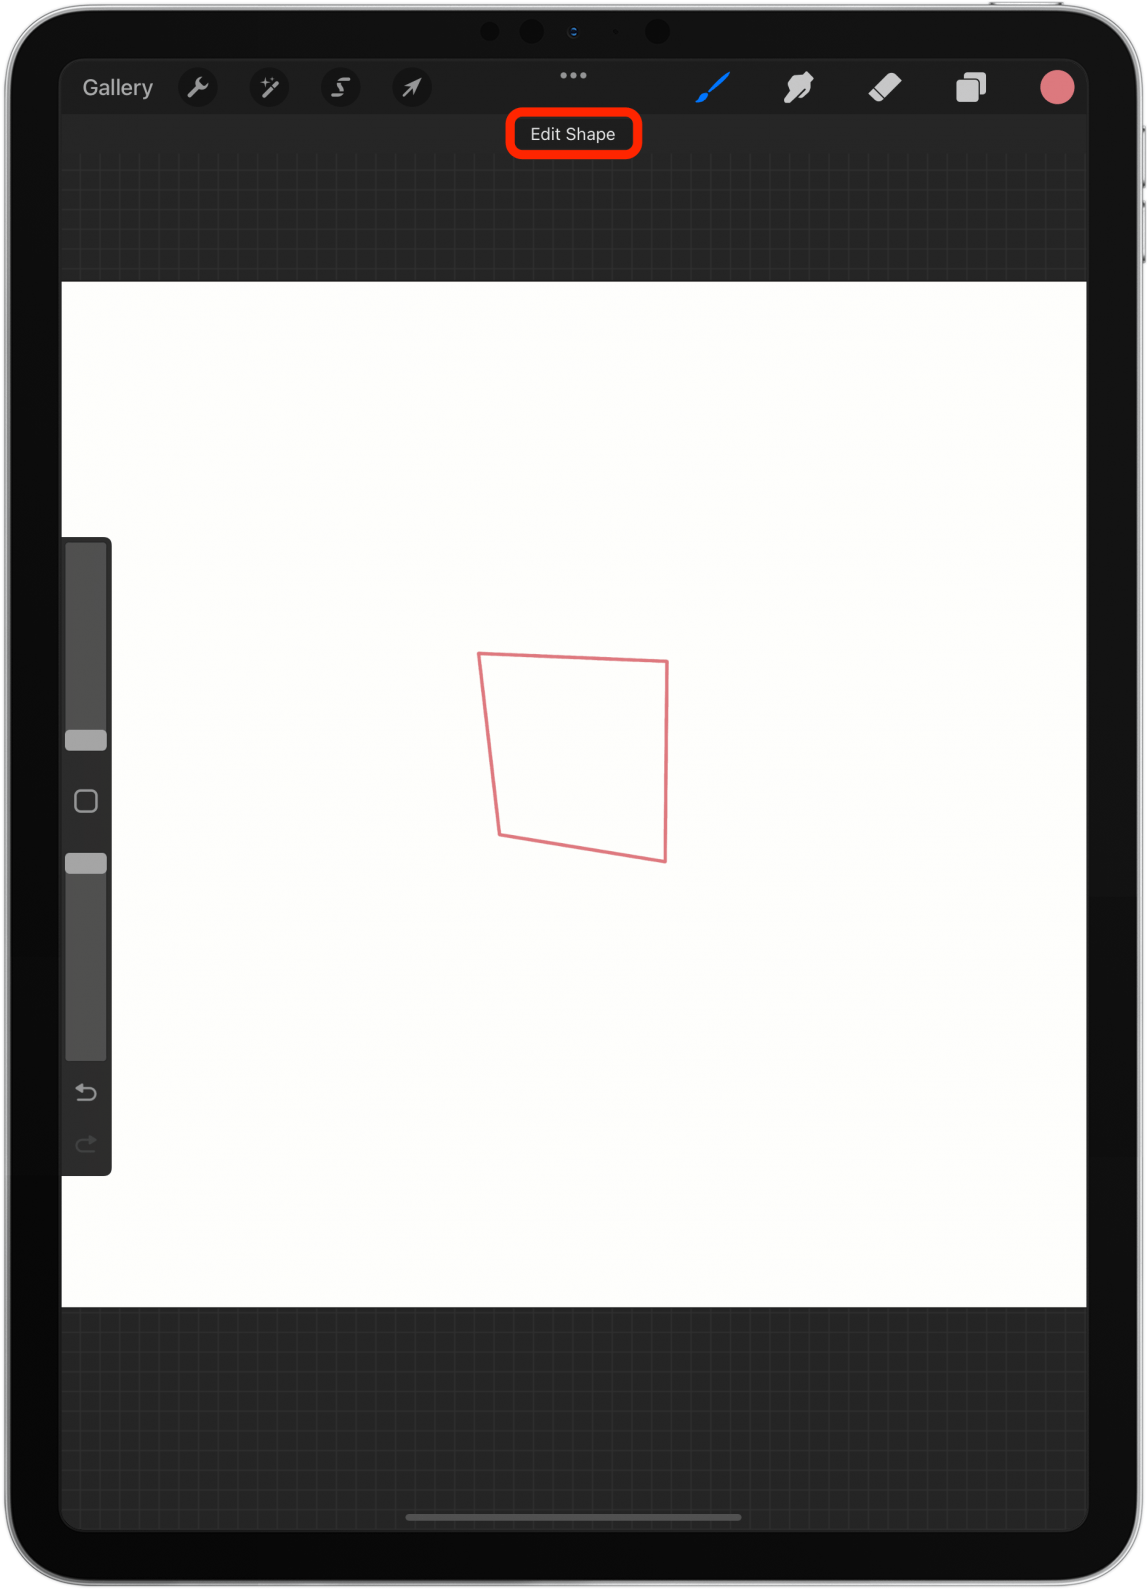
- Sometimes there will only be one option, for example, if you draw a line. Other times, you’ll be able to pick between several options.
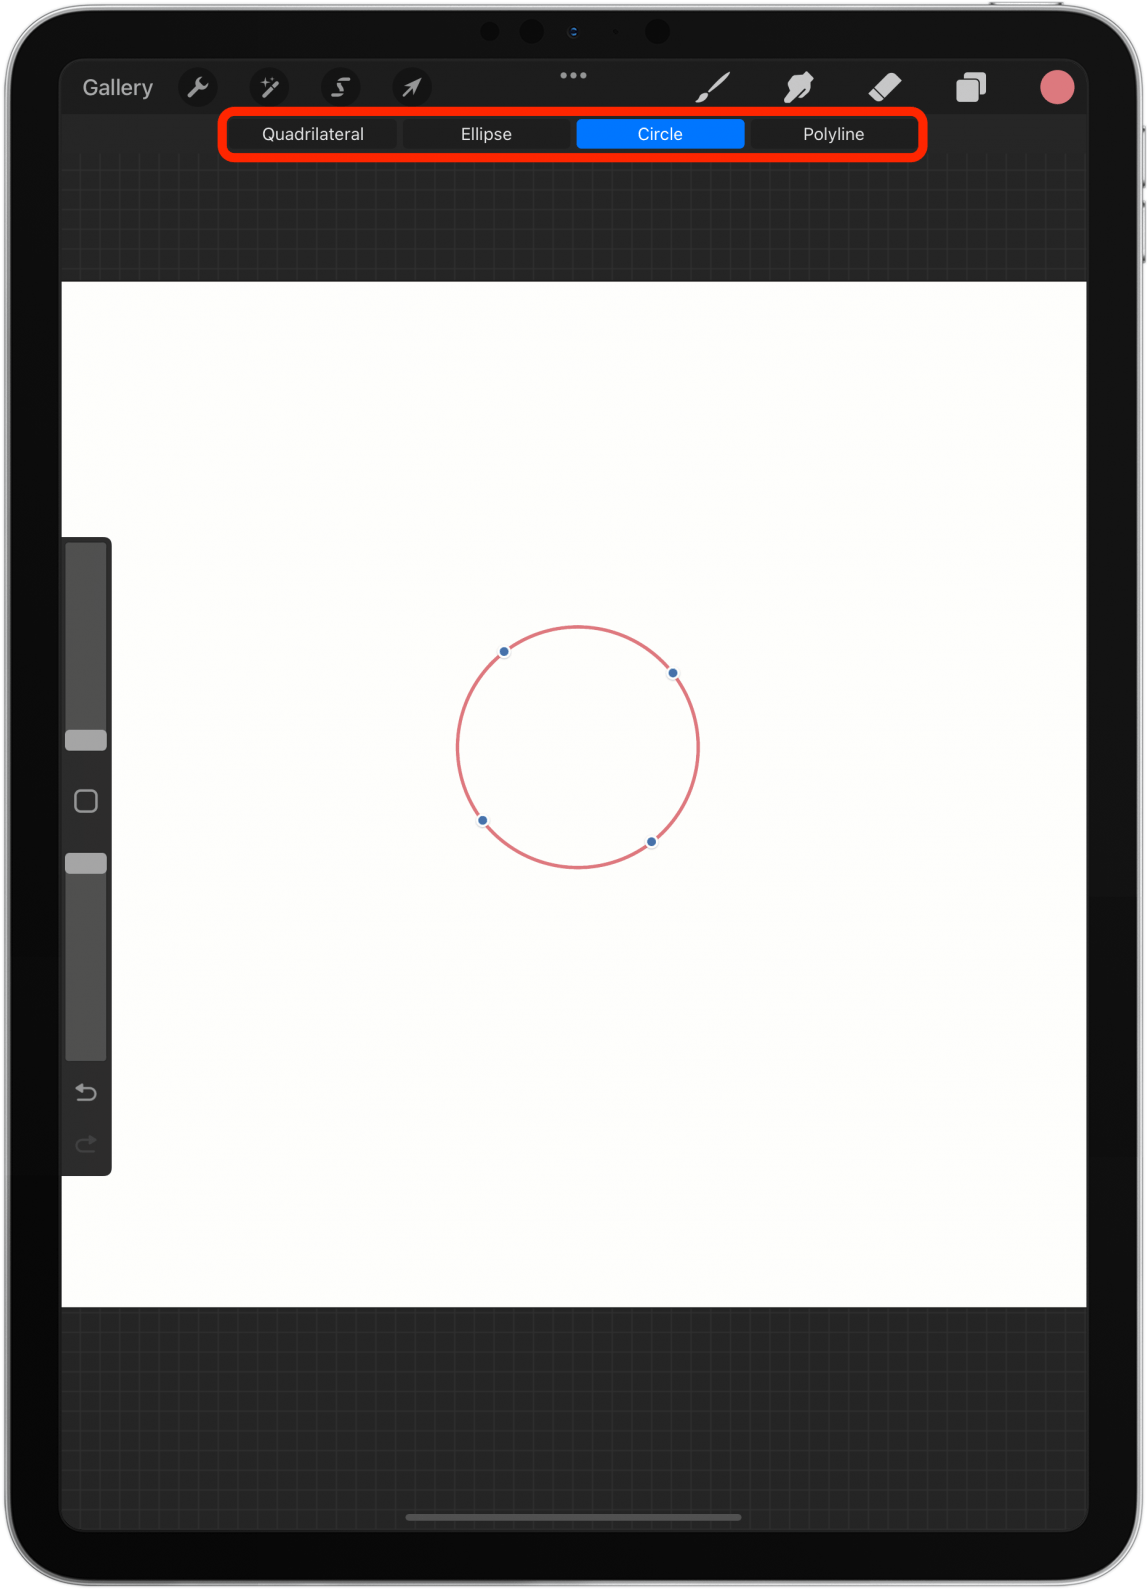
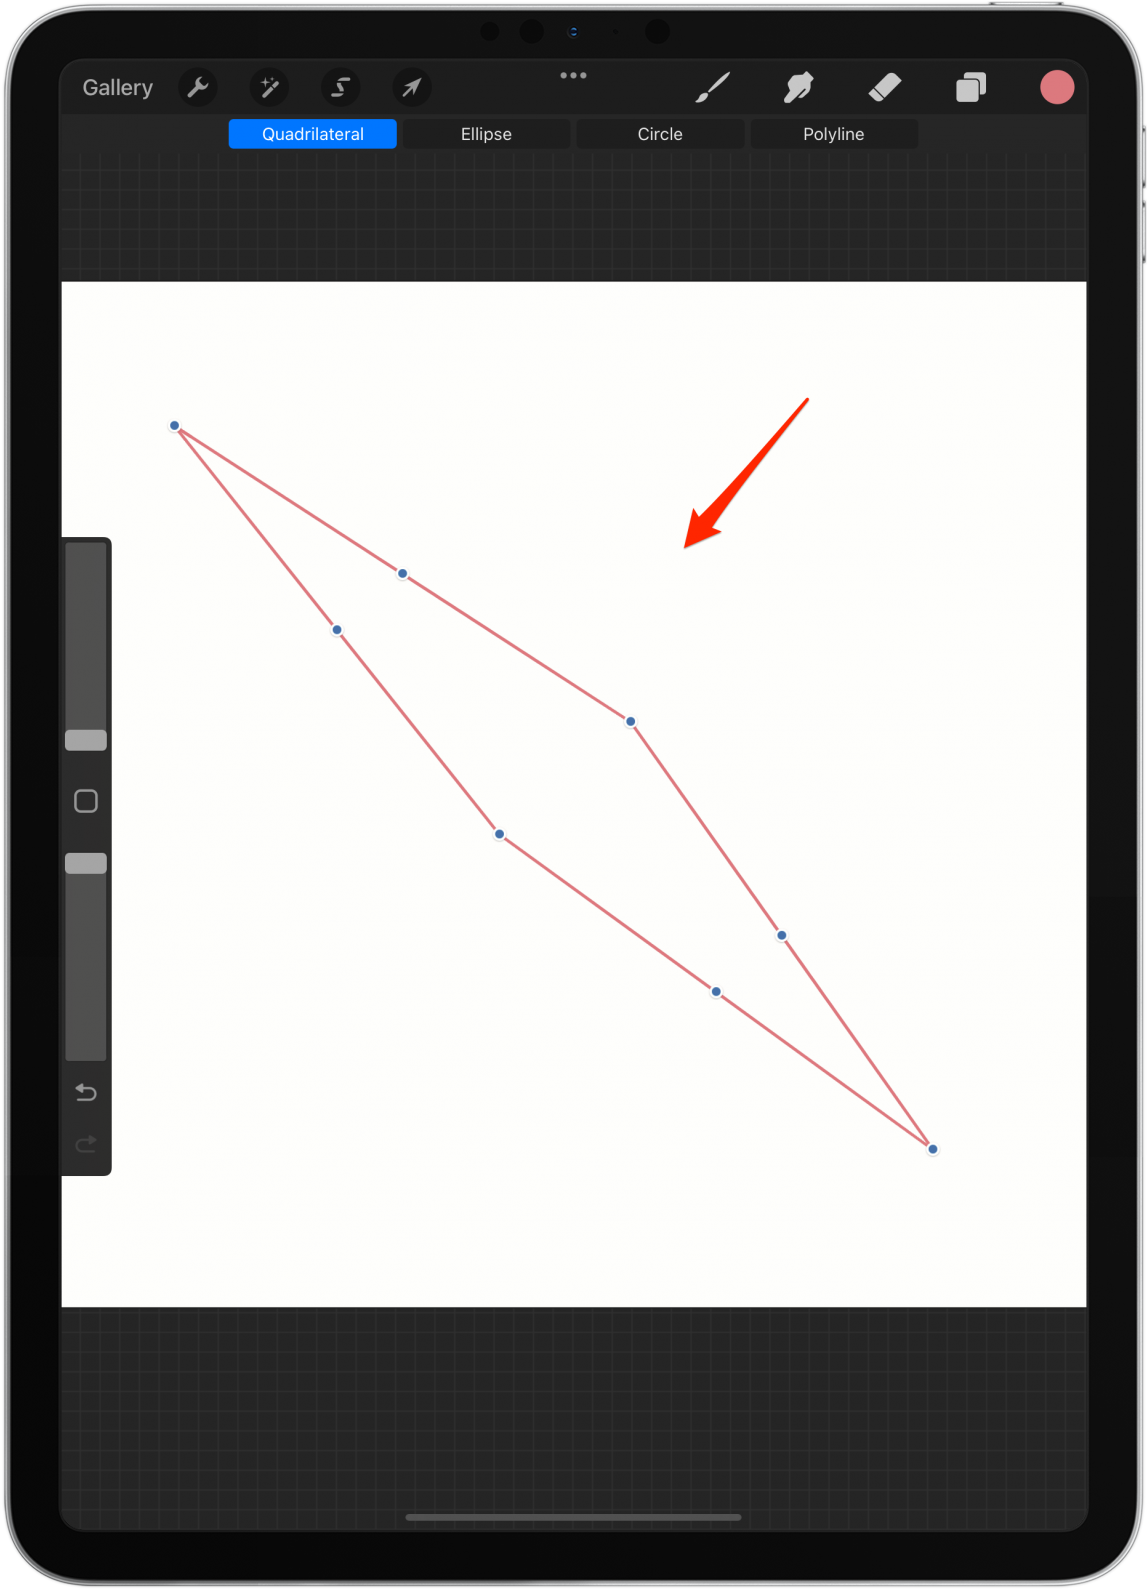
- You can also alter the shape by dragging the blue dots.
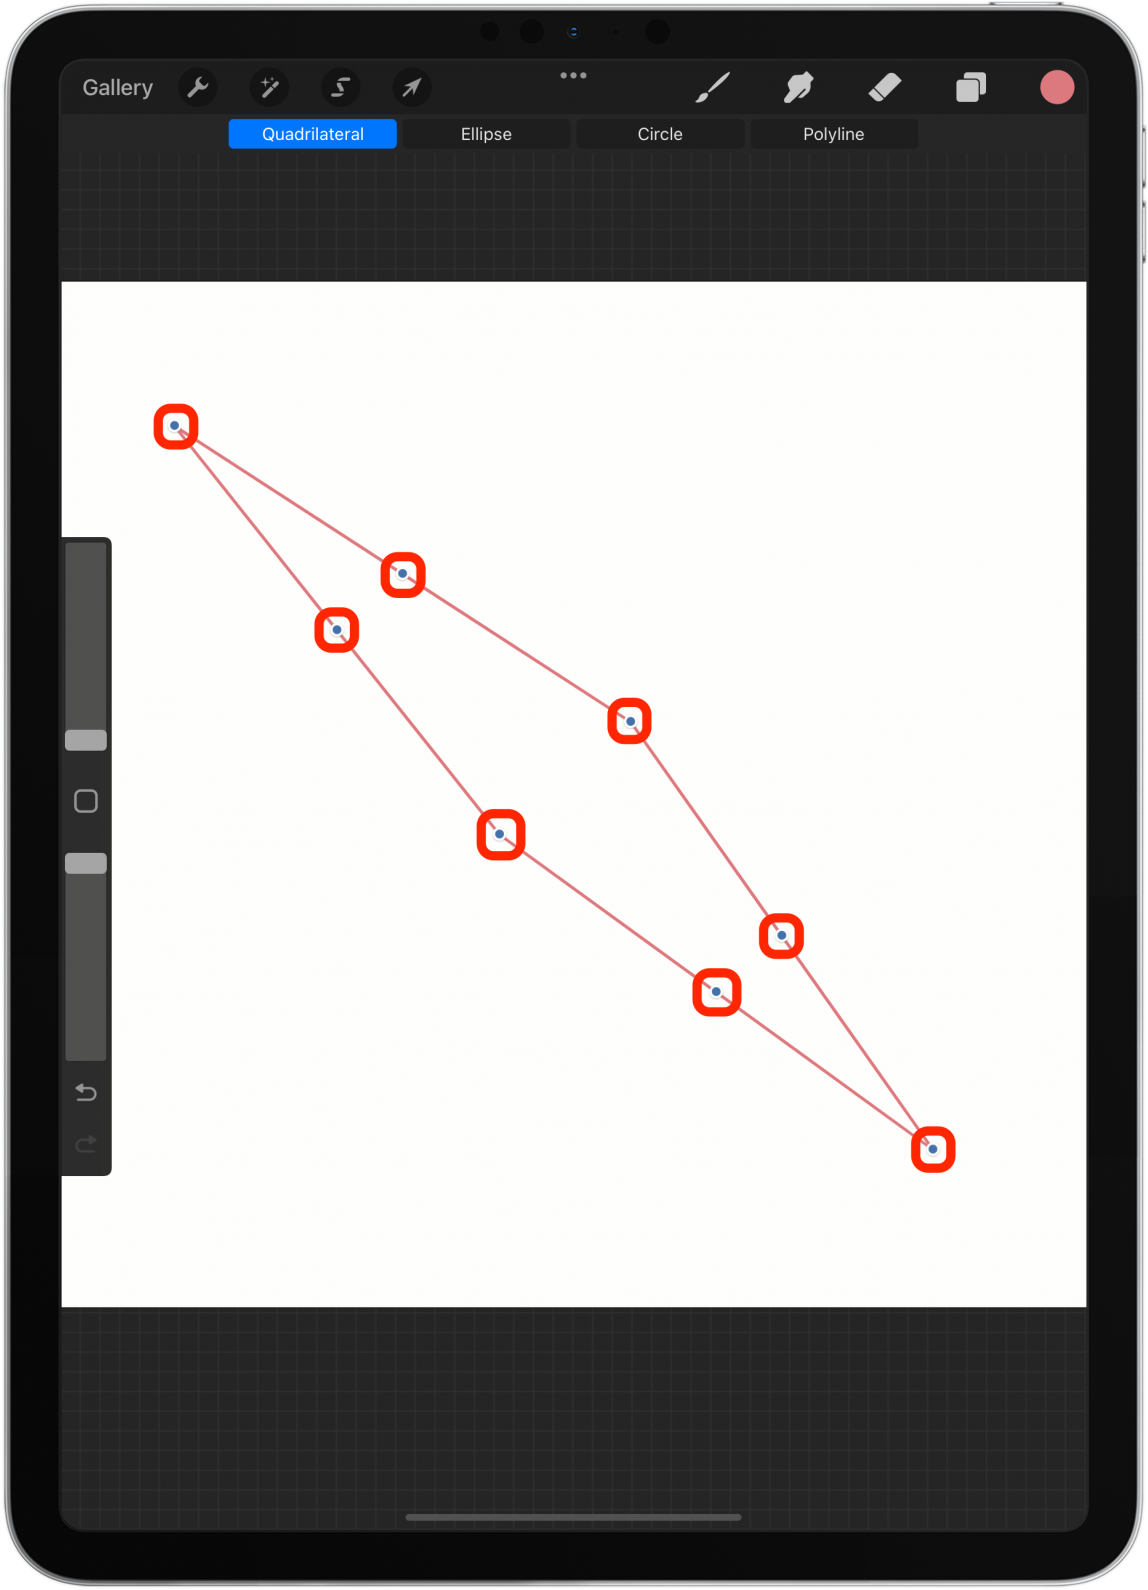
- Tap the display to save your shape. You won’t be able to go back and edit it using the shape options once you do this.
The shape options include line, arc, poly-line, ellipse, circle, triangle, square, rectangle, or quadrilateral shape.
7. How to Color In Shapes & Layers the Quickest Way
While some find it therapeutic to color shapes in manually, others find it tedious. Luckily, there are two quick ways to color in shapes and layers.
- Open a new project and draw some shapes with a solid brush like Monoline and make sure the shapes are fully closed.
- Tap the color icon to select a color, then tap the canvas again.
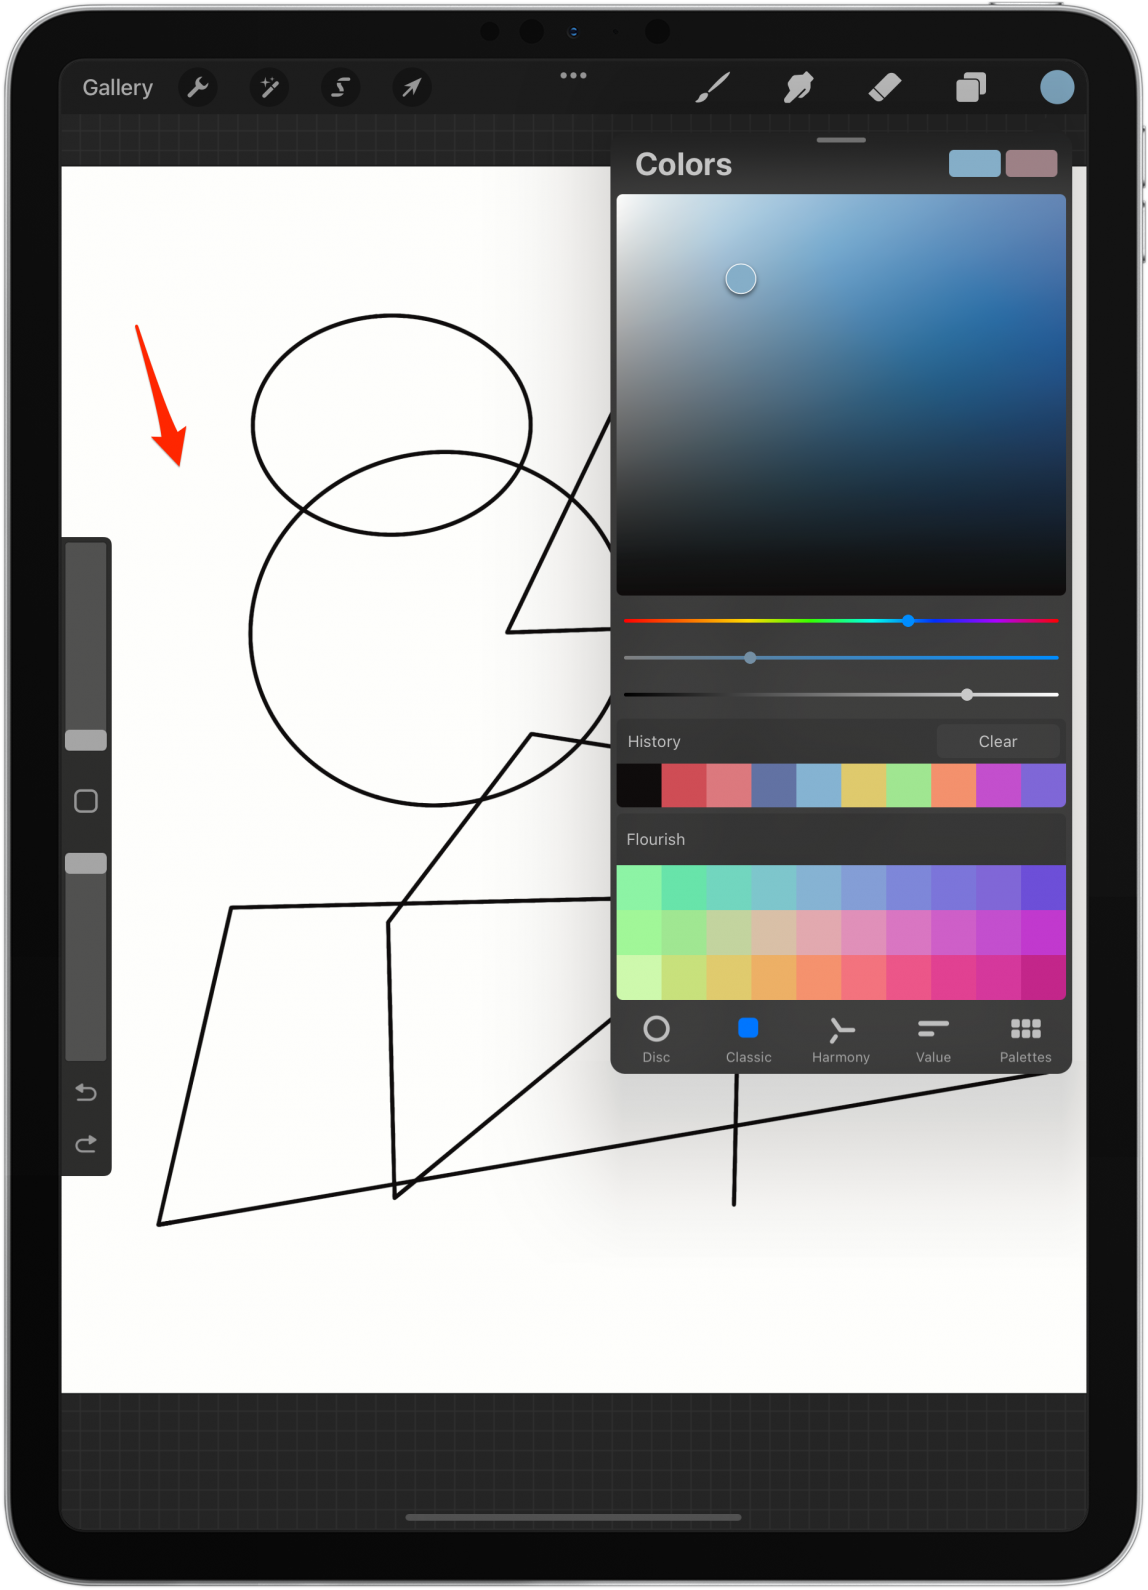
- Drag the color from the color icon into your shape. You have to drag it from the color icon; you can't do it from the color selection menu.
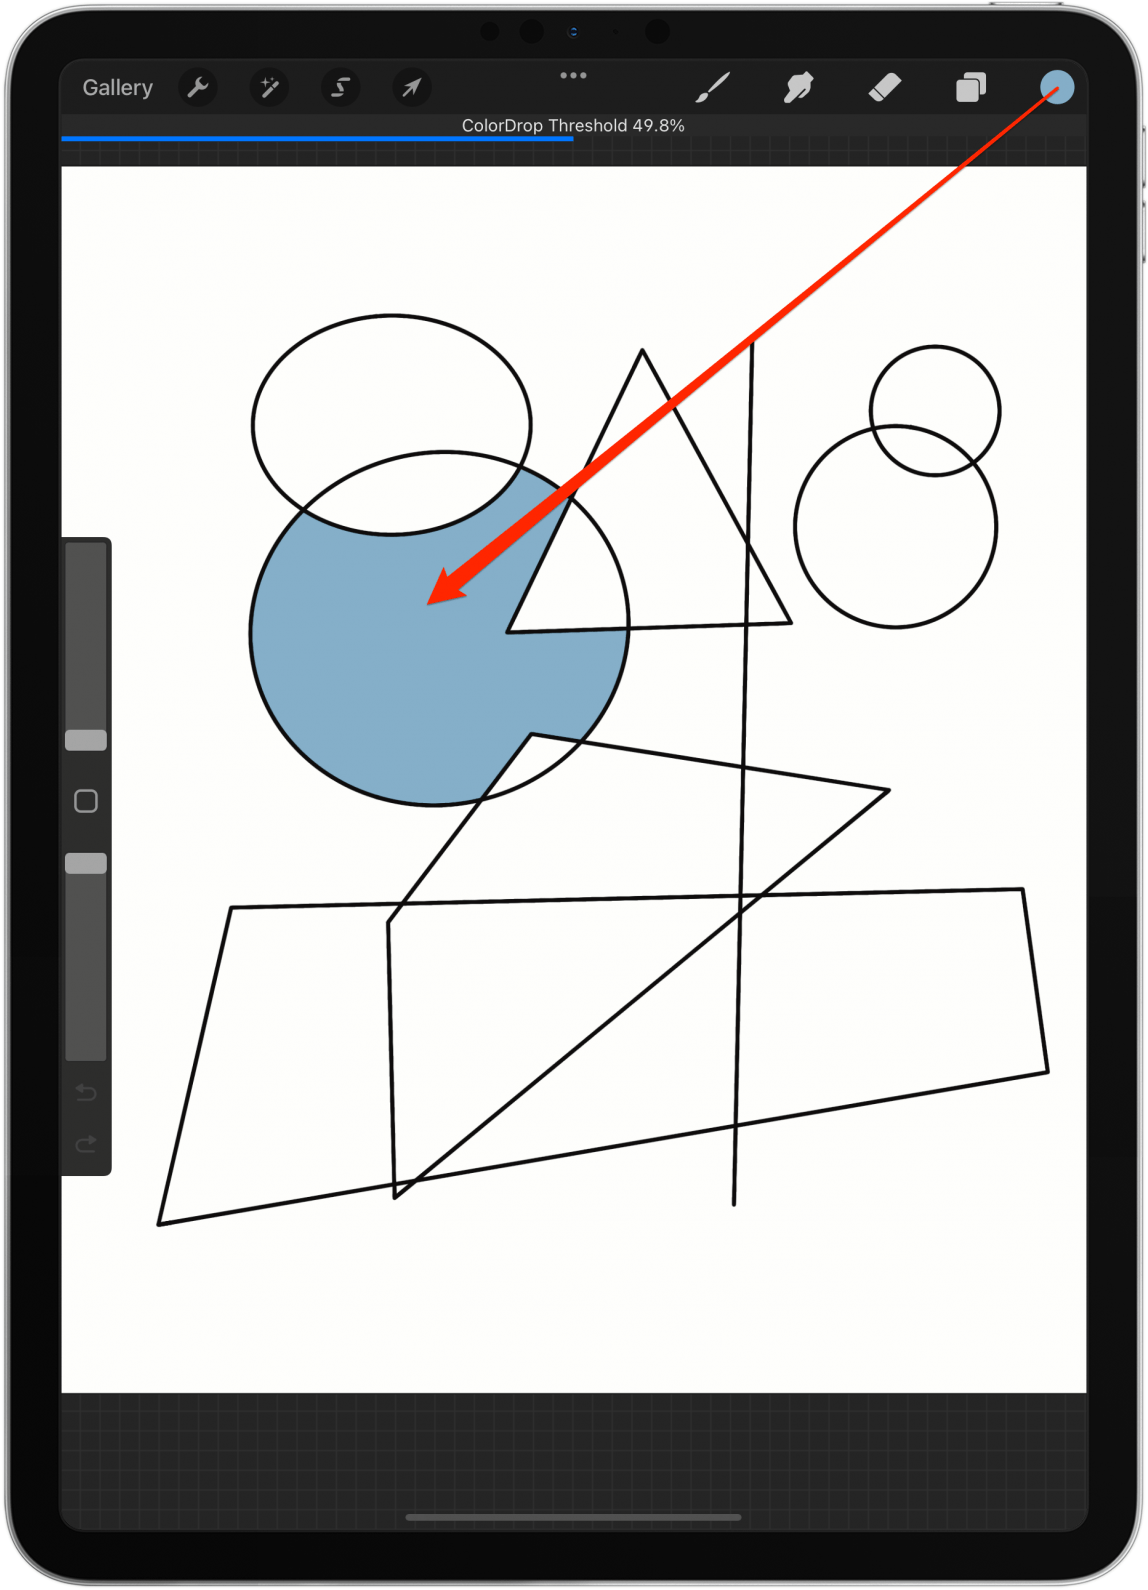
- If your shape is open or you drag it outside of the shape, it’ll color the background of that layer.

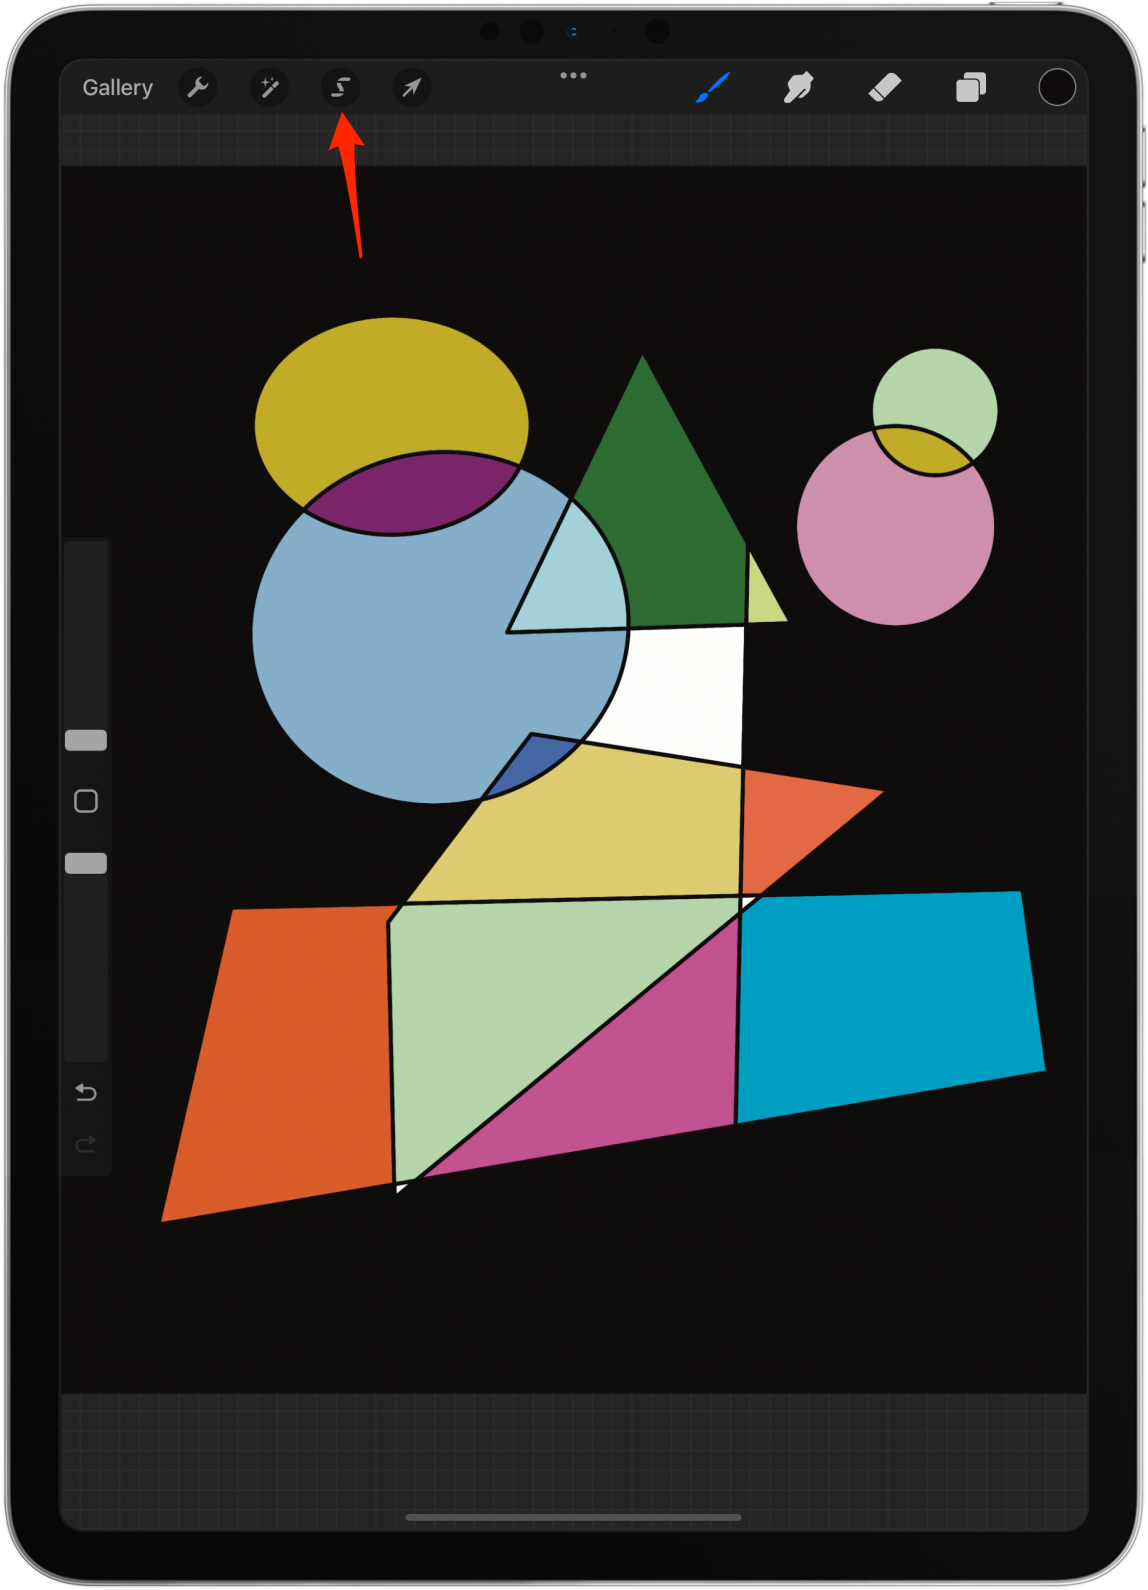
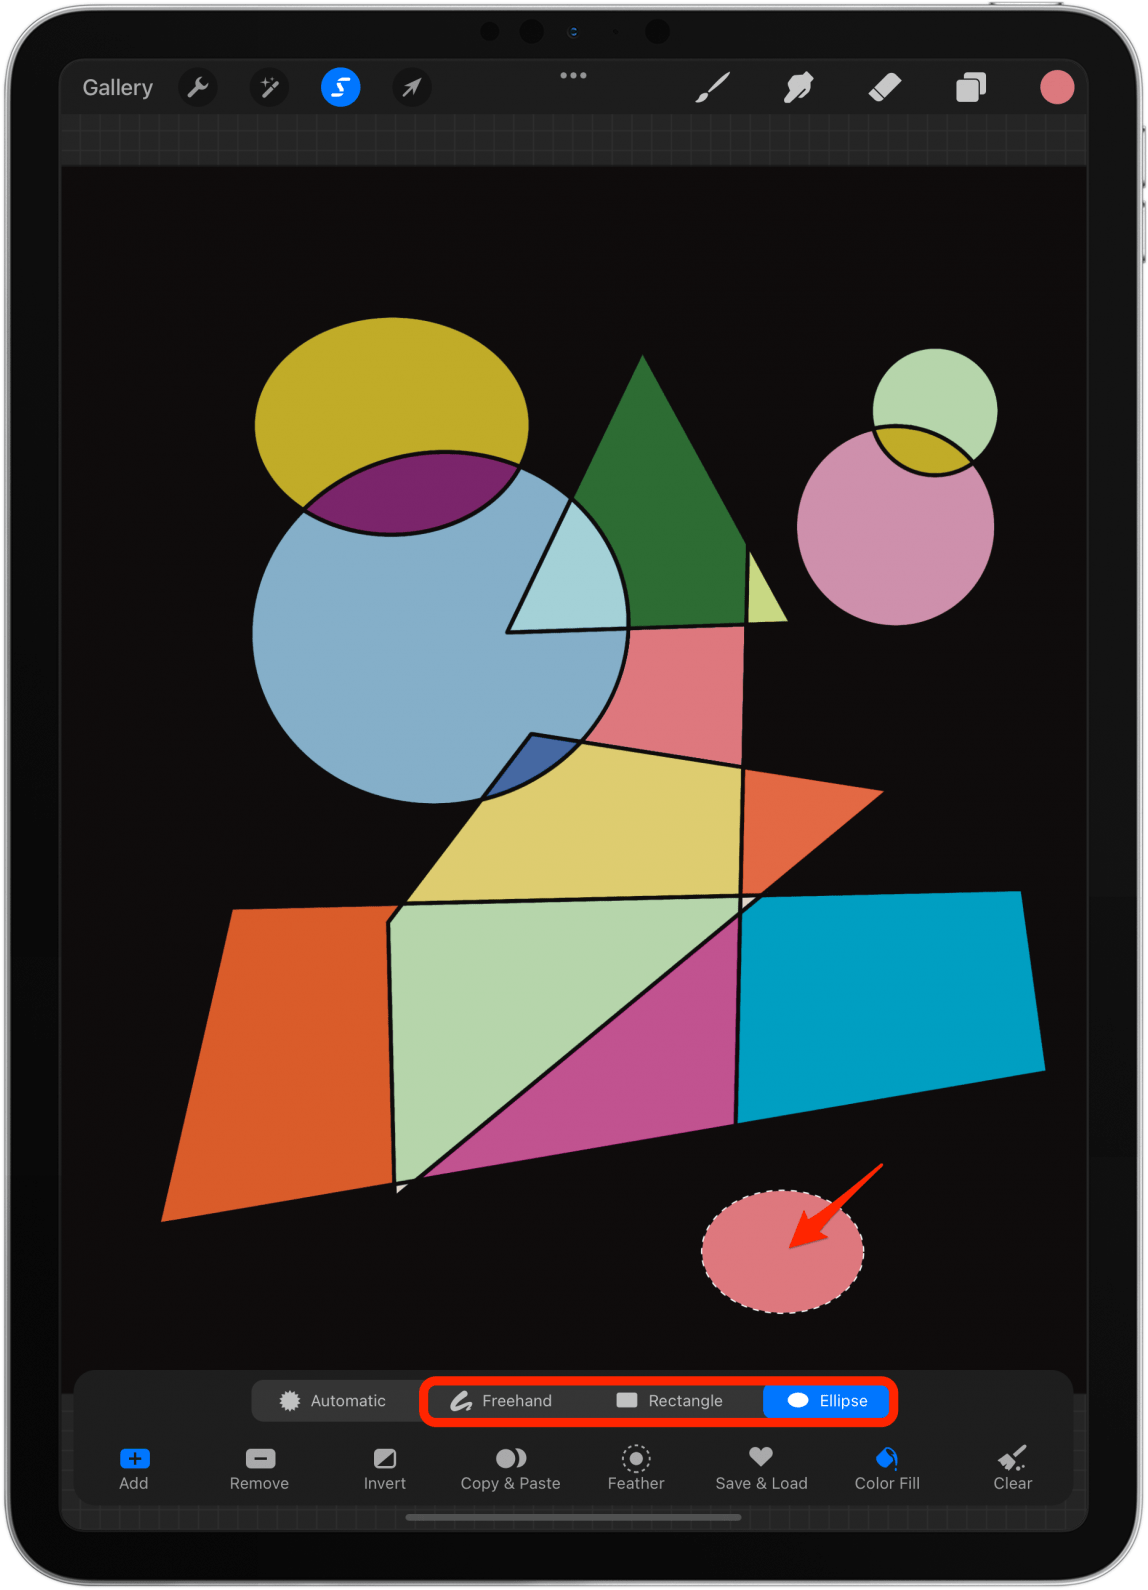
- Another way to fill in shapes is to tap the mask icon.
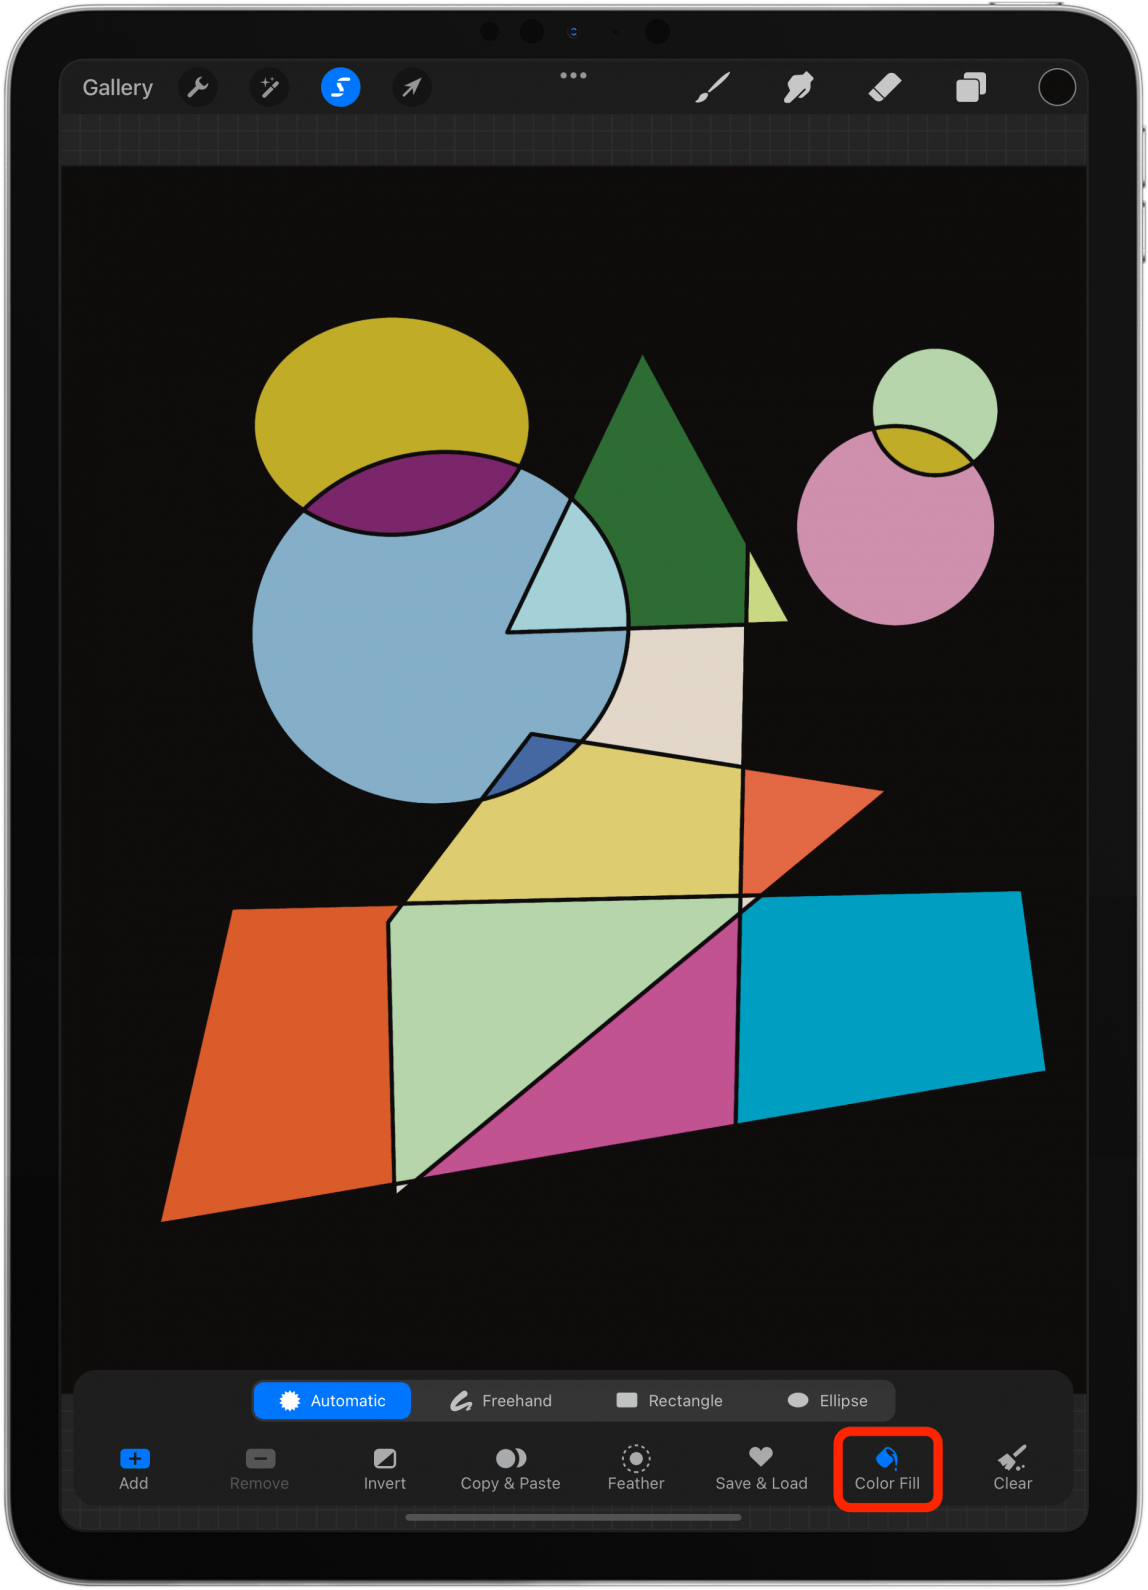
- Make sure Color Fill is selected at the bottom.
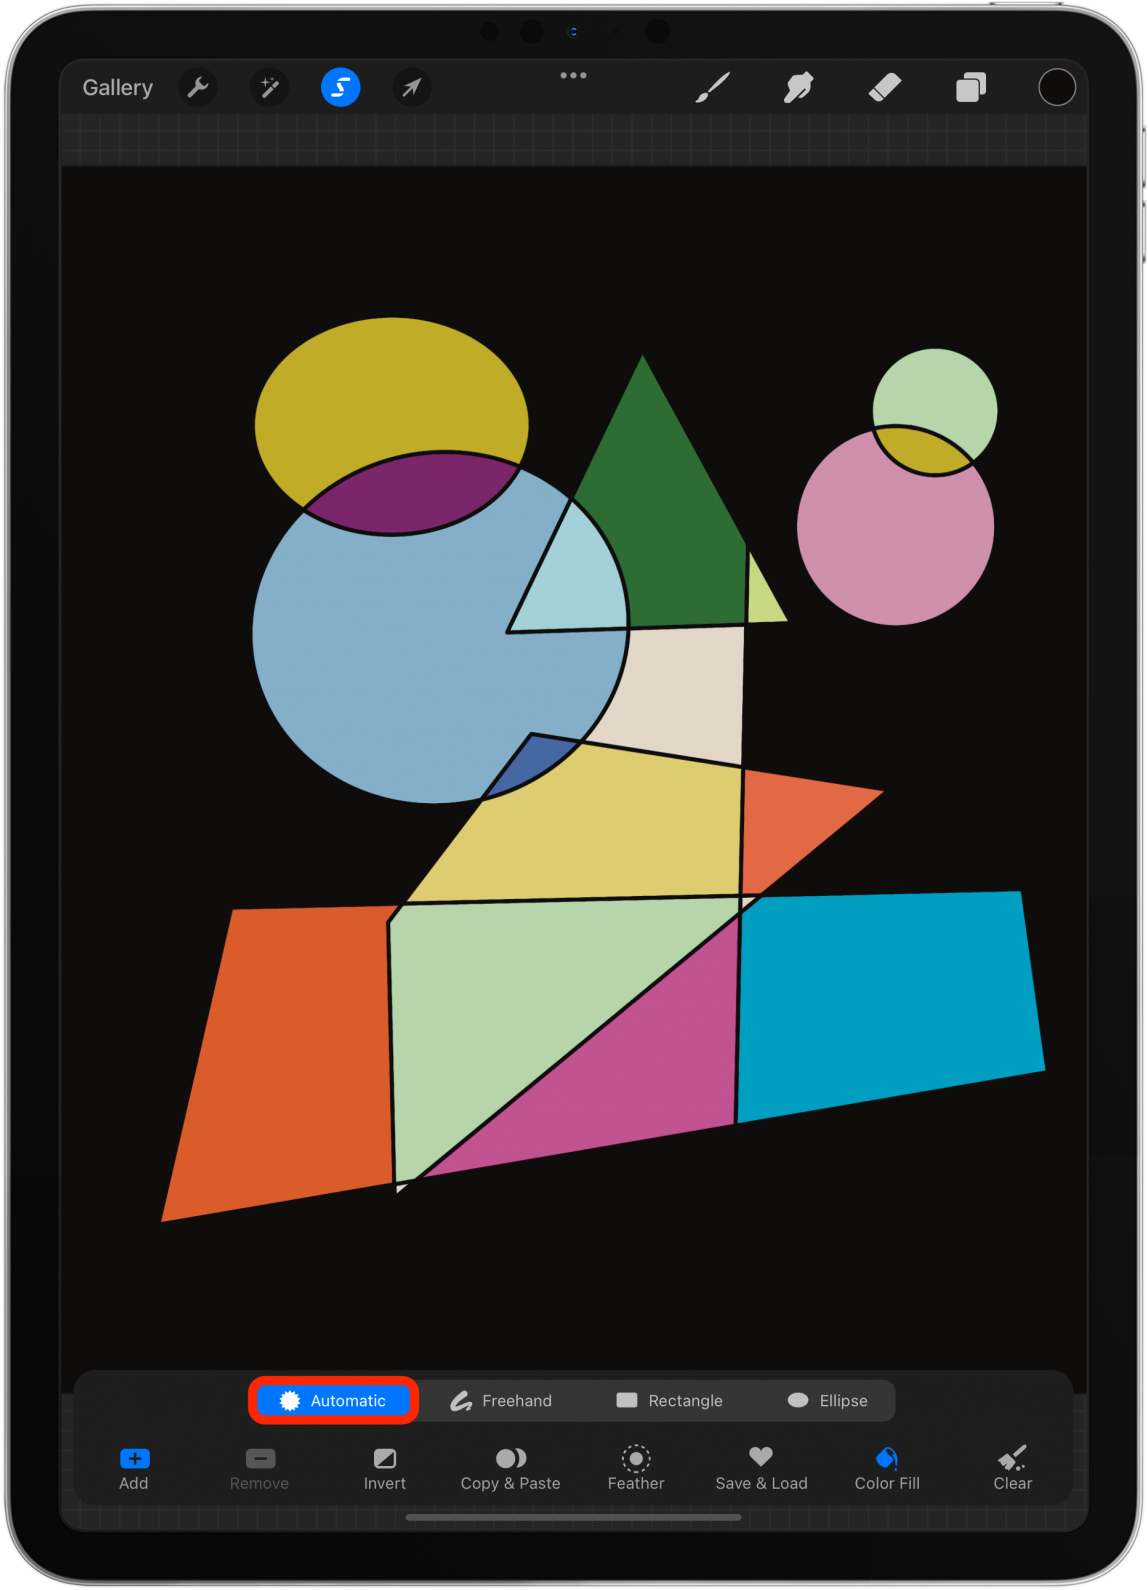
- Select a color.

- Make sure Automatic is selected.
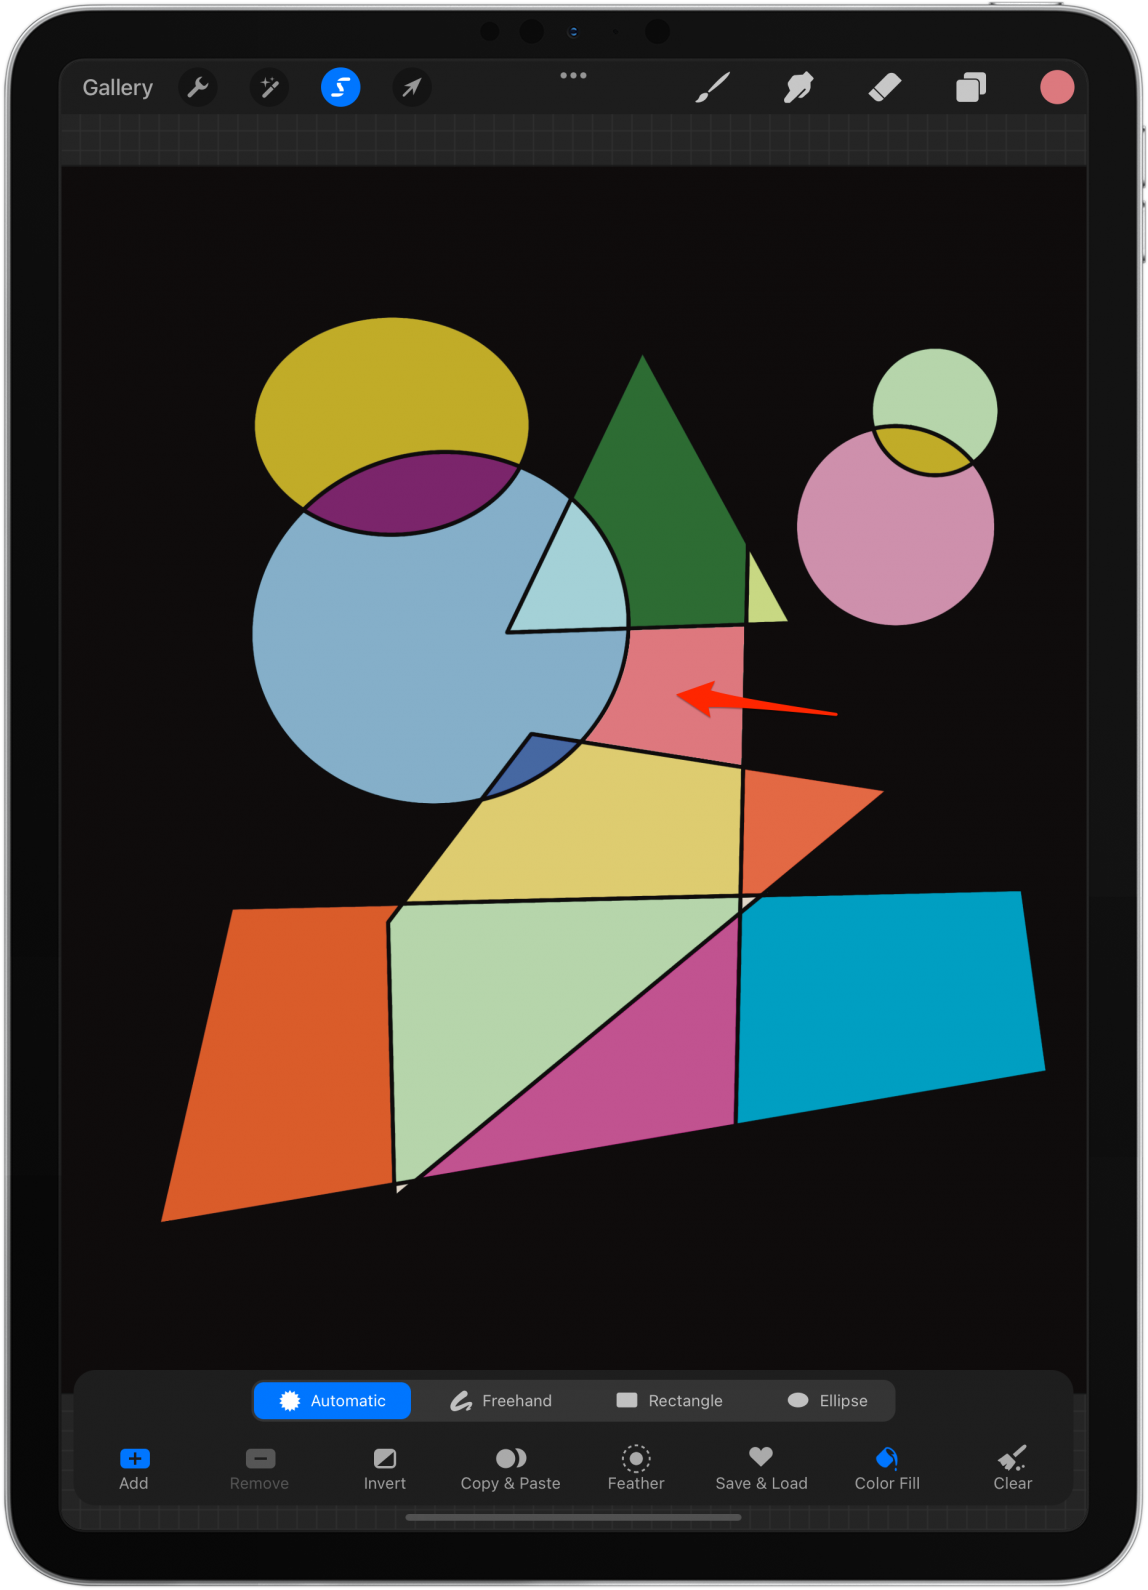
- Tap the area you wish to color.
- If you select the rectangle, ellipse, or freehand, you can draw shapes that will be filled in with the color in the color icon.
8. How to Use the Eyedropper Tool to Copy an Existing Color
If you like a color and can’t figure out how to recreate it, you can copy it directly from an existing image. You can also use this method to select a color you’ve already used that is no longer in your color menu’s history.
- Open a new project with an image that has a color you wish to practice copying.
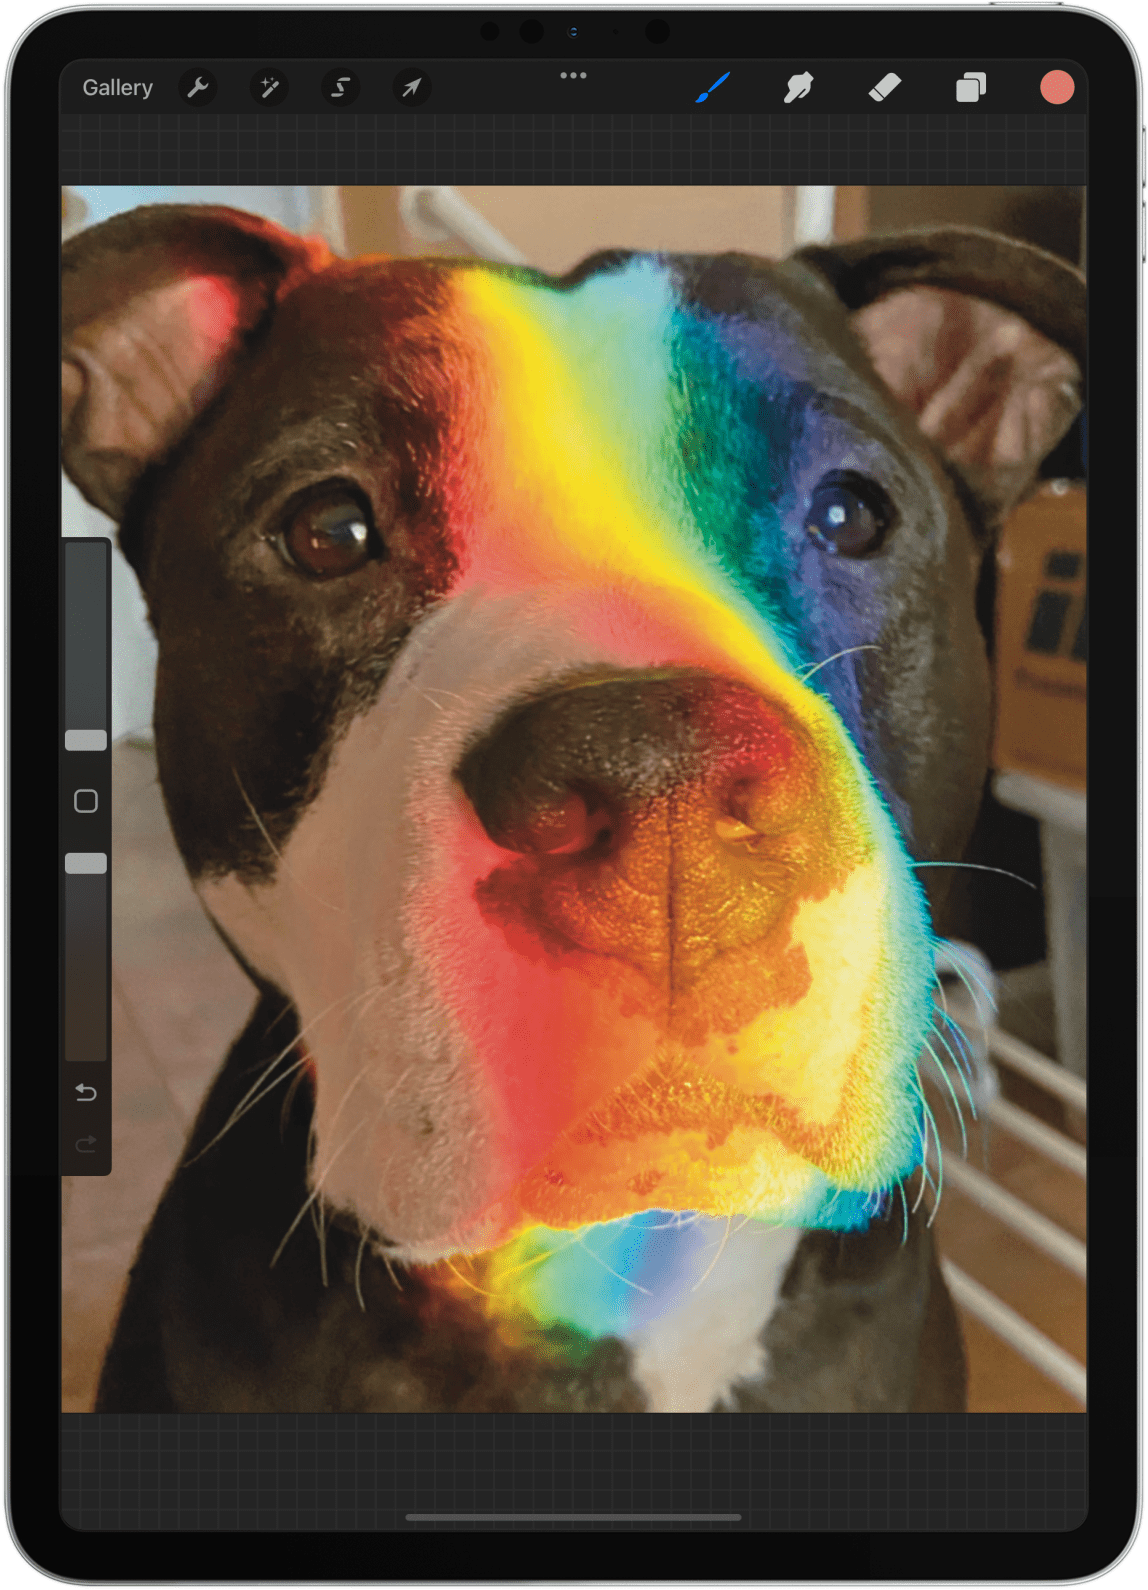
- Tap the square in between the brush size and opacity sliders.

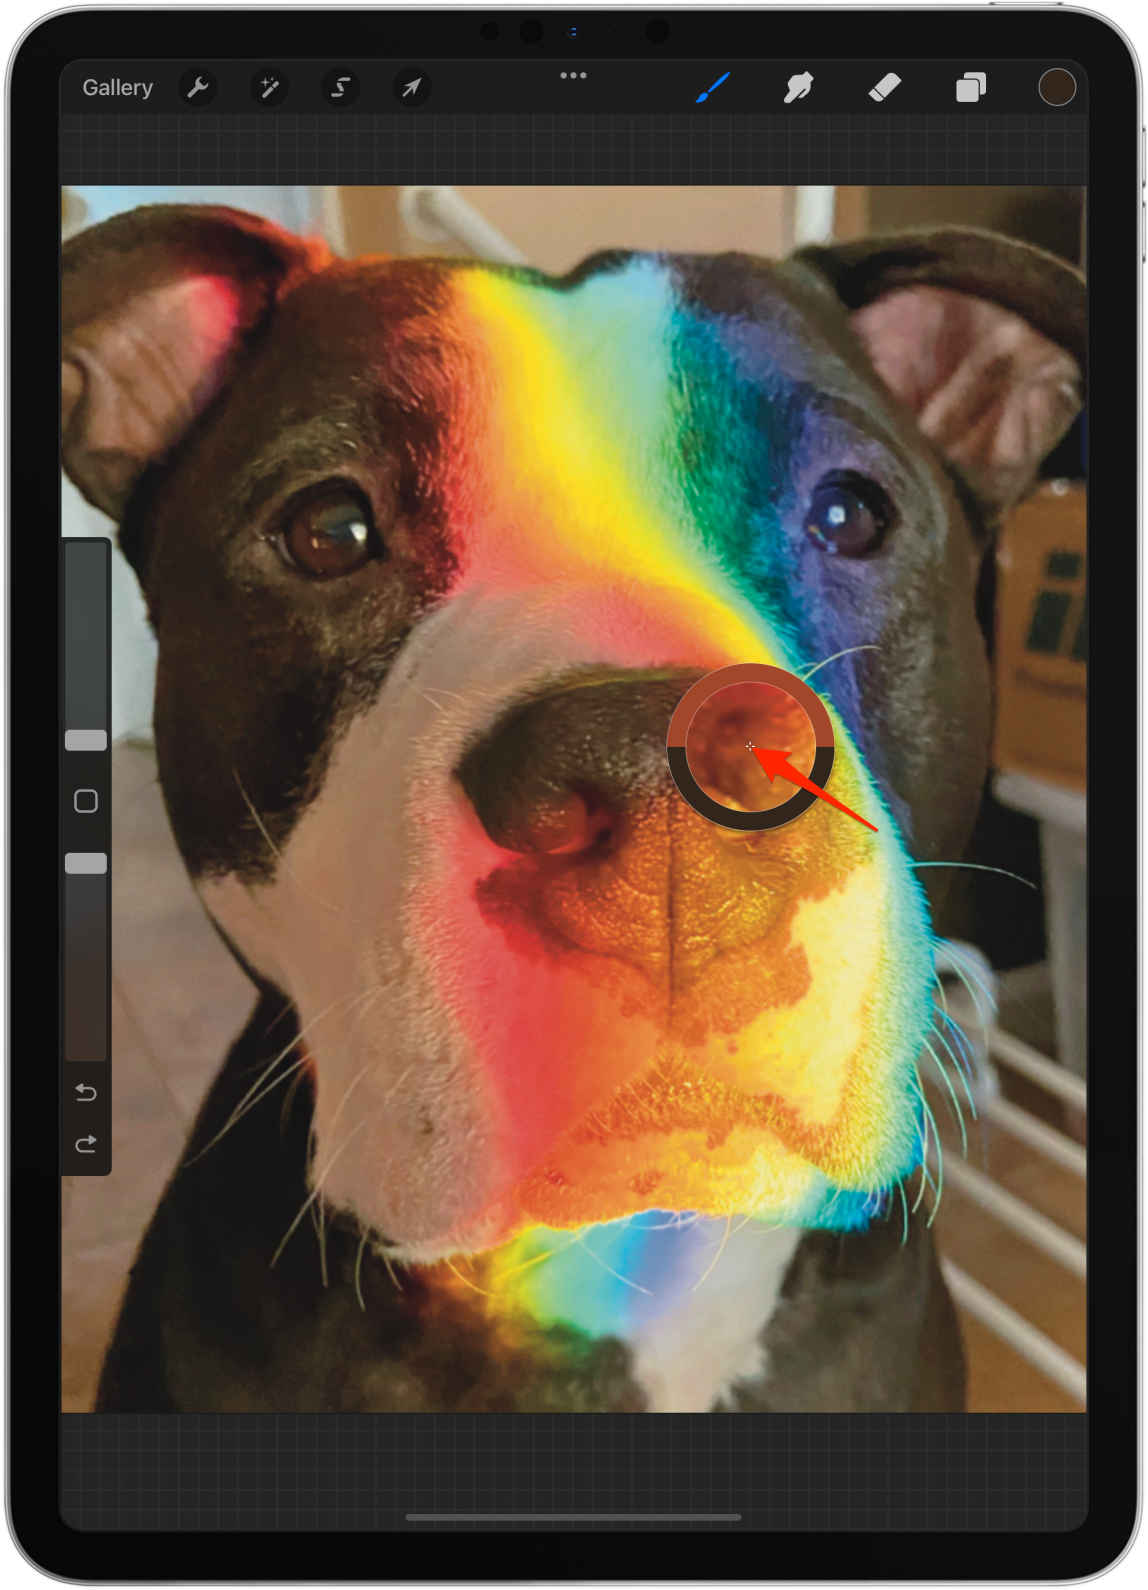
- A circle will appear. Drag it to find the color you want to copy.

- When you release it, the color will appear in the color icon.
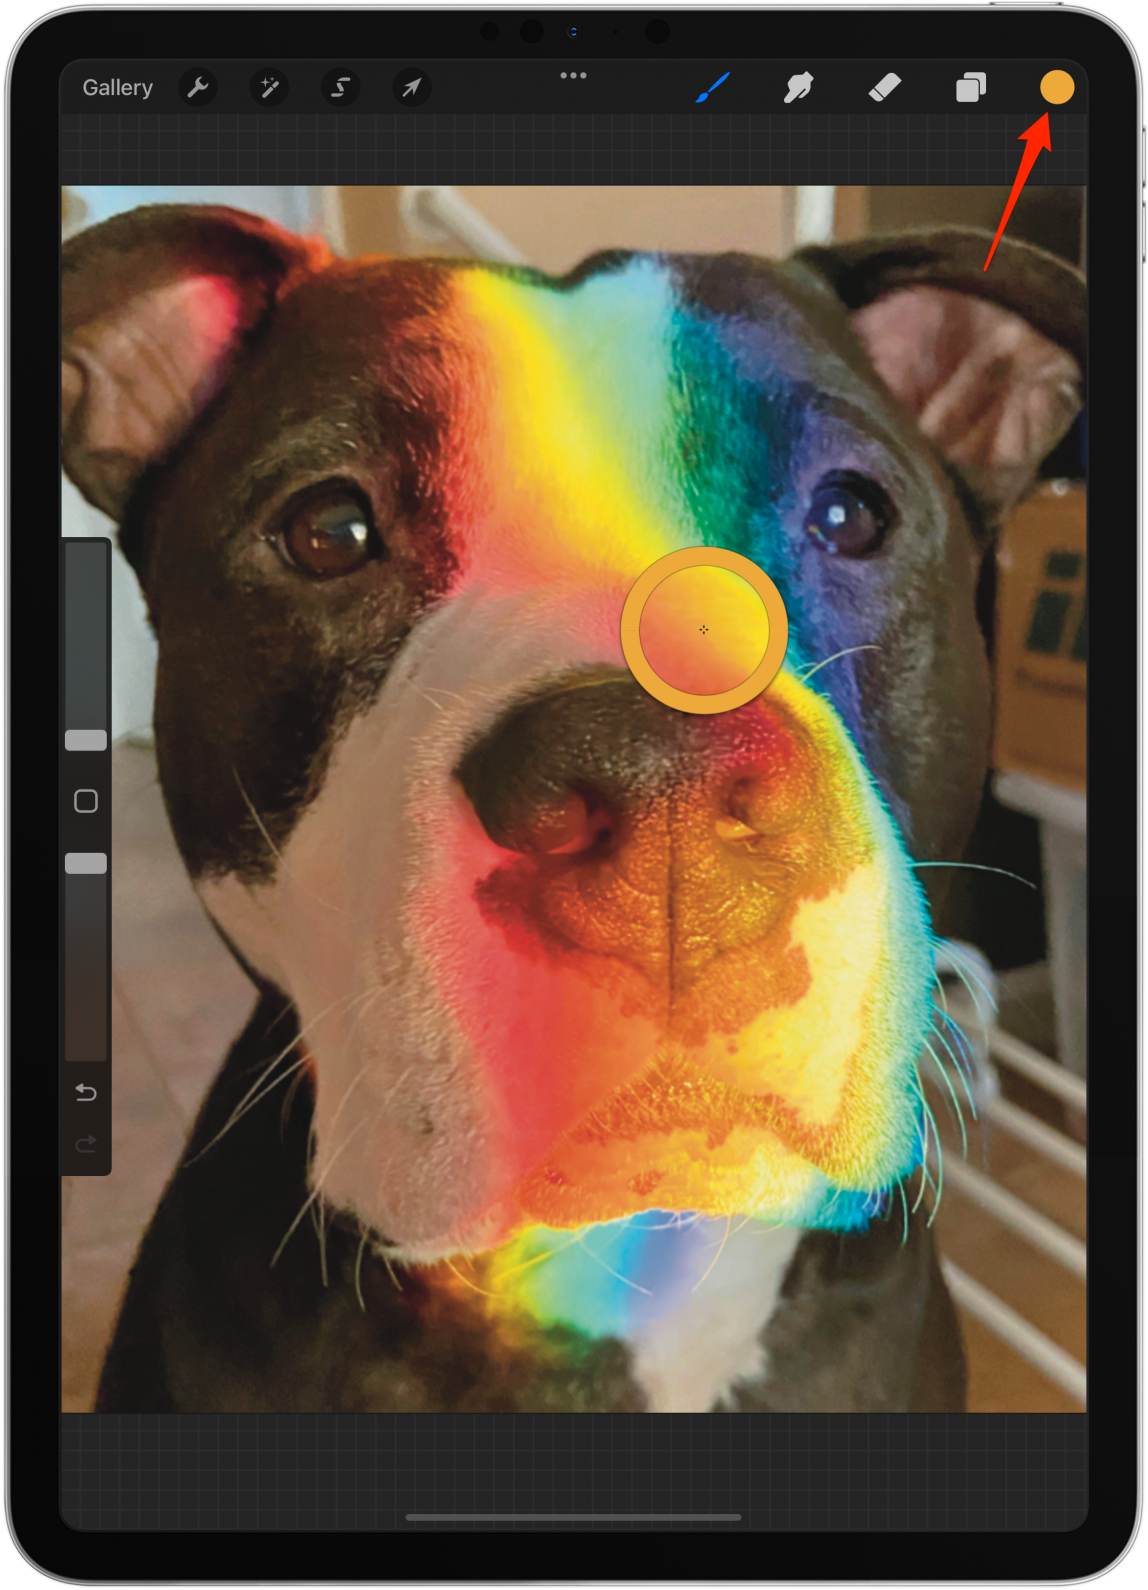
- If you let go accidentally, tap the square again, and it will reappear.

- Another way to select a color is to make sure your brush is selected, then use your finger to tap and hold anywhere on the image until the same color-grabbing circle shows up.
9. Save Your Favorite Brush & Eraser Plus “Bookmark” Size & Opacity
If you find a brush you really like, you may want to save it for use in the future. If you’re working on a project with lots of line work and want to make sure your brush doesn’t change sizes, I will teach you how to save the size (and opacity) as well.
- Open a new project and select a brush you like.
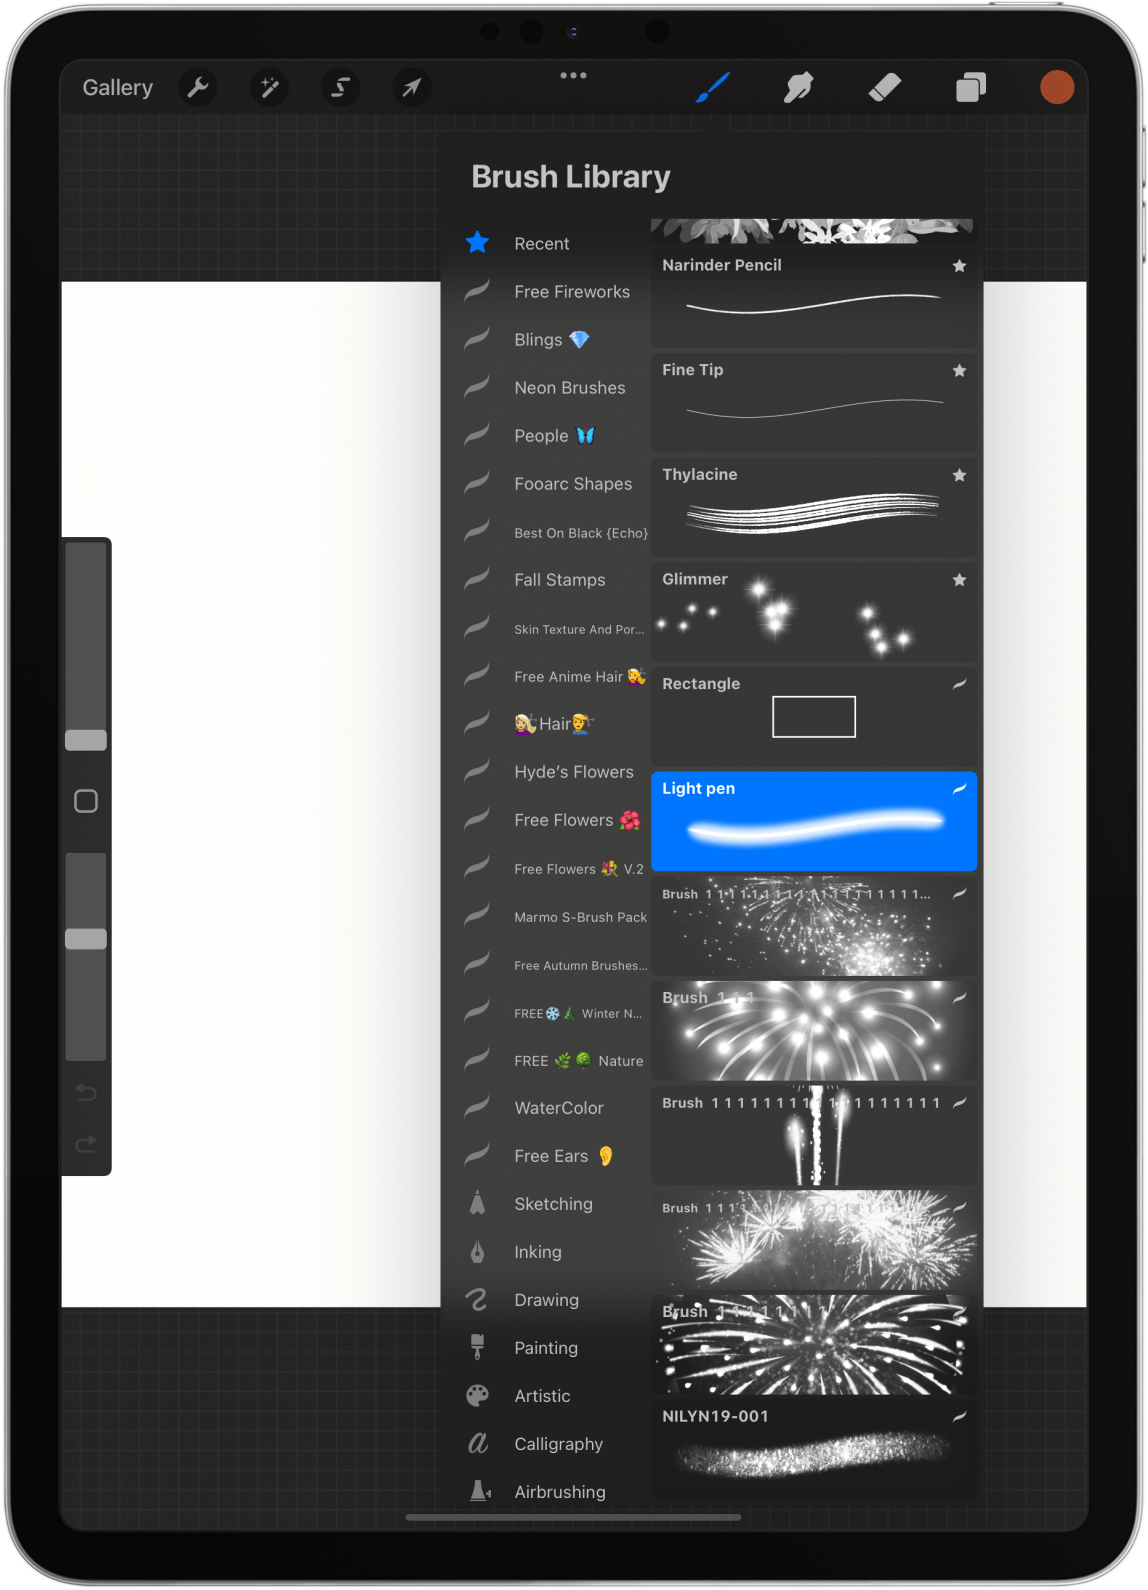
- Swipe left over the brush and select Pin.
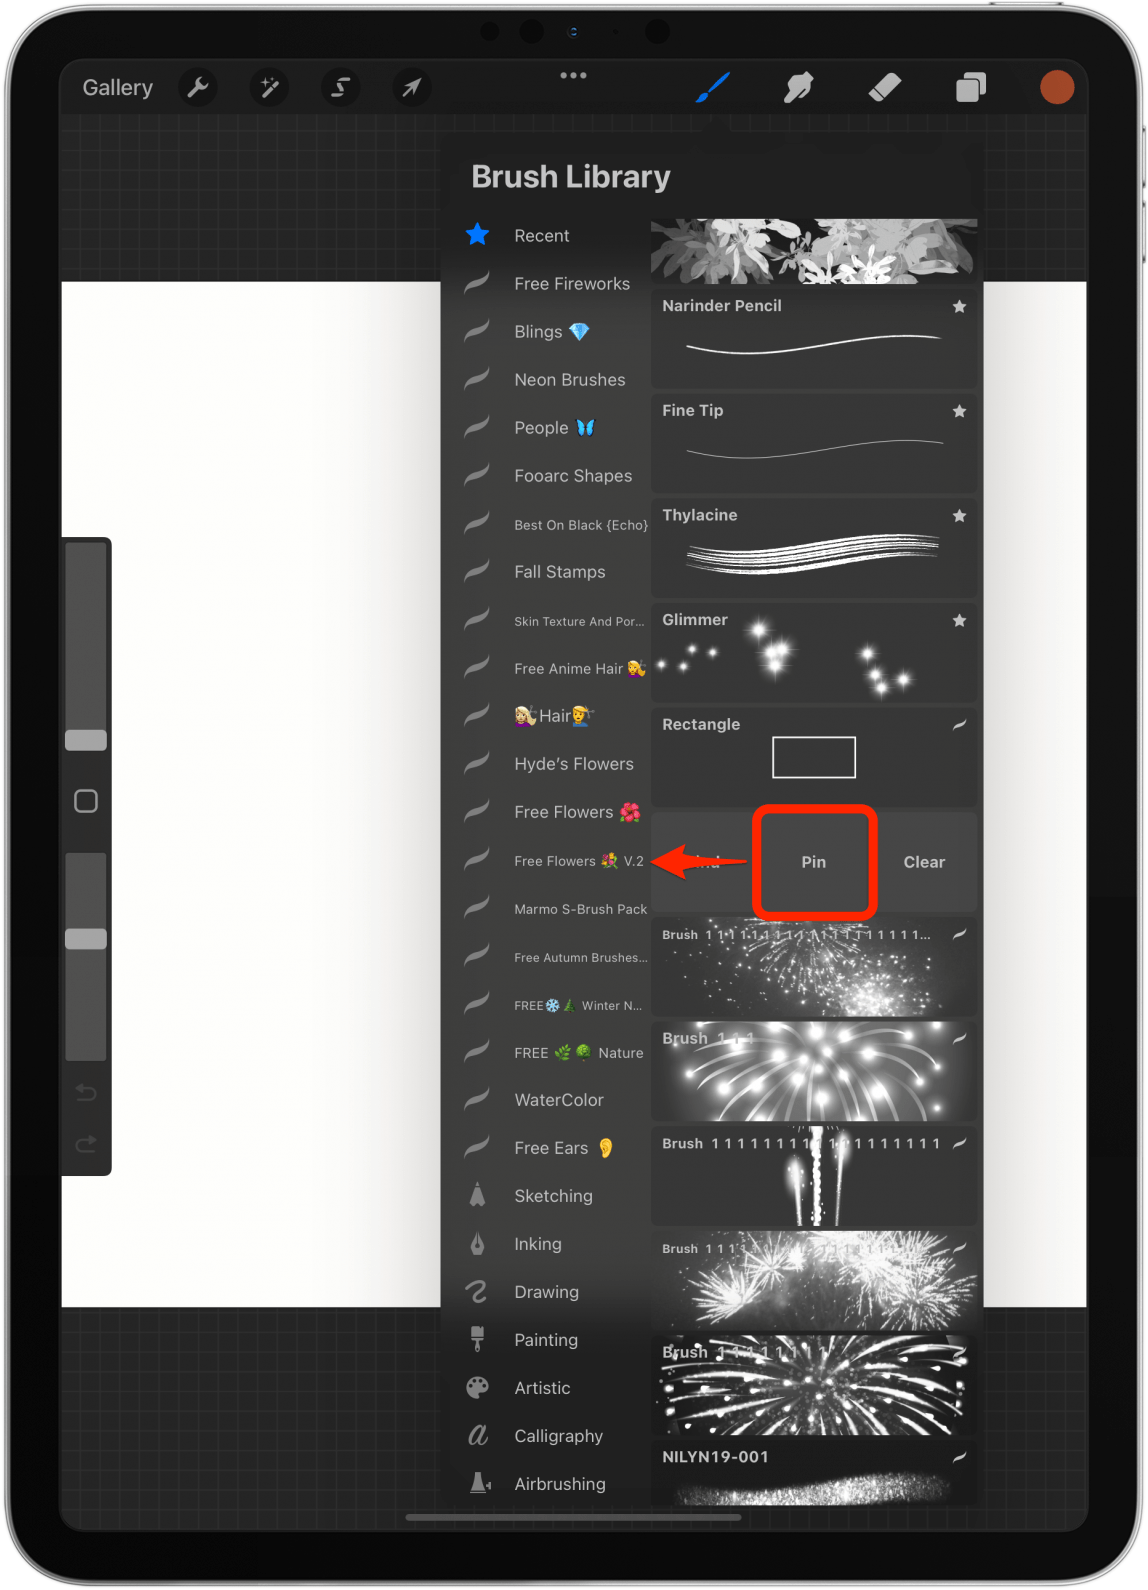
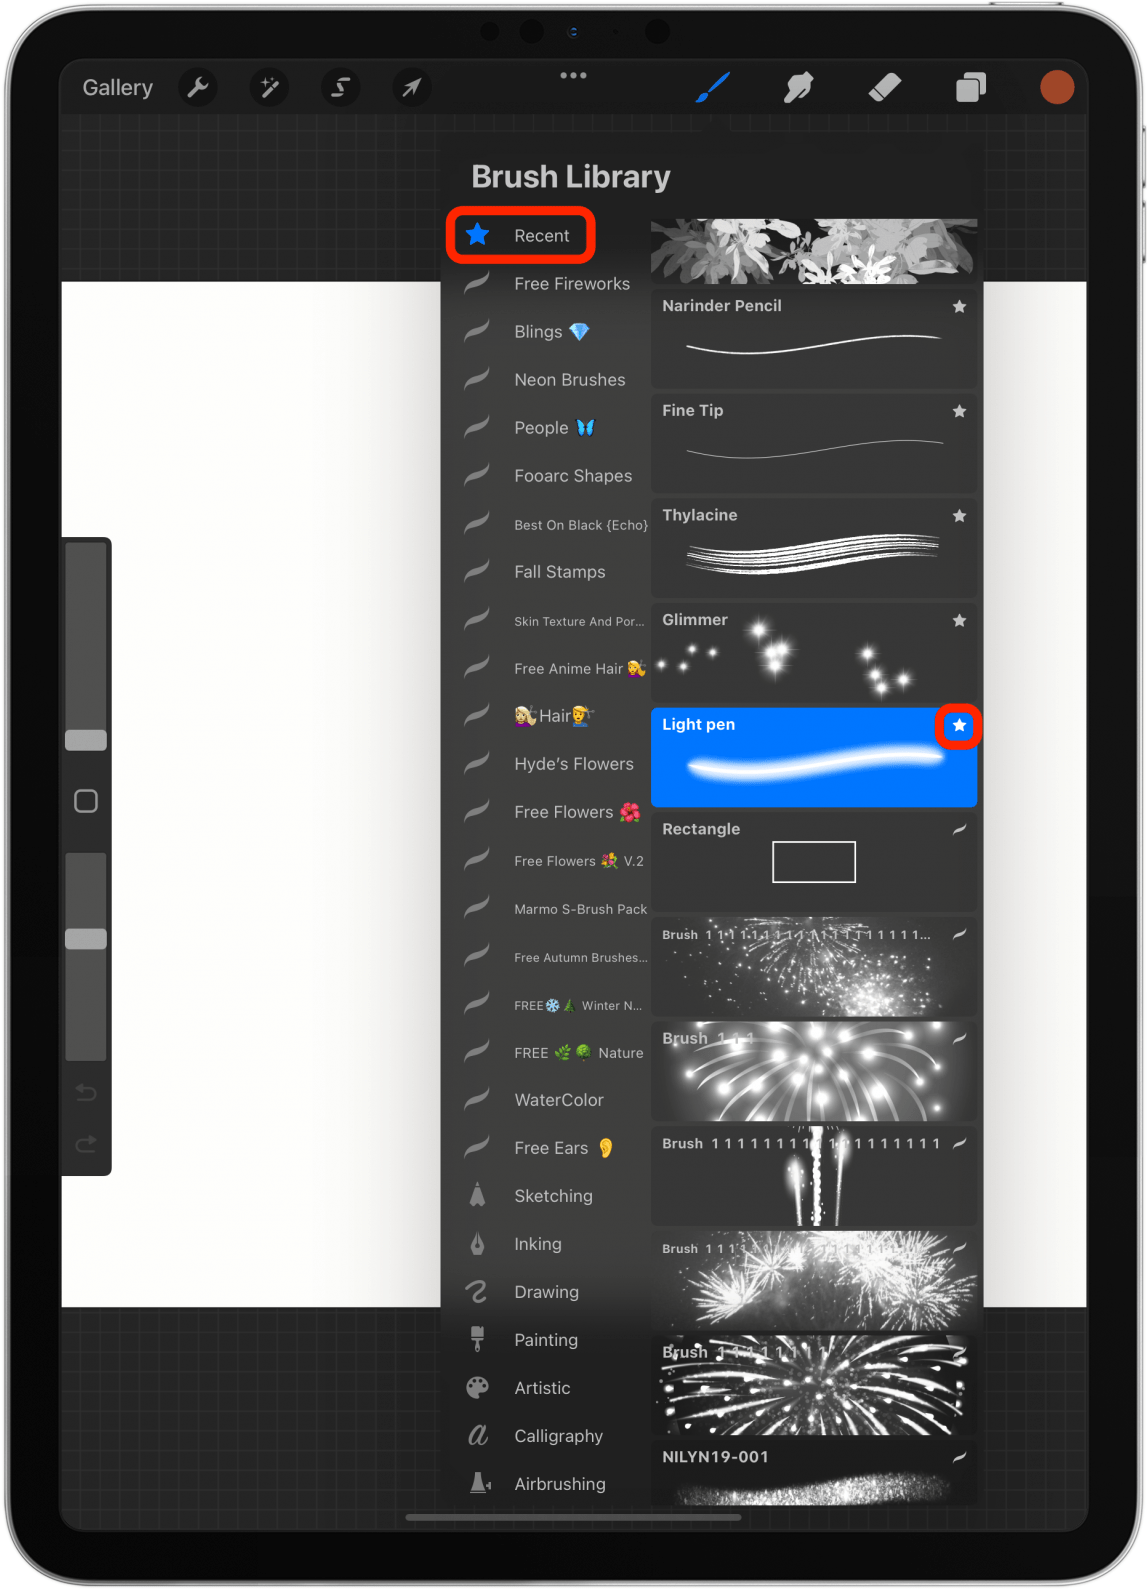
- A star will appear next to it, and it will always be pinned at the top of the list in your Brush Library Recents.
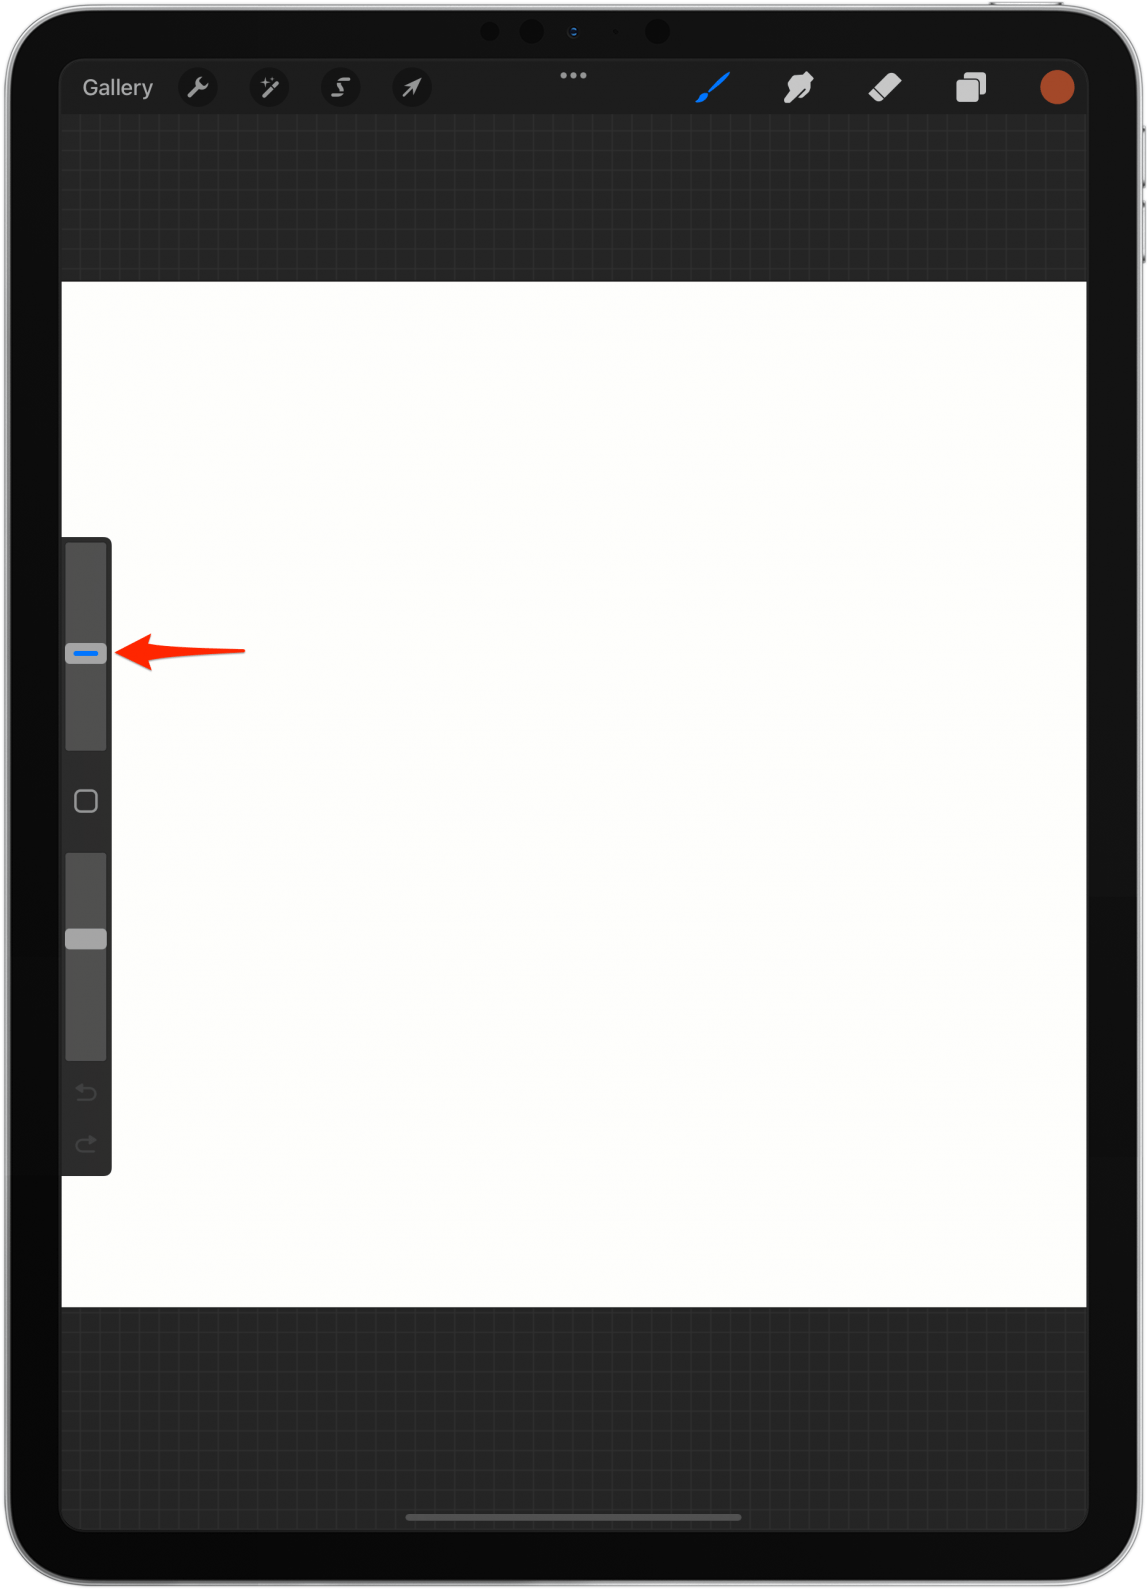
- To save a particular brush size and opacity, drag the slider to the correct setting and tap the plus.
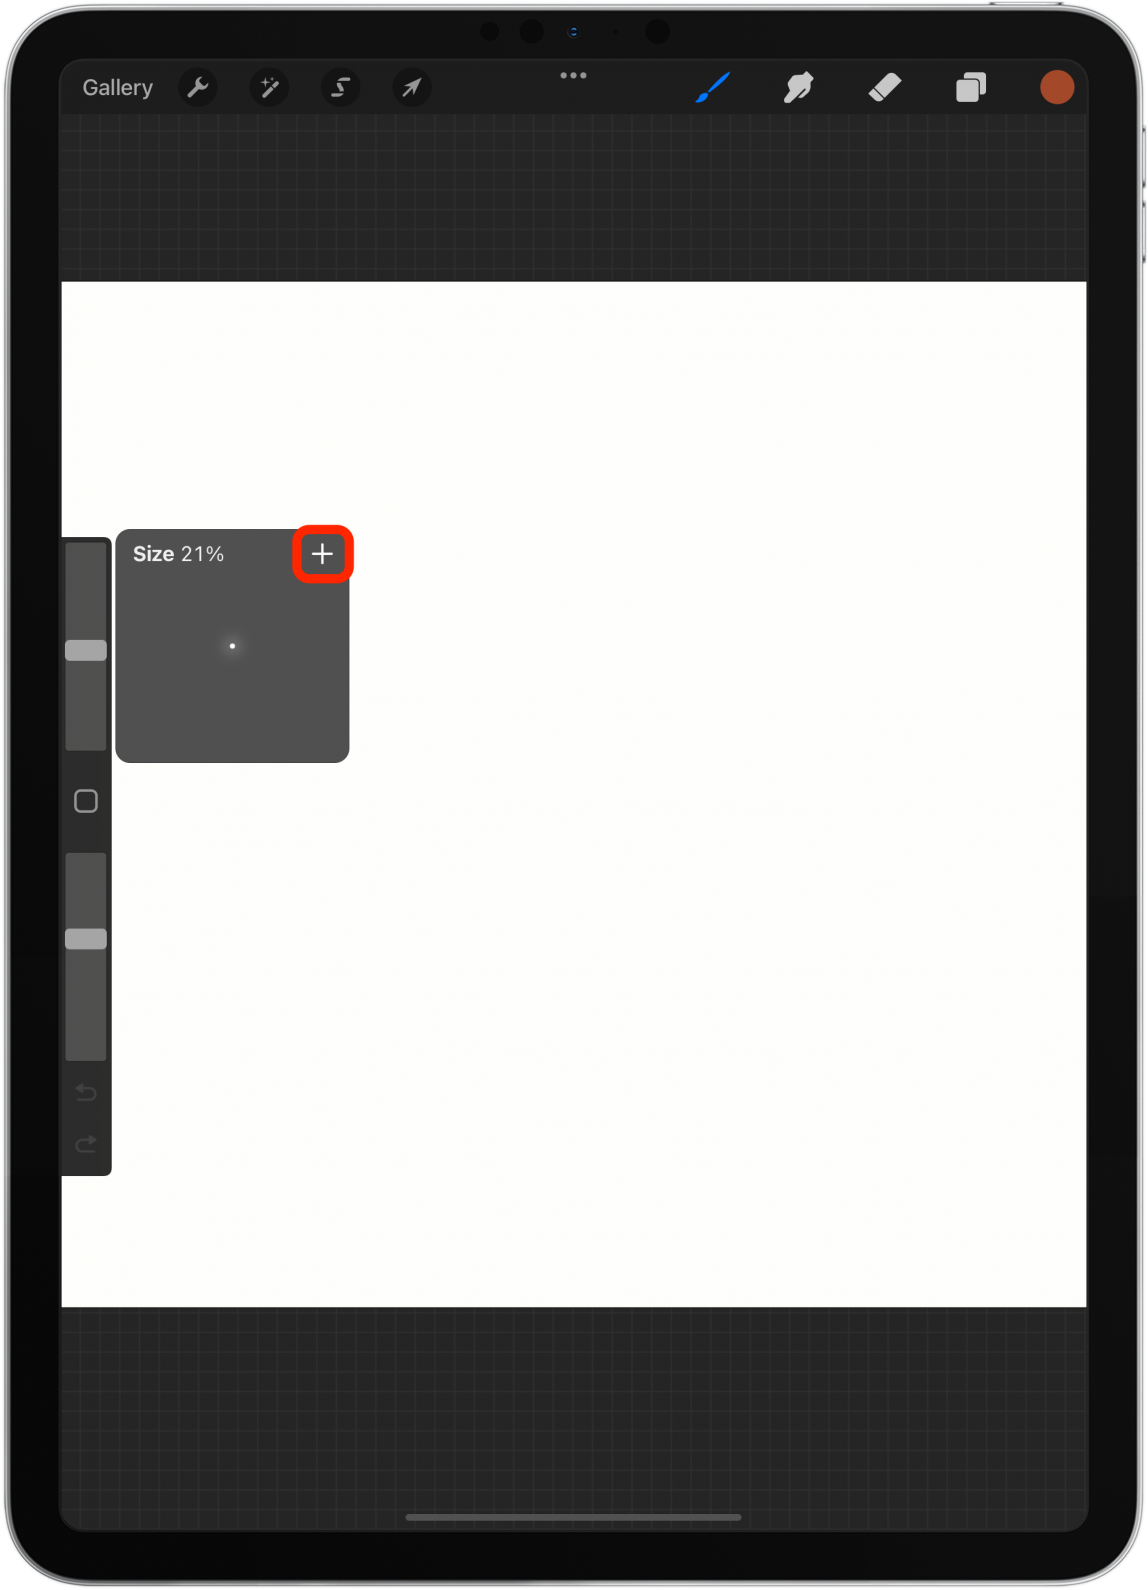
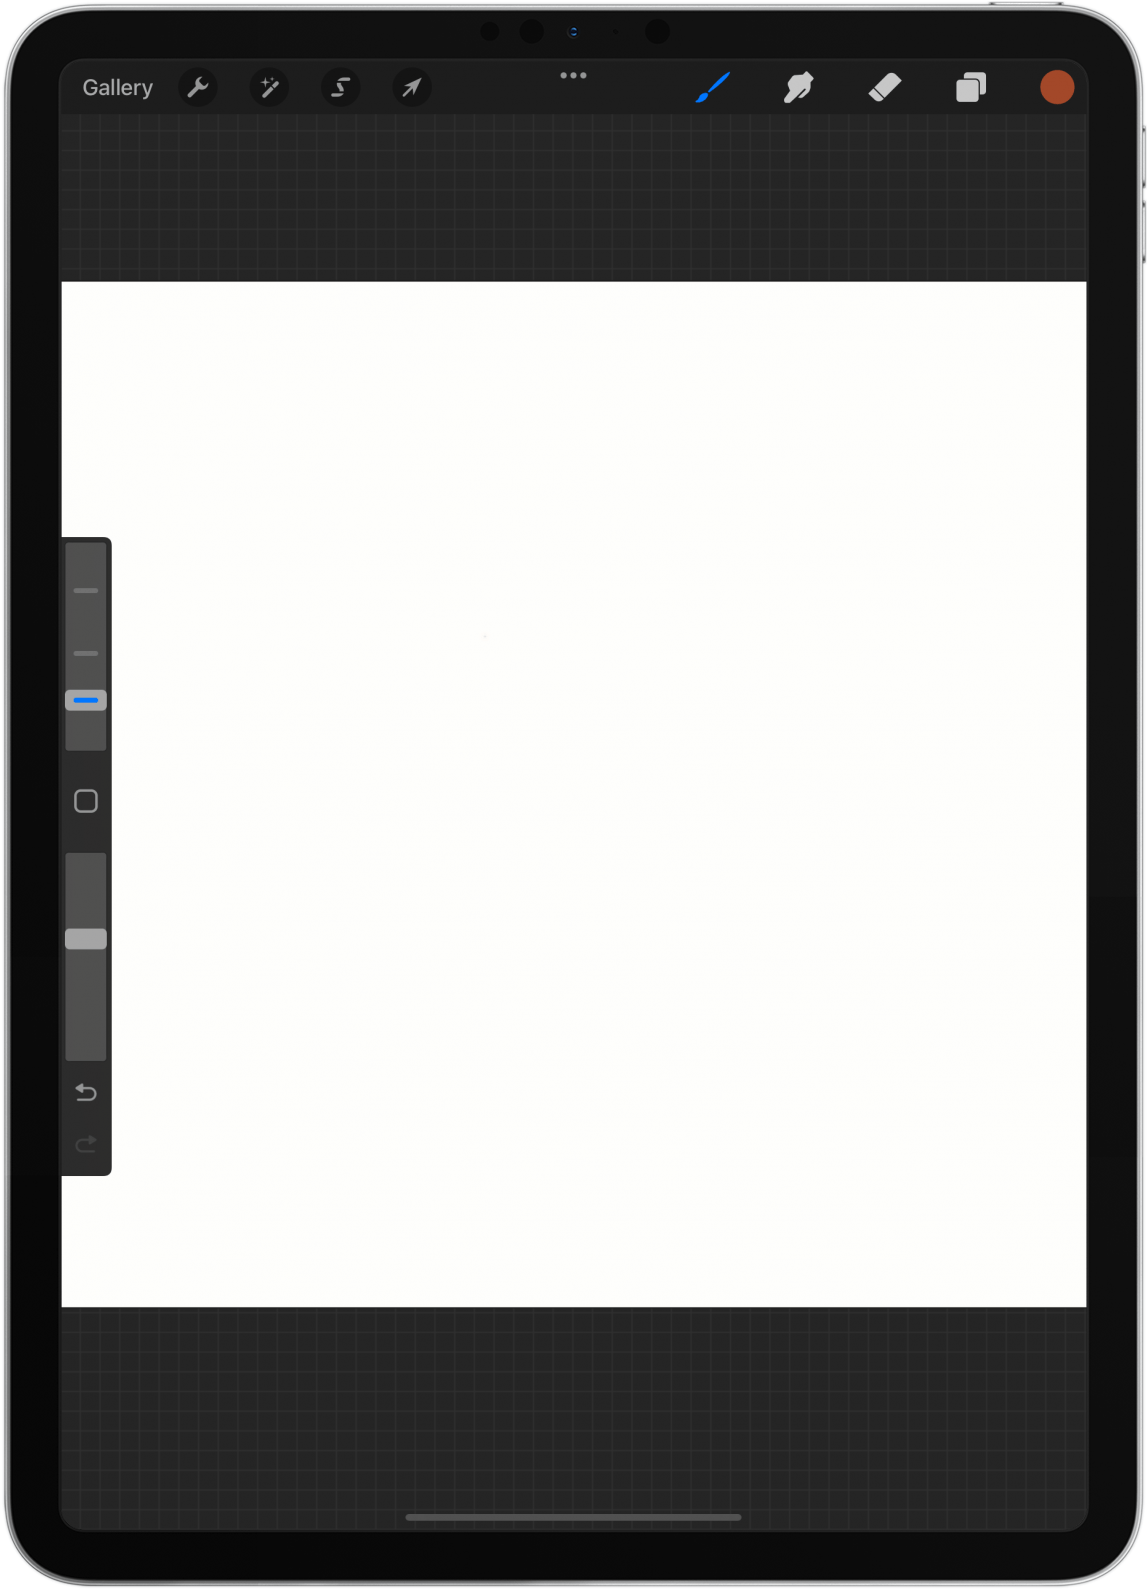
- There will now be a line that you can quickly tap to get to that size. This is paintbrush specific but will appear in any new Procreate project you open.
- You can save several different sizes and opacity levels.
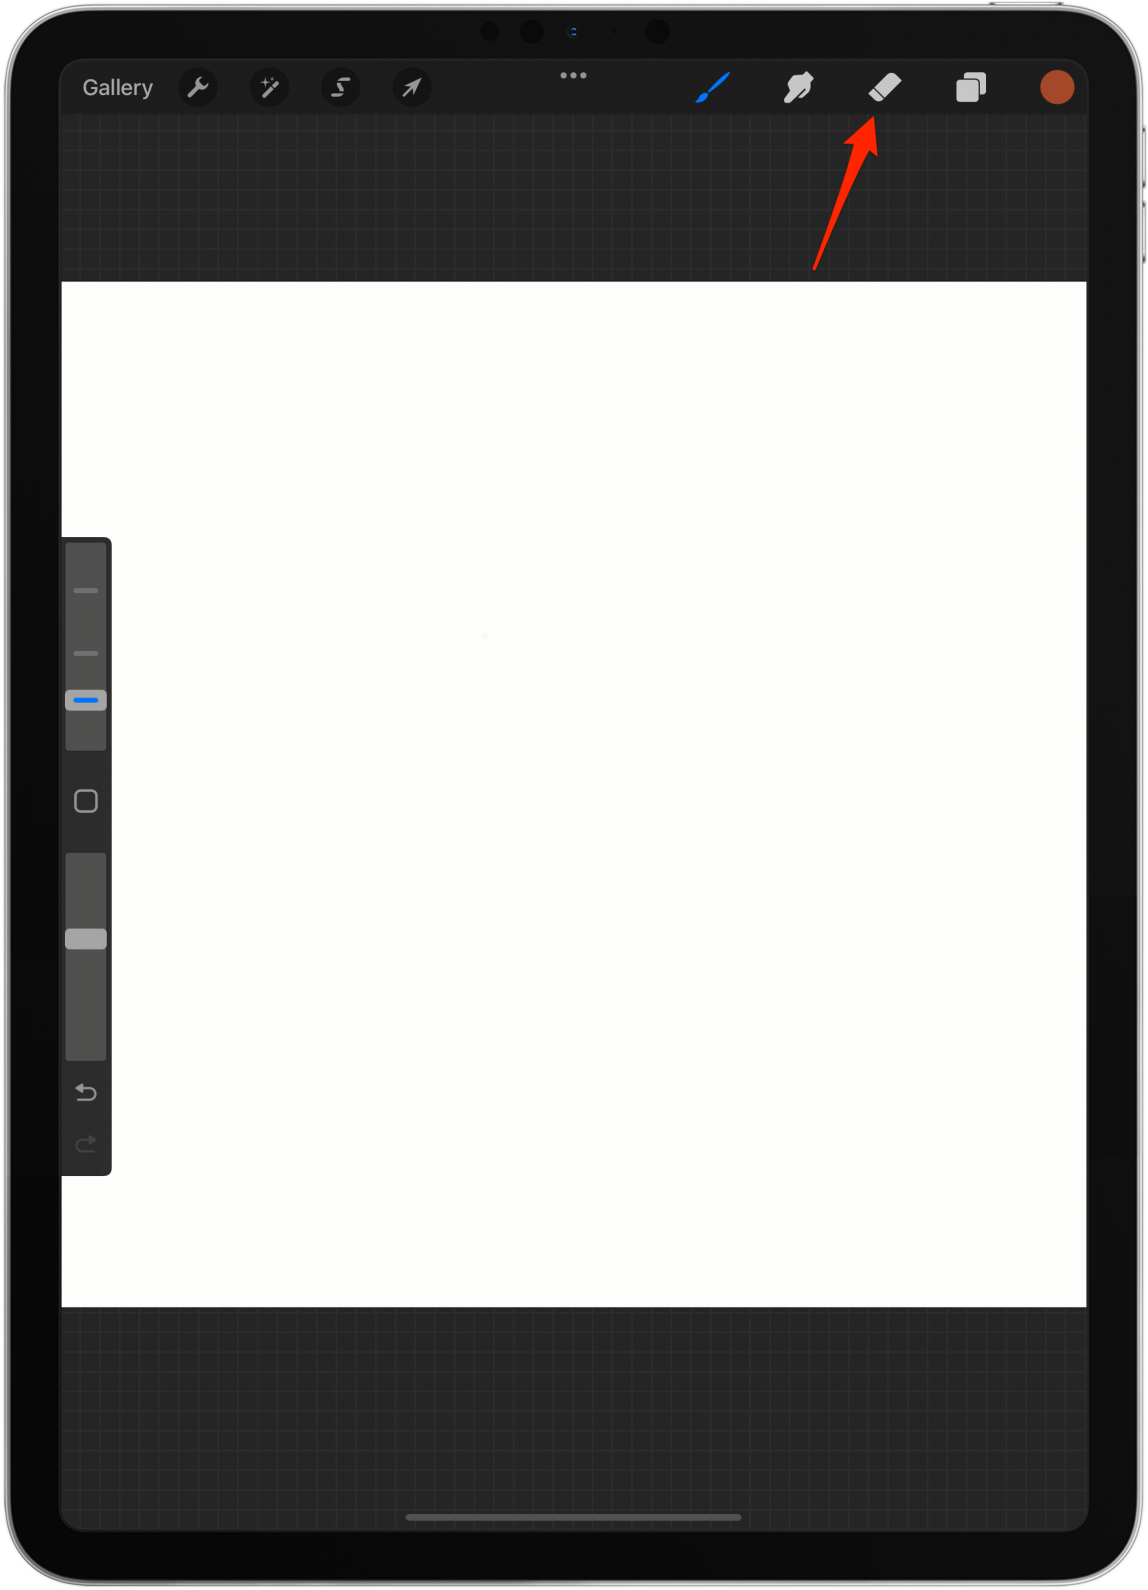
- The process is the same for the eraser tool.
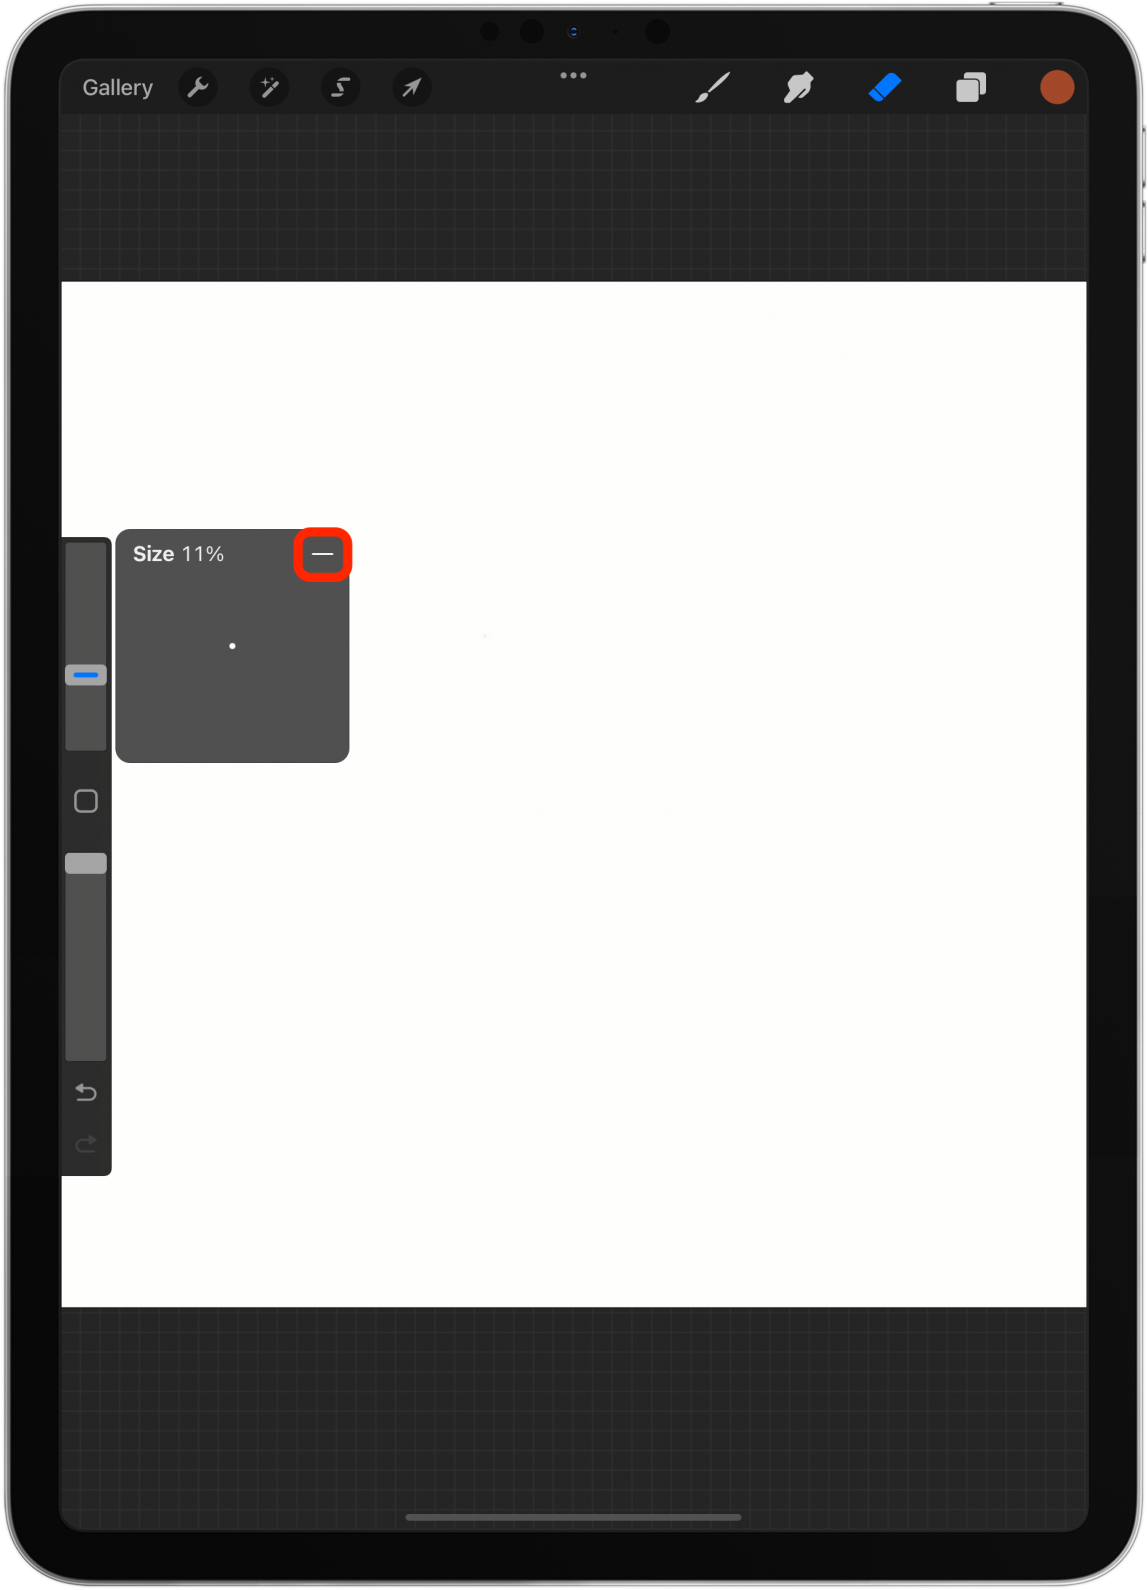
- To remove a saved size or opacity, tap it, then tap the minus sign.
This is a new feature that came with the latest Procreate update. If you are running an older version of Procreate, you won’t be able to do this. You can update the app for free to enjoy this and other new features.
10. Export a Time-Lapse Replay of Your Drawing
I used to screen record to share my drawing process, but Procreate has a built-in feature for this that doesn’t waste as much battery or take up as much storage as screen recording. Make sure to check out Tip 1 to set up a template with the right speed and quality for your Time-Lapse. Next:
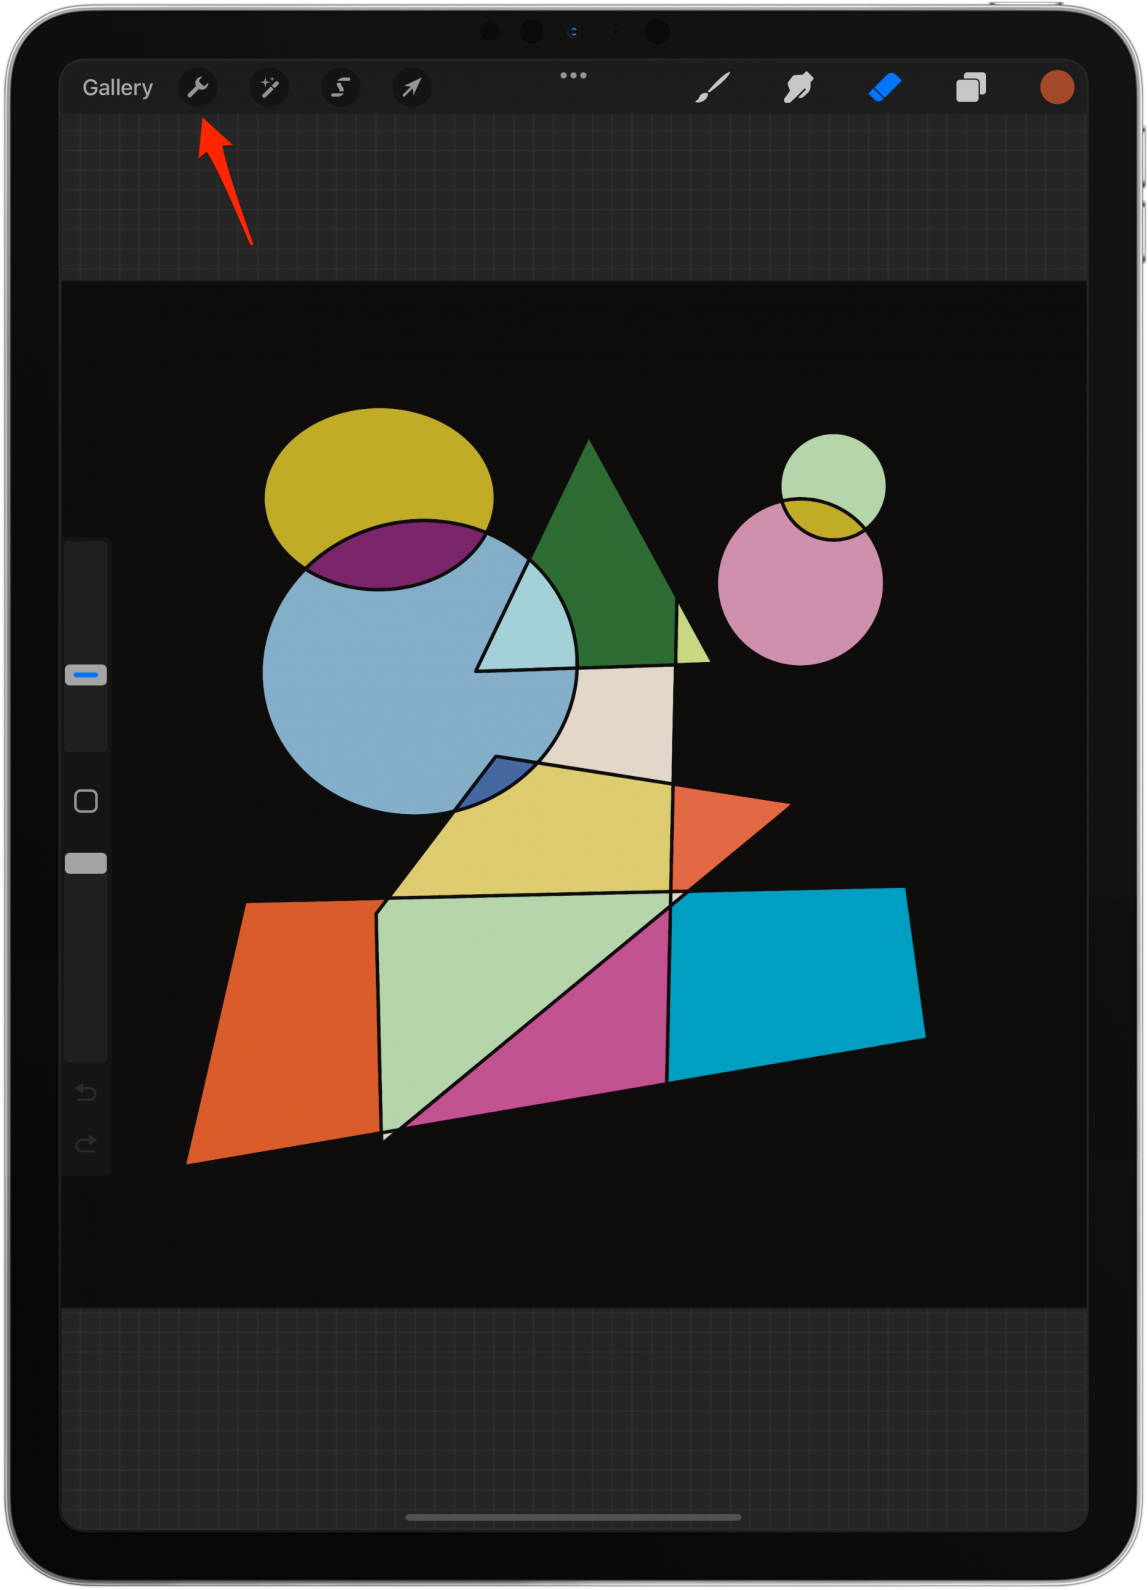
- Open a project that you’ve worked on and tap the wrench tool.
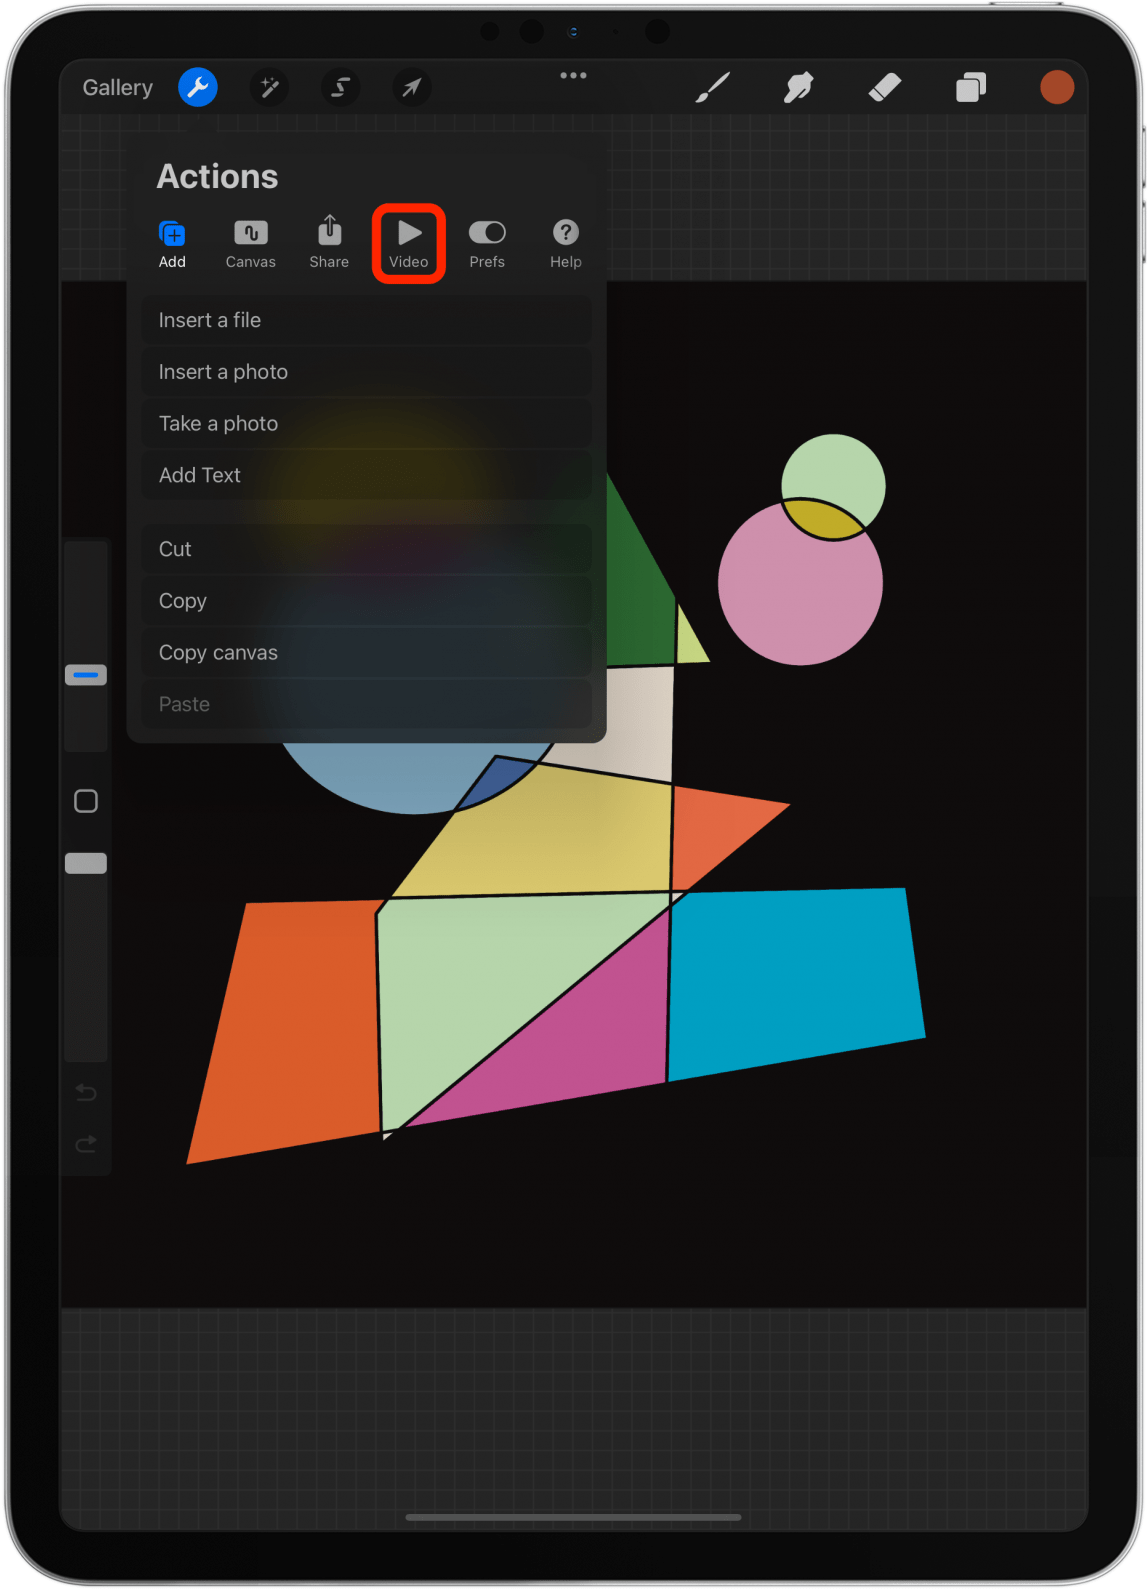
- Tap Video.
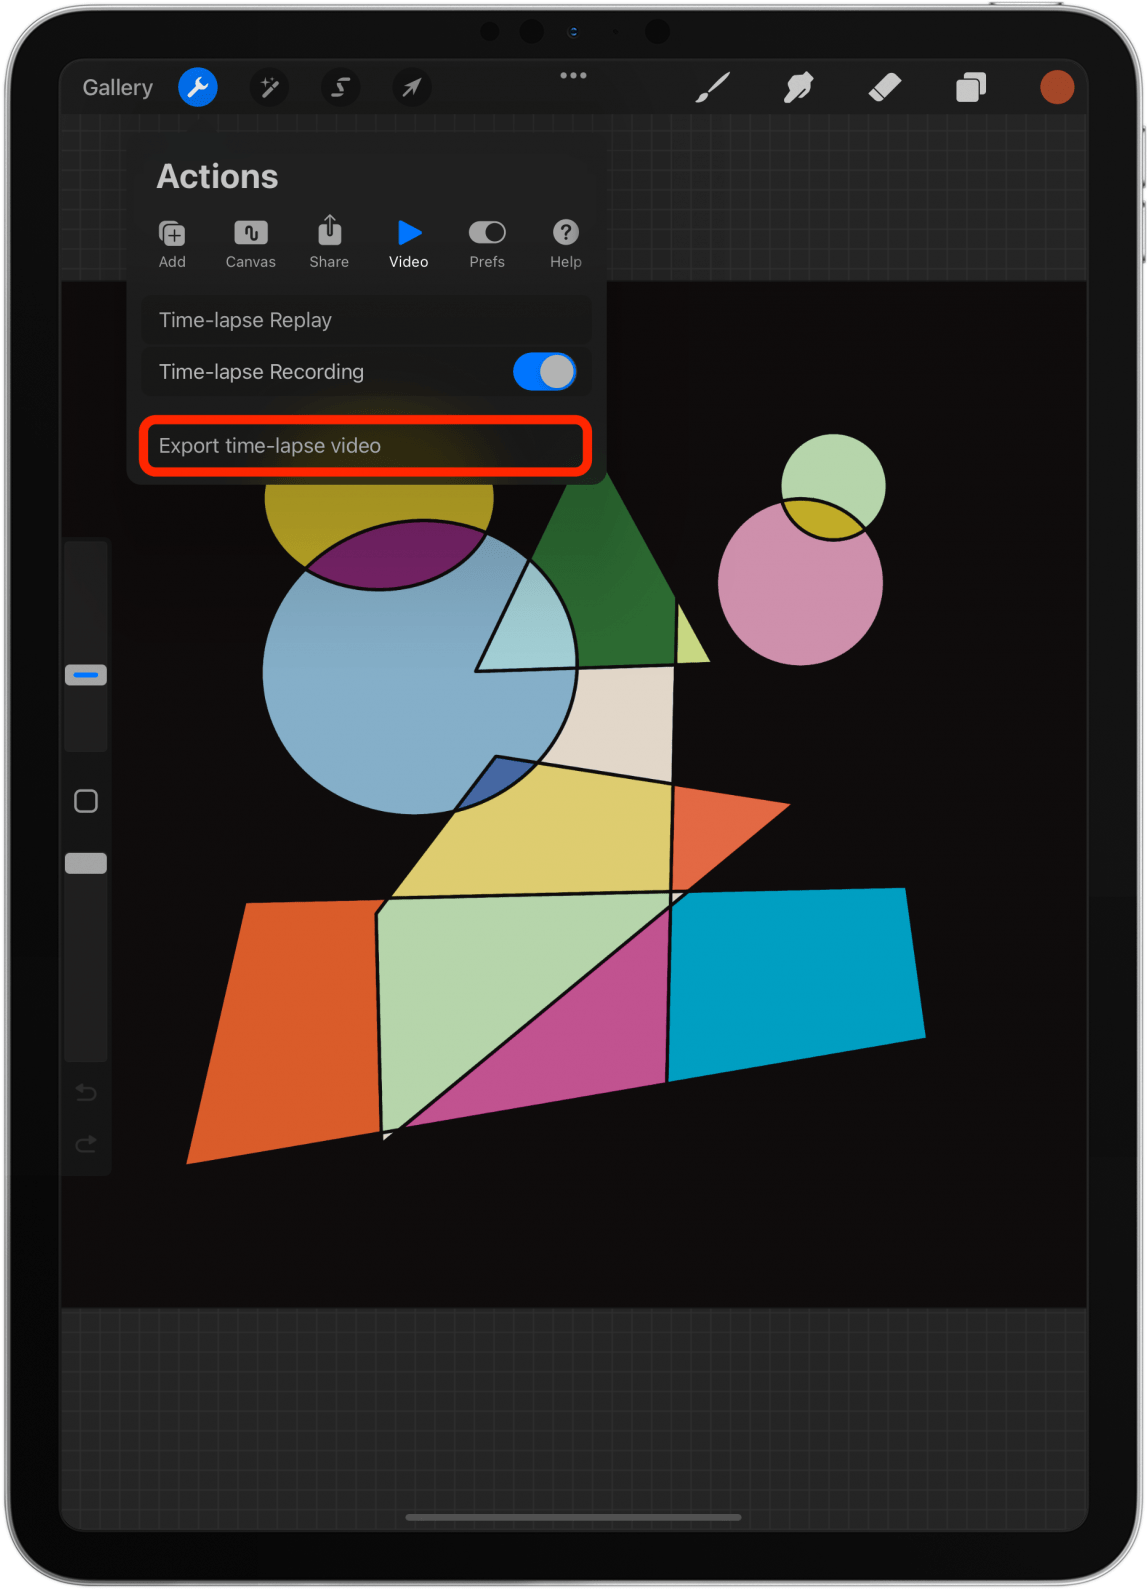
- You can watch the replay by tapping Time-lapse Replay.

- Tap Export time-lapse video to export it.
- Pick between Full length and 30 seconds. If 30 seconds isn't selectable, then the time lapse isn't long enough to last 30 seconds.
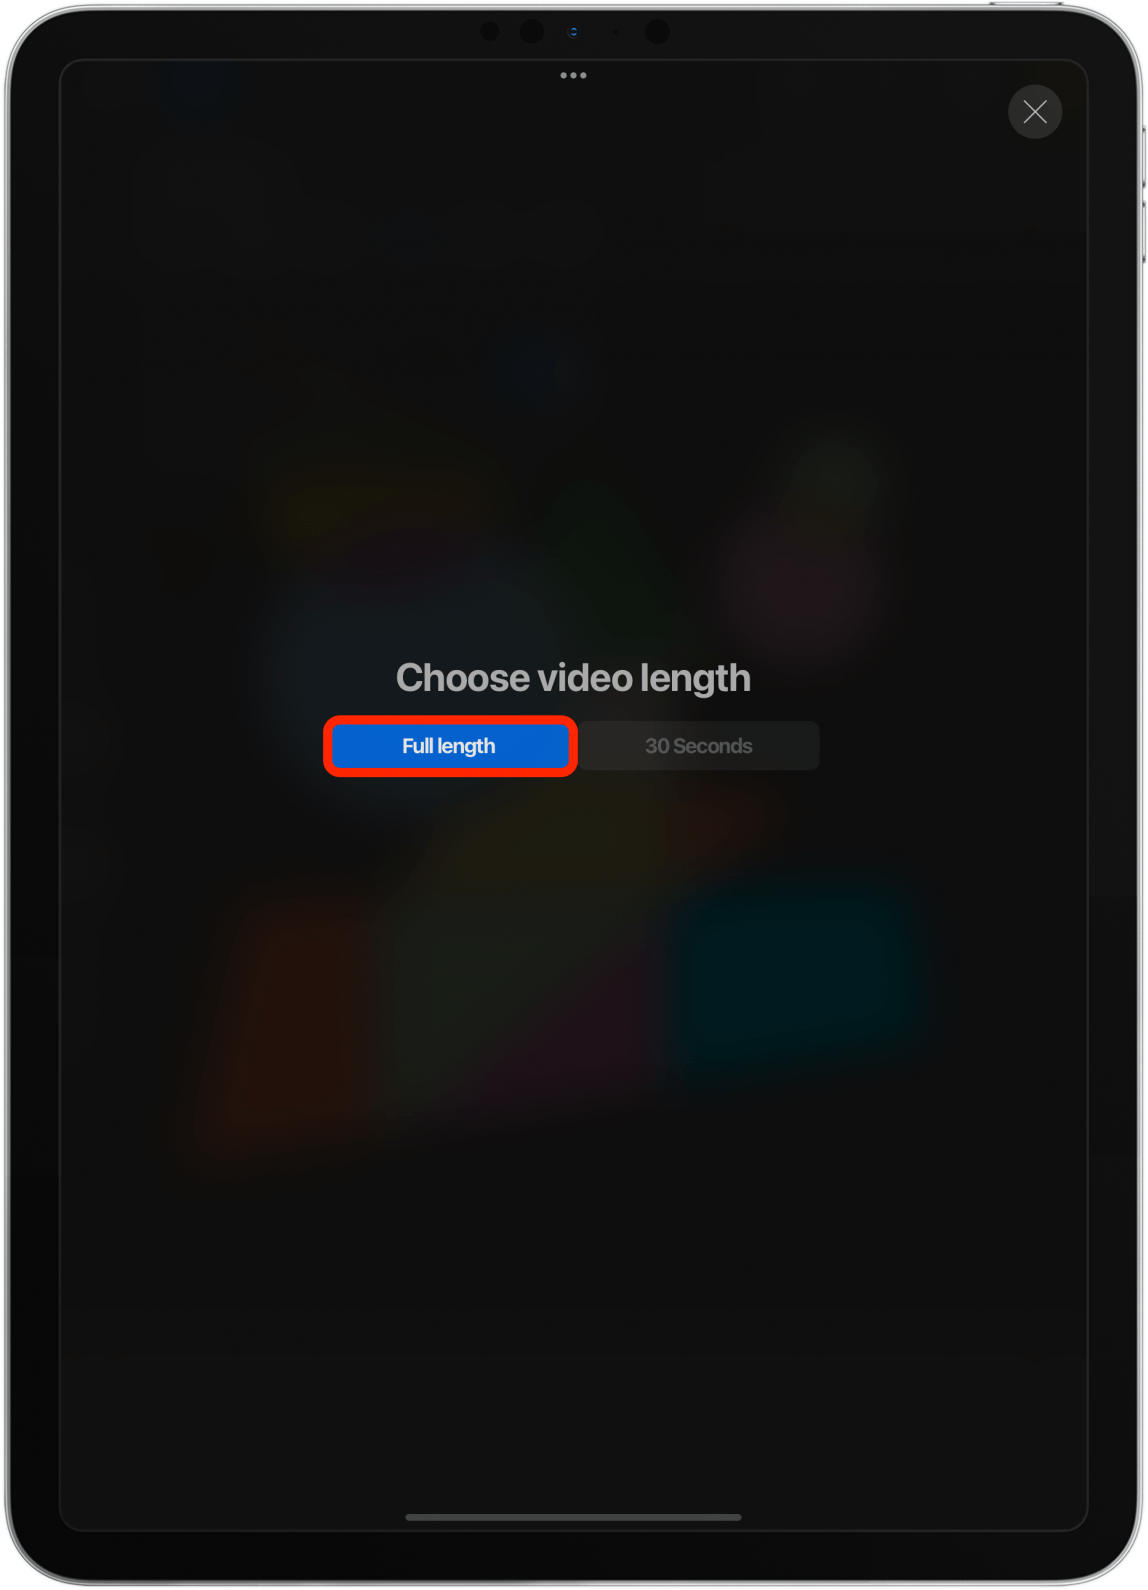
Your exported video will save to your Photos app.
We hope these tips have taught you something new and that you've enjoyed drawing on Procreate. Did you know that some people use Procreate to create NFT crypto art? It's quite an interesting concept! Learn about downloading free Procreate brushes next!

Olena Kagui
Olena Kagui is a Feature Writer at iPhone Life. In the last 10 years, she has been published in dozens of publications internationally and won an excellence award. Since joining iPhone Life in 2020, she has written how-to articles as well as complex guides about Apple products, software, and apps. Olena grew up using Macs and exploring all the latest tech. Her Maui home is the epitome of an Apple ecosystem, full of compatible smart gear to boot. Olena’s favorite device is the Apple Watch Ultra because it can survive all her adventures and travels, and even her furbabies.

 Olena Kagui
 Hal Goldstein
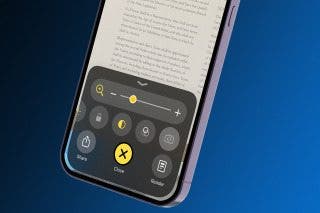
 Leanne Hays
 Susan Misuraca

 Ashleigh Page
 Rhett Intriago
 Amy Spitzfaden Both

 Rachel Needell