How to Edit Photos & Videos on Mac
Here's how to edit photos and videos on a Mac so you can adjust light or color, get rid of red-eye, and more.

Leanne puts her love of troubleshooting and repair to use managing our Ask an Expert Facebook group and has authored hundreds of how-to, Apple news, and gear review articles.
Learn More Leanne puts her love of troubleshooting and repair to use managing our Ask an Expert Facebook group and has authored hundreds of how-to, Apple news, and gear review articles.
Learn MoreHow do you add effects to photos on a Mac? The Photos app includes free video editing and picture editing software. Apple makes it easy to adjust light, color, and more in your pictures and videos. If you don’t like edits you’ve made and are wondering, “How do I undo a photo edit on a Mac?” we’ll go over that as well.
Related: How to Put a Filter on a Photo or Video on Mac
How to Edit Photos & Videos on Mac
If you want to adjust light or color, get rid of red-eye, and more in your photos and videos, it's time to learn how to edit photos and videos on a Mac. It's also important to know how to undo a photo edit on a Mac, in case you don't like how the edits look. Alternately, you can duplicate a photo or video on your Mac and make edits to the copy. Let's get started. For more great photos app tutorials, check out our free Tip of the Day.
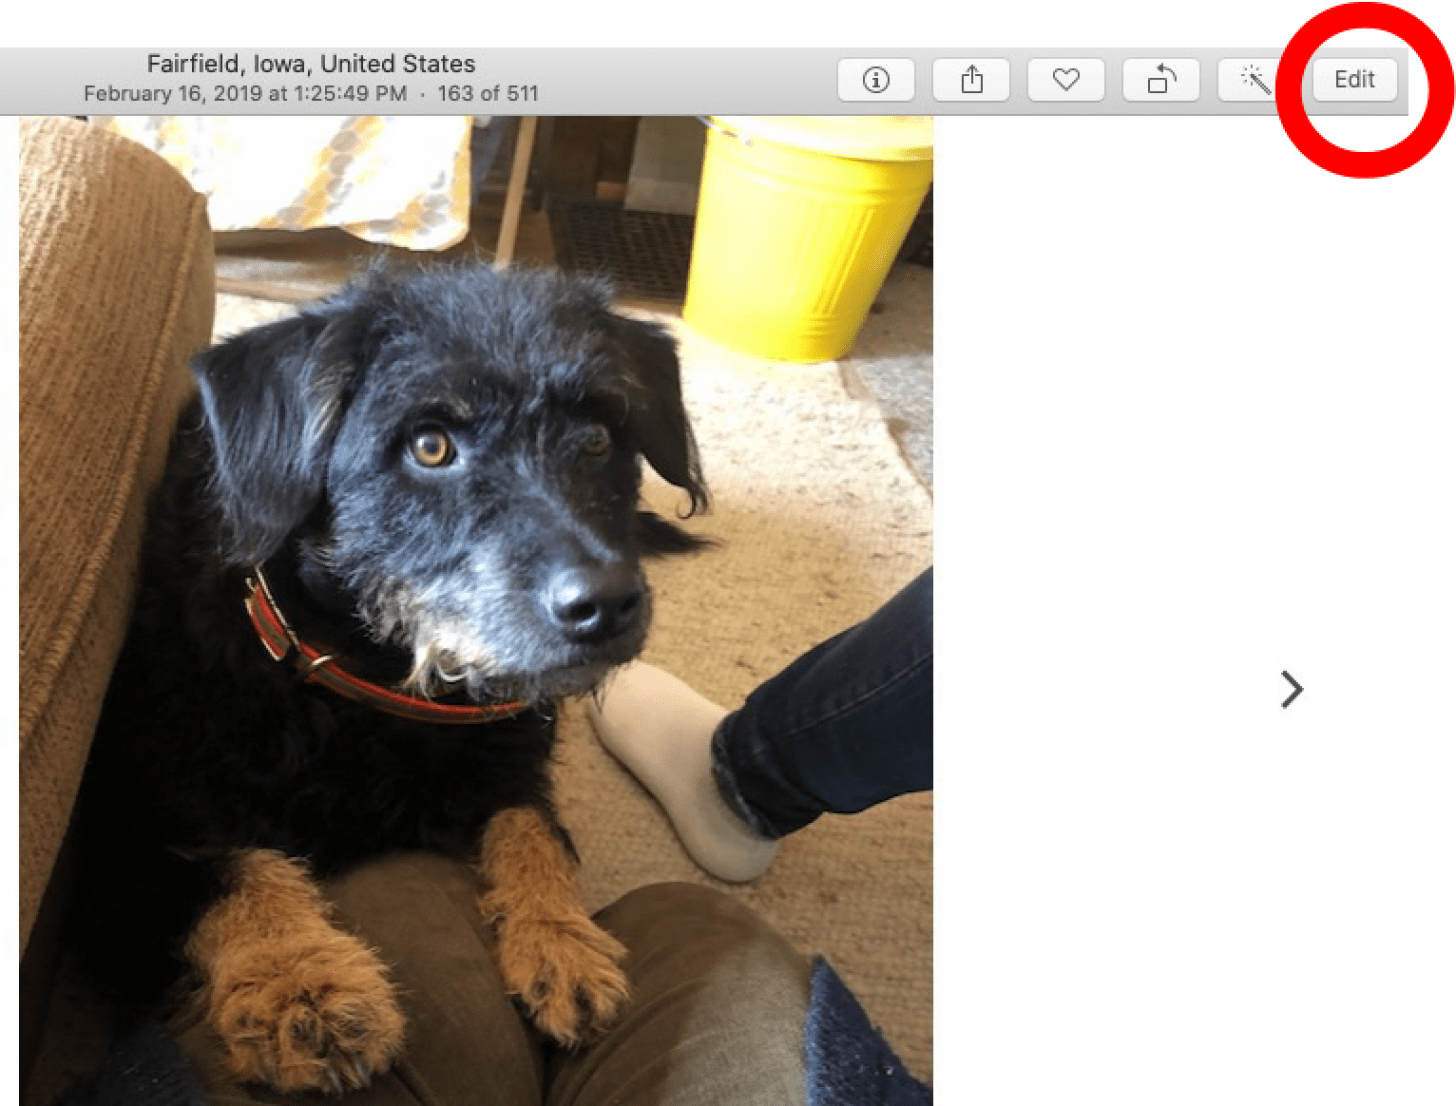
- Open the photo you’d like to edit, and click Edit.
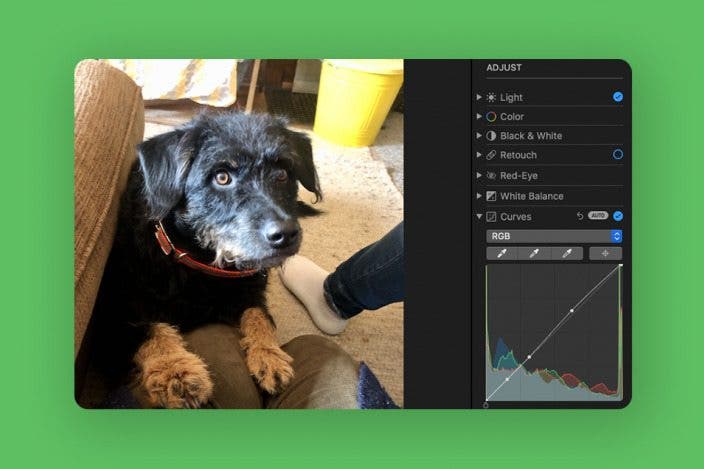
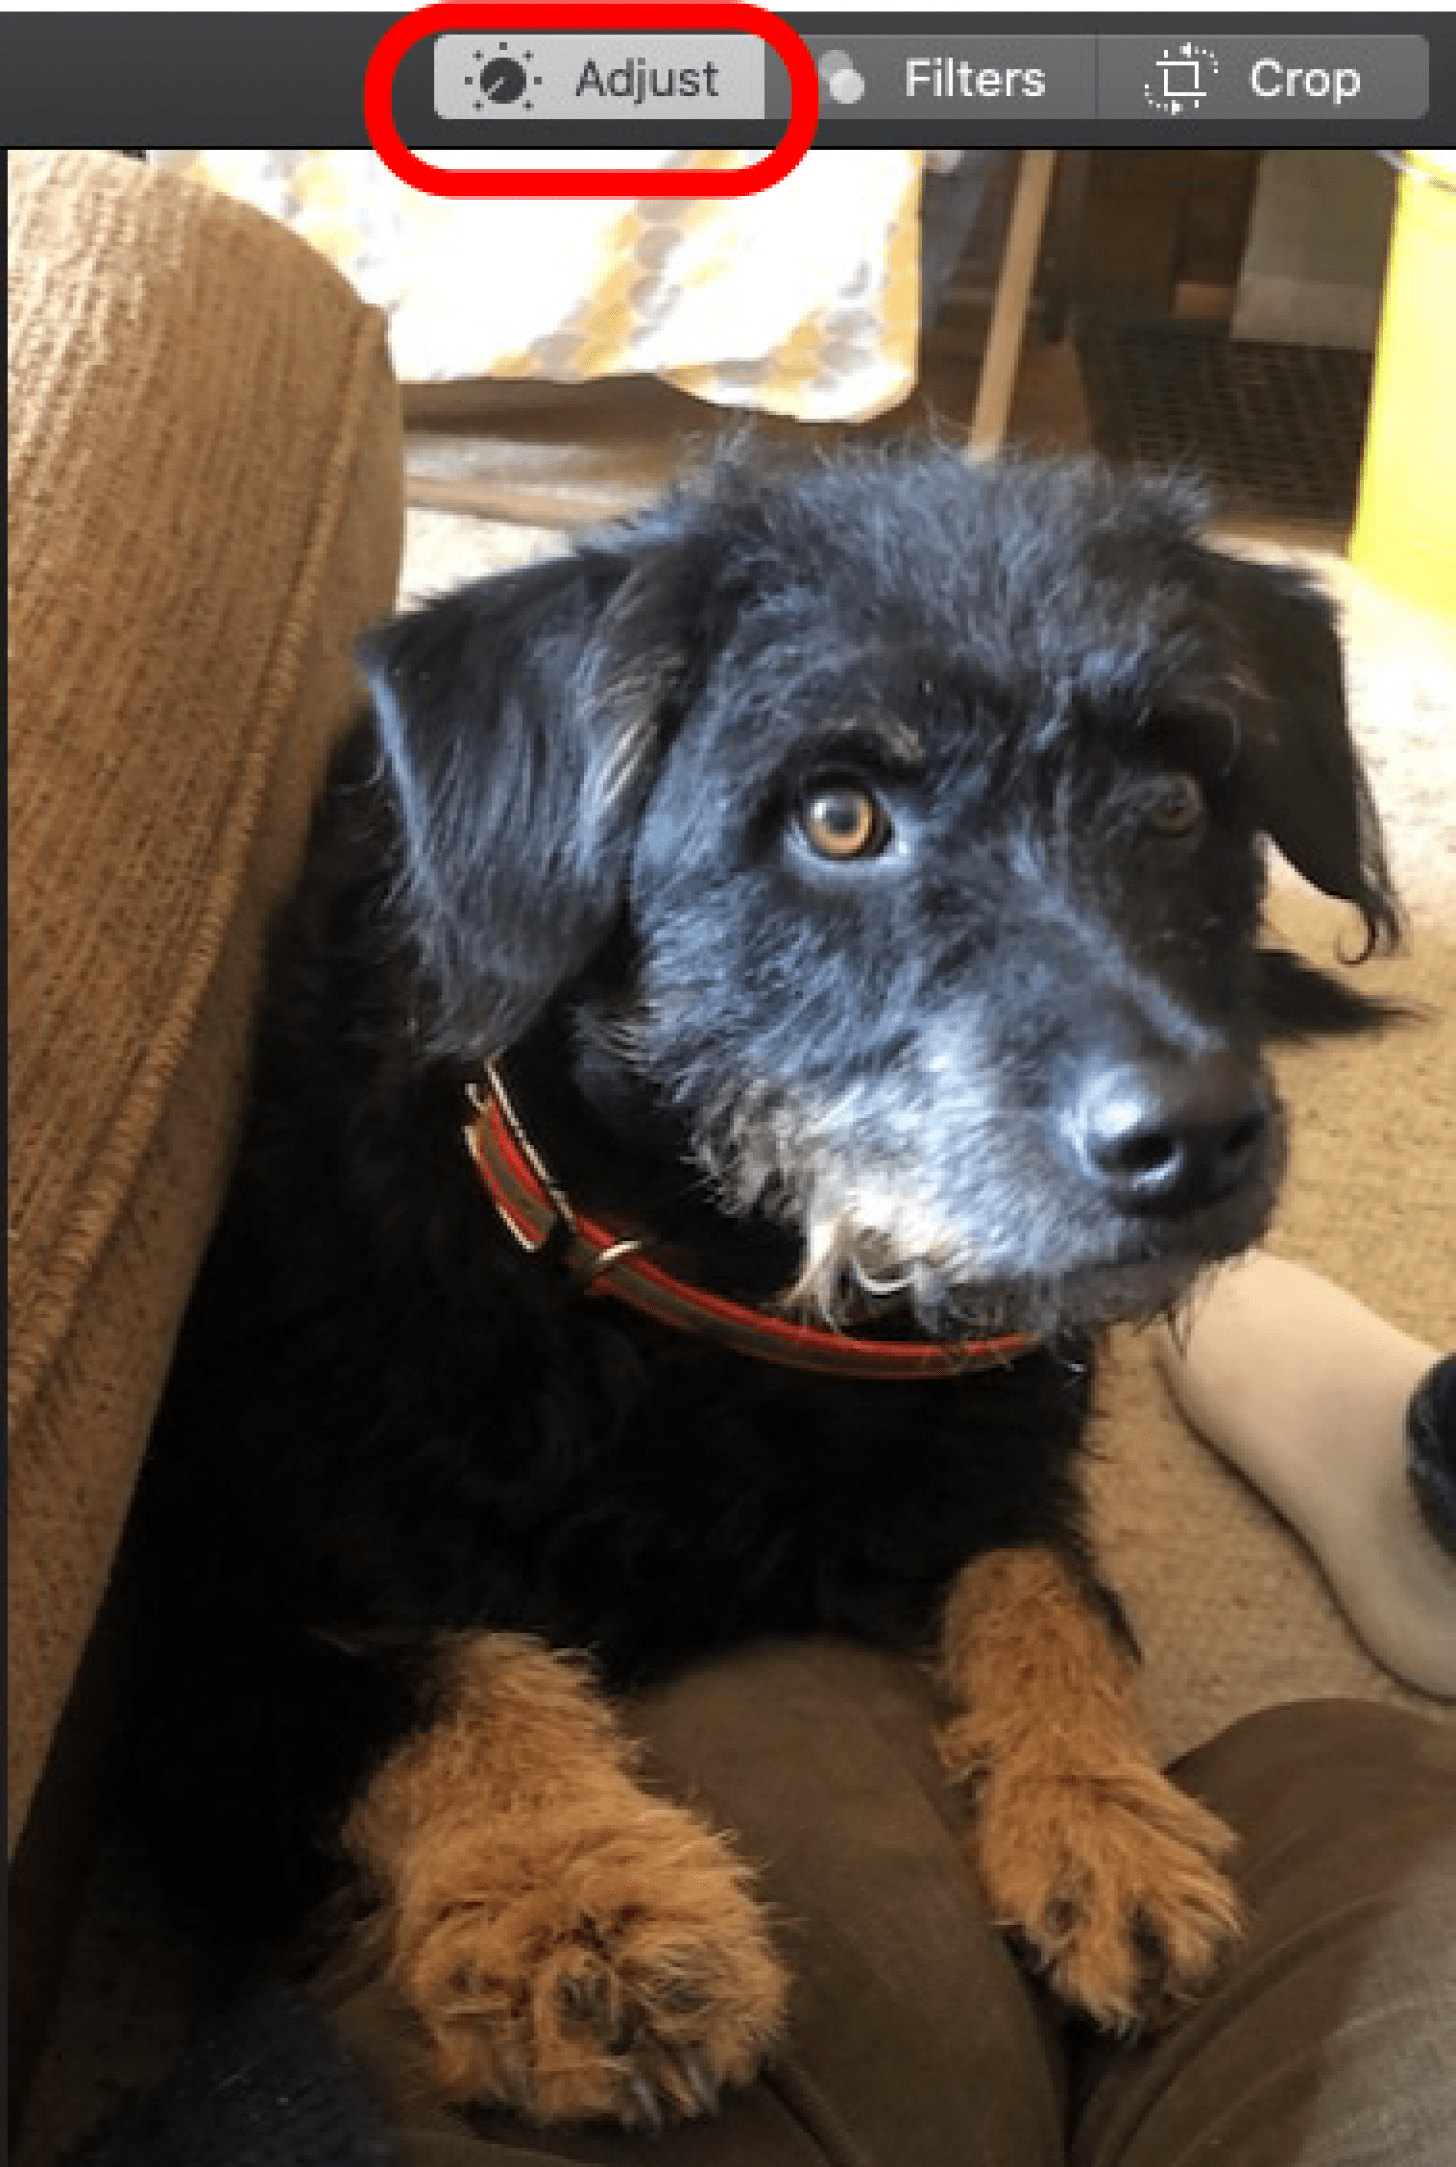
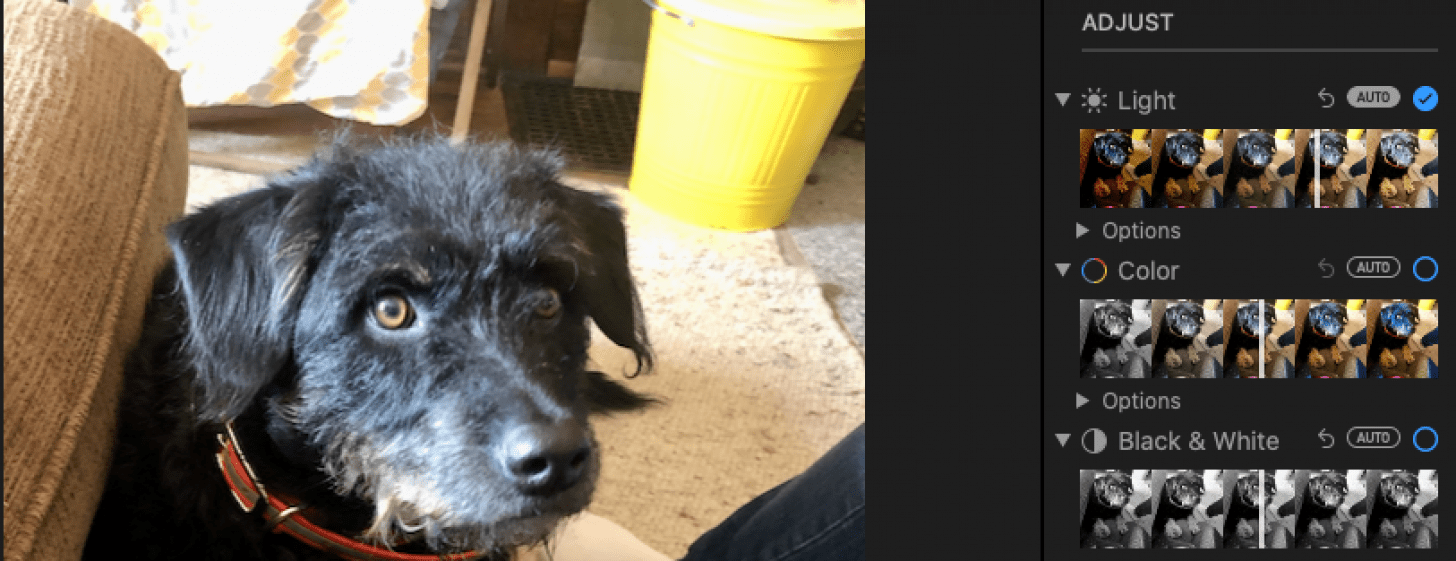
- Click Adjust at the top of the screen.
- You’ll see multiple options on the right. Click the small arrows next to Light, Color, or Black & White to reveal filter options. Tap a filter to choose it.
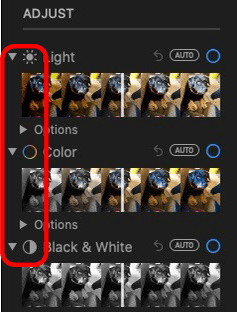
- Click Auto next to one of these options, and the Photos app will automatically adjust the setting. A checkmark will appear when you’ve tapped Auto or chosen a filter.
- Click the arrow next to Retouch, then click the paintbrush icon and drag the slider bar to make the circle slightly larger than the area you want to retouch. Click and drag the cursor from an area you’d like to copy to areas you’d like to remove, such as a blemish.

- Click Auto next to Red-Eye to allow the Photos app to automatically reduce or eliminate the red-eye effect in your picture.
- Or, click the arrow next to Red-Eye to reveal a paintbrush and size slider that will allow you to drag over and eliminate the red-eye effect.

- The White Balance editing tool works the same way as Red-Eye and Retouch. You can either choose the Auto option or click the arrow and adjust manually.
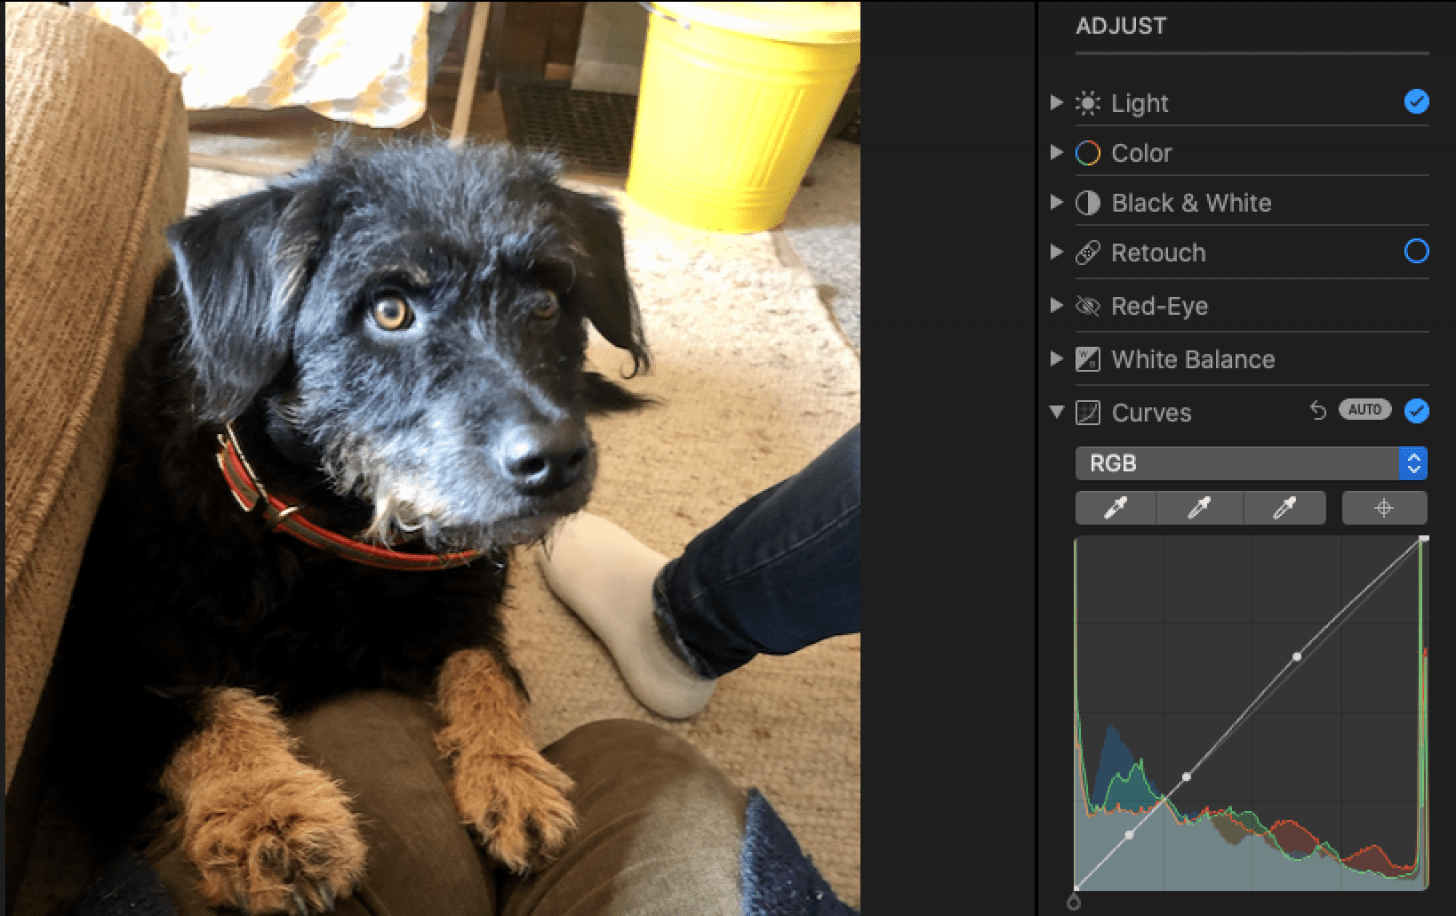
- Click the arrow next to Curves, then click Auto, and the Photos app will automatically balance the red, green, and blue in your photo.
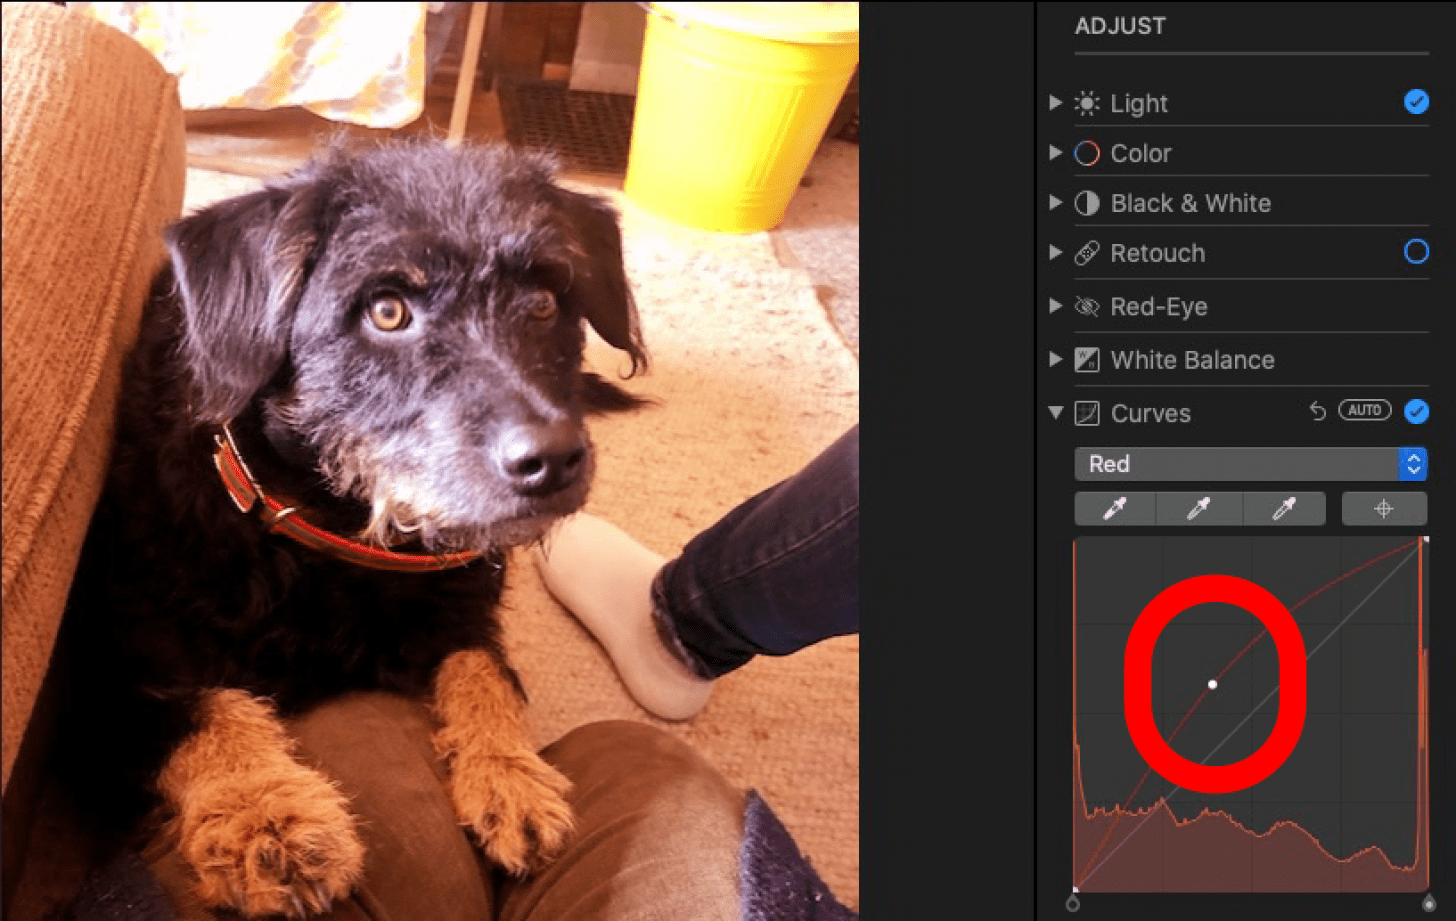
- Alternately, click Red, Green, or Blue from the drop-down menu, then click and bend the curve with your cursor to adjust each color level.
- Here’s an example of using the curves tool manually to adjust Red levels. I’ve dragged the curve upwards with the cursor, resulting in more prominent red tones in the photo.
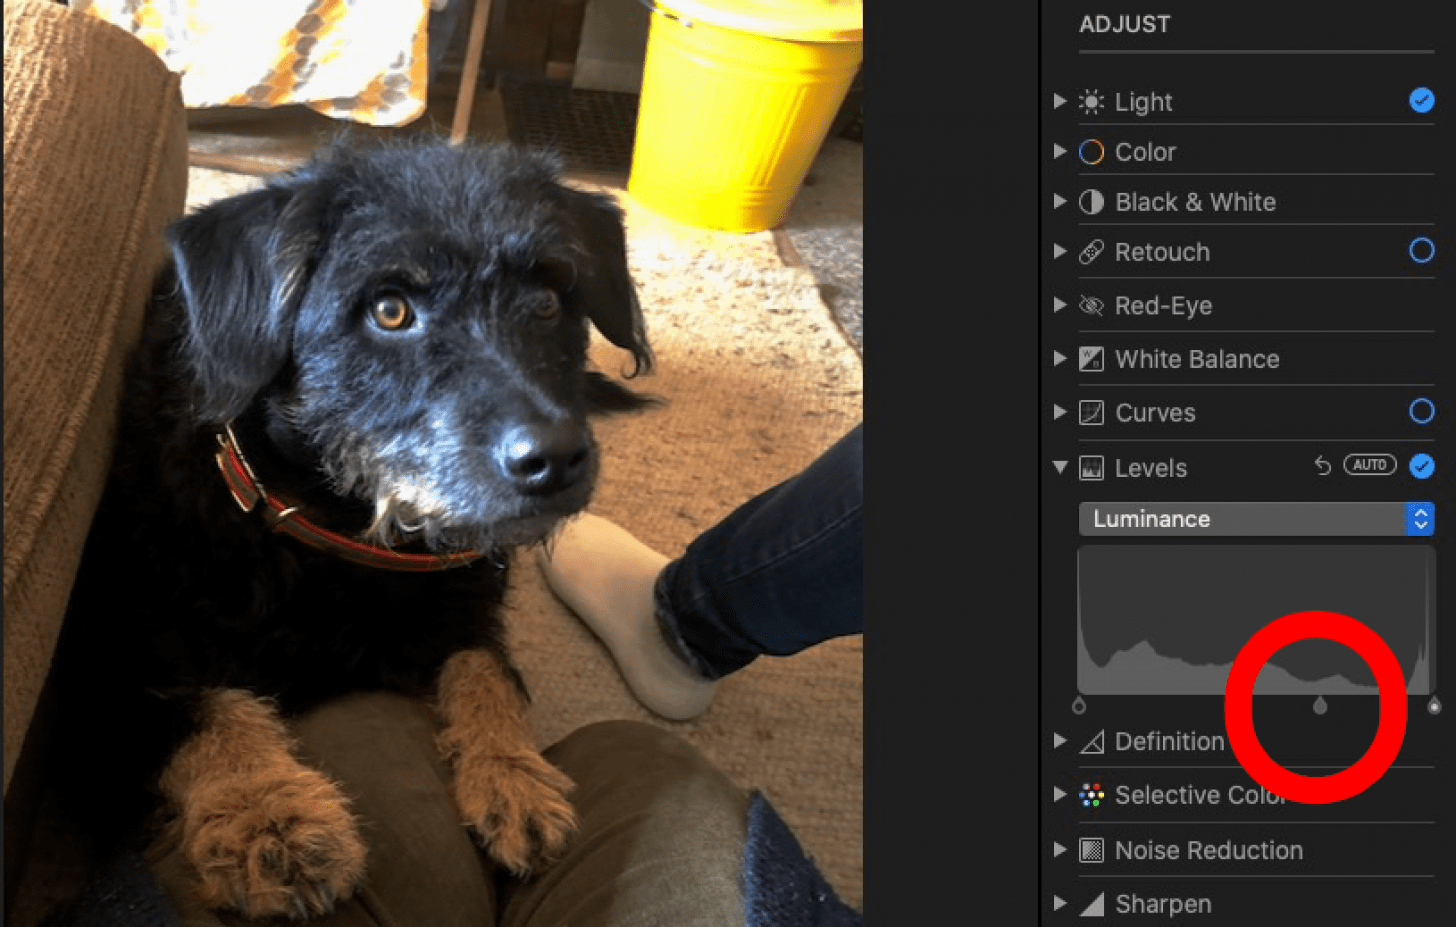
- Click the down arrow next to Levels, then click Auto to have the Photos app balance the brightness levels in your image.
- Click the drop-down menu next to Levels, select an option, then click and drag on a teardrop shape at the bottom of the field to the left or right to adjust the color.
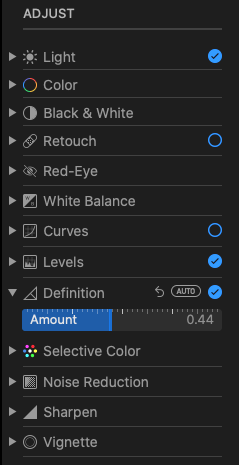
- Click the arrow next to Definition, click Auto, and the Photos app will adjust levels for you.
- Drag the slider under Definition to make the borders in your photo softer or more crisp.
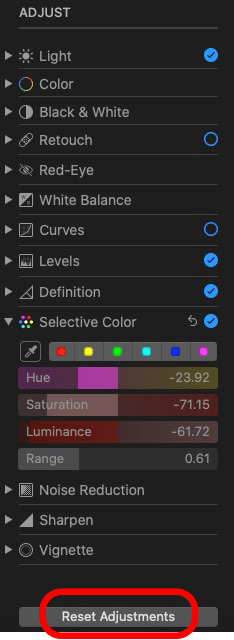
- Click the arrow next to Selective Color and drag the bars by Hue, Saturation, Luminance, and Range to adjust these settings.
- Click the dropper icon, then click on a particular color in the photo to adjust it, using the Hue, Saturation, Luminance, and Range sliders.

- If you don’t like any of the manual adjustments you’ve made in any of the above categories, click Reset Adjustments.
- To get rid of all edits and changes you’ve made to your picture, click Revert to Original.

If you enjoyed this Photos app tutorial, you might also want to learn how to zoom in and out of a photo on a Mac, so you can make detailed edits. You can also learn how to copy and paste photo edits on your Mac. This way, you can use a favorite effect or edit over and over.

Leanne Hays
Leanne Hays has over a dozen years of experience writing for online publications. As a Feature Writer for iPhone Life, she has authored hundreds of how-to, Apple news, and gear review articles, as well as a comprehensive Photos App guide. Leanne holds degrees in education and science and loves troubleshooting and repair. This combination makes her a perfect fit as manager of our Ask an Expert service, which helps iPhone Life Insiders with Apple hardware and software issues.
In off-work hours, Leanne is a mother of two, homesteader, audiobook fanatic, musician, and learning enthusiast.

 Rhett Intriago
 Olena Kagui

 Leanne Hays

 Rachel Needell


 Amy Spitzfaden Both


 Susan Misuraca