How to Blur Something in a Picture on iPhone

With 10-plus years of experience with Apple devices, Rachel specializes in all things iPad and is a Notes app expert. Find her writing in the Daily Tip newsletter and iPhone Life magazine.
Learn More With 10-plus years of experience with Apple devices, Rachel specializes in all things iPad and is a Notes app expert. Find her writing in the Daily Tip newsletter and iPhone Life magazine.
Learn MoreWhat to Know
- Learn how to blur a picture on iPhone 15 and earlier models using the Photos app and third-party apps.
- The photos app will only let you blur the background of photos taken in Portrait Mode.
- Third-party apps can be used to blur parts of photos such as people, text, or private information.
Ever had a weird person photobomb your family pictures? Or has your nephew decided that wearing shirts with curse words is appropriate birthday-party attire? There may be many reasons why you might need to blur out part of a photo. We’ll teach you how to blur a photo on iPhone 15 and earlier models using native apps and third-party options.
How to Blur Background on iPhone Using the Photos App
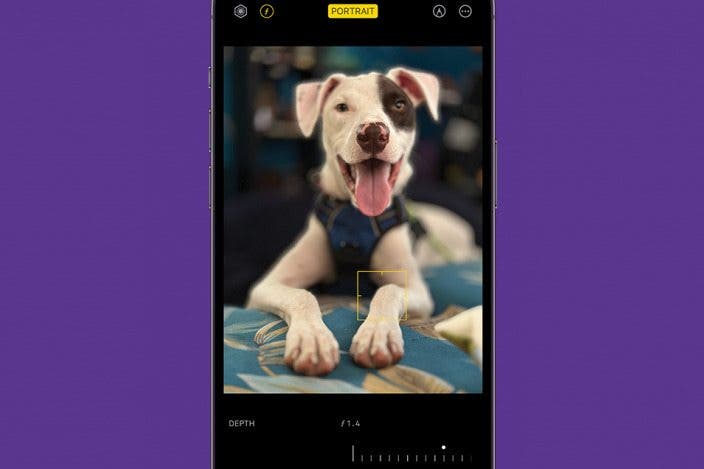
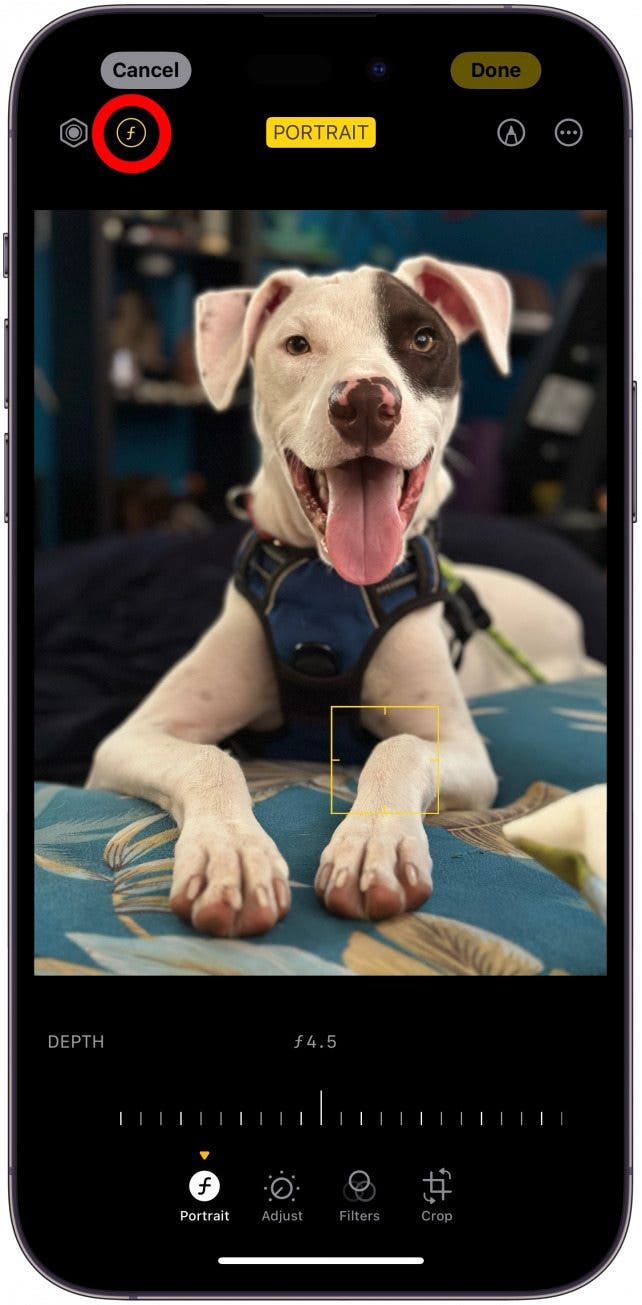
Unfortunately, Apple’s photo editing software does not have the capabilities to blur out a specific part of the photo. It is possible to blur the background in two scenarios. If you took a Portrait Mode photo on an iPhone 14 and earlier, you can blur, unblur, and control the level of blur on the background. If you have an iPhone 15 and take a photo with an obvious subject, you can follow the steps below and blur the background of the photo even if you didn't take it in Portrait Mode. To adjust the blur on a qualifying image:
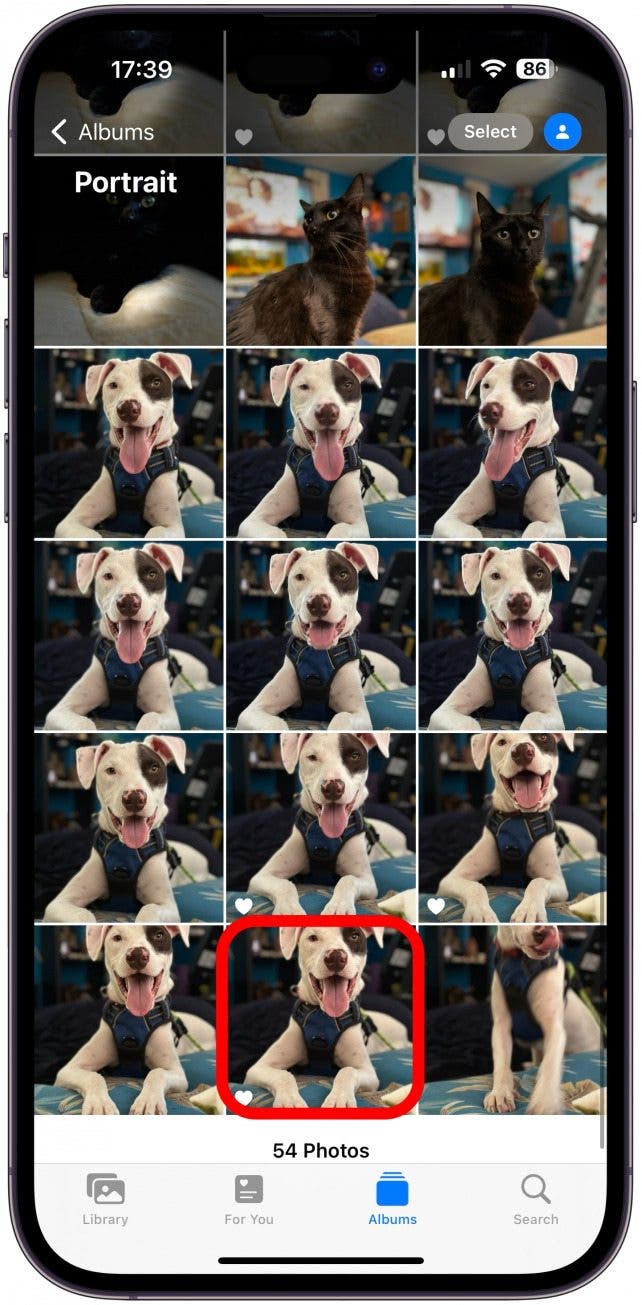
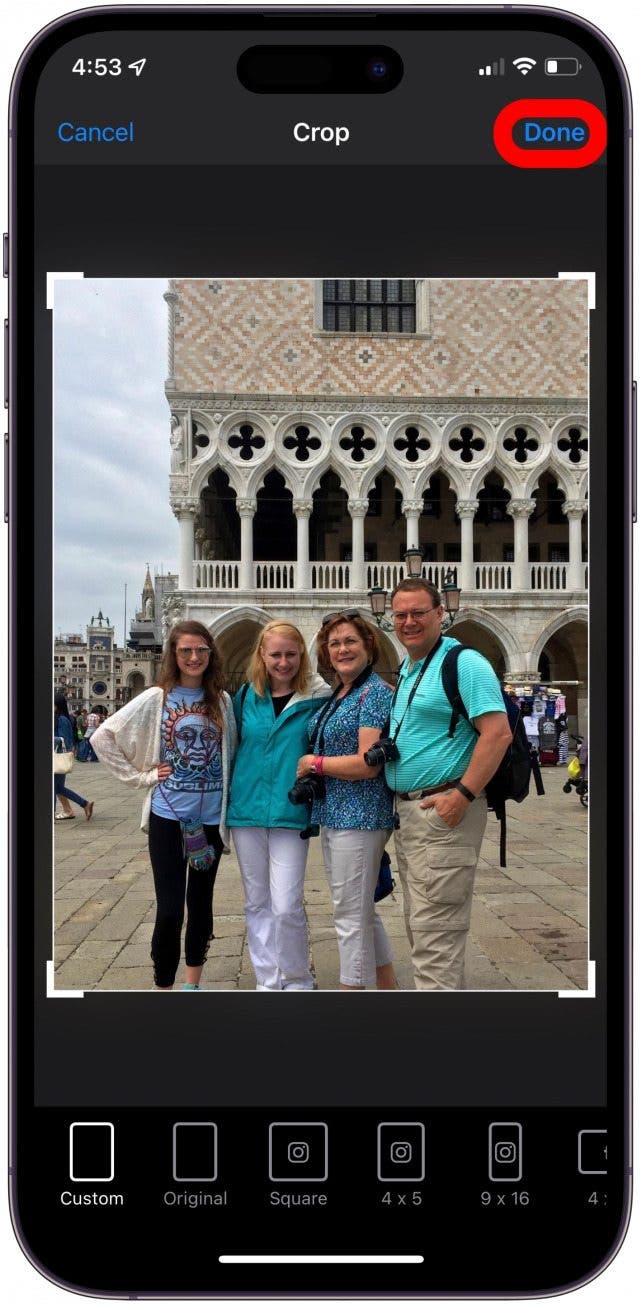
- Open the image in the Photos app.
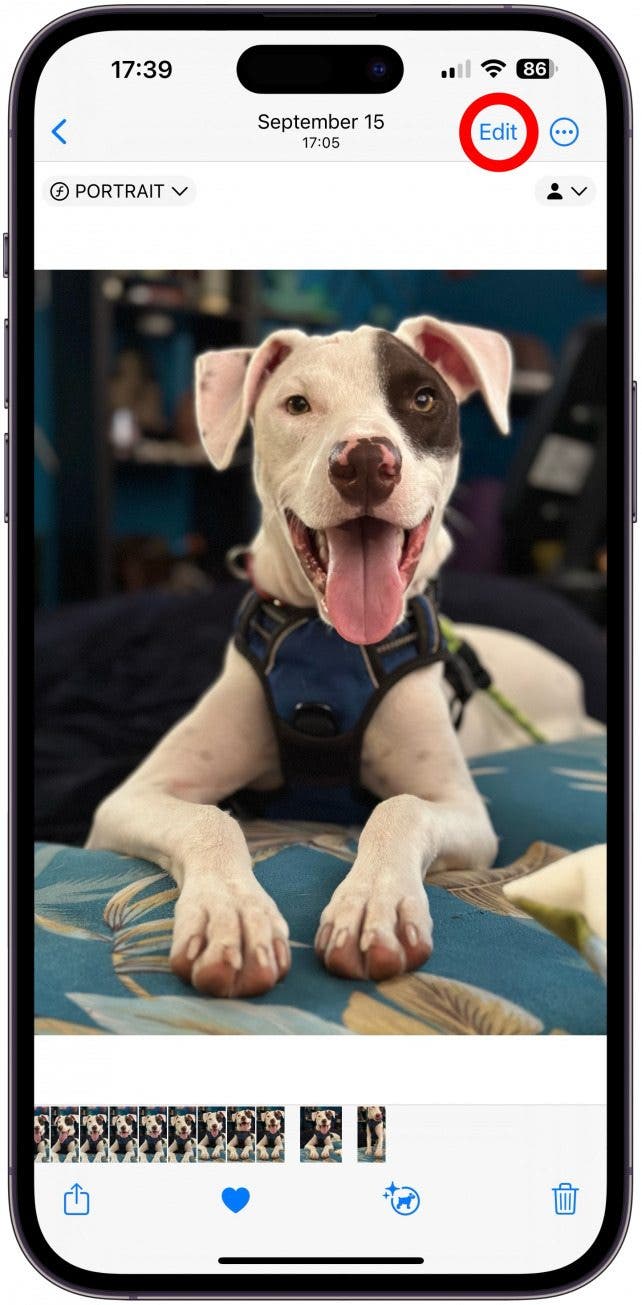
- Tap Edit.
- Tap the f if depth settings aren't already selected.
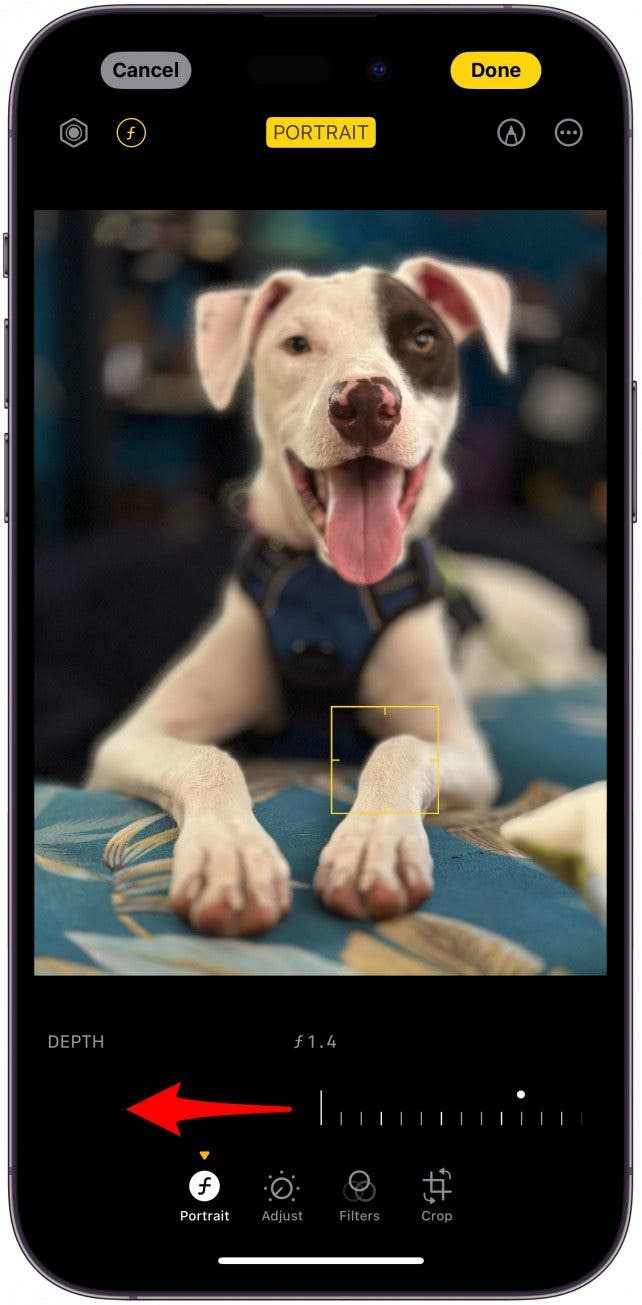
- Swipe left to intensify the blur.
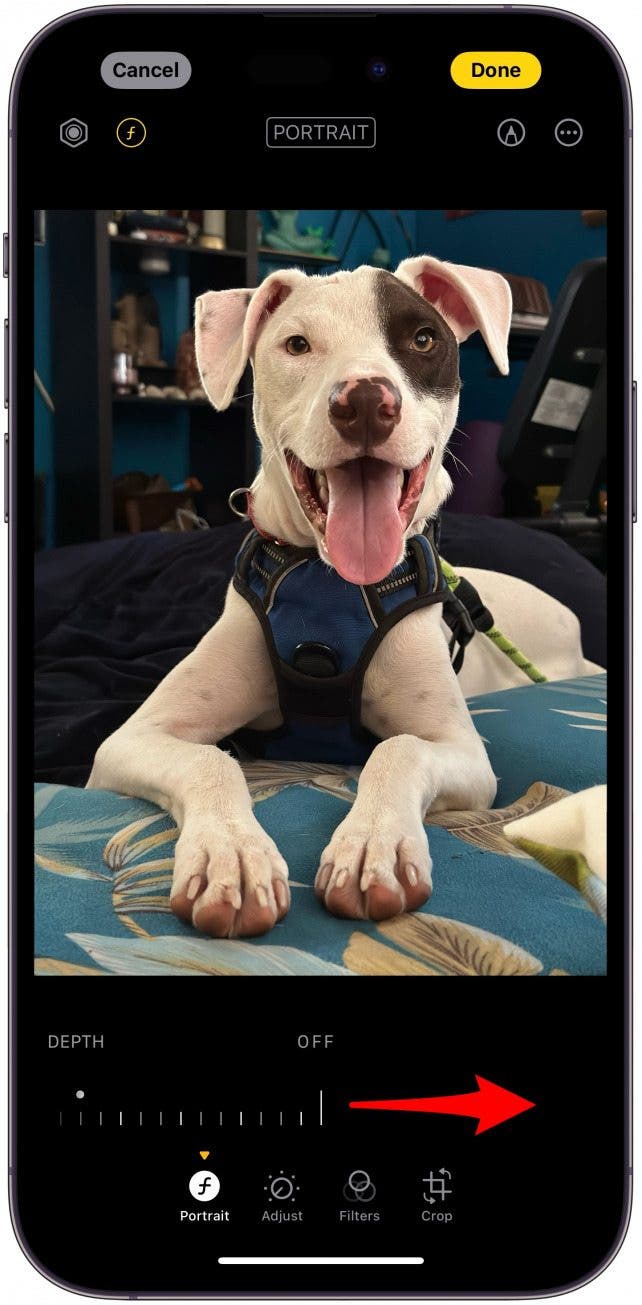
- Swipe right to turn the blur off.
- Tap Done.
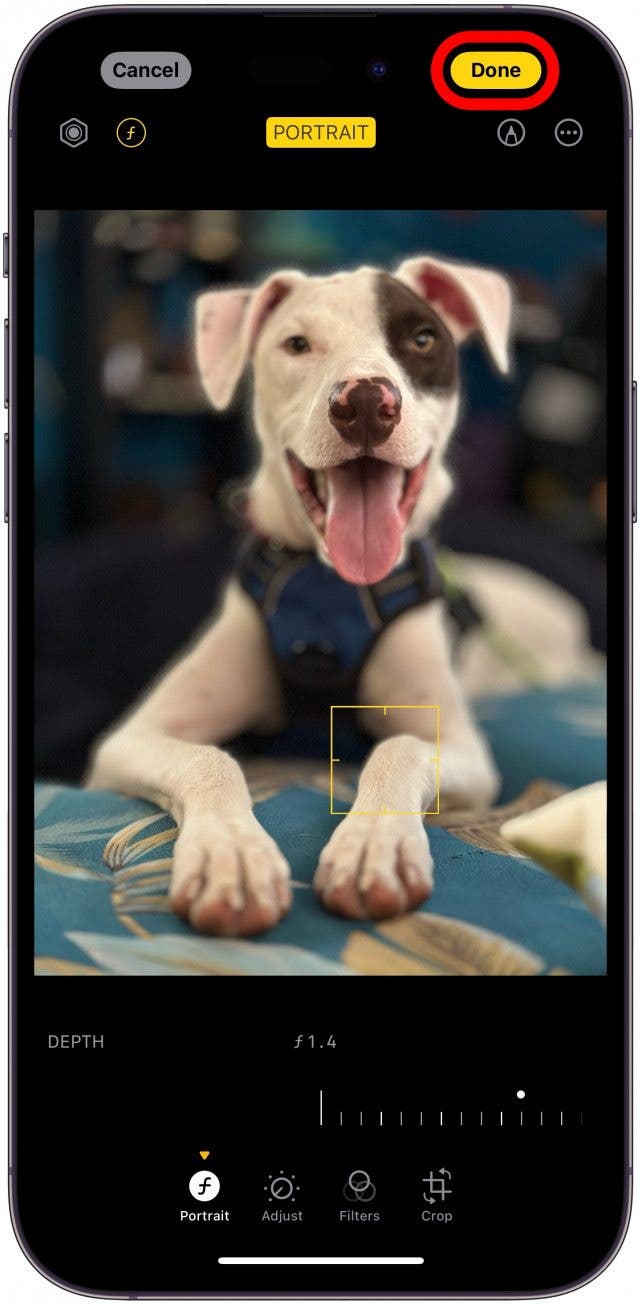
You can always go back and make more edits to the image including adjusting the blur, also called the Bokeh effect.
Pro Tip
If you are trying to cover something up rather than blurring it, you can use Markup and draw or highlight over the part of the image you wish to hide. You can also use a sticker, even a custom photo sticker you created yourself, to cover something up in your picture.
Free Third-Party Apps to Blur Parts of Photos on iPhone
If you want to blur a specific part of an image or the background of an image that wasn't taken using Portrait Mode or an iPhone 15, you'll have to try a third-party app. Luckily, I’ve downloaded and tried out a few completely free apps that I think are the simplest to use and the most effective. Blur Photo is a great app for simplicity and ease of use. Blur Photo Effect Background is another great app especially for blurring out faces. I’ll show you how to use them below.
Blur Part of an Image with Blur Photo App
![]()
Blur Photo is an easy-to-use app that will give you a very opaque blur anywhere on your photo. First, download Blur Photo from the App store and then we can get started. For more cool tips and tricks about how to use your iPhone, sign up for our Tip of the Day newsletter!
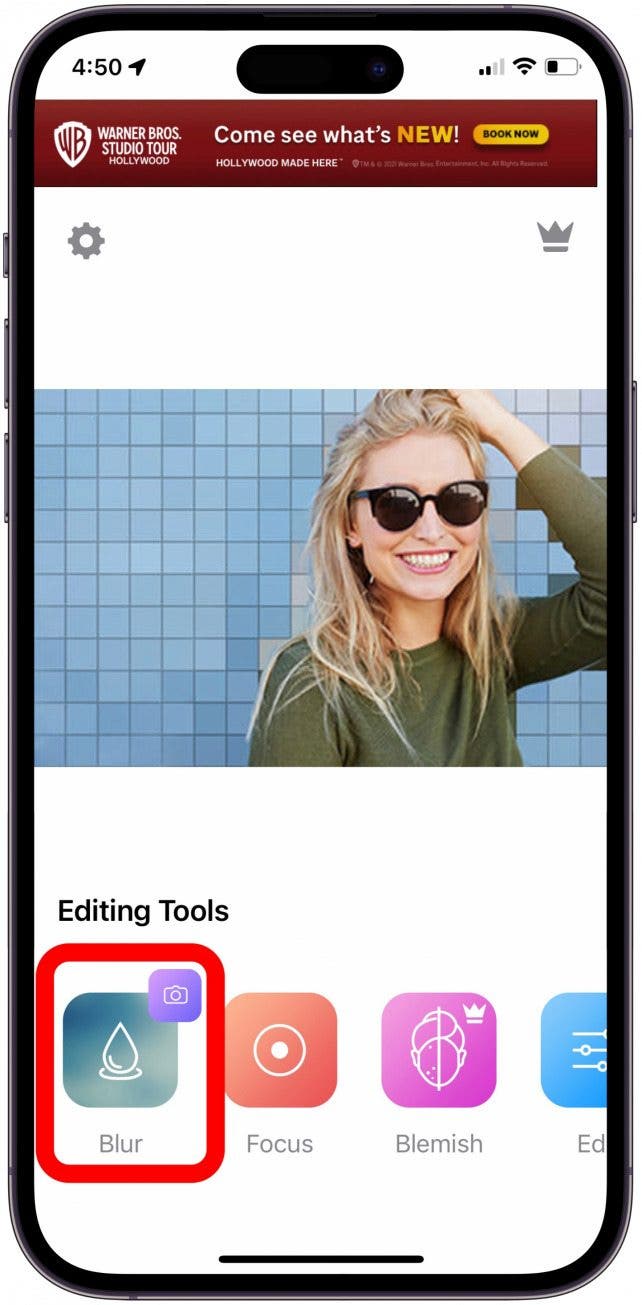
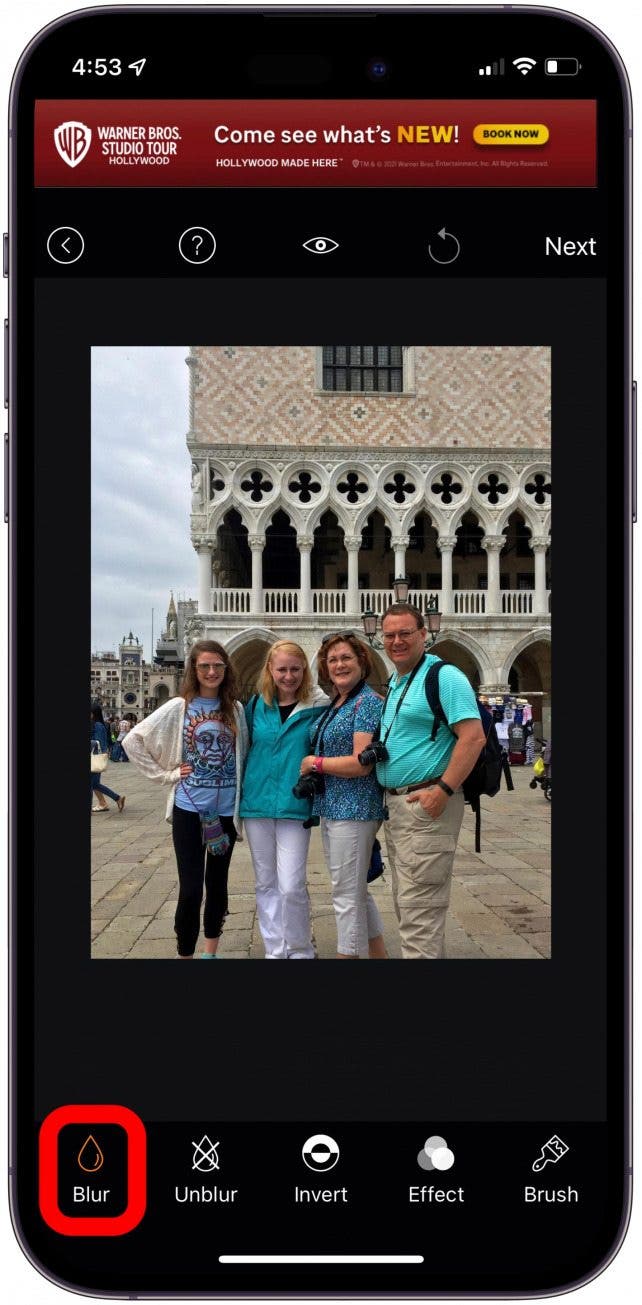
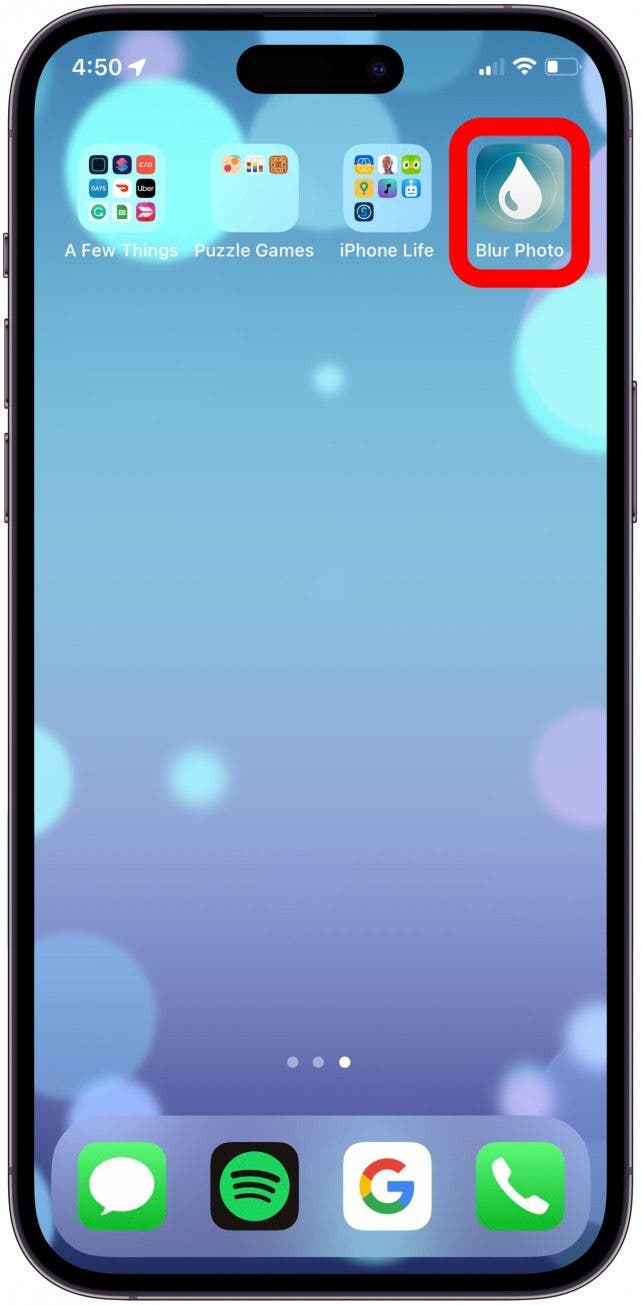
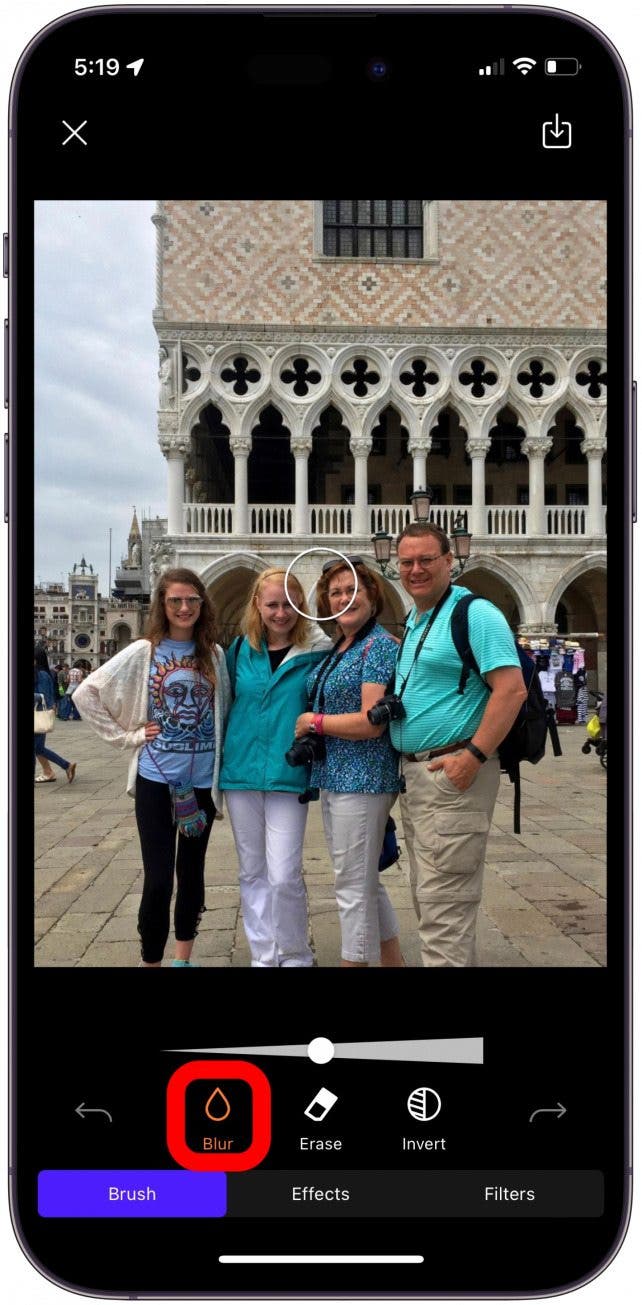
- Open the Blur Photo app on your iPhone.
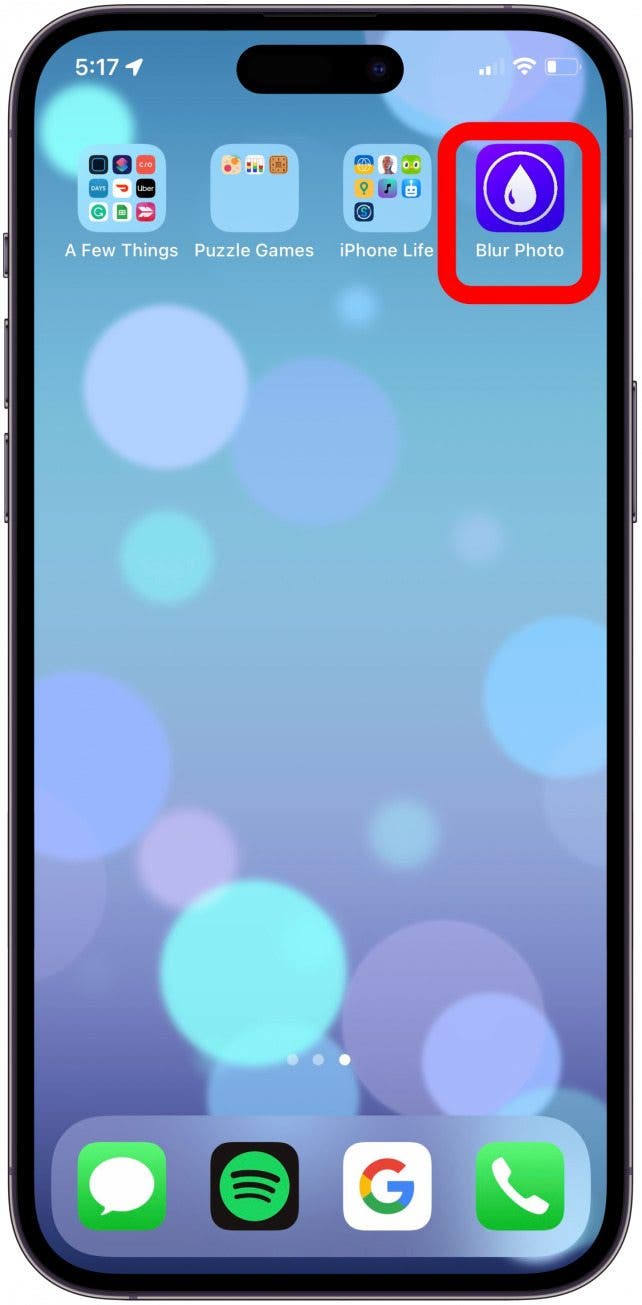
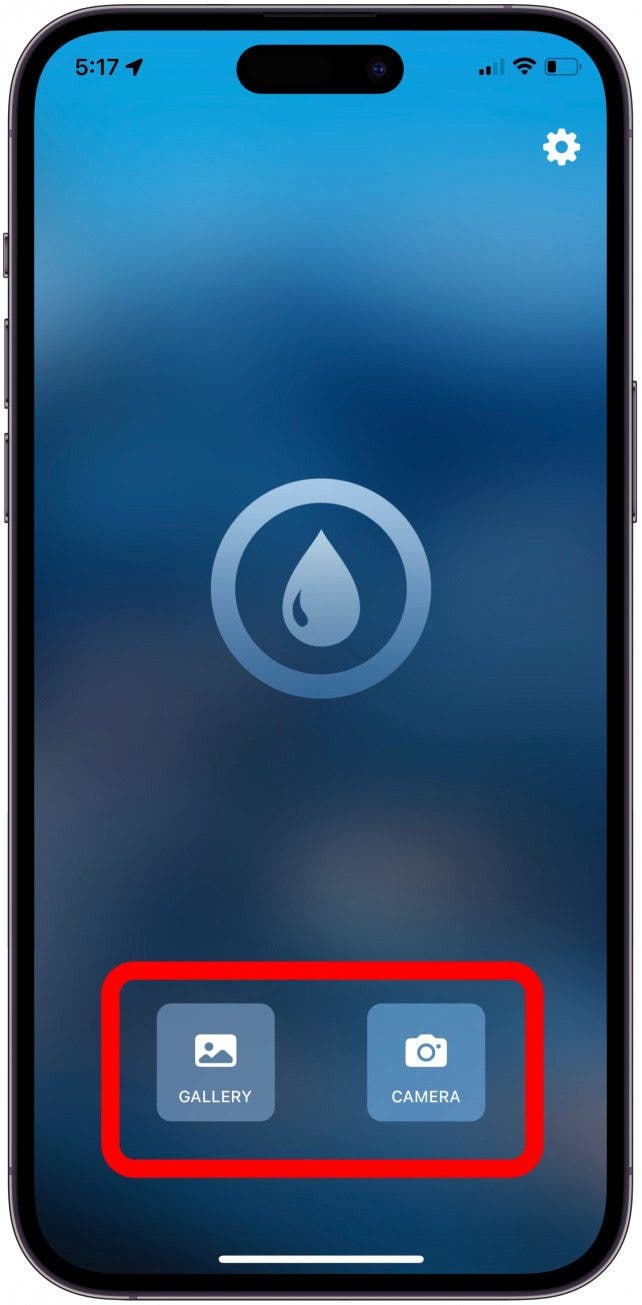
- Tap Blur to explore your photos.
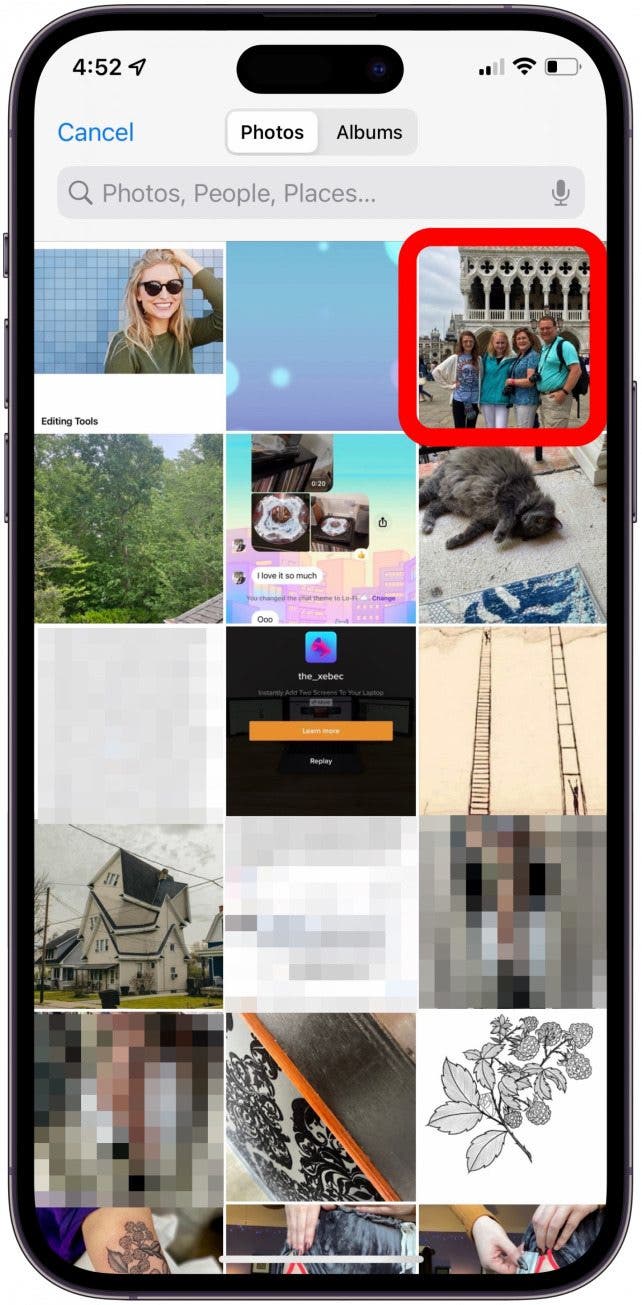
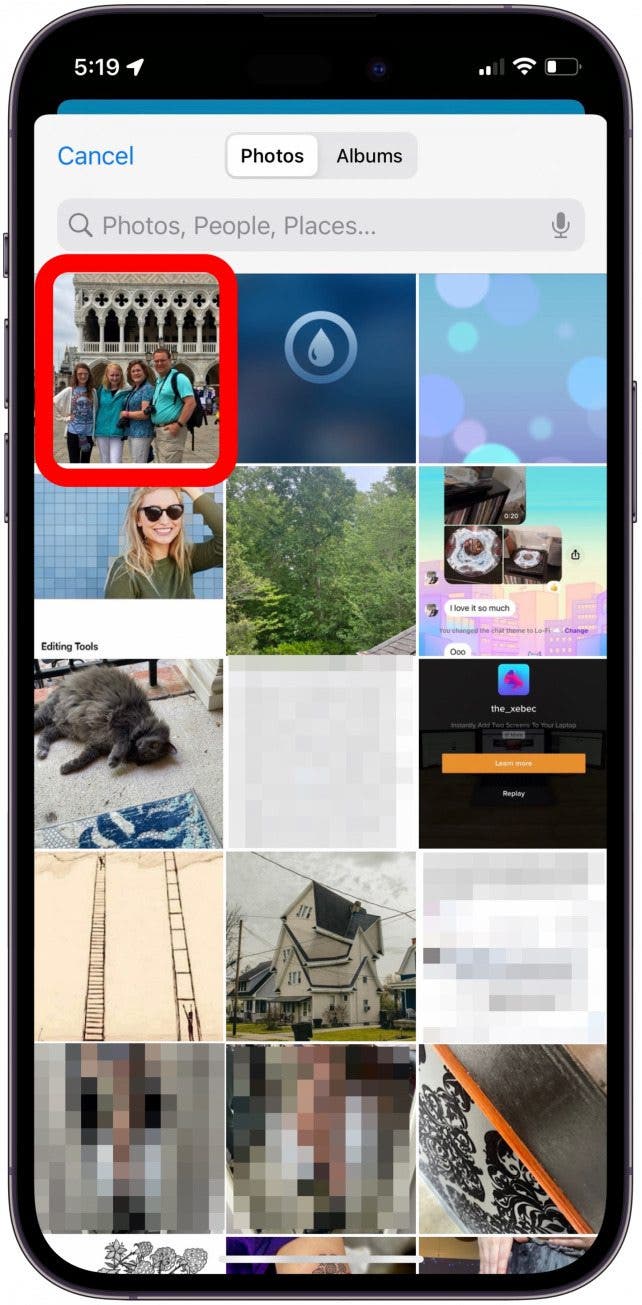
- Select a photo you'd like to blur.
- Crop the photo to your needs.
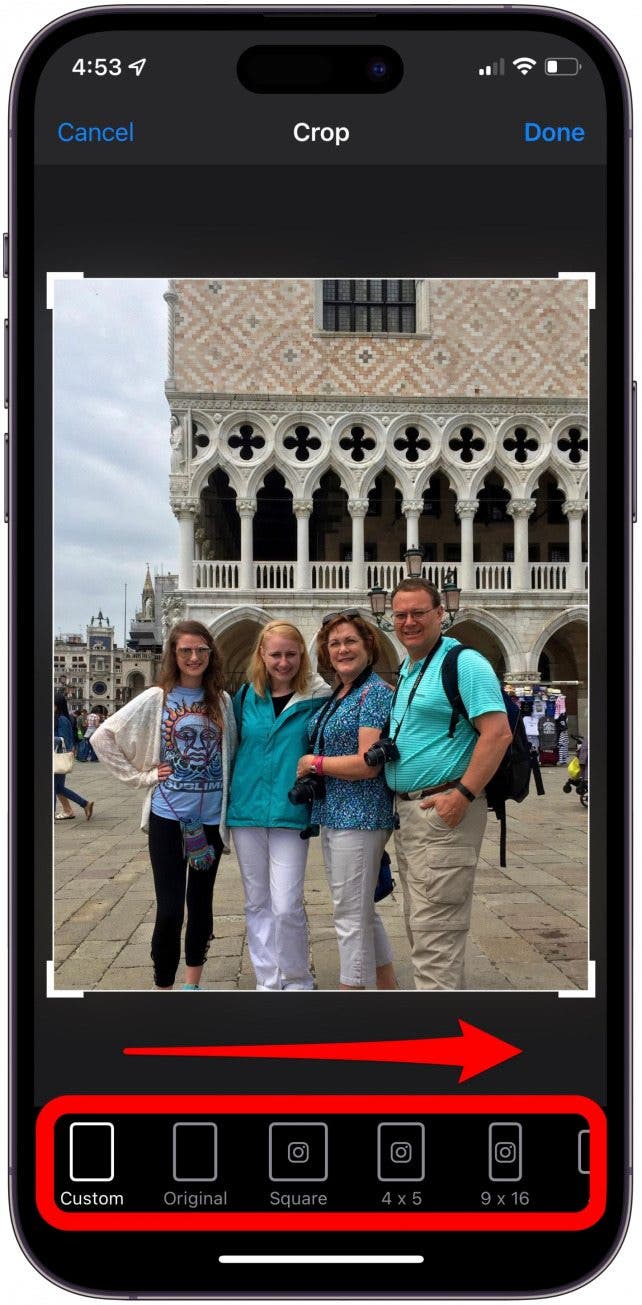
- Tap Done when finished.
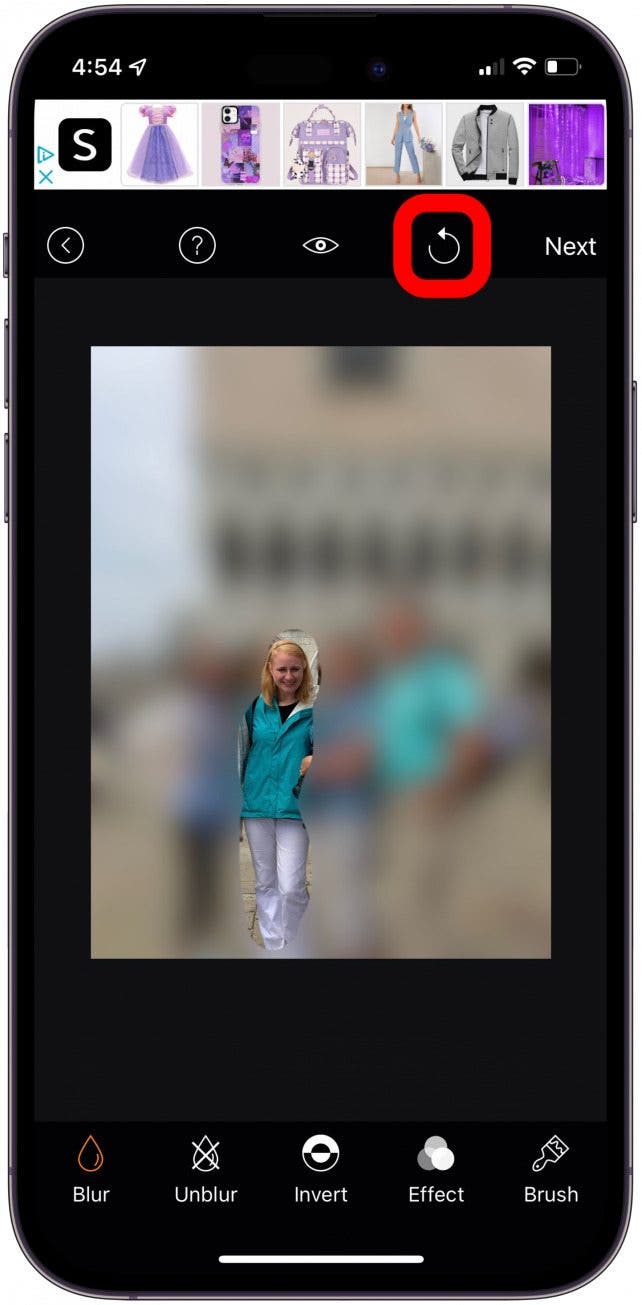
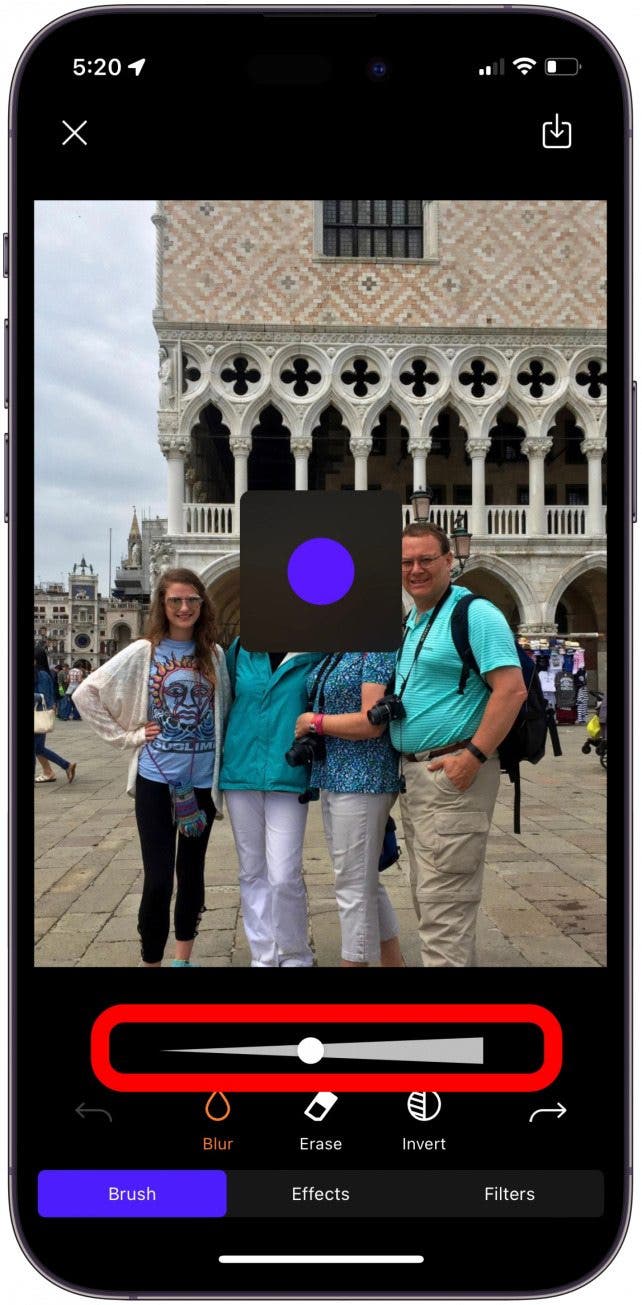
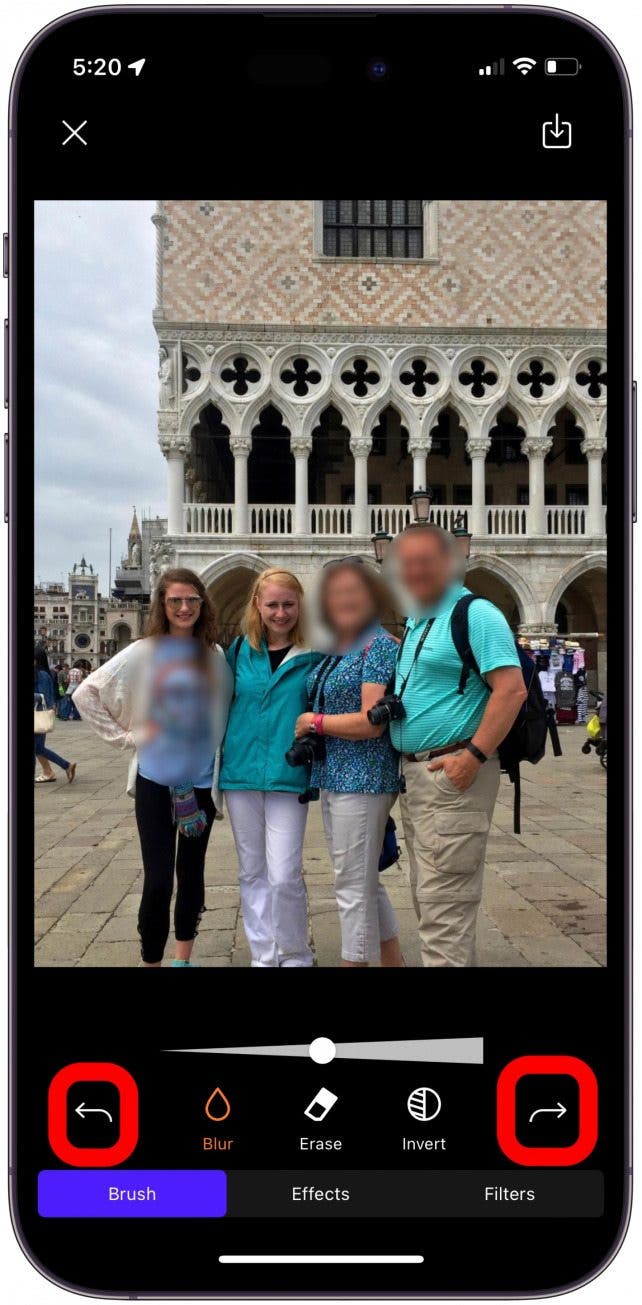
- Tap the Blur Tool.
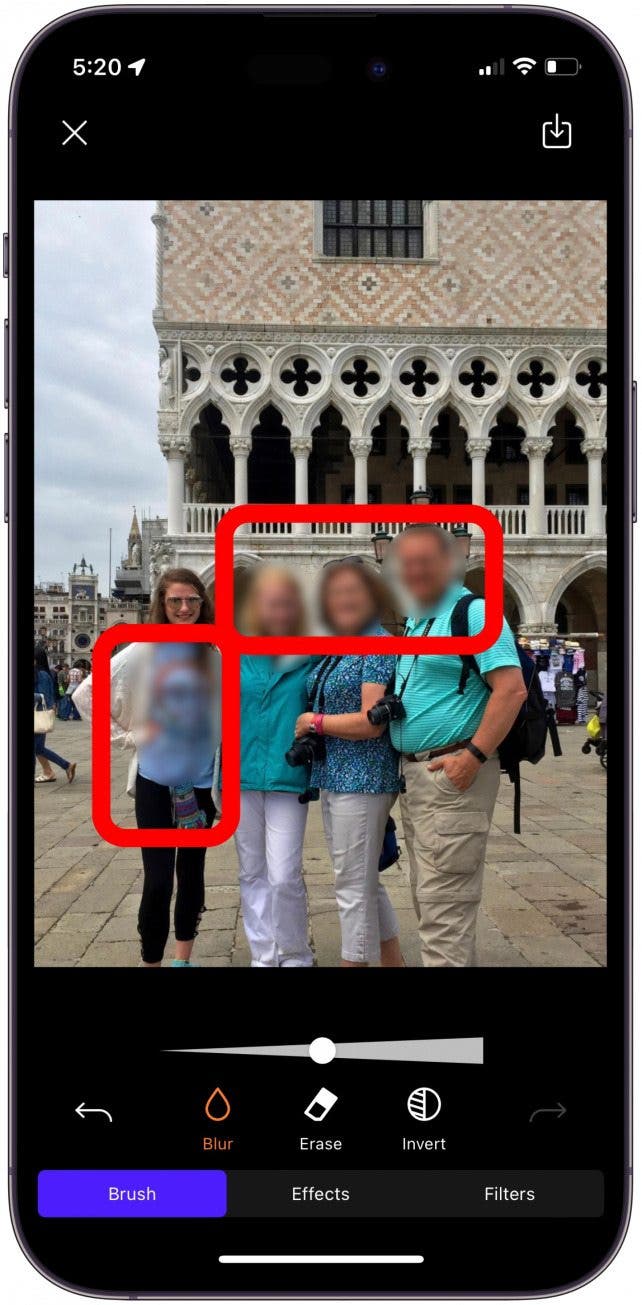
- Use your finger to draw on the photo where you would like to blur.
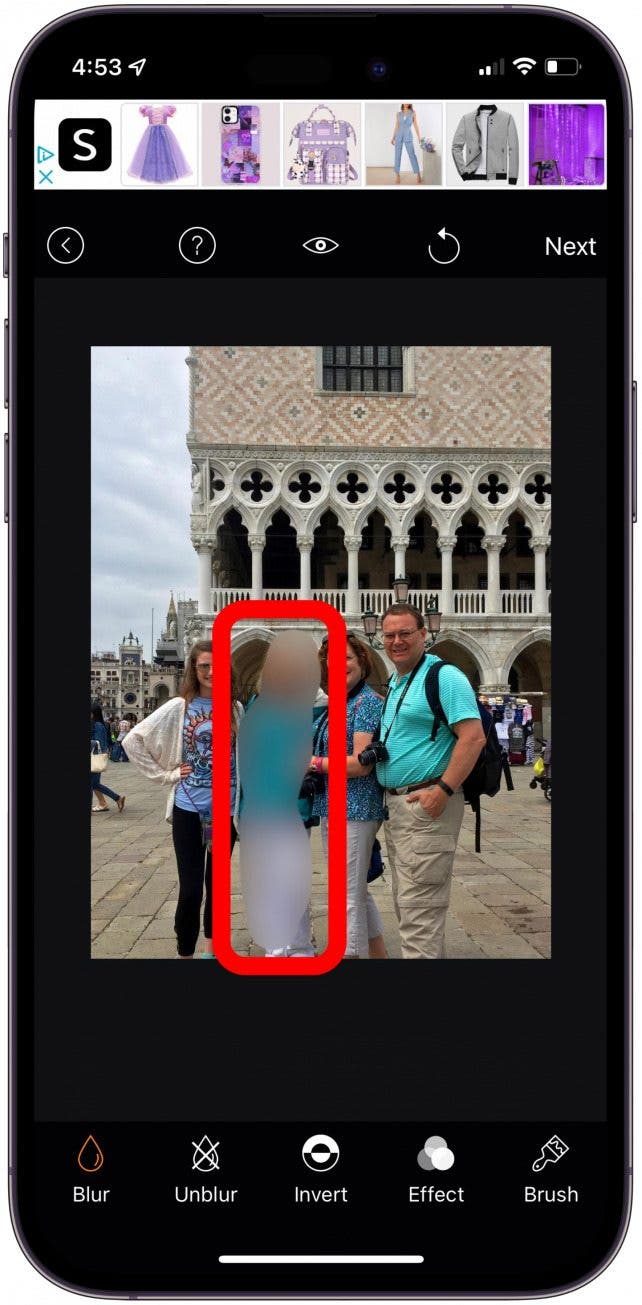
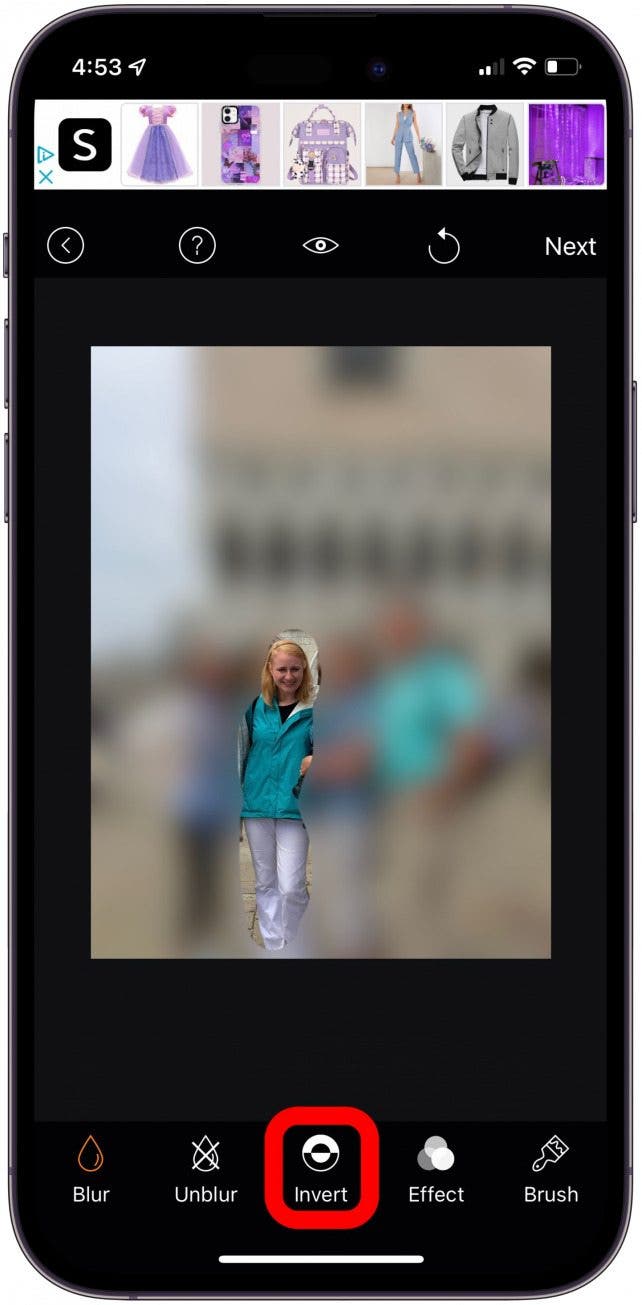
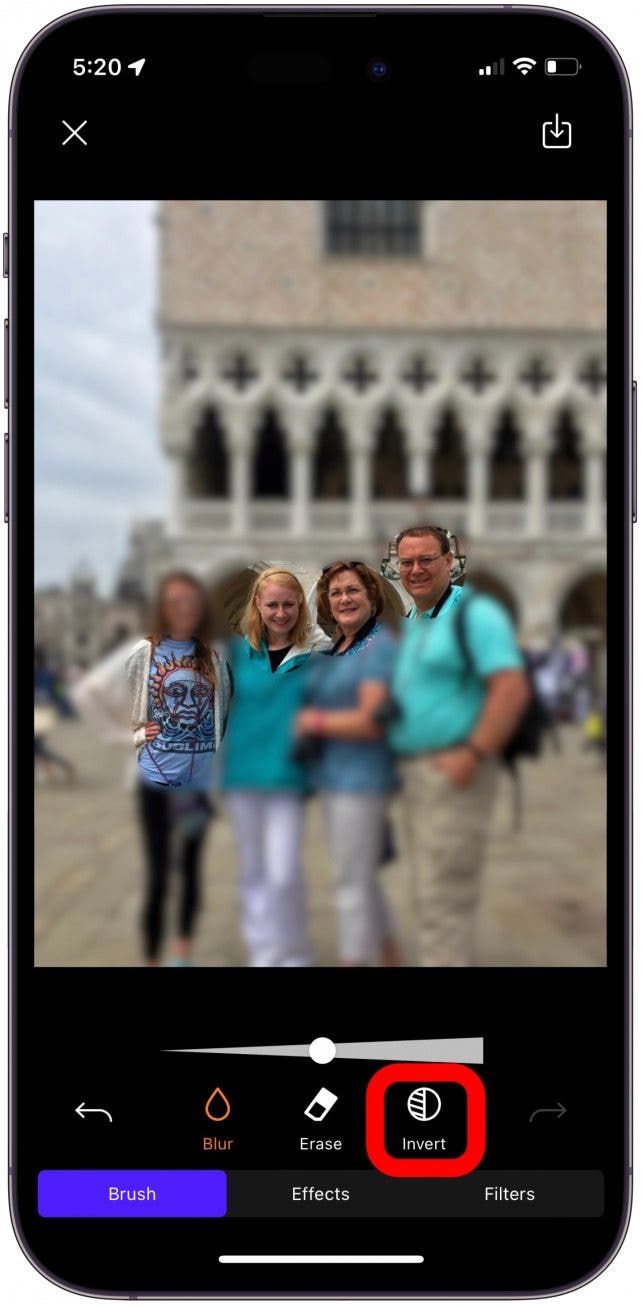
- Tap the Invert button to reverse the blur, leaving only your selection in focus.
- The Undo button is at the top menu to handle quick mistakes.
- Tap Next when you're happy with your photo.
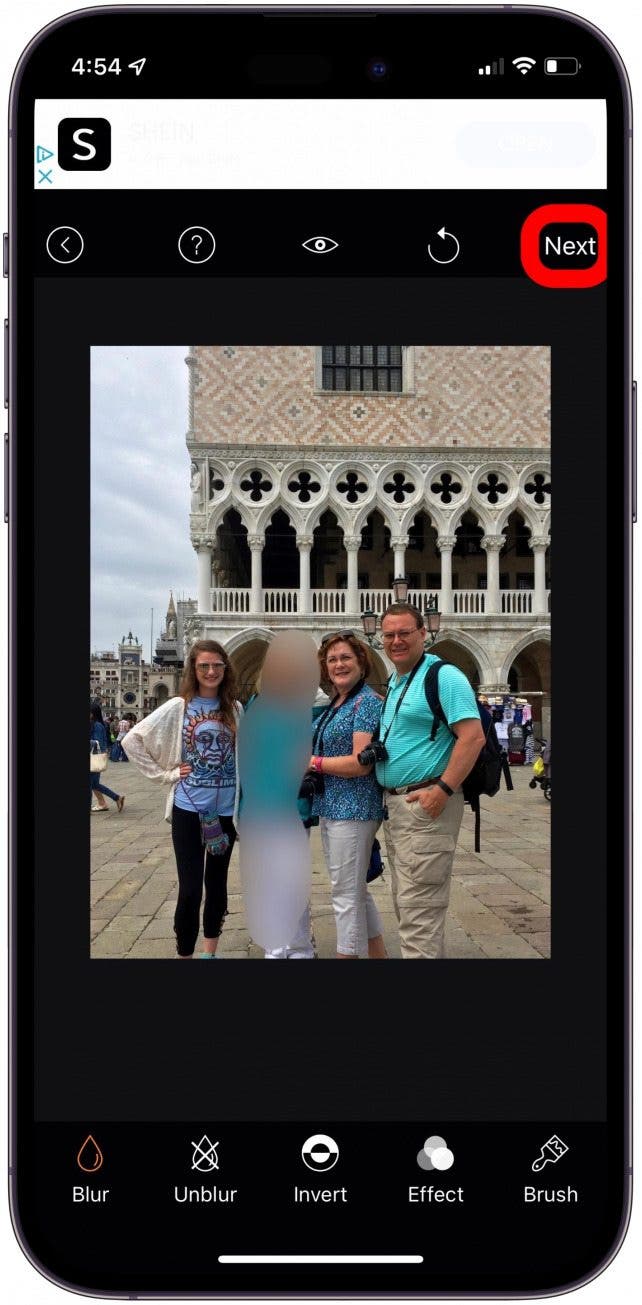
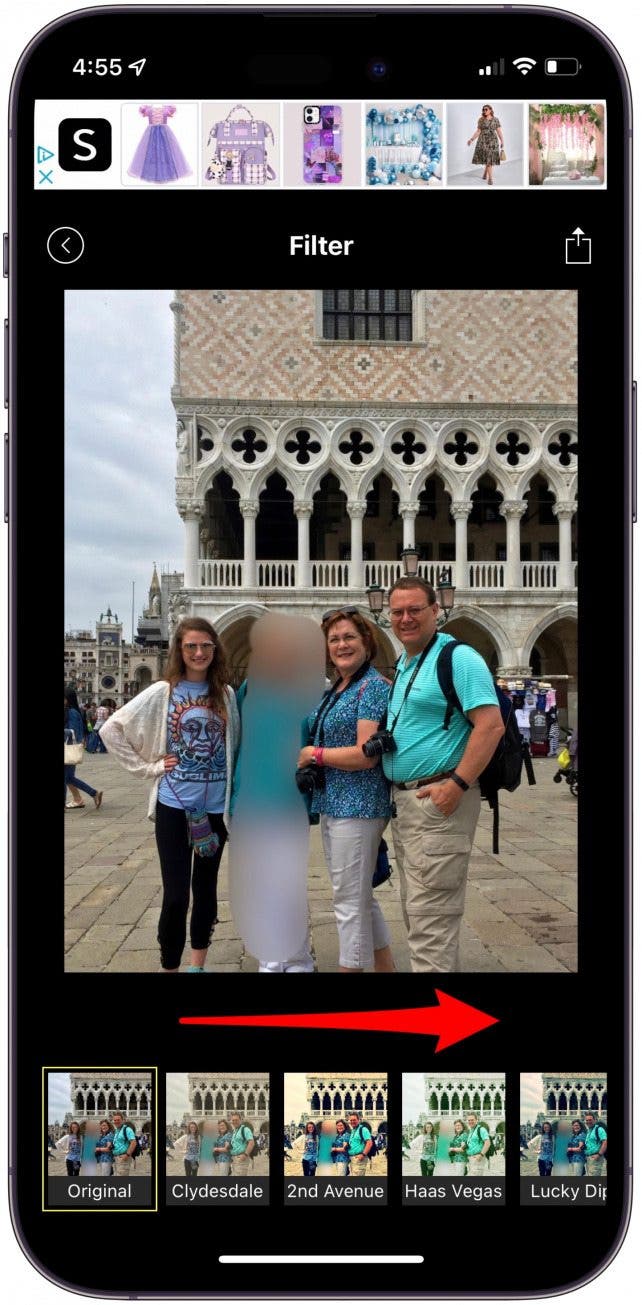
- Swipe through the app's filter options.
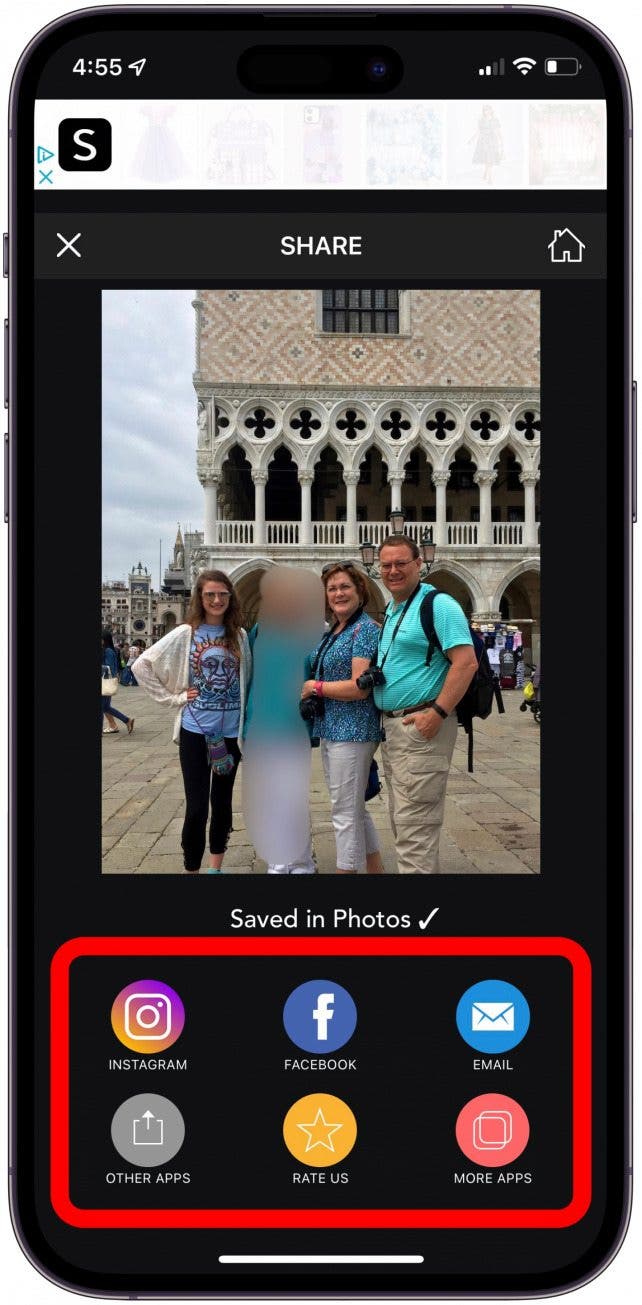
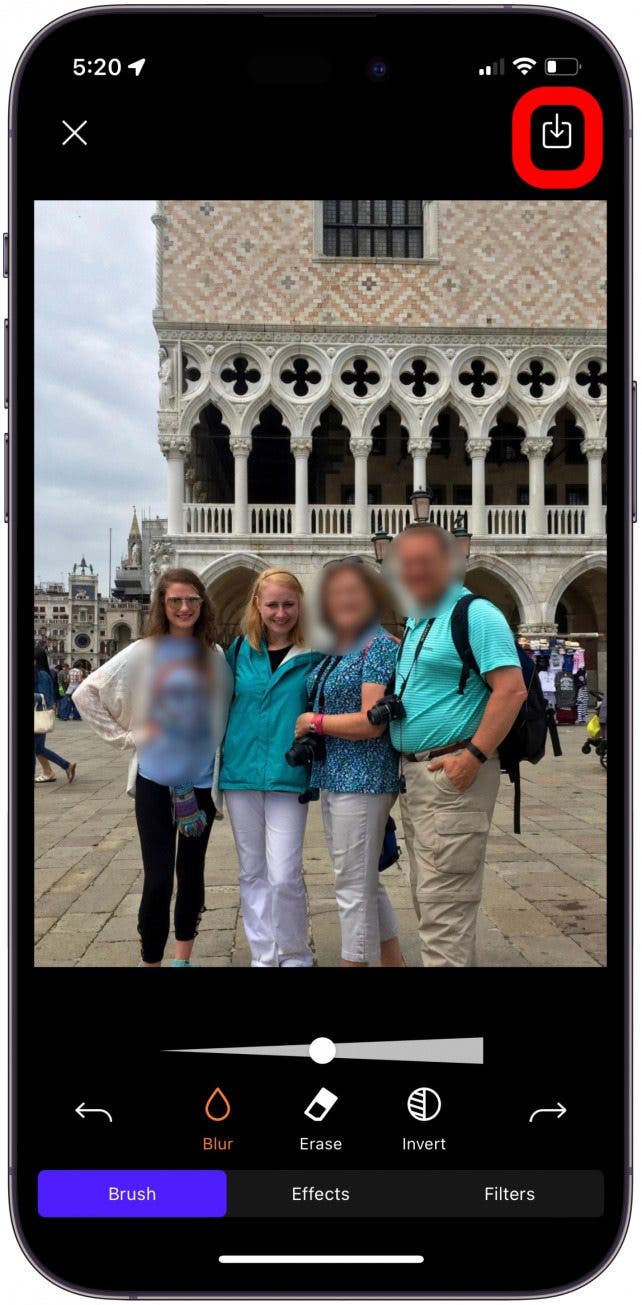
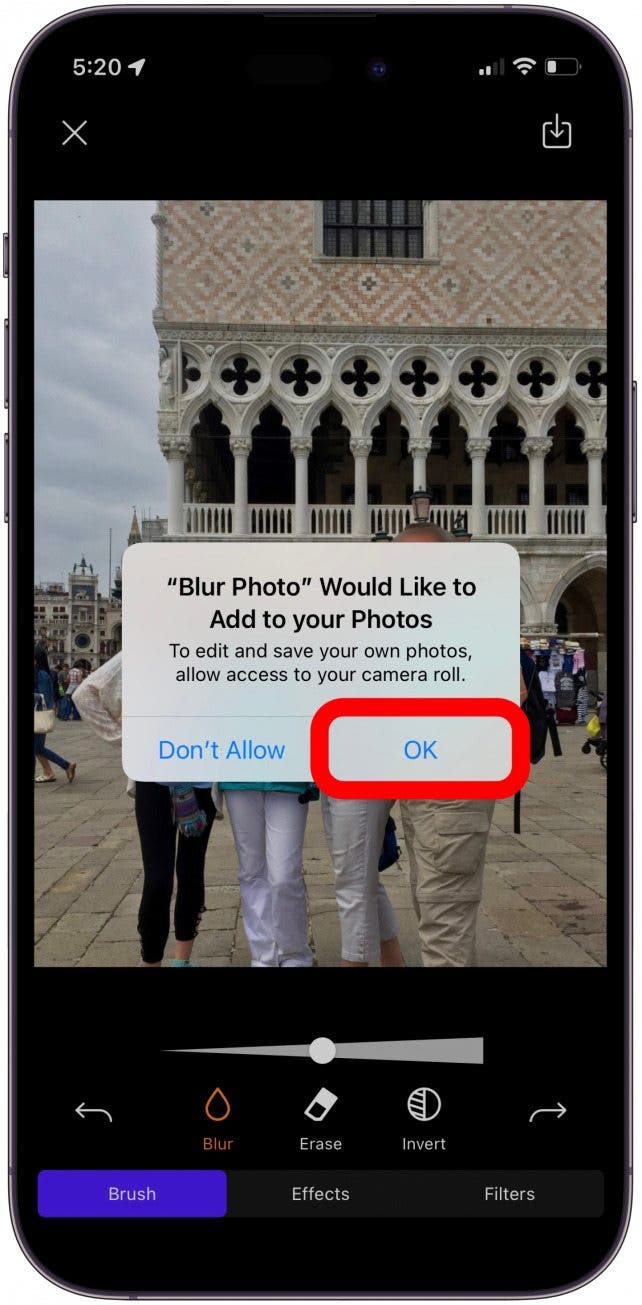
- Click the Share button when finished.
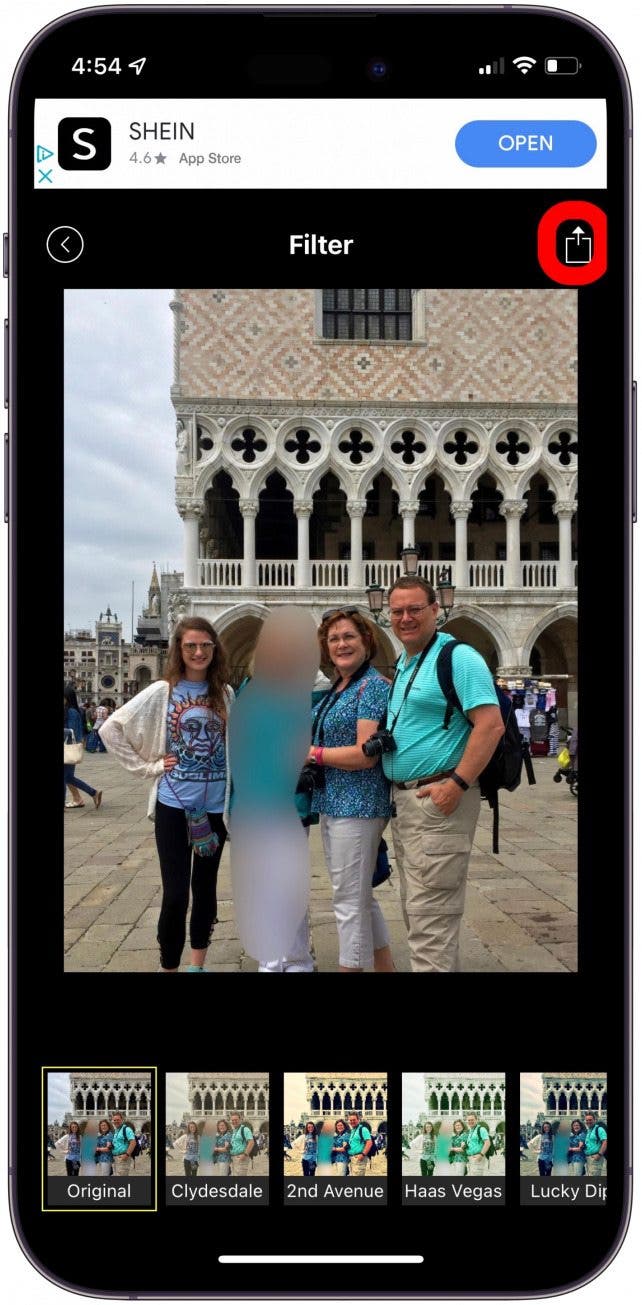
- Your photo will automatically save to your camera roll. You can also select where you'd like to share the photo directly.
How to Blur Out Part of a Picture with Blur Photo Effect Background
![]()
Another simple, user-friendly app you can use to blur parts of your picture is called Blur Photo Effect Background. I'll walk you through how to use this app below.
- Open the Blur Photo Effect Background app.
- Either choose a photo from your camera roll or take a new photo.
- Select a photo to blur.
- Tap the blur tool at the bottom menu.
- You can adjust the size of your blur tool.
- Then, use your finger to draw on the photo where you'd like to blur.
- You can also choose to invert the blur, leaving only where you drew in focus.
- To undo or redo, you can tap the arrows at the bottom menu.
- When you're done, click the save button in the top right corner.
- You will receive a message asking to save the photo to your camera roll. Tap OK.
And that's how you blur out only part of your picture! These apps are very similar, but they produce a slightly different opaqueness and they offer slightly different customization options. Feel free to try out either to decide which one you prefer. Remember, they're both completely free so you never have to stress about a photo mistake again!

Rachel Needell
Related topics
Related Articles
 Leanne Hays
Quickly Silence Notifications with Wrist Flick (watchOS 26)
 Olena Kagui
iPhone 15 Release Date & Rumor Roundup: Everything We Know

 Rachel Needell
 Rhett Intriago

 Susan Misuraca

Compromised Passwords on iPhone: What Are They & What to Do


 Amy Spitzfaden Both