Coolest Ways to Use Markup on iPhone to Edit Photos and PDFs
Here's how to use Markup on iPhone to draw perfect shapes, make notes, highlight, add text, and more.


In the last 10 years, Olena has been published in dozens of publications internationally and written hundreds of how-to articles and complex guides about Apple products, software, and apps.
Learn More In the last 10 years, Olena has been published in dozens of publications internationally and written hundreds of how-to articles and complex guides about Apple products, software, and apps.
Learn MoreMarkup is a nifty iPhone feature that allows users to doodle, magnify, and add text to images and PDFs in the Photos, Mail, Notes, Files, and Messages apps. Whether you need to add a signature, insert text, or draw shapes onto existing documents or photos, Markup has you covered. With Markup, you can save time when signing digital documents and add your personal flair to your images. Here how to use the markup tools on your iPhone.
Related: Photos Not Uploading to iCloud? 6 Ways to Fix iCloud Photo Syncing Issues
How to Use Markup in Photos on the iPhone
Using the markup tool in the Photos app is simple, and allows you to add text to a picture, insert shapes, and more. We'll walk you through how to use these iPhone photo markup tools so you can easily edit images to achieve your desired effect. To learn more about what you can do in the Photos app, check out our Tip of the Day newsletter. Here's how to mark up a photo on your iPhone:
- Open the Photos app.

- Select the photo you wish to edit.
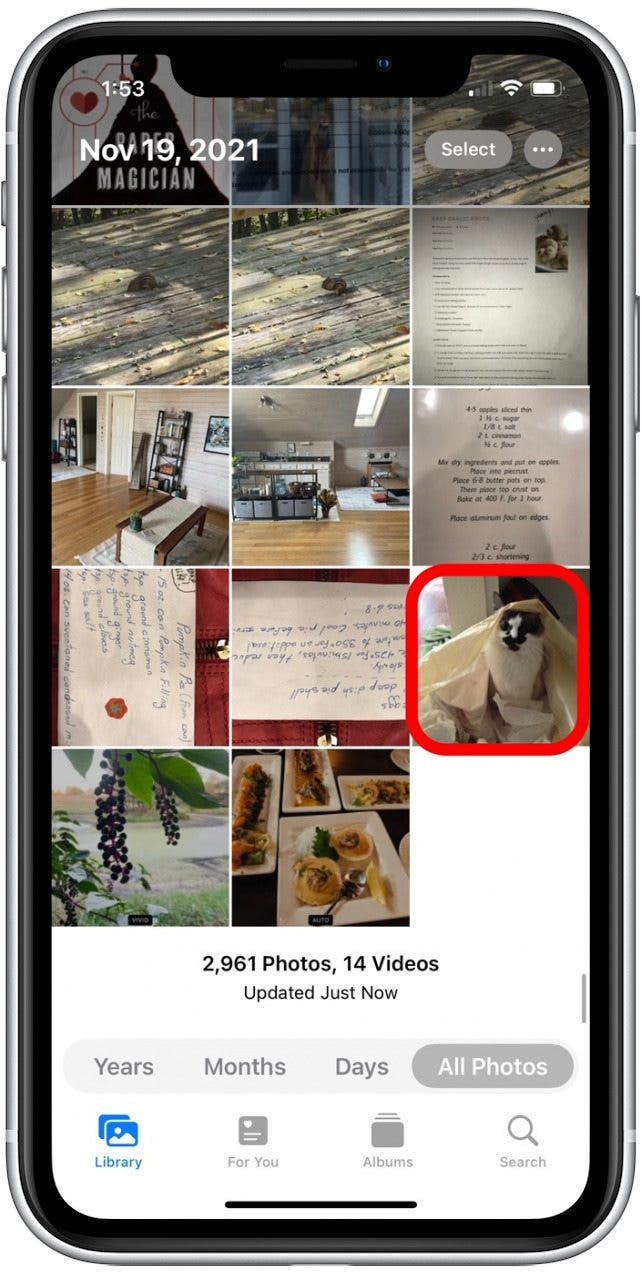
- Tap Edit.
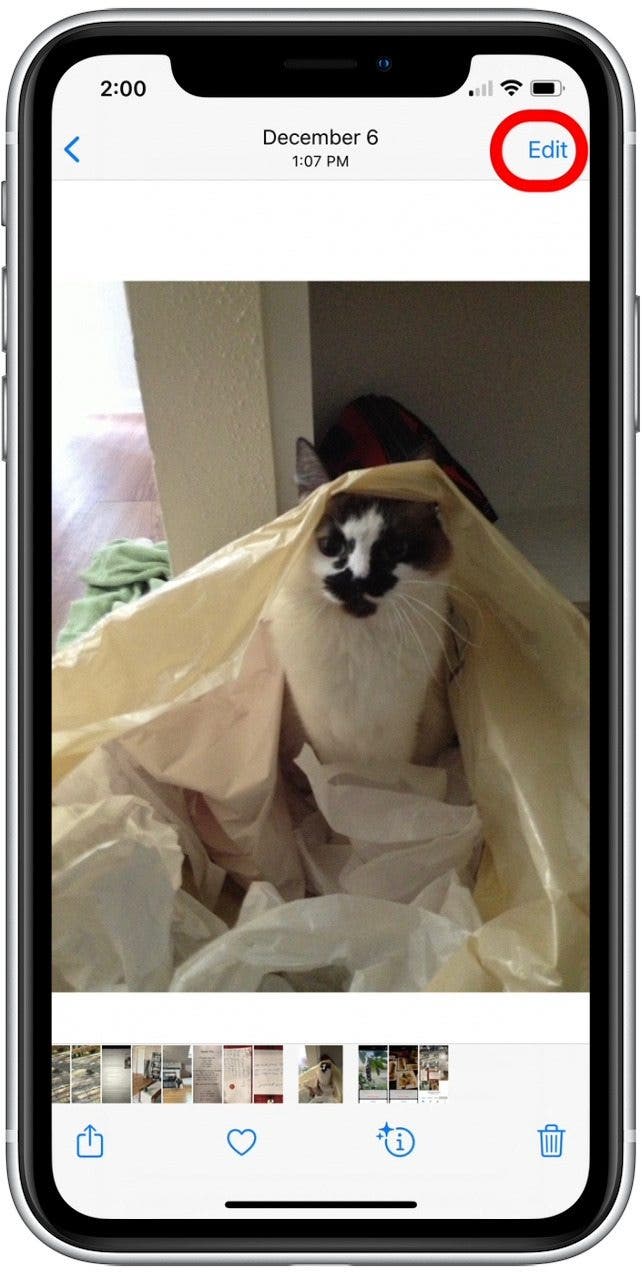
- Select the Markup icon.
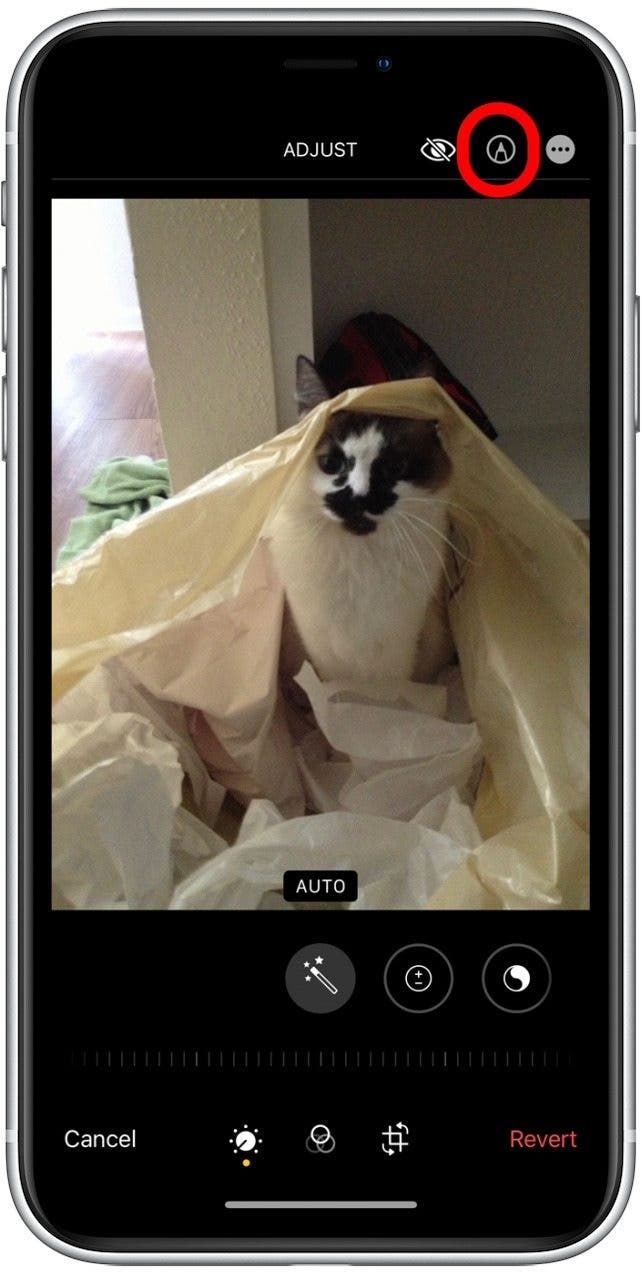
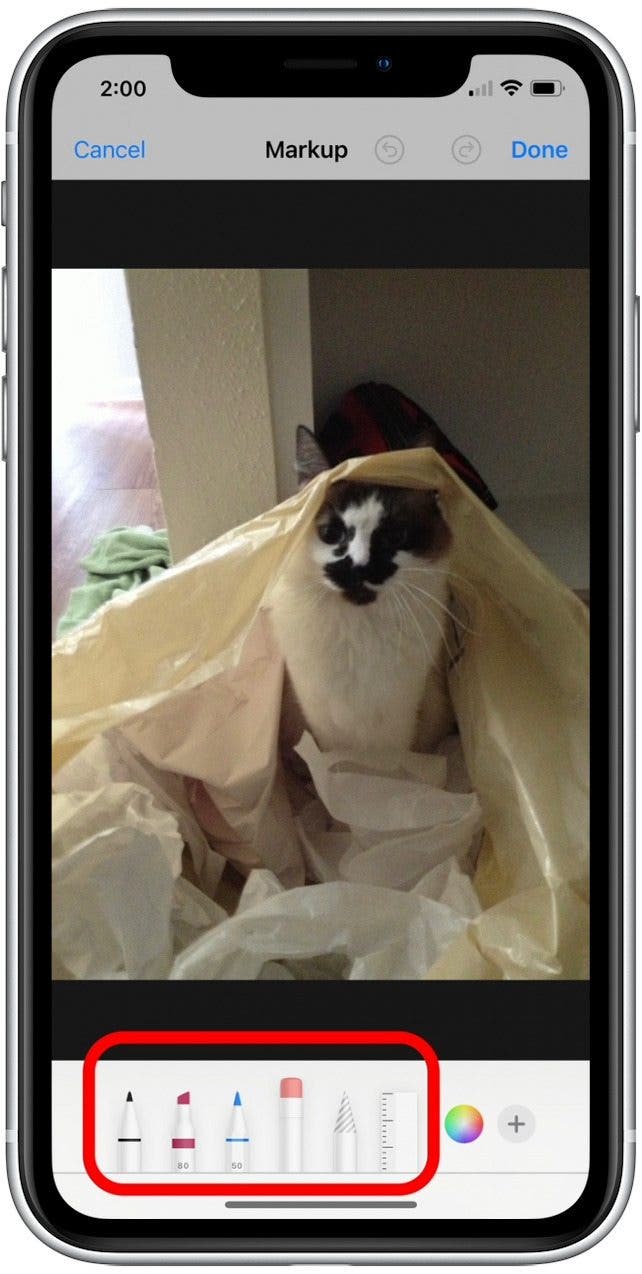
- Select your Markup tool.
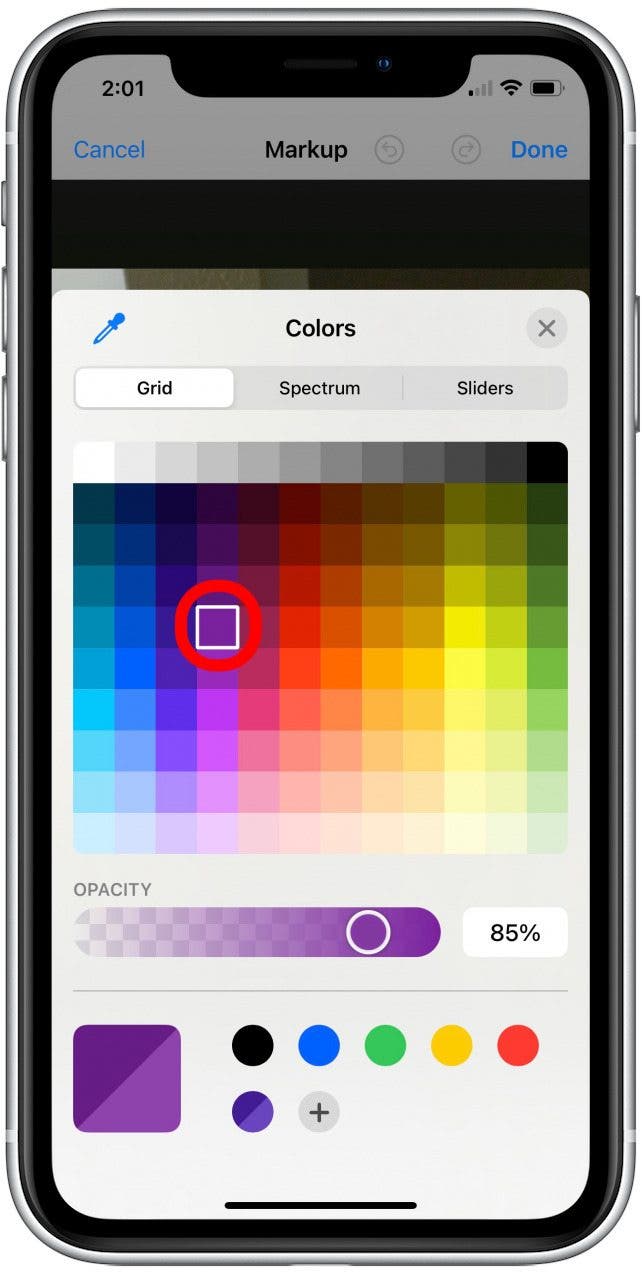
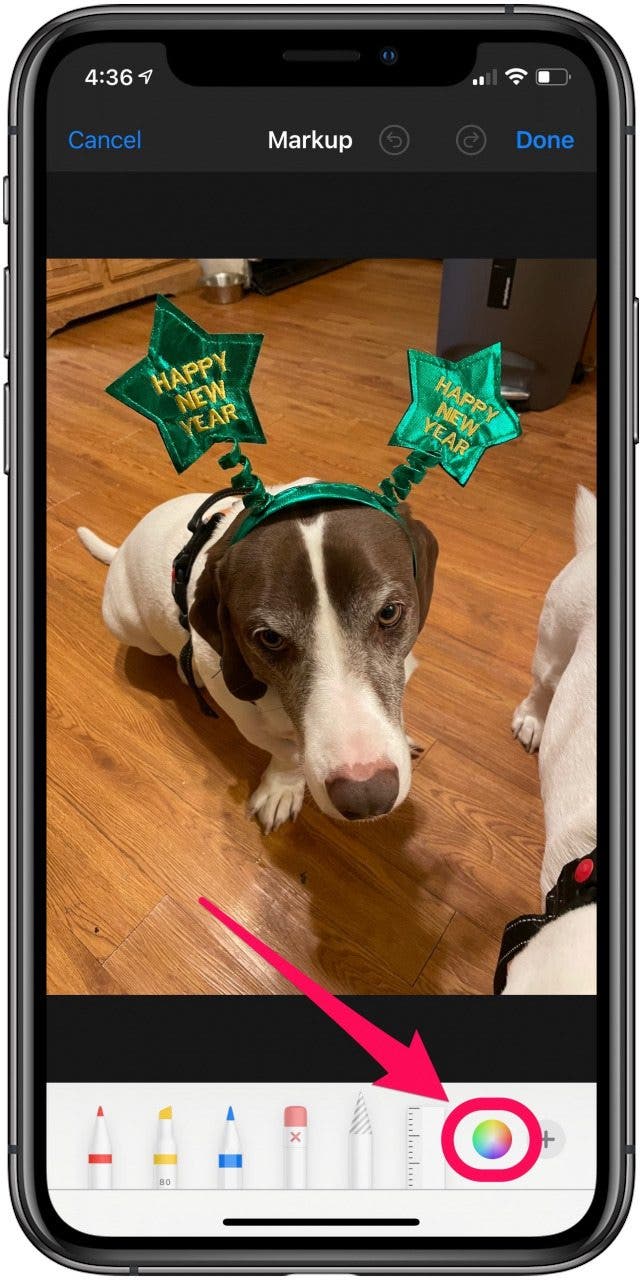
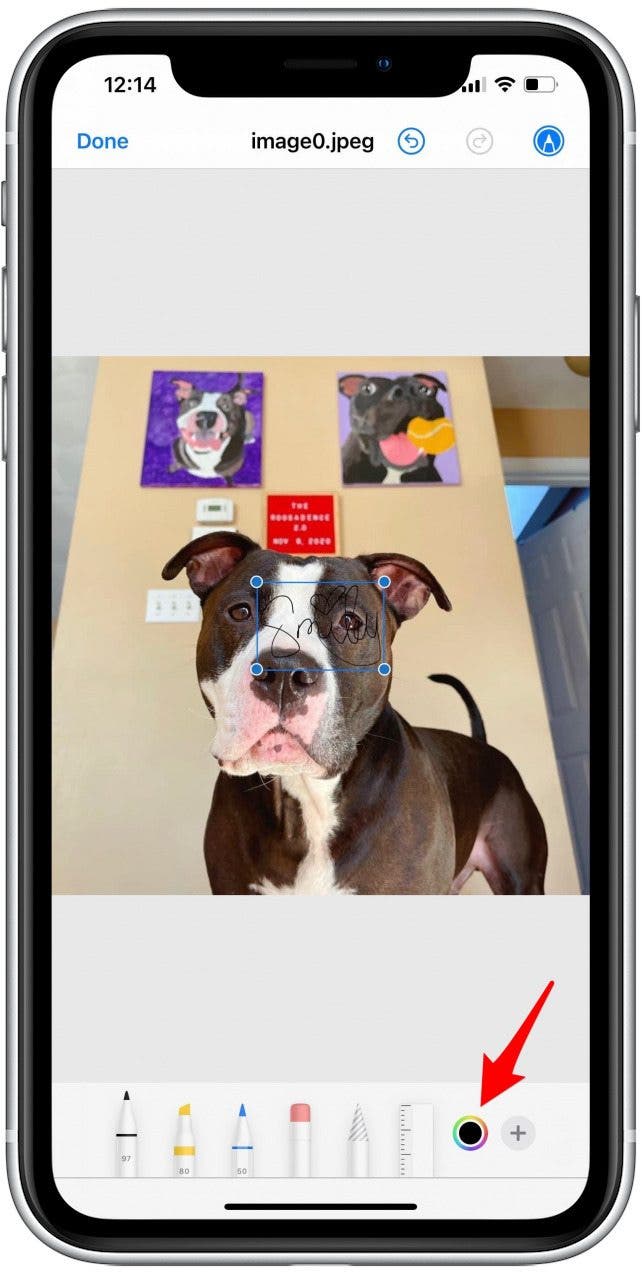
- Tap the color wheel to change colors.
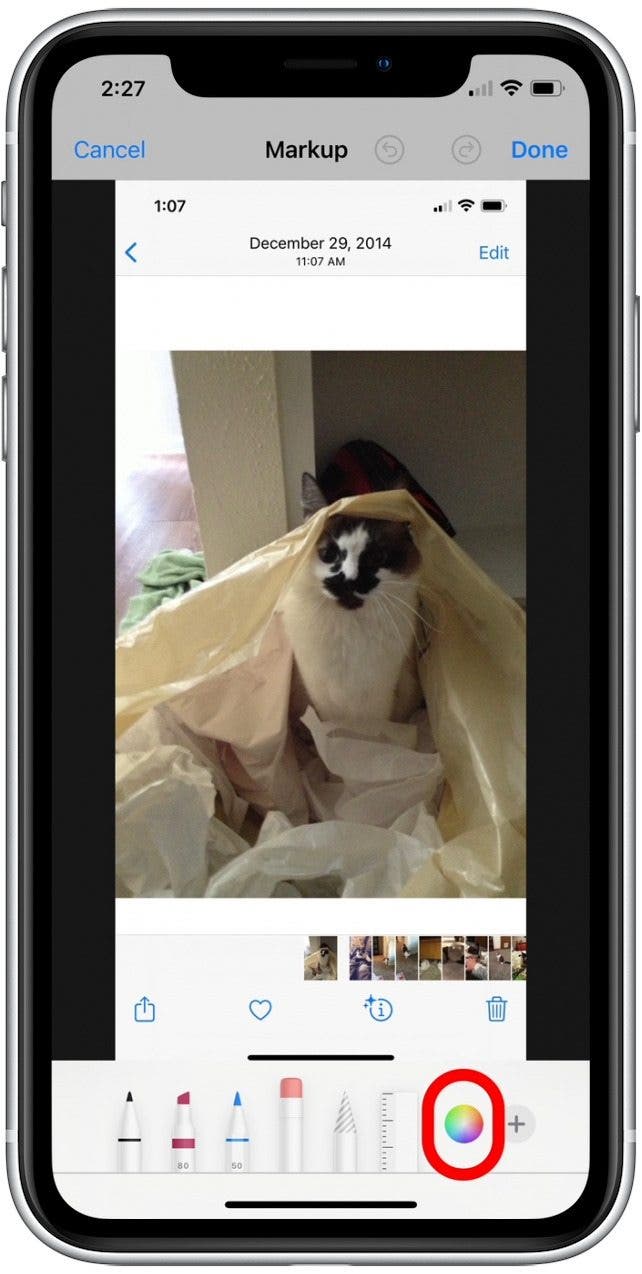
- Choose the color and opacity you’d like to use.
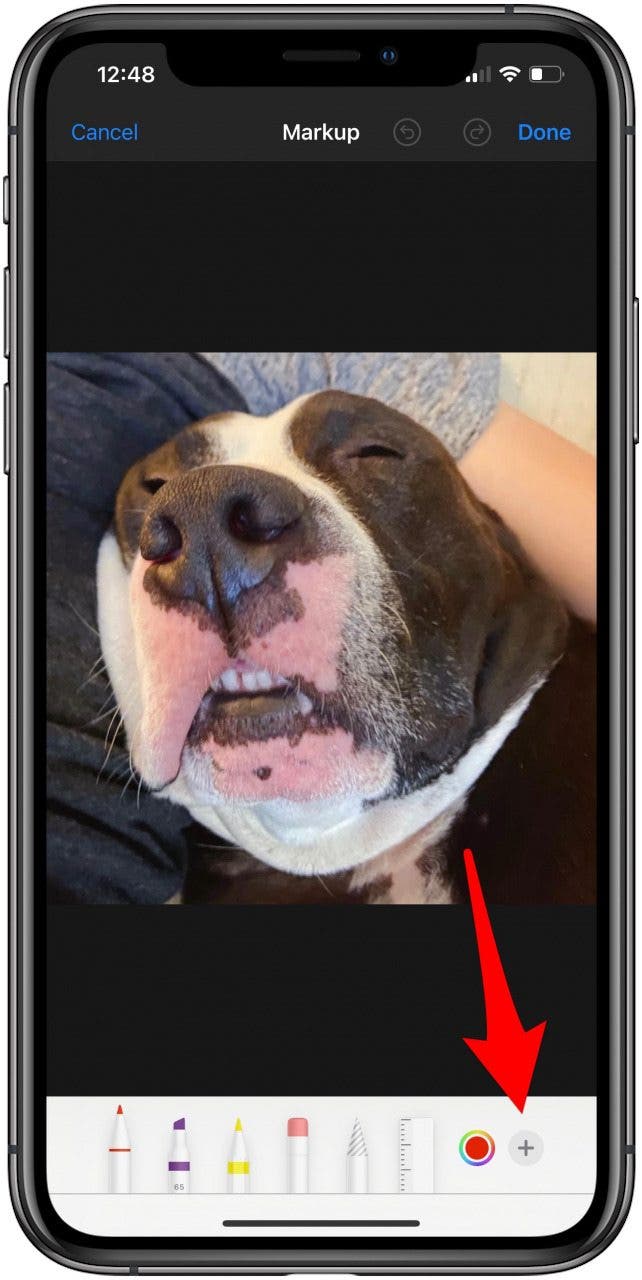
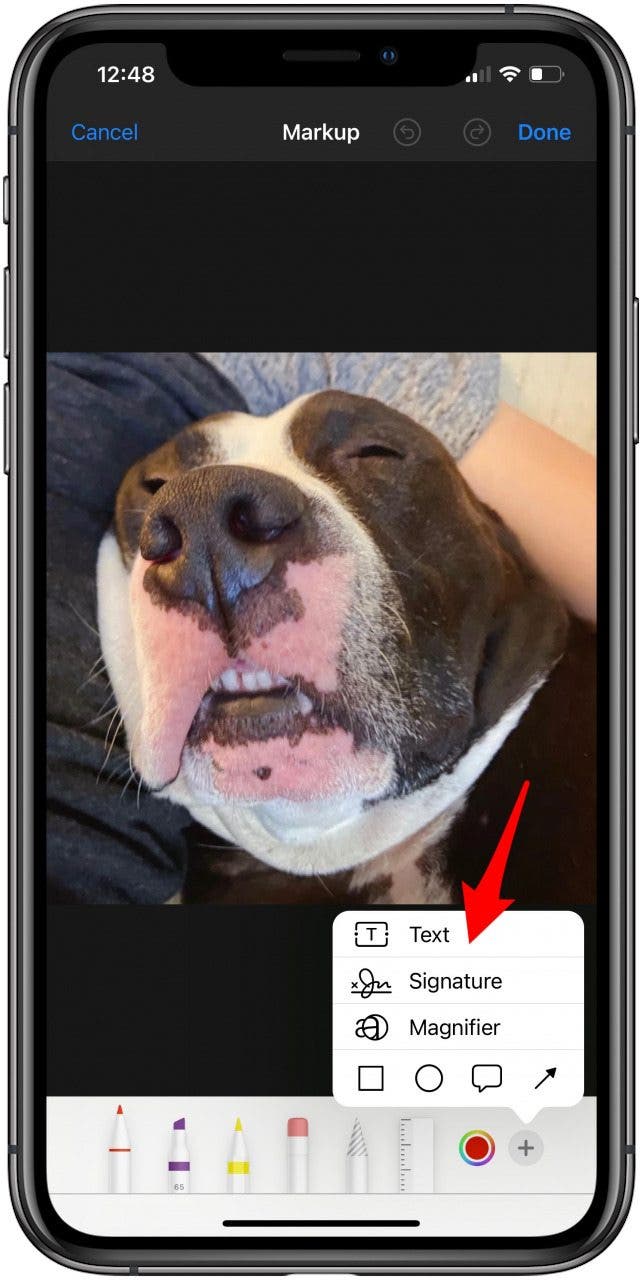
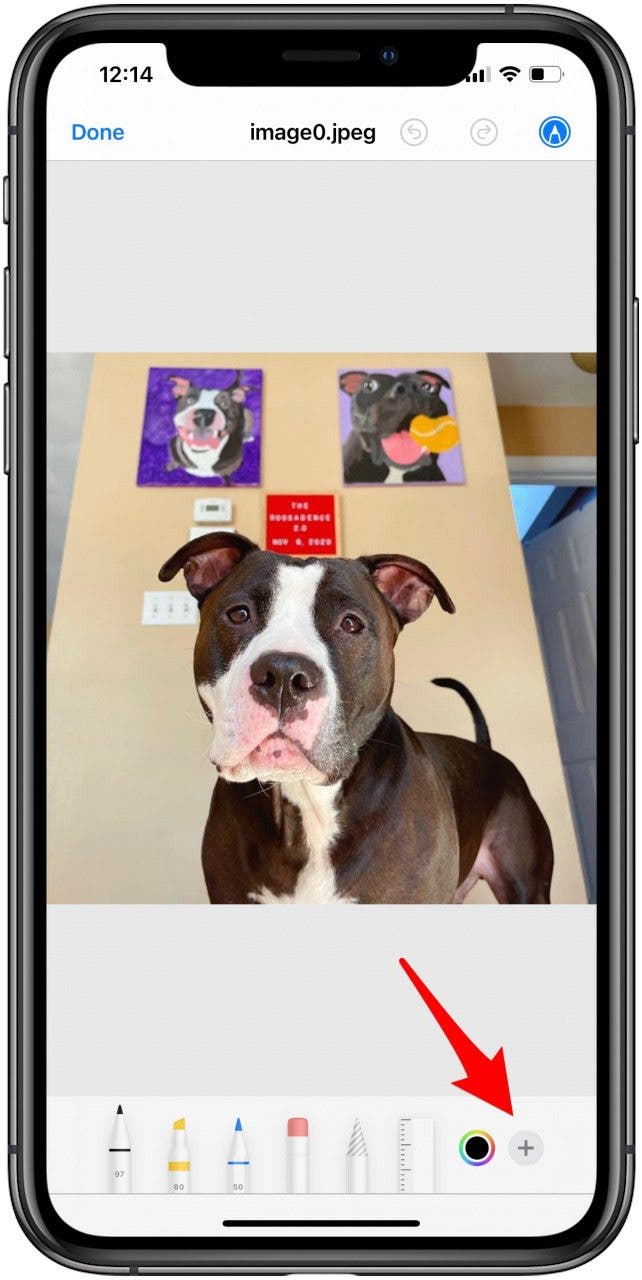
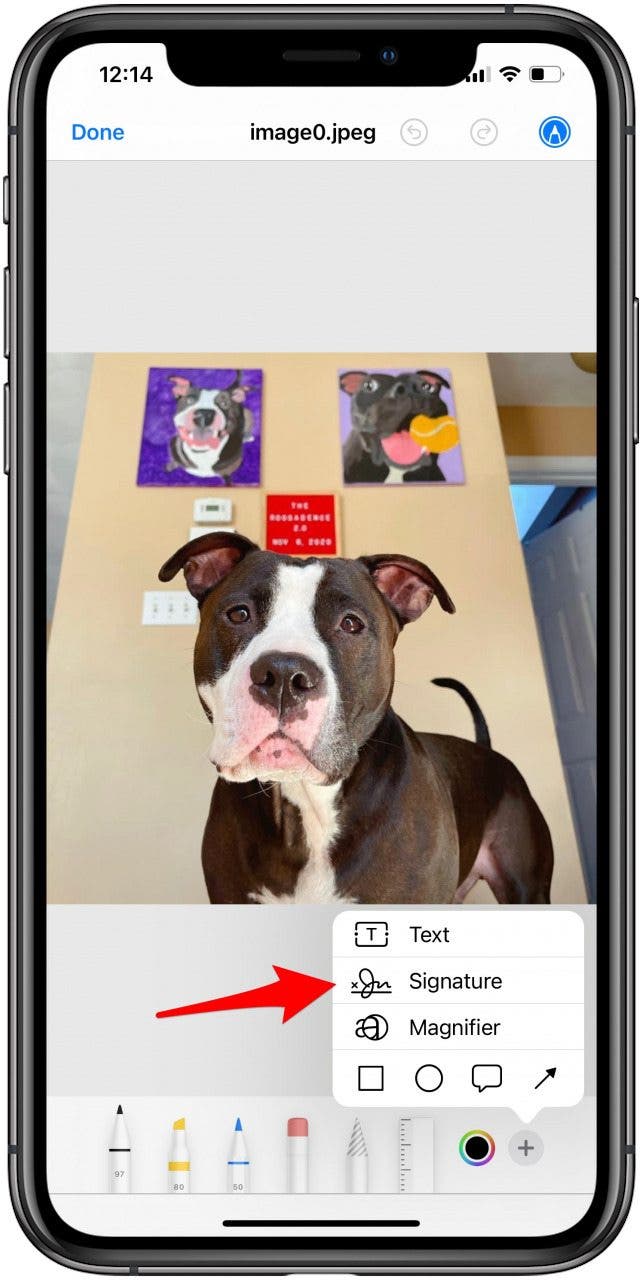
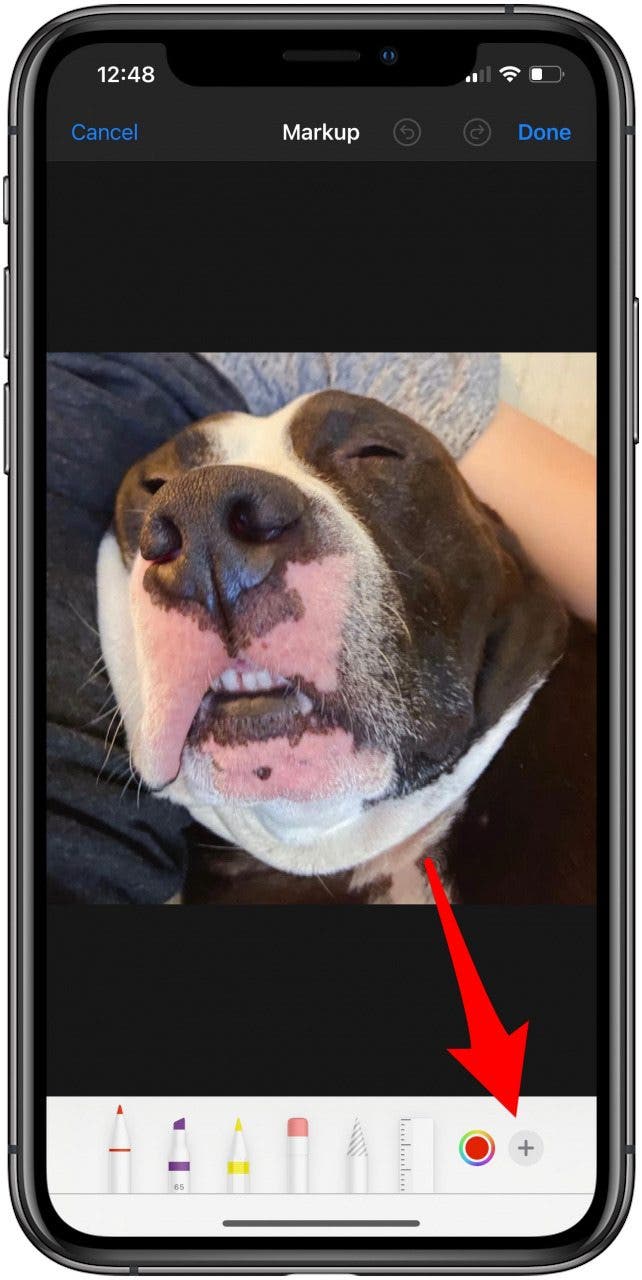
- Tap the plus icon for more options.
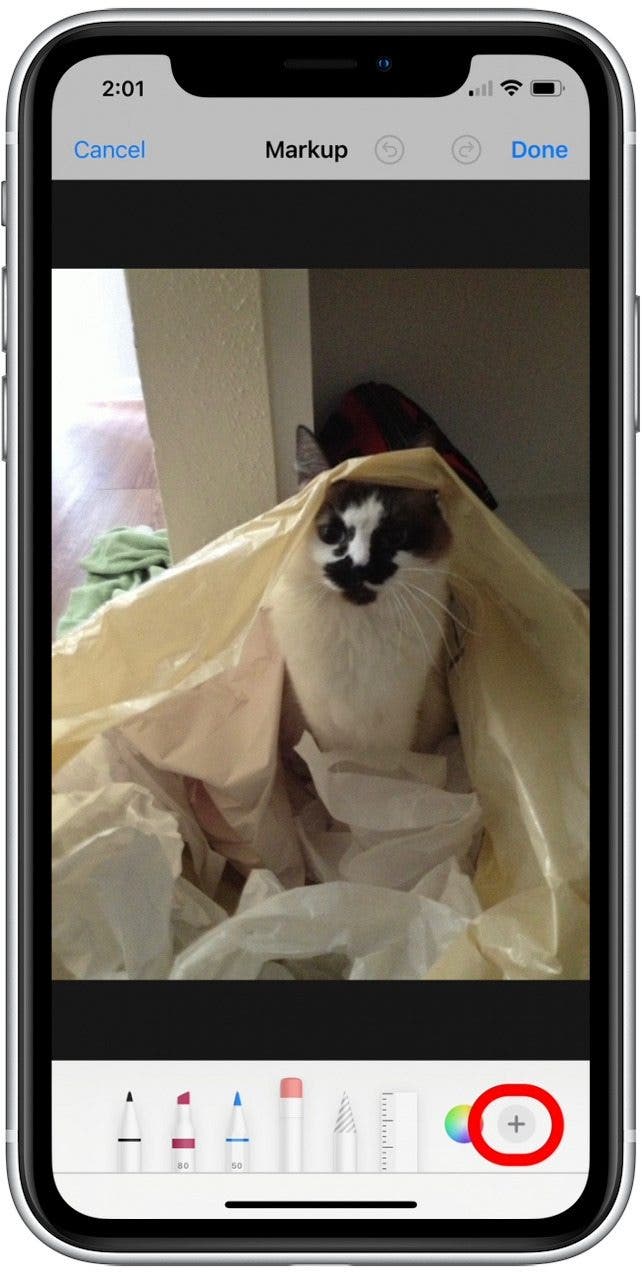
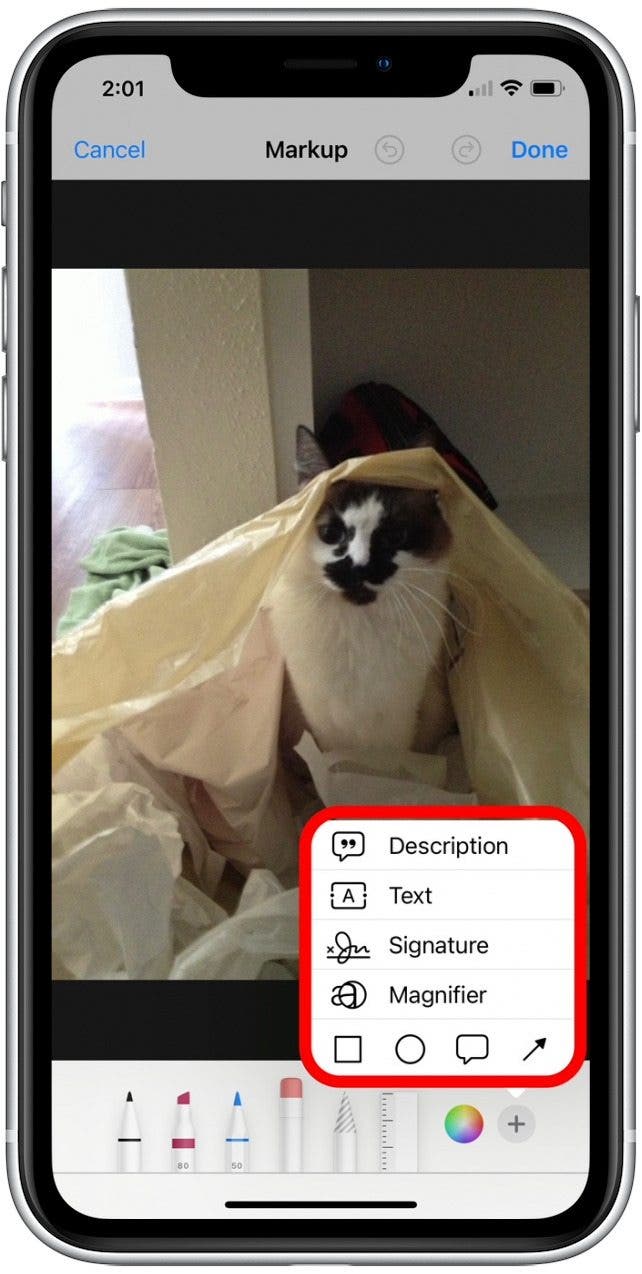
- Tap Description, Text, Signature, Magnifier, or a shape.
- Drag the blue dots to move and enlarge your text box or shape.
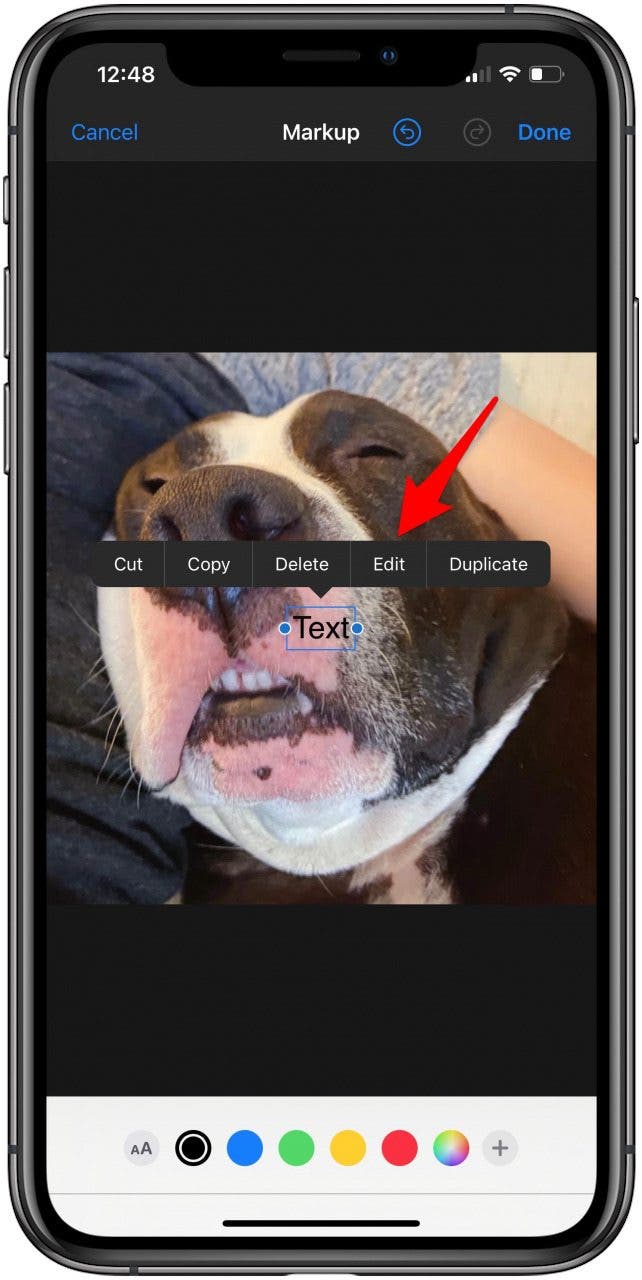
- If you added a text box, tap it and then tap Edit.
- Type your text, then tap Done.
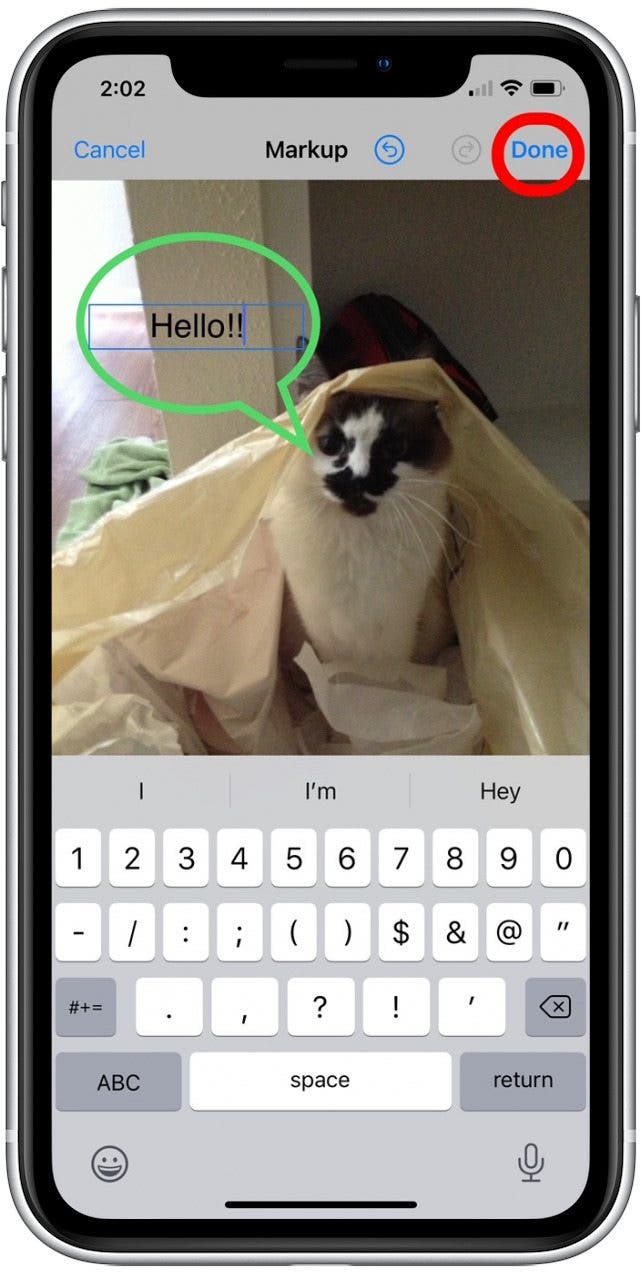
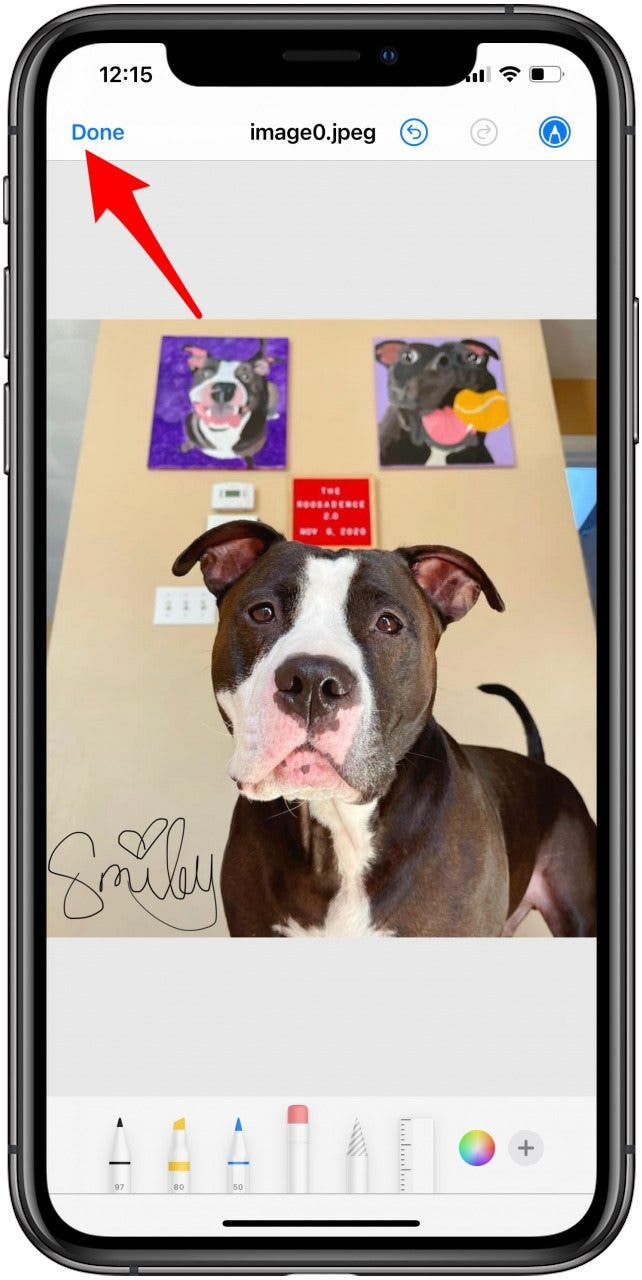
- Once you are done editing the photo, tap Done.
How to Use Markup in Messages on the iPhone
Follow the steps below to learn how to add text to photos on your iPhone, insert shapes, and add drawings right in the Messages app. The beauty of using this option is that when you edit the photo right in the Messages app, it will not be saved in your Photos app. This is great when you want to quickly send a friend a funny photo with captions or shapes added, but don't want to save those changes over the original photo.
- Open the Messages app.
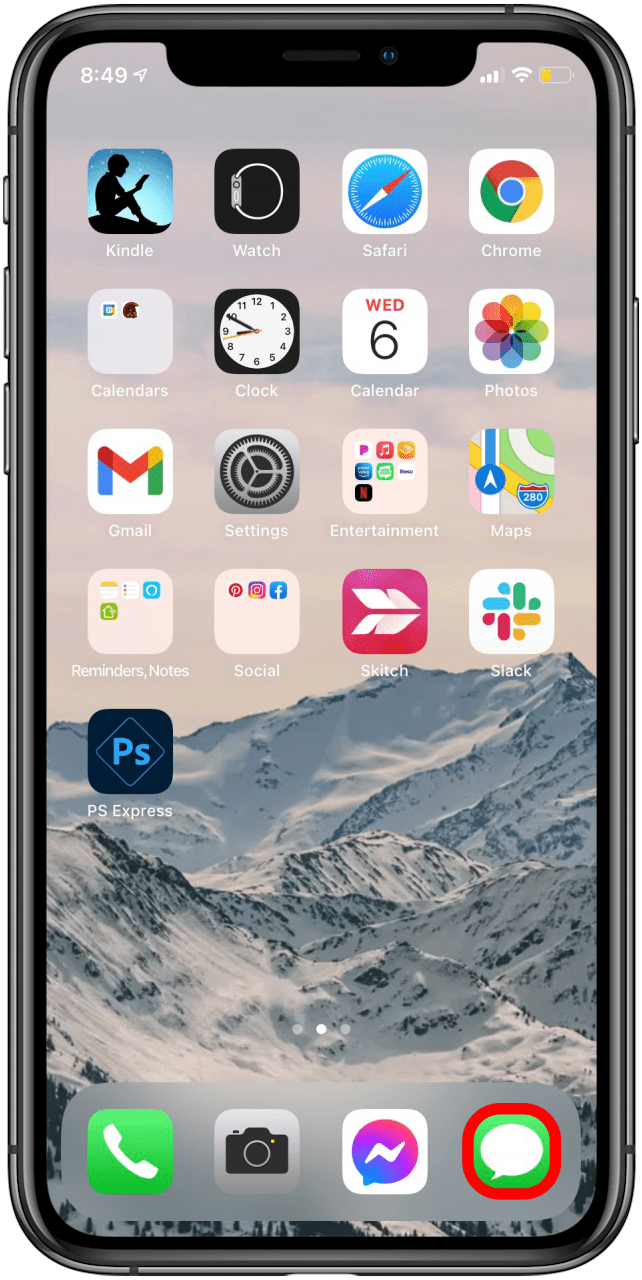
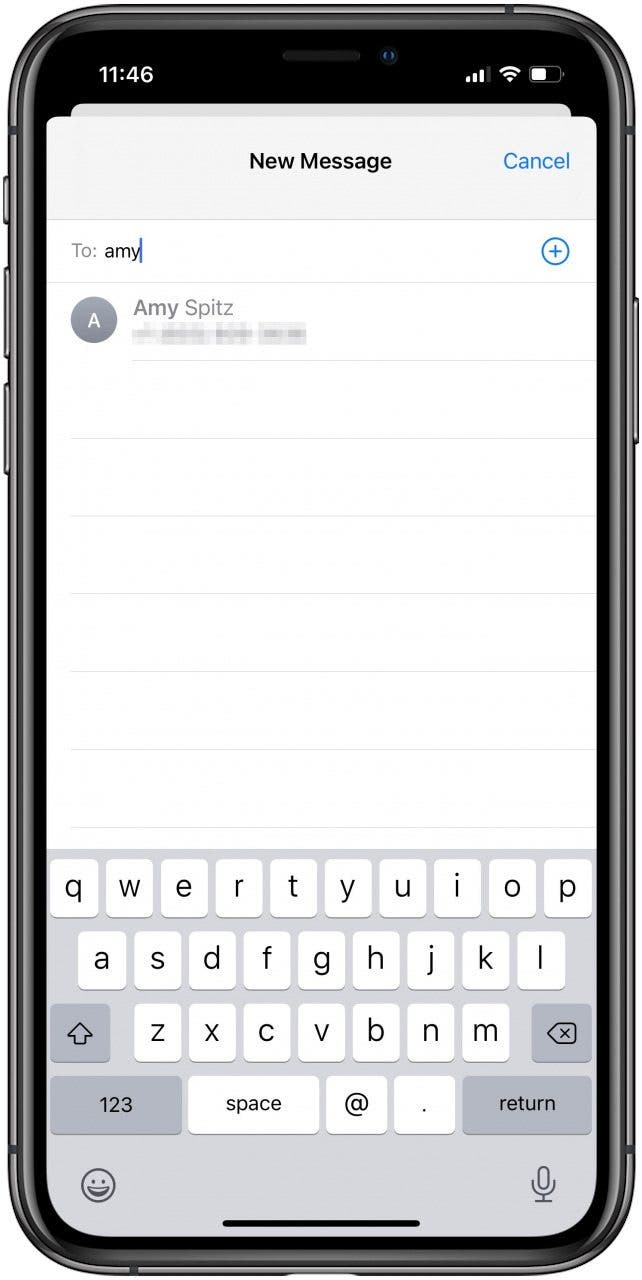
- Tap on the New Message button.

- Enter the name of at least one recipient.
- Tap on the camera icon.
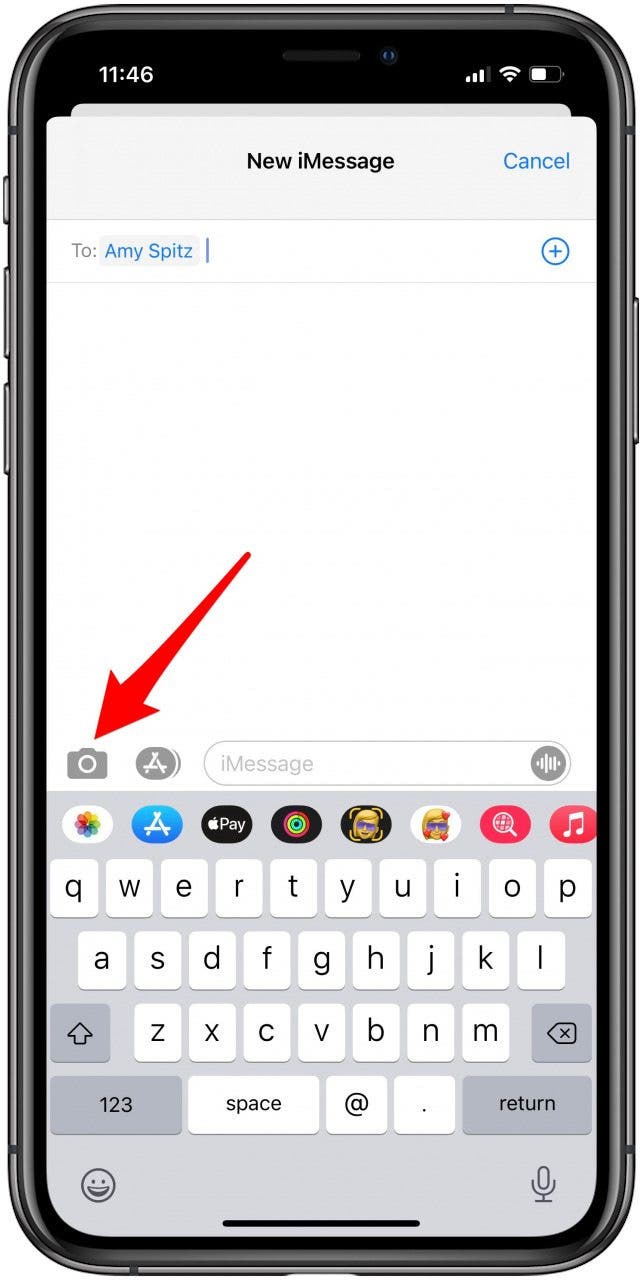
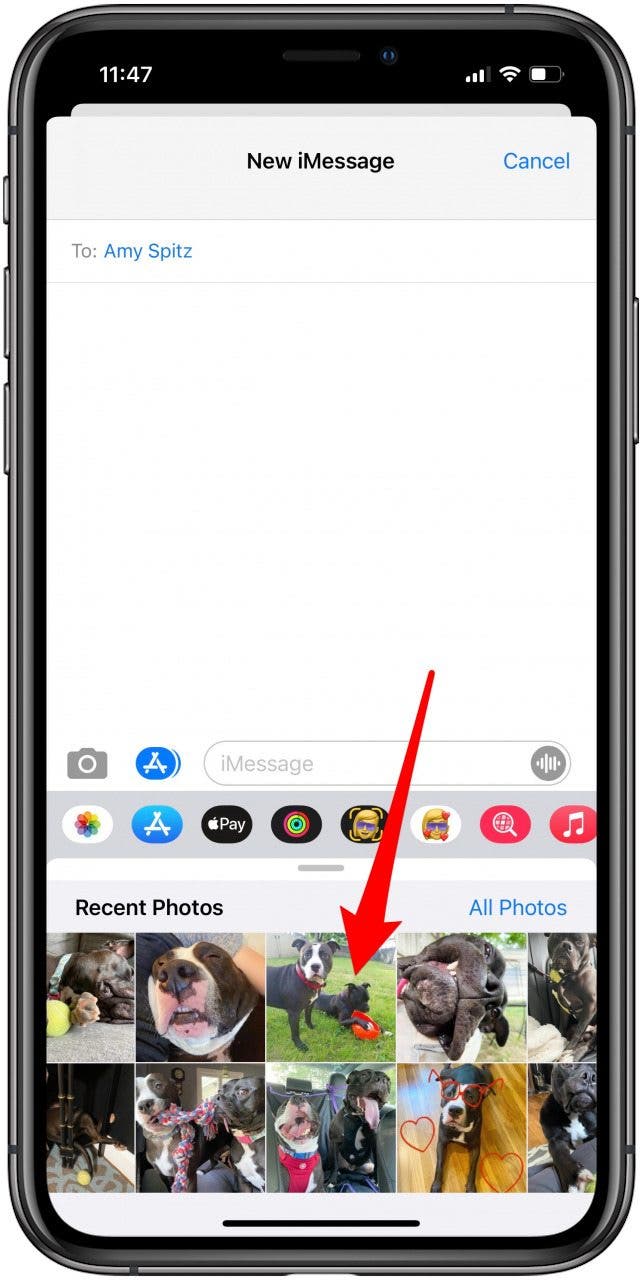
- Your Camera app will open. You can take a new photo or tap on the top-left button to open your Photos Gallery.

- Select the photo you wish to edit, it will pop into the new message.
- Tap on the photo within the message.
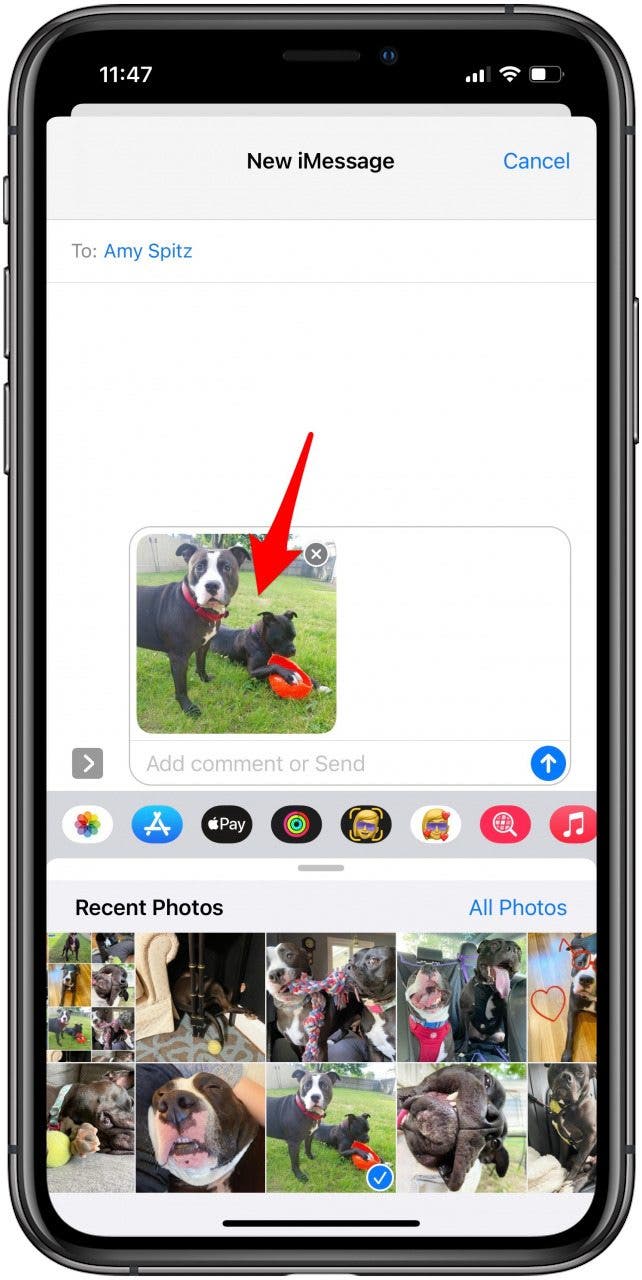
- Tap Markup on the bottom left.
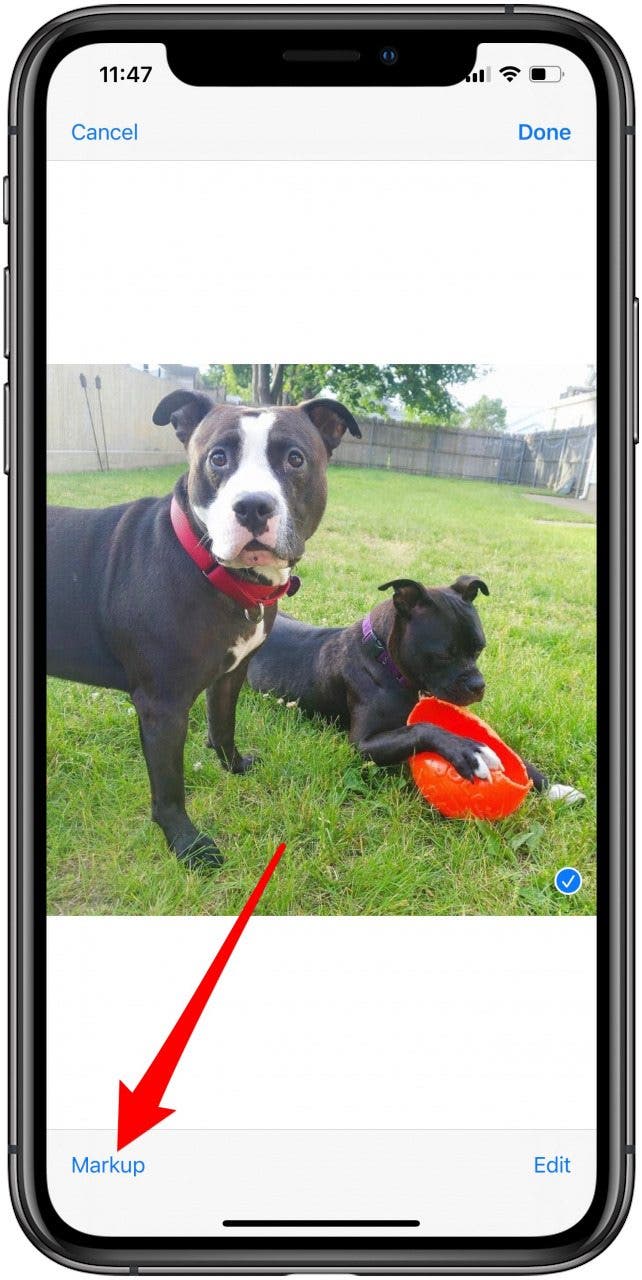
- Once you are done editing the photo, tap Save.

- Tap Done.
How to Use Markup in Email on iPhone
You can use Markup to insert drawings into emails on your iPhone as well, which allows you to add clarity to something that can't be explained well with words, or simply share fun doodles!
How to Use Markup in Notes
You can use Markup to create inline drawings directly in a note as well as to markup photos added to a note.
How to Use iPhone Markup Tools in the Files App
Once you open Markup in Photos, Messenger, Notes, Files, or Mail, there are various ways you can use it to edit your photo or document. You can draw in various styles and colors, create shapes, add typed text, and insert electronic signatures.
How to Draw with Markup
- There are several tools for drawing using Markup. You can chose between the pen, highlighter, and pencil options.

- Tap a drawing tool to select it and tap it again to adjust line thickness and opacity
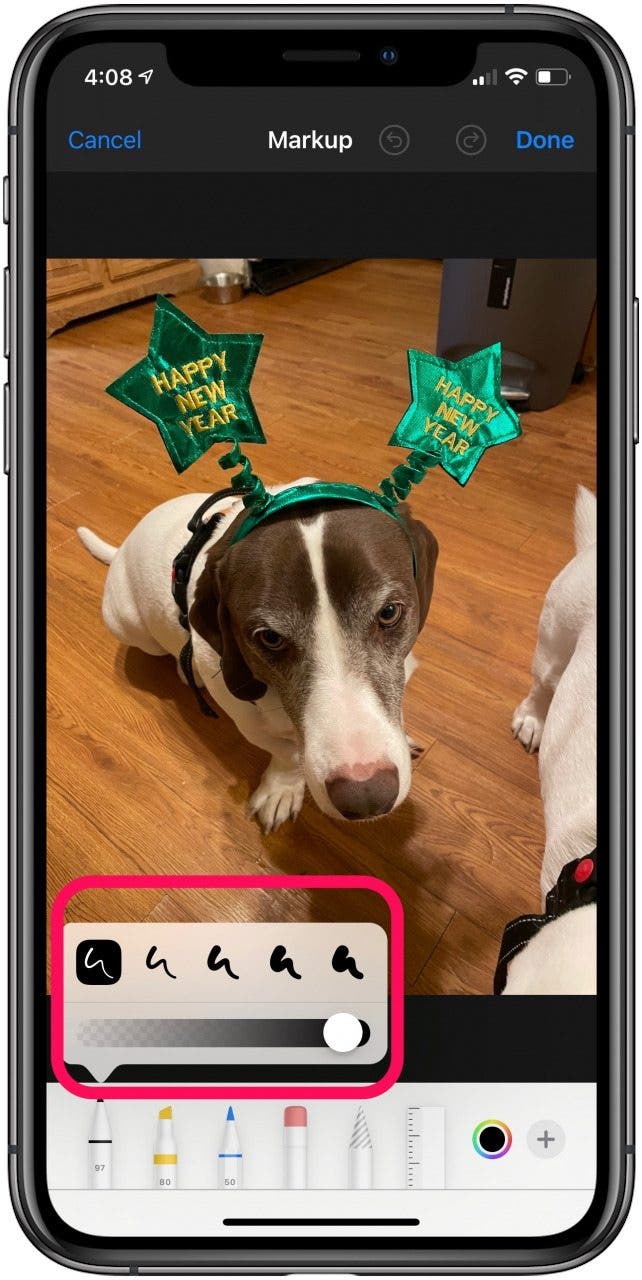
- Tap the color wheel to change the color or adjust opacity.
How to Erase, Select & Edit with Markup
- Other Markup tools include the eraser, lasso tool, and ruler.

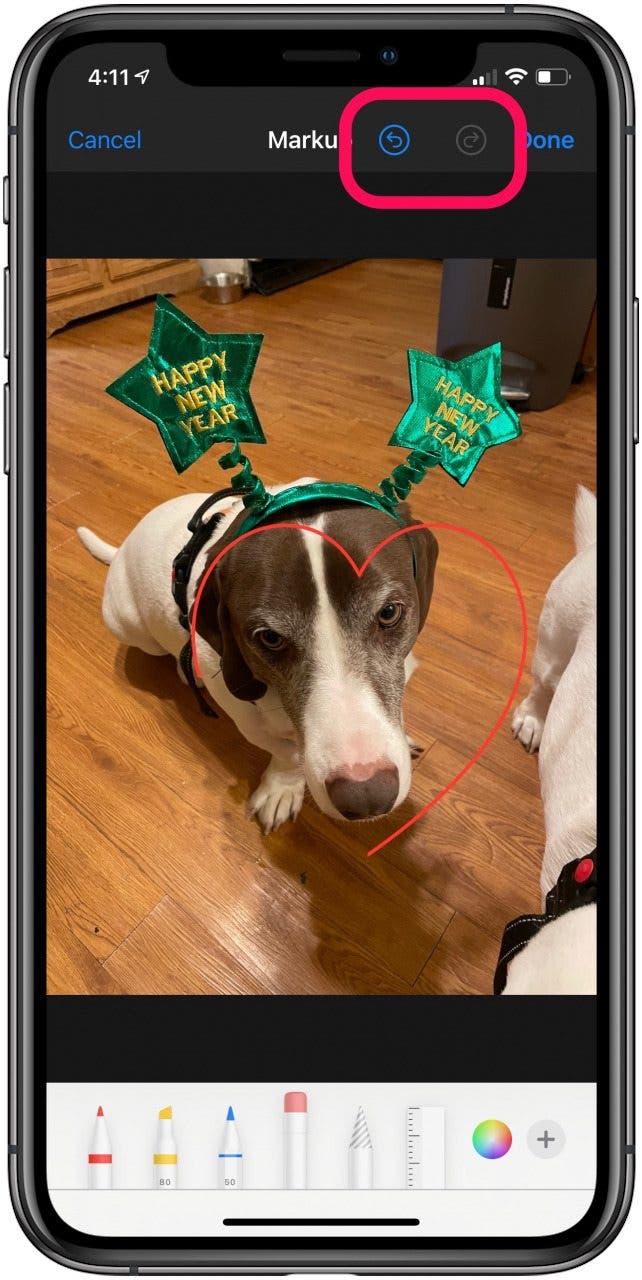
- You can draw in strokes that can easily be undone or redone with the tap of the undo and redo buttons at the top of the screen.
- You can also erase any edits with the eraser tool by selecting it and then rubbing a stylus or your finger over the area you need erased.
- If you like what you’ve drawn but need it moved, the lasso tool can be used to move your drawing. Simply tap on the lasso tool, trace around the drawing you want to move and drag it anywhere.
- When the lasso tool is selected, you can also select individual drawings by pressing and holding them. A selected drawing can be changed in color, duplicated, deleted, cut, or snapped into shape.

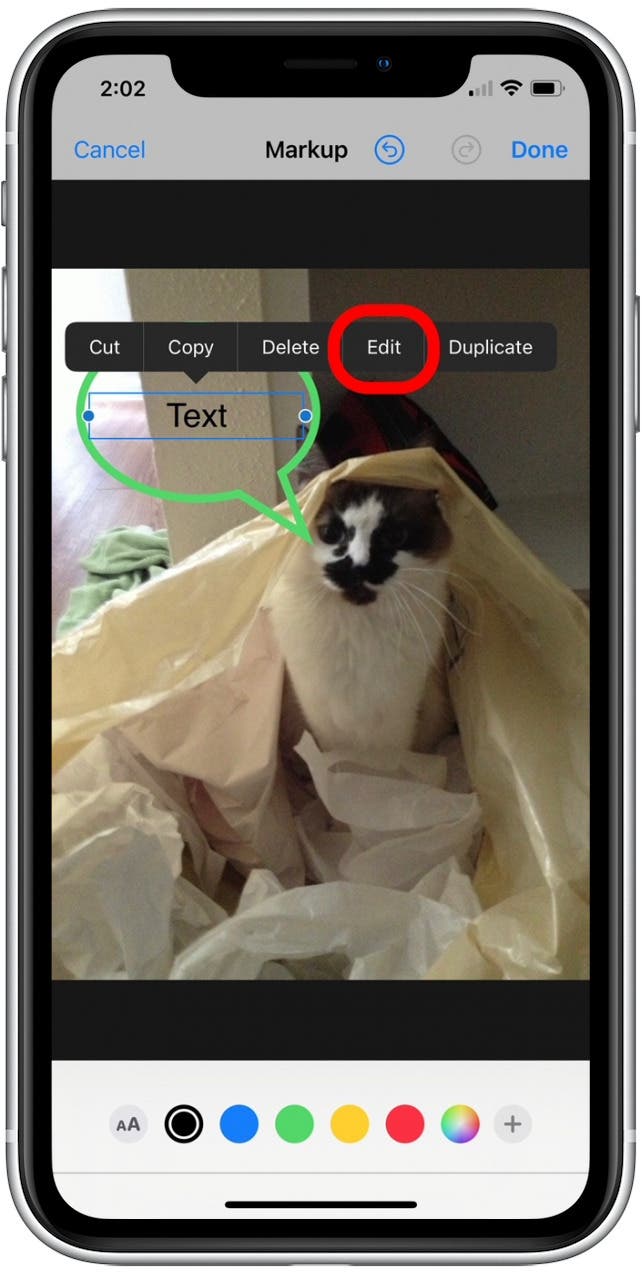
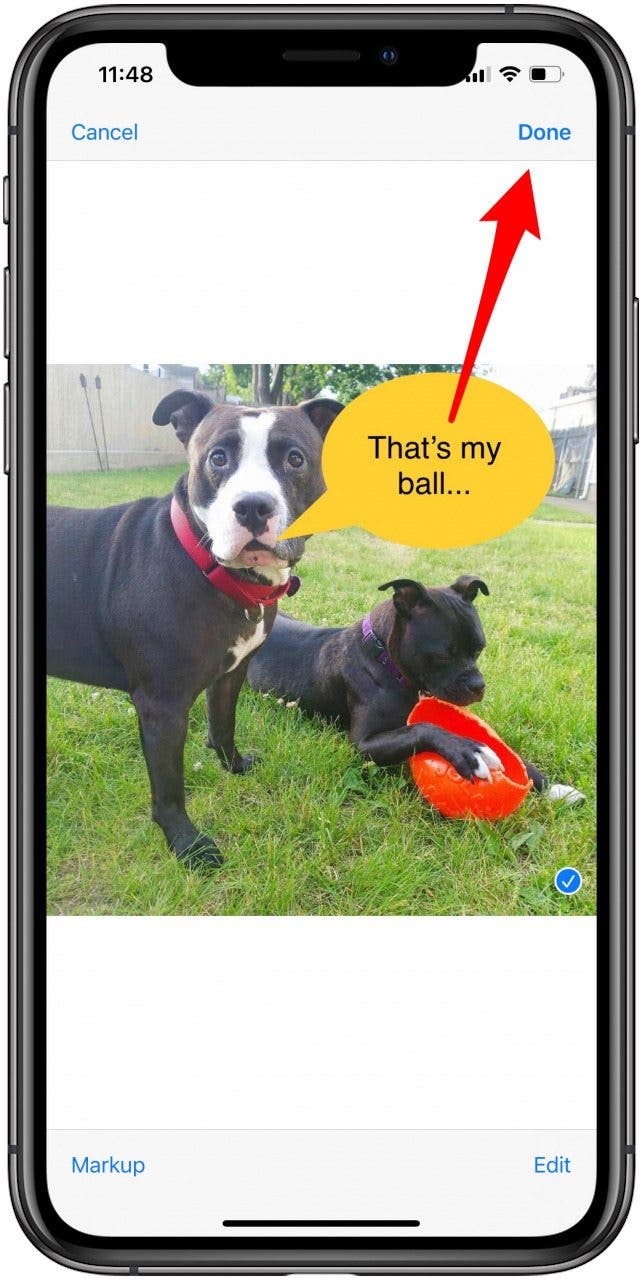
How to Add Text with Markup
- Tap on the + button.
- Select the Text menu option.
- Drag the text box where you want it.
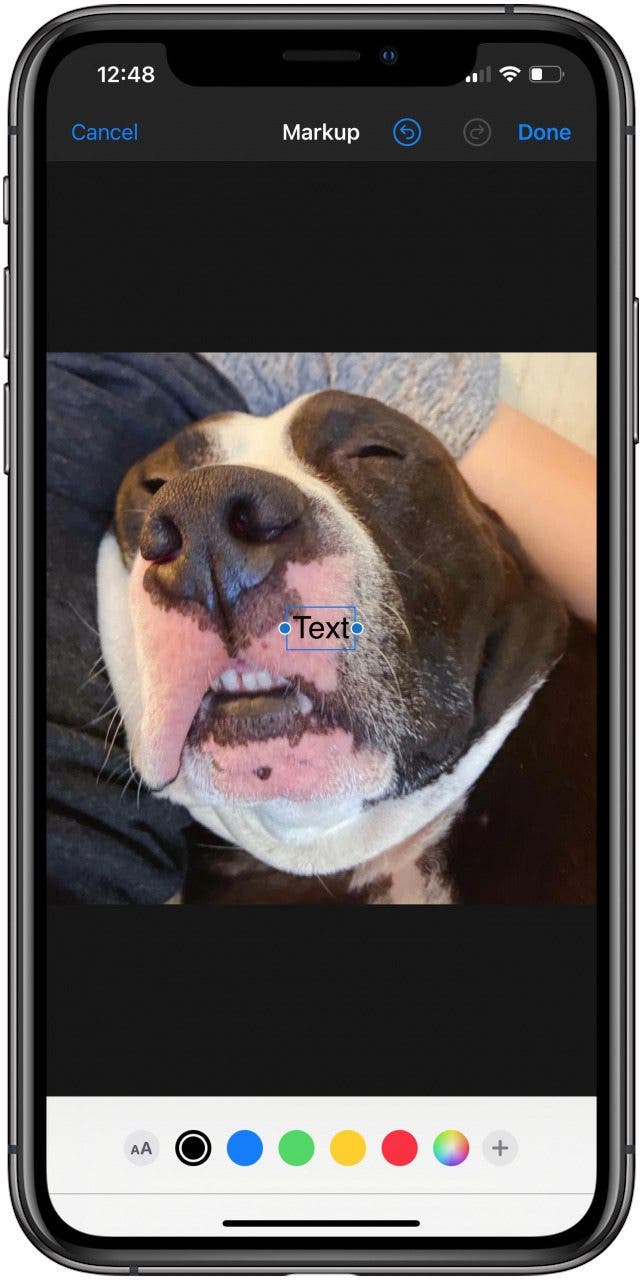
- Long-press on the box and select Edit to type.
- Change the color by tapping the colors at the bottom of the screen. If you tap the color wheel, you can find a wider selection of shades and opacity. You can even use the eyedropper to copy a color that is already in your image.
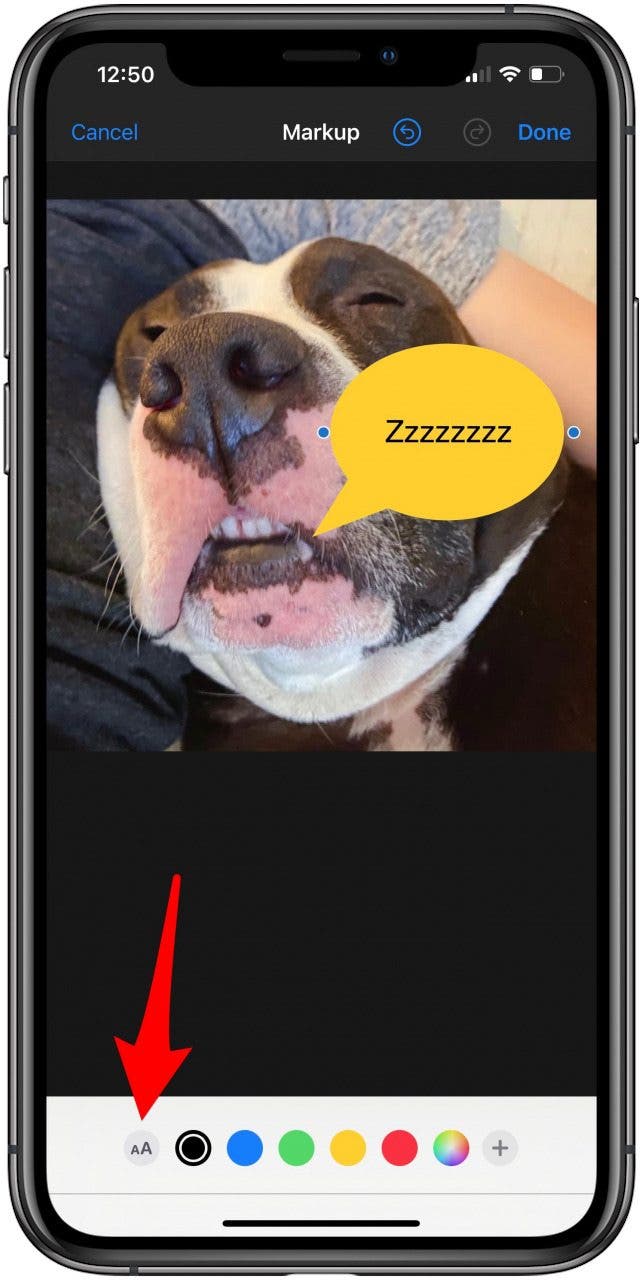
- Change the size, font, and alignment by tapping on the AA button on the bottom left.
- Tap Done when you are finished editing the image.

How to Add a Signature with Markup
- Tap on the + button.
- Select Signature.
- A pop-up window will open and prompt you to sign your name using your finger or a stylus at the bottom of the screen.
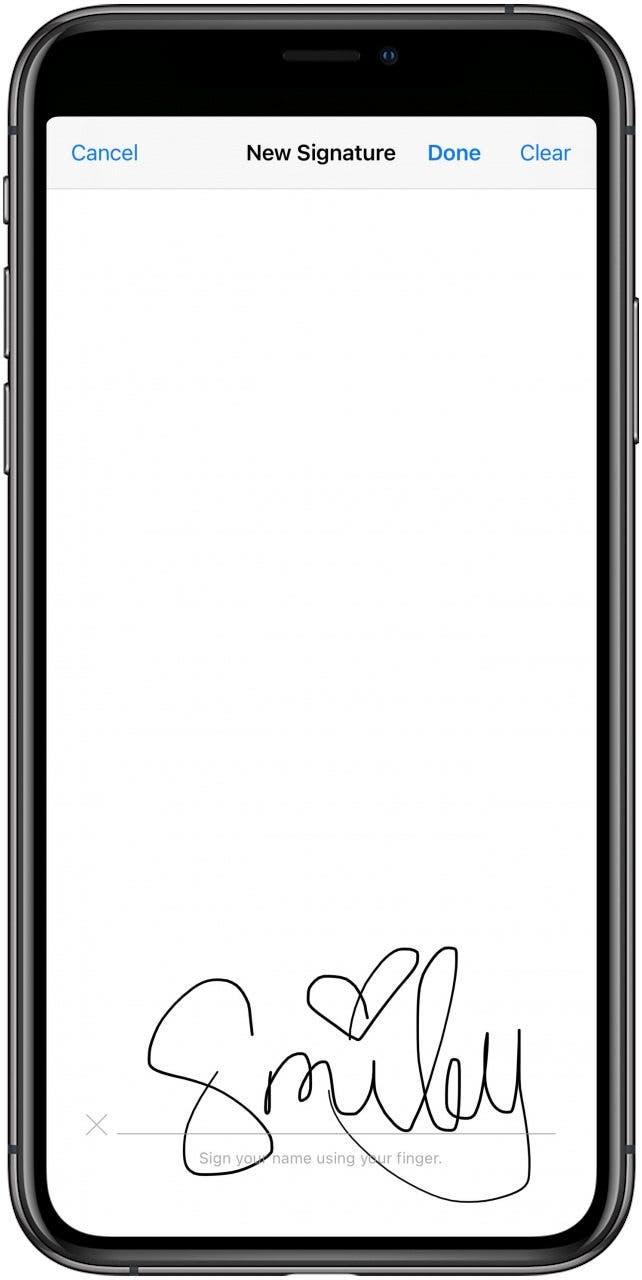
- Tap Clear and try again if you are not satisfied.
- Tap Done once you are satisfied.
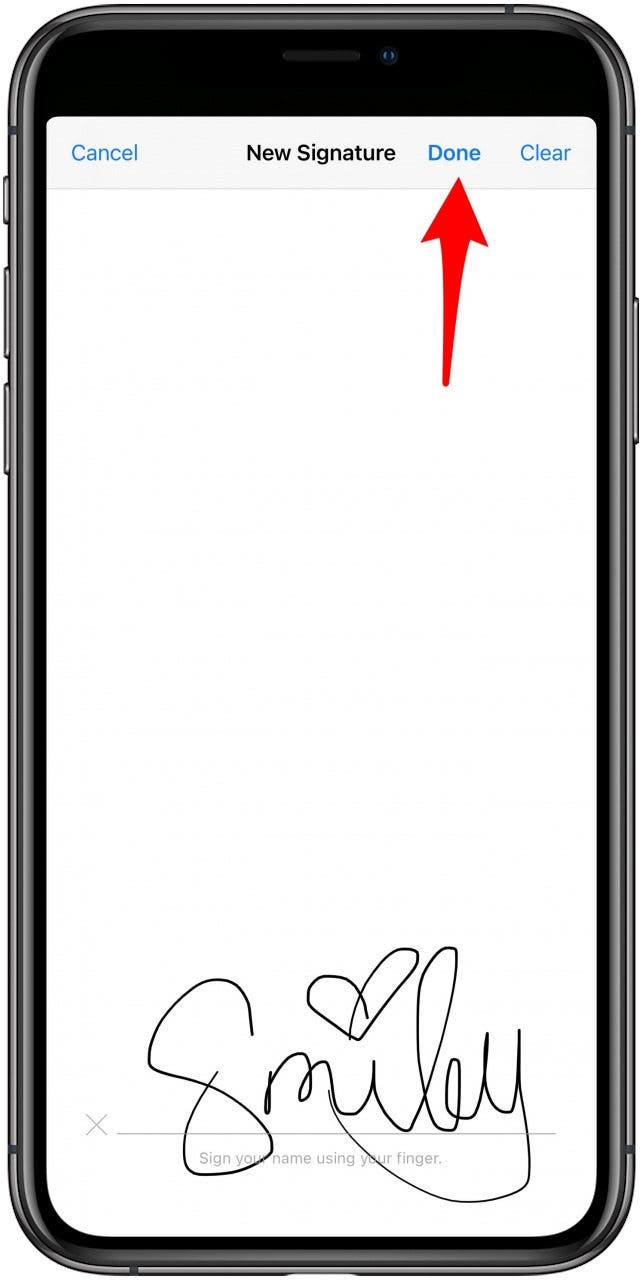
- Your signature will appear in the image. You can drag and re-size it as necessary.

- You can also tap the color wheel to change the color of your signature.
- Tap Done when you are finished editing the image.
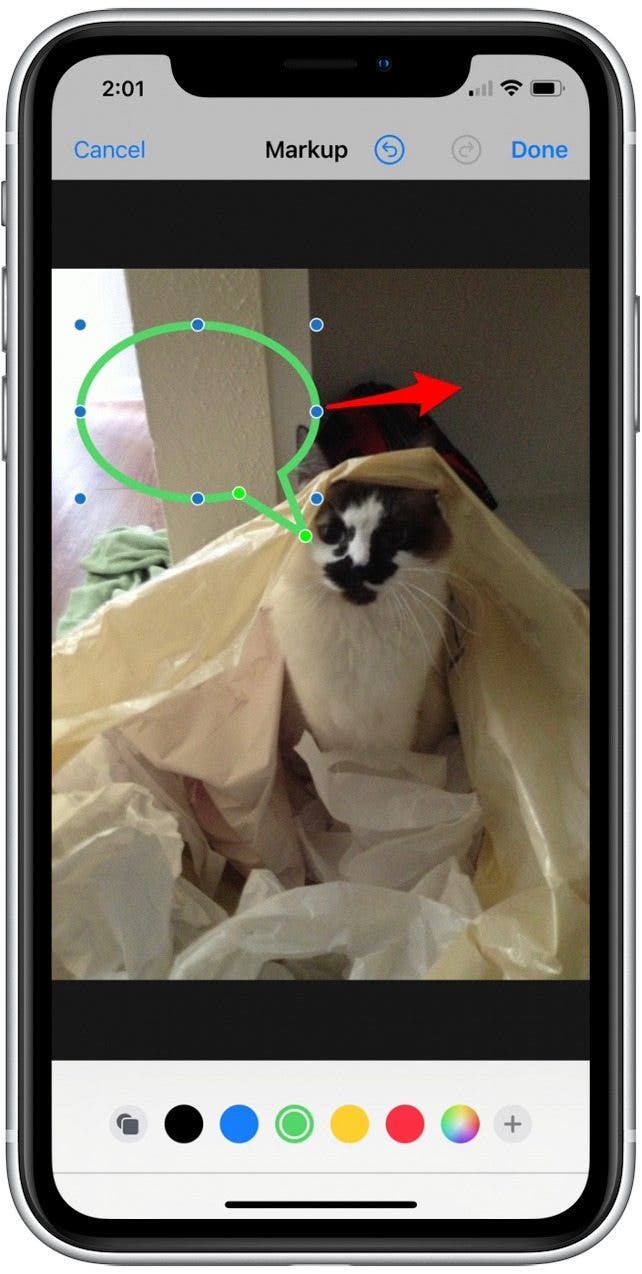
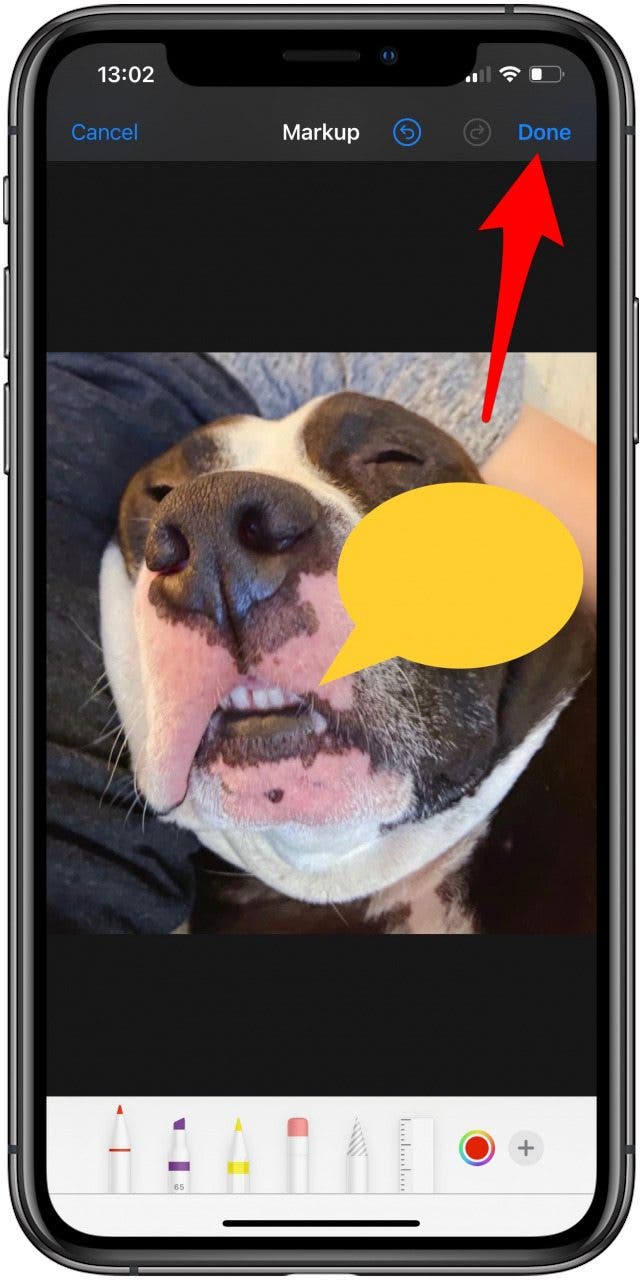
How to Add a Shape with Markup
- Tap on the + button.
- Select one of the four shapes available: square, circle, speech bubble, and arrow.

- Your shape will appear in the image. You can drag and adjust the shape as necessary. You can tap also set it to just an outline or make it an opaque shape.
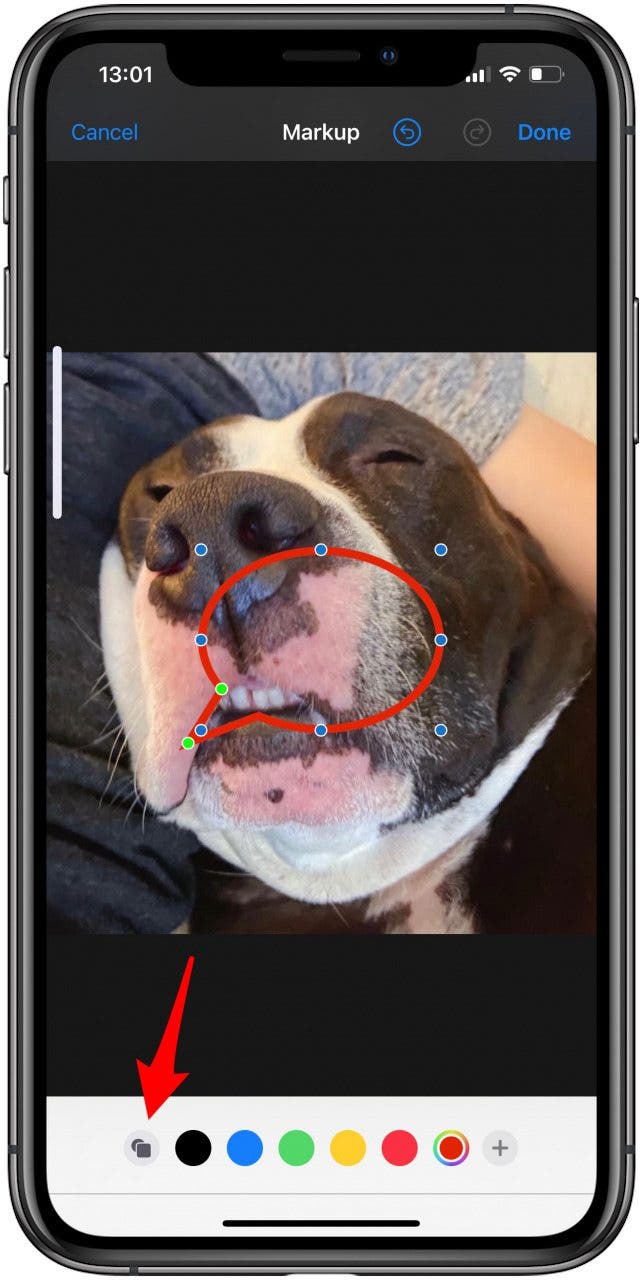
- Finally, you can change the color of your shape.
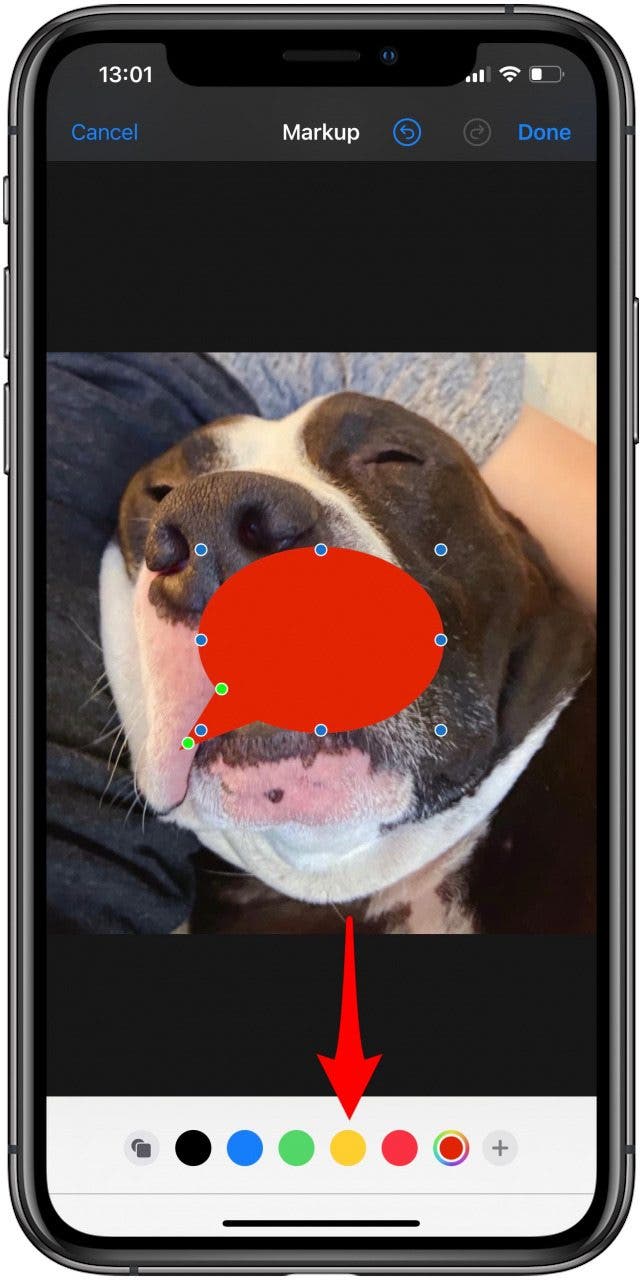
- Tap Done when you are finished editing the image.
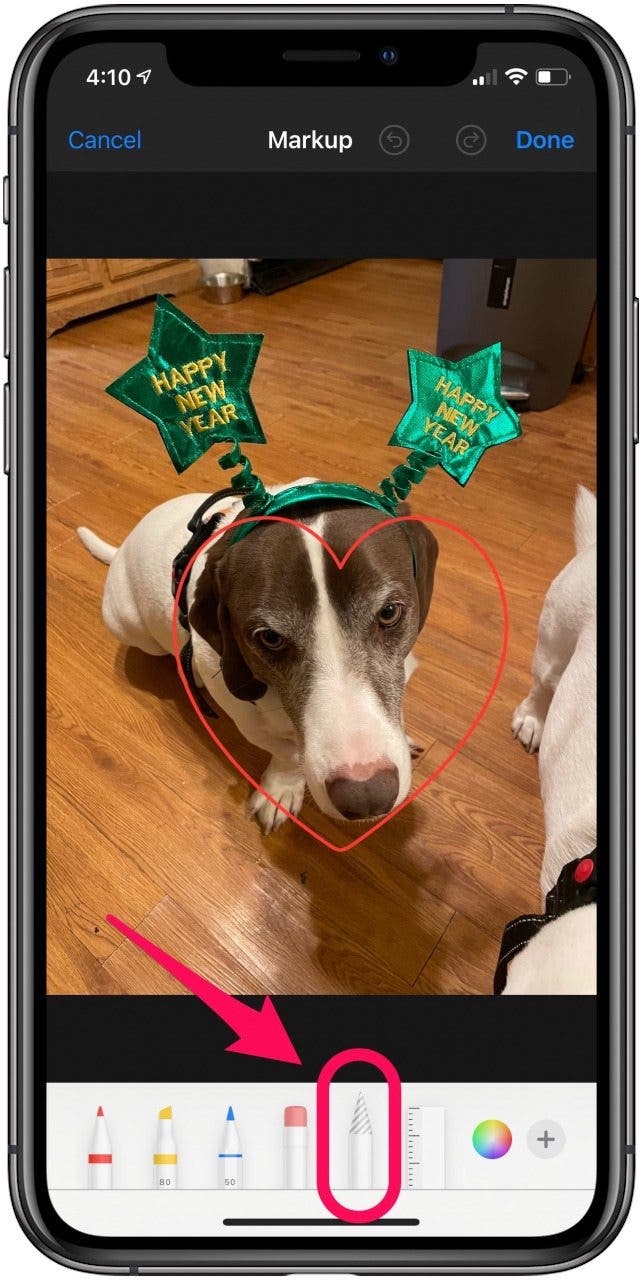
How to Draw Perfect Shapes with Markup
You can draw a variety of shapes perfectly using Markup. Simply draw the shape without lifing your finger and hold until it snaps into a perfect shape. The shapes that you can draw by hand that will transform into perfect shapes include:
- Arcs
- Arcs with arrow tips
- Circles
- Clouds
- Continuous lines
- 90-degree angles
- Hearts
- Lines with arrow tips
- Outlined arrows
- Pentagons
- Rectangles
- Speech Bubbles
- Stars
- Triangles
If the shape doesn’t auto-transform, simply erase or undo your drawing and try again. If you prefer your drawn shape to the automatically transformed one, you can also press undo to revert it to a drawing. The auto-transformed drawings can be dragged and re-sized and you can change their color and opacity.
Pro Tips for Using Markup Shapes:
- The shapes can be drawn in any direction. For example, you can draw an upside-down heart.
- The stars can be drawn as outlines or in a criss-cross pattern.
That's it! Now you'll be able to use markup tools in a variety of apps to add text to photos, give feedback, make notations, or simply create a funny image.

Olena Kagui
Olena Kagui is a Feature Writer at iPhone Life. In the last 10 years, she has been published in dozens of publications internationally and won an excellence award. Since joining iPhone Life in 2020, she has written how-to articles as well as complex guides about Apple products, software, and apps. Olena grew up using Macs and exploring all the latest tech. Her Maui home is the epitome of an Apple ecosystem, full of compatible smart gear to boot. Olena’s favorite device is the Apple Watch Ultra because it can survive all her adventures and travels, and even her furbabies.

 Amy Spitzfaden Both
 Rhett Intriago

 Rachel Needell
 Olena Kagui


 Leanne Hays