Easily Share an iCloud Photo Library with Others

With over 10 years of experience in publishing, Amy specializes in Apple news and rumors, health and fitness tech, and parenting in the digital age.
Learn More With over 10 years of experience in publishing, Amy specializes in Apple news and rumors, health and fitness tech, and parenting in the digital age.
Learn MoreDid you know you can create an iCloud Shared Photo Library and invite up to five people to join? This differs from a shared album in that the entire library is shared between participants, and everyone can add photos. No more sharing individual photos! Here's how to set up an iCloud Shared Photo Library.
Why You'll Love This Tip
- Instantly share photos between friends and family.
- Maintain a consistent library between you and your friends.
- No more sharing individual photos back and forth—you can keep all these photos in one place!
How to Share an iCloud Photo Library
System Requirements
This tip was performed on an iPhone 16 Pro running iOS 18.5. Find out how to update to the latest version of iOS.
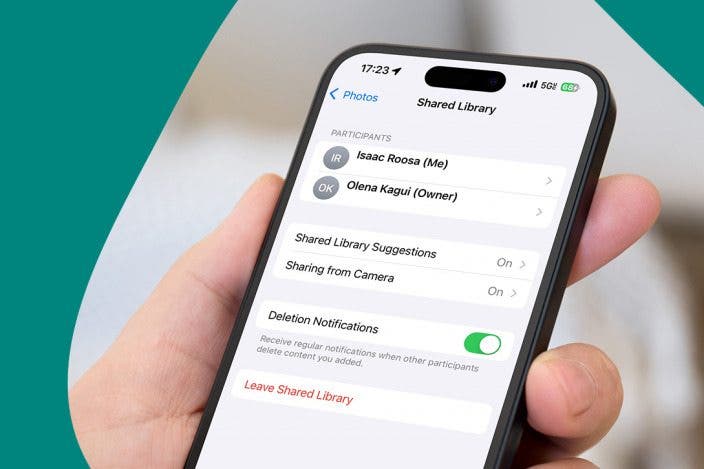
Shared Photo Library vs shared album: which is better? The Shared Library on iPhone lets you share a whole Photo Library with up to five people through iCloud. Unlike shared albums, the iCloud Shared Photo Library allows you to record photos and videos right in that library instead of adding them afterward, and everyone can add, edit, share, and delete. You also have the option to manually add photos to the iCloud Shared Photo Library. Keep in mind that you don't have to share your entire Photo Library to make a Shared Photo Library. You can choose which photos you want to include and which to keep private. For more hidden iPhone photo features, check out our Tip of the Day. Now, here's how to set up the iCloud Shared Photo Library:
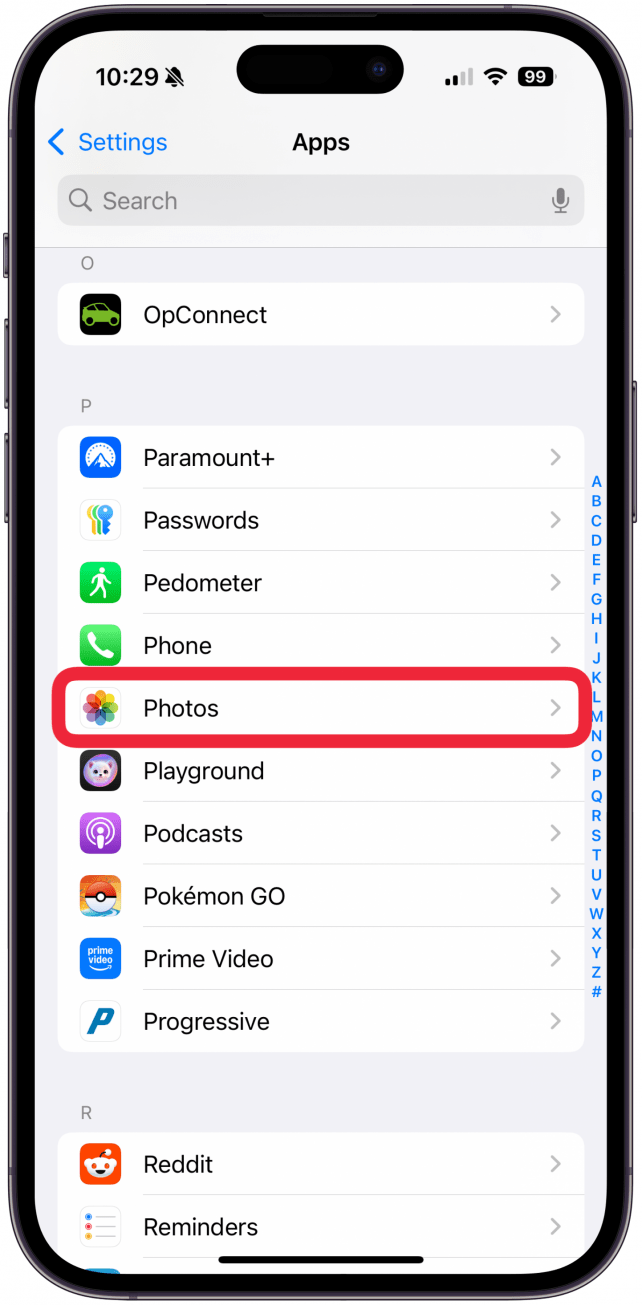
- Open Settings, scroll to the very bottom, then tap Apps.
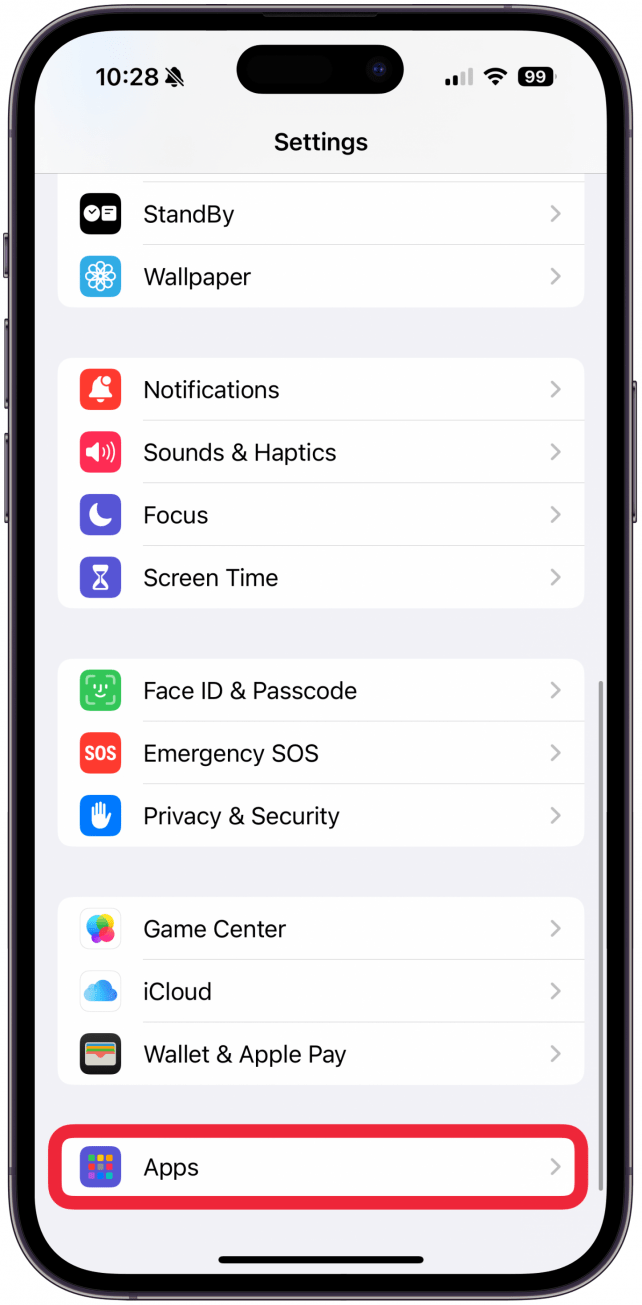
- Tap Photos.
- Tap Shared Library. You will see Set Up to the right of the text if it's not already set up.

- Tap Start Setup or Get Started.

- Tap Add Participants.
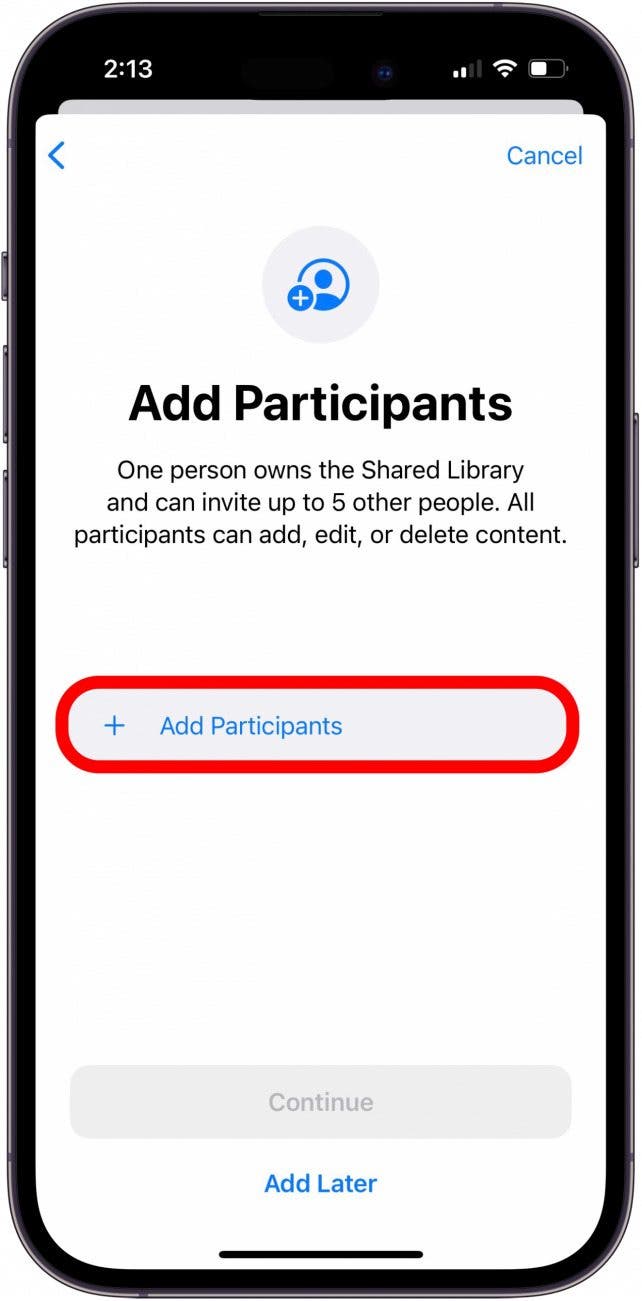
- Type in the name of the contact you want to add, then tap their name when it appears.

- Tap Add.

- Once you're done adding participants, tap Continue or Next.

- Choose how much of your existing Personal Library you want to share. You can choose All My Photos and Videos, Choose by People or Date (if you want to share all the photos from one day or of one person), or Choose Manually.

- Tap Continue.

- If you're choosing manually, choose the photo you want to share, then tap Add.

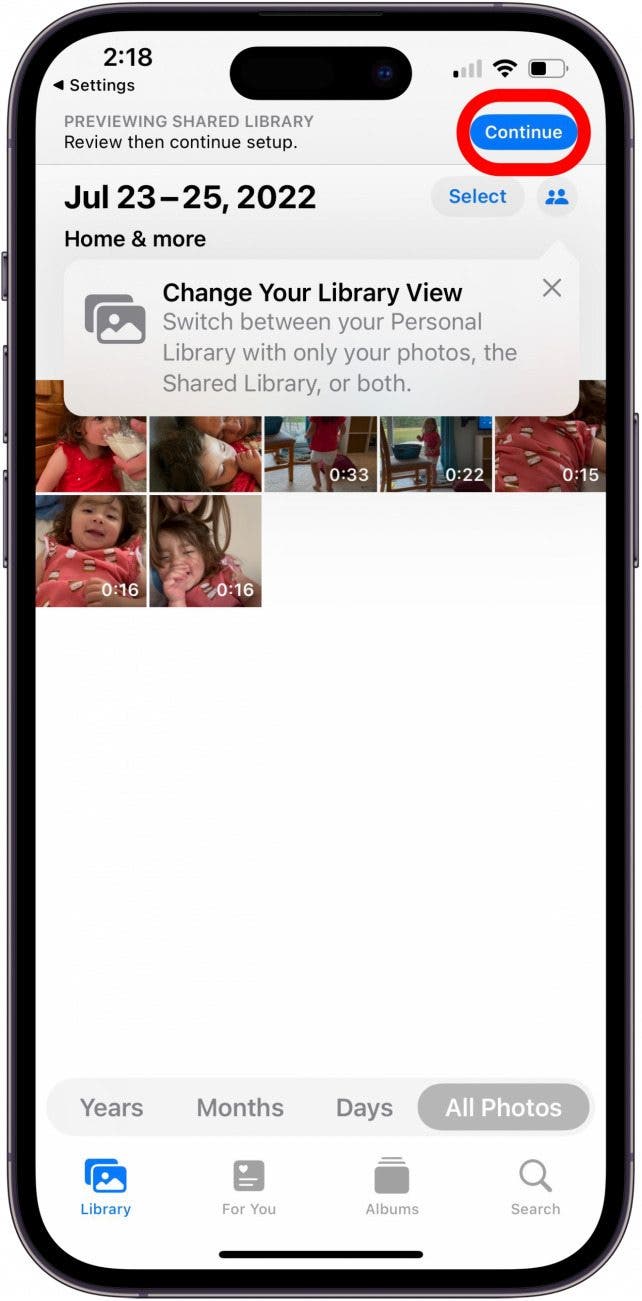
- Tap Preview Shared Library if you want to preview the library before sharing it. Otherwise, tap Skip and Continue.
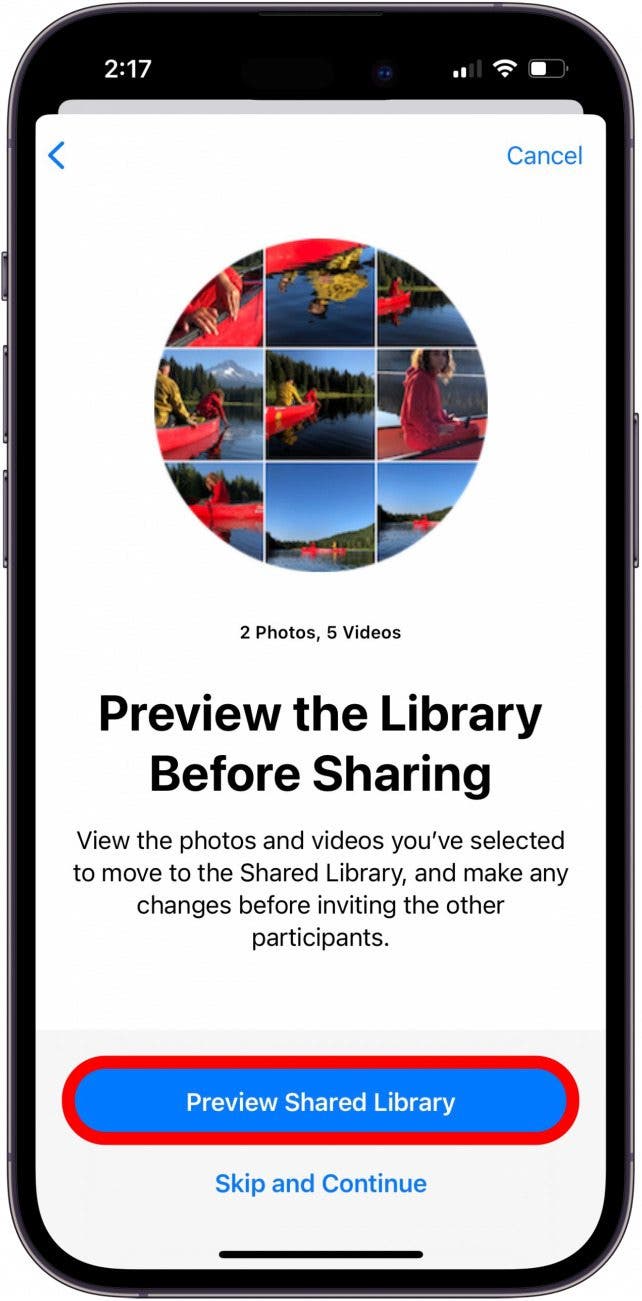
- If you previewed your library, review it, and then tap Continue.
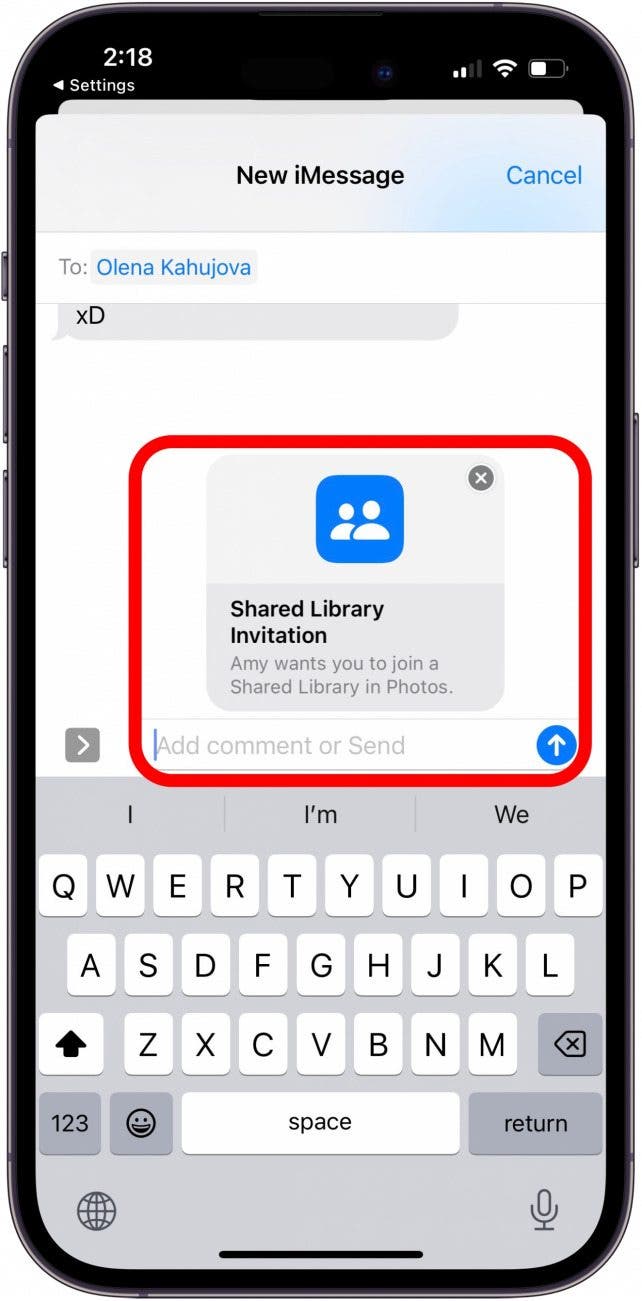
- Now, you will officially send invitations to your Shared Library. Select Invite via Messages or Share Link.

- Send the message or share the link in your desired format.
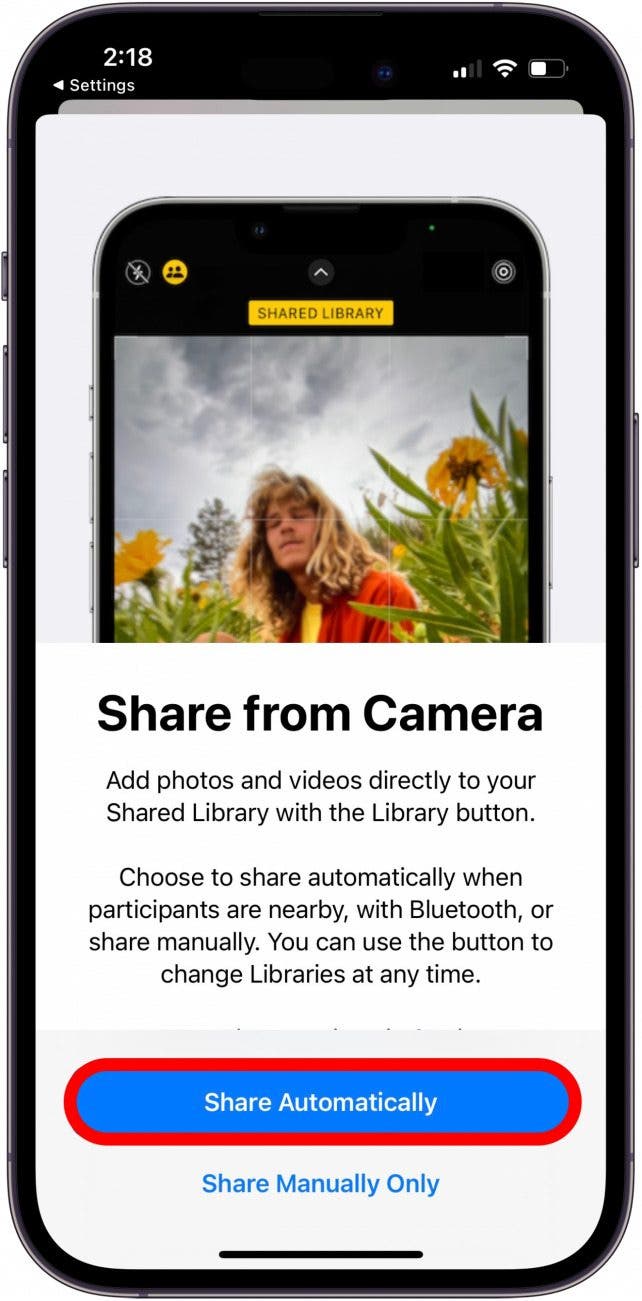
- Now, select whether you want to share photos in this library automatically via Bluetooth when the participants are nearby. Tap either Share Automatically or Share Manually Only.
- Tap Done.
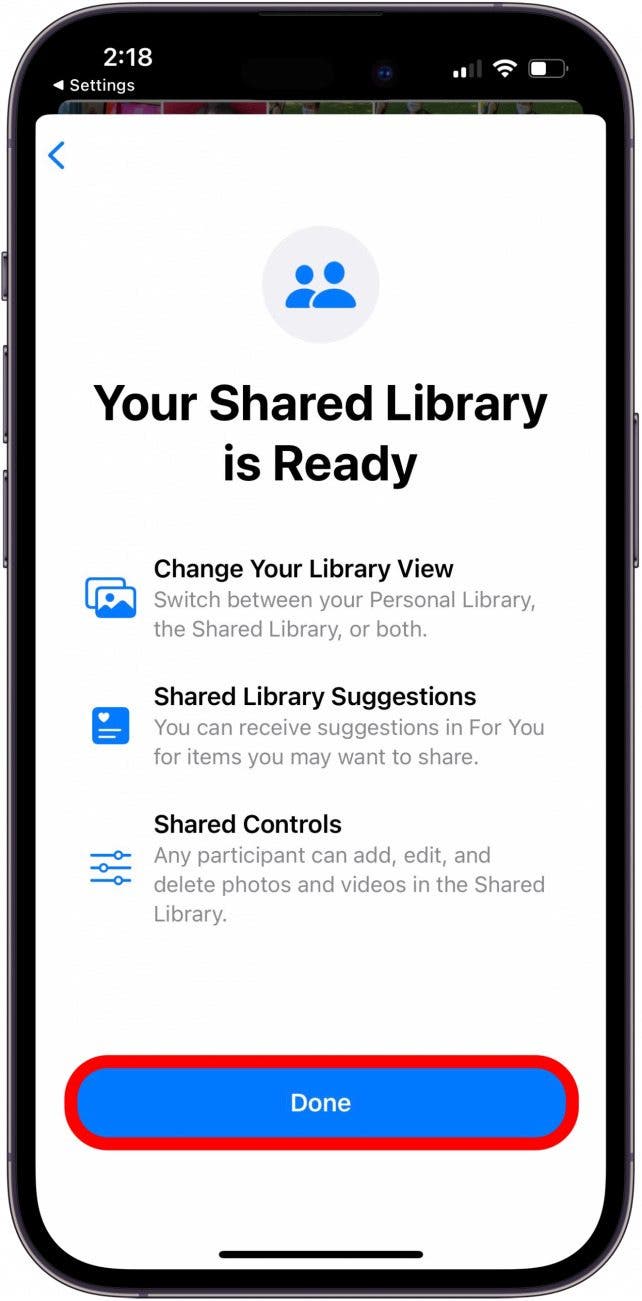
And there you have it, you are now sharing photos through iCloud! You can also add people to a Shared Photo Library after the fact. It's easy! Enjoy a new and more customizable way to share photos through iCloud.
More On: Photos App
Top image credit: DenPhotos / Shutterstock.com

Every day, we send useful tips with screenshots and step-by-step instructions to over 600,000 subscribers for free. You'll be surprised what your Apple devices can really do.

Amy Spitzfaden Both
Amy Spitzfaden-Both is the Managing Editor for iPhone Life magazine and an award-winning novelist, with over 10 years of experience in the publishing industry. She specializes in Apple news and rumors, health and fitness tech, and parenting in the digital age. She graduated from MIU with a BA in Literature and Writing.
Amy lives in New Hampshire with her husband and daughter. When she’s not writing or glued to her iPhone, she enjoys hiking, traveling, and creating her own tea blends.
 Leanne Hays
 Olena Kagui
 Rachel Needell


 Rhett Intriago