How to Add People to an iCloud Shared Photo Library
Learn how to add someone to an iCloud Shared Photo Library and also how to remove them.


With over 10 years of experience in publishing, Amy specializes in Apple news and rumors, health and fitness tech, and parenting in the digital age.
Learn More With over 10 years of experience in publishing, Amy specializes in Apple news and rumors, health and fitness tech, and parenting in the digital age.
Learn MoreiOS 16 is introducing a Shared Photo Library that lets you share a whole library with other iCloud users, provided they've all updated to iOS 16. Learn how to add people to the library so you can all share photos and videos, even as you take them, and how to remove people when you decide you no longer want them in your Shared Photo Library.
How to Add People to a Shared Photo Library
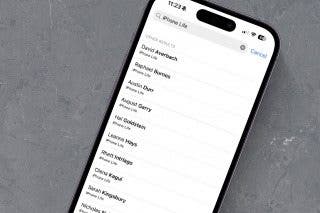
You can share you iCloud Shared Photo Library with up to five other people, as long as they've all updated to iOS 16. This feature is not currently available for Android users or anyone using iOS 15 or earlier. First, you'll want to set up your Shared Photo Library. While setting up your library, you'll have the option to add users, and you can follow the prompts to do that. But what about if you want to add someone once your library is already set up? Here's how to add someone to your iCloud Shared Photo Library. For more ways to get the most out of iOS 16, check out our free Tip of the Day.
- Open Settings.

- Tap Photos.

- Tap Shared Library.

- Tap Add Participants.

- Type in the name, phone number, or email address of the person you want to add.

- Tap Add.

- Send the invitation via iMessage or email.

- The new member will show up in your Participants list.

How to Remove Someone from an iCloud Shared Photo Library
We all make mistakes, and it might turn out we don't want to share our library with someone we've added. Or, since you can only be part of one Shared Library, someone might request to be removed from yours so they can join another. Here's how to remove people from an iCloud Shared Library.
- Open Settings.
- Tap Photos.
- Tap Shared Library.
- Tap on the name of the person you want to remove.

- Tap Remove [NAME] from Shared Library.

- To confirm, tap Remove [NAME].

After that, they will no longer be listed as a participant. However, if you regret your action you can always add them again! Assuming they'll take you back...

Amy Spitzfaden Both
Amy Spitzfaden-Both is the Managing Editor for iPhone Life magazine and an award-winning novelist, with over 10 years of experience in the publishing industry. She specializes in Apple news and rumors, health and fitness tech, and parenting in the digital age. She graduated from MIU with a BA in Literature and Writing.
Amy lives in New Hampshire with her husband and daughter. When she’s not writing or glued to her iPhone, she enjoys hiking, traveling, and creating her own tea blends.
 Leanne Hays
 Olena Kagui
 Amy Spitzfaden Both
 Rhett Intriago

 Cullen Thomas


 Rachel Needell