Photographic Styles: How to Use iPhone Camera Filters

What to Know
- Photographic Styles are filters that you can apply to your photos before you take them.
- You can change Photographic Styles from the camera app.
- Photographic Styles can also be adjusted under the Camera menu in the Settings app.
iPhone camera tricks are some of the best parts of being an iPhone owner, which is why I love Photographic Styles. Photographic Styles lets you preset five camera settings and choose between them to create consistency in your photographs and save you some editing later. How do these styles work and how customizable are they? Let's take a look at this fancy feature and learn how to set the best iPhone camera settings.
Photographic Styles: Save Your Best iPhone Camera Settings
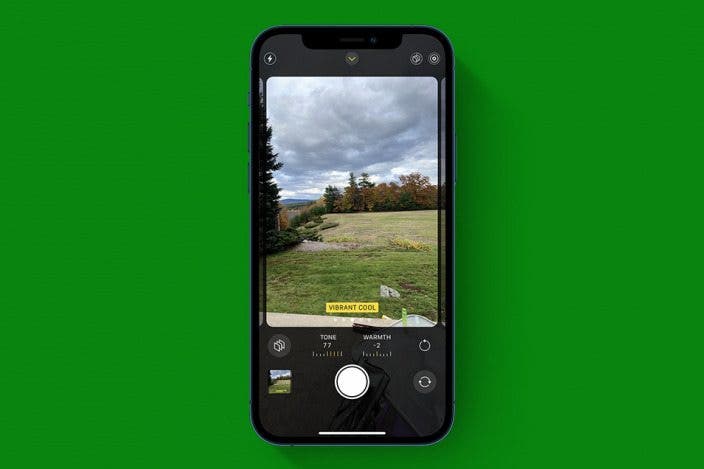
What are Photographic Styles? Photographic Styles is a feature that was first introduced with the iPhone 13 that lets you set five different styles of iPhone camera filters. What this means is, you can choose five versions of tone and warmth, normally things you might fiddle with in editing. This is excellent for those looking for consistency in their work—like if you have an Instagram aesthetic you want to keep—and for those looking to cut down on editing time after.
How to Use Photographic Styles on the iPhone
So how do you use these preset Photographic Styles? It's easy! For more iPhone camera tips, such as the solution to why your iPhone camera is shaking, check out our Tip of the Day. Now, let's learn how to change camera settings on iPhone with Photographic Styles.
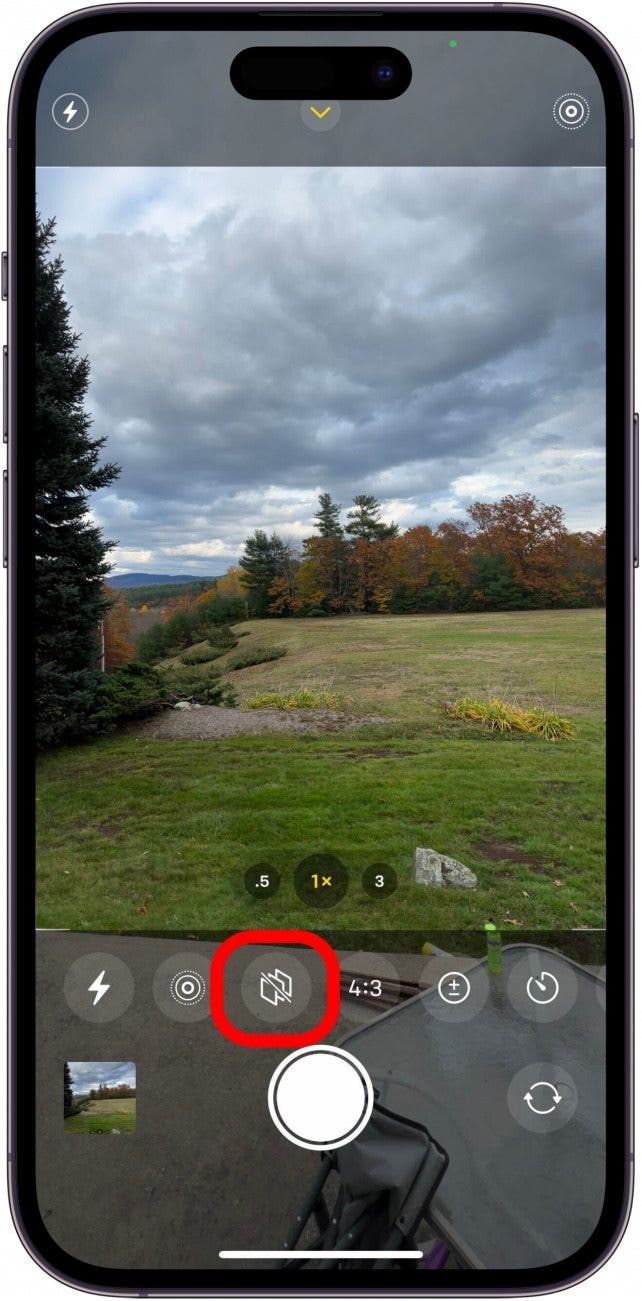
- Open your camera app and make sure you are in Photo mode.
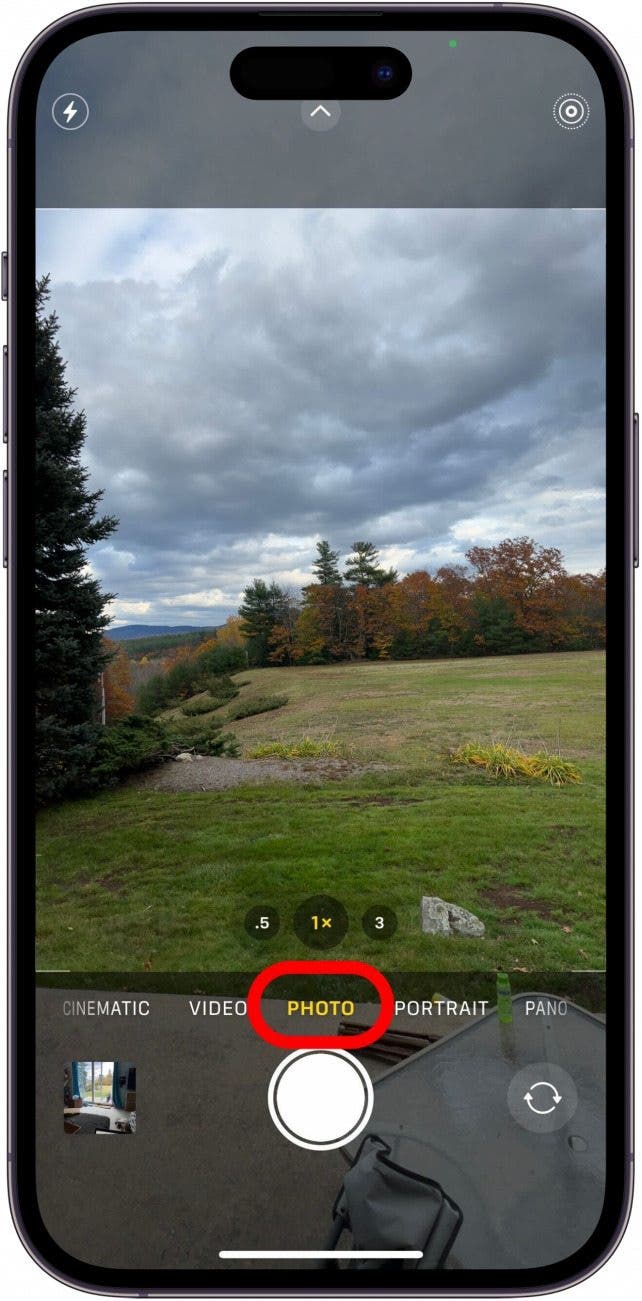
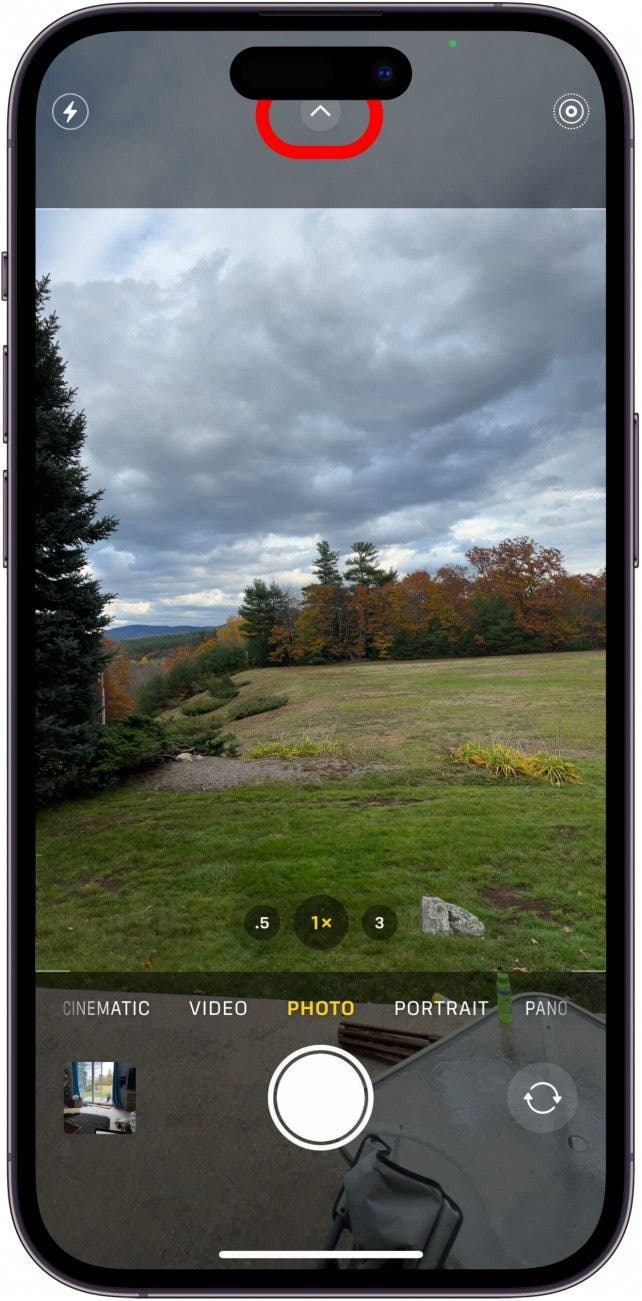
- Tap the arrow at the top of your to open the Camera app menu.
- Tap the Photographic Styles icon, which looks like three squares lined up at angle.
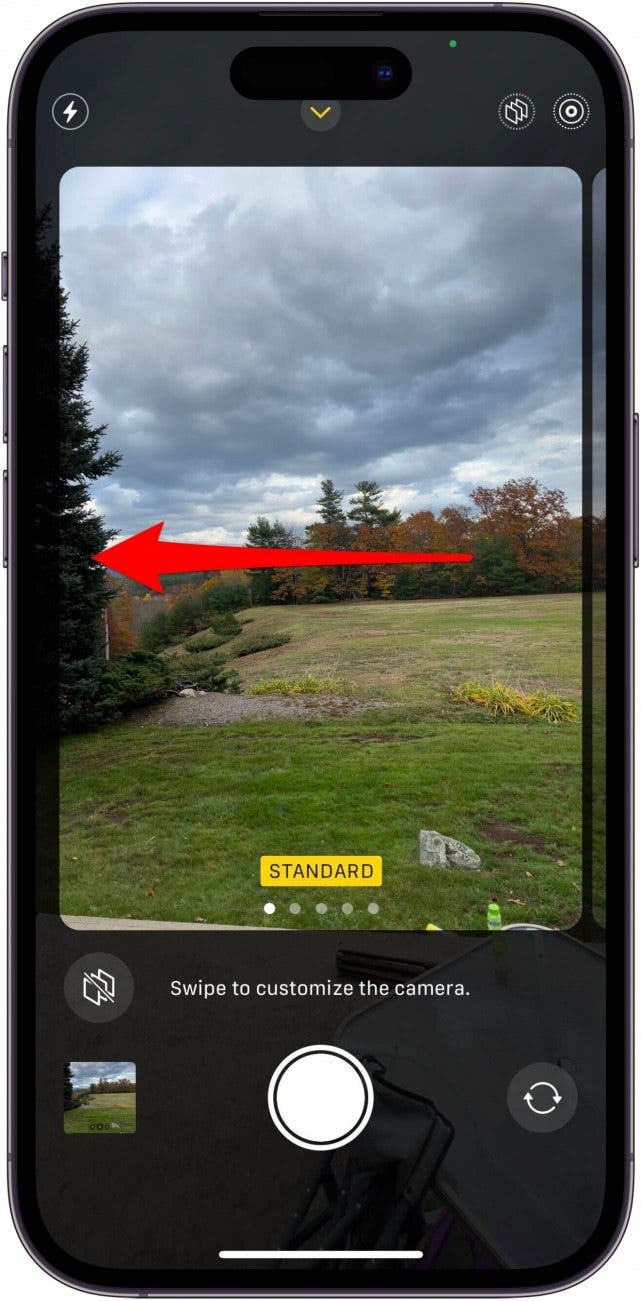
- Swipe to see the different presets.
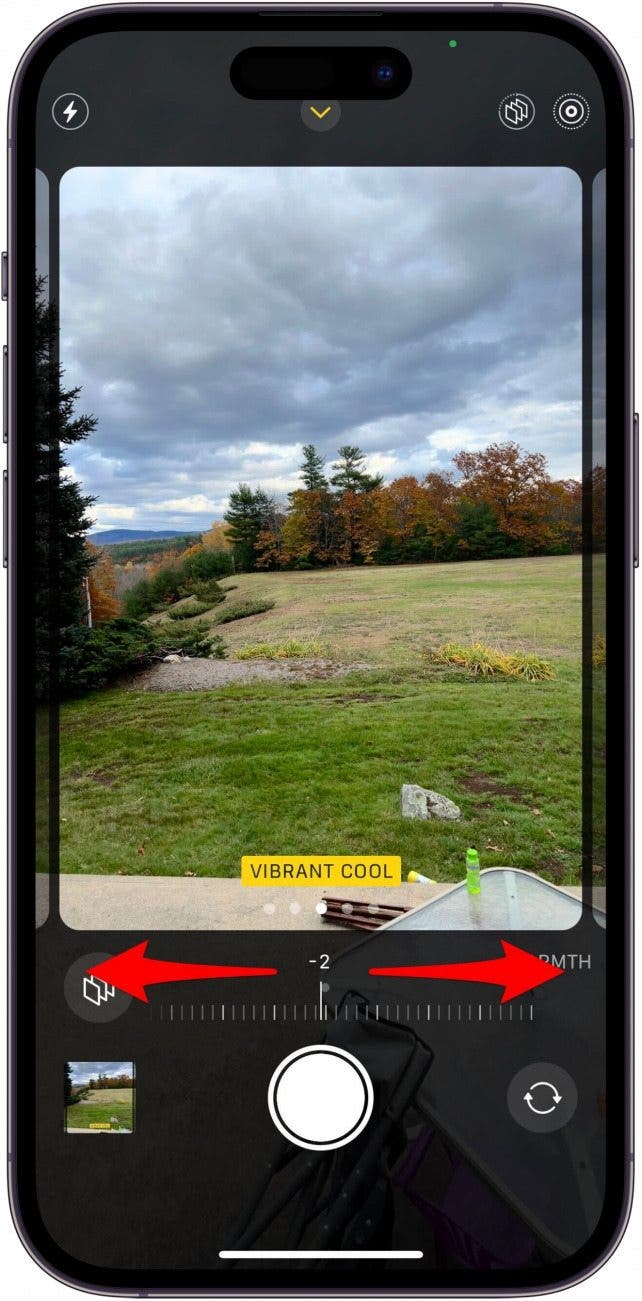
- To adjust one of the settings, tap either Tone or Warmth, and adjust the slider to your preference.
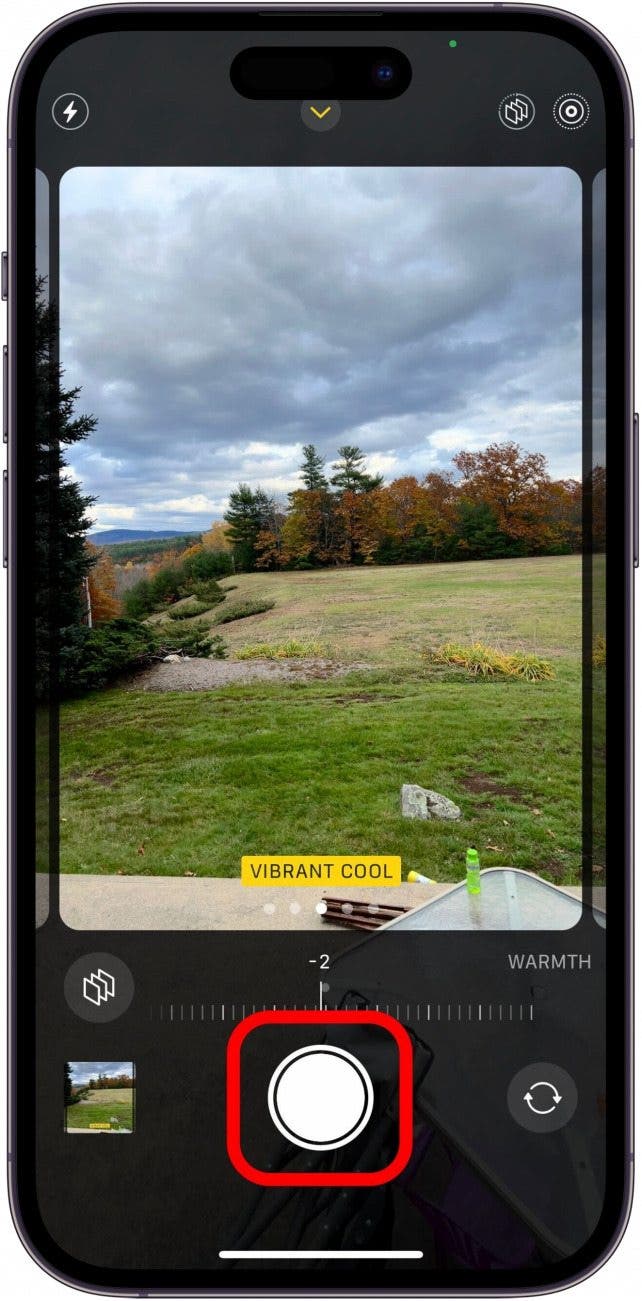
- Tap the shutter button to take a picture now, or tap the Photographic Styles button at the top of your screen to close the menu.
Pro Tip:
You can also adjust Photographic Styles by going into the Settings app, selecting Camera, and then tapping Photographic Styles.
That's how to take professional photos with iPhone by using Photographic Styles. If you have a preset enabled, you'll see the Photographic Styles icon at the top right of the screen. This means the photo you're taking has the balance you set for that style. You can turn it off by tapping the icon and swiping back to Standard. If you are experimenting with Photographic Styles on your iPhone and getting blurry photos, our article on how to fix iPhone camera quality should help.
The Photographic Style names will change based on what you set, with Tone options either Rich or Vibrant and Warmth offering Cool or Warm, so you might end up with Rich Cool, Vibrant Warm, or any other combination. If you have either setting at zero (the spot at the exact center) the name won't show up, so you'll just have one word: Rich, Vibrant, Cool, or Warm. If both are at center, you're in standard mode. Next, find out why Portrait Mode is zoomed in on iPhone 13 Pro and Pro Max, and newer devices.
FAQ
- How do I take high quality photos with my iPhone? Taking high quality photos on the iPhone can be a bit tricky. Our guide on how to take beautiful photos with your iPhone should help improve your iPhone photography skills.
- How do I preserve Camera settings? If you want your camera settings to stay consistent each time you open the app to snap a photo, you can preserve camera settings. When you preserve settings on your iPhone camera, it means those settings will stay the same every time you close and re-open the app.
- How do you switch camera modes? You can easily switch camera modes by swiping left and right on your screen in the Camera app. Check out our article on how to switch between cameras on iPhone for more detailed information.
- Which iPhone has the best camera? If you want the best camera, purchasing the latest iPhone is likely a safe bet. Each generation of iPhone improves on the camera from the previous generation. Our article on which iPhone model has the best camera can help you decide for yourself which iPhone you should get.

Amy Spitzfaden Both
Amy Spitzfaden-Both is the Managing Editor for iPhone Life magazine and an award-winning novelist, with over 10 years of experience in the publishing industry. She specializes in Apple news and rumors, health and fitness tech, and parenting in the digital age. She graduated from MIU with a BA in Literature and Writing.
Amy lives in New Hampshire with her husband and daughter. When she’s not writing or glued to her iPhone, she enjoys hiking, traveling, and creating her own tea blends.
 Leanne Hays
 Rhett Intriago
 Olena Kagui
 Rachel Needell

 Susan Misuraca

 Amy Spitzfaden Both

 David Averbach