How to Crop Photos on Mac (Easiest Way!)
Quickly crop an image or PDF on your Mac using the built-in Preview app.

As an online tech educator, Jivan is passionate about making complex topics approachable through clear, engaging instruction, with a focus on practical skills and emerging AI education.
Learn More As an online tech educator, Jivan is passionate about making complex topics approachable through clear, engaging instruction, with a focus on practical skills and emerging AI education.
Learn MoreIf you're searching for a picture cropping tool, look no further than the Preview app on your Mac! It’s free, it’s built into every Mac computer, and it has a lot of basic editing tools you may not be aware of. We’ll show you how to crop photos on Mac using the native Preview app.
Related: How to Crop a Picture on iPhone & iPad
Why You’ll Love This Tip:
- Utilize Apple’s native editing tool, with no need for third-party apps.
- Easily crop a rectangle, oval, or your own custom shape.
How to Crop an Image on Mac Using Preview
Most likely you have already used the Preview app countless times, maybe even without realizing it. It is the default program for viewing images and PDF files on Macs. However, many users miss the cropping tool because it is not initially visible when you first open Preview. For more tips on Mac editing tools, consider signing up for our free Tip of the Day newsletter. Now, let's cover how to crop photos on Mac using the Preview app.
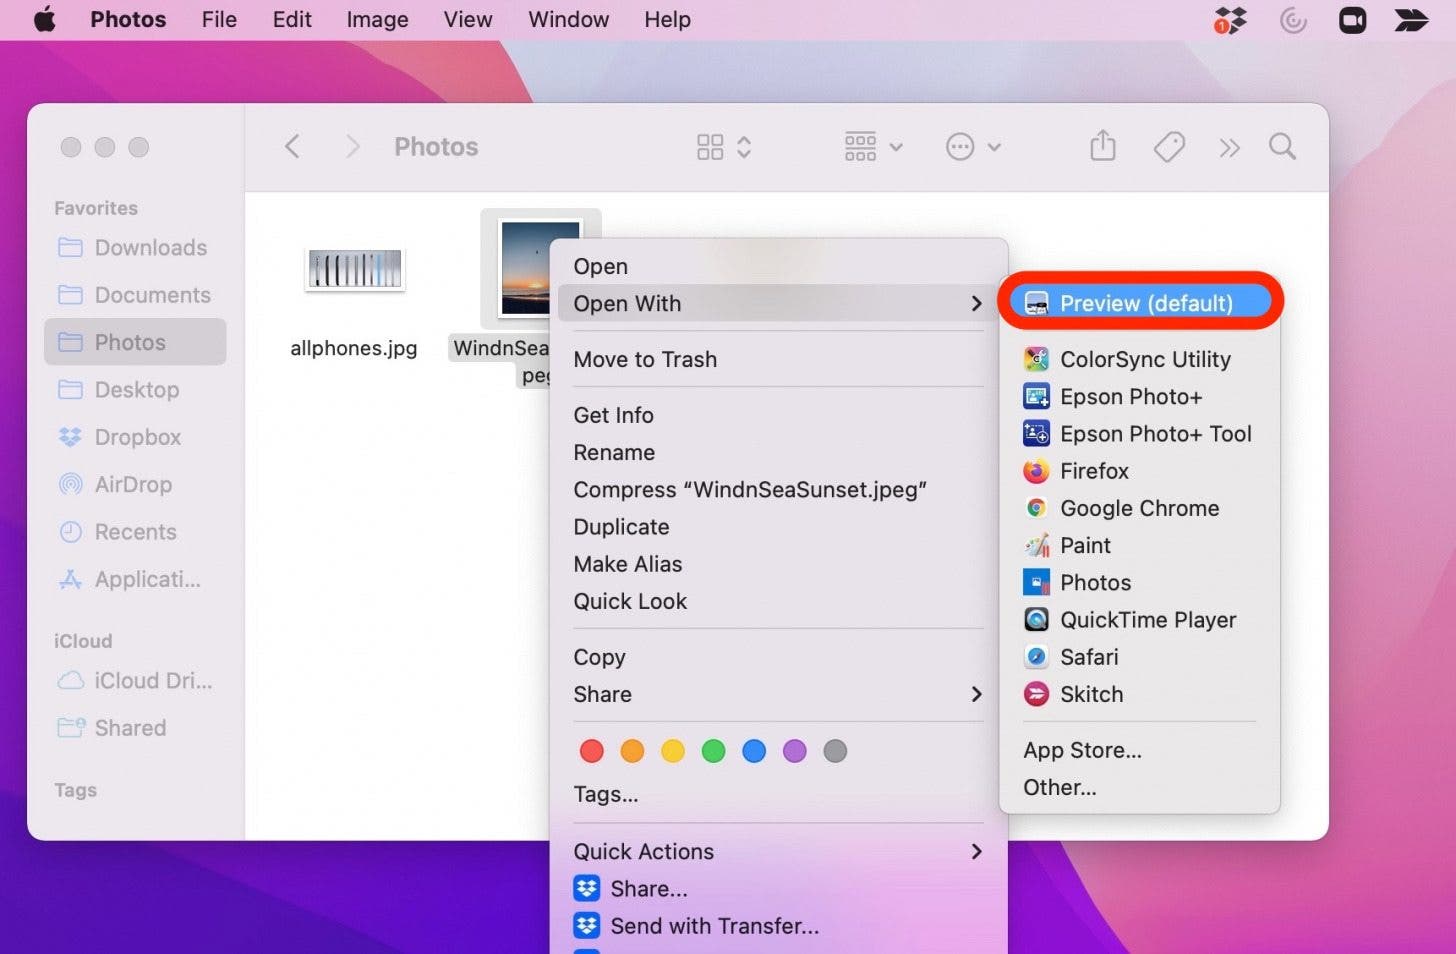
- Double-click to open the image you would like to crop. This will automatically launch Preview.

- If you have another software set as your default editor, you can also right-click on the image, select Open With and then click Preview.
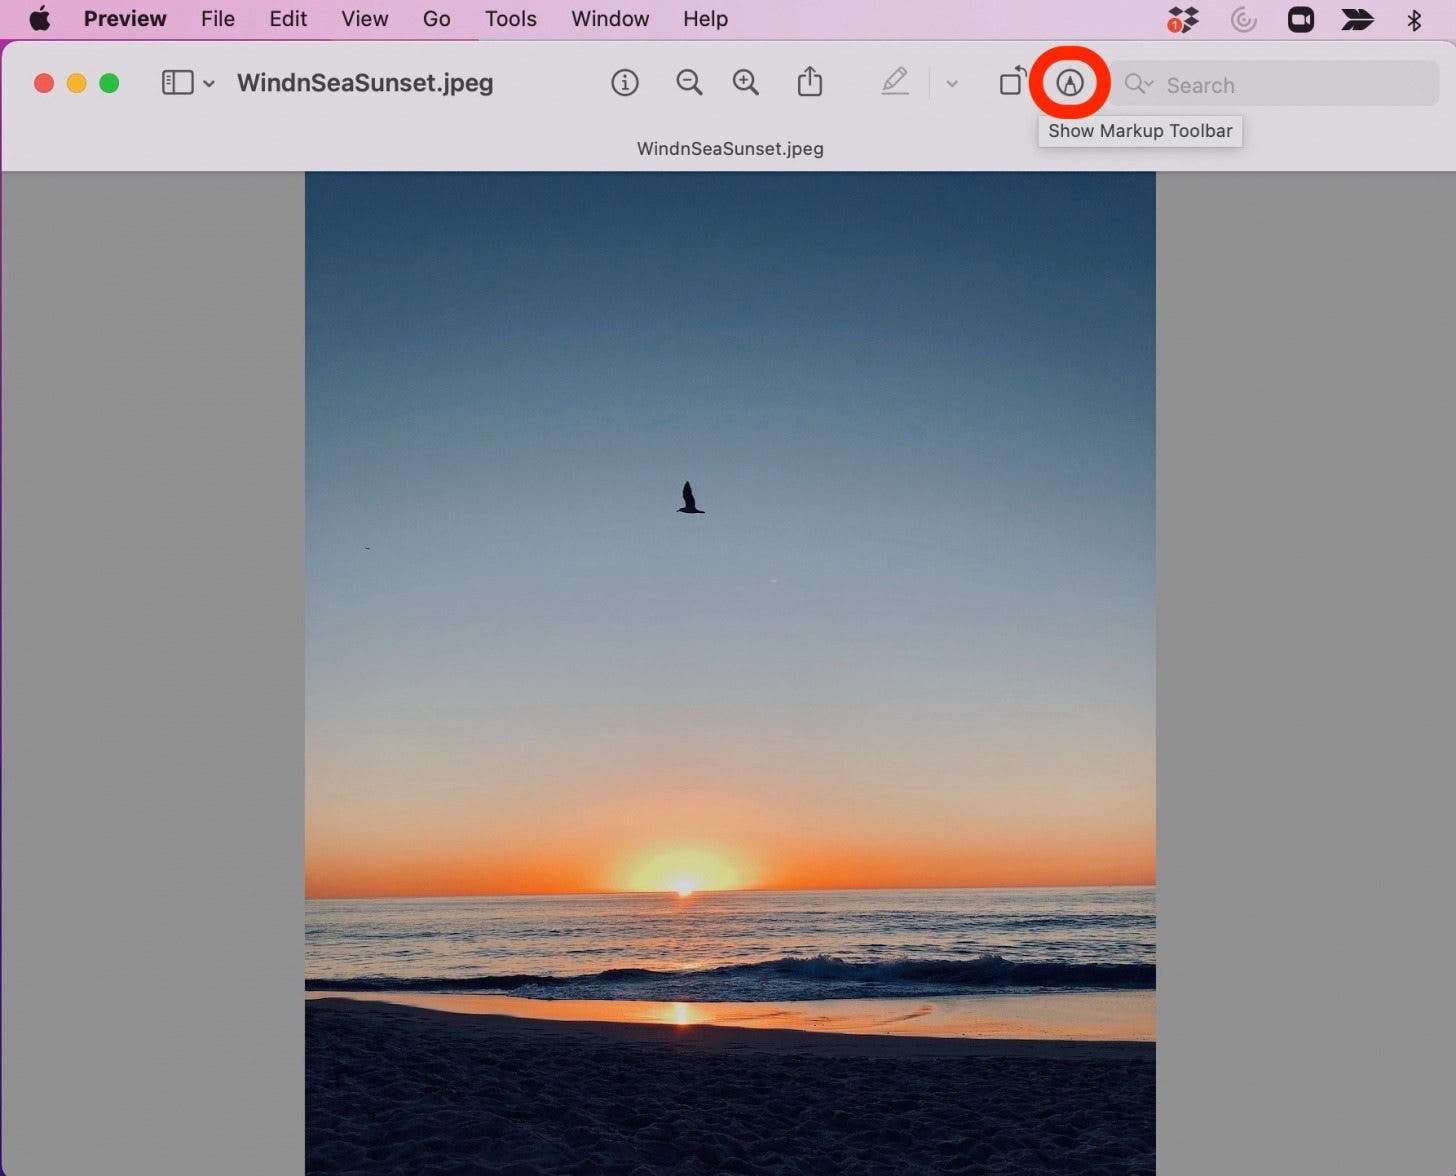
- Click the Show Markup Toolbar icon to reveal your editing tools.
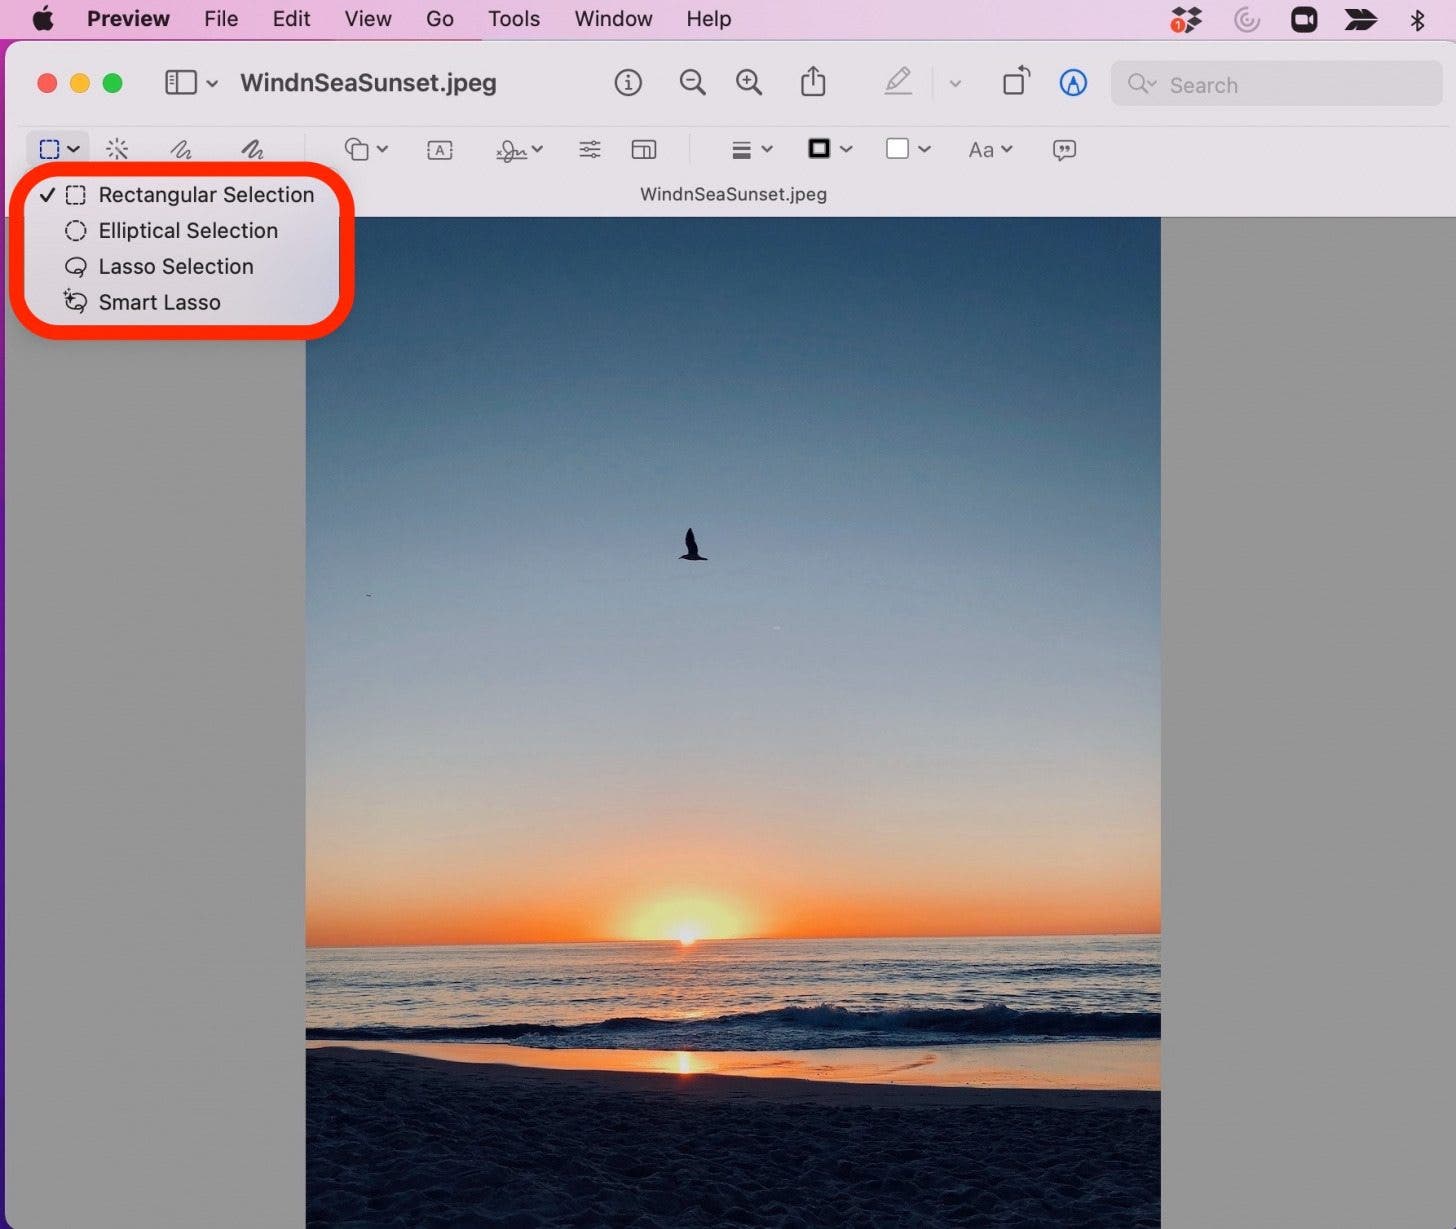
- Click the Selection Tool icon to choose what shape your cropped image or PDF will be.
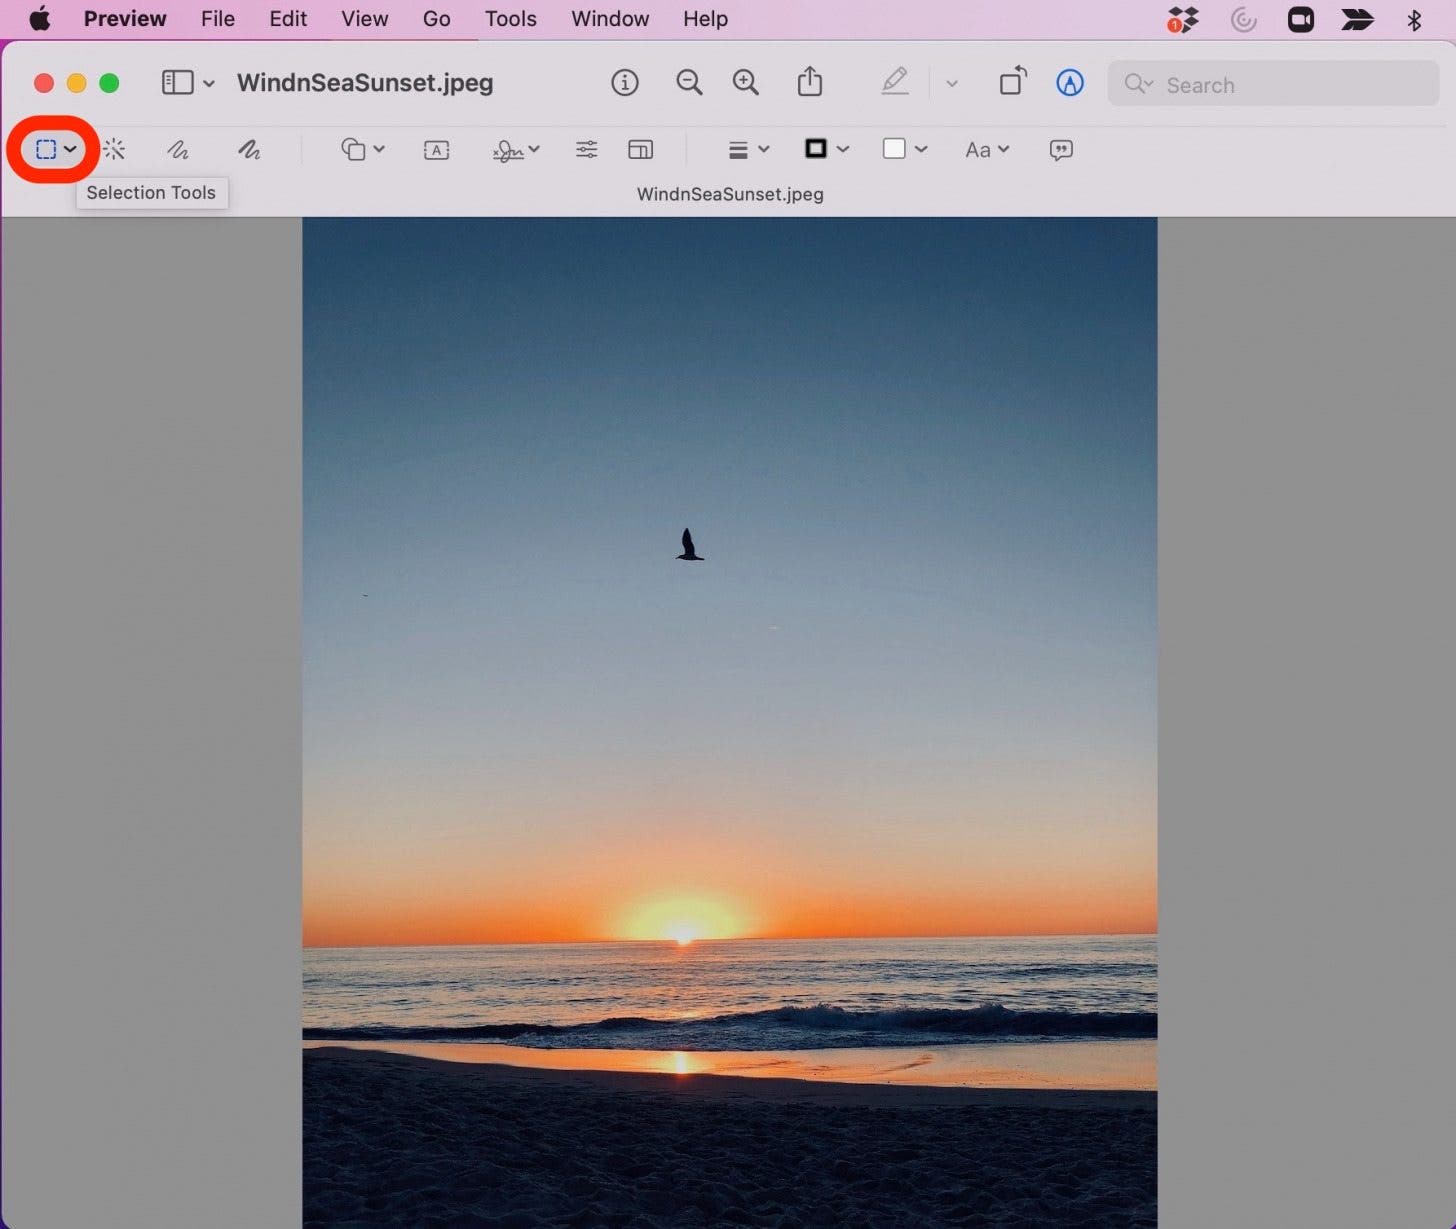
- You can choose Rectangle, Elliptical, or Lasso (the Lasso and Smart Lasso options allow you to freehand any shape you want).
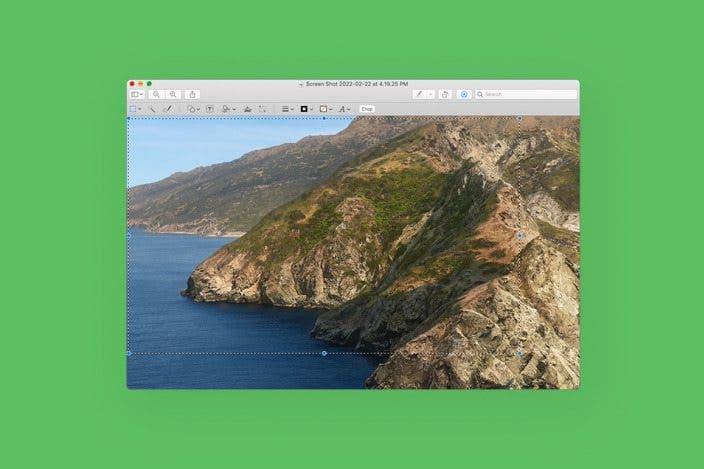
- Click and drag the mouse over the area of the image you would like to keep. Eight expandable blue dots will appear over your selected area, and everything on the outside of the border will be cropped out.
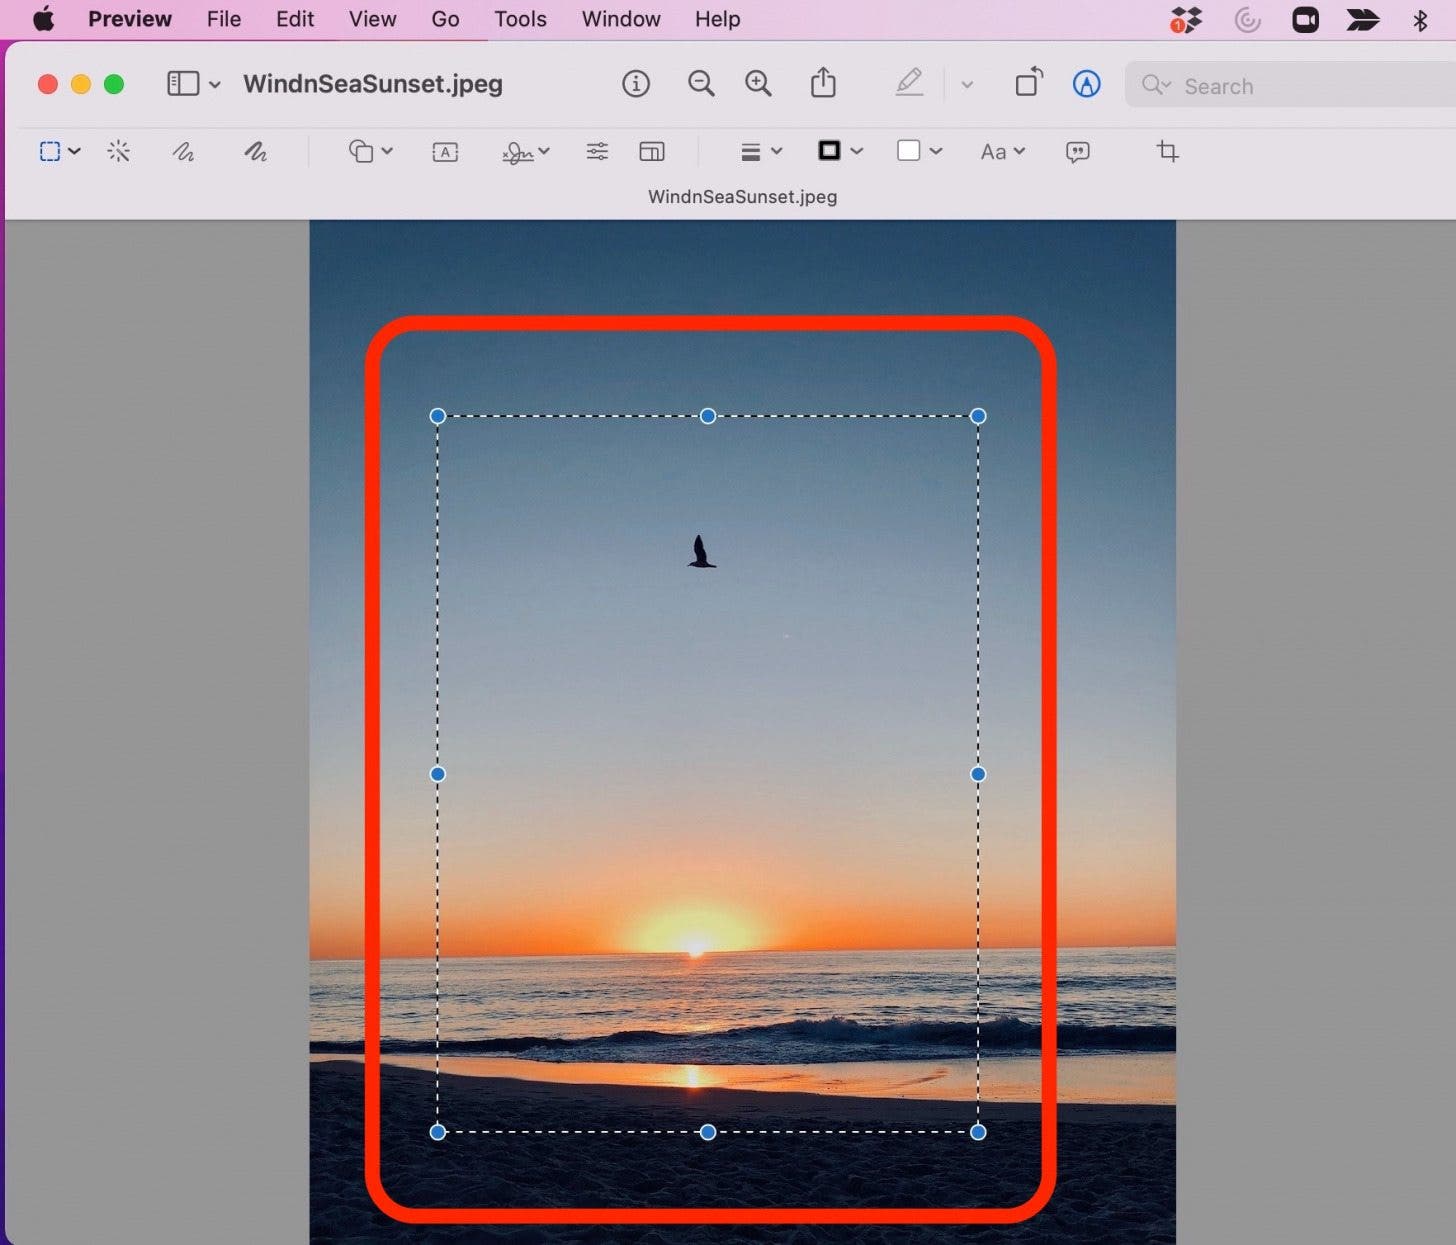
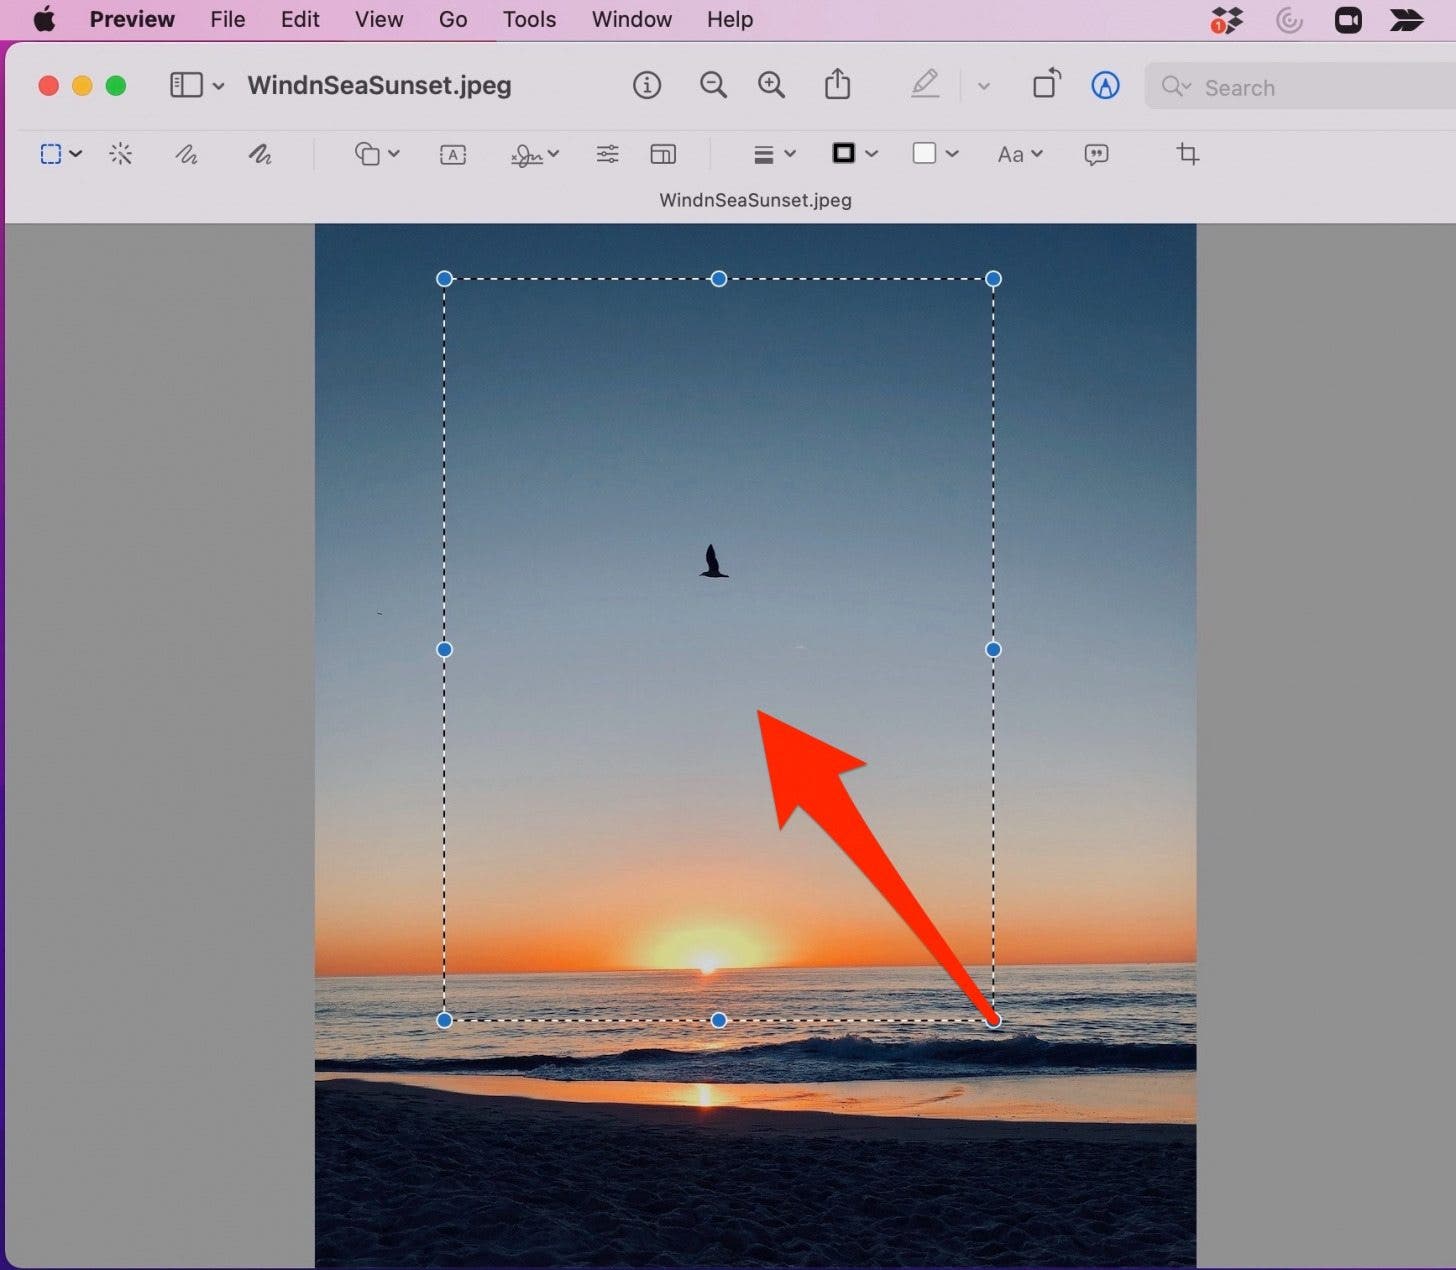
- If needed, you can continue to adjust the selected area to be cropped by clicking and dragging one of the blue dots.
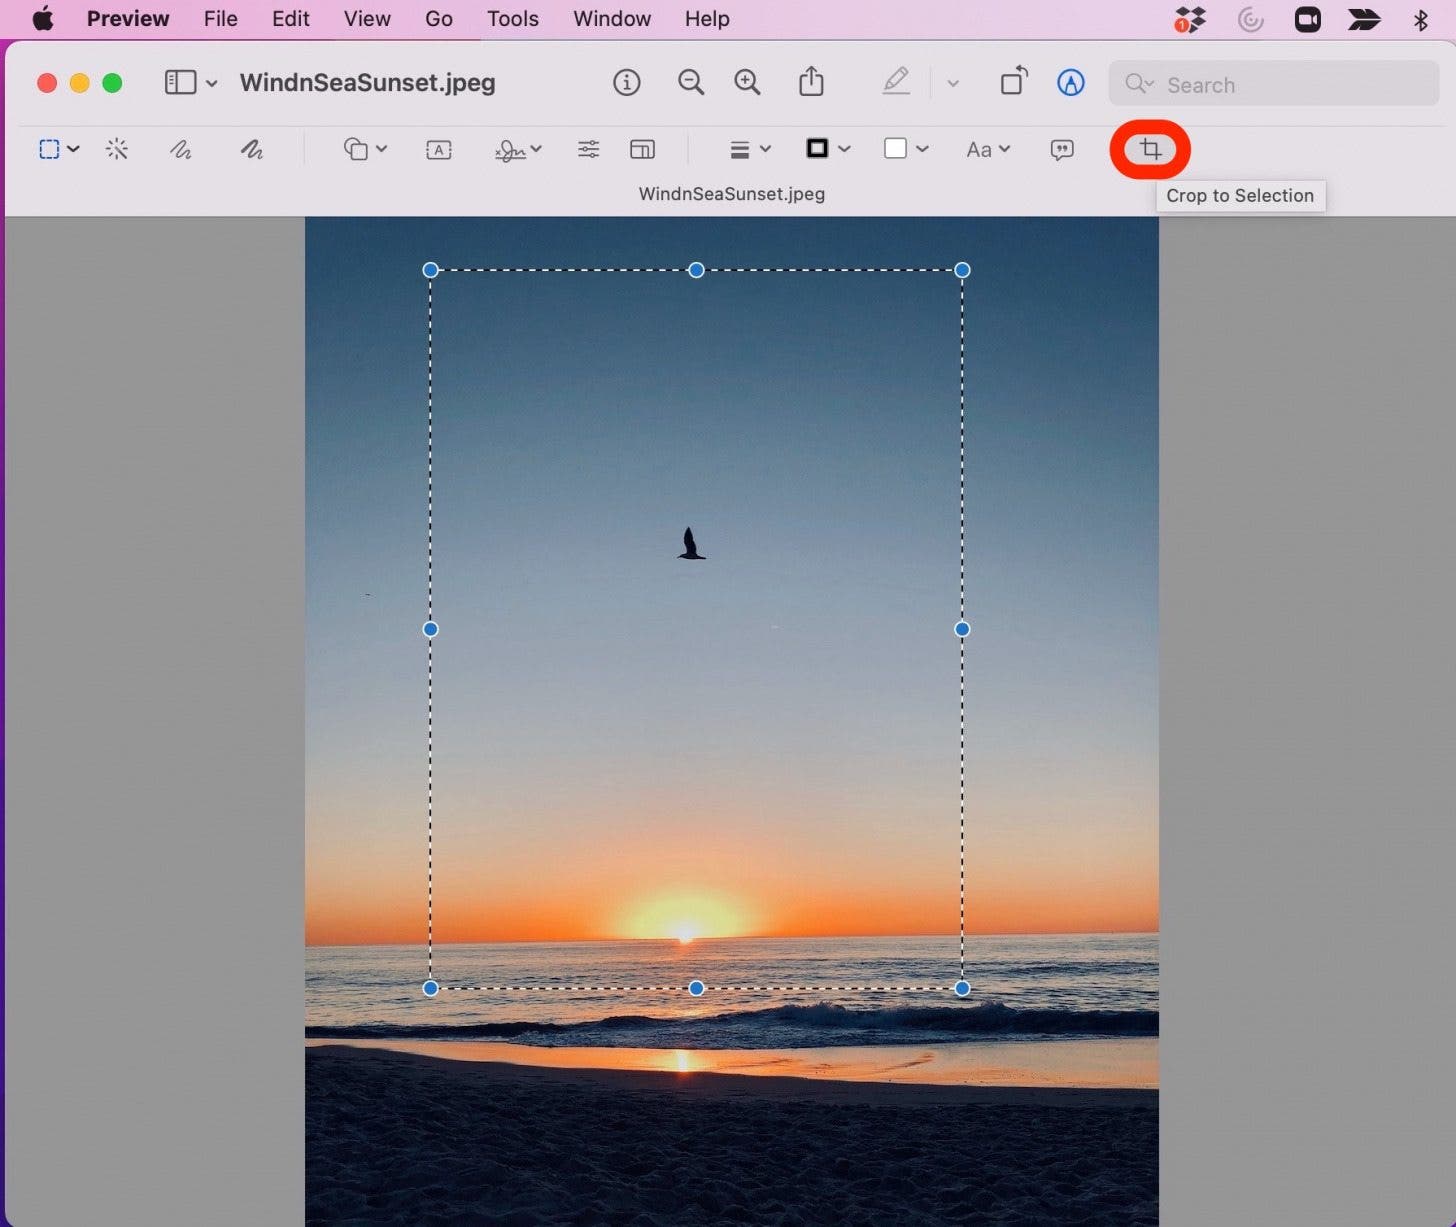
- Once you have set your crop border, click the Crop icon. You can also press Command+K on your keyboard to complete the crop.
- If you don't like your cropped photo, simply click on Edit and select Undo Crop to start over.

The picture cropping tool is just one of the useful features in Preview. You can also resize, add text, rotate, adjust colors, remove the background, sign a document, or even extract part of an image and paste it on top of another image using Smart Lasso. There's a lot to explore! For basic photo editing, it’s all you may ever need.

Every day, we send useful tips with screenshots and step-by-step instructions to over 600,000 subscribers for free. You'll be surprised what your Apple devices can really do.

Jivan Hall
Based in sunny San Diego, California, Jivan spends as much time as possible outdoors, with his two young sons, playing sports, chasing waves, and continuing the never-ending quest for the perfect fish taco.
Related Articles

 Ravi Both
 Olena Kagui
 Amy Spitzfaden Both

 Rachel Needell
 Leanne Hays
WWDC 2023 Recap: Apple Vision Pro Headset, 15-Inch MacBook Air & iOS 17
 Susan Misuraca

 Rhett Intriago
Review: Sleep in Complete Silence with QuietOn 3.1 Earbuds