How to Apply Styles to Your Photo Lock Screen
Learn how to give your Lock Screen photo some pop by applying different styles and effects.

Kenya Smith is a Feature Web Writer for iPhone Life with a background in journalism and strategic communication, including award-winning column writing and newspaper experience.
Learn More Kenya Smith is a Feature Web Writer for iPhone Life with a background in journalism and strategic communication, including award-winning column writing and newspaper experience.
Learn MoreLike a lot of people, you probably have used your favorite photo as a Lock Screen before. Well, iOS 16 has made creating a photo Lock Screen even more fun. You can now add different styles and effects to your favorite photos to make your photo Lock Screen stand out. Let's find out how to add these styles to your photo Lock Screen.
Related Article: How to Blur a Picture or Part of a Picture on iPhone (2022)
How to Apply Styles to a Photo Lock Screen
Before completing these steps, make sure you have read our article on how to create photo Lock Screens. Applying styles to a photo Lock Screen will allow you to add cool effects to your photo. For example, the multi-layered photo effect Lock Screen can be compared to the Portraits Apple Watch face you may be familiar with if you have an Apple Watch. This is because both devices let you pick a portrait mode photo that can be layered with the time in front of or behind the subject of the photo.
Keep in mind that you can only try the following steps with iOS 16, which will be available after the September 7 iPhone announcement. Otherwise, you can download the free public beta on your iPhone.
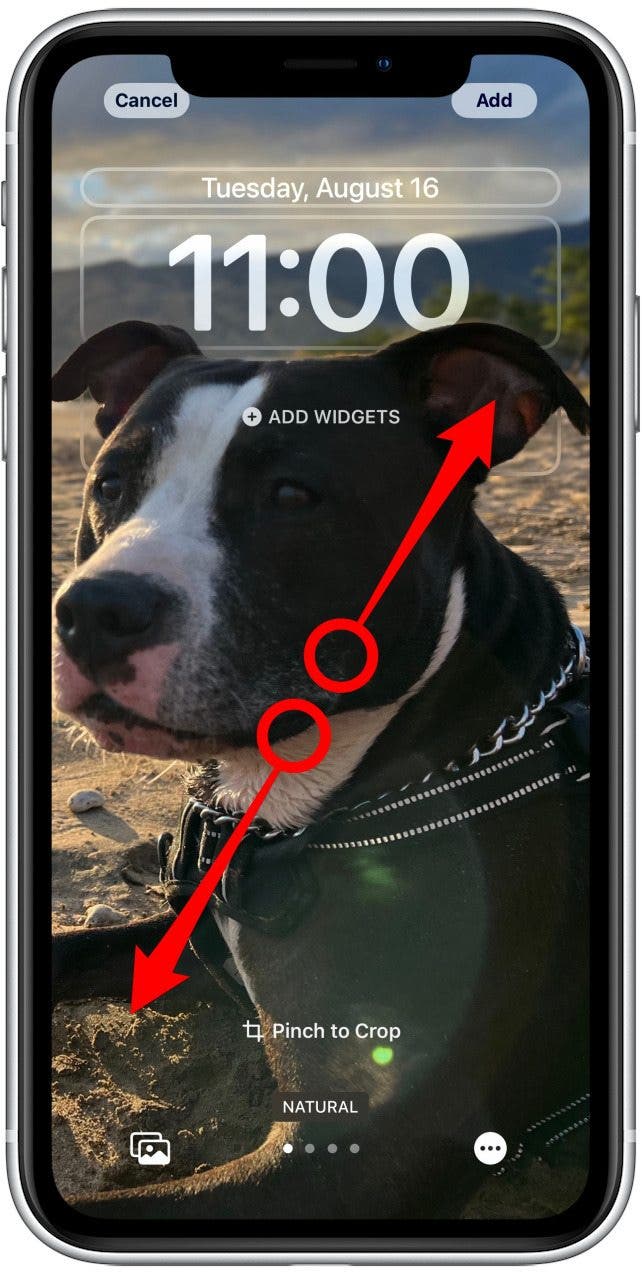
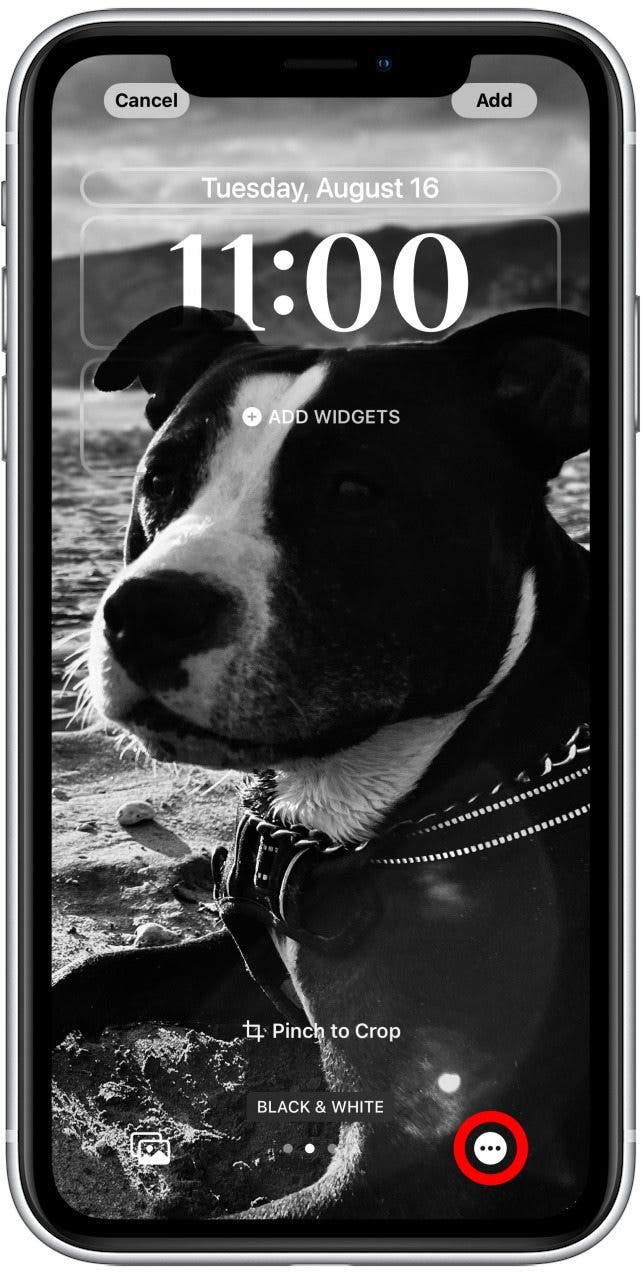
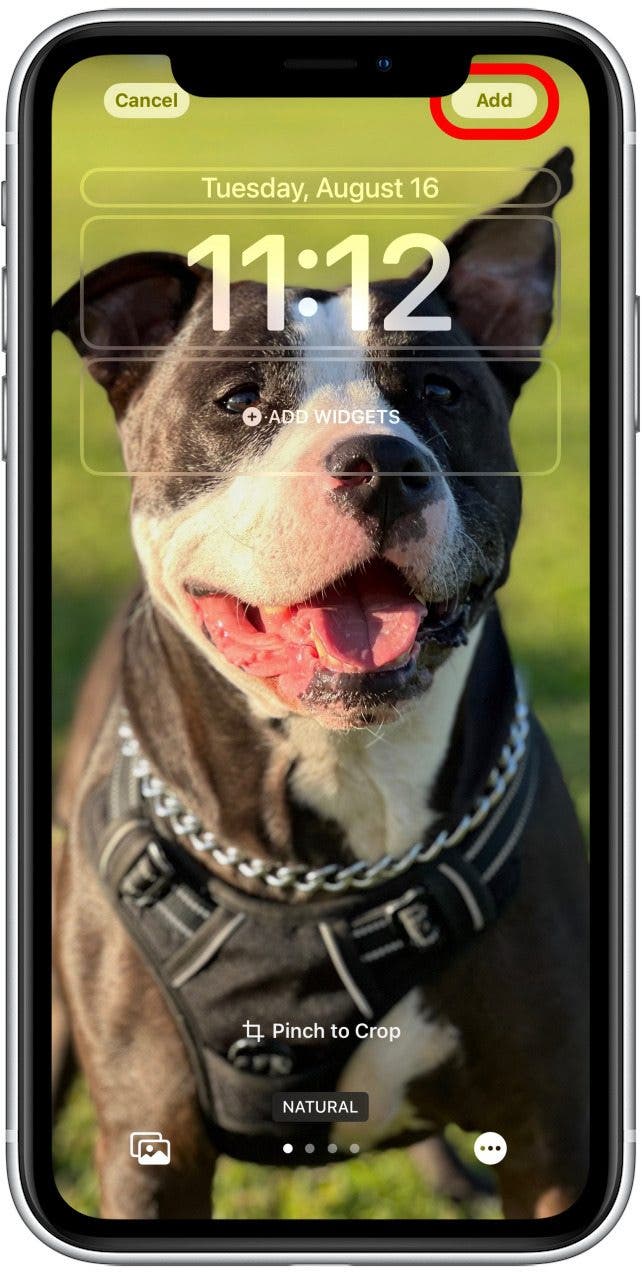
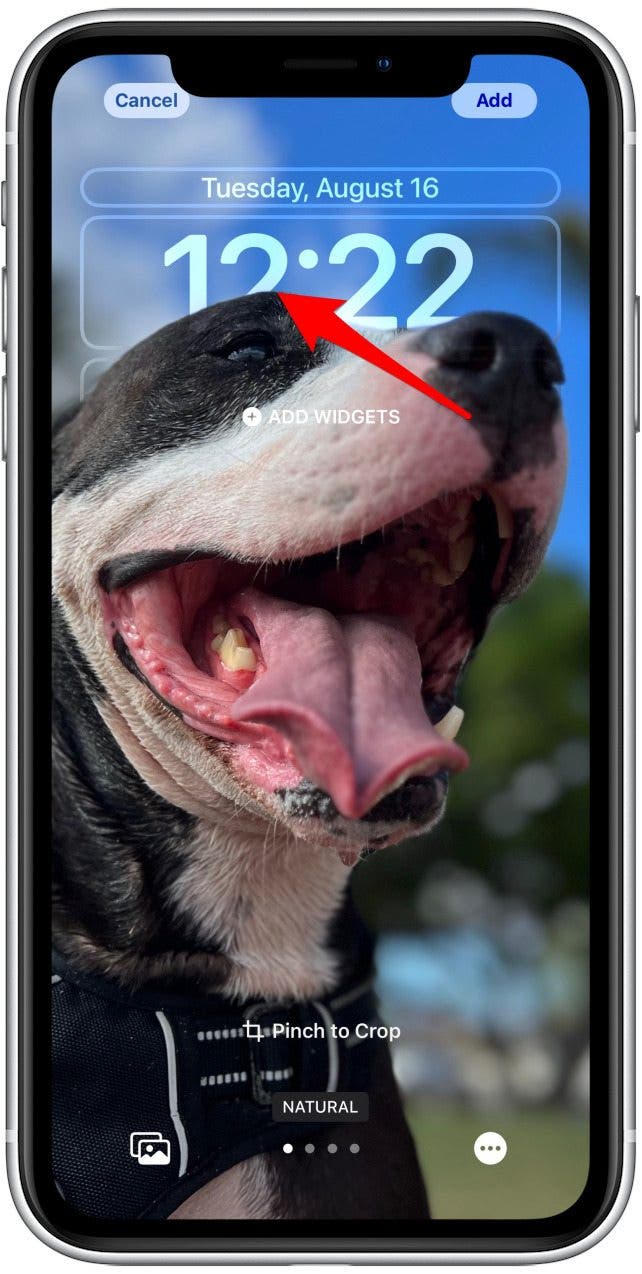
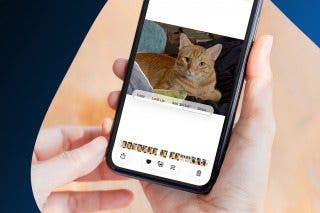
- The first thing you should do with Photo Lock Screens is pinch your fingers to crop the photo. This works the same as zooming in and out. You can also use two fingers to drag the photo into the desired position. Depending on your photo, you may be able to use Depth Effect, which makes part of the photo’s subject partially cover the time. Please refer to the troubleshooting section below if you experience any issues.
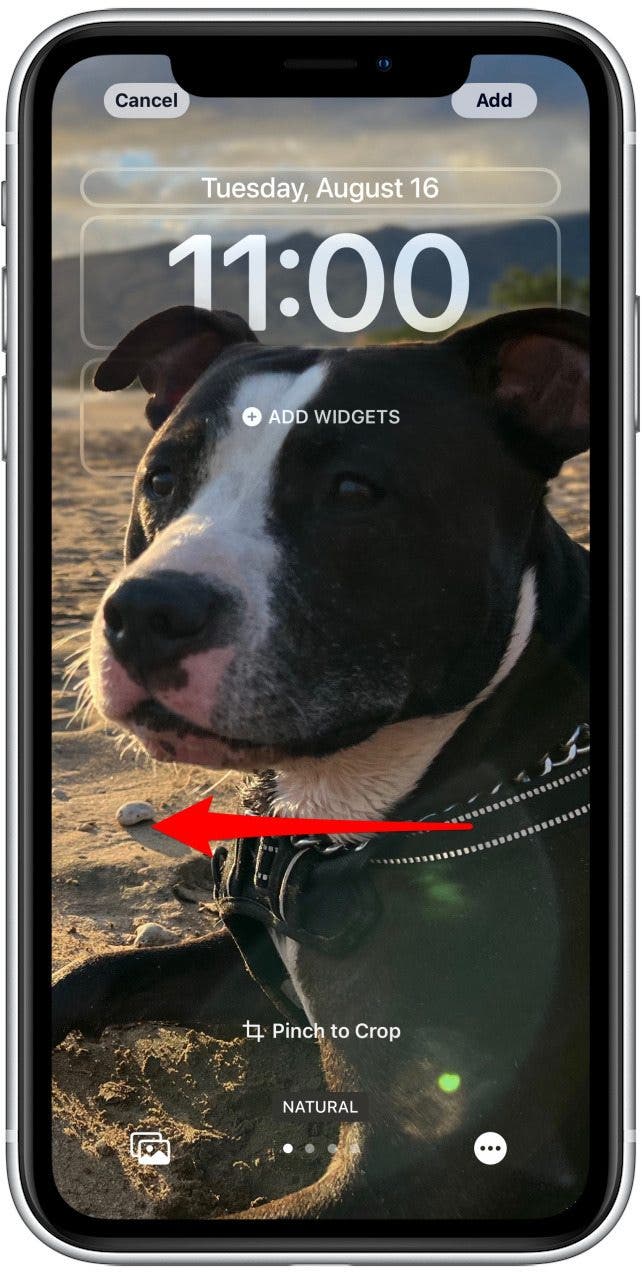
- The default is Natural, swipe left to see your photo in Black & White.
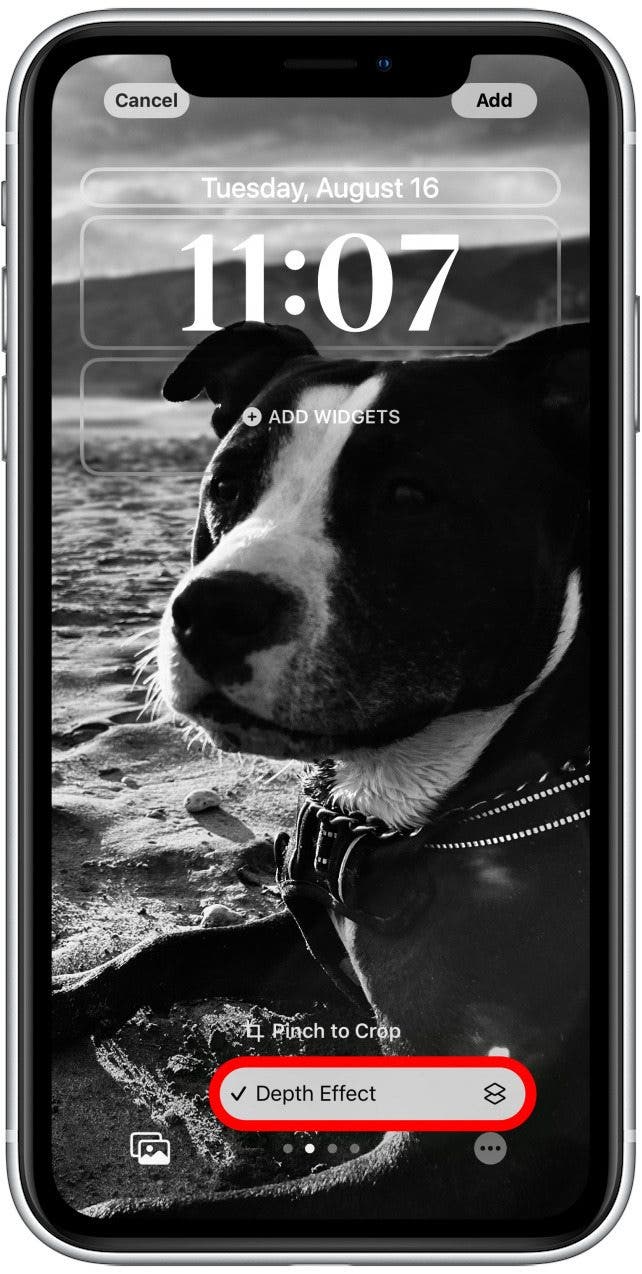
- Tapping the three dots on either Natural or Black & White will let you toggle Depth Effect on or off.
- If Depth Effect is checked, you’ll be able to create a multi-layered photo effect, which places part of the photo in front of the time. If it isn’t checked, your photo will remain behind the time. Please keep in mind that the photo has to be positioned perfectly for this to work.
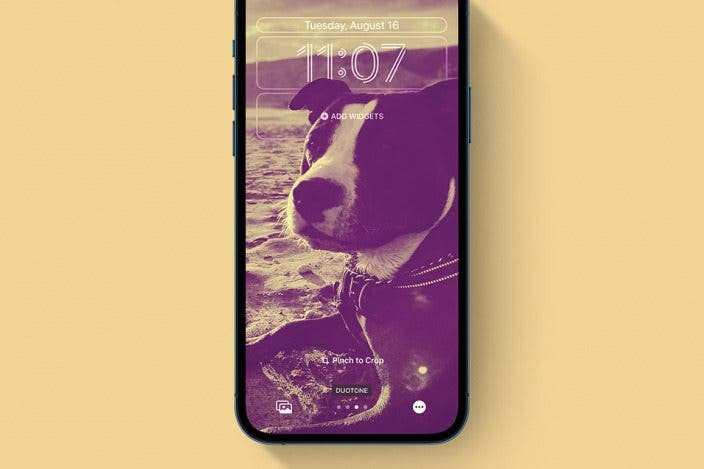
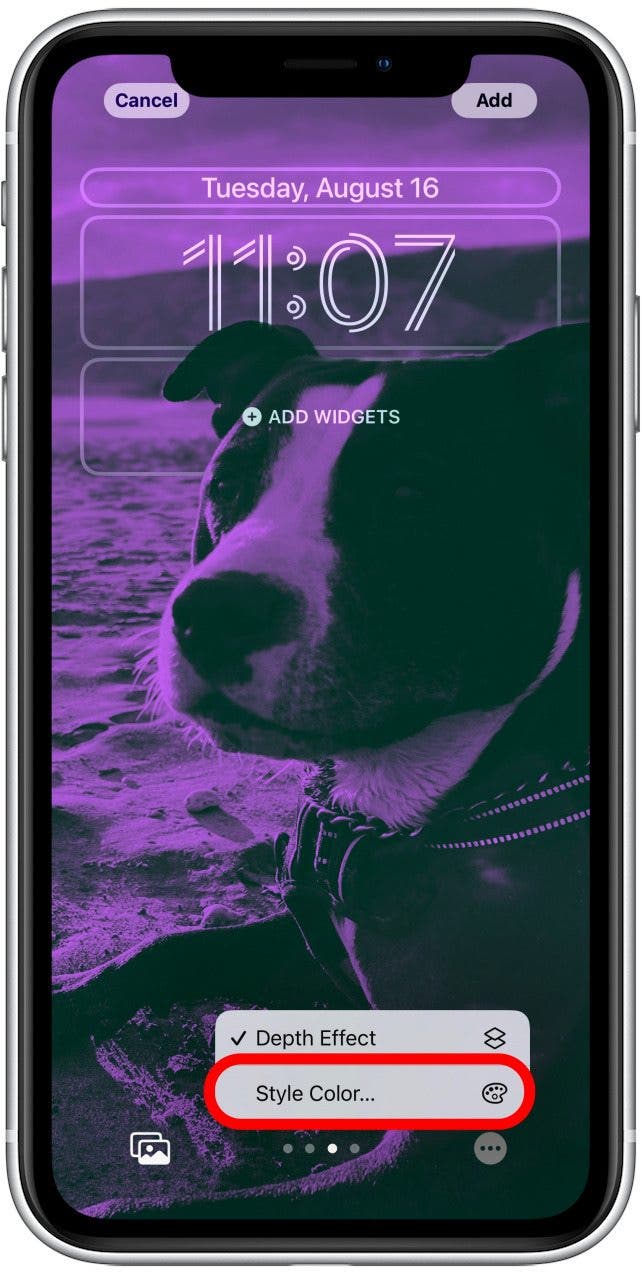
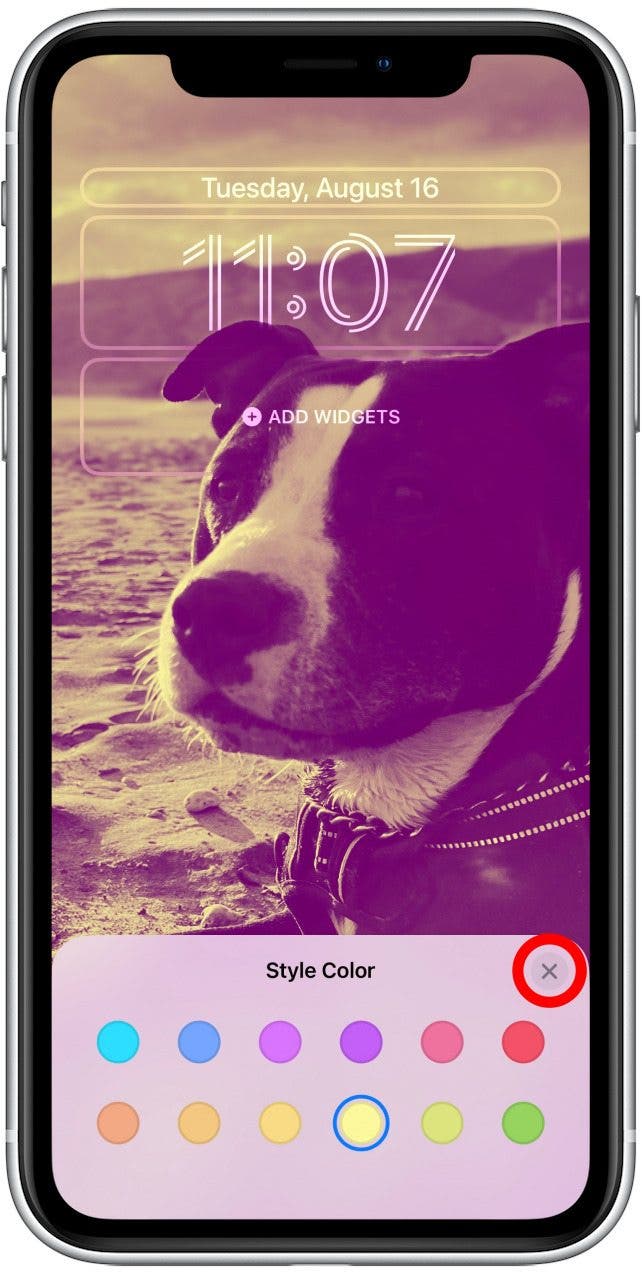
- If you swipe to Duotone or Color Wash, tapping the three dots will let you select a Style Color in addition to turning Depth Effect on or off.
- Just tap on one of the 12 colors to pick your preferred tone. You can only pick one; the second tone will always be black.
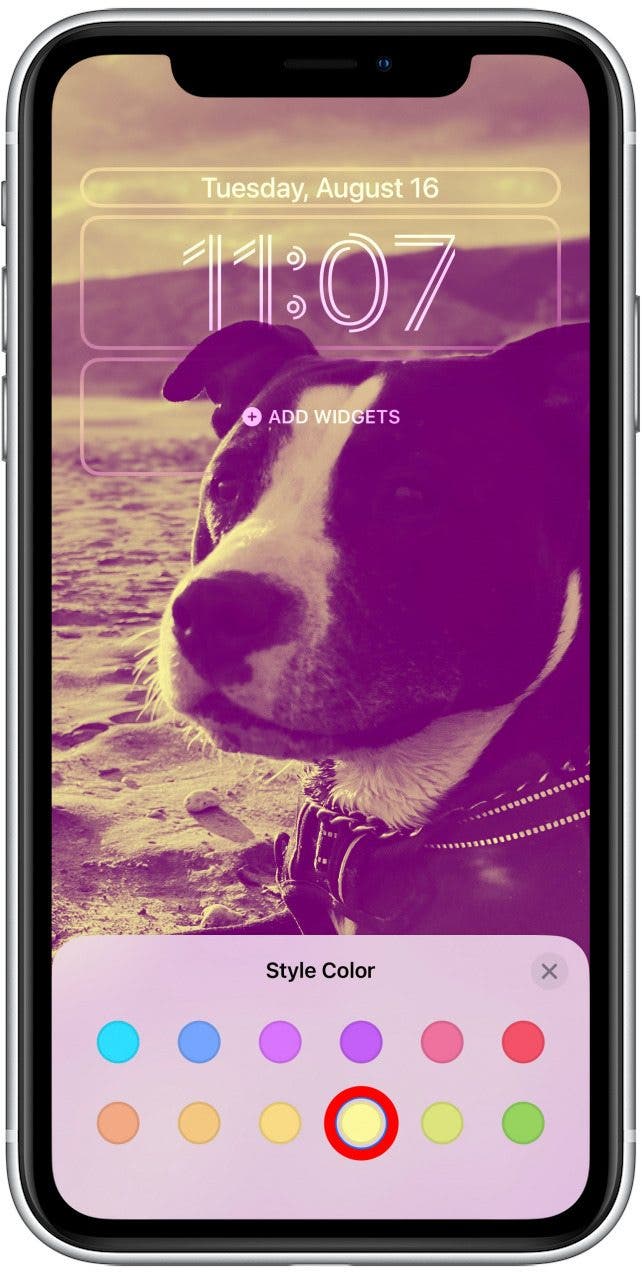
- Tap X when you are satisfied with your color choice.
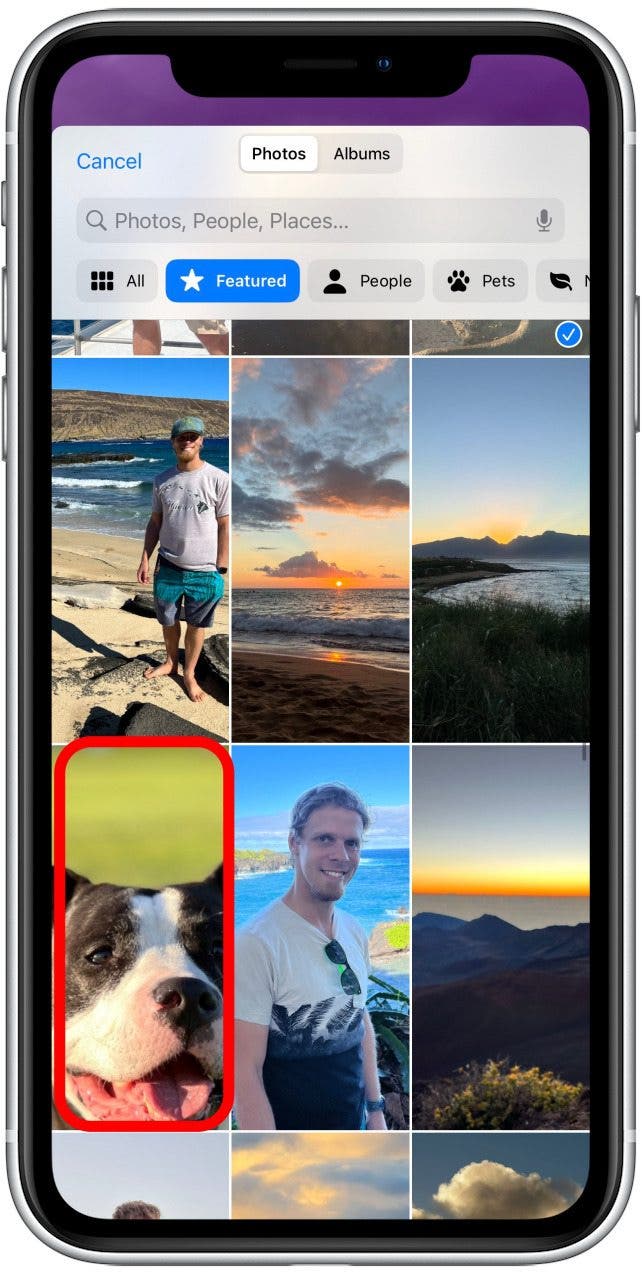
- Finally, if you decide you want to select a different photo, you can tap the photo icon in the bottom left.

- Here you can scroll to search for photos, type a search query into the search bar, or browse within your Albums. Tap the photo you wish to use.
- Tap Add when you are finished customizing your new Photo Lock Screen!
Troubleshooting the Depth Effect
Here's what to do if you run into an issue using Depth Effect on the iOS 16 photo Lock Screen.
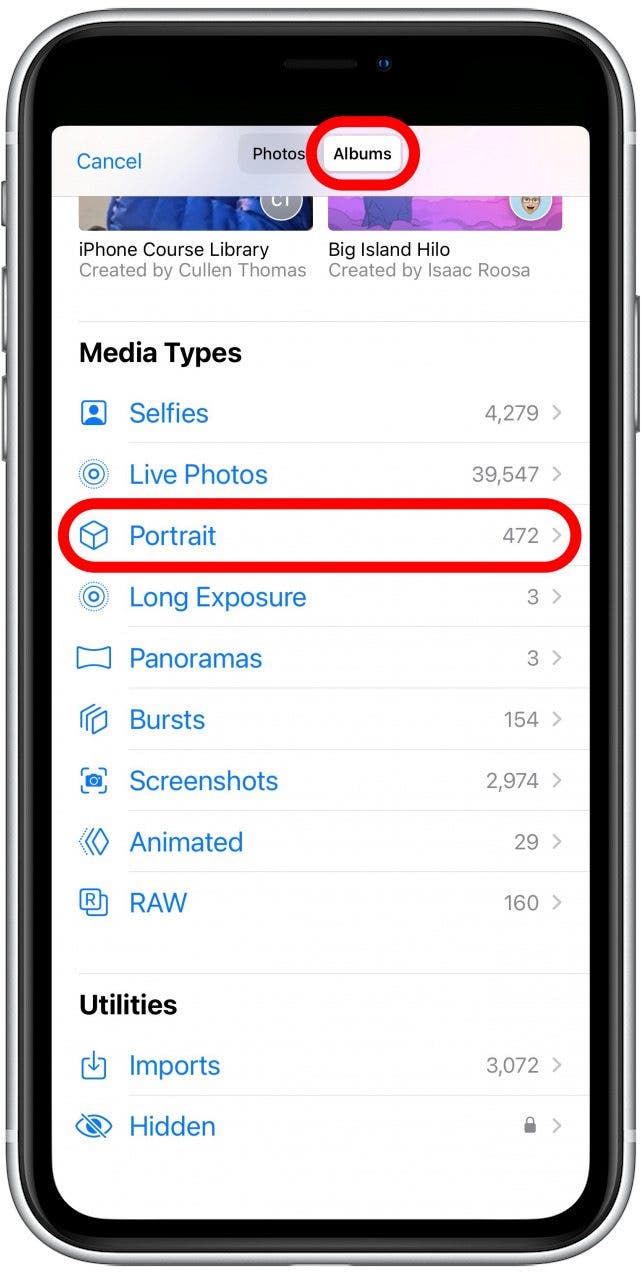
- Many new iOS 16 users struggle to achieve the desired layered photo Lock Screen. When creating a layered photo Lock Screen, it is important to pick a Portrait Mode photo because there has to be a depth distinction between the background and the subject. The best way to make sure you are using the right photo is to tap Albums and select Portrait to see your selection of portrait mode photos.
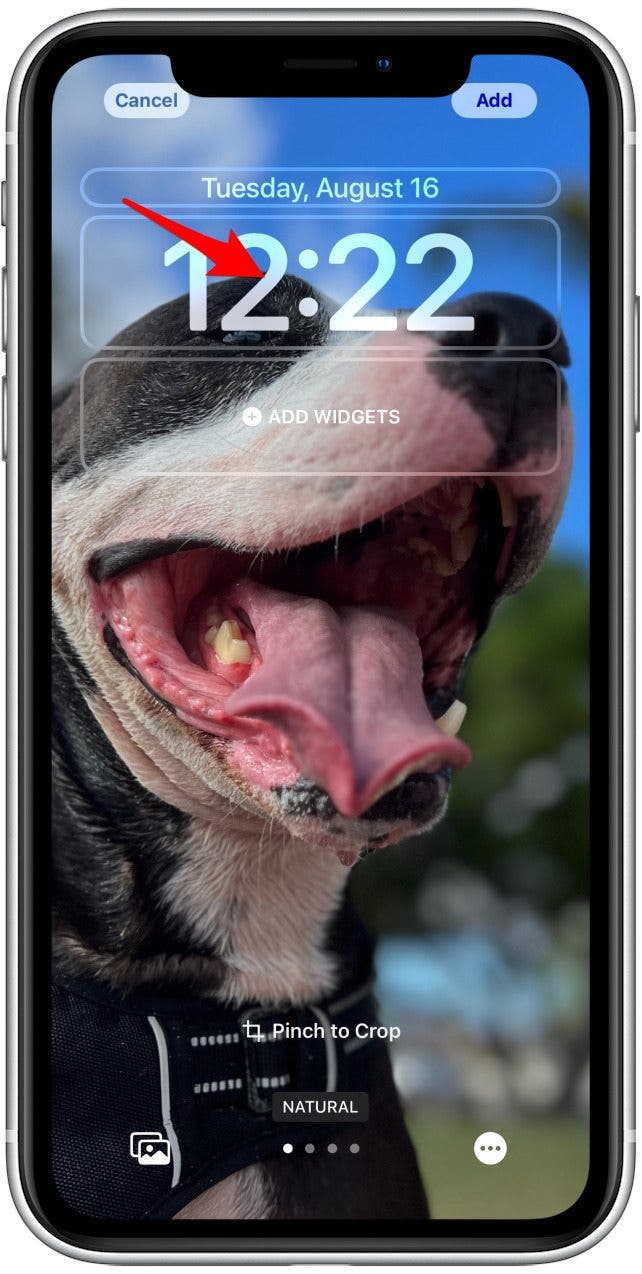
- Another important step is to find a photo where the top of your subject can cover part of the time, otherwise there is nothing for it to overlap and you won’t get the desired effect.
- When positioning your image by pinching your fingers to zoom in or out, make sure the top of the subject remains below the bottom half of the time. If you make it too big, it won’t overlap and will appear behind the time.
- Finally, make sure you don’t have any widgets below the time. You can still have a widget above the time, but delete any widgets below it.

- If you’ve followed all the steps above and it still doesn’t work, double-check that you have the Depth Effect enabled.
If none of these steps helped, you may want to try restarting your phone. You may also want to check to see if there are any software updates available as these will fix known bugs that could be causing this error.

 Olena Kagui
 Hal Goldstein
 Amy Spitzfaden Both
 Rhett Intriago
 Rachel Needell


 Susan Misuraca