iTunes Library: How to Transfer All Your Music to an External Hard Drive


Is your iTunes library getting a little unwieldy and taking up too much space on your hard drive? If you've been wondering how to transfer or move your iTunes library to an external hard drive, then this is the article for you. We've already covered how to know if you need an external hard drive. Read on to learn how to export your iTunes library to an external hard drive, so you always have it with you regardless of internet or iCloud connection.
Related: iPad Slow? Learn How to Speed up iPad, Even Older Ones!
The iTunes Match Option
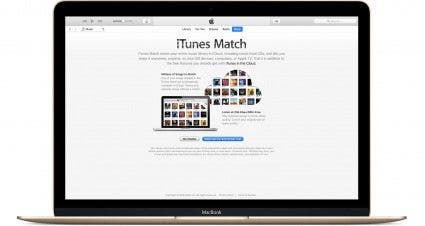
If you're searching for a way to keep your iTunes Library from taking up too much space on your hard drive, and also don't want to have to increase your iCloud storage capacity, an external hard drive is a great solution. There is another option, though, and that's a subscription to iTunes Match. For $25 a year you can upload up to 100,000 songs to an iCloud Music Library, where you can access them from any of your Apple devices. If you'd rather transfer your iTunes Library to an external hard drive, though, read on.
Get Ready to Transfer iTunes Library
Keep in mind that you're only legally able to transfer your iTunes library to an external hard drive, not your Apple Music library. You own all the music in your iTunes library, but Apple Music songs are rentals, paid for by your monthly subscription fee.
To get prepared to transfer your iTunes Library, make sure you have everything you need to export your iTunes Library to your external hard drive. Materials you'll need include:
- The desktop or laptop your iTunes library is on.
- An external hard drive.
- A USB cable to connect the external hard drive to your computer.
- A few hours to leave the external hard drive connected while your iTunes library is transferring. The amount of time this process takes will depend on the size of your library and the speed at which your interfaces can transfer data.
Organize your iTunes Library
Before you transfer your iTunes Library to an external hard drive, it's helpful to consolidate it so that you're sure all of your music makes the transition. To do this:
- Open the iTunes app; you can find this in your apps folder or by using the Finder; both are located on the Dock.

- From the iTunes Menu Bar, click File, then Library, then Organize Library.
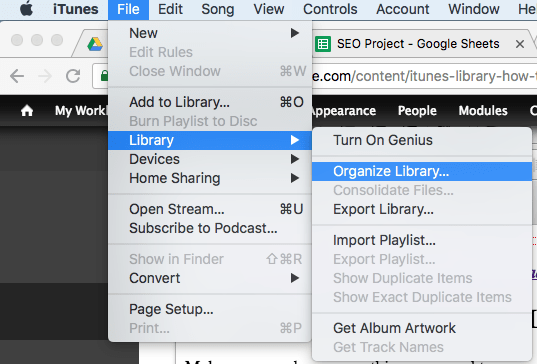
- Now, check the box marked Consolidate Files and click OK.
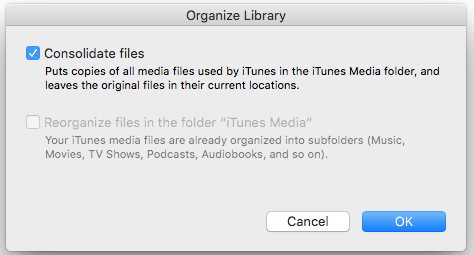
Now a copy of all your music files will be gathered together into your iTunes Media folder, ready for you to transfer to your external hard drive.
Copy iTunes Backup to External Hard Drive
Now you're ready to transfer the iTunes Media folder you just created onto your external hard drive. To do this:
- Connect your computer to your external hard drive with your USB cable.
- Close iTunes and open the Finder (looks like the little face, see picture below.)

- Once Finder is open, click on Go, then click on Home.
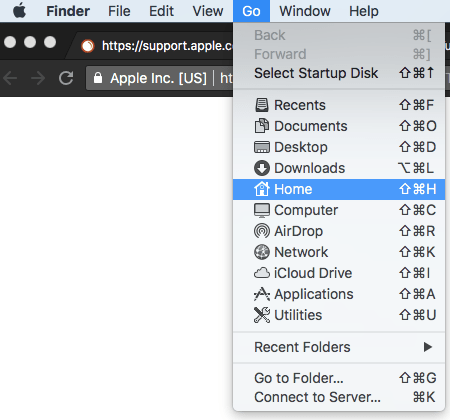
- Now all your folders will appear; double-click the Music folder.

- Within the Music folder, you'll find the iTunes Media folder you created earlier.

- Now drag your iTunes Media folder to your desktop and drop it into your external hard drive.

- If you don't see your external hard drive on the desktop, it may be found under devices in the Finder sidebar.

The amount of time it takes to copy your iTunes library will vary depending on how extensive your library is.
To Redirect or Not?
If you want iTunes to play iTunes content from your external hard drive rather than your desktop drive from now on, you'll need to redirect the app, so it knows where to search for your library. To do this:
- Tap the Option key on your keyboard while you open the iTunes app. It took a few tries for me to get the timing just right so that the Choose iTunes Library menu popped up.
- Click Choose Library.

- Click on your external hard drive under devices in the Finder sidebar.
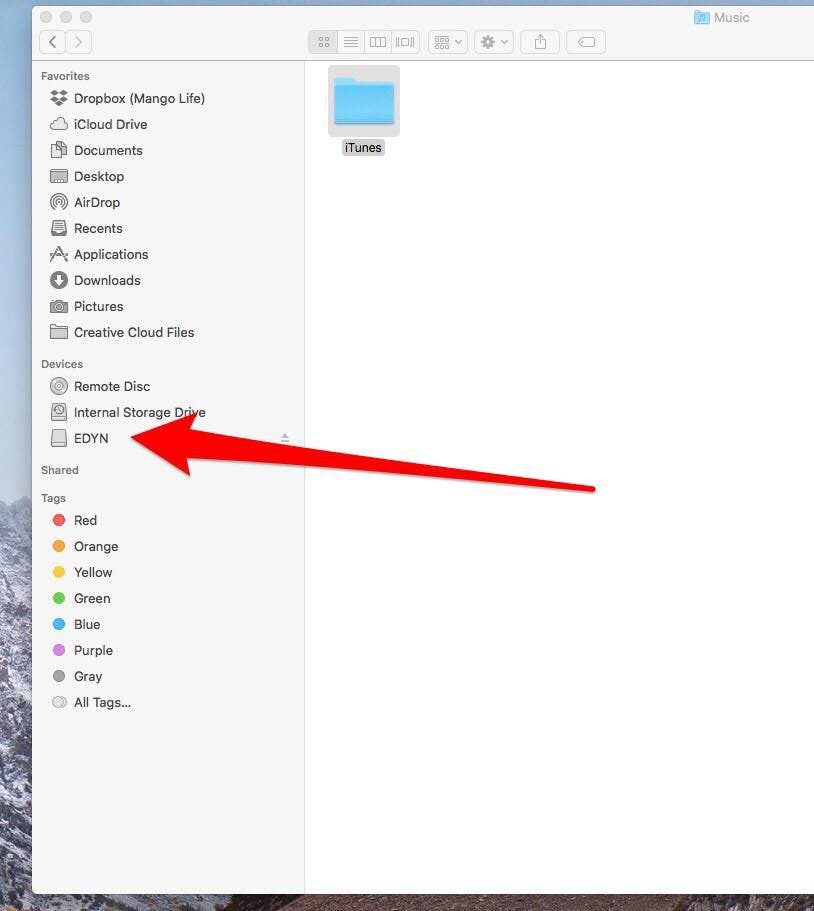
- Under Name in your iTunes menu click on iTunes.
- Now click Open.
If you don't delete the iTunes library on your desktop's hard drive, you'll need to direct the iTunes app to the external hard drive whenever you want it to search for content there.

Leanne Hays
Leanne Hays has over a dozen years of experience writing for online publications. As a Feature Writer for iPhone Life, she has authored hundreds of how-to, Apple news, and gear review articles, as well as a comprehensive Photos App guide. Leanne holds degrees in education and science and loves troubleshooting and repair. This combination makes her a perfect fit as manager of our Ask an Expert service, which helps iPhone Life Insiders with Apple hardware and software issues.
In off-work hours, Leanne is a mother of two, homesteader, audiobook fanatic, musician, and learning enthusiast.
 Rhett Intriago

 Olena Kagui
 Ashleigh Page
 Cullen Thomas
 Leanne Hays
 Amy Spitzfaden Both
 Rachel Needell