How to Back Up a Mac with Time Machine
Prevent data loss by setting up automatic Mac backups using Apple’s Time Machine feature.

Ashleigh has written and tested hundreds of articles about devices and features within Apple's ecosystem, specializing in iPhone, iPad, AirPods, and Mac content.
Learn More Ashleigh has written and tested hundreds of articles about devices and features within Apple's ecosystem, specializing in iPhone, iPad, AirPods, and Mac content.
Learn MoreUsing Time Machine is very simple, since it's the built-in backup feature on your Mac. For this option, all you'll need is an external hard drive with enough space to store your data. We'll show you how to do it, and share Apple's recommendation for how much external storage you need to back up your Mac.
Related: How to Back Up Your iPhone to Your Computer
How Much Storage Space Do I Need to Back Up My Mac?
You'll need to use an external storage device (a hard drive) for Time Machine or other external Mac backups. Apple estimates that you'll need about twice as much available storage space on your external drive as the capacity on your Mac.
Apple provides a list of compatible external storage devices for Macs in case you need to verify that yours will work.
How to Use Time Machine to Back Up a Mac
Time Machine is simple to use and can back up your Mac automatically, including files, photos, email, apps, music, and more. The benefit of this method is that it requires almost no knowledge of the inner workings of your computer. It's essentially as easy as plug-and-play once initial setup is complete. For best results, make sure your Mac is connected to power before beginning the process of performing backups. If you enjoy learning tips and tricks for your Apple devices, check out our free Tip of the Day newsletter!
Here's how to use Time Machine to perform a Mac backup with an external hard drive:
- Plug your external hard drive into your Mac.
- You should see a window pop up on your Mac asking if you want to use the external drive with Time Machine.
- Click Use as Backup Disk.
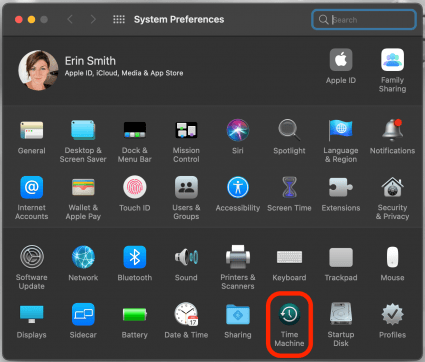
- If you don’t see the window, open System Preferences.
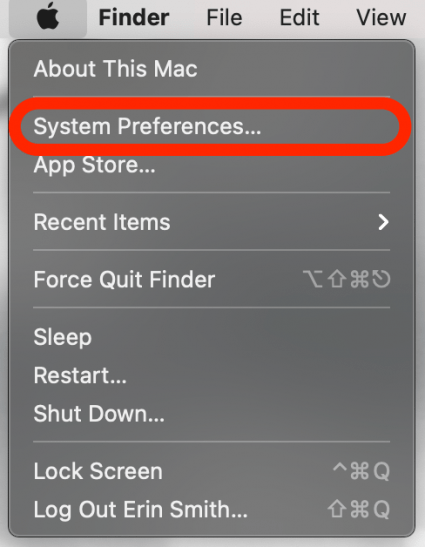
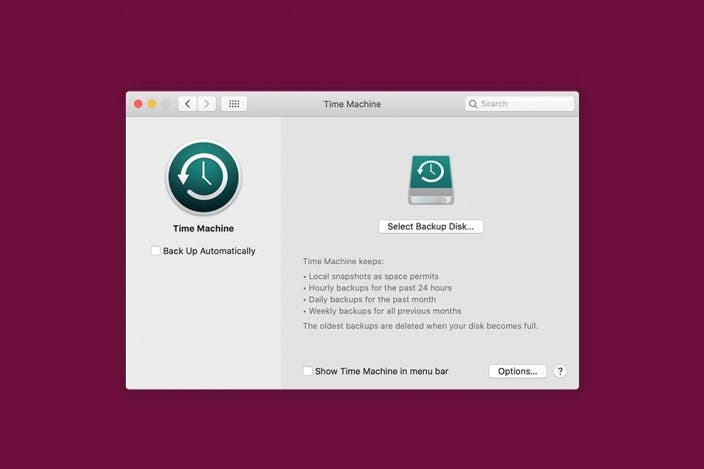
- Select Time Machine.
- Click Select Backup Disk to choose your disk as the Mac backup drive.

- Select the storage device you've plugged in.
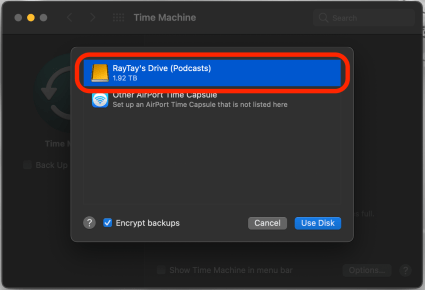
- If you want to encrypt your Mac backups, you can also click the box next to Encrypt backups at the bottom of the window.

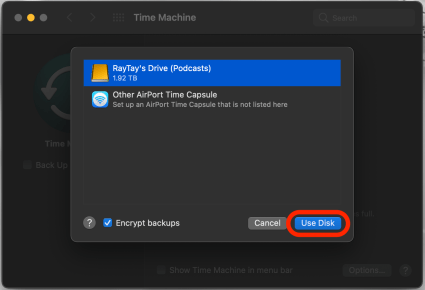
- Click Use Disk.
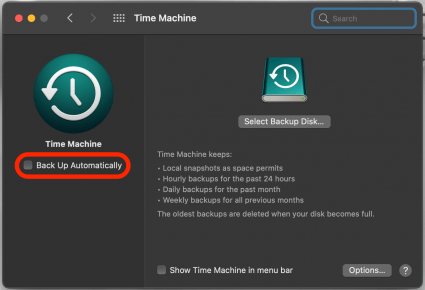
- If you want to, you can click Back Up Automatically to ensure that automatic backups occur when the drive is plugged in.
Apple's Time Machine web page explains that once you've set it up, the service "automatically makes hourly backups for the past 24 hours, daily backups for the past month, and weekly backups for all previous months. The oldest backups are deleted when your backup disk is full." Because of its simplicity and how extensive the backups are, this may be the best way to back up your MacBook or Mac. If you're interested in hand-selecting which items you back up, you can use the Options menu in Time Machine to customize your Mac backups.
We hope this article has helped you establish an automatic Mac backup routine that serves your needs and sets your mind at ease! If you wish to go another route, you can always update your Mac to iCloud instead!

Every day, we send useful tips with screenshots and step-by-step instructions to over 600,000 subscribers for free. You'll be surprised what your Apple devices can really do.

 Rachel Needell
 Rhett Intriago
 Nicholas Naioti
 Olena Kagui

 Leanne Hays
 Amy Spitzfaden Both