How to Connect AirPods to PC
AirPods can connect to more than just Apple devices.


AirPods are undoubtedly some of the best wireless earbuds on the market. While they work best when used with Apple devices, you can connect AirPods to PCs and many other devices. In this article, we’ll go over how to connect your AirPods to computers running Windows 10, and which features work.
Jump To:
- How to Connect AirPods to Windows Laptops & Desktops
- Which AirPods Features Work with PC?
- Frequently Asked Questions
How to Connect AirPods to Windows Laptops & Desktops
Using your AirPods on PC is just like connecting any other Bluetooth-enabled device to your computer. For more useful AirPods advice, be sure to sign up for our Tip of the Day newsletter. Now, here’s how to connect AirPods to Windows computers:
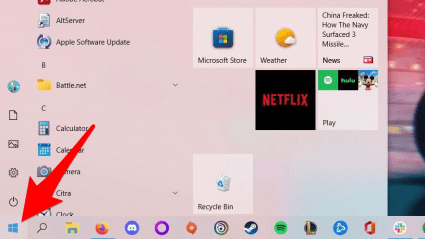
- Click the Windows icon in the lower-left corner of your screen to open the start menu.
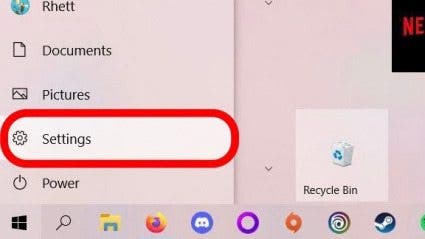
- Click Settings.
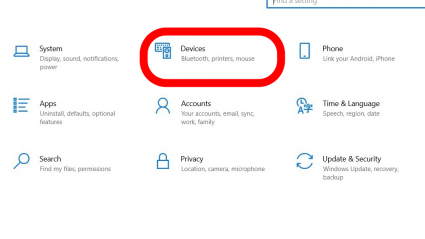
- Click Devices.
- If the toggle is not blue, click it to enable Bluetooth.

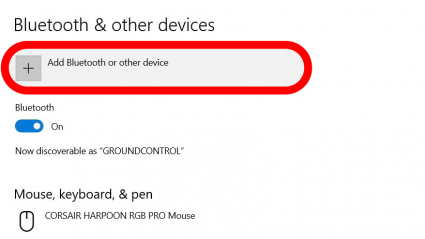
- Click Add Bluetooth or other device.
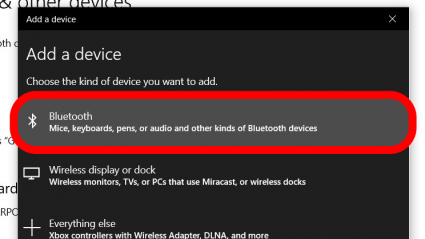
- In the Add a device menu, click Bluetooth.
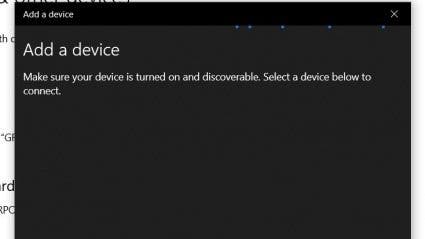
- Your computer will start to search for nearby Bluetooth devices. Note: If you already see your AirPods listed in this menu, that means you have connected them to your computer previously. You should just be able to select them and start listening.
- Now, insert both AirPods into the case, and leave the case open.
- Press and hold the button on your AirPods case until the LED flashes white.
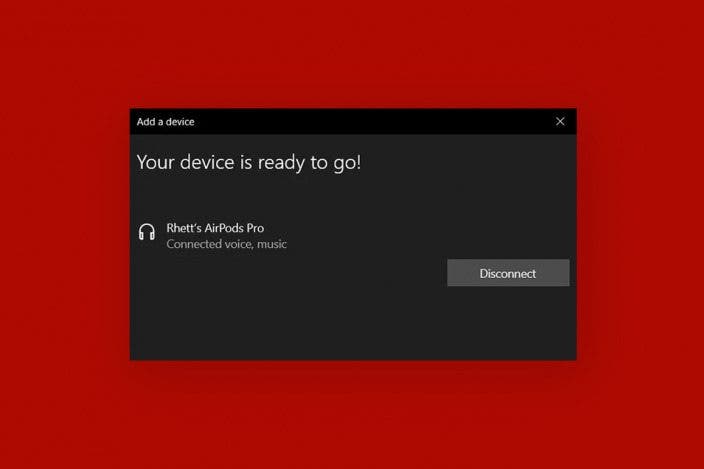
- On your PC, you should see your AirPods show up in the Add a device window. The name may be different for you. For me, it just showed up as "Headphone," but changed to Rhett’s AirPods Pro after connecting. Click on them to connect.
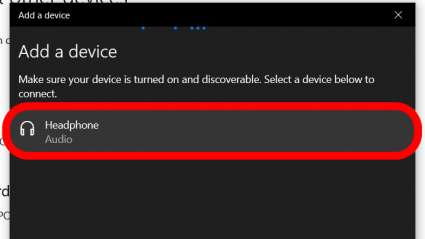
Your AirPods will now be connected to your PC. If you’re not sure how to connect AirPods to Mac, iPad, or iPhone, we can also help with that.
Which AirPods Features Work with PC?
Your AirPods can be used for listening to music, gaming, streaming, and much more on PC. Most of your AirPods features remain intact when connected to Windows. For example, with AirPods Pro and third-generation AirPods, you can still use gestures to adjust the volume of your computer.
You can also use your AirPods’ media controls like pausing and playing music. In the case of the AirPods Pro, you can even still take advantage of the Active Noise Cancellation and Transparency modes by pressing and holding the stem of either AirPod to switch between noise-control modes. If Noice Cancellation is not working for you, check out our guide on how to fix it.
Of course, because AirPods are designed with Apple devices in mind, there are some limitations when using them on your Windows PC. You will not be able to use Siri on any AirPods model. For AirPods Pro, AirPods Max, and 3rd generation AirPods, you cannot use Spatial Audio. If you're unsure of which model you have, be sure to check out our guide on how to identify AirPods.
FAQ
Can you connect AirPods to Windows 11?
Yes. The process might look a bit different than the screenshots above, but the steps should still be the same.
AirPods won’t connect to PC. Why?
Double-check that you have Bluetooth enabled in your PC’s settings. If you do not see a toggle for turning Bluetooth on and off, your computer may not be Bluetooth-compatible.
What to do if AirPods won’t go into pairing mode?
Make sure that both AirPods are inserted in the case and that you have the case open. Your AirPods will not go into pairing mode if the case is closed.
AirPods connected but no sound?
Check that your audio output is set to your AirPods. You can do this easily by clicking the small speaker icon in the taskbar and then clicking on the name of your audio output device just above the volume bar. You can choose a new output device from there.
Can you connect AirPods Max to PC?
Yes. The process is mostly the same as the steps outlined above, except that instead of pressing the button on the AirPods case, you will need to press and hold the Noise Control button on the AirPods Max.

Rhett Intriago
Rhett Intriago is a Feature Writer at iPhone Life, offering his expertise in all things iPhone, Apple Watch, and AirPods. He enjoys writing on topics related to maintaining privacy in a digital world, as well as iPhone security. He’s been a tech enthusiast all his life, with experiences ranging from jailbreaking his iPhone to building his own gaming PC.
Despite his disdain for the beach, Rhett is based in Florida. In his free time, he enjoys playing the latest games, spoiling his cats, or discovering new places with his wife, Kyla.

 Rhett Intriago
 Hal Goldstein
 Susan Misuraca
 Amy Spitzfaden Both
 Rachel Needell
 Olena Kagui