Unleash Your Inner App Developer Part 41: Logging In With Facebook


Do you have an idea for an app but lack the programming knowledge to begin building it? In this weekly blog series, I will take you, the beginner app developer, step by step through the process of creating apps for the iPhone, iPod touch, and iPad. Join me each week on this adventure and you will experience how much fun turning your app ideas into reality can be! This is part 41 of the series. If you are just getting started, check out the beginning of the series at this link.
These days, more and more iOS apps offer users the option of logging in with Facebook. If you want your app to go viral, this is a great first step. In fact, 80 percent of the top-grossing iOS apps use social media logins. As stated in the Facebook documentation:
"One of the benefits of having people sign in to your app using Facebook is that they can grant permissions to your app so you can retrieve information or perform actions on Facebook on their behalf."
If the main actions users perform in your app are posted on Facebook, it's a great way for their Facebook friends to find out that your app exists, and some of the great things they can do within your app.
Step 1: Installing the Facebook SDK for iOS
There are several steps you need to take in order to get started integrating Facebook with your iOS apps. The first step is installing the Facebook SDK for iOS.
- Installing the Facebook SDK for iOS - This is your first step in the process. First, click on this link which downloads the Facebook SDK for iOS .pkg installer file to your Mac. After the file has finished downloading, double-click the .pkg file to launch the installer (Figure 1).
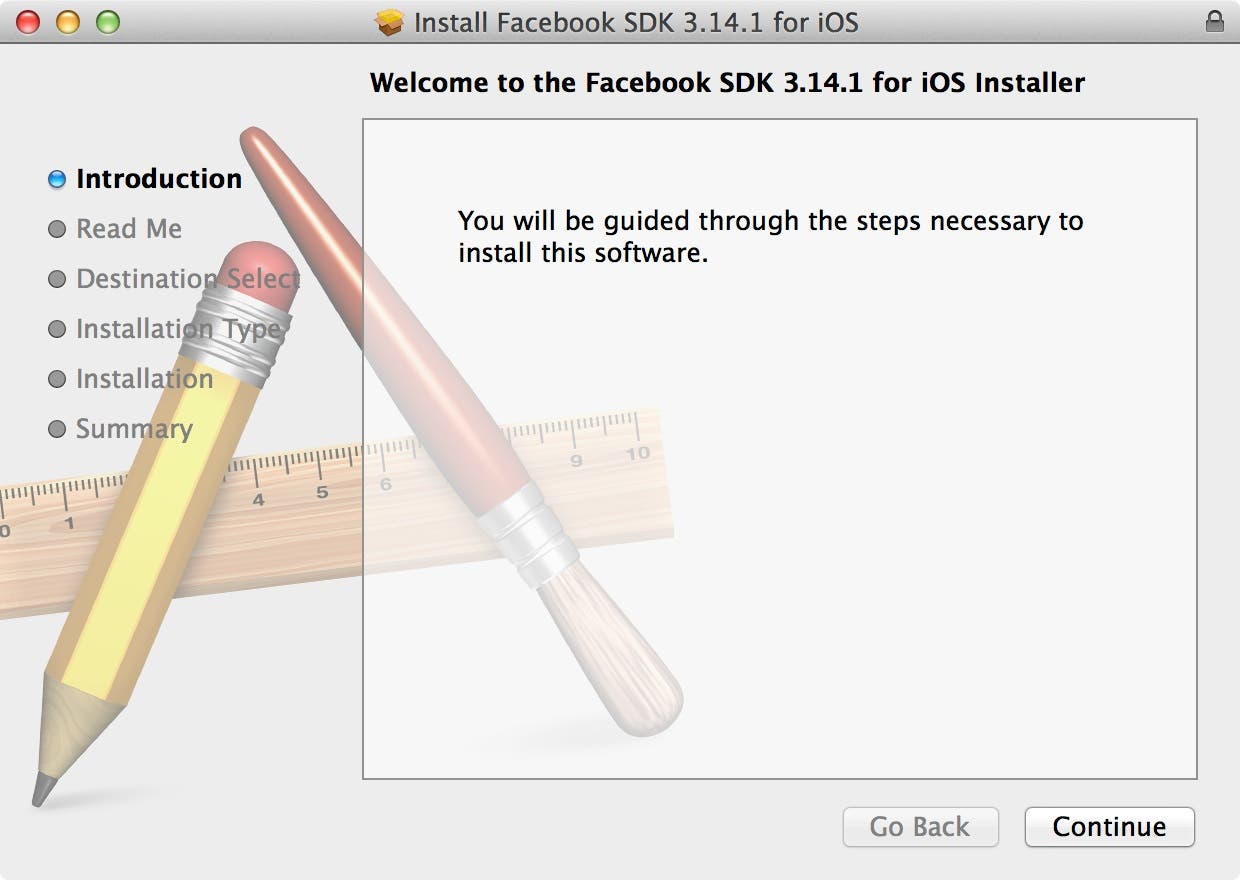 |
| Figure 1 - The Facebook SDK for iOS installer |
- Click Continue to read the developer terms, and then click Continue again to display the Select a Destination panel of the installer. Click Continue again to navigate to the Standard Install panel. Click Install to install the Facebook SDK for iOS in the default location (your Documents folder).
- When the installation is complete, you will be taken to a panel that says "The Installation was completed successfully". You can click Close to exit the installer.
Step 2: Registering as a Facebook Developer
Your next step is to obtain an ID for your app from Facebook.
- Click on this link to navigate to the Facebook's Developer Registration page (Figure 2).
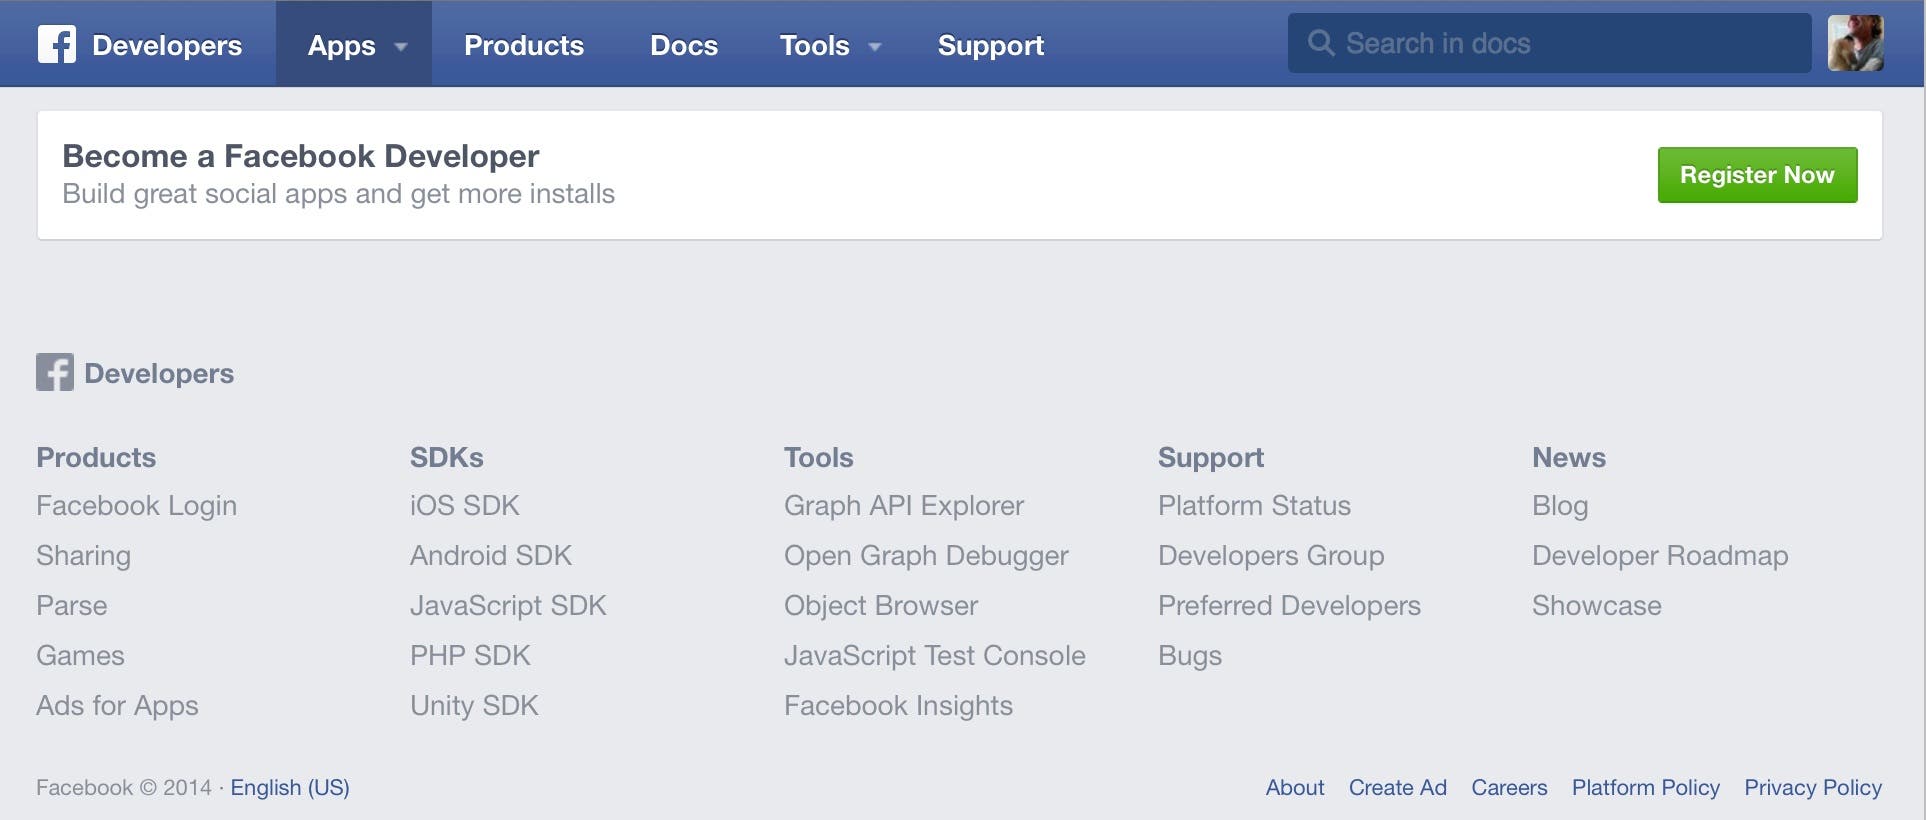 |
| Figure 2 - The Facebook Developer Registration page |
- If haven't already registered as a Facebook developer, click the Register Now button, which prompts you to enter your Facebook password.
- Next, a dialog appears asking if you accept the Facebook Platform Policy. If you agree, click the switch to respond YES, and then click Next.
- This displays a Register as a Facebook Developer dialog (Figure 3).
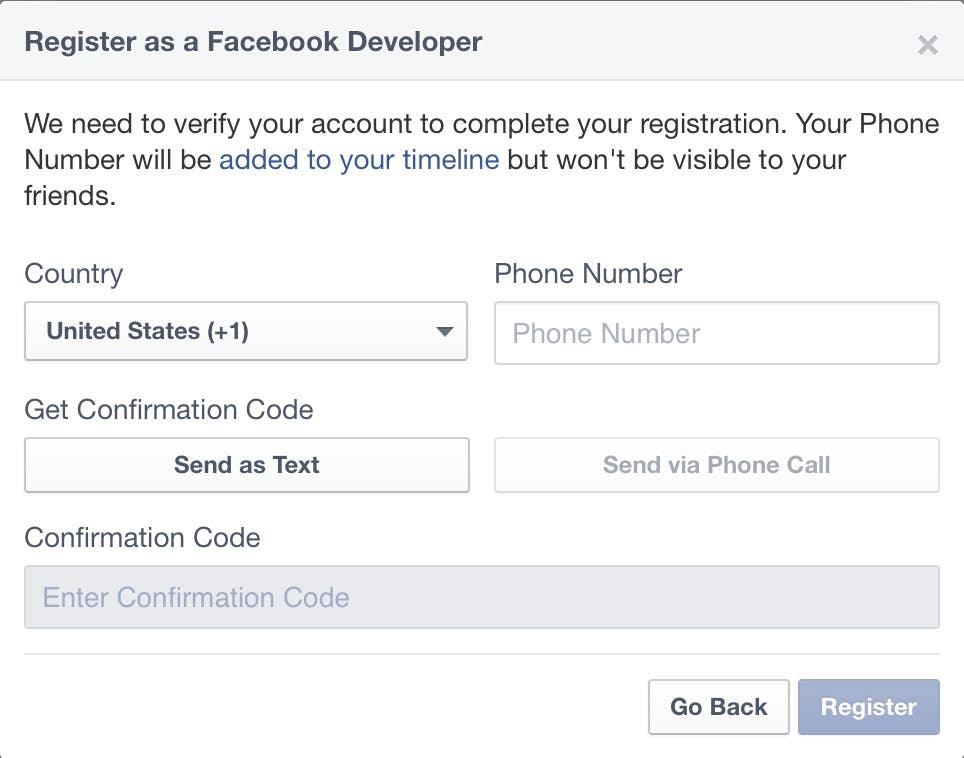 |
| Figure 3 - Registering as a Facebook developer |
You need to enter your phone number in order to receive a confirmation code from Facebook (the dialog states that your phone number will be added to your timeline, but will not be visible to your friends.) After entering your phone number either select Send as Text or Send Via Phone Call to retrieve your confirmation code. After you receive your confirmation code, enter it and then click Register.
- If your registration is successful, you will see the dialog shown in Figure 4. Click the Done button to proceed.
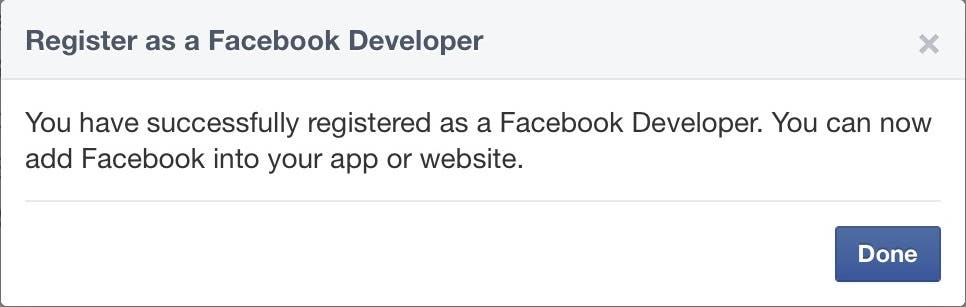 |
| Figure 4 - You are now a registered Facebook Developer! |
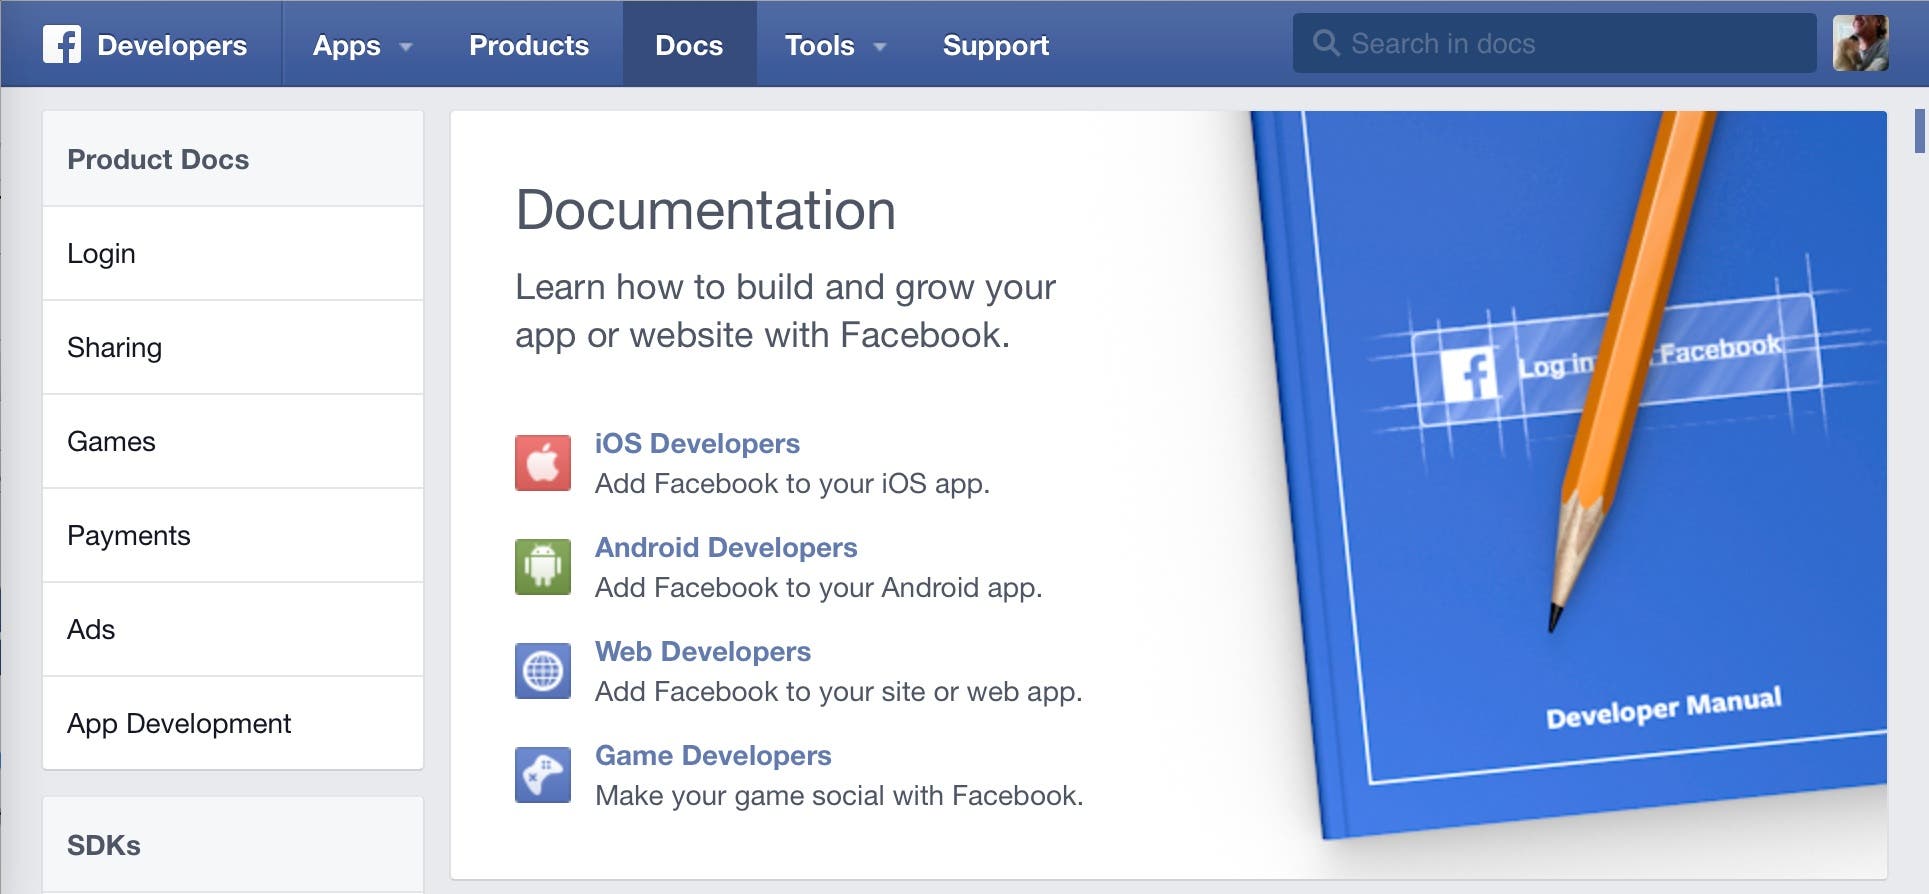
This takes you to the Facebook App Dashboard (Figure 5).
 |
Step 3: Obtaining a Facebook App ID
After registering as a Facebook developer, now you're ready to obtain a Facebook App ID.
- In the Facebook App Dashboard, select Apps > Create a New App (Figure 6).
 |
| Figure 6 - Create a New App |
- In the Create a New App dialog (Figure 7), enter your app's Display Name, Namespace (an optional unique identifier for your app), choose a Category, and then click the Create App button.
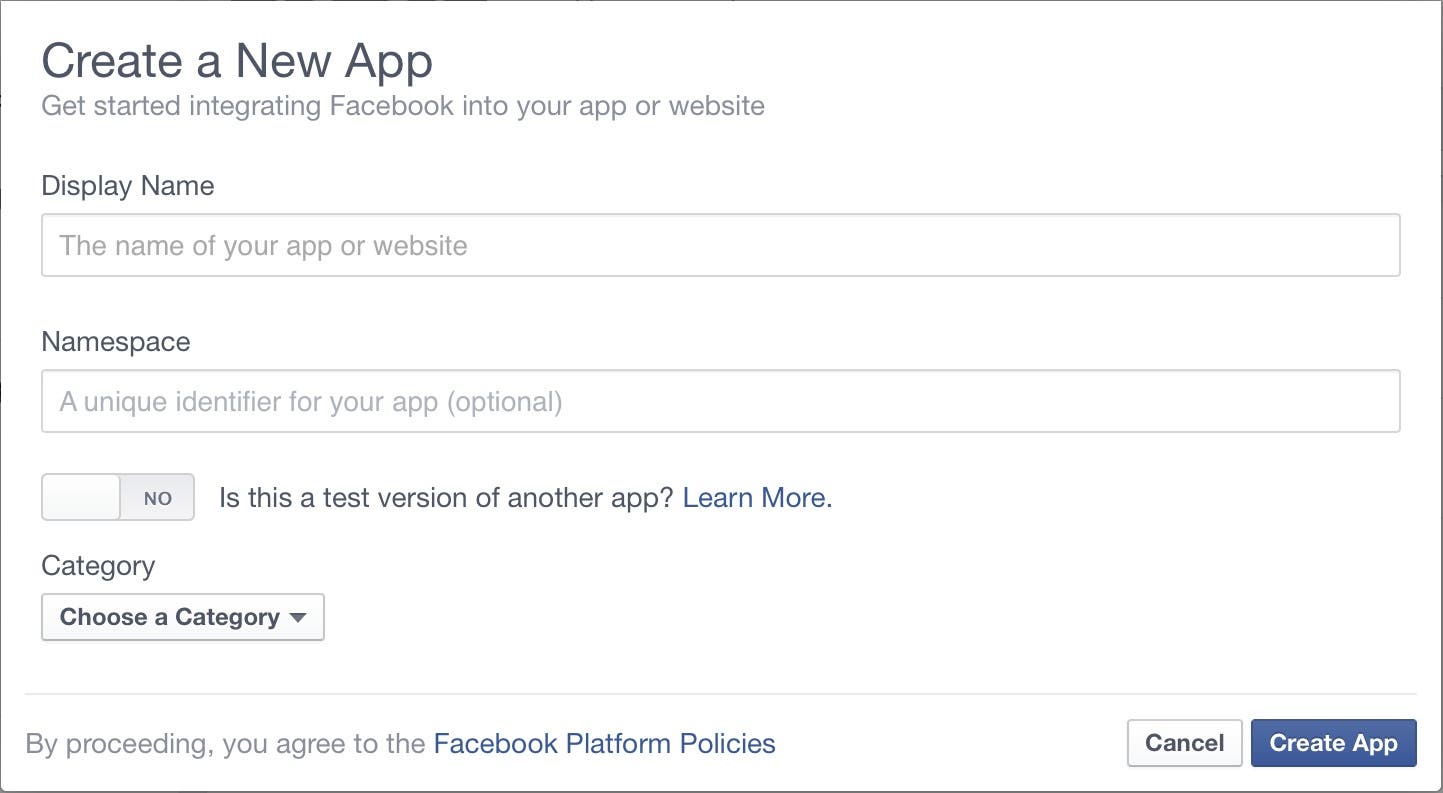 |
| Figure 7 - The Create a New App dialog |
- In the Security Check dialog you will be prompted to type the text that you see and click Submit. This displays your app and it's new ID in the App Dashboard (Figure 8).
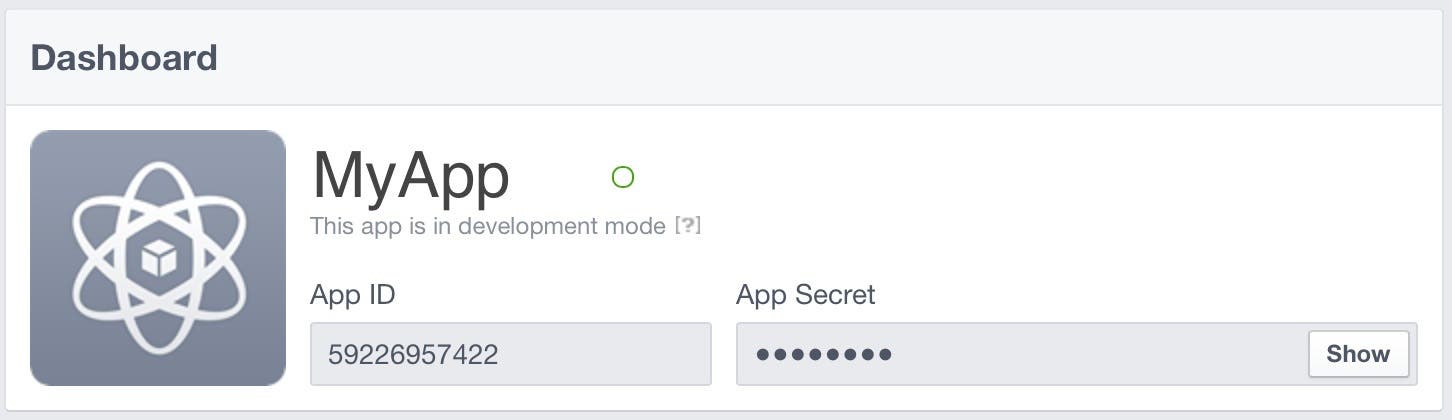 |
| Figure 8 - Your newly registered app in the Facebook App Dashboard |
Step 4: Configuring Your Facebook App
Now you need to configure your Facebook app to support login from an iOS app.
- In the panel on the left side of the Facebook App Dashboard, select Settings to display the App Settings page (Figure 9).
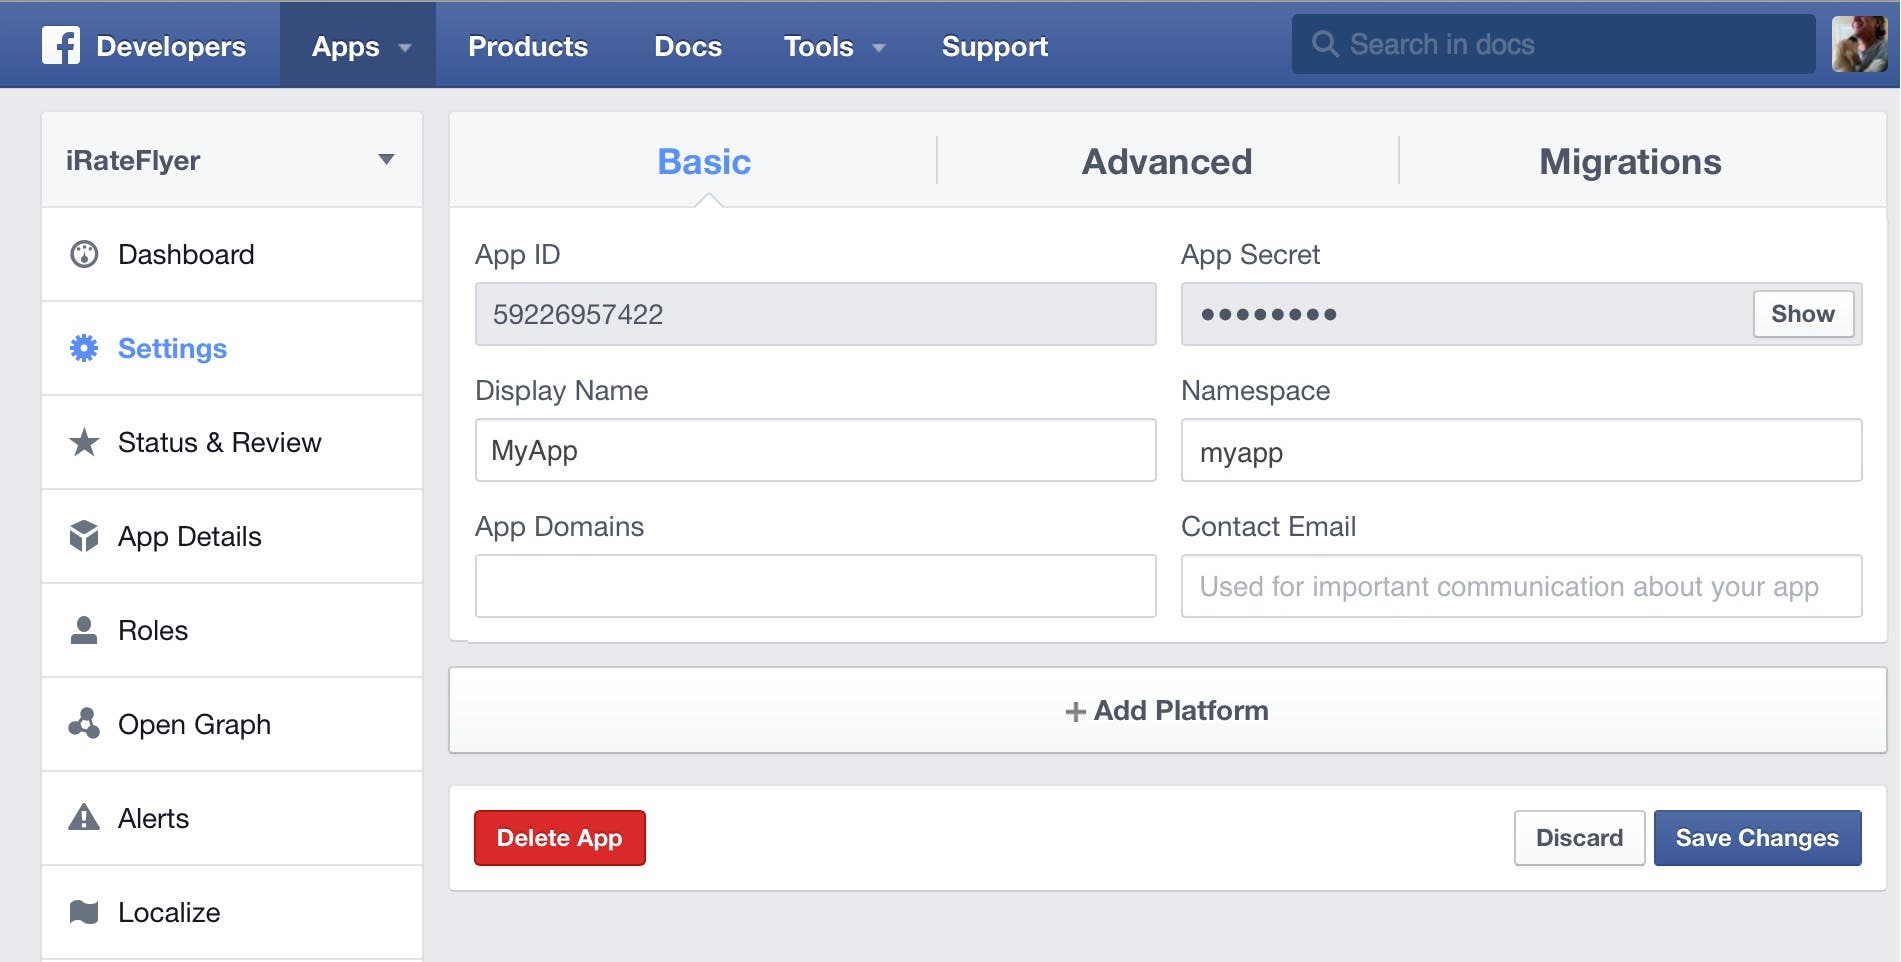 |
| Figure 9 - The App Settings page |
- Click the + Add Platform button to display the Select Platform dialog (Figure 10).
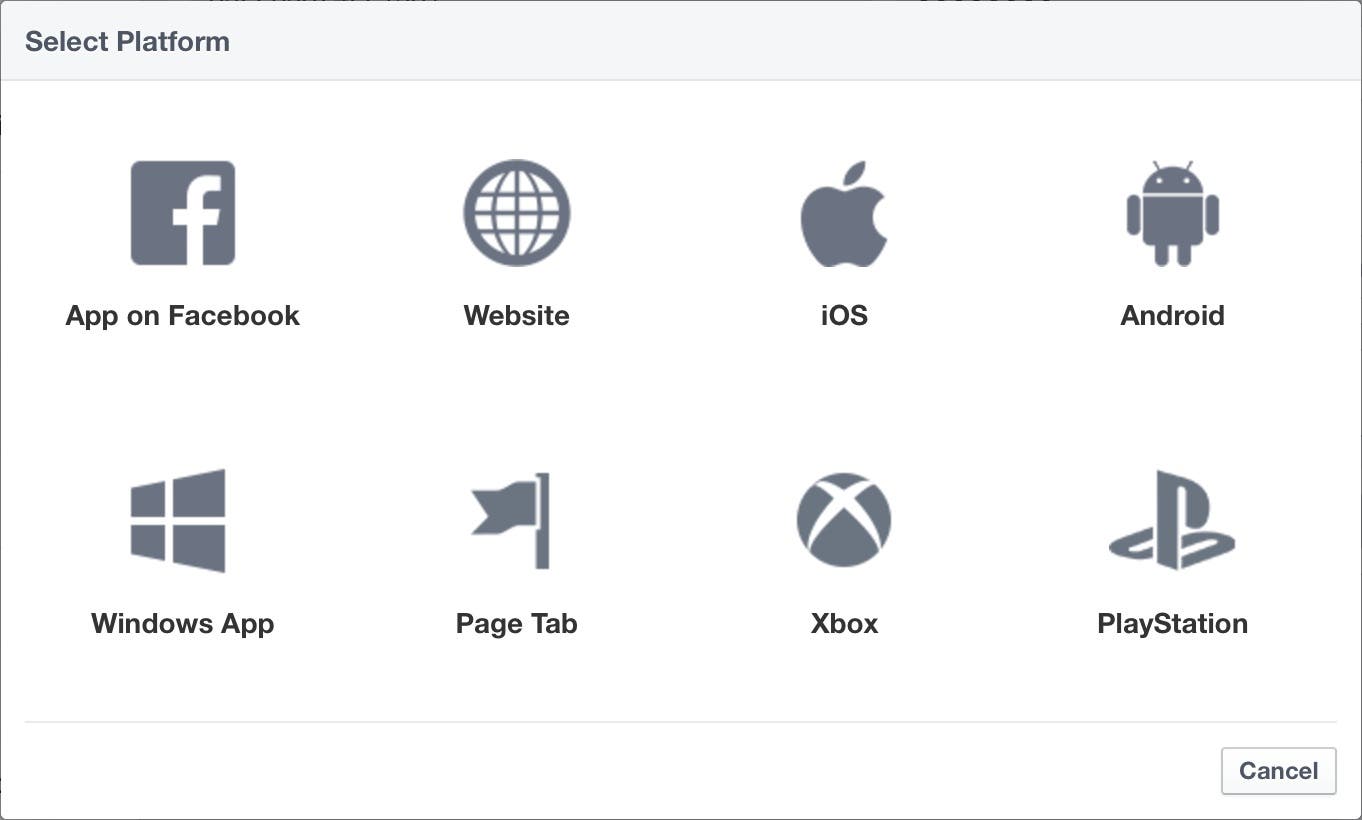 |
| Figure 10 - The Select Platform dialog |
-
Select iOS. This displays a new iOS panel beneath your app in the Facebook App Settings page (Figure 11).
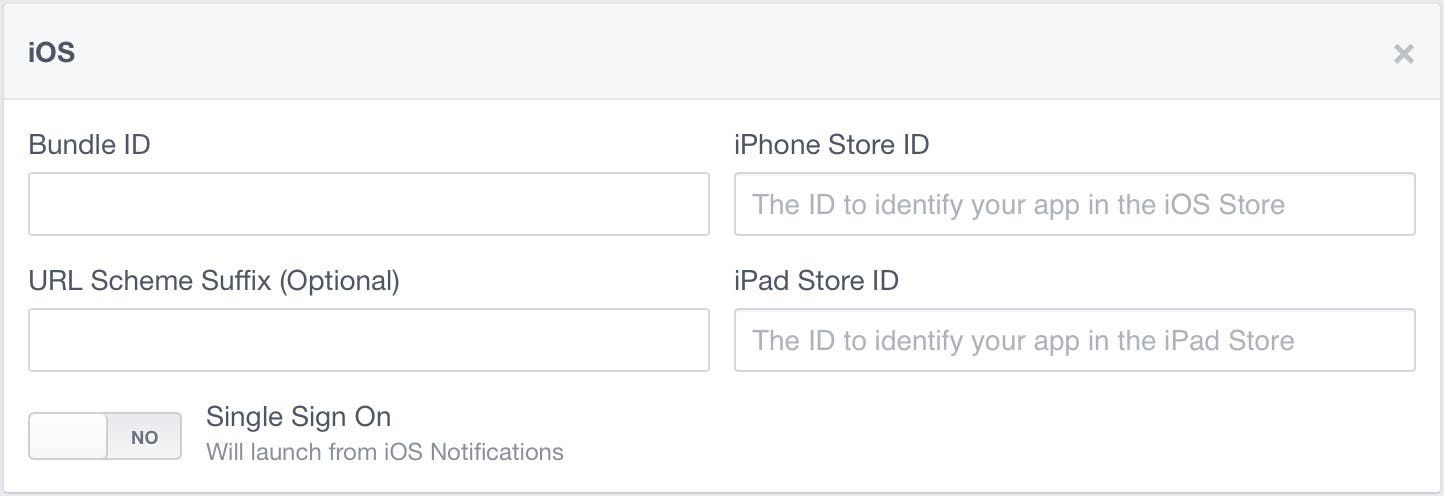 |
| Figure 11- Configuring your app for iOS |
- In the Bundle ID field, enter your app's bundle identifier, which you can find in the General pane of the Project Editor in Xcode (Figure 12). Also, click on the switch to set Single Sign On to YES (you can leave the iPhone/iPad Store ID fields empty for now.) Afterwards, click Save Changes.
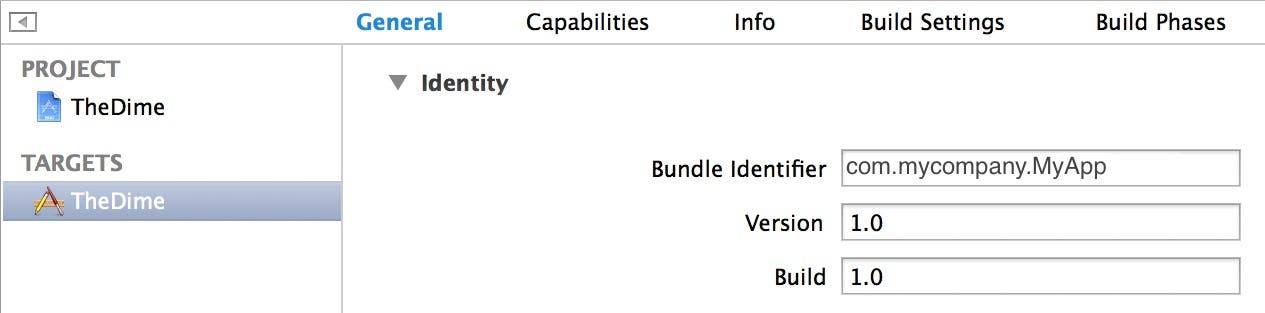 |
| Figure 12 - Your app's Bundle Identifier in the General pane of the Project Editor |
Step 5: Configuring Your Xcode Project
Now you need to add the Facebook SDK for iOS to your project and configure your .plist file.
- In the Project Navigator, right-click the Frameworks group and select Add Files to "<Project Name>"... from the popup menu.
- In the Add Files dialog, navigate to the folder that contains the Facebook SDK for iOS that you downloaded earlier (it's located in the Documents folder by default). Select FacebookSDK.framework, make sure the Copy items into your destination group's folder (if needed) check box is unchecked, the Create groups for any added folders option is selected, and then click Add.
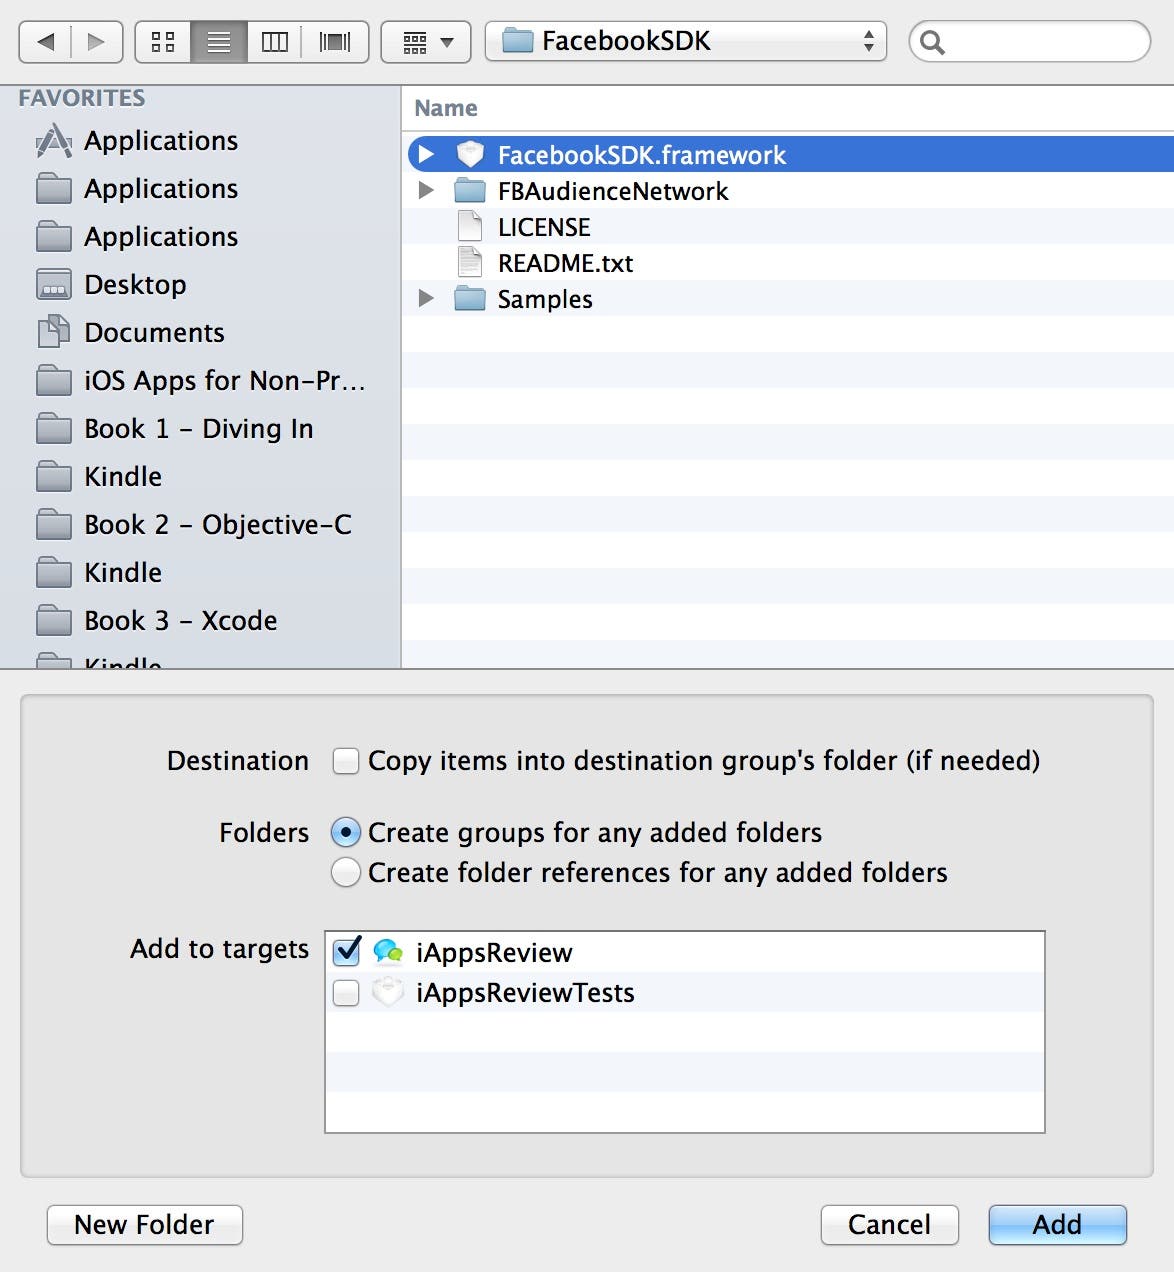 |
| Figure 13 - Add the Facebook SDK to your project. |
This adds the FacebookSDK.framework under your the Frameworks group.
- In the Project Navigator, expand your project's Supporting Files group, and select your project's .plist file.
- Select the very first item (Information Property List) in the .plist file and click the plus sign that appears to the right (Figure 14). When you do this, a new item is added to the property list.
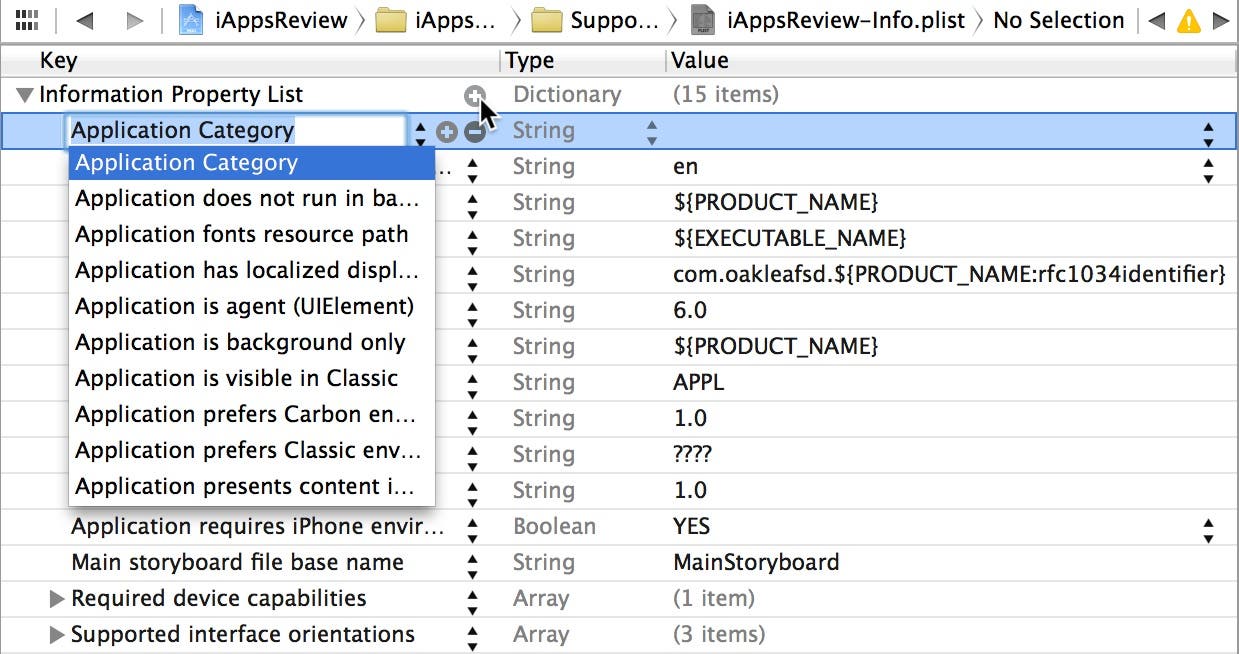 |
| Figure 14 - Add a new item to the property list. |
- In the popup for the new item under the Key column, enter the text FacebookAppID (Figure 15). Afterwards, double-click in the Value column and enter the app ID that was assigned to your app in the Facebook App Settings page.
 |
| Figure 15 - Enter your app ID in the .plist file. |
- Now you need to add another .plist entry. To do this, hover your mouse pointer over the Information Property List item (Figure 14) and click the plus sign again. In the Key column, enter FacebookDisplayName (Figure 16) and then press Tab. In the Value column, enter the Display Name you entered in the Facebook App Dashboard.
 |
| Figure 16 - Add your app's Display Name to the .plist file. |
- There's one more key you need to add to your .plist file. Hover your mouse pointer over the Information Property List item, and click the plus sign again. In the Key column, enter URL Types (Figure 17).
 |
| Figure 17 - Add the URL types key to your project's .plist file |
- Click the arrow to the left of URL types to expand the entry, and then click the arrow to the left of Item 0 to expand it. Change the Key below Item 0 to URL Schemes as shown in Figure 18.
 |
| Figure 18 - Set the Key to URL Schemes. |
- Finally, click the arrow to the left of URL Schemes and set the Value of Item 0 to the app ID assigned to your app in the Facebook App Settings page, but with an fb prefix (Figure 19).
 |
| Figure 19 - Creating the URL Schemes entry in the .plist file |
That's it! Now you need to write some code for your app that allows users to log in via Facebook.
Facebook Login Options
Facebook offers two options when logging into Facebook from your iOS app:
- Use the Facebook login view that displays a built-in Facebook login button and handles much of the complexity for logging in and out for you.
- Use your own custom login view and using API calls to the Facebook SDK.
The majority of apps need to use the second option, because not all users will want to log into your app using Facebook, and you will need to provide an alternative, such as an email address and password. So, in this post, I'll demonstrate how to implement your own custom login view.
Checking for an Active Facebook Session at Startup
If a user has already logged into your app via Facebook, you should check to see if there is still a valid session available, and if so, automatically log the user in.
- At the top of your AppDelegate.h header file, add the following import statement:
#import <FacebookSDK/FacebookSDK.h>
- In your AppDelegate.m implementation file, add the following code to the application:didFinishLaunchingWithOptions: method, before the final return YES; statement (note that you will get a compiler error until you complete the next steps):
// Whenever a person opens the app, check for a cached session
if (FBSession.activeSession.state == FBSessionStateCreatedTokenLoaded) {
// If there's one, just open the session silently, without showing the user the login UI
[FBSession openActiveSessionWithReadPermissions:@[@"public_profile"]
allowLoginUI:NO
completionHandler:^(FBSession *session, FBSessionState state, NSError *error) {
// Handler for session state changes
// This method will be called EACH time the session state changes,
// also for intermediate states and NOT just when the session open
[self sessionStateChanged:session state:state error:error];
}];
}
When the AppDelegate's application:didFinishLaunchingWithOptions: method is executed at app startup, if the FBSession object's state is set to FBSessionStateCreatedTokenLoaded, this means there is an active Facebook session. If there is an active session, an openActiveSessionWithReadPermissions:allowLoginUI:completionHandler: message is sent to the FBSession object. Notice an @"public_profile" argument is passed in this message call. This requests access to the user's public profile. You must always pass this argument when creating this connection. You can also ask for additional permissions when making the connection. To find out more, check out Facebook's documentation at this link, under the section Asking for permissions.
The sequence diagram in Figure 20 shows the objects and message flow of the code you just added.
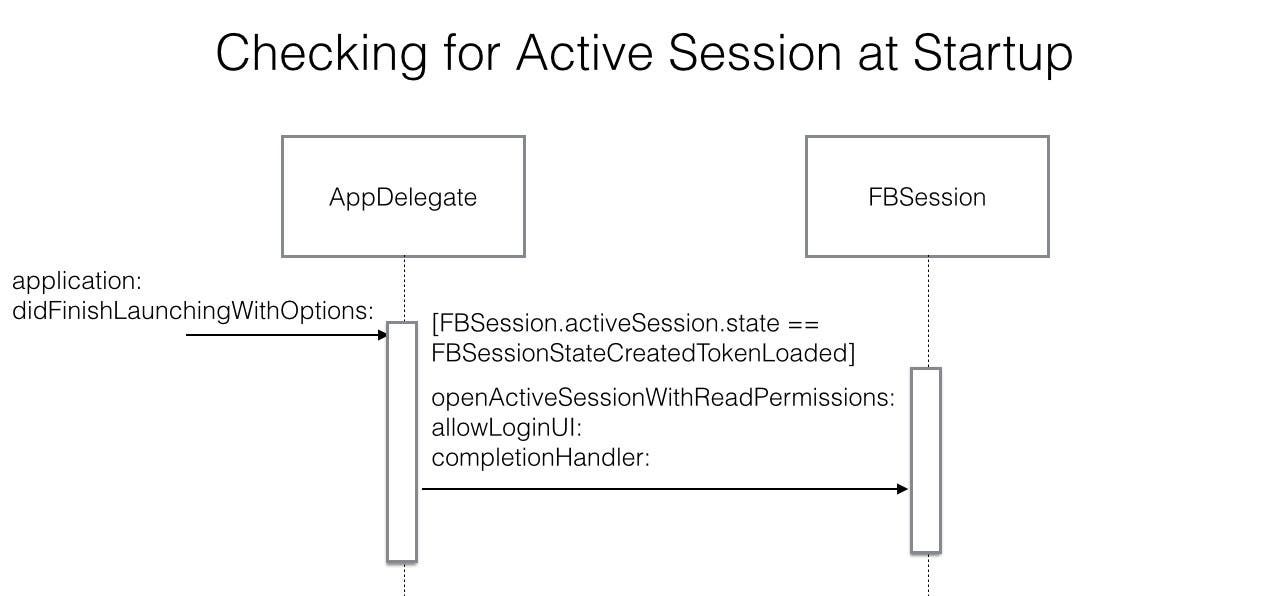 |
| Figure 20 - Checking for an active Facebook session at startup |
Adding the Session State Handler Method
Now you need to add the sessionStateChanged: method you referenced in the code you added in the previous step along with a few helper methods.
- Add the following method declaration to your AppDelegate.h file:
- (void)sessionStateChanged:(FBSession *)session state:(FBSessionState) state error:(NSError *)error;
- Now add the following method implementations to your AppDelegate.m file:
// This method will handle ALL the session state changes in the app
- (void)sessionStateChanged:(FBSession *)session state:(FBSessionState) state error:(NSError *)error
{
// If the session was opened successfully
if (!error && state == FBSessionStateOpen){
NSLog(@"Session opened");
// Show the user the logged-in UI
[self userLoggedIn];
return;
}
if (state == FBSessionStateClosed || state == FBSessionStateClosedLoginFailed){
// If the session is closed
NSLog(@"Session closed");
// Show the user the logged-out UI
[self userLoggedOut];
}
// Handle errors
if (error){
NSLog(@"Error");
NSString *alertText;
NSString *alertTitle;
// If the error requires people using an app to make an action outside of the app in order to recover
if ([FBErrorUtility shouldNotifyUserForError:error] == YES){
alertTitle = @"Something went wrong";
alertText = [FBErrorUtility userMessageForError:error];
[self showMessage:alertText withTitle:alertTitle];
} else {
// If the user cancelled login, do nothing
if ([FBErrorUtility errorCategoryForError:error] == FBErrorCategoryUserCancelled) {
NSLog(@"User cancelled login");
// Handle session closures that happen outside of the app
} else if ([FBErrorUtility errorCategoryForError:error] == FBErrorCategoryAuthenticationReopenSession){
alertTitle = @"Session Error";
alertText = @"Your current session is no longer valid. Please log in again.";
[self showMessage:alertText withTitle:alertTitle];
// Here we will handle all other errors with a generic error message.
// We recommend you check our Handling Errors guide for more information
// https://developers.facebook.com/docs/ios/errors/
} else {
//Get more error information from the error
NSDictionary *errorInformation = [[[error.userInfo objectForKey:@"com.facebook.sdk:ParsedJSONResponseKey"] objectForKey:@"body"] objectForKey:@"error"];
// Show the user an error message
alertTitle = @"Something went wrong";
alertText = [NSString stringWithFormat:@"Please retry. \n\n If the problem persists contact us and mention this error code: %@", [errorInformation objectForKey:@"message"]];
[self showMessage:alertText withTitle:alertTitle];
}
}
// Clear this token
[FBSession.activeSession closeAndClearTokenInformation];
// Show the user the logged-out UI
[self userLoggedOut];
}
}
- (void)userLoggedIn
{
}
- (void)userLoggedOut
{
}
- (void)showMessage:(NSString *)message withTitle:(NSString *)title
{
UIAlertView *alert = [[UIAlertView alloc] initWithTitle:title message:message delegate:self cancelButtonTitle:@"OK" otherButtonTitles: nil];
[alert show];
}
The sessionStateChanged: method is automatically called when there is any change in the status of the Facebook session. If the session state changes to open (FBSessionStateOpen), the userLoggedIn method is called. If you would like, you can add code to this method that changes a visual element to indicate the user is logged in, or you can perform some other action.
If the session state changes to closed (FBSessionStateClosed), the userLoggedOut method is called, where you can again add some code to respond to this change in state.
The rest of the code in the sessionStateChanged: method performs error handling and displays alerts to the user where appropriate.
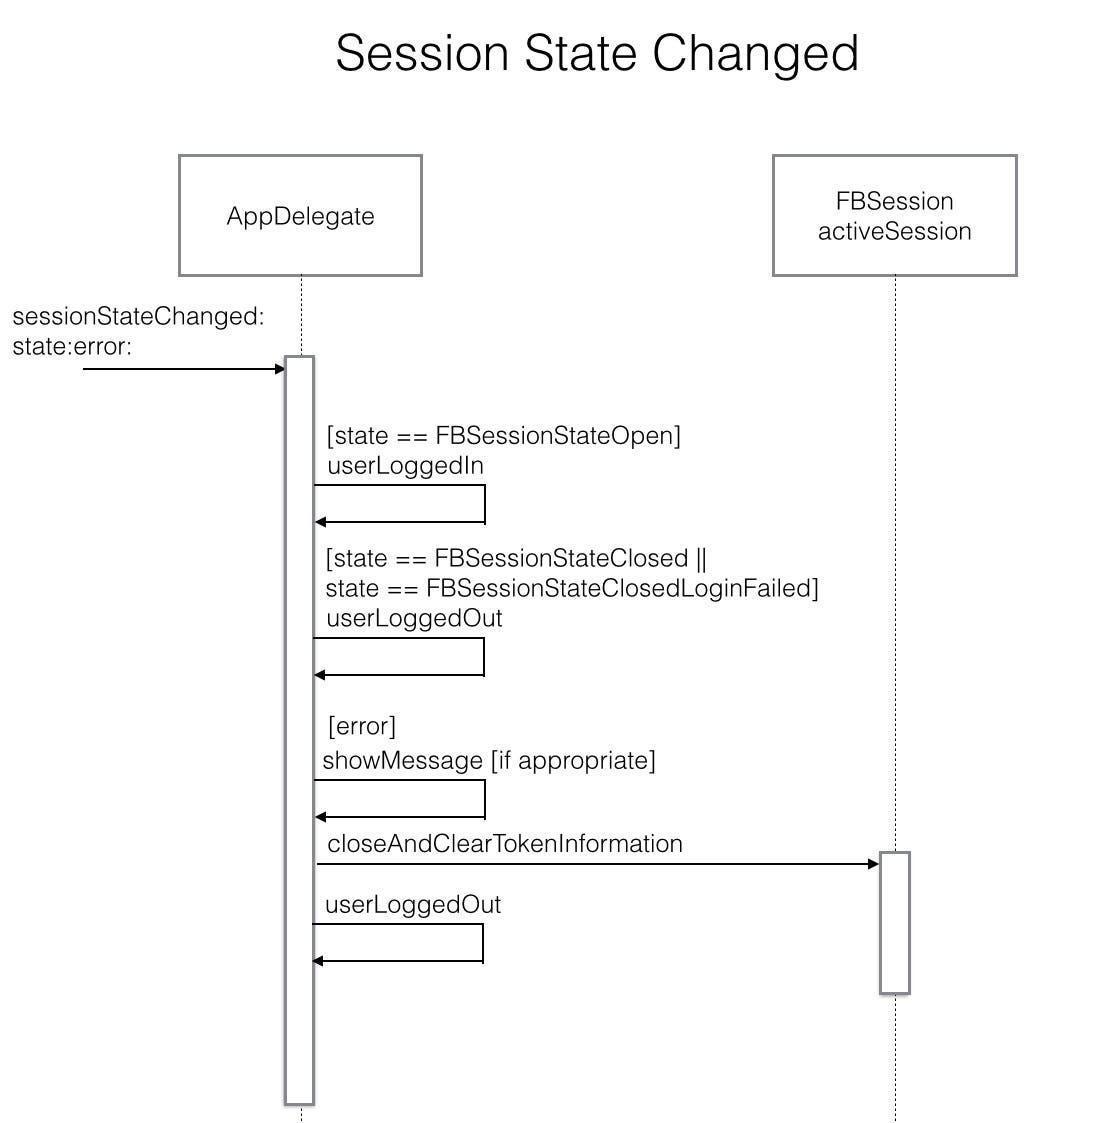 |
| Figure 21 - The session state changed sequence diagram |
Opening a New Facebook Session
If there is no active Facebook session at startup, you need to create a new one. Typically, the code to create a new session is found in the action method for a "Log in with Facebook" button.
- Add the following code to your Facebook login button's action method (you can name your method differently than the method name shown here):
- (IBAction)facebookButtonTouched:(id)sender {
// Open a session showing the user the login UI
// You must ALWAYS ask for public_profile permissions when opening a session
[FBSession openActiveSessionWithReadPermissions:@[@"public_profile"]
allowLoginUI:YES
completionHandler:
^(FBSession *session, FBSessionState state, NSError *error) {
// Retrieve the app delegate
AppDelegate* appDelegate = [UIApplication sharedApplication].delegate;
// Call the app delegate's sessionStateChanged:state:error method to handle session state changes
[appDelegate sessionStateChanged:session state:state error:error];
}];
}
This code sends the FBSession object an openActiveSessionWithReadPermissions:allowLoginUI:completionHandler: message, again passing in the requested permissions (you can change the permissions to suit your needs). For the completionHandler argument, this code passes an Objective-C block that, when called, passes a sessionStateChanged:state:error: message to the AppDelegate object.
If the Facebook app is installed on the user's iOS device, then control is passed to the app. Otherwise, control is passed to Facebook running in the iOS browser.
- During the Facebook login process, the Facebook app returns control to your application by calling the application:openURL:sourceApplication:annotation: method in your AppDelegate. So, you need to add this method to your AppDelegate.m file:
// During the Facebook login flow, your app passes control to the Facebook iOS app or Facebook in a mobile browser.
// After authentication, your app will be called back with the session information.
- (BOOL)application:(UIApplication *)application
openURL:(NSURL *)url
sourceApplication:(NSString *)sourceApplication
annotation:(id)annotation
{
return [FBAppCall handleOpenURL:url sourceApplication:sourceApplication];
}
Figure 22 contains a sequence diagram that depicts the object and message interaction during the login process.
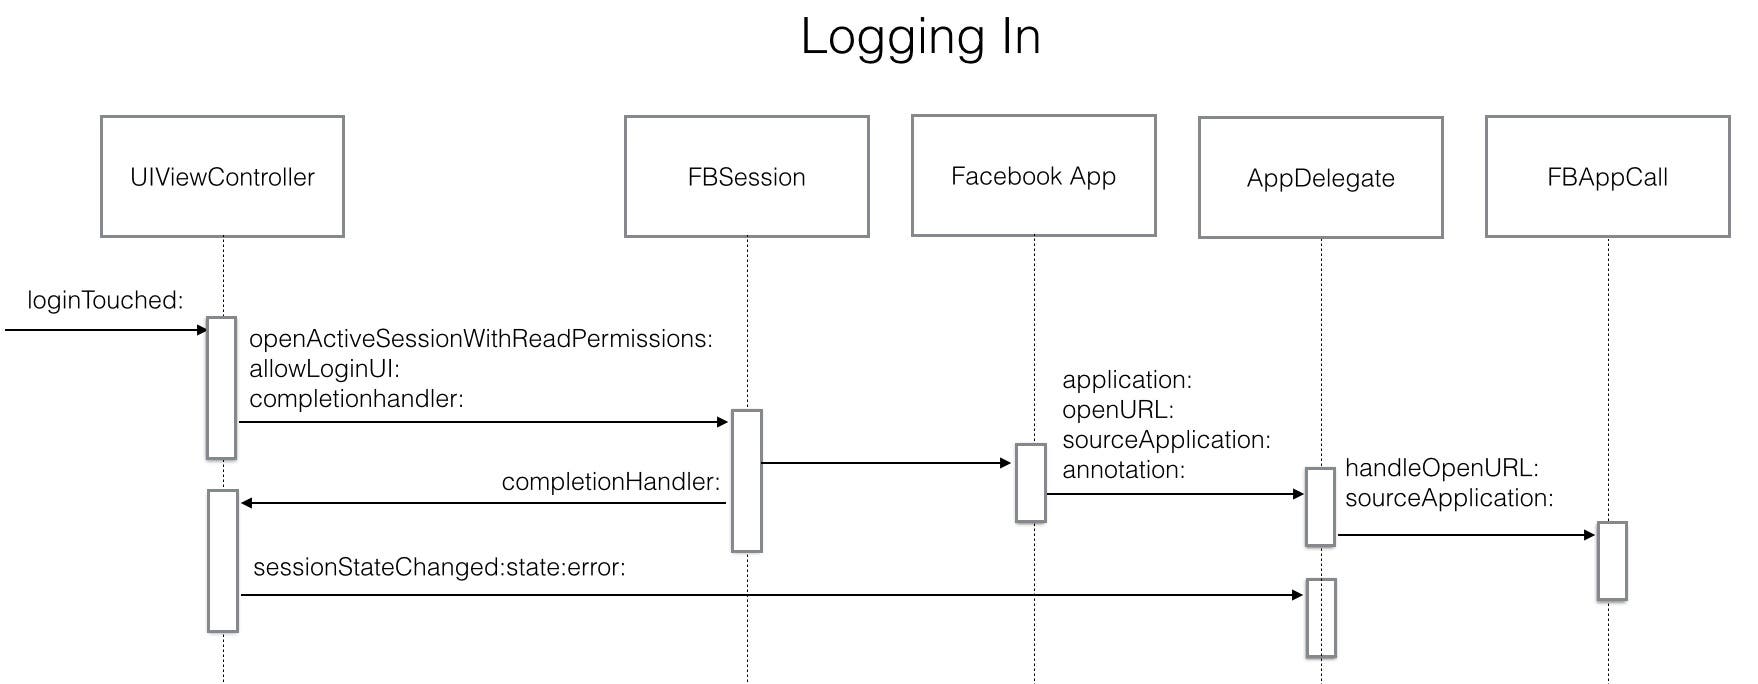 |
| Figure 22 - The Facebook login sequence diagram |
- Lastly, you need to add code that handles the case where the user leaves your app while the Facebook dialog is shown. Note that your AppDelegate.m file should already contain an applicationDidBecomeActive: method, so simply add the code shown below to the existing ethod.
- (void)applicationDidBecomeActive:(UIApplication *)application
{
// Handle the user leaving the app while the Facebook login dialog is being shown
// For example: when the user presses the iOS "home" button while the login dialog is active
[FBAppCall handleDidBecomeActive];
}
Logging Out of Facebook
Typically, your app will have a Log Out button (often in the Settings scene) that logs the user out of Facebook. It's good form to ask the user if they are sure they want to log out, so you should display an alert first, and then log out the user if they confirm.
- Select the header file of the view controller that contains the Log Out button, and adopt the UIActionSheetDelegate protocol:
@interface SettingsTableViewController : mmUITableViewController <UIActionSheetDelegate>
@end
- Next, select the implementation file of the view controller that contains the Log Out button, and add the following import statement:
#import <FacebookSDK/FacebookSDK.h>
- Now add the following methods to the view controller that contains the Log Out button:
- (IBAction)logOut:(id)sender {
UIActionSheet *sheet = [[UIActionSheet alloc] initWithTitle:@"Are you sure you want to log out?"
delegate:self
cancelButtonTitle:@"Cancel"
destructiveButtonTitle:@"Log Out"
otherButtonTitles:nil];
sheet.actionSheetStyle = UIActionSheetStyleDefault;
[sheet showInView:self.view];
}
- (void)actionSheet:(UIActionSheet *)actionSheet didDismissWithButtonIndex:(NSInteger)buttonIndex
{
if (buttonIndex == 0) {
// Log out
[FBSession.activeSession closeAndClearTokenInformation];
}
}
In this example, logOut: is the action method for the Log Out button. It displays an action sheet that asks the user if they are sure they want to log out. The actionSheet: method is called when the user taps either the Cancel or Log Out buttons of the action sheet. If they have selected Log Out, the FBSession.activeSession object is passed a closeAndClearTokenInformation message, which logs the user out.
Figure 23 contains a sequence diagram that shows the object interaction when the user logs out.
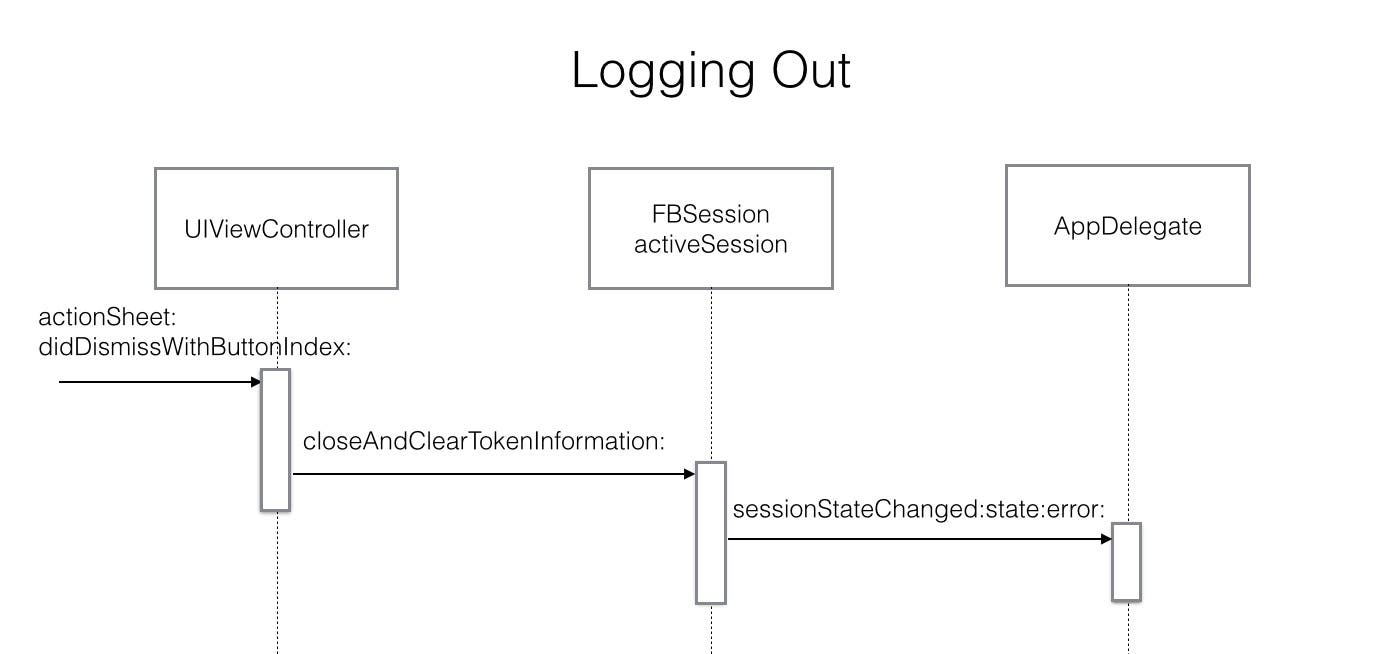 |
| Figure 23 - The Logging Out sequence diagram |
Conclusion
That wraps up the main tasks you need to perform to integrate Facebook login to your iOS apps. If you run into any trouble along the way, I recommend you also check out Facebook's iOS sample app that demonstrates logging in and out, which you can get at this link. If you want to allow users to log in using an email address and password, you can add this functionality to the view controllers that contain your log in and log out methods.

Kevin McNeish
Kevin McNeish is author of the new book “Learn to Code in Swift” as well as the “iOS App Development for Non-Programmers” book series (www.iOSAppsForNonProgrammers.com), winner of the Publishing Innovation Award. Kevin is also an award-winning app developer, software architect, and conference speaker in the U.S. and abroad. He has spent much of his career making difficult concepts easy to understand. Follow Kevin on Twitter: @kjmcneish.
 Leanne Hays
 Olena Kagui
 Rhett Intriago
 Rachel Needell
 Amy Spitzfaden Both