Review: Turn Footage into Memories with Spivo Video Editing
Leave video making to the experts and watch them transform the footage from your trip into a beautiful video memory with accompanying music!


In the last 10 years, Olena has been published in dozens of publications internationally and written hundreds of how-to articles and complex guides about Apple products, software, and apps.
Learn More In the last 10 years, Olena has been published in dozens of publications internationally and written hundreds of how-to articles and complex guides about Apple products, software, and apps.
Learn MoreWe all love to take videos of the world around us. Every time I come home from a vacation, wedding, or even a walk with my dogs, my phone is bursting with footage. Despite having video editing experience, I don’t always have the time, energy, or inspiration to turn it into a viewable memory, which is where Spivo comes in to save the day! In just one week, the Spivo Video Editing team can turn hours of video and thousands of photos into a memory that you can easily share and watch to relive the happy memories.
What Is Spivo Video Editing?
Spivo Video Editing is a service that turns photos and videos that you’ve taken on your iPhone, action camera, drone, or any other photo or video equipment into a video with music. You select your preferred length, mood, quality, and music, and notes on specific scenes you wish to include, unless you prefer to let the experts choose. Within a week, a team of video professionals send you the final product. If you have any concerns, you can request changes to make sure your video is exactly as you envisioned.
I decided to send Spivo my videos and photos from a trip to Ni’ihau, Hawaii’s Forbidden Island. I sent hours of footage taken on my GoPro and iPhone, plus some photos that we took throughout the day. I was really impressed with the video they created. You can watch it here!
How Does Spivo Video Editing Work?
The idea of getting a quote, sending over footage, and specifying how I want a video to look may seem daunting, but Spivo makes it really easy. I’ll walk you through the steps on an iPhone, but you can also do this on an iPad, Mac, or a non-Apple device alternative:
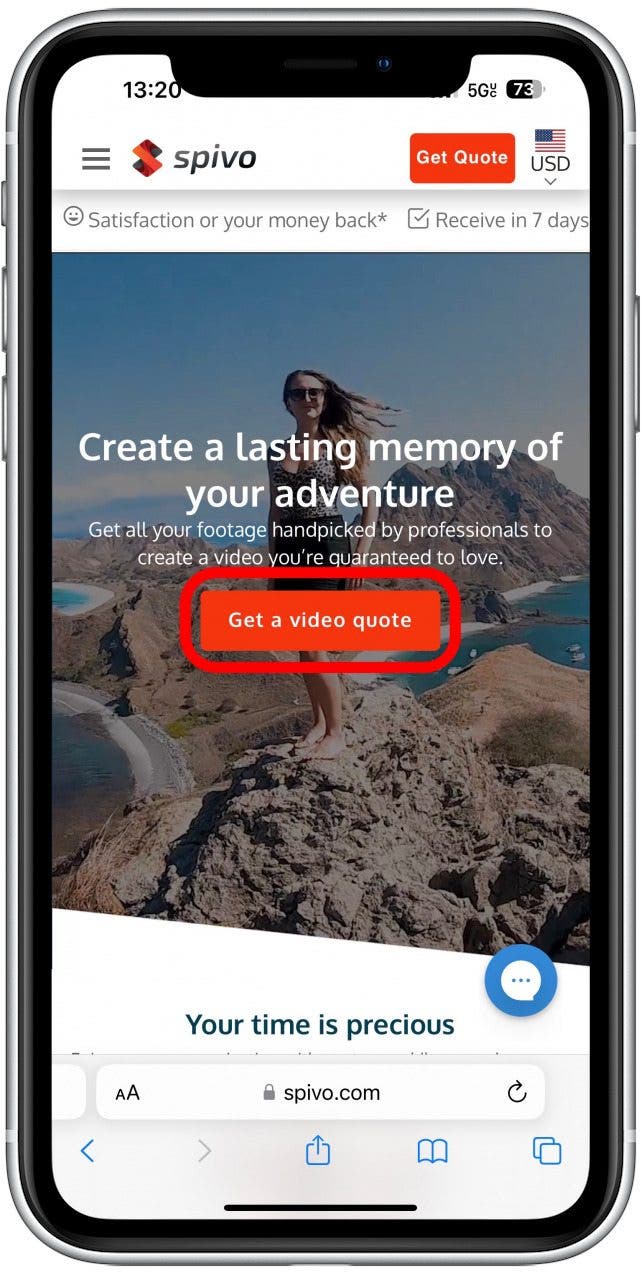
- Open the website https://www.spivo.com/ and tap Video Editing Service.

- Next, tap Get a video quote.
- Select who the video is for. If you want to give the video as a gift, tap For someone else. If it is a marketing or promotional video for your company, tap For a business. If this is a video of your vacation or wedding, tap For myself.

- Next pick the type of video this is, you’ll get to make more specifications later, so don’t overthink this step. In my case, I picked Travel or Adventure.
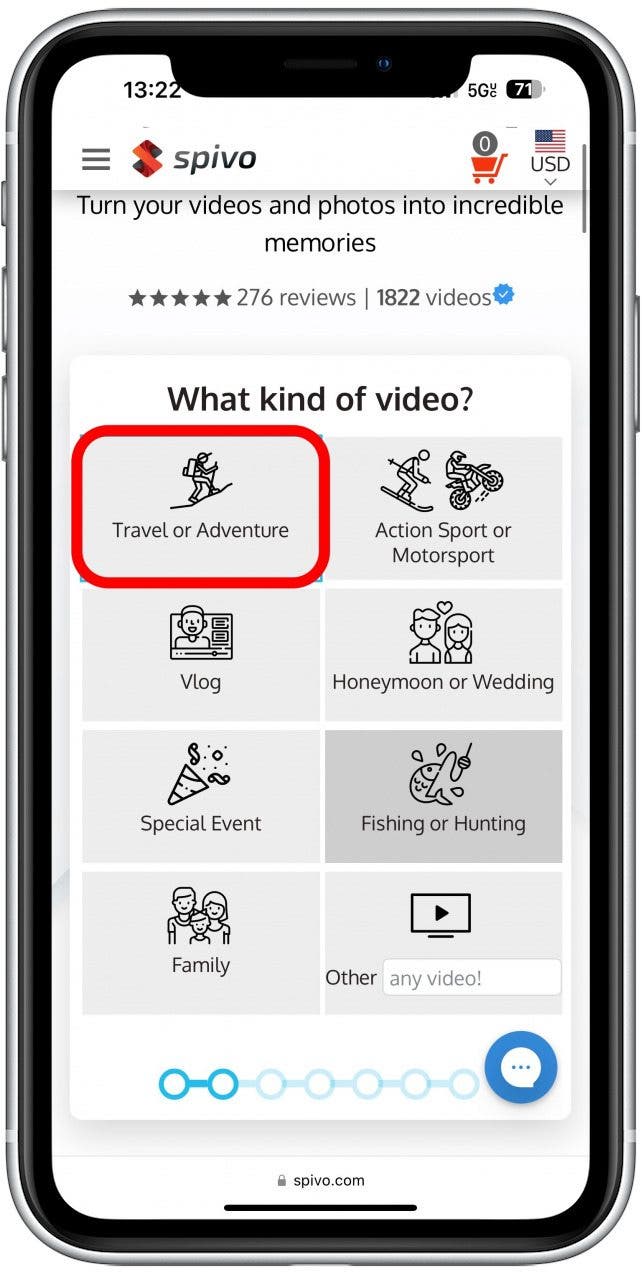
- Now you’ll have to select what kind of videos and photos these are. You can select multiple, even all of them if you have many different formats. Once you are done selecting them, tap Continue.

- Type your name, then tap Continue.

- Next, enter your email address. Below the Continue button, you’ll notice a box that you can check if you wish to receive information and promotional emails such as special discounts! By default, this is not checked. If you check it, you can always unsubscribe at a later time. Tap Continue.

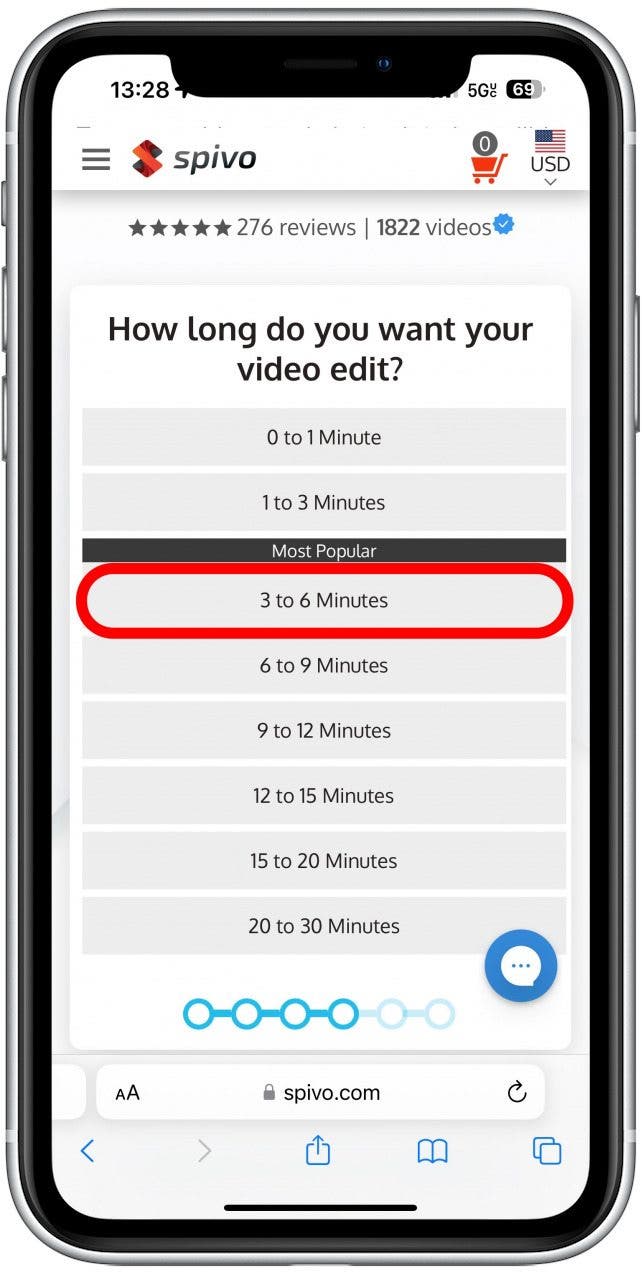
- At this stage, you can select how long you want your video to be. The most common is 3–6 minutes, which I will select. Don’t worry, you can make adjustments later if you need to.
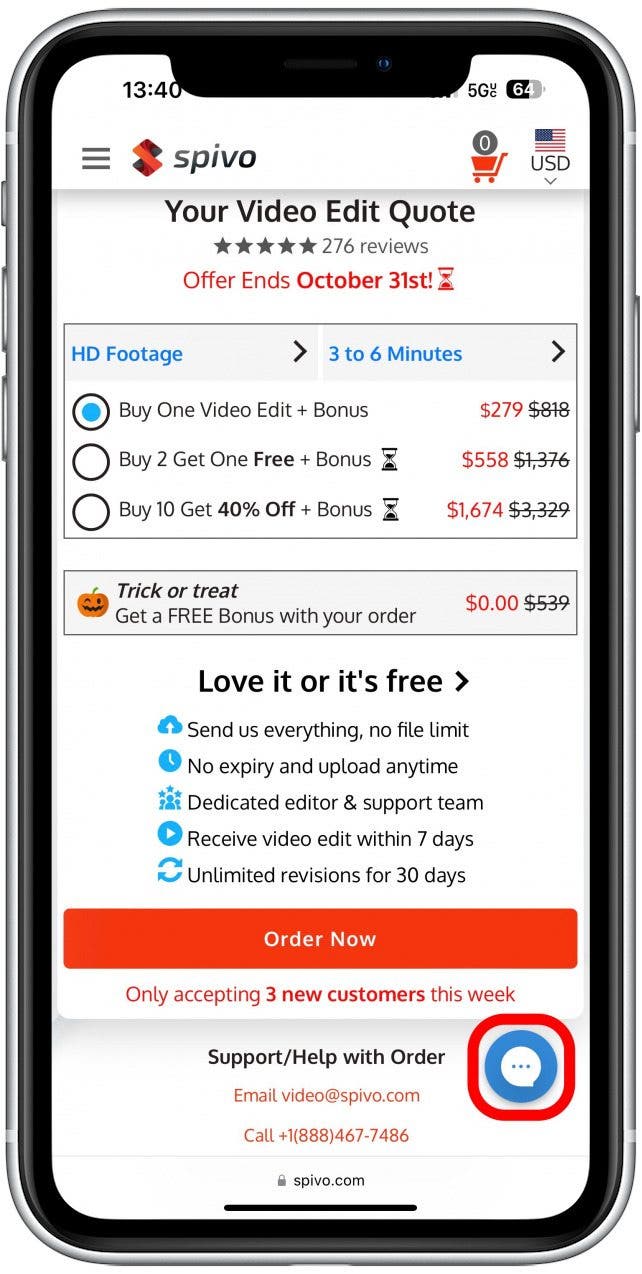
- Next, you’ll need to let Spivo know what the quality of the videos you’ll be uploading. If you are uploading iPhone videos, you can open the video in your Photos app and tap the i icon to check the size.
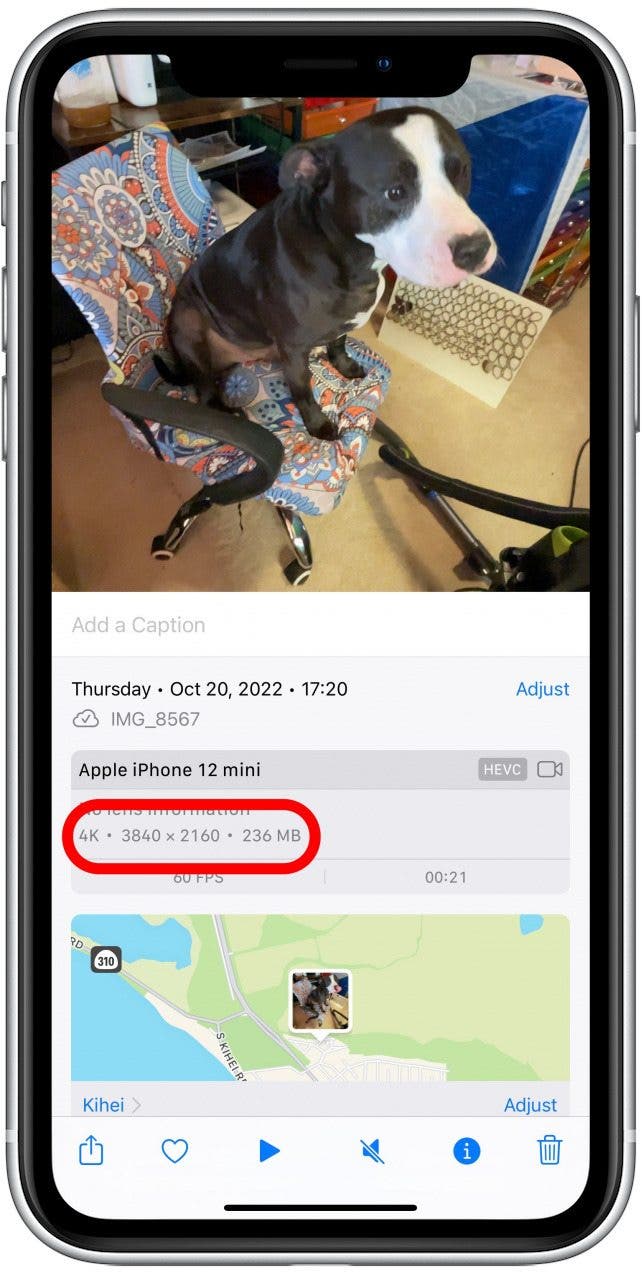
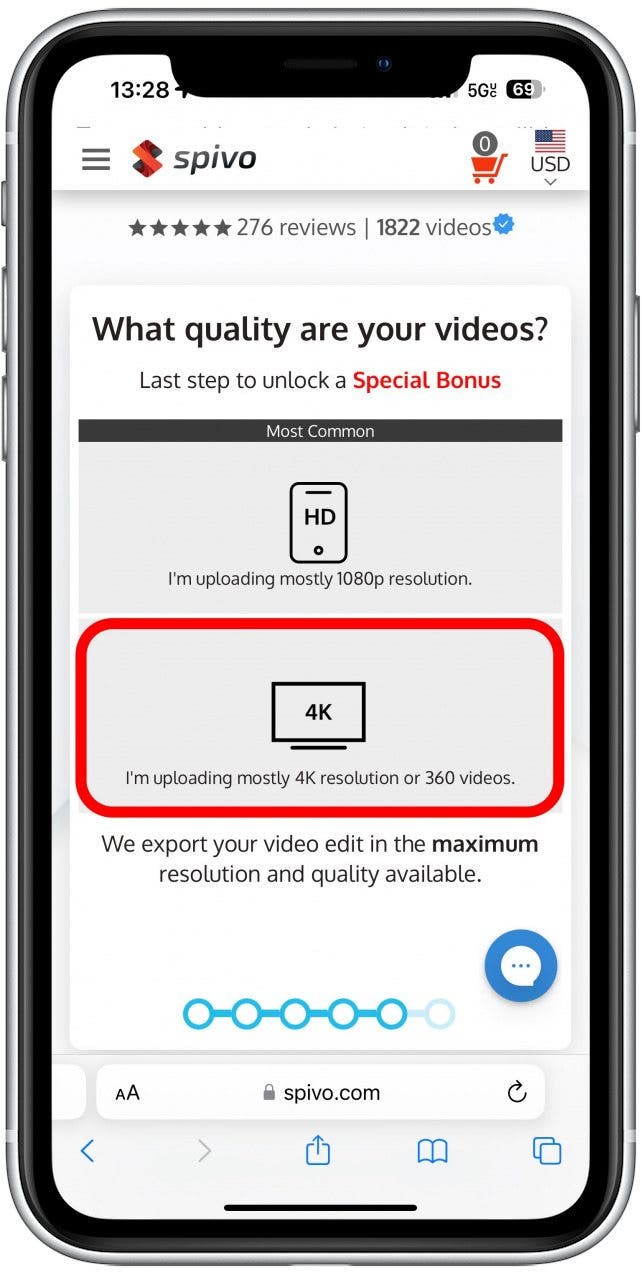
- I specifically set my iPhone to take videos in 4K, but you may be recording at a lower resolution. Once you figure out which one applies to you, select it.
- Wait a few seconds while your quote is calculated. You will soon see your price and any applicable discount offers that may apply. By default, Buy One Video Edit + Bonus will be selected. You can tap the circle next to Buy 2 Get One Free + Bonus or Buy 10 Get 40% Off + Bonus if you wish.
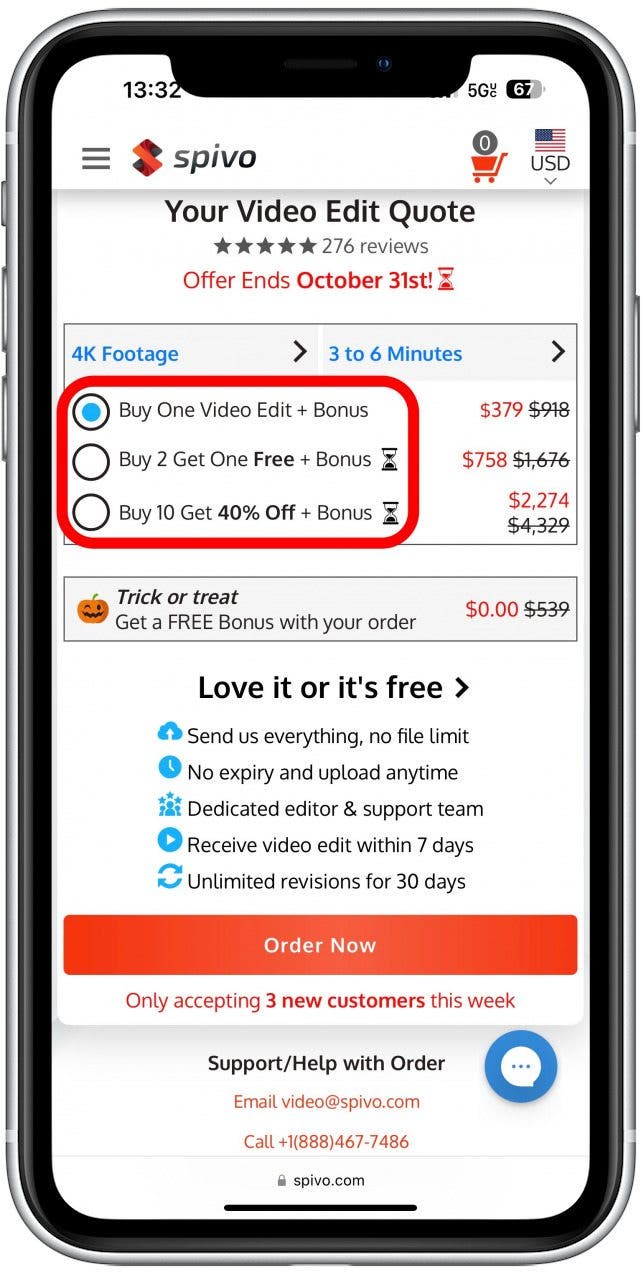
- You can also tap 4K Footage or 3 to 6 Minutes to make any changes and see how this changes the cost.

- If you have any questions at any point in the process, you can tap the chat icon and get the assistance you need.
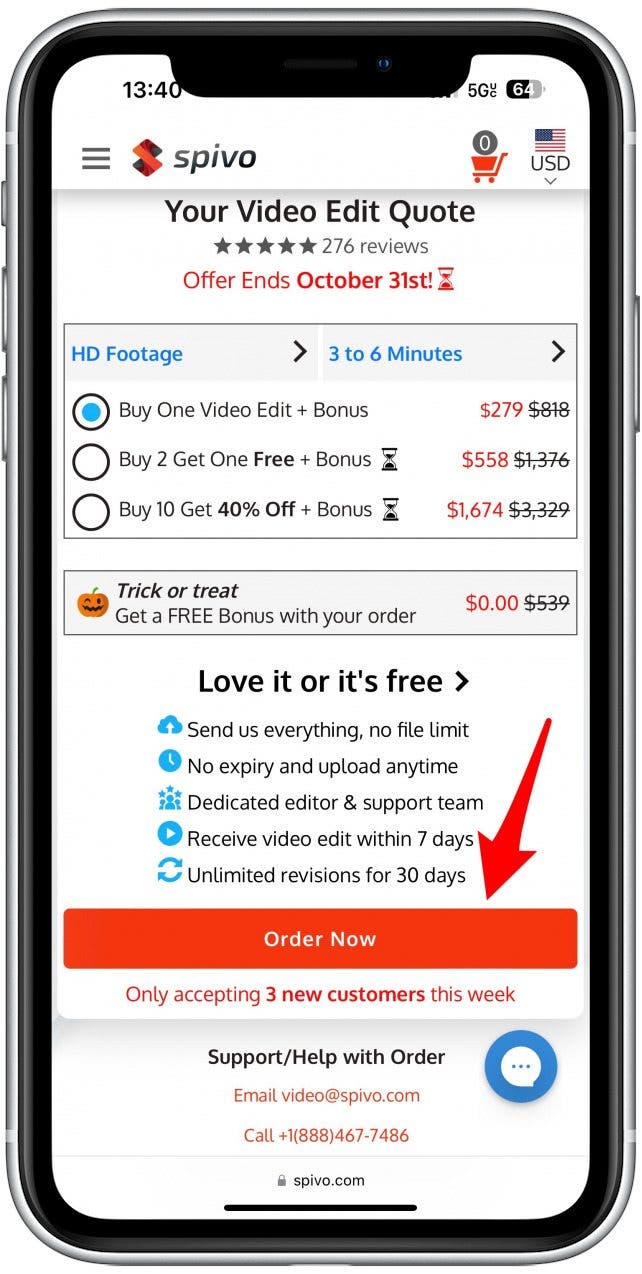
- Once you are ready, tap Order Now.
- Once you follow the steps and pay for your order, you will be sent a link to your email. I will switch to my Mac now as I’m uploading photos from a folder on an external hard drive. I recommend that you either create a folder with all the content on your Mac or an album with all the videos and photos if you want to upload directly from your iPhone. Once you get the email, open it and click on Your Video Edit Project.

- Under Step 1 click on Upload files.

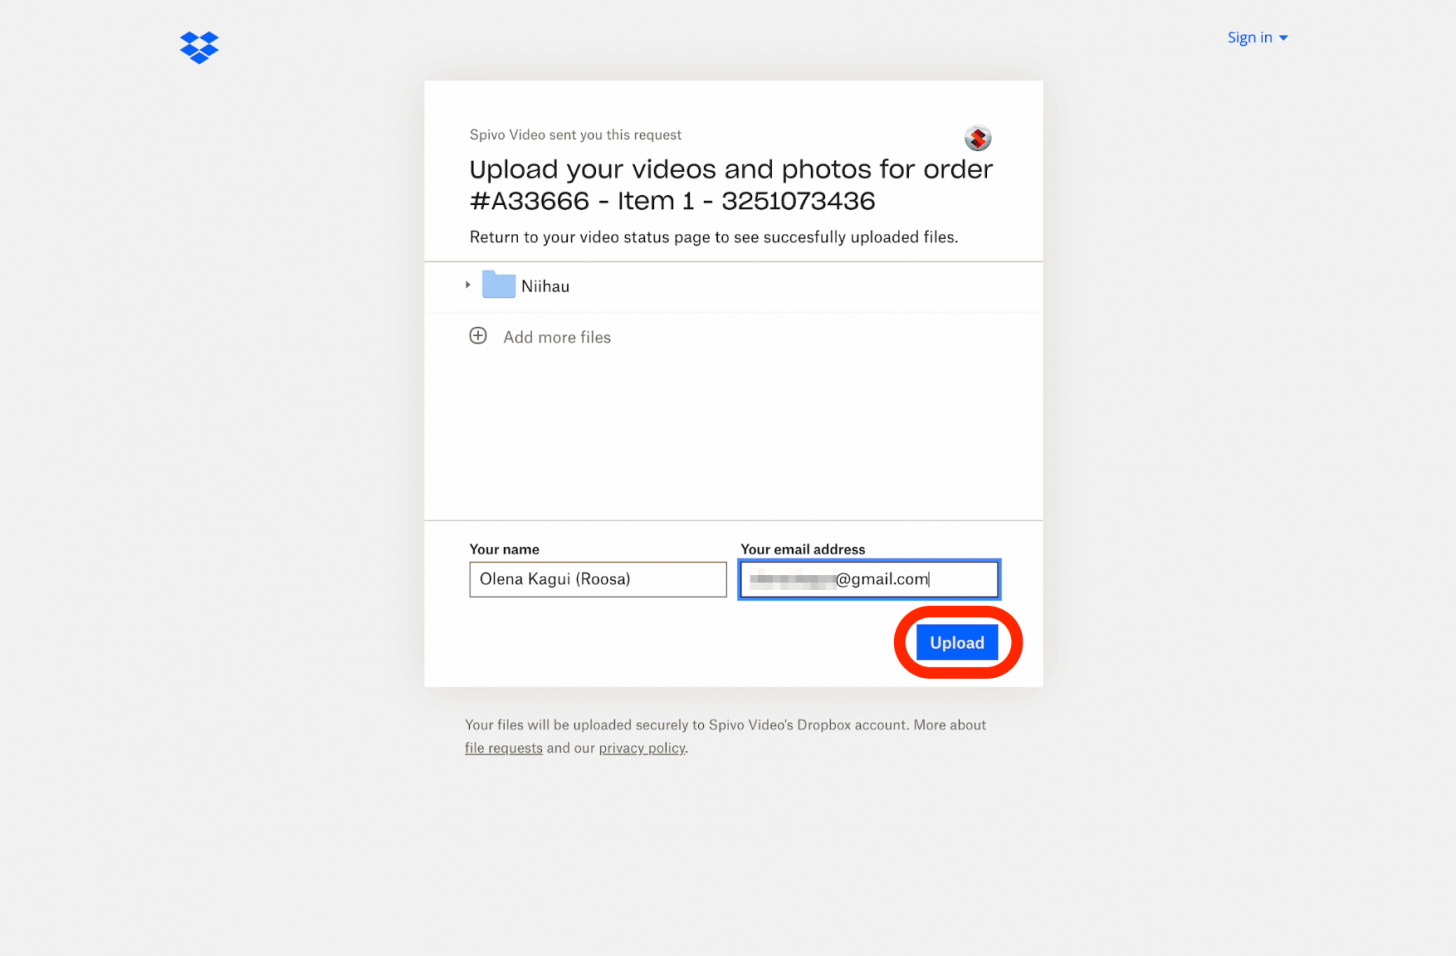
- Click Add files and select your folder or drag it in.
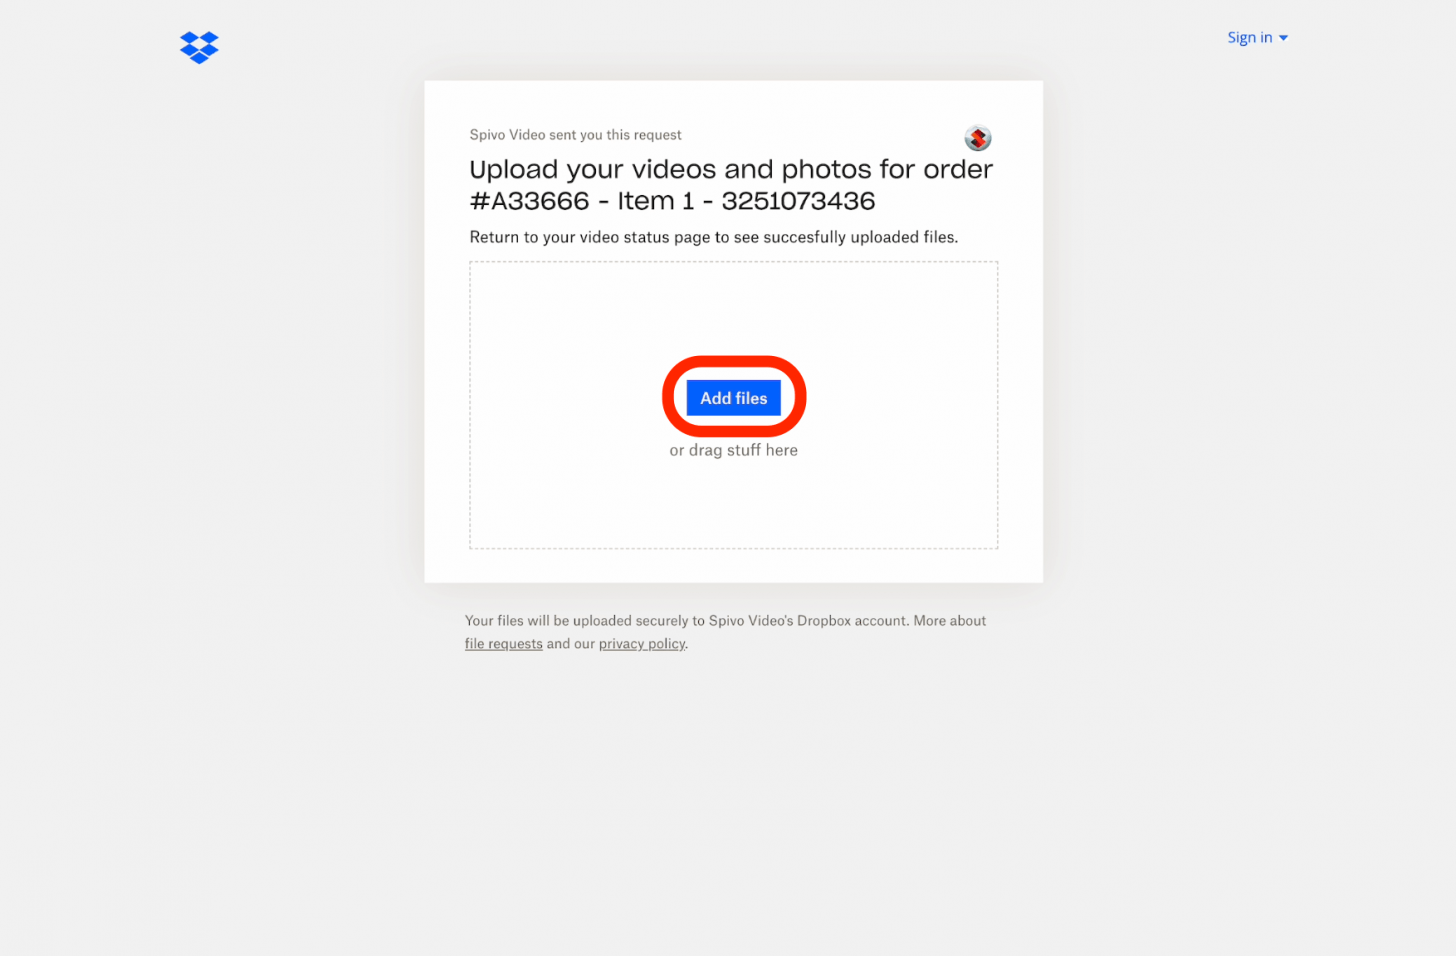
- Once you see your file(s) write your name and email address where indicated, then click Upload.
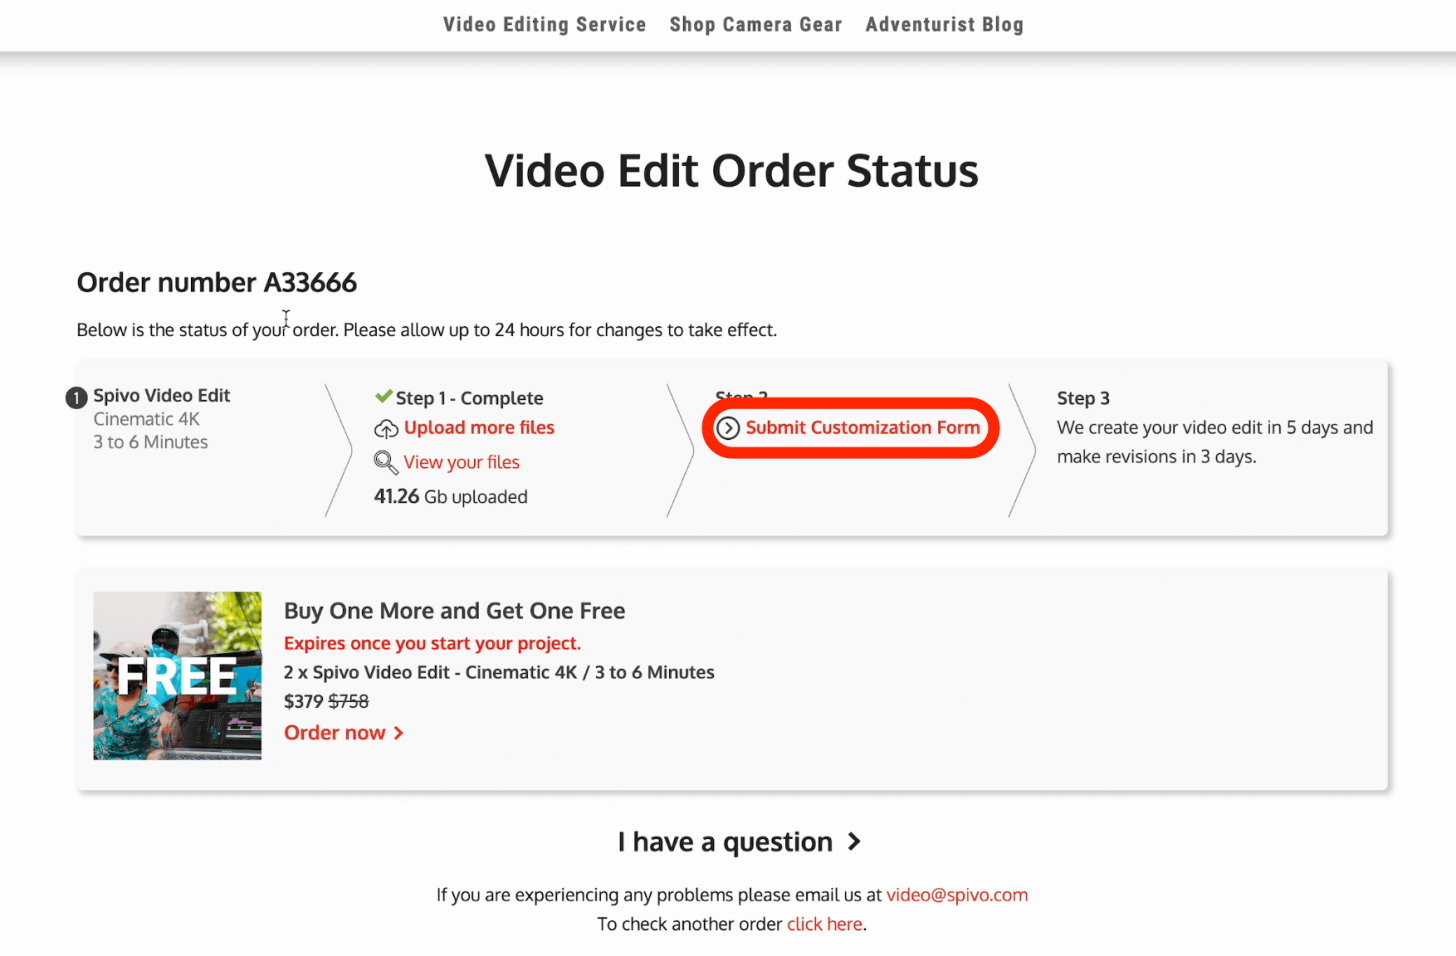
- Return to the email in step 15 and click on Your Video Edit Project again. Here you can view the files you've uploaded or upload more files. Once your files are all uploading, the next step is to click Submit Customization Form.
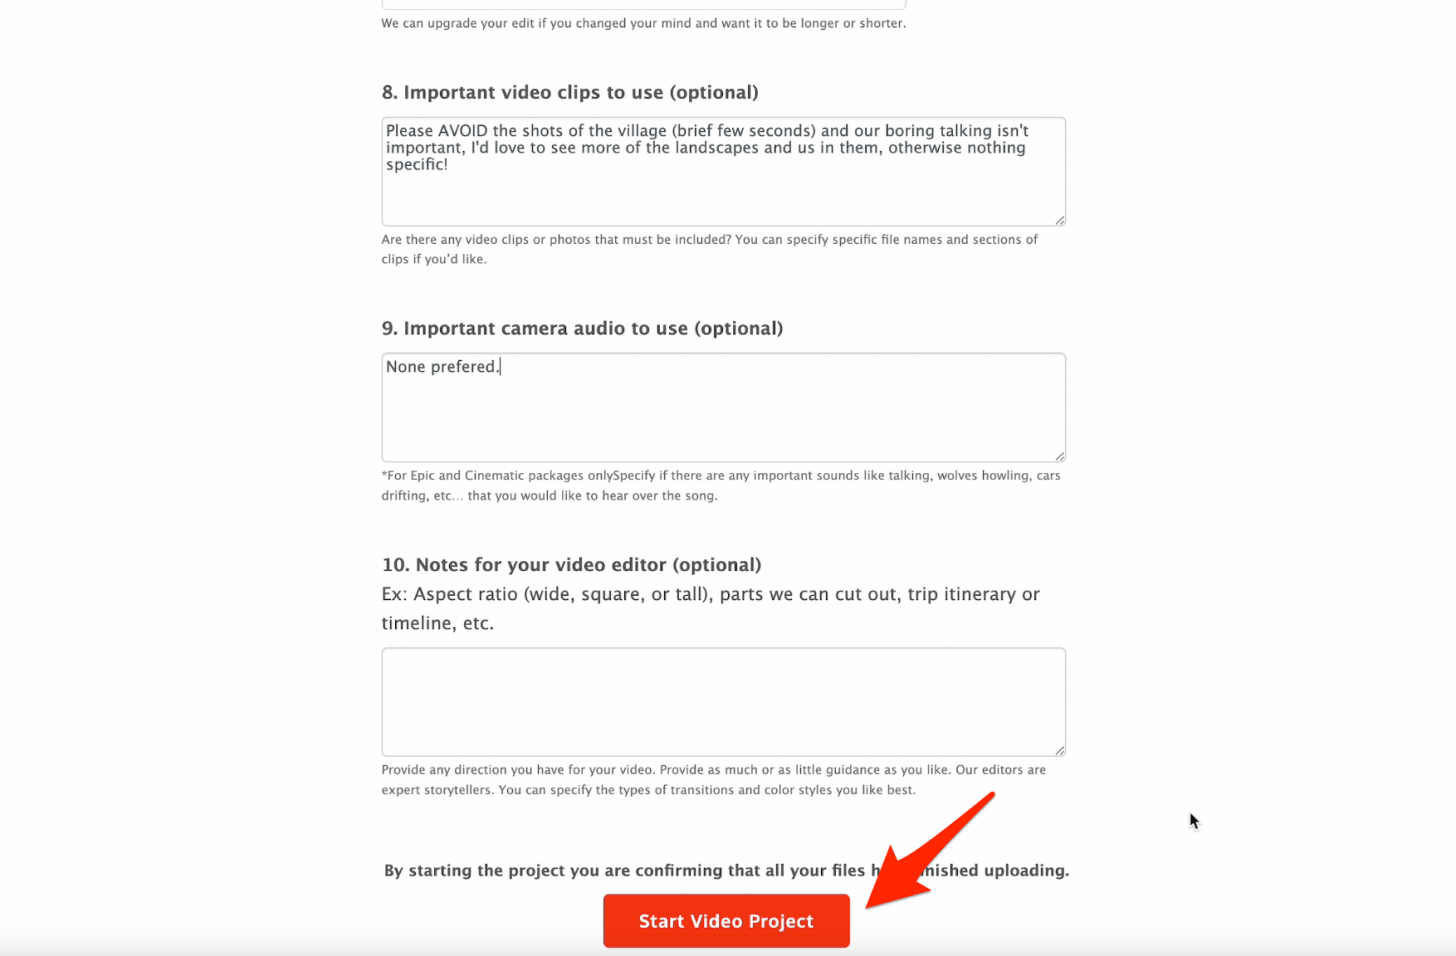
- Follow each step and make sure to fill in anything with a red star, these are mandatory to include.
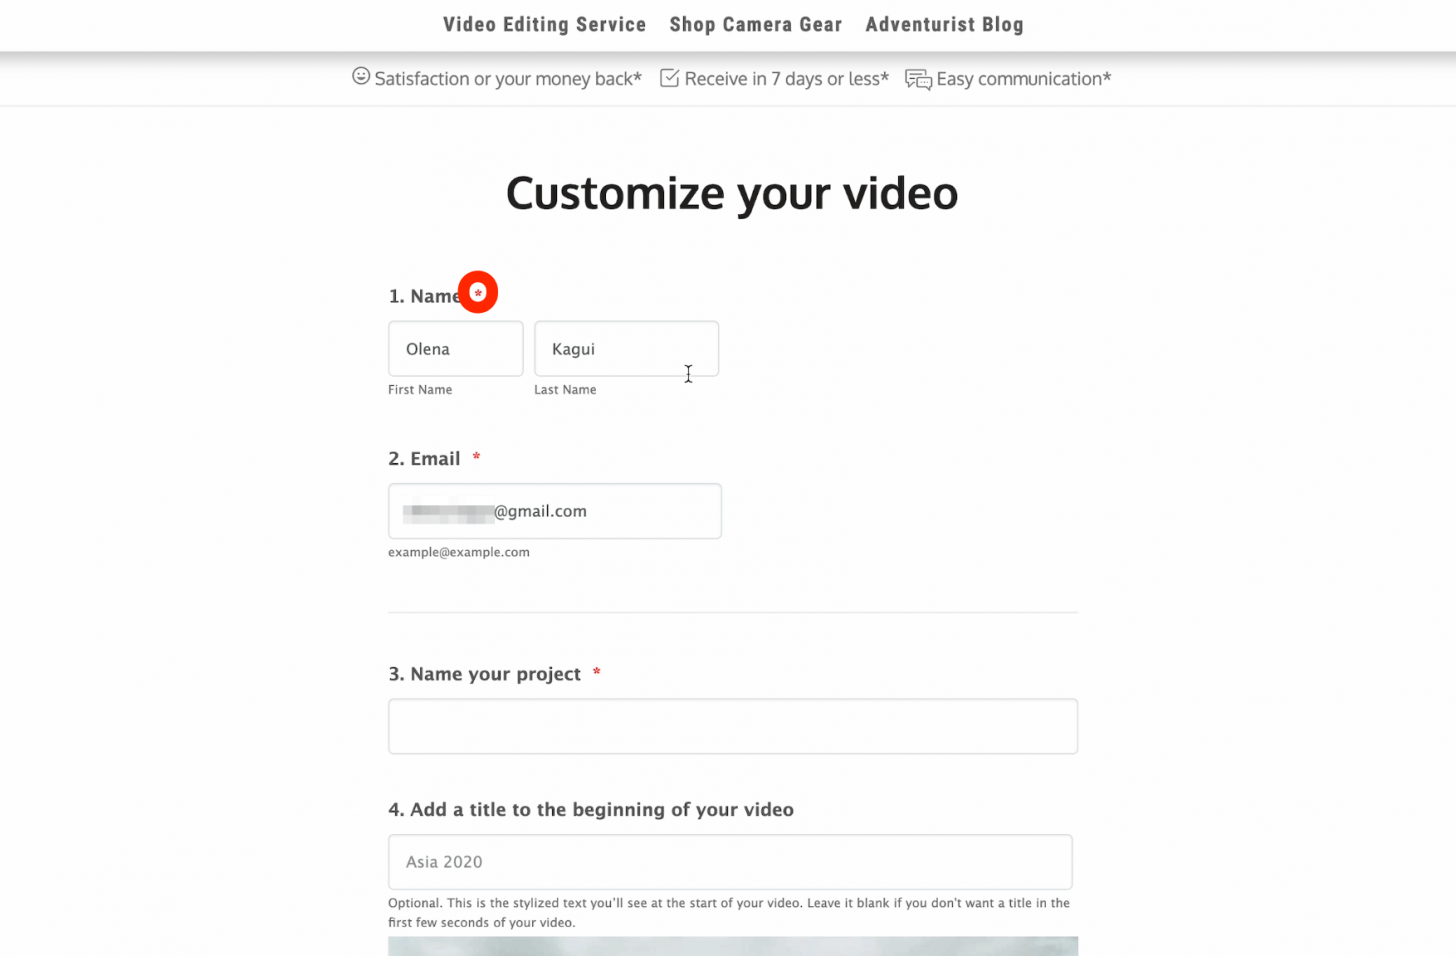
- Anything without the red star is optional. If you don't write something or make a selection, the Spivo Video Editing team will have less direction and will do what they think works best.
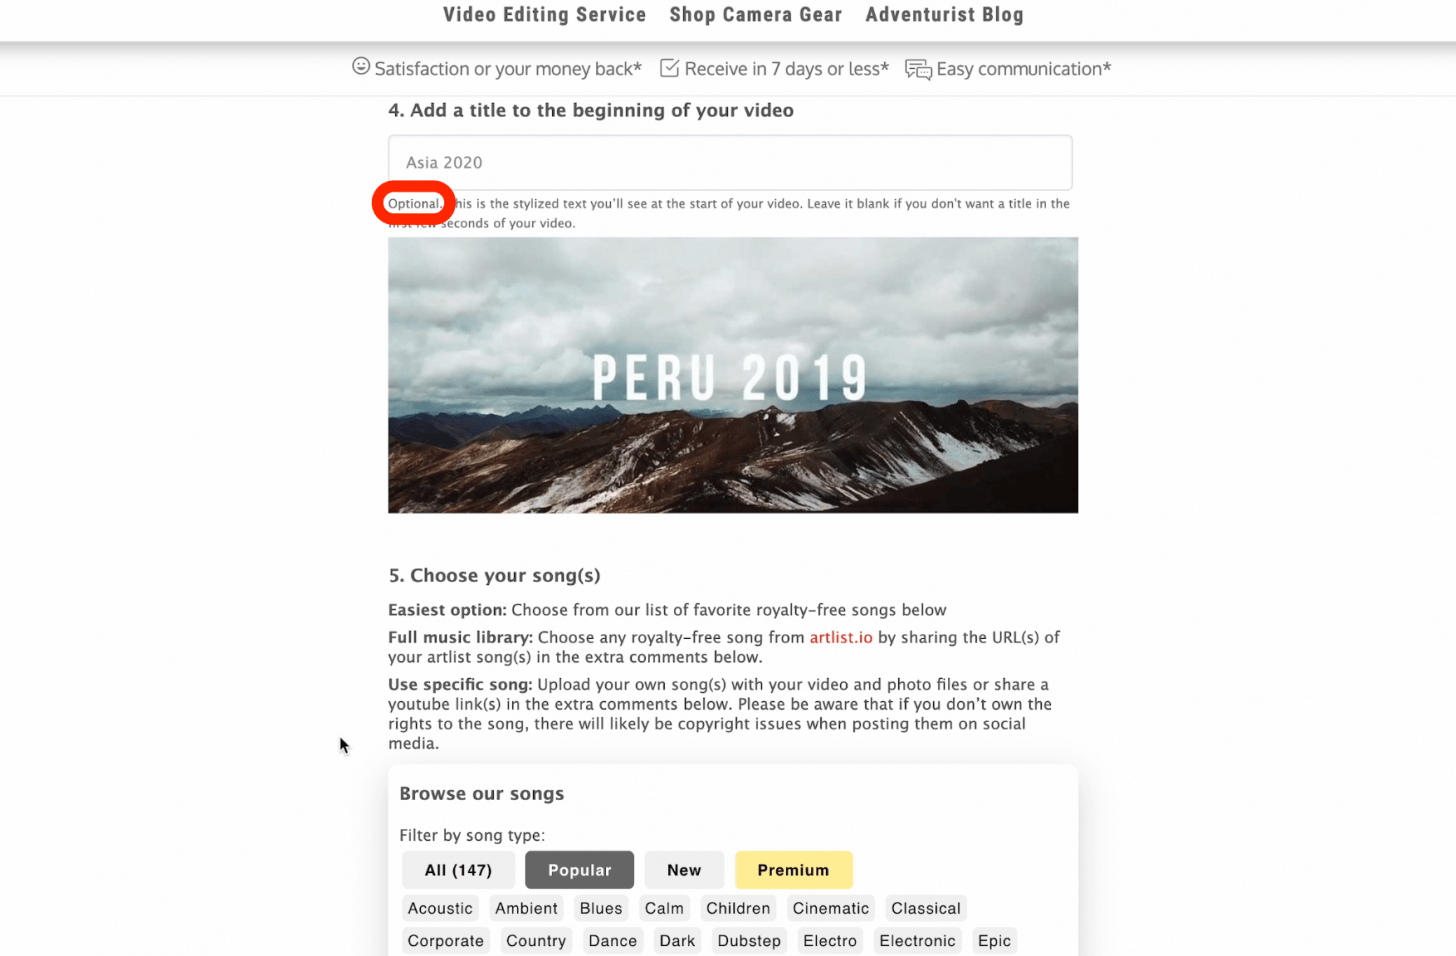
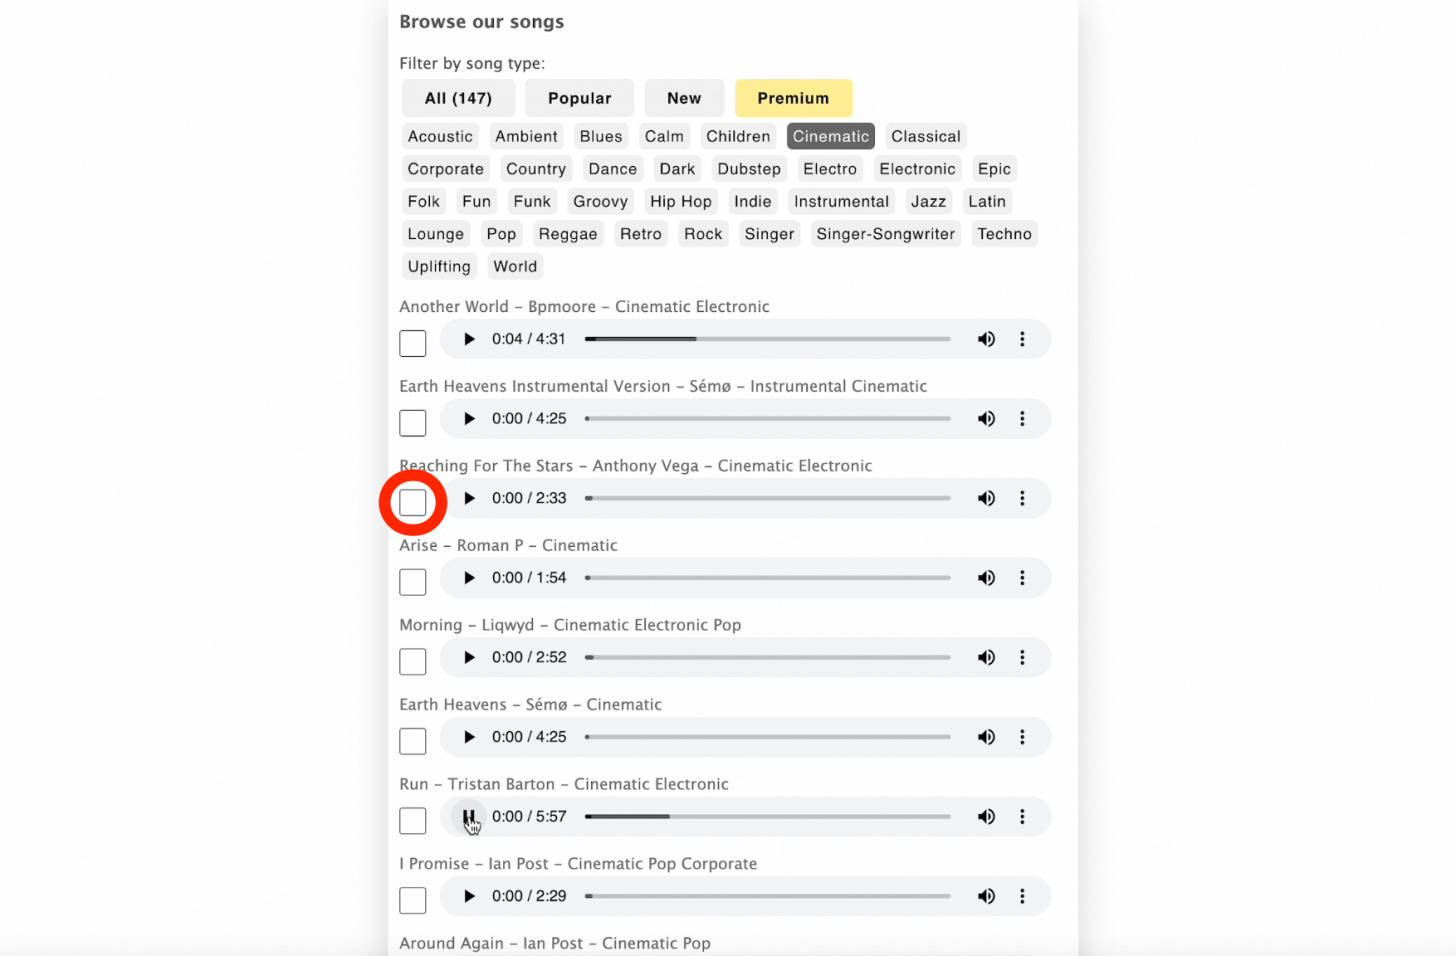
- To select a song or several songs, click the square to the left of the play button. You can browse by clicking on a genre and listen to the song by clicking on the play button.
- There are several more optional steps where you can type your preference or any notes you have for the team. You can leave everything blank if you wish. Once you are done, click Start Video Project.
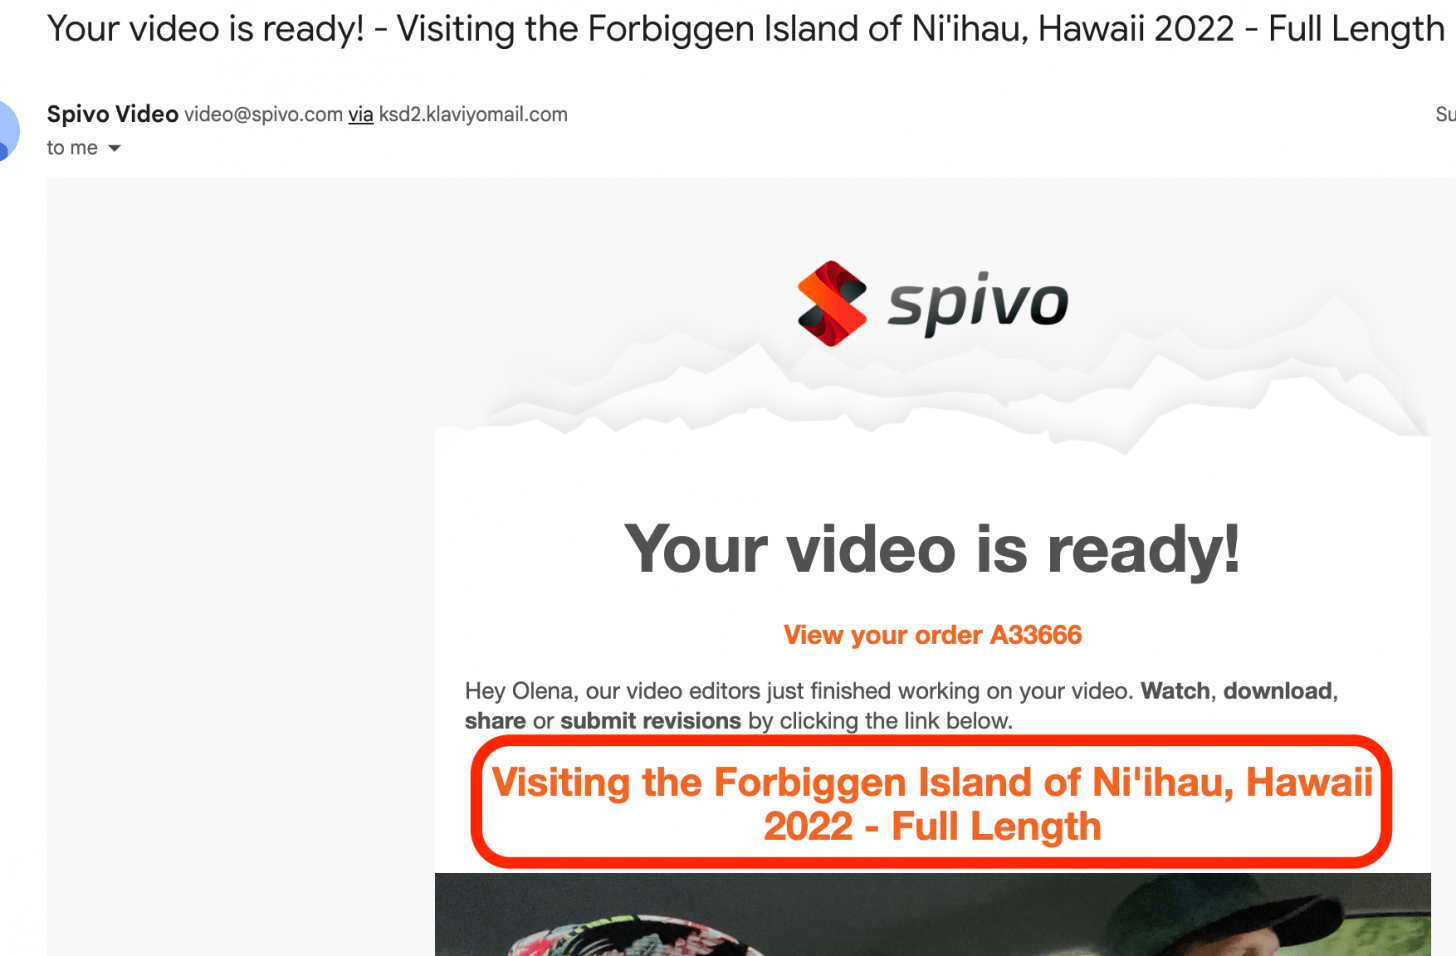
- Within seven days, you'll get an email that says 'Your video is ready.' Open it to watch, download, share, or submit revisions.
Pros
- Easy to order and customize
- One week turnaround time
- No limit on the amount of content that you can upload
- Professional editing team at your disposal
- Unlimited changes to the final video can be requested free of cost for 30 days
- Money-back guarantee
Cons
- Cost
Final Verdict
The Spivo Video Editing team will create an amazing video out of any content you provide. They are thorough and responsive, willing to take the time to answer any questions you may have. The possibility of requesting changes and the money-back guarantee are good for your peace of mind, especially when spending this much on a professional video. The price is a pain point for me, but it is worth it to memorialize special events. It also makes a great gift for family members, especially if you split the cost with your relatives or friends.

Olena Kagui
Olena Kagui is a Feature Writer at iPhone Life. In the last 10 years, she has been published in dozens of publications internationally and won an excellence award. Since joining iPhone Life in 2020, she has written how-to articles as well as complex guides about Apple products, software, and apps. Olena grew up using Macs and exploring all the latest tech. Her Maui home is the epitome of an Apple ecosystem, full of compatible smart gear to boot. Olena’s favorite device is the Apple Watch Ultra because it can survive all her adventures and travels, and even her furbabies.

 Olena Kagui
 Rachel Needell
 Rhett Intriago
 Susan Misuraca
 Leanne Hays

 Amy Spitzfaden Both

 Nicholas Naioti
 Cullen Thomas