Even though I have three DSLR cameras and a variety of wide and telephoto lenses sitting on my shelf, I still prefer to shoot videos with my iPhone X. I used to do it to prove a point—that you can make quality videos with just your iPhone. But nowadays I shoot with my iPhone for other reasons I’ve discovered along the way.
One of the biggest reasons I enjoy using my iPhone is that it lends itself better to intimate storytelling, which is important for the types of videos I like to make. I’ve found that when shooting with my iPhone versus a DSLR, my subjects act more natural. That’s because most everyone is familiar with iPhones. It’s like ordering mac and cheese at a restaurant. You’ve had it before, and you’ve made it yourself at some point. It’s not a mystery. It's also easier to carry three iPhones than it is to haul three DSLRs with a variety of lenses. And if the impact of the story is going to be the same regardless of the tool used, then heck, why not shoot with an iPhone?
There is no limit to the types of videos you can create with your iPhone. I would even argue that it is better suited to some video formats, such as vertical social media videos. It is beyond me why anyone would go through the trouble of taking out their DSLR, shooting a 15-second video, exporting it to a computer, editing said video, exporting, transferring it to the iPhone, and then posting to Instagram when no one can even tell the difference!
Lately, my favorite place to share videos is IGTV, a new vertical video platform by Instagram. Think of the content as Instagram stories but longer (up to ten minutes for most accounts or one hour if you’re internet famous.) It’s a great way to casually connect with your audience via video, unlike the formally produced videos on YouTube. Other video types I love are the mini storytelling documentaries I create for clients and my own personal projects.
Creating Your Shot List
Regardless of the type of video I create, my process is the same. Before I shoot any video, my first step is to create a shot list, which is a detailed description or sketch of shots that I plan to include in the video. For example, each video typically has at least three types of shots: a wide shot, a medium shot, and a close-up. Depending on the story you’re trying to tell, the subject of these shots will vary. A good shot list also includes details about camera movement. Will the shot be captured by moving the camera horizontally (trucking shot) or vertically (pedestal shot)? This is the most important step, because without knowing what kinds of shots you need to capture, you won’t know what gear to bring on the shoot.
Packing for Your Shoot
Once you have your shot list, the fun and creative part begins—figuring out what tools will allow you to get those shots! For starters, I like to pack two iPhones in my gear bag. I usually shoot with the iPhone X and use an older model to act as either a second camera or as a remote control for the iPhone X (I’ll go into that later!). Aside from an additional phone, the rest of the gear in my bag usually includes a mount, several microphones, external lighting, additional storage, and a power source. Here’s how I decide which to bring:
Mounts:
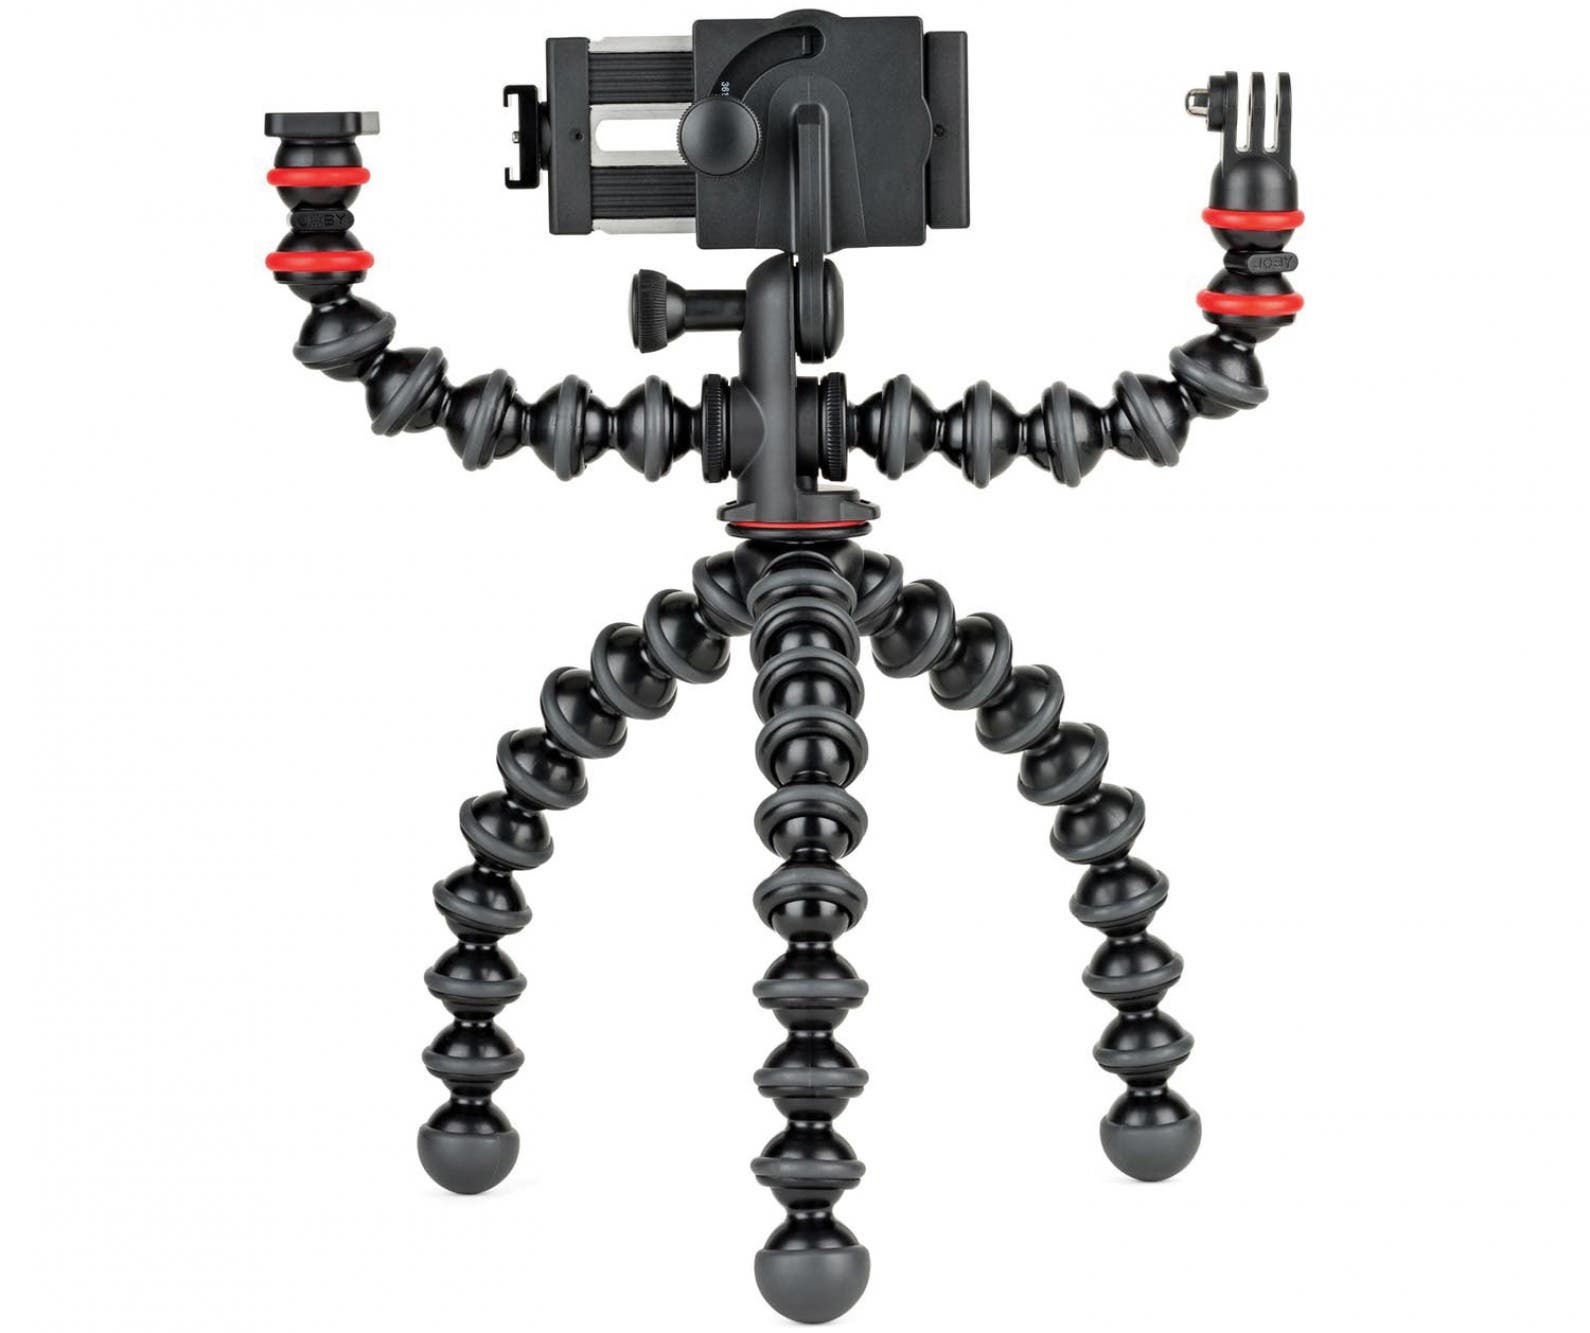
If I know I’m going to be moving the iPhone a lot during the shoot, I will bring a gimbal, a handheld tool that stabilizes footage. I bought the DJI Osmo Mobile 2 ($189.00), specifically because it is compatible with FilMic Pro ($14.99), the filmmaking app that I use (more on that later). I will also always bring a tripod. I try to keep things as mobile as possible, so I’ll often bring a mini tripod like the Joby GorillaPod Mobile Rig ($99.95). For interviews or still footage, I will bring my full-sized Manfrotto tripod (starting at $219.99).
Microphones:
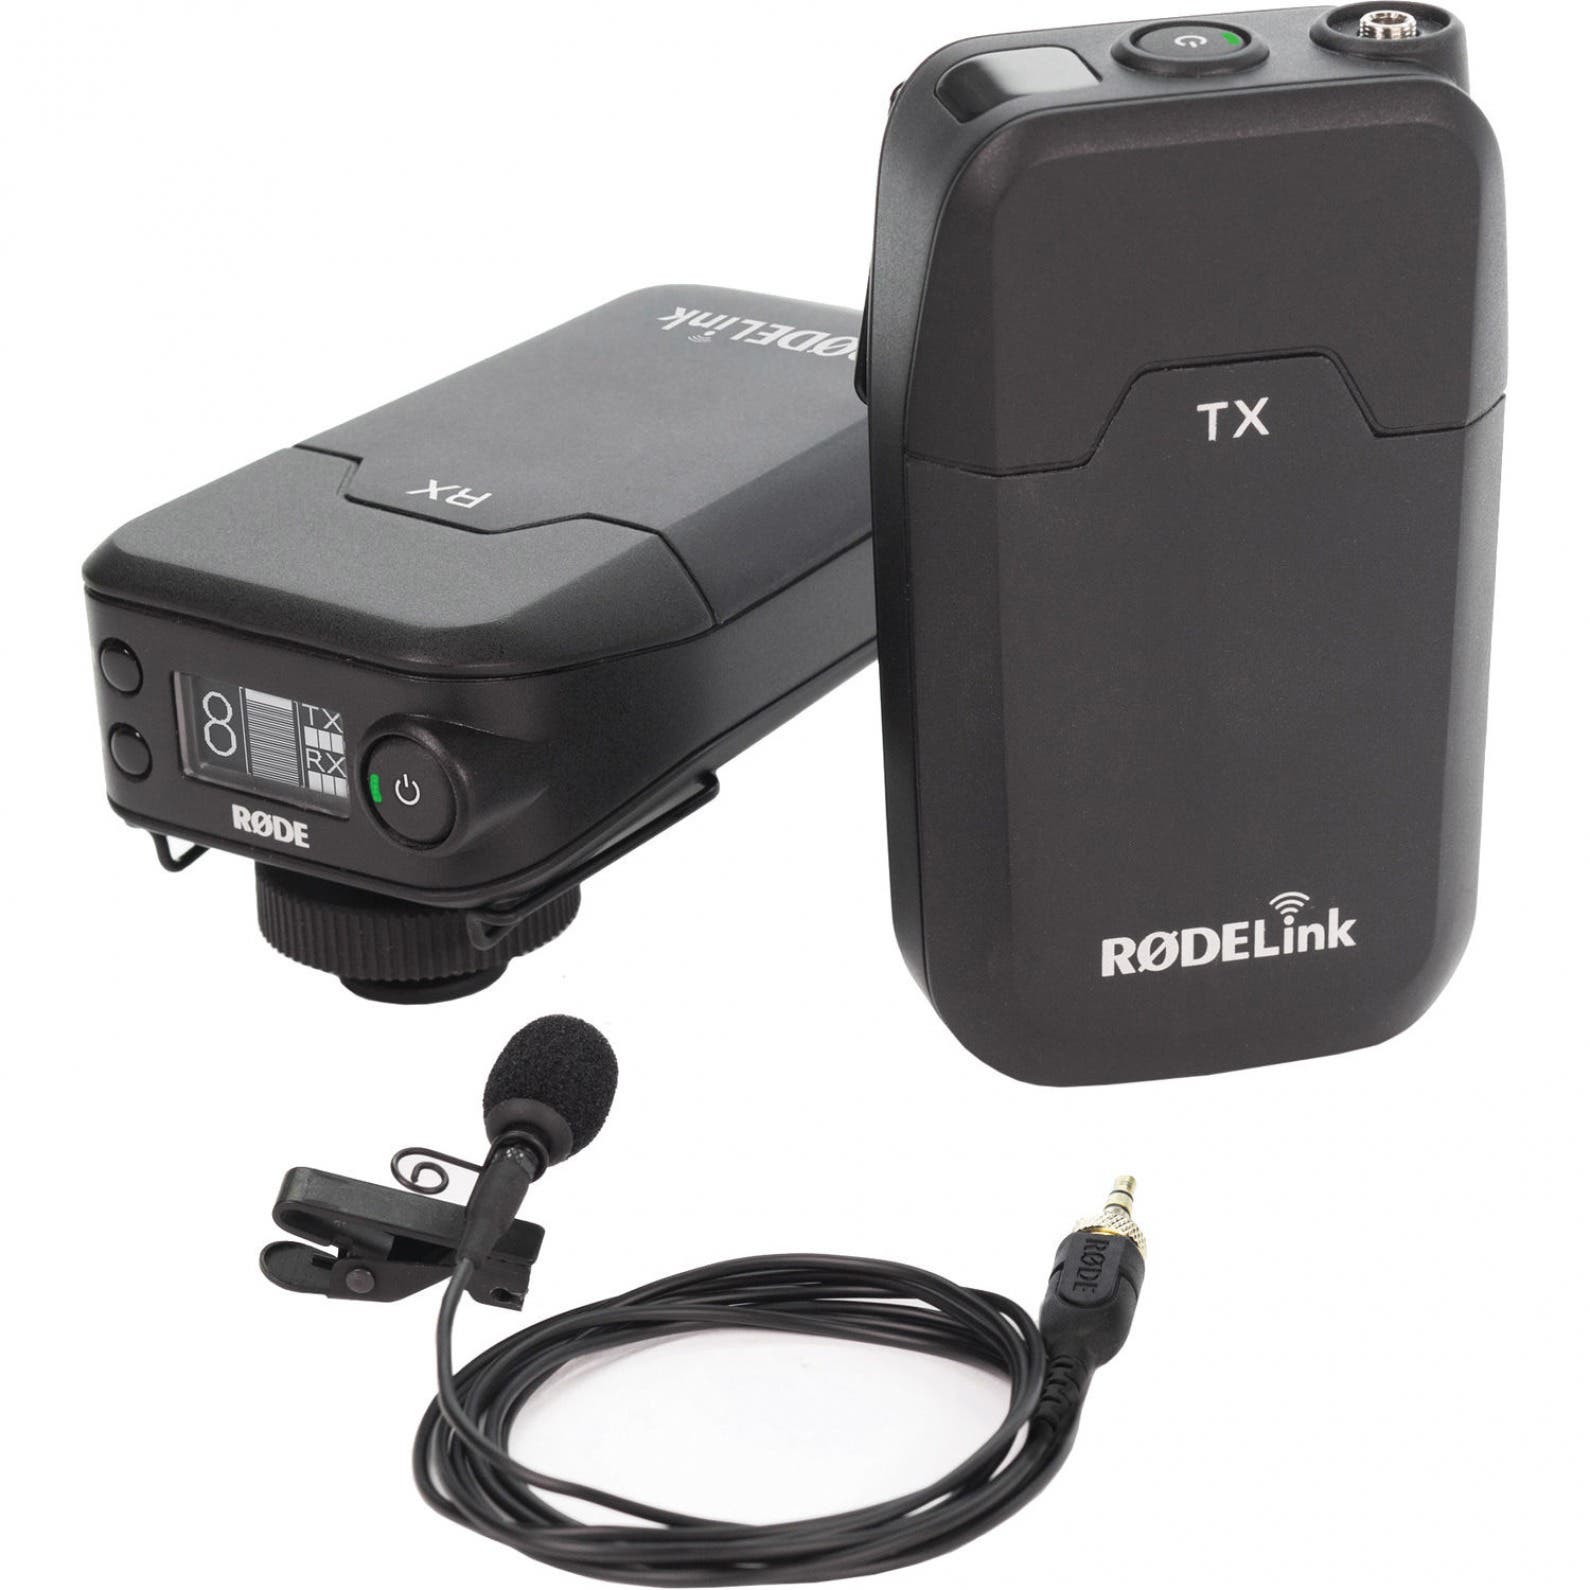
I always, always bring an external microphone. While the iPhone’s camera is capable of professional-quality video, its microphone is not. With the use of a simple adapter, I’m able to use mics made for DSLRs to upgrade the audio. My go-to microphone is the Rode VideoMic Pro ($169.99) shot-gun mic. For interviews, I will bring a set of hands-free lavalier microphones. Depending on how mobile the interview needs to be, I’ll either bring a wired set or a wireless set like my Rode RodeLink Wireless Kit ($394.13). But honestly, any external mic is a huge improvement over the iPhone, because it will isolate your audio and minimize ambient noise.
Attachment Lenses:
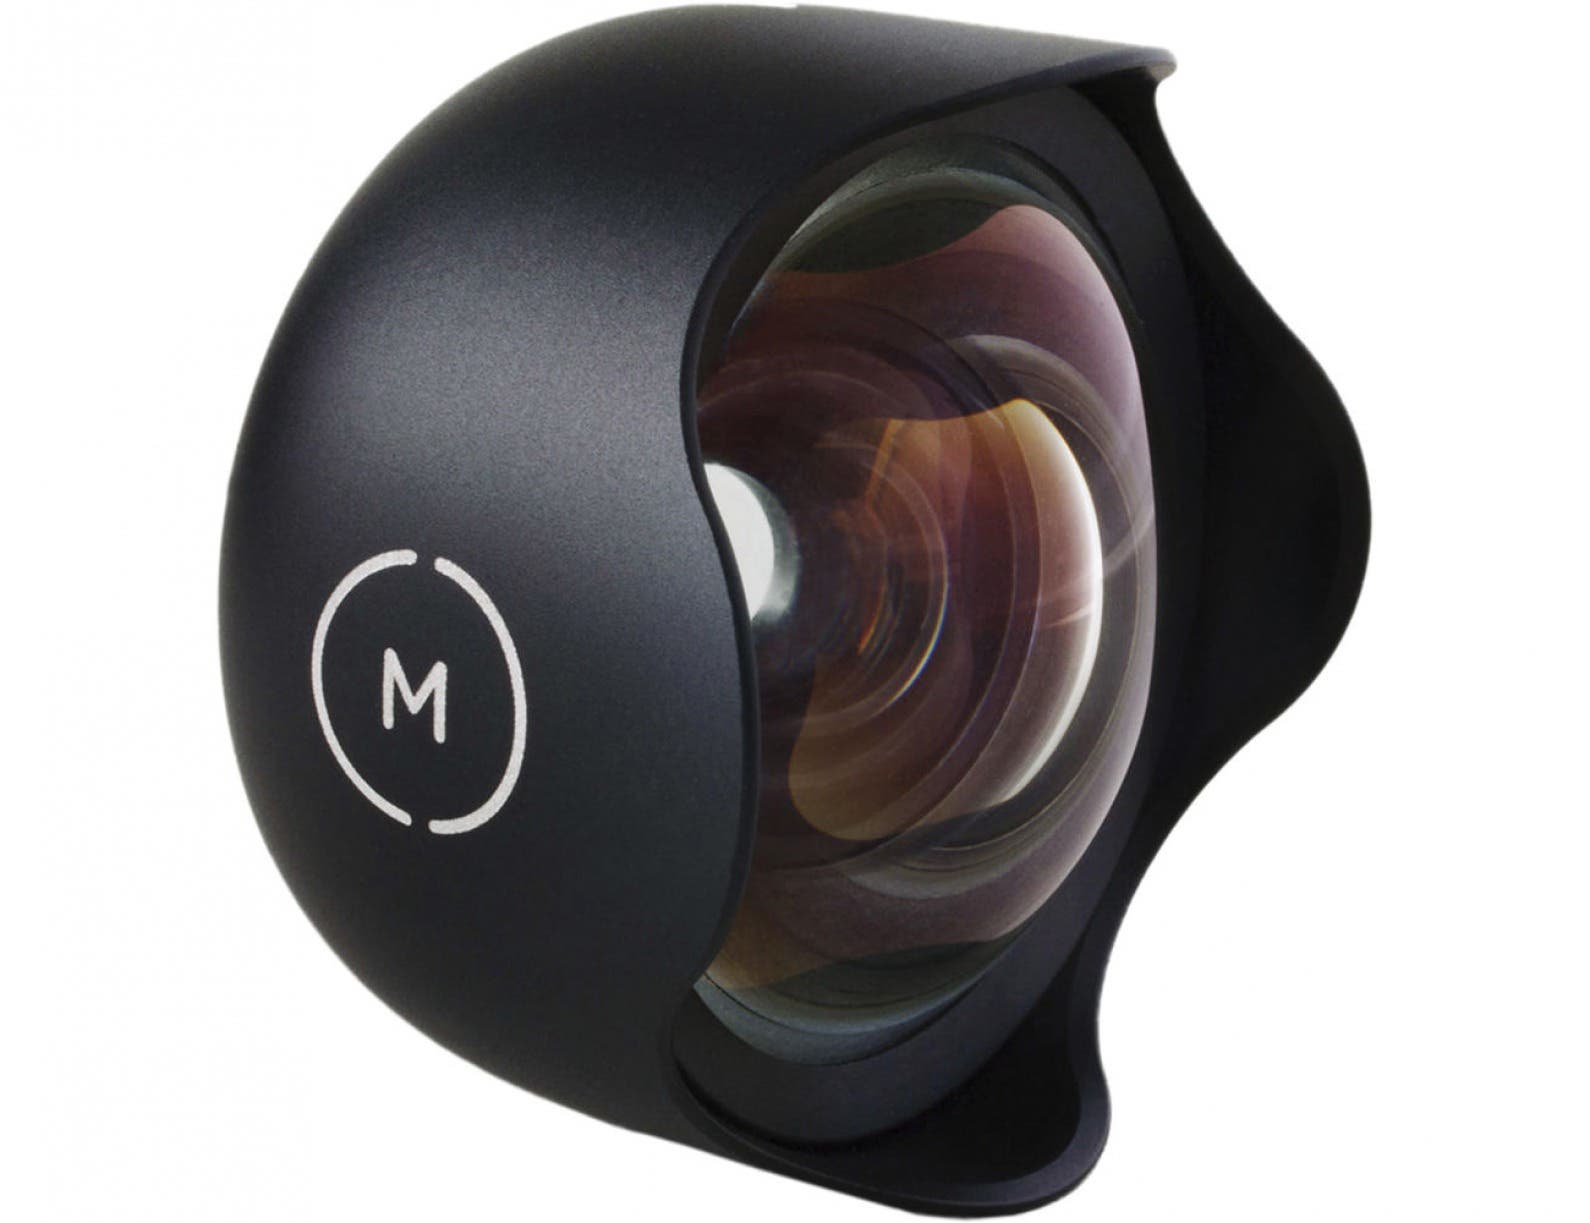
I have all sorts of lenses by Olloclip (starting at $54.99–$119.99) and Moment ($89–$119.99) that range from super macro to wide to telephoto. But I’ll admit that I really only use the wide lens and only when I really have to, because the built-in wide and telephoto lenses on the iPhone X make them almost unnecessary. The attachment lenses do come in handy when you need that little bit of extra reach or need a slightly wider view for cramped places.
Lights:
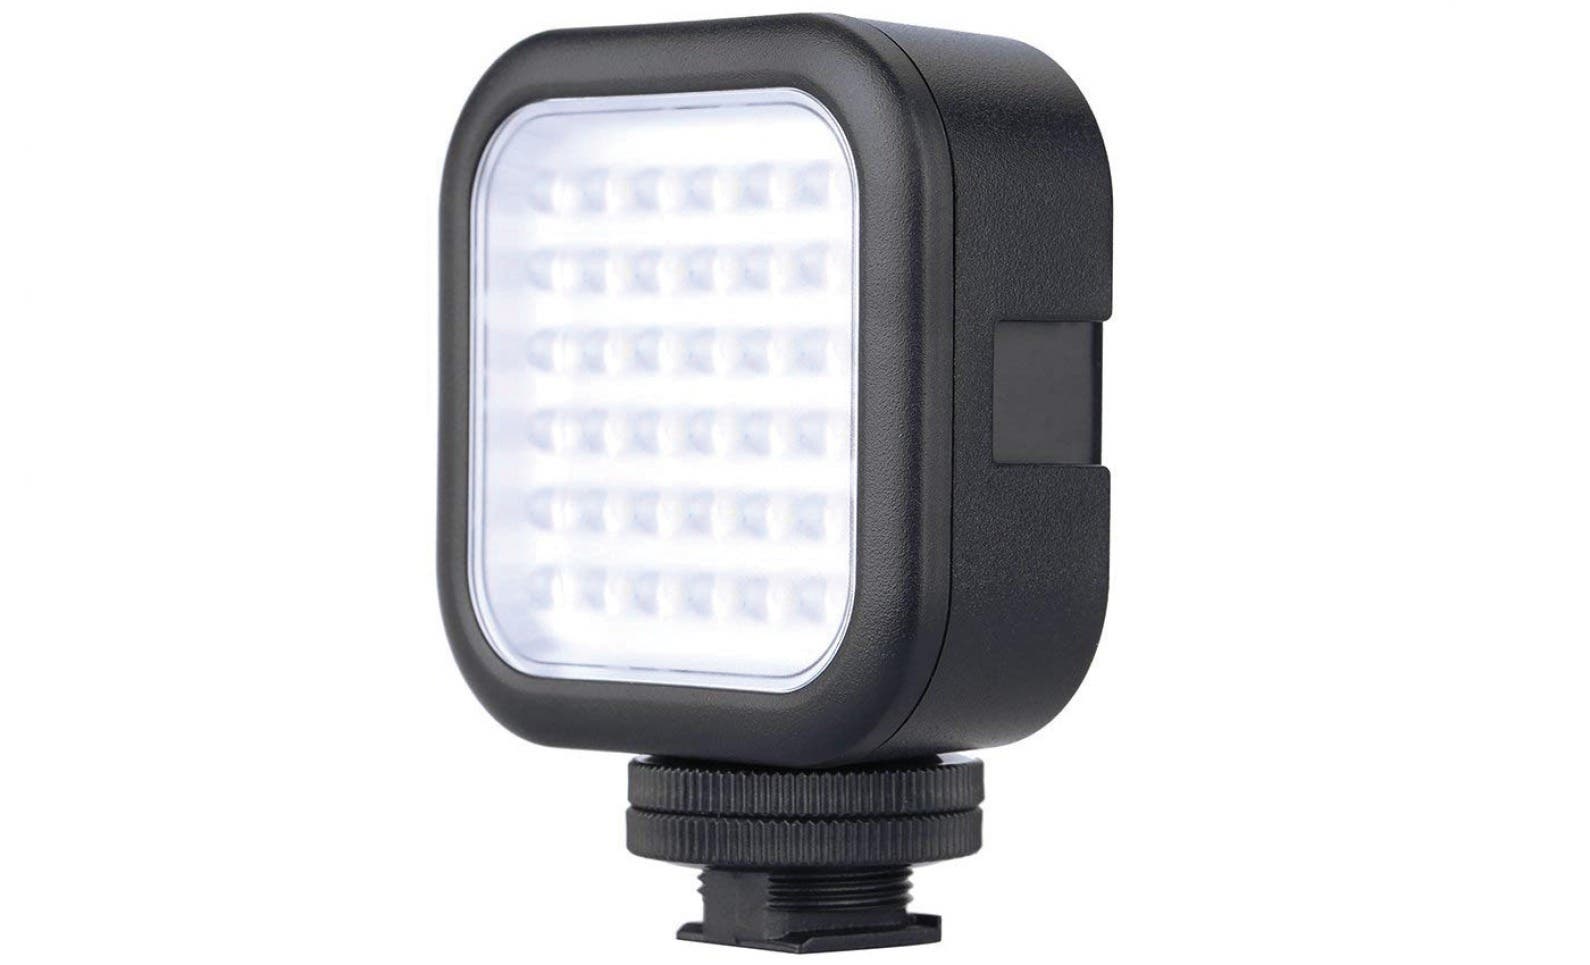
Oftentimes, your iPhone requires some extra help in low-light situations. External lights are great for adding and manipulating light and modifying the tone and mood of your set. I’ll sometimes use my Godox LED light (starting at $20) to remove shadows from my subject’s face or to add a pop of brightness in a scene. Because these lights are compact, they have a permanent place in my bag.

Power & Storage:
Nothing fills your iPhone’s storage more than filming hours of footage. Shooting thirty minutes of 4K footage shot at thirty fps will net about ten gigabytes of storage. Even though my iPhone has 256 GB of storage, I’m constantly offloading video onto an external flash drive or wireless drive. I use the SanDisk 128 GB Lightning FlashDrive ($62–$120) to transfer files to and from my iPhone, iPad, and MacBook. For more permanent storage, I use the WD My Passport Wireless Drive (starting at $149.99). Power is also another problem. If I’m going to shoot for longer than twenty minutes, I will plug my iPhone into an external charger and charge as I’m filming. There’s nothing worse than running out of battery in the middle of a shoot!
Overall, my advice with gear is that there’s no one set of gear to always bring. Don’t bring everything and the kitchen sink! It defeats the purpose of shooting with an iPhone. You need to think about the shoot and customize accordingly.
Choosing Your Camera App
The last thing I recommend is to get an app that will let you fully control all of your camera settings. My favorite, which seems to be many filmmakers’ favorite, including Steven Soderbergh, who used this app to film Unsane, is FilMic Pro. This is the app that lets me use one of my iPhones as a remote for controlling settings on my iPhone X. This allows me to place my iPhone in the most obscure places to get those creative shots. The strength of Filmic Pro is that it allows me to control the resolution, frame rate, shutter speed, exposure, focus area, and even color modes of what I’m filming. This is super important if you want quality video!
Executing the Shoot
Once I have all the gear, it’s just a matter of executing the shoot. Because there’s not a whole lot of gear or settings to mess around with when shooting on your iPhone, it’s much easier to focus on the creativity of filmmaking. However, it can also be easy to forget to be a filmmaker when you’re just using the iPhone. Remember that you have to move your iPhone like you would any video camera. That means you need to do your trucking shots, your dolly shots, your pans, and your pulls. Just because it’s an iPhone you’re filming with doesn’t mean the artistry behind filmmaking is gone. It’s very much there. And with the iPhone, you can get really creative with your shots because it fits in the most random places!
Making a quality video with your iPhone is easier now than ever, thanks to ample accessories and technology created specifically for mobile filmmaking. If you’re a beginner when it comes to filmmaking, the iPhone is a great place to start, because of the relatively low investment you’ll need to make in gear and the ability to focus on what truly matters—visual creativity and storytelling. But I tell ya, once you get started shooting on your iPhone, I’m guessing that you just might stay with it because it’s that good.