Unleash Your Inner App Developer Part 18: Core Data Behind the Scenes


Do you have an idea for an app but lack the programming knowledge to begin build it? In this weekly blog series, I will take you, the non-programmer, step by step through the process of creating apps for the iPhone, iPod touch, and iPad. Join me each week on this adventure, and you will experience how much fun turning your ideas into reality can be! This is Part 18 of the series. If you are just getting started now, check out the beginning of the series here. (This post has been updated to Swift 1.2, Xcode 6.3 and iOS 8.)
We've been discussing Core Data in my last several posts and now you should understand the basics of:
- Adding Core Data to a project
- Designing entities in a data model
- Generating entity classes from a data model
- How to retrieve, update, and delete entities
- Creating business controller classes for each entity class
- Using business controllers with view controllers
This week we're going to take a look at Core Data behind the scenes and examine the database that is automatically created for you the first time you try to retrieve entities. If you don't have it already, you can get a copy of the latest project from this link.
Examining the SQLite Database
When you run an app in the Simulator, a folder is created for you on your development computer's hard drive that contains the compiled app and its related files. To see this folder:
- Launch the Mac OS X Finder App (the one with the smiley face);
- In the Finder menu, click Go, and then hold down the option key. This adds Library to the list of folders as shown in Figure 1.
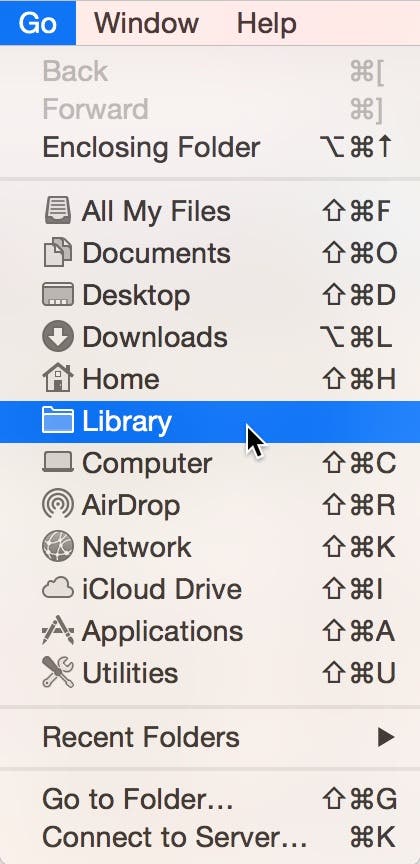 |
| Figure 1 - Hold down the Option key to add Library to the list of folders. |
- Select the Library folder from the menu to display the contents of this folder in Finder;
- Next, drill down into the Developer folder, and then down into the CoreSimulator > Devices folder. You will see multiple subfolders with unique ID names, one for each version of the iPhone Simulator you have installed on your Mac (Figure 2).
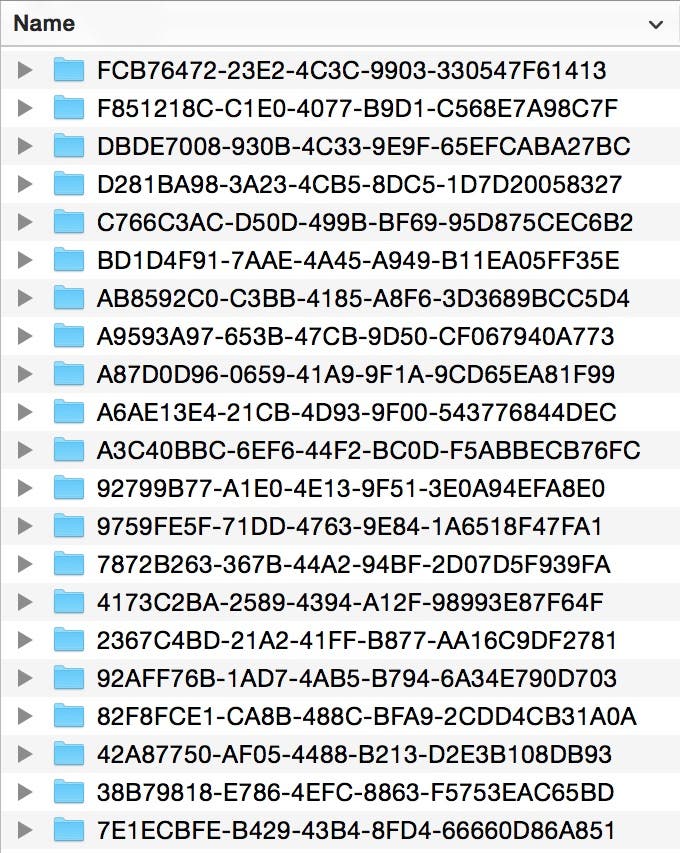 |
| Figure 2 - The Devices folder |
- To get to the actual app files you have to drill down even further. However, the Devices folder is a good mid-point when searching for Simulator files, so I recommend dragging this folder to the Favorites bar on the left side of the Finder window for easy access.
To make it easy to find your app's Simulator files, I have added a line of code to the mmBusinessObject's applicationDocumentsDirectory computed property that displays the location of your app's SQLite database file in Xcode's Console when you run the app in the Simulator.
- To see this code in action, click Xcode's Run button. In the first scene, select Write a Review, and then in the Write Review scene, select App Category. Afterwards, check the Xcode Console (Figure 3).
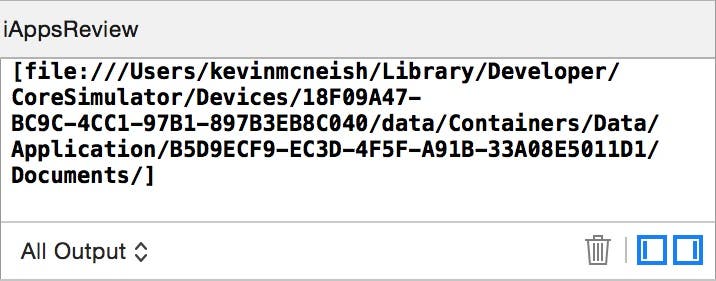 |
| Figure 3 - Your app's Documents directory is displayed in Xcode's Console. |
- To navigate to this folder, go back to Finder, click on the Devices shortcut you created a few steps back and then drill down into the folders listed in the Console until you reach the Documents folder where you can see the SQLite files (Figure 4). The primary file has a .sqlite extension.
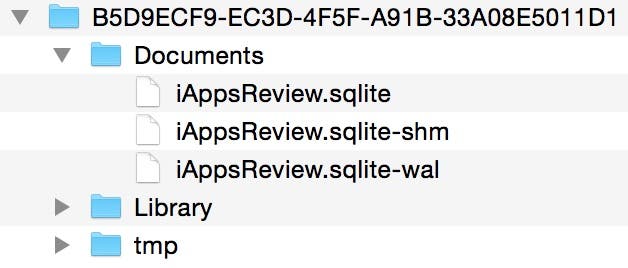 |
| Figure 4 - The SQLite files |
To examine the contents of the file, you need a special app, which is discussed in the next section.
Firefox and the SQLite Manager
I have found that one of the best tools for viewing a SQLite database is the SQLite Manager add-on for the Firefox web browser. I'll show you how to get this tool on your development machine.
- If you don't already have the Firefox web browser installed on your Mac, go to this link to download and install Firefox:
- After installing Firefox, go to the following link to download and install SQLite Manager:
https://addons.mozilla.org/en-us/firefox/addon/sqlite-manager/
- Now that you have both Firefox and SQLite Manager installed, launch Firefox (you should be able to find it in your Applications folder on your Mac);
- After Firefox successfully launches, go to the Firefox Tools menu and select SQLite Manager. This displays the SQLite Manager window (Figure 5).
 |
| Figure 5 - The SQLite Manager window |
- To open the app's SQLite database files, click the Connect Database toolbar button at the top of the SQLite Manager window (Figure 6).
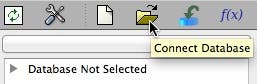 |
| Figure 6 - Opening a database in SQLite Manager |
- On the left side of the Select SQLite Database dialog, click the Devices folder you added to Favorites in the previous section. On the right side of the dialog, drill down into the Documents folder that was displayed in the Xcode Console when you ran the app in the Simulator and select the .sqlite file (Figure 7).
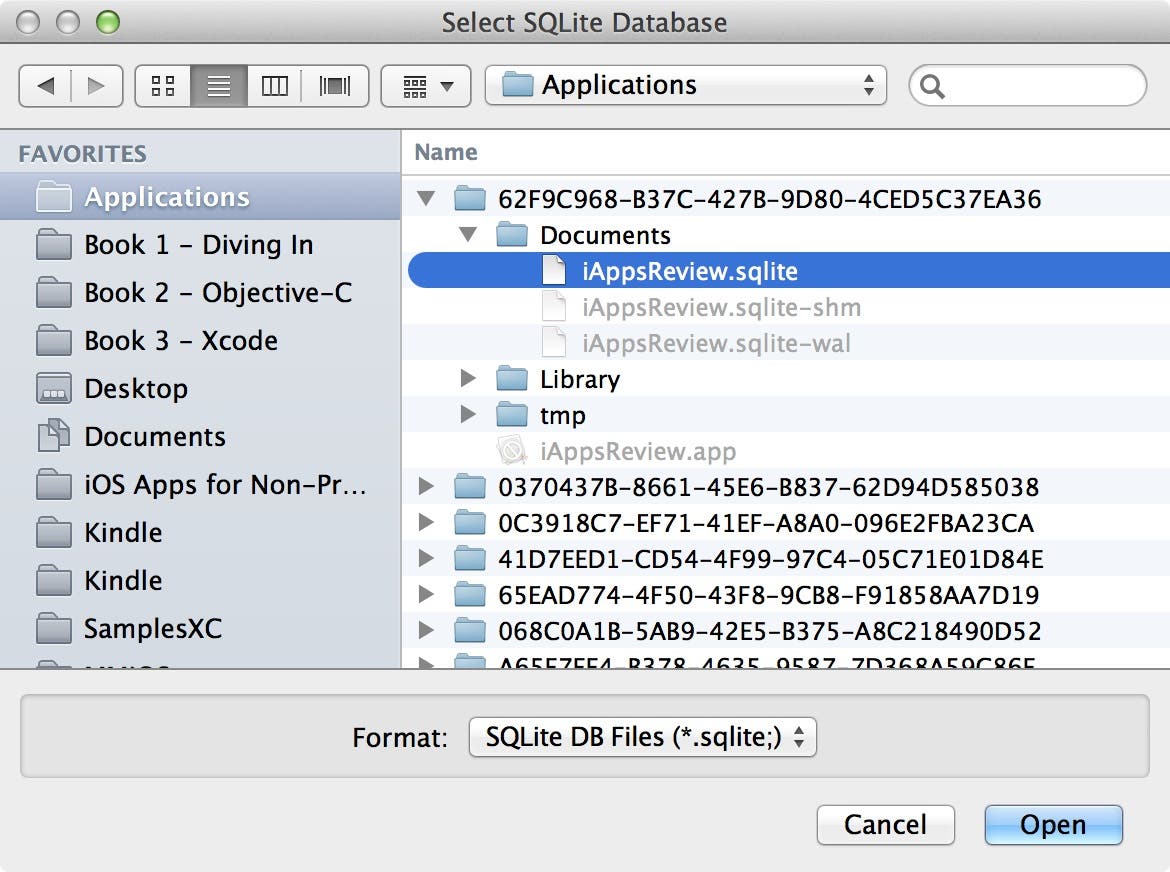 |
| Figure 7 - Select the iAppsReview.sqlite file. |
- Click Open to display the SQLite files in the panel on the left (Figure 8).
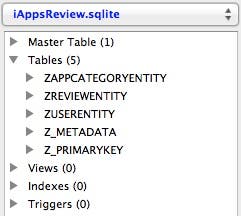 |
| Figure 8 - iAppsReview Database tables |
You don't need to know all the details about what each of these tables does. In fact, one of the main goals of Core Data is to hide these details from you. However, it's good to have a basic understanding of the underlying mechanics in case something should go wrong.
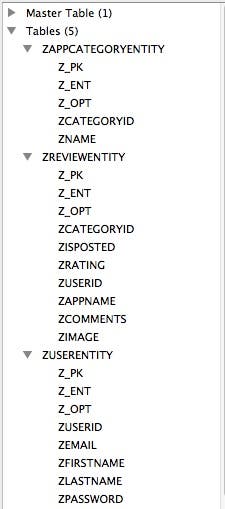
There are three tables, ZAPPCATEGORYENTITY, ZREVIEWENTITY, and ZUSERENTITY that have the same name as the entities that you added to the entity data model, but with a Z prefix.
- Expand the table nodes and you will see the columns shown in Figure 9. Z_PK is the primary key (unique identifier) for the entity, Z_ENT is the entity ID (every entity of a particular type has the same entity ID), and Z_OPT indicates the number of times an entity has been changed (starting with 1 when it is initially added to the database). All the other columns are attributes you added to the entities in the entity data model with a Z prefix.
 |
| Figure 9 - iAppsReview table columns |
- Let's add records to the database so that we can have something to view in our app.
In the panel on the left in the SQLite Manager, click on ZAPPCATEGORYENTITY to select it. Then, on the right side of the panel make sure the Browse and Search tab is selected, and then click the Add button. This displays the dialog shown in Figure 10.
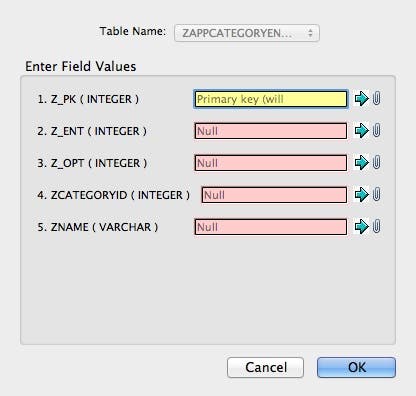 |
| Figure 10 - Adding an App Category record |
- Enter 1 in the Z_ENT, Z_OPT, and ZCATEGORYID boxes, and in the ZNAME box, enter the text Entertainment as shown in Figure 11.
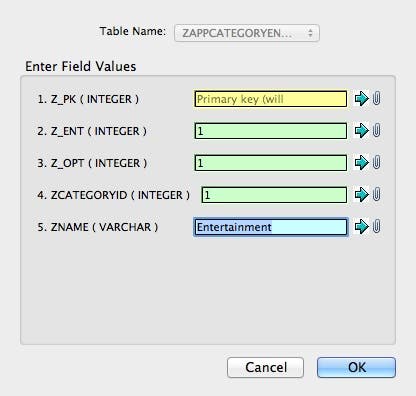 |
| Figure 11 - Adding an Entertainment category |
- Click the OK button. This displays the confirmation dialog shown in Figure 12.
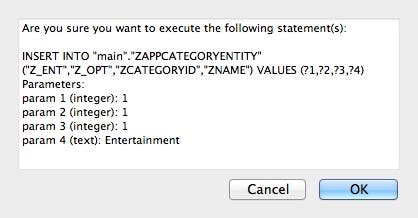 |
| Figure 12 - The new record confirmation dialog |
- Click the OK button to add the new record to the database. When you do this, the New Record dialog is redisplayed with a confirmation message at the top as shown in Figure 13. As stated in this message, if you press Cancel, you will exit the dialog. Otherwise, you can add another new record.
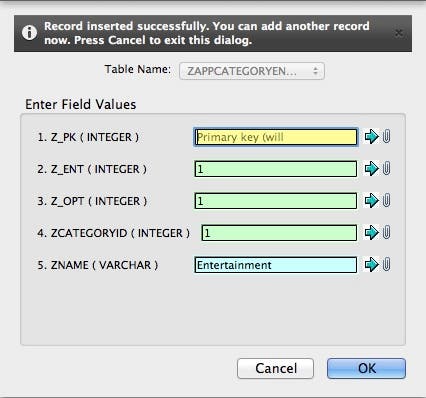 |
| Figure 13 - Record inserted successfully! |
- To add the next record, press the tab key until the ZCATEGORYID box has focus and its contents are highlighted (without changing any other values). Type the number 2, then tab to the ZNAME box and enter the text Games (which deletes the existing text) and press OK. In the confirmation dialog, press OK to save the record.
- Now let's add just one more category record. Tab down to the ZCATEGORYID box again, and this time enter the number 3. Next, tab to the ZNAME box, enter the text News, and click the OK button to save the new record. Afterwards, press Cancel to exit the dialog.
At this point you should now have three app category records in the database.
Test Driving the App
Now that you have app category records in the database, let's run the app again and see how this data looks at run time.
- At the top-left corner of the Xcode window, set the scheme to iPhone 6.
- Click Xcode's Run button.
- When the app appears in the Simulator, click the Write a Review row at the top of the iAppsReview screen.
- Click the App Category row at the top of the Write Review scene and the app will crash with an error displayed in the Console (Figure 14).
 |
| Figure 14 - A Core Data error! |
The error in the Console tells us that Core Data was unable to load the AppCategoryEntity class. What's going on?
I allowed you to get this error because you're going to experience it in your real-world app development. Fortunately, it's an easy fix.
- Go back to Xcode and click the Stop button.
- In the Project Navigator, select the iAppsReview.xcdatamodeld file. On the left side of the entity data model, select AppCategoryEntity. On the right side of the Xcode window, select the Data Model Inspector. In the Class box, add "iAppsReview." (include the period) before the AppCategoryEntity name as shown in Figure 15.
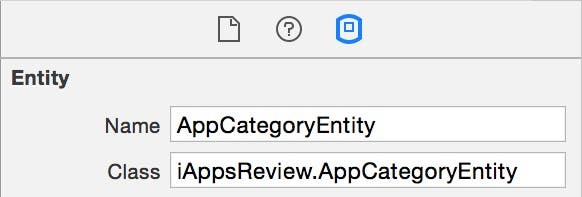 |
| Figure 15 - Add the module name to the entity name |
iAppsReview is the project's module name, and Core Data needs this information in order to load the entity from the SQLite database at run time. Oddly enough, you need to leave the module name off when generating an entity class from the model, but you need to add it in before running the app. This is one of those "gotchas" that isn't really covered well in Apple's documentation, but is something you need to know when working with Core Data!
- While you're here, you need to add the module name to the other entities in the entity data model. To do this, just select each entity, go to the Data Model Inspector and add the iAppsReview. prefix.
- Now you're ready to try running the app again. Click Xcode's Run button, navigate to the Write Review scene and select the App Category row and you should see the three categories you entered in the database as shown in Figure 16! If you are like most people, it's pretty exciting to see the app displaying entities that it retrieved from the database on the device.
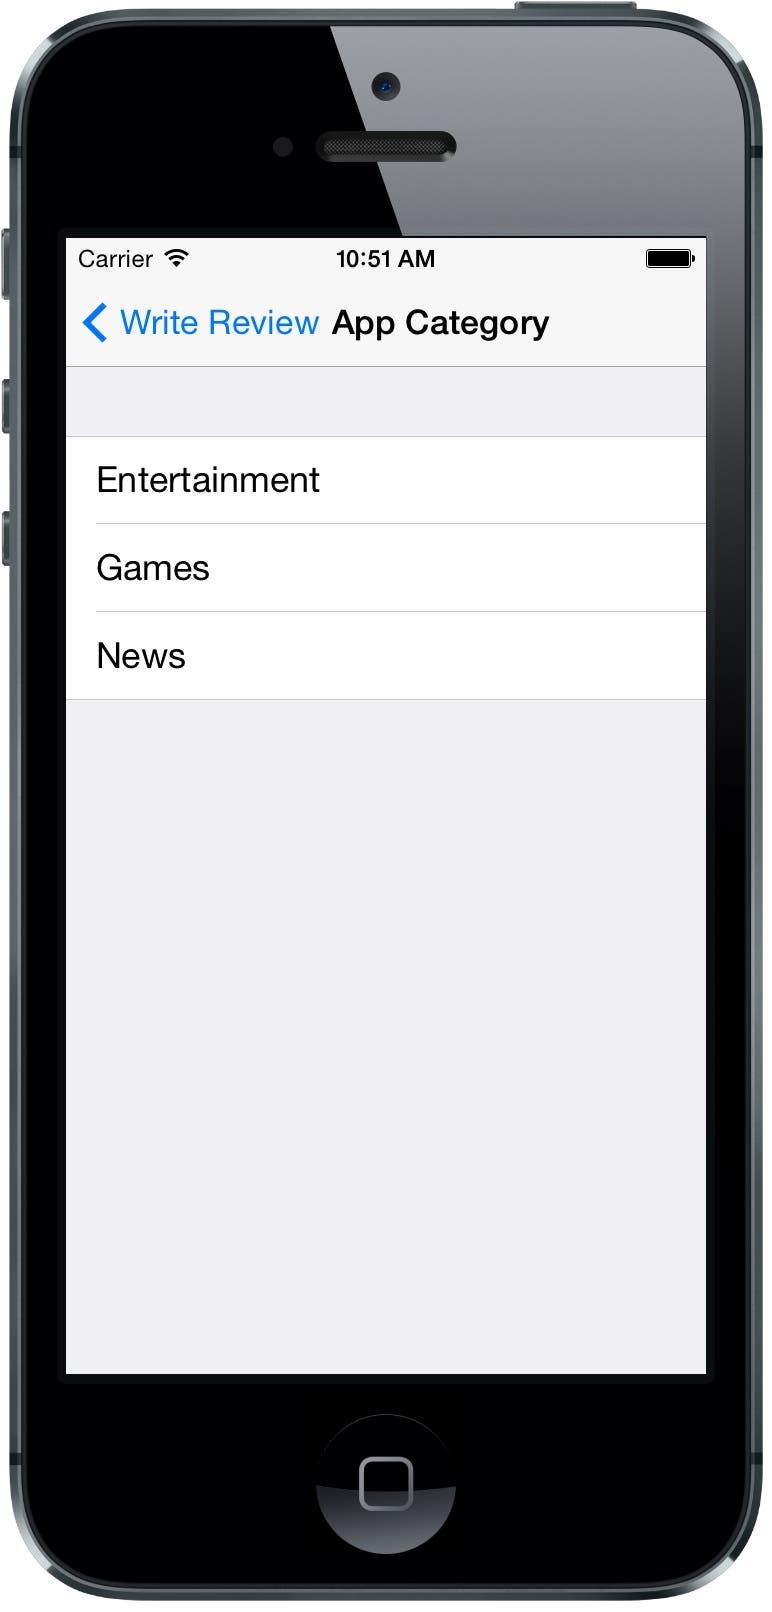 |
| Figure 16 - The app categories at run time! |
If you want to see more records in the table view, go ahead and add the following category rows to the database just as you did in the previous section and then run the app in the Simulator to see the new records:
| ZCATEGORYID | ZNAME |
| 4 | Productivity |
| 5 | Search Tools |
| 6 | Social Networking |
| 7 | Sports |
| 8 | Travel |
| 9 | Weather |
Conclusion
At this point you have done much of the work necessary for adding Core Data to the iAppsReview project. In my next post we will enhance the project to create and update other entities and I'll even show you how to ship a database with your app so that your users have a database pre-populated with data.

Kevin McNeish
Kevin McNeish is author of the new book “Learn to Code in Swift” as well as the “iOS App Development for Non-Programmers” book series (www.iOSAppsForNonProgrammers.com), winner of the Publishing Innovation Award. Kevin is also an award-winning app developer, software architect, and conference speaker in the U.S. and abroad. He has spent much of his career making difficult concepts easy to understand. Follow Kevin on Twitter: @kjmcneish.
Related topics
Related Articles

 Leanne Hays
 Amy Spitzfaden Both
 Rhett Intriago


 Olena Kagui
 Rachel Needell


How to Set Orientation Lock on iPhone on a per App Basis

Security News: Phone Networks Compromised by Spies, macOS Infostealers on the Rise, and More
 Cullen Thomas