Swift Programming 101 - Understanding Access Control


Access Control is one of the late-breaking features added to the Swift language. It allows you to specify the parts of your code you want to make public, and the parts you want to hide. It's an important tool in creating easy-to-use, and easy-to-understand interfaces.
Targets and Modules
In Xcode, your source code files are assigned to different targets. A typical Xcode project has two targets—one for your main app file, and one for unit tests. To see the targets in a project, click the first node in the Project Navigator. This displays the Project Editor with a Projects and Targets list on the left. (If you don't see this list, click the small square highlighted in Figure 1).
 |
| Figure 1 - Xcode's targets |
By default, all the files in the Project Navigator and any new files you add to the project are part of the main app target. The only file that is part of the unit test target is the unit test code file under the "Tests" group.
To see which target a particular file belongs to, select it in the Project Navigator, go to the File Inspector, and look under the Target Membership section (Figure 2).
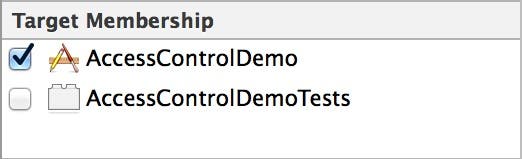 |
| Figure 2 - Viewing a file's target membership |
By default, all the code in a project belonging to the same target is also part of a single module. In Swift, by default, all the code that is part of the same module can access all other code in that module. This is a vast improvement over Objective-C where you could only reference another class in the same project by importing its header file—a real speed bump when teaching beginners how to write code.
If you are building a single, stand-alone app, this level of access control may work well for most of the code you write. However, there are typically a number of places where it's best to change this default access level.
Access Levels
There are three access levels in Swift (Figure 3).
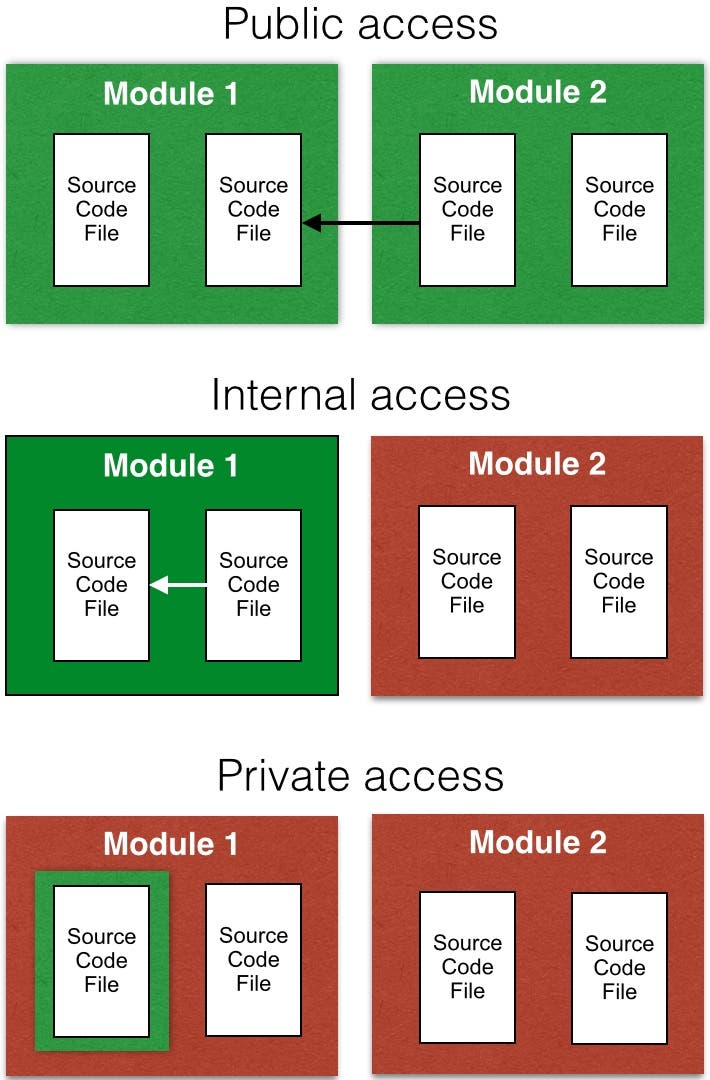 |
| Figure 3 - Swift's code access levels |
- Public - Allows access to code within the same module, or to another module that imports the module the code is declared in.
- Internal - Allows access to code in the same module, but not to any other module. This is Swift's default access level.
- Private - Restricts access to the source file the code is declared in. Although it's typical to have a single class, structure, enum, etc. defined in a source code file, you can declare more than one per file.
Access Control Modifiers
You use the public, internal, and private modifiers to specify the access level of your code. For example, here are the modifiers used to declare access to classes:

Here are the modifiers used to declare access to members of a class:

Again, if you don't specify an access modifier, the default access level for your code is internal.
Class Access Level
Let's get a hands-on look at class access level. To work through these steps, download the sample project at this link.
- Open the AccessControlDemo project located in the folder where you downloaded the sample project.
- As the Project Navigator shows, there are three classes you are going to use to check out how access levels work with classes; PublicNote, InternalNote, and PrivateNote (Figure 4).
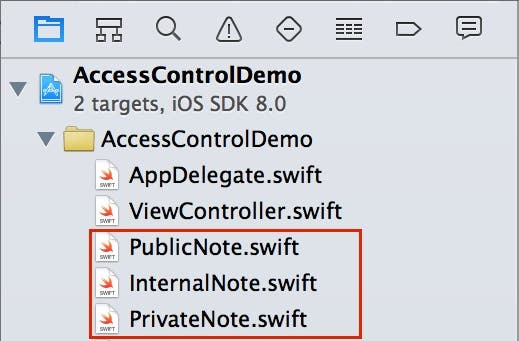 |
| Figure 4 - The "class access level" demo classes |
- If you select each of the three classes, you will see the following class declarations:
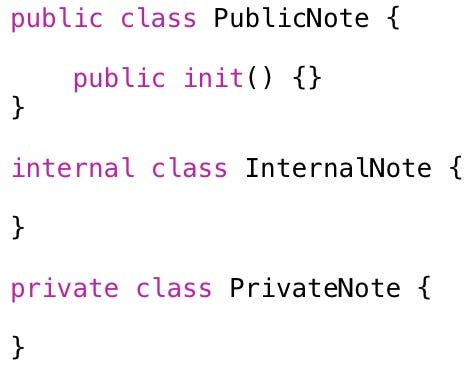
Keep the three different access levels depicted in Figure 3 in mind as we try to access these classes from different places:
- A different module
- The same module
- The same source code file
Accessing a Public Class
Let's start by trying to access the public class from a different module.
- In the Project Navigator, expand the AccessControlDemoTests group folder and select the AccessControlDemoTests.swift code file.
- Add the following code to the testExample method:
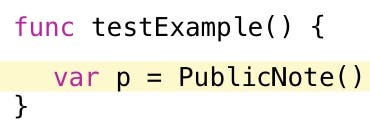
- Press Command+B to build the project. You will get a Use of unresolved identifier 'PublicNote' compiler error. Do you know why?
Remember, the PublicNote class is in a module different from the one the unit test class is in, so we need to import the module.
- By default, a project's module name is the same as the project name, so you need to add the import statement to the top of the AccessControlDemoTests code file:
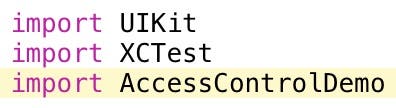
- Press Command+B to build the project and the compiler error will go away.
- Now add the following code to the testExample method:
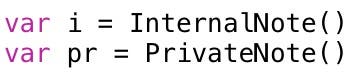
- Press Command+B and both these lines of code produce a Use of unresolved identifier error. That's because, as Figure 3 shows, you cannot access an internal or private class from a different module.
- Go ahead and delete the last two lines of code you added in the previous step so the project compiles without error.
Now let's see how this works when we try it from the same module where the classes are declared.
- Select the ViewController.swift file in the Project Navigator.
- In the viewDidLoad method, add the following three lines of code:
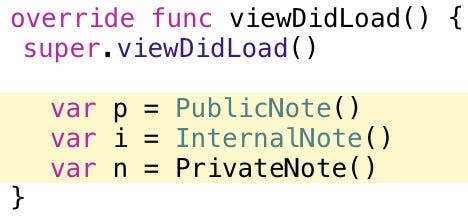
The first two lines of code work great. That's because you can reference a public or internal class from code in the same module. However, the last line of code fails, because you can only reference a private class from within the same source code file where the private class is declared.
- Delete the last line of code you added in the previous step, so the project compiles without error.
- Select the PrivateNote.swift file in the Project Navigator, and add the following class declaration to the code file:
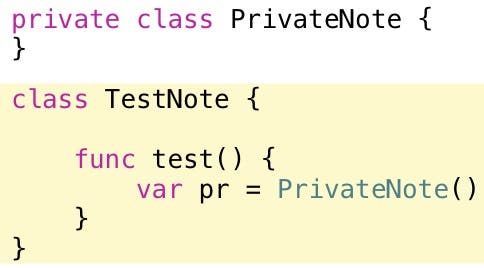
This code compiles without an error. That's because the only way you can access a private class is from the code that resides in the same source code file.
Class Member Access Level
Now let's see how different access levels work with members of a class.
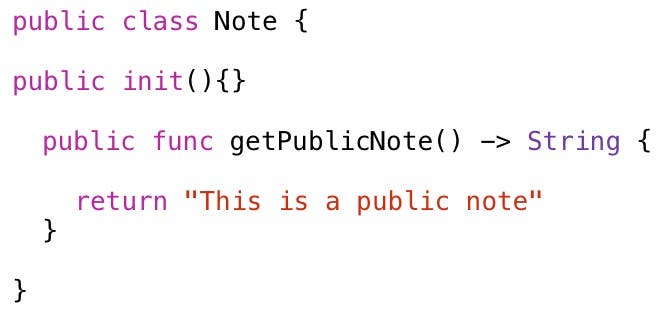
- Select the Note.swift file in the Project Navigator. Here's the class definition you'll find there:
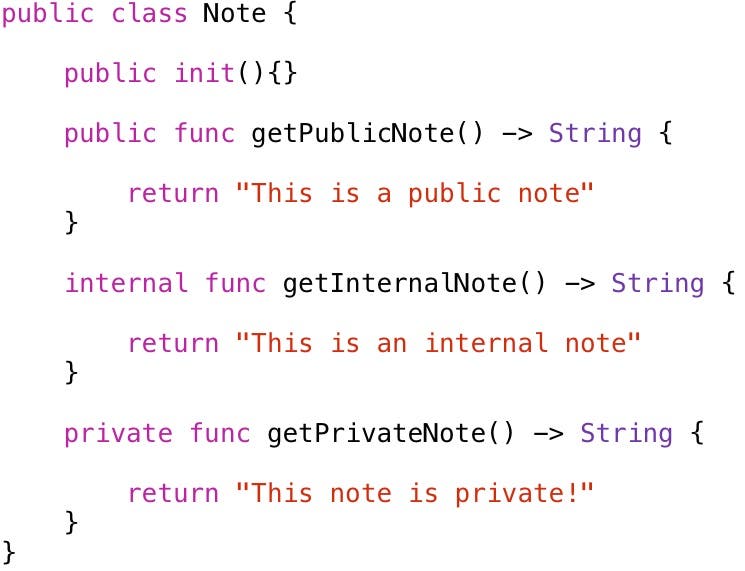
This is a public class named Note that has public, internal, and private methods. Let's try accessing the methods of this class from a different module.
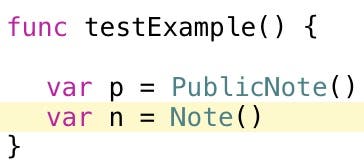
- Select the AccessControlDemoTests.swift file in the Project Navigator and add the following code to the testExample method. This code creates an instance of the Note class:
- Add a new empty line of code and then type n. as in Figure 5.
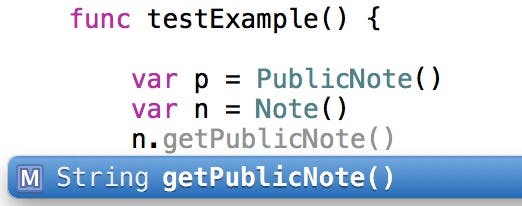
Notice that the only method accessible from another module is the public method.
- Delete the last few characters you entered in the previous step.
Let's see how the method access levels work when we access them from within the same module.
- Select the ViewController.swift file in the Project Navigator and add the following code to the viewDidLoad method:
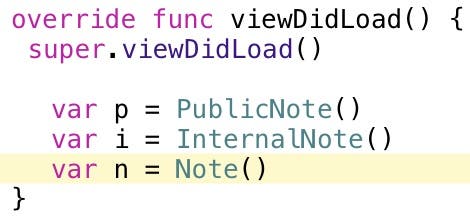
- Add a new empty line of code and type n. as in Figure 6.

Notice that both the public and internal methods are accessible from code located in the same module.
- Delete the last few characters you entered so the project compiles again without error.
Now let's see how the method access levels work when we access them from within the same source code file.
- Select the Note.swift code file in the Project Navigator.
- Add the following class declaration at the bottom of the Note.swift code file:
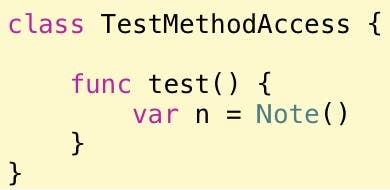
- On a new empty line, type n. and you will see all three methods including the method marked as private in Figure 7.
 |
| Figure 7 - All three methods appear in Code Completion. |
- Remove the last few characters you typed so the project will compile again.
- Note that you can also access the private method within the class it is declared in. For example, if you go to the getPublicNote method and type self. you can see that all three methods are accessible (Figure 8).
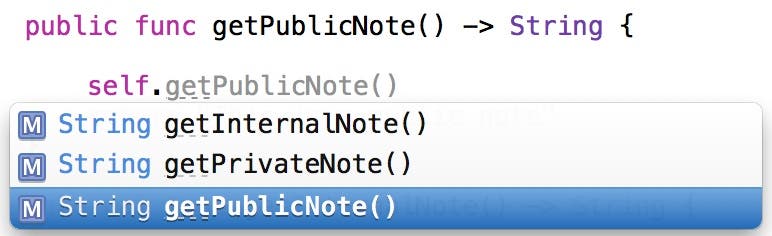 |
| Figure 8 - You can access a private member from within the class in which it is declared. |
- If you typed self. in the getPublicNote method, delete it so the project compiles without error.
Types, Members and Access Levels
Here are some basic rules governing how setting the access level of a class affects the access level of its members (properties, methods, initializers and subscripts).
- Setting the access level of a class to private sets all its members to private by default.
- Setting the access level of a class to public or internal (or don't specify any level, which defaults to internal), defaults all its members to internal.
Beginner developers often make the mistake of making all members of a class public. This is not a good approach, because it exposes members of the class that may not be useful to a consumer of the class, and in the process clutters and confuses the class interface.
In addition, if you expose too much of the inner workings of a class, you run the risk of allowing developers to use your class in ways that are unsafe and that produce tight coupling. If classes are too tightly coupled, it creates a brittle code base—when one class changes, it creates a chain reaction that forces major changes to other classes.
So Apple's approach of making the members of a public class internal by default is the right way to go. It forces you to take the extra step of adding the public keyword to a member, causing you to consider whether that member should be public.
Method and Function Access Level
In addition to the default access level it receives from its containing class, a method's access level must be set to the most restrictive access of its parameters and return values. For example:

This method has a private parameter type and an internal return type. This makes the entire method private and therefore it must be marked private as this code sample shows.
This rule also applies to functions, which do not have a containing class.
Initializer Access Level
The rules that apply to a method's default access level that it receives from its containing class also apply to initializers—public and internal classes have internal initializers, and private classes have private initializers by default.
Where this rule usually surprises developers is when they realize they need to create a public initializer for a public class, since its default is internal.
The rules that apply to method parameters also apply to initializers—their access level must be set to the most restrictive access level of their parameters.
You can manually specify an initializer's access to be the same or equal to the access level of its containing class. The one exception is required initializers, which must have the same access level as the type they are contained in.
The initializer for structures is internal by default, unless it has any private members. In that case, it would be private by default. You can also manually create a public initializer for a structure.
Variable, Constant, Property, and Subscript Access Levels
In Swift, you can't set a variable, constant, property or subscript access level higher than the level of its type.
For example, in the following code, you must declare the note property as private, because its type, PrivateNote is private:

Getter and Setter Access Levels
Getter and setter methods are automatically assigned the same access level as the variable, constant, property or subscript they belong to.
You can manually specify a lower access level for a setter than a getter to restrict the read-write accessibility of that member. To do this, specify private(set) or internal(set) before the var or subscript declaration. For example:

Note that this works for both computed and stored properties, since Swift generates a getter and setter for a stored property behind the scenes.
Miscellaneous Access Levels
There are other access rules that apply to enumerations, protocols, extensions, generics, tuples, nested types, and type aliases. Consult Apple's documentation to find out the special rules that apply to each.
Inheritance and Access Control
One of the more interesting effects of access control is how it works with inheritance.
Inheritance and Classes
You can subclass any class your code has access to. This means:
- You can create a subclass of a public class from anywhere.
- You can create a subclass of an internal class only from within the same module.
- You can create a subclass of a private class only from within the same source code file.
A class does not automatically inherit its superclass access level. For example, in the following code, SubPublicNote does not inherit its superclass public access level:
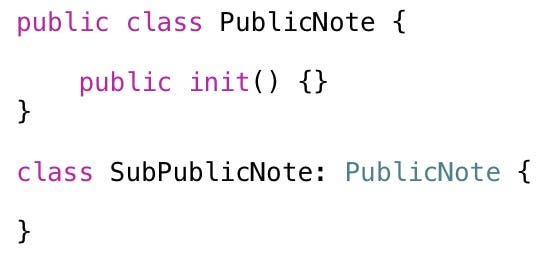
If you want SubPublicNote to be public, you have to explicitly declare it. However, note that you can't specify an access level for a subclass higher than its superclass. So, for example, you can't subclass an internal class and make it public.
Inheritance and Class Members
Class members also do not automatically inherit their access level. Rather, they get their default access level based on the access level of the class they are declared in, as described earlier in the Access Levels of Types and Their Members section.
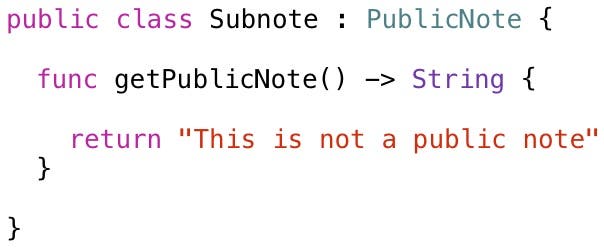
For example, in the following code, Subnote is a subclass of Note, and overrides its getPublicNote method. This method is internal by default. That's because it doesn't get its default access from its superclass, but from the class in which it is declared.
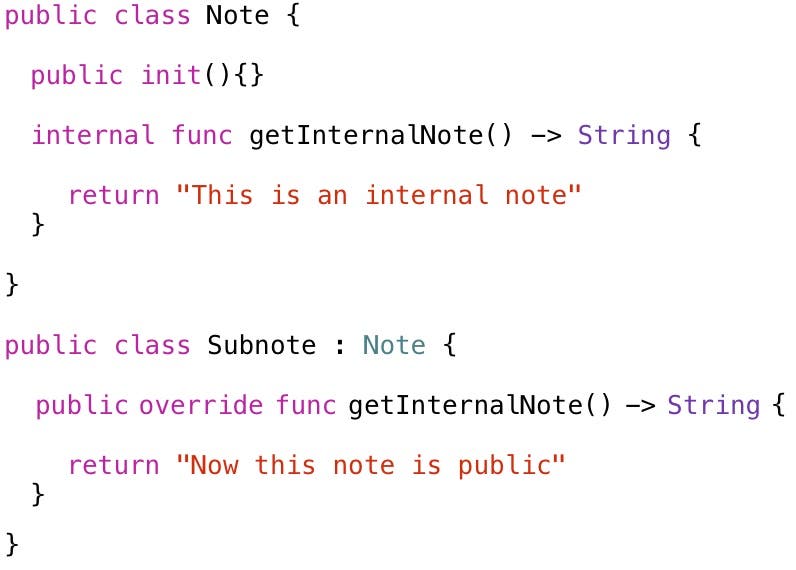
When you override a member, you can make it more accessible in the subclass, but you can't make it less accessible. For example, in the following code Subnote is a subclass of Note. It overrides the getPrivateNote method and elevates its access level to public:
Conclusion
Access control is an important feature of Swift that should be applied carefully to your iOS classes. It's well worth it to take the time to make an API that only contains the necessary members, because it makes your apps easier to create and extend in the future!

Kevin McNeish
Kevin McNeish is author of the new book “Learn to Code in Swift” as well as the “iOS App Development for Non-Programmers” book series (www.iOSAppsForNonProgrammers.com), winner of the Publishing Innovation Award. Kevin is also an award-winning app developer, software architect, and conference speaker in the U.S. and abroad. He has spent much of his career making difficult concepts easy to understand. Follow Kevin on Twitter: @kjmcneish.
 Leanne Hays
 Olena Kagui
 Rhett Intriago


 Ashleigh Page
 Amy Spitzfaden Both