Unleash Your Inner App Developer Part 2: Your First Taste of Xcode


Do you have an idea for an app but lack the programming knowledge to begin building it? In this weekly blog series, How To Unleash Your Inner App Developer, I will take you, the non-programmer, step by step through the process of creating apps for the iPhone, iPod Touch, and iPad. Join me each week on this adventure, and you will experience how fun turning your ideas into reality can be! This is Part 2 of the series. If you're just getting started now, check out the beginning of the series here (This post has been updated to iOS 8, Xcode 6.3 and Swift 1.2.)
After introducing the tools you'll need to develop apps in my previous post, I assume you've installed Xcode and are ready to get a taste of app development! I find there is no better way to learn than by doing, so let's dive in and start creating an app.
Creating a Prototype App
Whenever I create an app for myself or a client, I always create a prototype of the app first. With Xcode, Apple's tool for creating iOS apps, you can create high-quality prototype apps that appear mostly functional while writing little or no code. This is a real advantage for budding app developers who don't know a programming language yet. Creating a prototype is a best practice. It allows you to get your app into the hands of potential users and beta testers and receive valuable feedback from them. It's much more difficult to change an app after you have spent many hours writing code associated with a particular user-interface design!
One of the best things about Xcode's prototyping capabilities is that you don't throw your prototype away when you're ready to create the "real" app. You can keep the user-interface layout, navigation, and basic functionality of the prototype app, and simply add code to make it fully functional. I'll take you through this process in the upcoming weeks as we first build a prototype, and then turn it into a real app.
Begin With the End in Mind
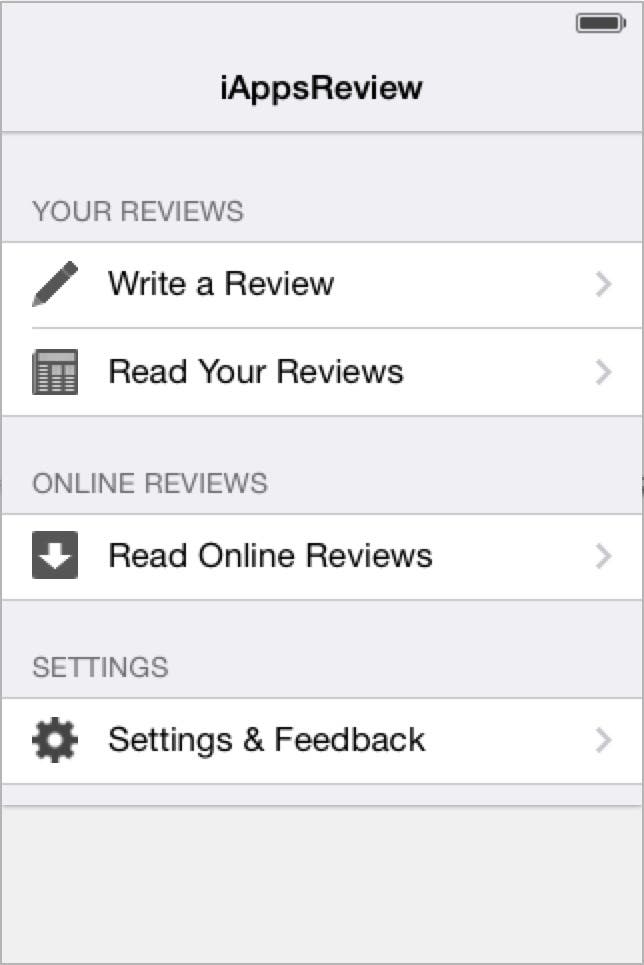 |
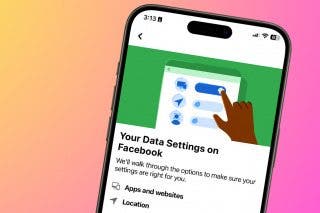
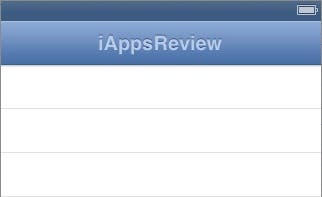
| Figure 1 - The main app screen |
I find it's best to learn how to create iOS apps by making an app that is fun and informative. With that in mind, in the upcoming weeks we will build an app called iAppsReview that can be used to review the apps on your iOS devices. When I'm designing an app, I usually start out by drawing the app's main screens on paper first. This allows me to work out the basic look and navigation flow of the app more quickly than using Xcode to lay out my initial ideas. Once I'm happy with the basic app design, I begin constructing one screen at a time in Xcode, using my pencil and paper design as a guide. I've already done this part for you, so let's take a look at the main screens in the app so you can get a good overview of what the app looks like as well as the main features it has to offer.
- Write a Review - Write a new review of an app
- Read Your Reviews - Read reviews of apps that they have already written
- Read Online Reviews - Read online reviews that others have written
- Settings & Feedback - Change the app's settings and provide the app developer (that's you) with feedback
Notice there is an icon to the left of each option. I find that users appreciate seeing an image that helps them quickly identify each main action in an app. This is a technique Apple uses in many of its built-in apps such as Settings, Photos, iTunes, and the Music app.
On the right side of each option is a gray arrow. This indicates that when the user taps one of the options, they will be taken to another screen. For example, Figure 2 shows the Write Review screen, which appears when the user taps the Write a Review option.
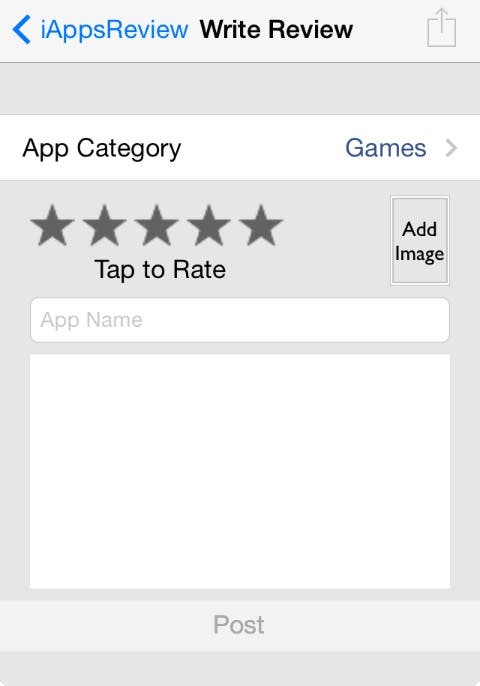 |
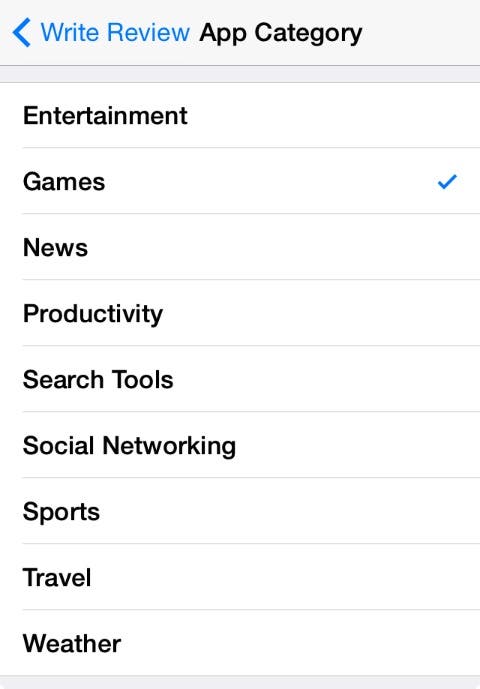
| Figure 2 - The Write Review screen |
When writing a review, the user taps the App Category option at the top of the screen, which takes them to another screen where they can select an app category from a list.
The main screen includes the Tap to Rate stars recognizable to users from rating apps and books in iTunes Store and the iBookstore. There is also a place for users to enter the app name as well as a larger text area to write comments.
At the right of the screen is an Add Image button, which the user can tap to select images of the app that they have taken on their device. After selecting a photo, a small thumbnail of the image is displayed in the button.
At the bottom of the screen is a Post button, which users can use to post their reviews to a website I have set up for this purpose. So eventually, you will learn how to create an app that can communicate with a web server over the internet!
Users can also share their reviews with others by tapping the action button on the right side of the bar at the top of the screen. When they tap this button, a popup will appear allowing them to share their reviews via Twitter, Facebook, or email. When we add this functionality to the app, you will be amazed at how easy it is to integrate with social media using the latest tools from Apple.
In subsequent posts I'll detail the other options in the app, but for now, I've given you enough information to begin creating the app.
Creating a New Xcode Project
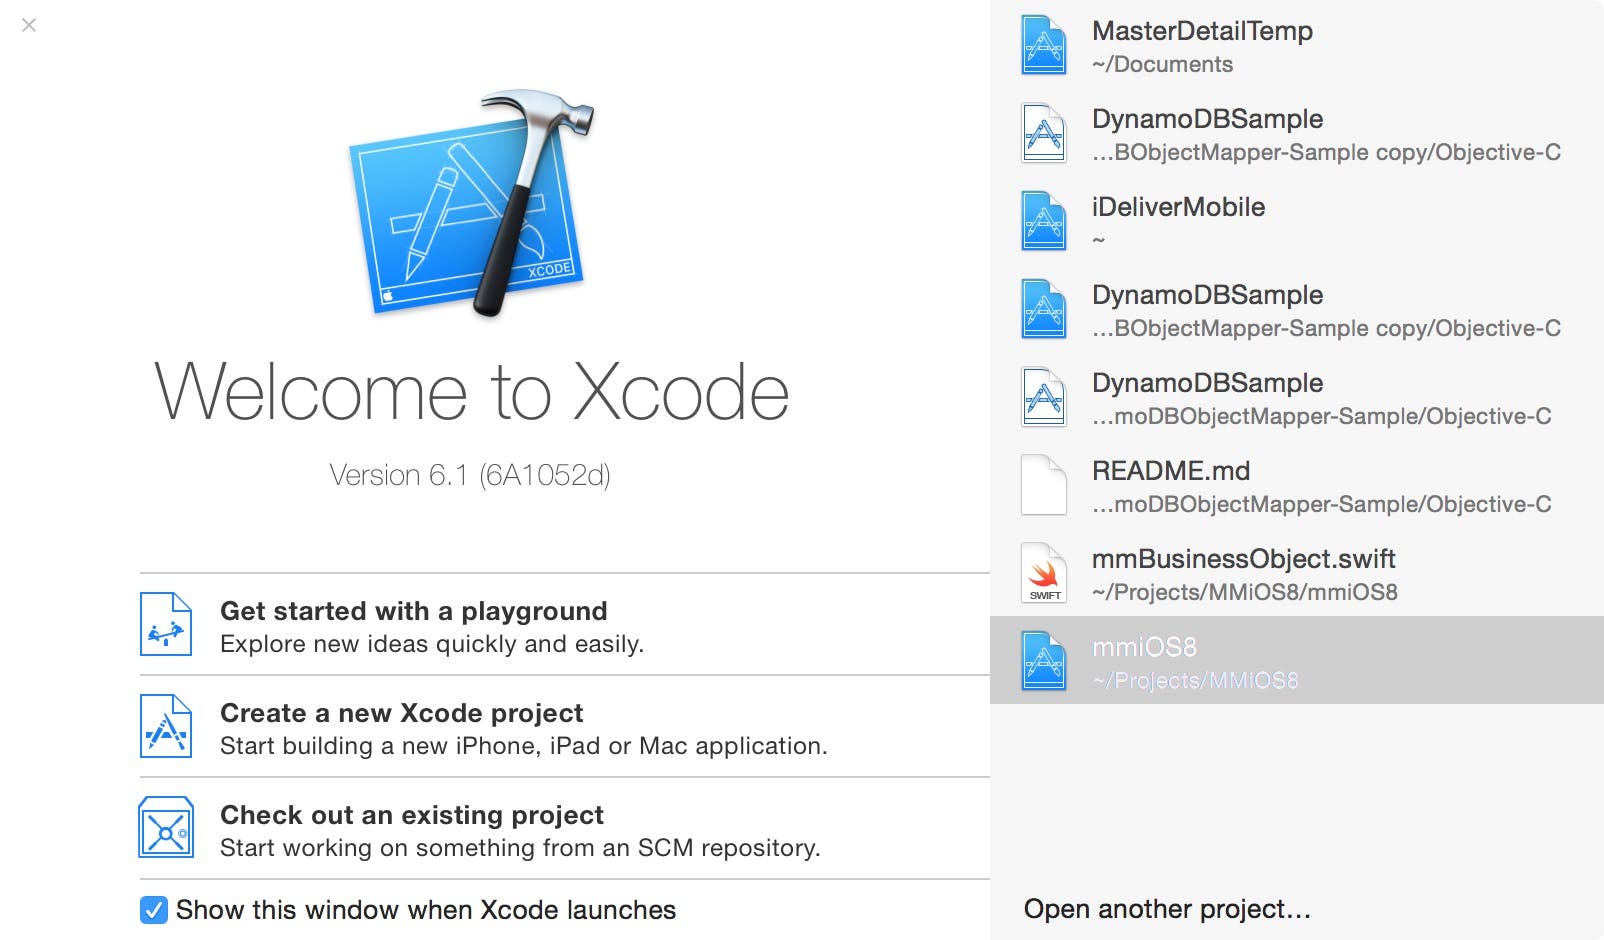 |
| Figure 3 - The Xcode Welcome window |
To get started, you need to launch Xcode on your Mac by clicking the Xcode.app icon in your Mac's Application folder. When you first launch Xcode, you will see a Welcome screen as shown in Figure 3. This window allows you to create a new Xcode project, or open a project you previously created.
In Xcode, a project is a collection of files, including images, code files, user interface layout files, text files, and settings files. You can place all of these files in a project, and when you're ready to test your app, Xcode runs a build, which takes all of these files, processes them, and combines them into a single .app file that can be run on an iOS device or on Xcode's iPhone or iPad Simulator.
- Click the Create a new Xcode project option in the Welcome to Xcode window to create a new project.
- When you do this, the main Xcode window appears, and then the New Project window shown in Figure 4 is displayed. This window allows you to select a template from which to create your new project. This is similar in concept to selecting a template when creating a slide presentation or word processing document. The template provides your app with some basic layout and navigation features.
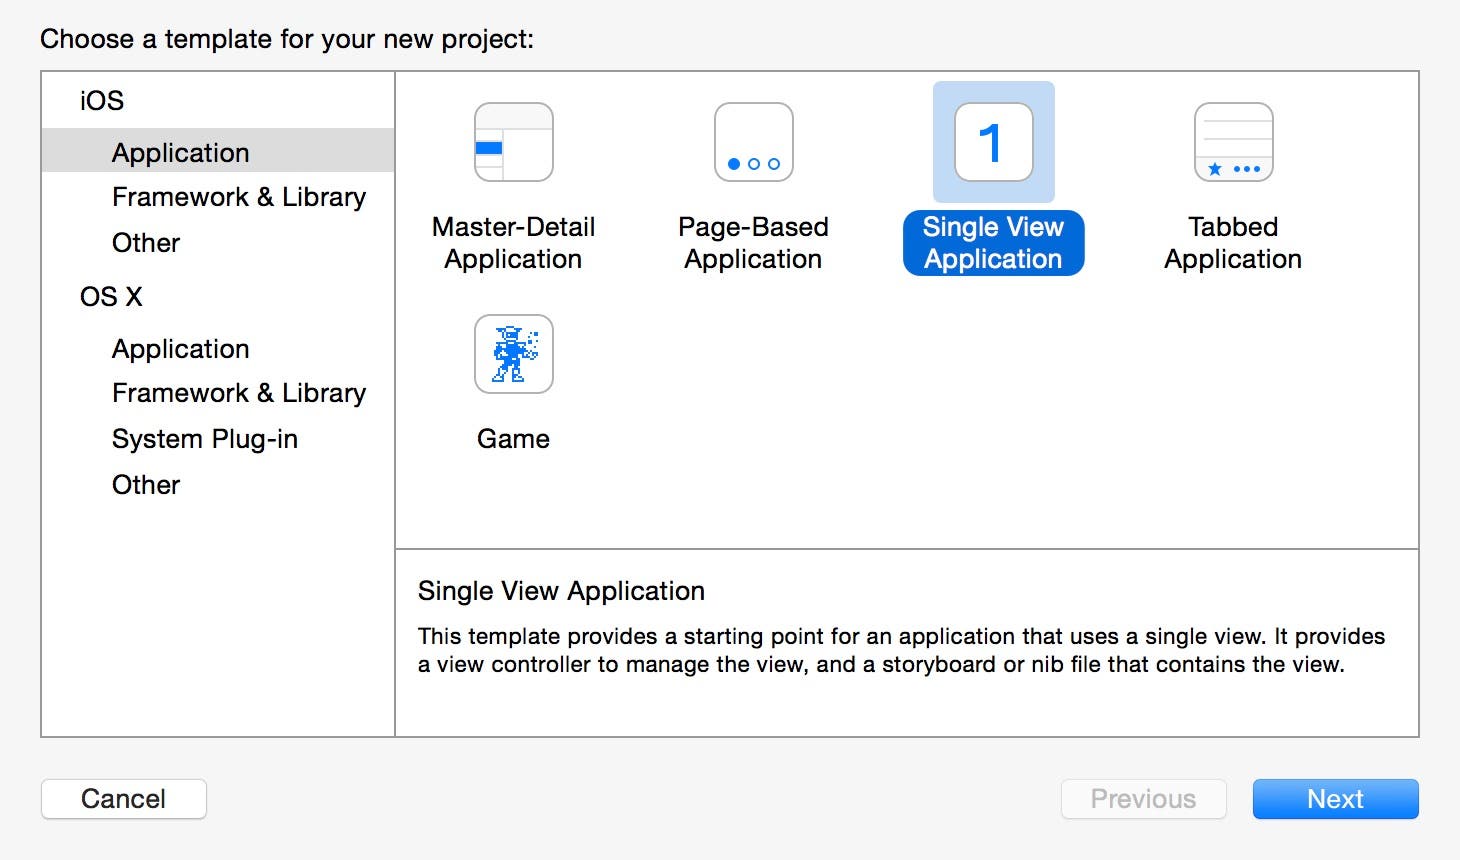 |
| Figure 4 - The New Project window |
- On the left side of the New Project window is a panel with sections labeled iOS and OS X. These two options are available because you can use Xcode to create apps for iOS devices as well as the Mac. Since we are creating an app for the iPhone, under the iOS section, select Application, and then on the right side of the window, select the Single View Application template as shown in Figure 4. This is the best template to choose when creating a prototype app because it doesn't add a lot of unnecessary files and user interface layout that you have to delete.
- Now click the Next button to navigate to the next step in the New Project window (Figure 5). This next step allows you to specify project information as well as several project options.
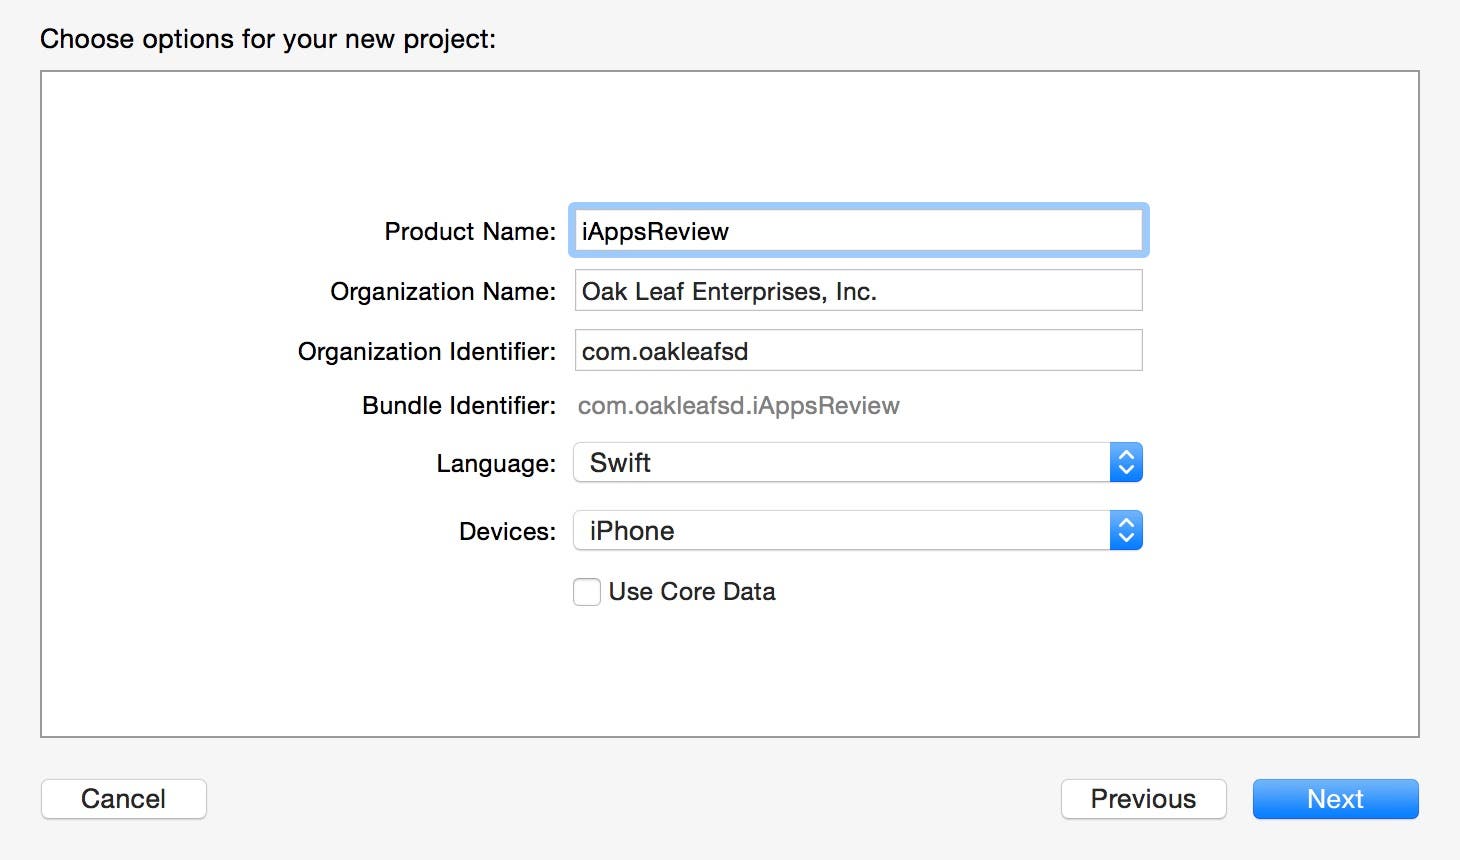 |
| Figure 5 - The New Project Window, Step 2 |
- Product Name - Enter iAppsReview as the name of the product. Xcode also will make this the name of your project.
- Organization Name - You can enter the name of your organization in this box, or you can just enter your name if you are not with an organization.
- Organization Identifier - This is part of the information used to uniquely identify your product. To help make this unique, you can use a web address in the format com.yourcompany. If you don't have a company name, you can just use edu.self. After entering the product name and company identifier, notice these two pieces of information are combined together to create the Bundle Identifier. The bundle identifier is Apple's way of uniquely identifying your app.
- Class Prefix - This option allows you to add a prefix to files you add to your project. Leave this box empty for this project.
- Devices - This option allows you to specify whether you want to create an app for the iPhone, iPad or a Universal app that runs on both the iPhone and the iPad. To make this first project simple, set this option to iPhone.
- Use Core Data - Leave this option unchecked. This option is intended for Apps that store data on the user's device. We will definitely be doing that in this app, but we'll add Core Data to the project later on.
- Click the Next button. This displays the Save window shown in Figure 6. Leave the Create local git repository for this project unchecked. This option provides version control for your project, but we don't need it right now.
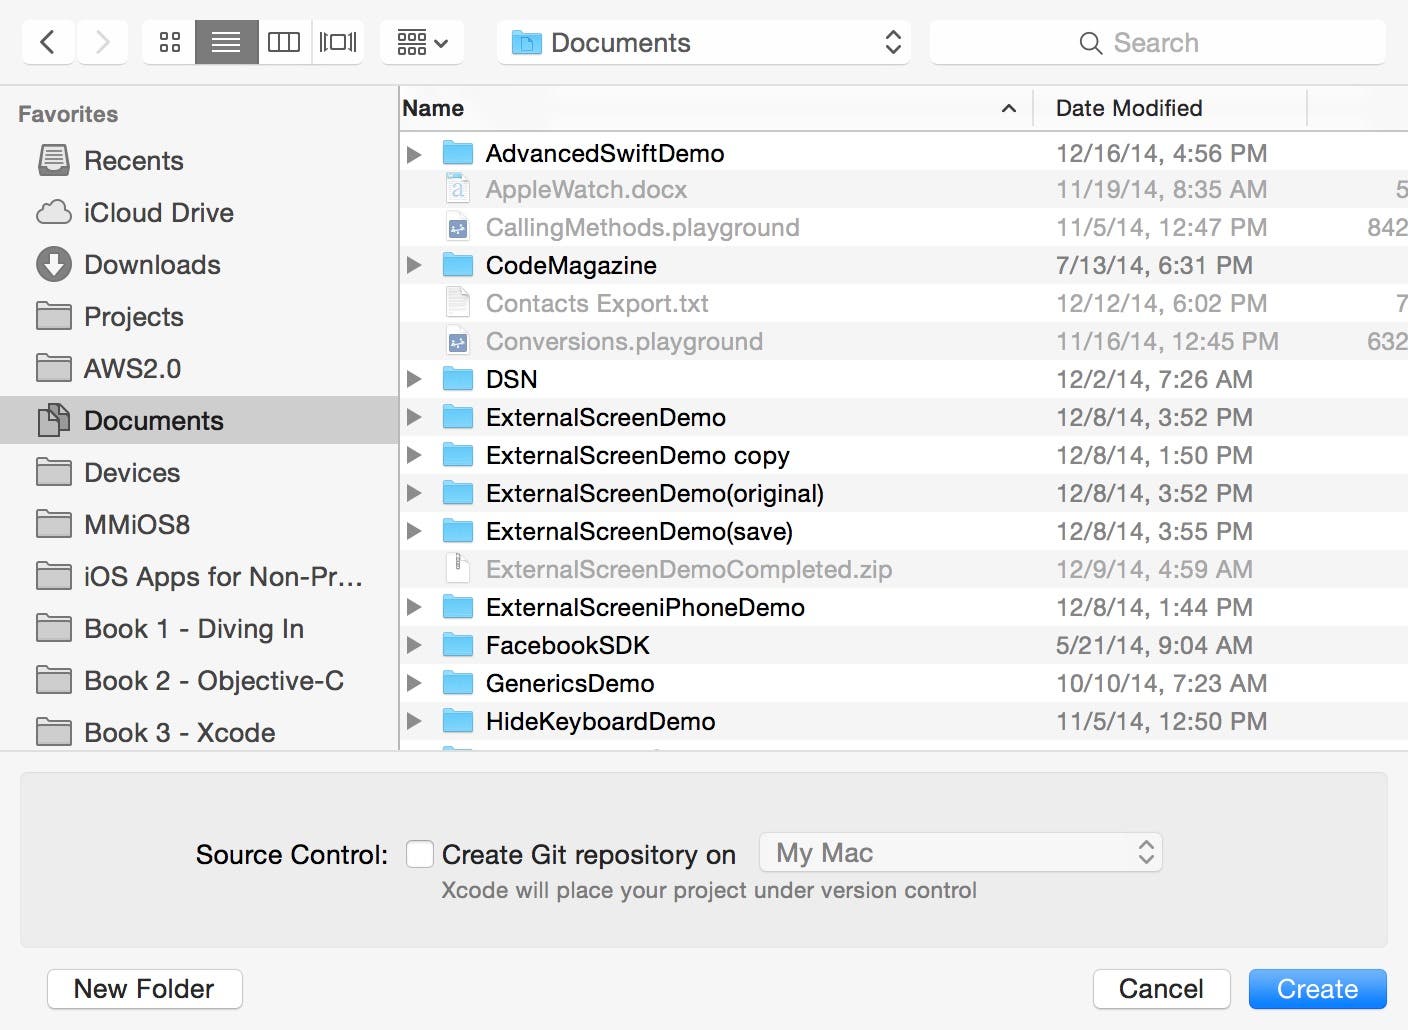 |
| Figure 6 - The Save Project window |
- You can store the new project in any folder you like, but I recommend selecting the Documents folder as I have done in Figure 6 so it's easy to find your project later on, and all the screen shots of my project will match yours.
- Click the Create button to create the new project.
Examining Your New Project
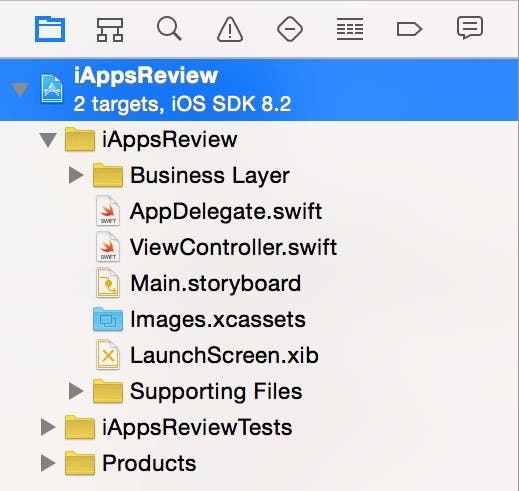 |
| Figure 7 - Your new project! |
When Xcode finishes creating your new project, you will see a list of files in the Project Navigator pane on the left side of the Xcode window as shown in Figure 7. Since we created a new project from the Single View Application Project template, there are just a few files included in the project. The folders in the Project Navigator are called groups and are used to organize related files together. Note that these group folders do not correspond to actual folders on your Mac's hard drive! They are just used to create a logical grouping of files.
The AppDelegate.swift and ViewController.swift files contain program code, but since you're not doing any coding right now, you don't need to worry about it yet!
Working with Storyboards
One of Apple's greatest innovations for making it easier to create iOS apps is storyboards. With storyboards, Apple takes a page right out of Pixar's play book. In the same way that a storyboard shows the main scenes and flow of a film, storyboards in Xcode allow you to see the main scenes in your app, and the navigational flow between them. The storyboard in Figure 8 shows just a few screens from the app we will be creating. The iPhone-shaped rectangles are called scenes. The lines with arrows connecting the scenes are known as segues and they help you visualize the navigational flow of your app.
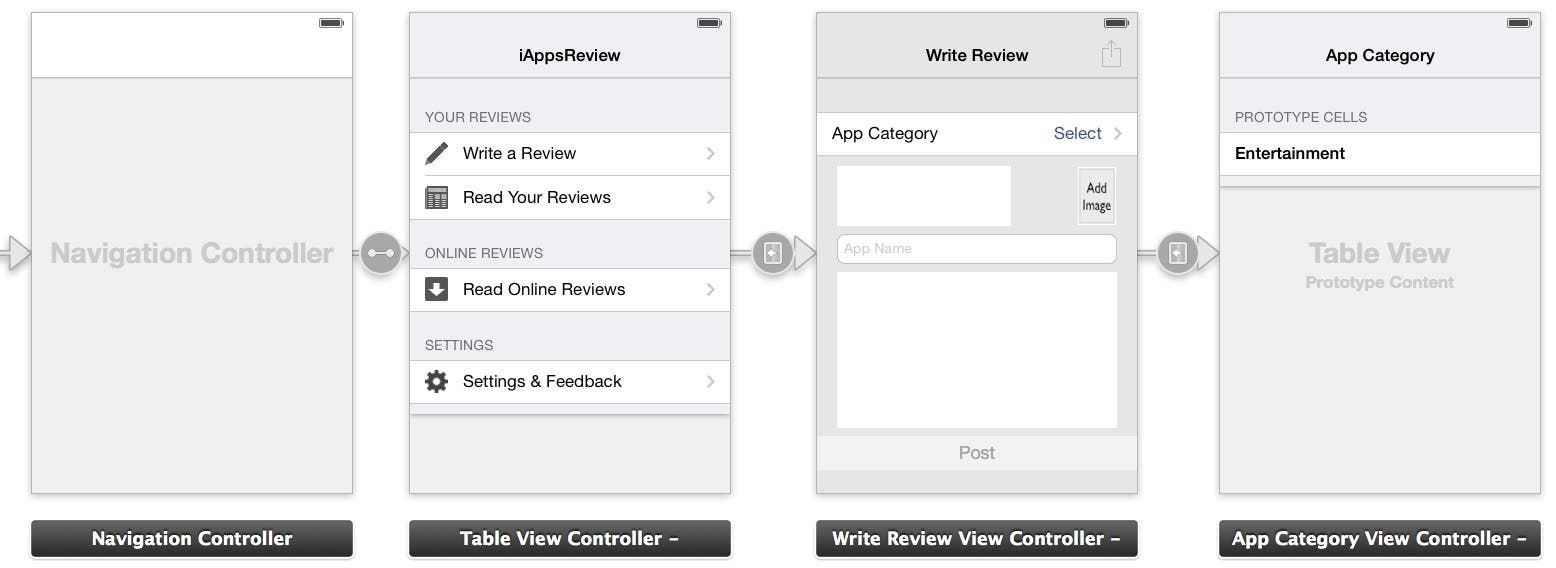 |
| Figure 8 - An Xcode storyboard shows the basic layout and flow of your app. |
Configuring the Storyboard
To simplify this tutorial, we are going to create an iPhone-only app that uses the simpler "springs and struts" layout rather than the newer (and more complex) auto layout. You will learn the details of Auto Layout later in this series, but I want to keep this example as simple as possible for now.
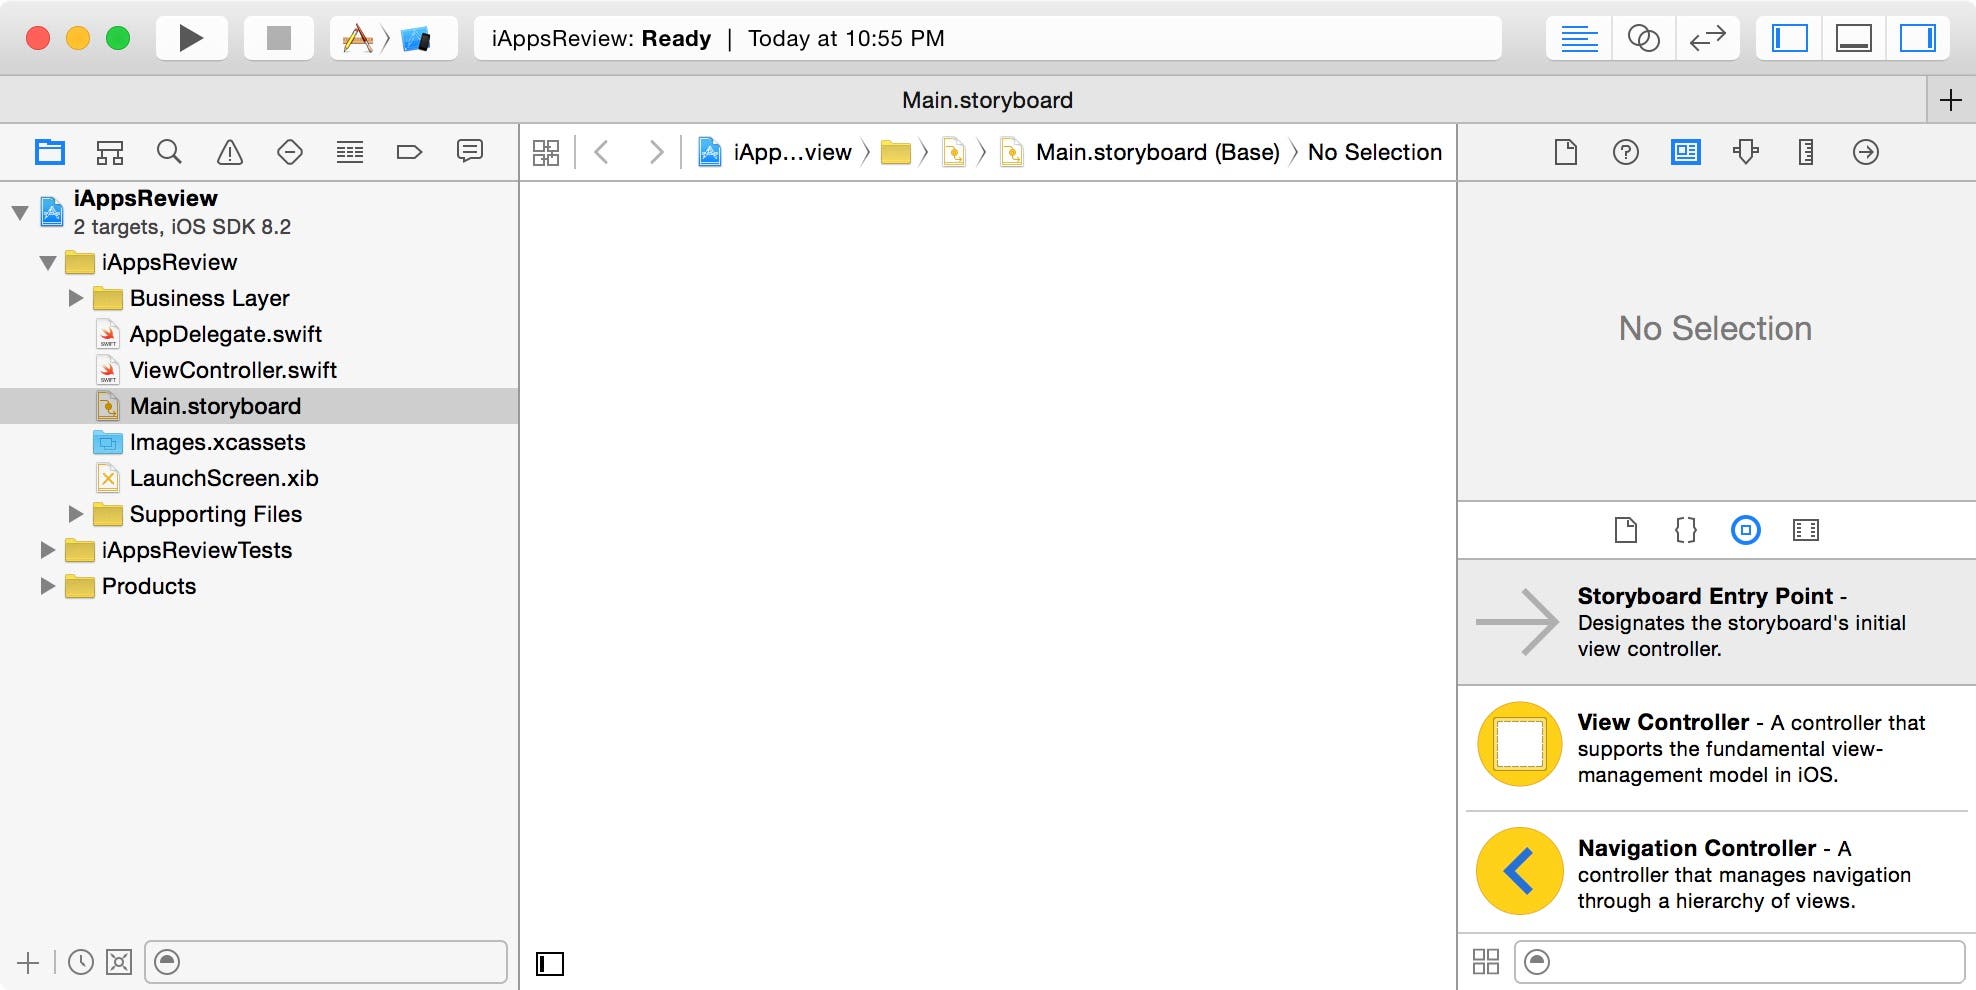
- In the Project Navigator on the left side of the Xcode window, select the Main.Storyboard file. This displays the storyboard in the center area of the Xcode window.
- On the right side of the Xcode window, click the button on the far left in the Inspector toolbar to display the File inspector.
 |
| Figure 9 - Select the File Inspector |
- Uncheck the Use Auto Layout check box. This displays a Using Size Classes Requires Auto Layout warning dialog (Figure 10). Select the Disable Size Classes option, which we don't need when creating an iPhone-only layout.
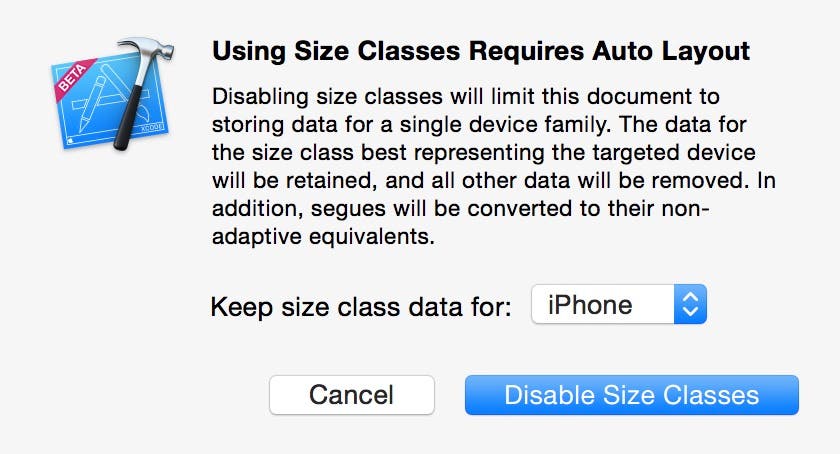 |
| Figure 10 - Select Disable Size Classes. |
Selecting this option displays an iPhone-shaped rectangle in the storyboard design surface (Figure 11).
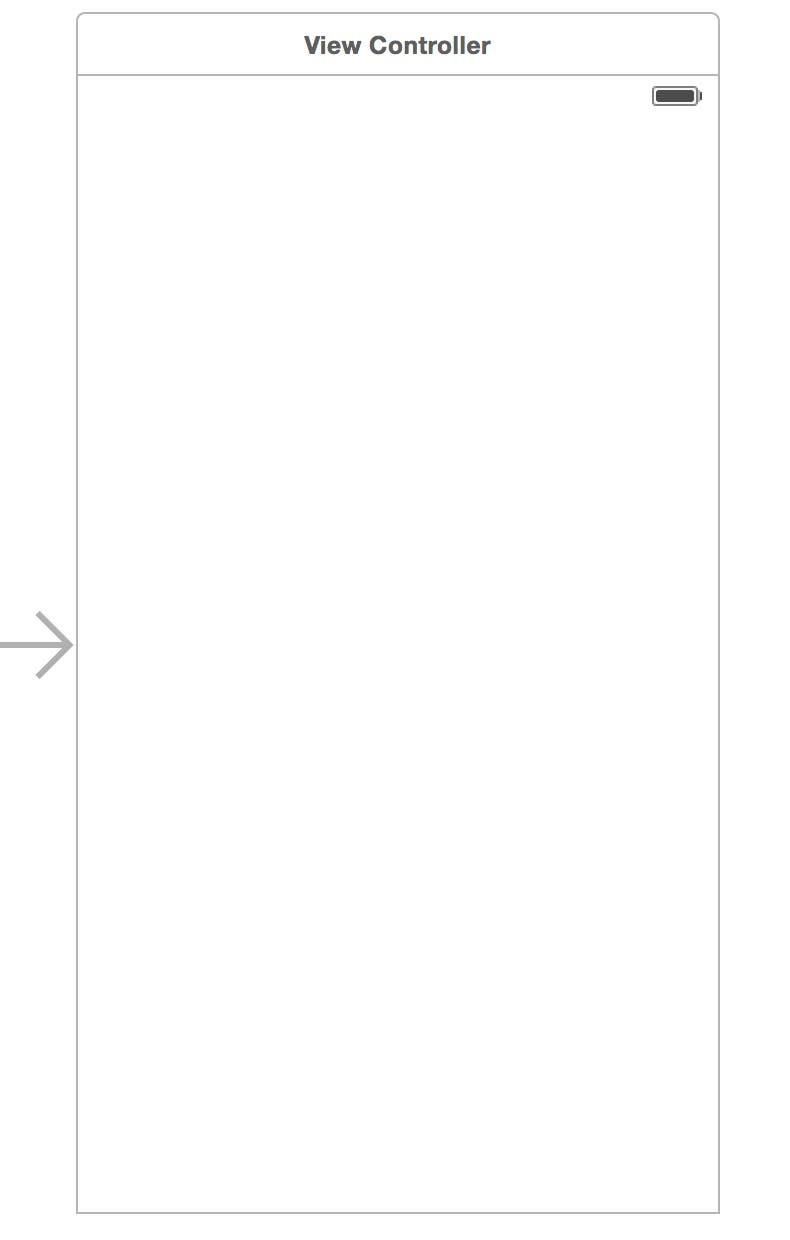 |
| Figure 11 - The iPhone-shaped rectangle is a scene. |
- Ultimately, the scene that was automatically added to the storyboard when you first created the project doesn't suit our needs, so we need to delete it. To do this, first click the rectangular area at the top of the scene, known as the scene dock, as shown in Figure 12. This changes the color of the scene's border to blue. Next, press the delete button to delete the scene from the storyboard, leaving a plain white design area.
 |
| Figure 12 - Click the scene dock at the top of the scene. |
Now you're ready to go back to the storyboard, but before you do, let's talk about navigation controllers.
Adding a Navigation Controller
In iOS apps, a navigation controller manages the navigation between different scenes. It presents a navigation bar at the top of the scene (Figure 13) which can contain a title, a back button, as well as other optional buttons.
 |
| Figure 13 - The navigation bar at the top of the scene |
The first object you normally add to a storyboard is a navigation controller because it controls all the other scenes. You will learn more about navigation controllers later in this blog, but for now, follow these steps to add a navigation controller to the storyboard:
- In the Project Navigator, select the Main.storyboard file, which displays the storyboard in the center of the Xcode window.
- Next, go to Xcode's Object Library located in the bottom right corner of the Xcode window (Figure 14). If it's not visible, go to the Xcode menu and select View > Utilities > Show Object Library.
 |
| Figure 14 - The Object Library is at the bottom right corner of the Xcode window. |
- Next, drag a navigation controller from the Object Library and drop it on the storyboard as shown in Figure 15.
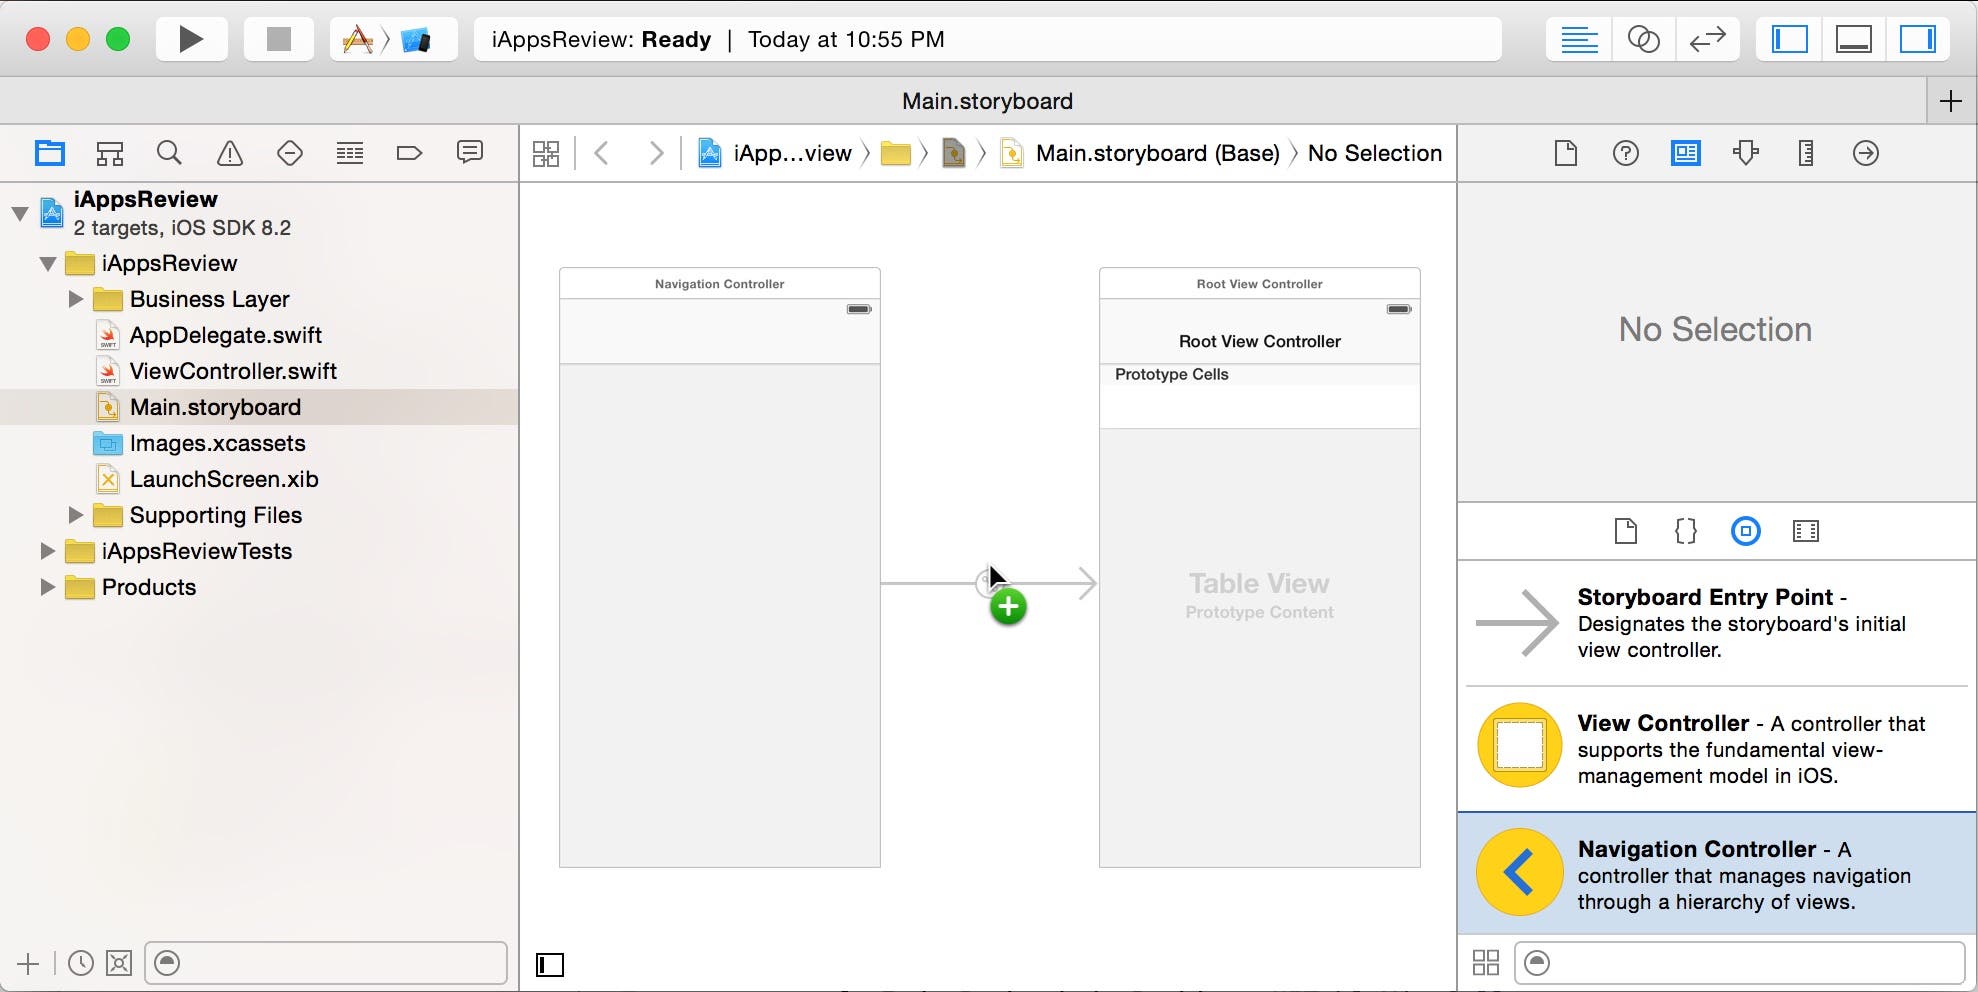 |
| Figure 15 - Add a navigation controller to the storyboard |
You may have been surprised to see that two scenes were added when you dragged the navigation controller to the storyboard. The Root View Controller on the right contains a Table View that can hold a list of items.
In previous versions of Xcode, adding a scene to an empty storyboard automatically set that scene as the storyboard's primary entry point. Starting in Xcode 6, you need to manually set the entry point. Let's do that now.
- If you are using Xcode 6.1.x, add a storyboard entry point by clicking the Navigation Controller's dock, which selects its associated view controller. Next, go to the Attributes Inspector and in the View Controller section, select the Is Initial View Controller check box.
If you are using Xcode 6.2 or newer, scroll to the top of the Object Library, located in the bottom right corner of the Xcode window. Drag a Storyboard Entry Point and drop it on the Navigation Controller. This adds an arrow on the left side of the navigation controller (Figure 16).
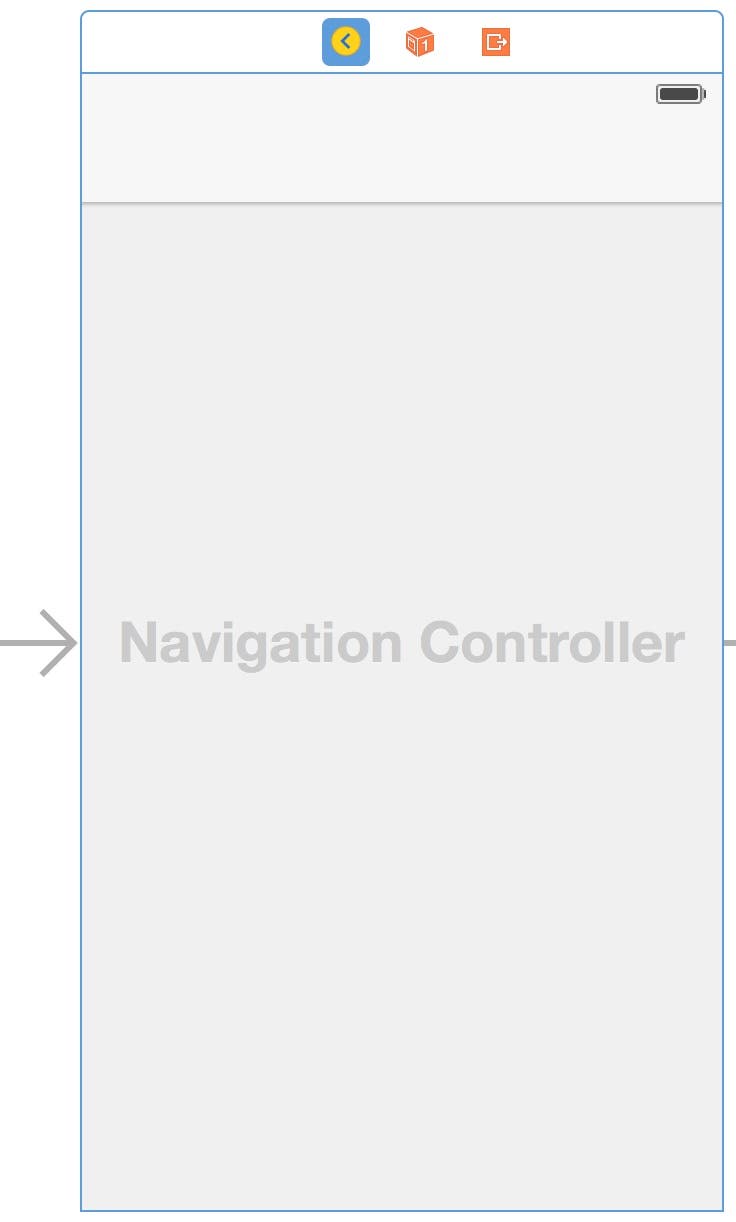 |
| Figure 16 - The entry point is added to the scene |
Understanding Table Views
Table views are used to display lists of data and are found in most of Apple's built-in Apps such as Settings (Figure 17), iTunes, Photos, and Mail. Each division of a table view is a section. For example, the table view in Figure 17 has three sections.
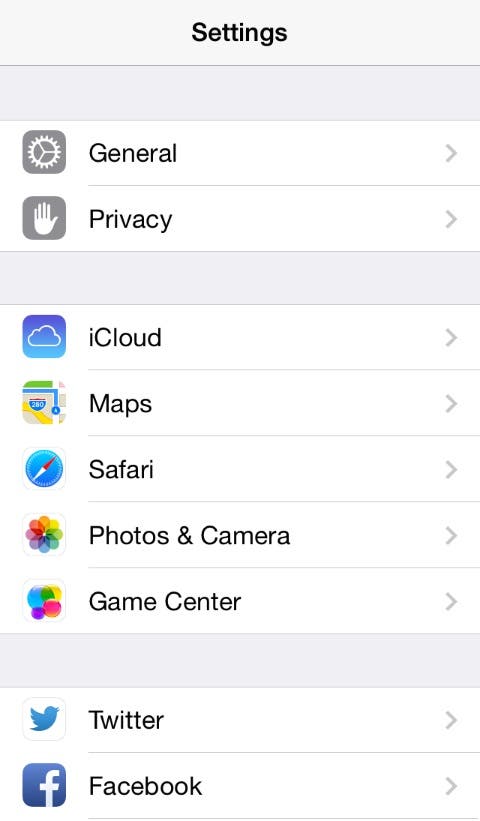 |
| Figure 17 - The Settings app's table view |
Each item in a section is known as a row, and a table view can contain an unlimited number of rows. Each row is one column wide and can contain an image, text, and an accessory icon, such as the disclosure indicator (the gray arrow) shown on the right side of the rows in Figure 17. Several of the scenes in the app you are creating contain table views, so it's good to become familiar with them.
Configuring the Table View
The last thing we will do in this week's post is configure the table view in the root view controller.
- In the Root View Controller, click on the gray area labeled Table View Prototype Content as shown in Figure 18.
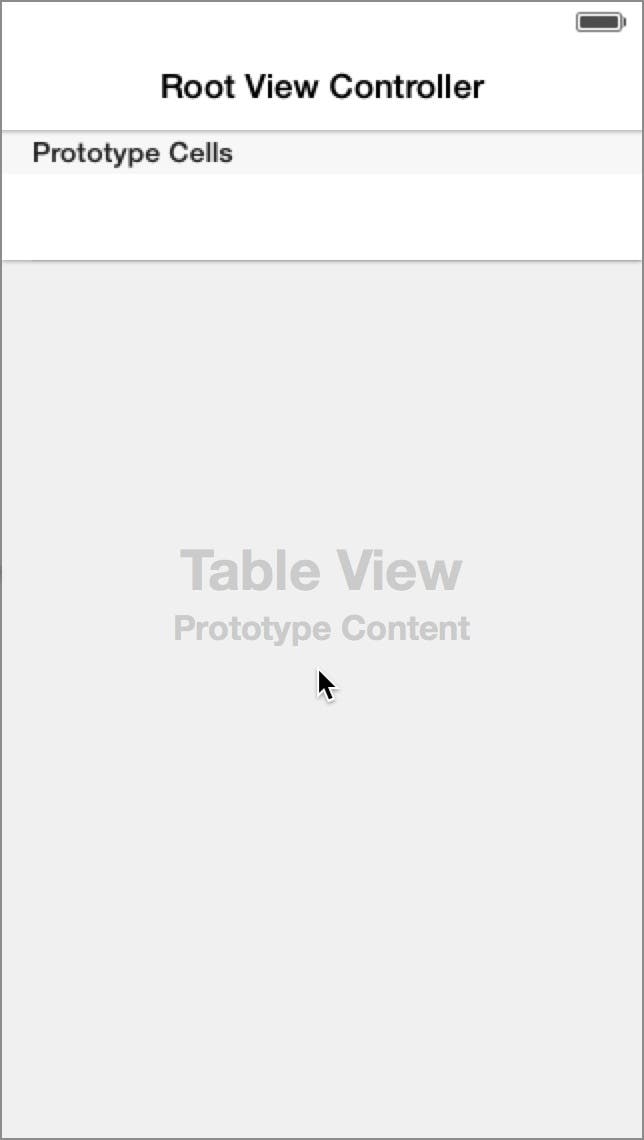 |
| Figure 18 - Select the table view. |
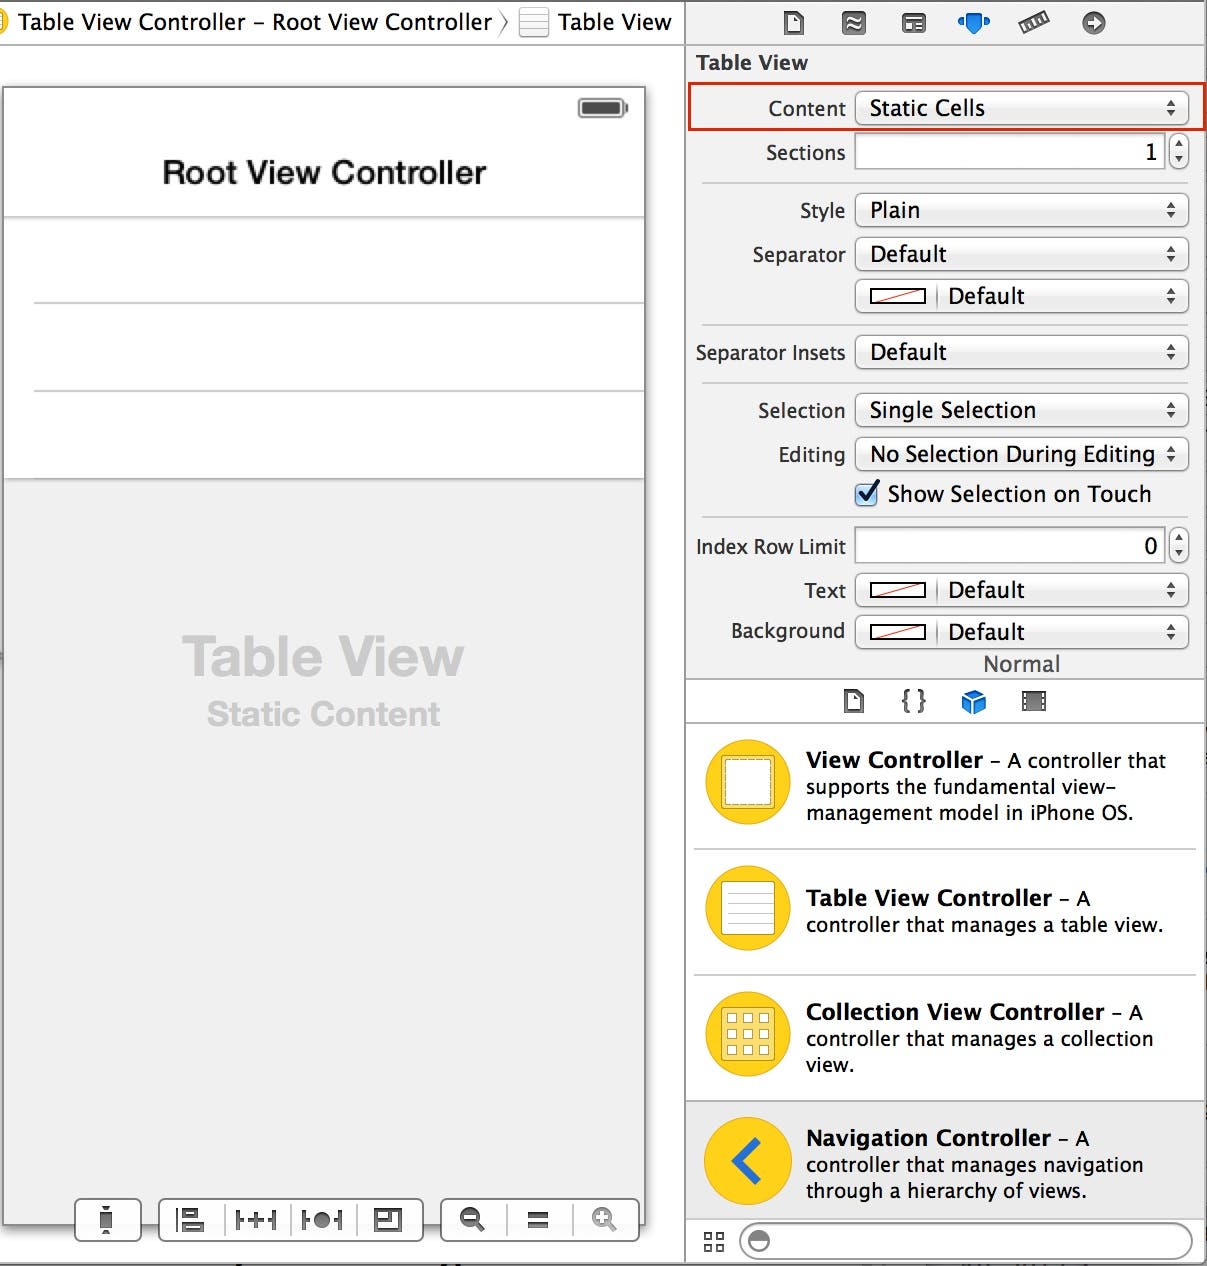
- Next, go to Xcode's Attributes Inspector contained in the Utilities panel on the right side of the Xcode window as shown in Figure 19. If the panel isn't visible, go to the Xcode menu and select View > Utilities > Show Utilities. Then, to display the Attributes Inspector, select the third button from the right in the Inspector toolbar. Whenever you select an object in the design surface, the type of the object is displayed at the very top section heading. You should always check this heading to make sure you have the correct object selected. In this example, you should see Table View displayed at the top of the Attributes Inspector as shown in Figure 19.
 |
| Figure 19 - The Attributes Inspector |
- When you are sure you have the table view selected, change the Content attribute from Dynamic Prototypes to Static Cells. When you do this, the appearance of the table view changes as shown in Figure 19. The cells that you set up at design time are used to produce rows in the table view at run time (when the App is running in the Simulator or an iOS device). We have selected the Static Cells option because rather than filling the cells with dynamic content, you will be adding static content at design time;
- Next, double-click the title of the blue navigation bar labeled Root View Controller at the top of this scene to put it into edit mode as shown in Figure 20;
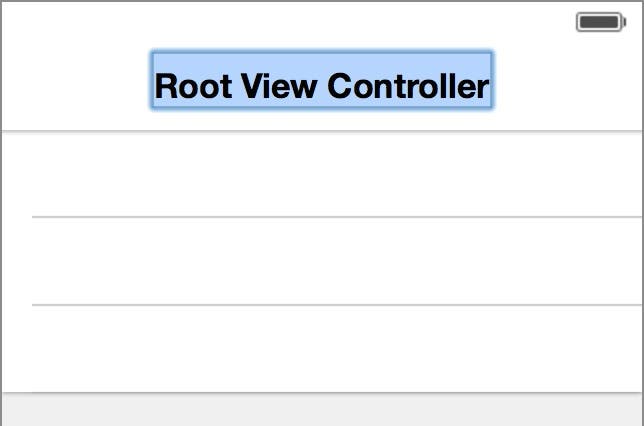 |
| Figure 20 - Edit the Root View Controller's title |
- Change the title of the navigation bar by typing iAppsReview as shown in Figure 21, and then press enter.
 |
| Figure 21 - Change the title to iAppsReview. |
Running the App in the Simulator
Let's run the app in the Simulator to check our progress so far.
- First, make sure the Scheme setting in the toolbar at the top of the Xcode window is set to one of the iPhone options as shown in Figure 22.
 |
| Figure 22 - Set the Scheme to one of the iPhone options. |
- To run the app in the iPhone Simulator, click the Run button in the upper left corner of the Xcode window (Figure 23).
 |
| Figure 23 - Click the Run button |
- After several seconds you should see the app displayed in the iPhone Simulator as shown in Figure 24. If this is the first time you have run an app in the Simulator, you probably feel pretty excited to see it up and running!
 |
| Figure 24 - The prototype app running in the iPhone Simulator! |
- If the Xcode window is visible, click on it to go back to Xcode, otherwise, press Command+Tab to go back to Xcode, and then press the Stop button to stop the app from running in the Simulator.
Conclusion
You have accomplished quite a bit in this post! So far you have learned how to create a new project, how to add new files to the project, how to create and configure a storyboard, and how to add a navigation and table view controller to a storyboard.
In my next post we will configure the app's main scene and table view so it looks just like the scene shown in Figure 1, and we'll even add the next scene to the storyboard that allows the user to write a new app review.

Kevin McNeish
Kevin McNeish is author of the new book “Learn to Code in Swift” as well as the “iOS App Development for Non-Programmers” book series (www.iOSAppsForNonProgrammers.com), winner of the Publishing Innovation Award. Kevin is also an award-winning app developer, software architect, and conference speaker in the U.S. and abroad. He has spent much of his career making difficult concepts easy to understand. Follow Kevin on Twitter: @kjmcneish.
 Olena Kagui

 Susan Misuraca
 Amy Spitzfaden Both
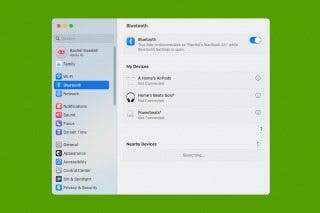
 Rachel Needell
 Donna Schill
 Rhett Intriago