We've been able to create shared albums and invite people to view and add content for years. Now, Apple has finally made it possible to easily share a shared album with Android users, but the trick is that the album has to be upgraded, a feature only available with iOS 27 or later. Let's go over how to share iPhone albums with iPhone and Android users.
Why You'll Love This Tip
- Learn how to create a shared album and share it with iPhone or Android users.
- Upgrading a shared album allows you to share it with Android users, and stores the album in full resolution. (Keep in mind this does take up more storage.)
How to Create a Shared Album & Share it with iPhone Users
System Requirements
This tip was performed on an iPhone 17 Pro running iOS 27. Upgraded shared albums are only available in iOS 27 and later.
The first step to sharing an album with an iPhone or Android user is, of course, creating a shared album. To make a shared album, open the Settings app, tap the banner with your name in it, tap iCloud, tap Photos, then turn on Shared Albums. Next, open the Photos app, tap the Collections tab, then tap Shared Albums.
- Tap the plus sign.

- Now you can add a Shared Album Name, choose a Sharing Option, make the album temporary, if you wish, and add photos and videos. Tap the check mark when you're finished to create the album.


How to Share an Upgraded Album with an Android User
If you've been waiting for an easy way to share albums with Android users, iOS 27 has you covered. Shared Albums can now be shared with an Android user, and they can even contribute their own photos and videos to the album. Before you can share the album, though, you need to upgrade it. Then, follow these steps:

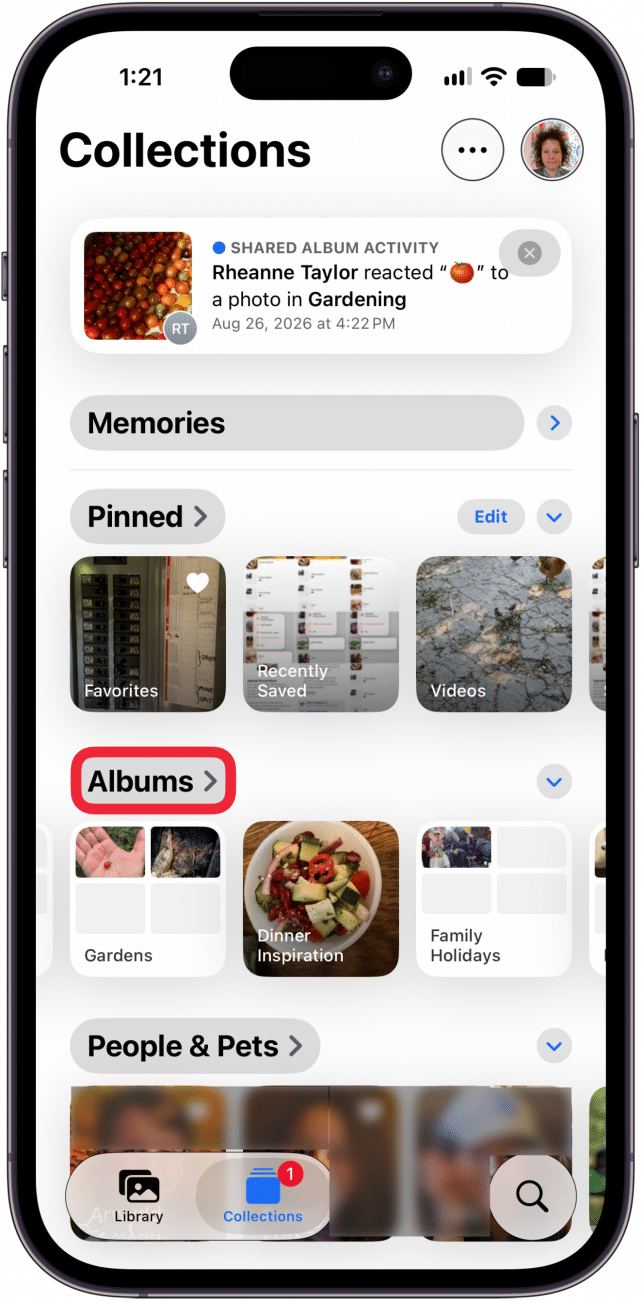
- Open the Photos app.

- Tap Collections.

- Tap Albums.

- Tap Shared.

- Touch and hold an album you want to share.

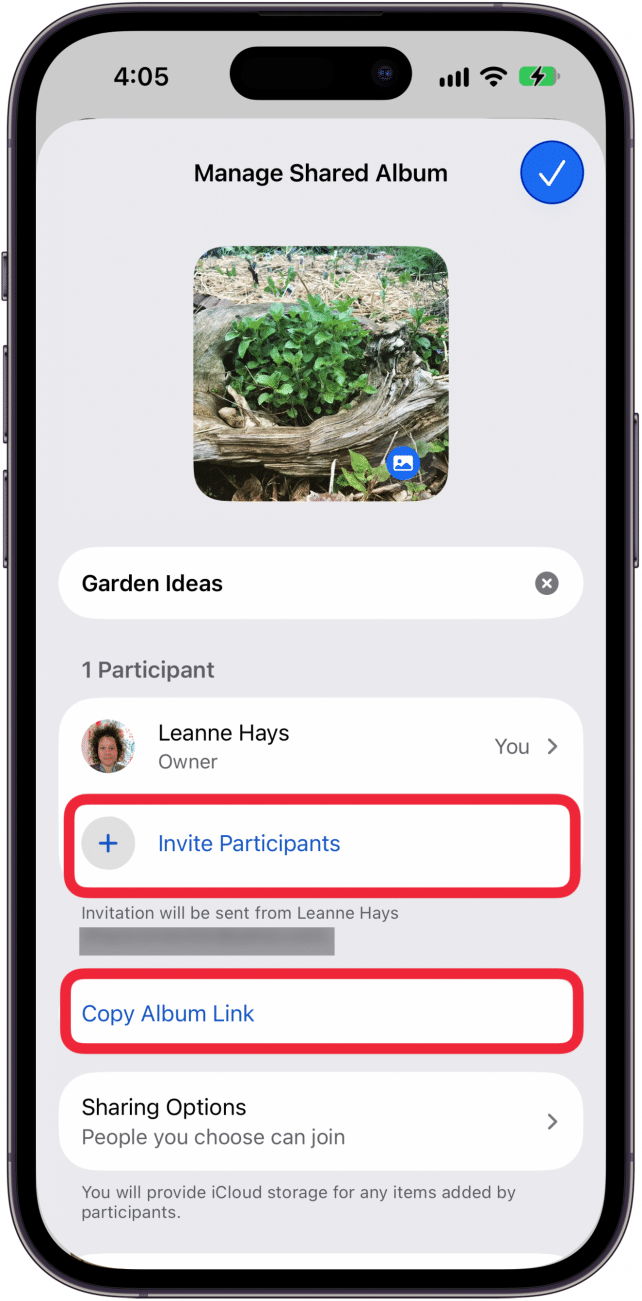
- Tap Manage Shared Album.

- Tap Invite Participants or Copy Album Link.

- If you tapped Invite Participants, select the participant here.

- Tap Allow Access Requests, Allow Anyone with the Link, or Continue.

If you tap Continue, you have to return to the album's Sharing Options to give access. Allow Access Requests is the most secure option, but it means Android users have to ask you for access, and be approved to join. Allow Anyone with the Link means that anyone with the link can view and add to the shared album. - If you tapped Copy Album Link, you can share the link via text message, Facebook Messenger, and more. In this example, I've shared the link with an Android user via text message.






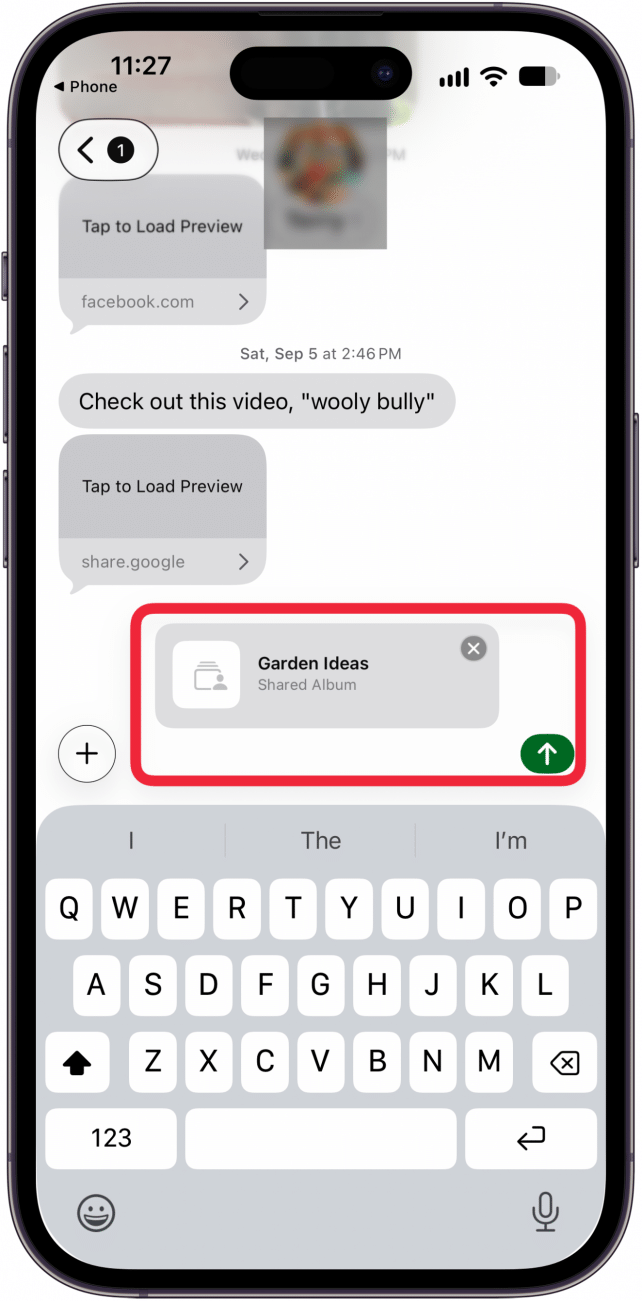
If you send a shared album to an Android user, they'll be able to view the album contents, as well as add photos to it. The recipient can also share the link with others without your permission, unless you toggle on Access Requests. Toggling on this setting means you'll get a notification if anyone you haven't invited attempts to view the link.
Now you know how to share a shared album with an Android user. Be sure to check out our free Tip of the Day for more great photo sharing tutorials.