How to Watermark Photos on iPhone
Learn how to add a watermark to photos on your iPhone to protect your work from unapproved use.


With over 10 years of experience in publishing, Amy specializes in Apple news and rumors, health and fitness tech, and parenting in the digital age.
Learn More With over 10 years of experience in publishing, Amy specializes in Apple news and rumors, health and fitness tech, and parenting in the digital age.
Learn MoreIf you're worried about the photos you post online being taken and used without your permission, you'll want to know how to watermark photos. A watermark is a stamp of sorts that marks your work as yours so others can't pass off your art or photography as theirs or download it and use it for commercial purposes. Let's learn how to make an iPhone watermark.
How to Make a Watermark on iPhone
Watermarks are great for when you want to advertise graphics without giving people the option to just download and use them. Watermarking a photo helps protect your intellectual property and keep people from using your art or photos without your approval. There are two ways to add a watermark to a photo on your iPhone. First, you can do it using the markup feature. Second, you can download an app and do it that way. Let's go over both options. For more ways to keep your data secure, check out our Tip of the Day.
How to Watermark Photos on iPhone Using Markup
You can add a watermark to a photo just using Markup in your Photos app, though the options here are more limited. Let's go over how to do this, and then you can decide if an app (which we will go over next) would better suit your purpose. Saved signatures are a great way to add a watermark to a photo, so for this example, we will do that, but you can also draw or add text as desired. Here's how to watermark photos with Markup:
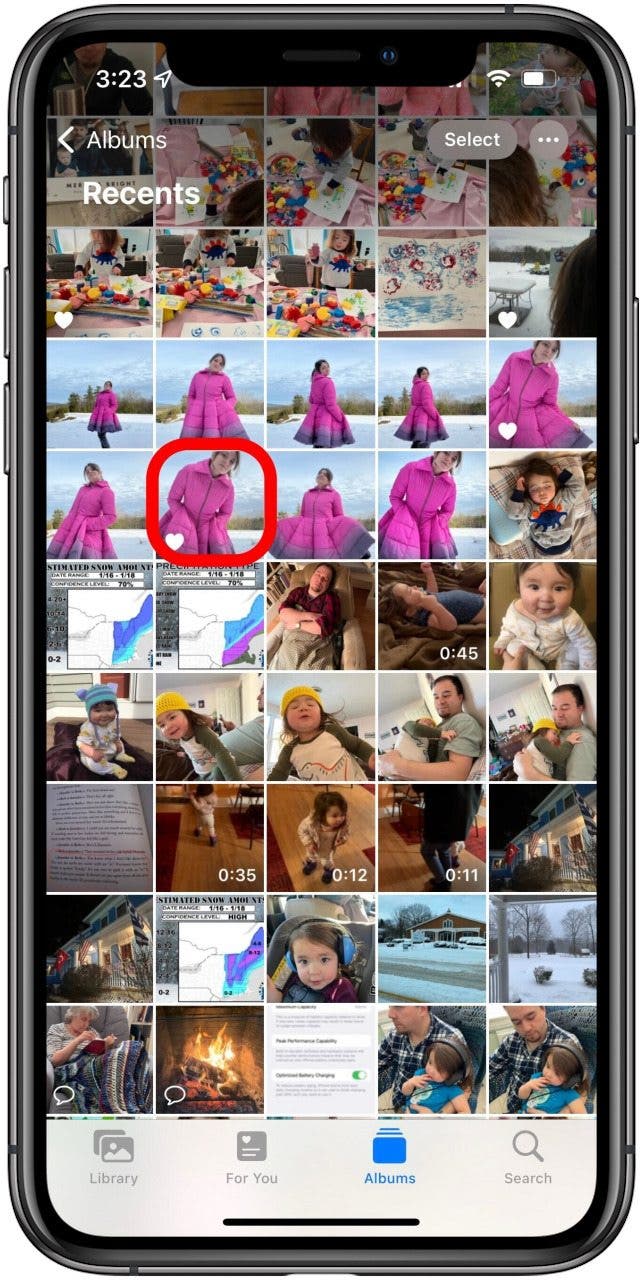
- Open the photo you want to watermark in your Photos app.
- Tap Edit.
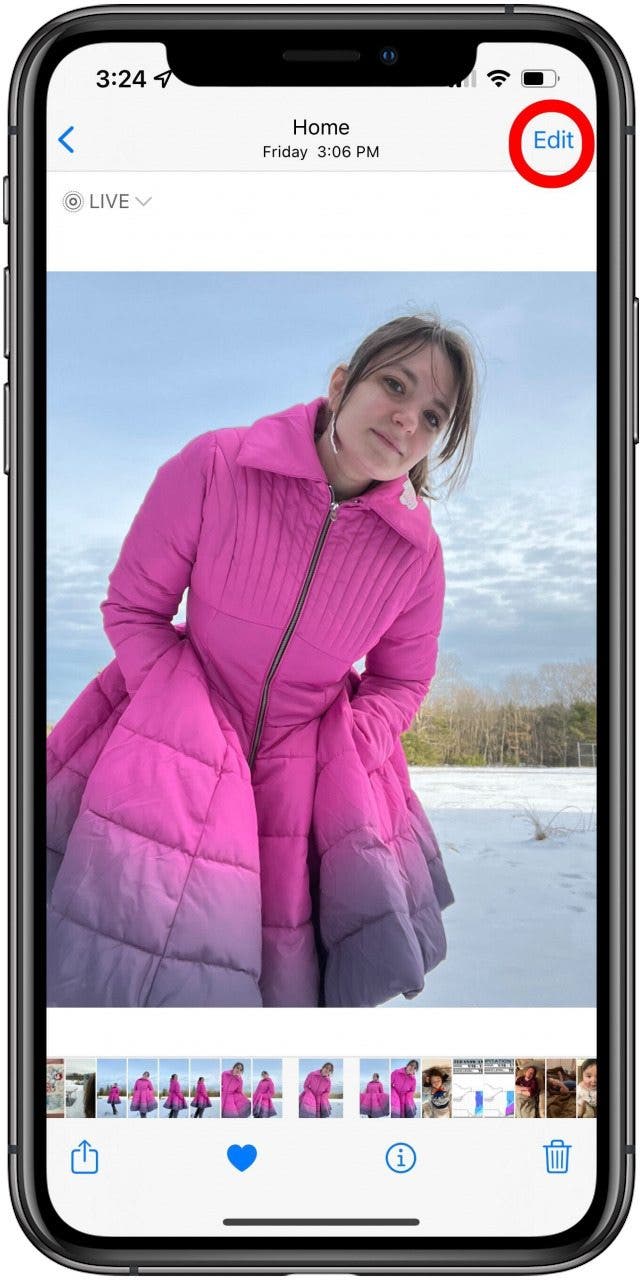
- Tap the Markup icon at the top of the screen.

- If it's a Live Photo, tap OK to turn the Live Photo function off and proceed with the markup.

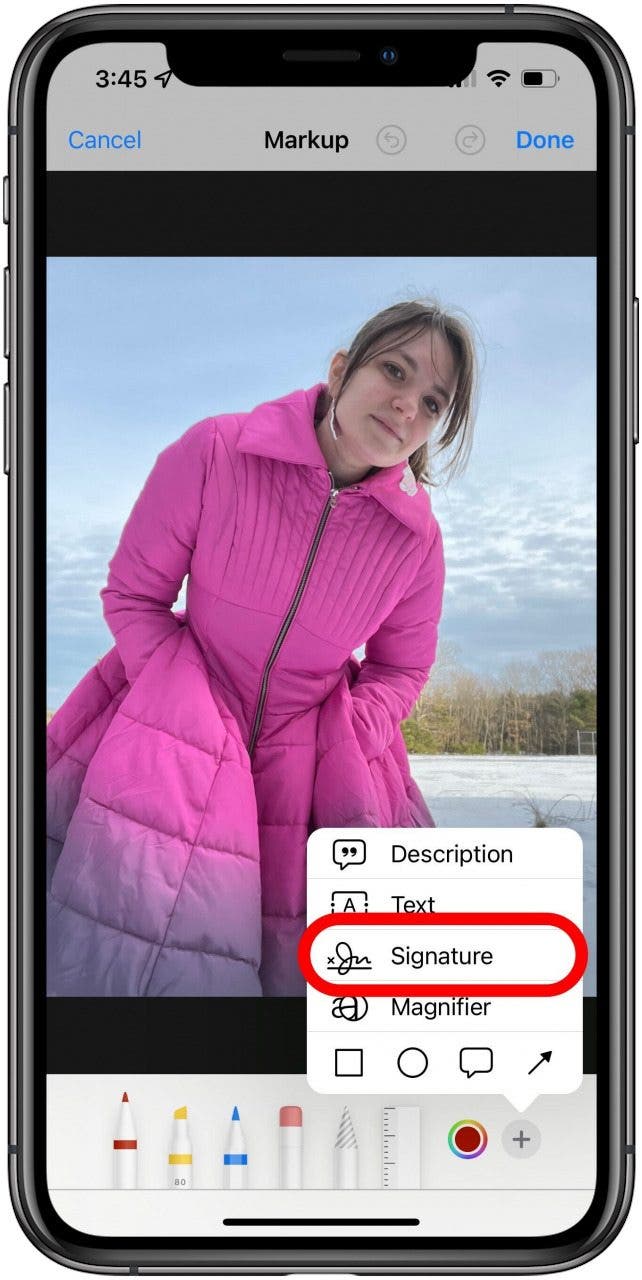
- From here, you can draw on the photo, or tap the plus icon for options to add text, a description, or a signature.

- If you want your signature to be the watermark, tap Signature.
- Draw a new signature and tap Done.
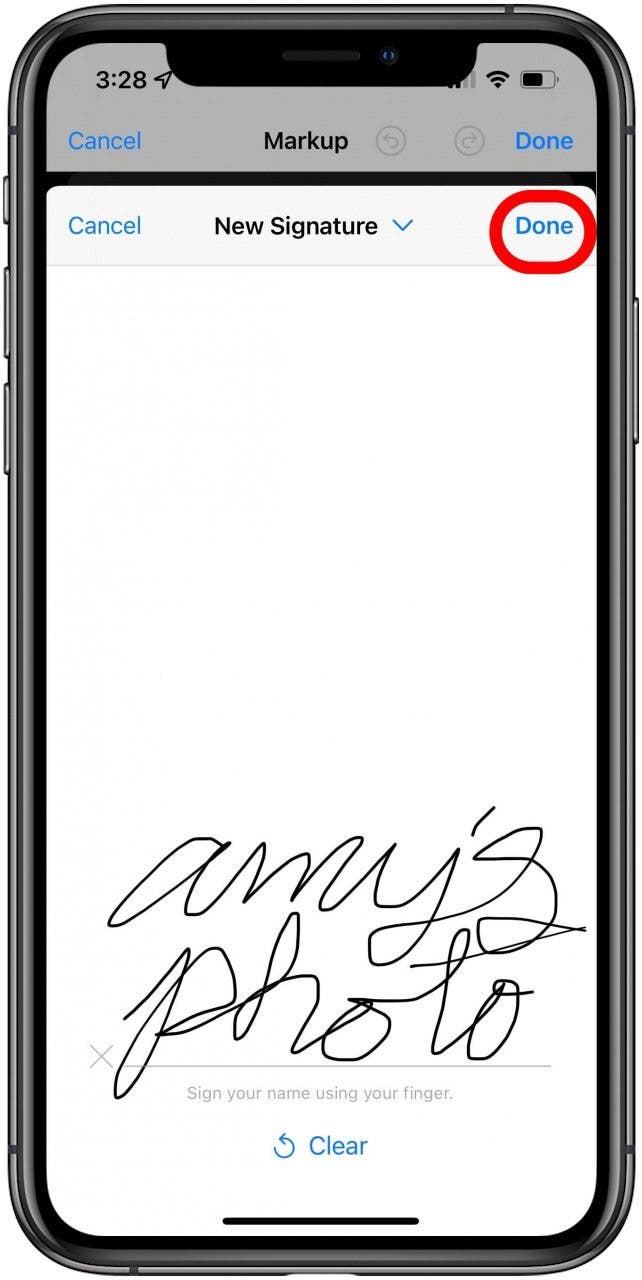
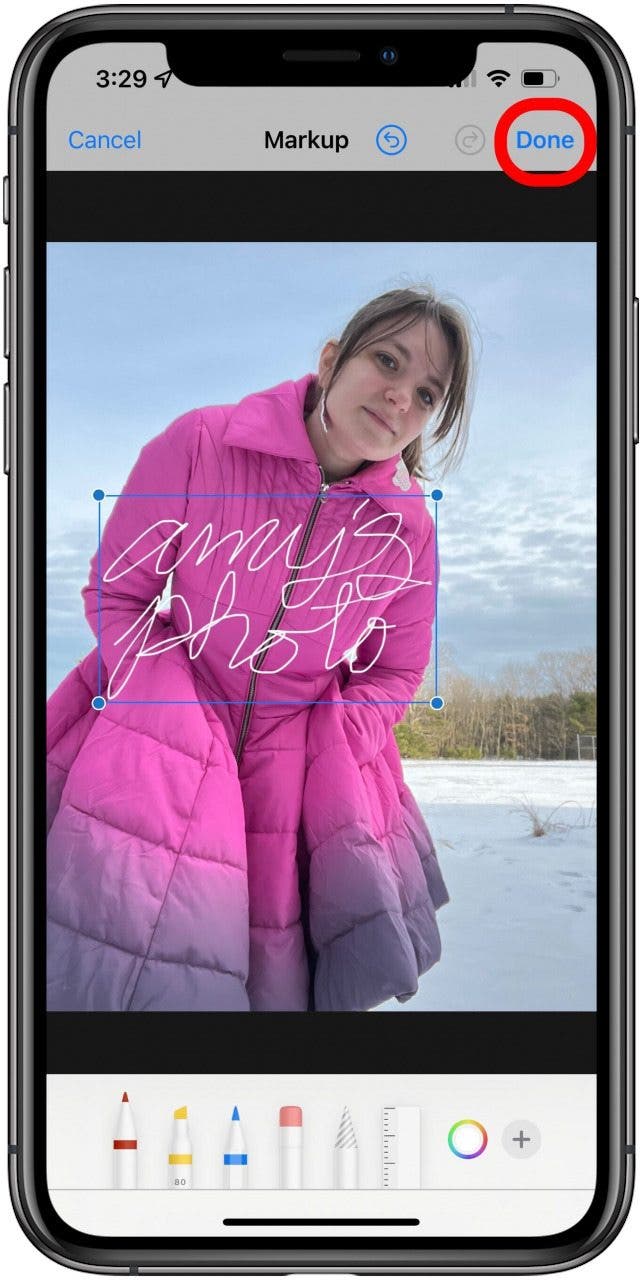
- Adjust the size, placement, and color of your signature as desired.

- Tap Done.
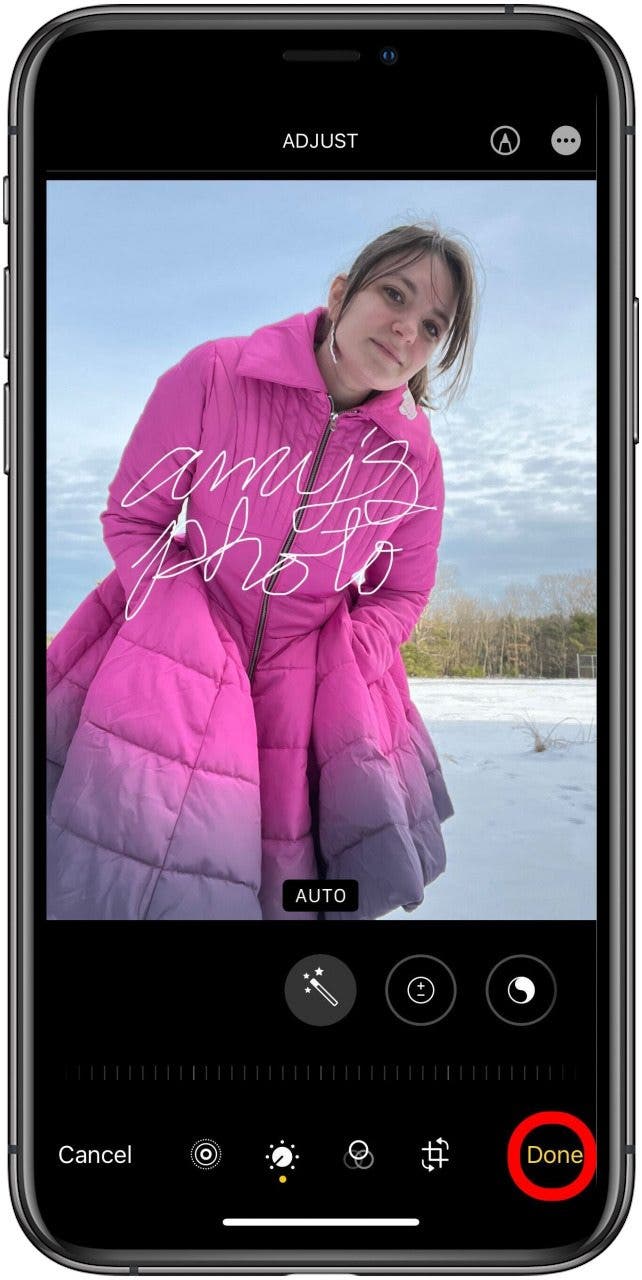
- Tap Done again to save your edits.
Related: How to Draw & Sketch in the Notes App on your iPhone or iPad
How to Make a Watermark on iPhone Using an App
While you can create a watermark on your iPhone using the Markup option above, there are apps (many of them free) that can do it for you. To find an app you like, just go to the App Store and search for something like "watermark" and see what options come up. I personally like eZy Watermark, which is free and allows you to create templates that you can then add to either single or multiple photos. Once the watermark is added, you can export it to your photos, and do what you wish with it. There are many good options for watermark apps, though, so here are some free ones that you can check out to see if they meet your needs:
Each app has its own process, so you might want to play around and see which one feels the most intuitive, but once you get the hang of it, adding a watermark is pretty simple!

Amy Spitzfaden Both
Amy Spitzfaden-Both is the Managing Editor for iPhone Life magazine and an award-winning novelist, with over 10 years of experience in the publishing industry. She specializes in Apple news and rumors, health and fitness tech, and parenting in the digital age. She graduated from MIU with a BA in Literature and Writing.
Amy lives in New Hampshire with her husband and daughter. When she’s not writing or glued to her iPhone, she enjoys hiking, traveling, and creating her own tea blends.

 Olena Kagui

 Rhett Intriago
 Amy Spitzfaden Both


 Sean Dugan
 Linda Ruth

 Rachel Needell