First iPhone? Learn How to Set Up New iPhone
Learn how to set up your new iPhone in 11 simple steps, including setting up your carrier, Touch or Face ID, Siri, iCloud, and more!

In the last 10 years, Olena has been published in dozens of publications internationally and written hundreds of how-to articles and complex guides about Apple products, software, and apps.
Learn More In the last 10 years, Olena has been published in dozens of publications internationally and written hundreds of how-to articles and complex guides about Apple products, software, and apps.
Learn MoreGetting your first iPhone is super exciting, but it can be a little intimidating. I'll walk you through the steps to getting your new phone up and running—the first steps including learning how to activate a new iPhone and set up a carrier or provider. I will also explain the other essential steps necessary to get you started!
How to Set Up Your Carrier & Service
Remember, your phone won't be able to make calls right out of the box. It requires a SIM card from a carrier (or a digital SIM). You may have purchased your phone from Wal-Mart or Best Buy, the Apple website, an online store like eBay, or directly from the carrier of your choice.
If you've already set up an account with your carrier to establish your cellular service, then you can visit your carrier's store or call them to have them assign you a phone number and activate your account. Learning how to activate an iPhone without a SIM card is possible, but it is unnecessarily difficult.
Note: The iPhone X series or later, including all of the iPhone 12 line, supports Dual SIM using a nano-SIM and an eSIM. This means your phone can support two separate data plans. To learn more about your eSIM and set it up, talk to your cell carrier company. To learn more about SIM cards, sign up for our free Tip of the Day newsletter.
How to Power on Your Device
Before you ask, “how do I activate my new iPhone?” Let’s cover powering on your device!
- Power on your iPhone by pressing down and holding the Side button (unless you have the iPhone SE, in which case you will press and hold the Sleep/Wake button along the top of your device).
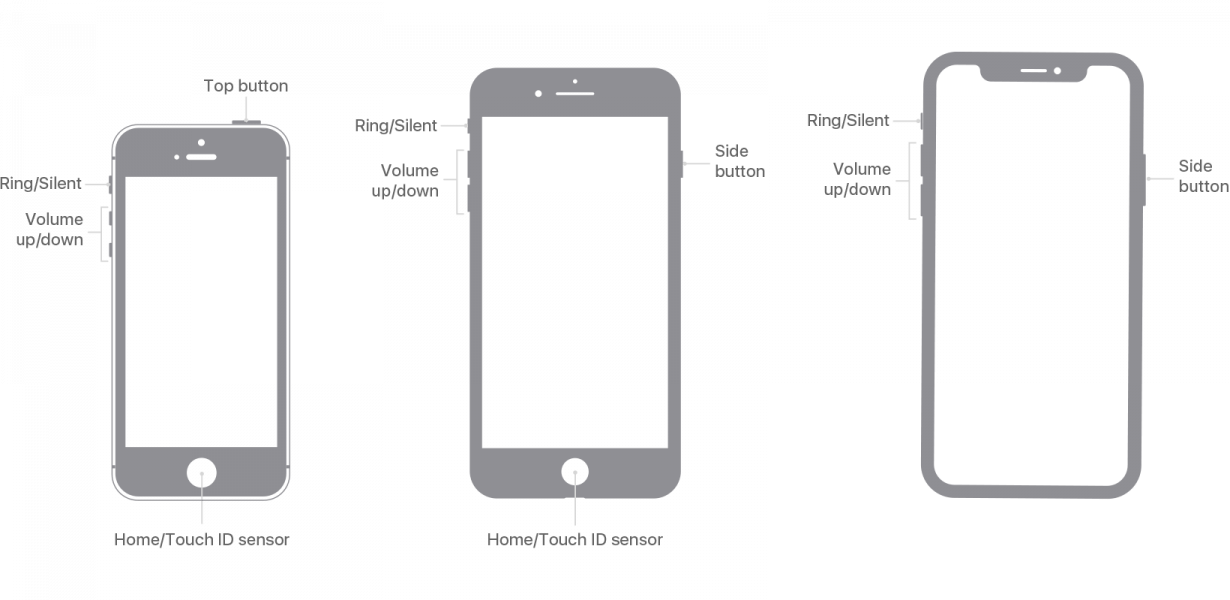
- You'll see "Hello" in many languages appear on your screen. If it doesn't, that means you need to charge your phone first. Learn how to tell if your iPhone is charging here.

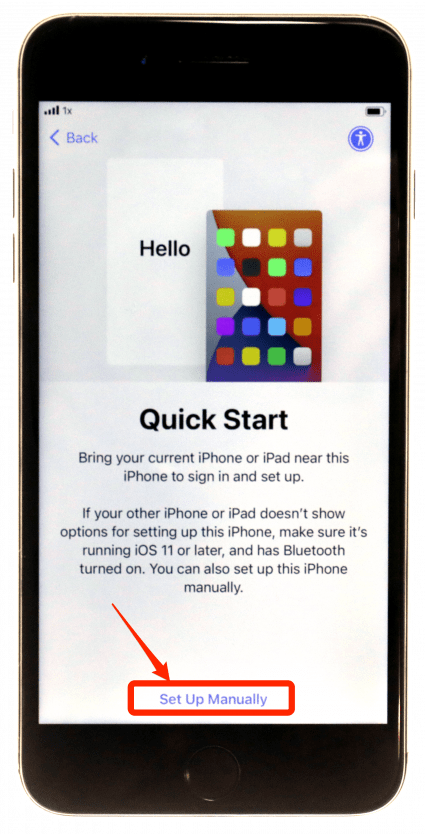
How to Begin the Setup Process
When the Quick Start menu pops up (after you've selected the language you want to use and the region where you live), you will need to select Set Up Manually. You'll then need to enter your Wi-Fi information in order to continue the setup process and review the Data & Privacy disclaimer.
How to Set Up Touch ID or Face ID
Depending on which iPhone model you have, you will then have one of two authentication options to set up: Face ID or Touch ID. Newer iPhone models have Face ID while older models have Touch ID.
- If you have a model with a Home button, then you will have the option to set up Touch ID, a feature that allows you to unlock your iPhone with your fingerprint. Setting this up is done by repeatedly placing your finger on your Home button.

- If you have an iPhone without a Home button, then you will have the option to set up Face ID, which allows you to unlock your phone with—you guessed it—your face! This is done by holding your iPhone in front of your face while unlocking your device.
If at any time your iPhone doesn't register your fingerprint or your face (for whatever reason), no worries. You can still enter a passcode, which you will set up after you've set up Touch ID/Face ID.
You can use Touch ID and Face ID for more than just unlocking your device. You can use them to make purchases with Apple Pay and even open apps with sensitive information (like your banking app or journaling app). It's a great feature that we definitely recommend. However, you can also opt-out of Touch ID/Face ID and just use a passcode.
How to Create a Passcode
When it's time to create your passcode, you'll be given the option to create a 6-digit passcode. If six digits is too many for you to remember or seems too few for your preferred security level, then you can choose another option.
- Tap Passcode Options.

- Select from one of:
- 4-Digit Numeric Code (the least secure)
- Custom Numeric Code (this is the same 6-digit code)
- Custom Alphanumeric Code (the most secure)
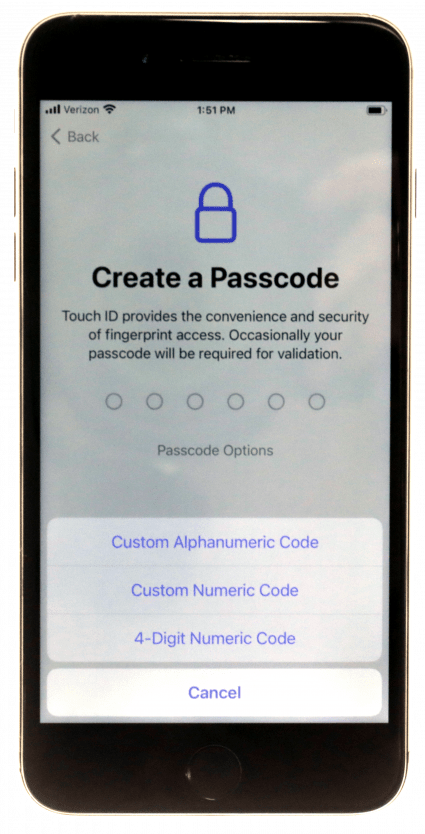
Whichever passcode option you pick, you'll be prompted to re-enter the passcode on the next screen.
How to Set Up Your Apple ID
Now you’ll have to log in to your iPhone with an Apple ID. If you don’t have one, then we’ll create one.
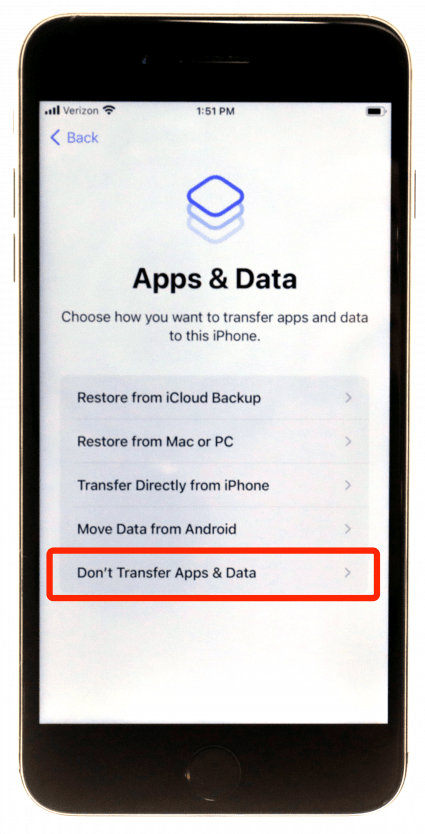
- On the Apps & Data screen, you'll see a few different options. Because this is your first iPhone, you will need to select Don't Transfer Apps & Data.
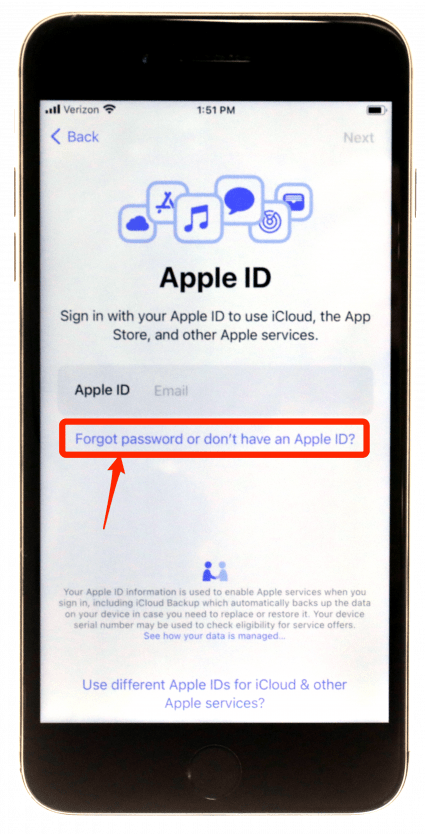
- You’ll be prompted to enter your Apple ID and password. Since you don’t have one yet, you’ll select Forgot Password or Don’t Have an Apple ID.
Creating an Apple ID and an Apple ID password are essential parts of being an iPhone user. It is the account that gives you access to all of Apple's services, including the iTunes and App Store, Apple's free text and video messaging services (iMessage and FaceTime,) and Find My iPhone to help you locate your misplaced or stolen phone. It also allows you to access Apple's cloud storage system, iCloud.
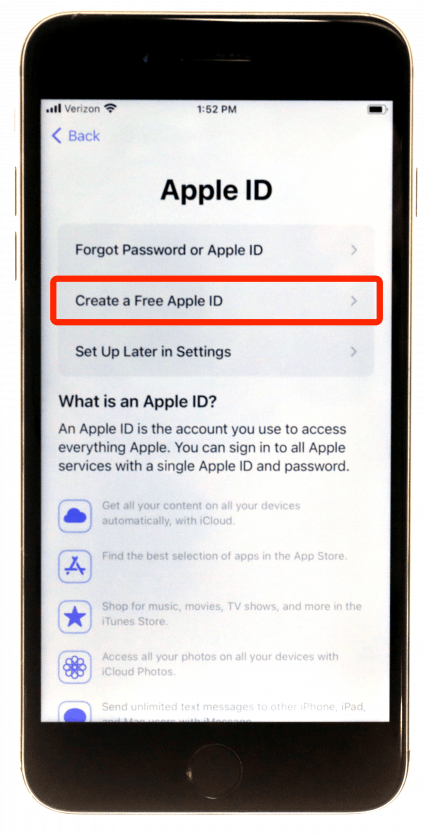
- Select Create a Free Apple ID.
- After entering your name and birthday, you'll choose your Apple ID, which is always an email address. I recommend choosing an email account that you use frequently and won't forget.

- When picking a password, choose something with a combination of upper and lowercase letters, numbers, and symbols. This password is for your Apple ID, which is shared across Apple devices.

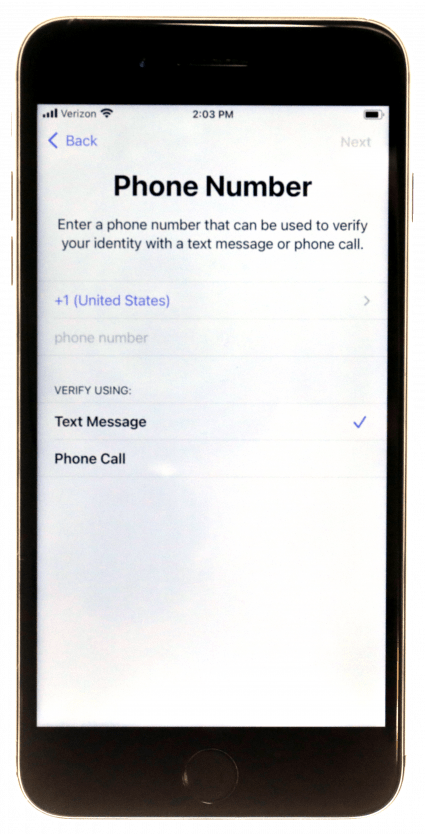
- Once you've set it up, a verification text will be sent to your phone. Enter the code from the text and enter your Apple ID and password to complete the process.
Later, once your iPhone is set up, you'll be asked to enter your Apple ID and password on your iPhone. Then you'll see your ID account located along the top when you open your Settings app.
While it's simple to retrieve a forgotten Apple ID or password (which we'll show you how to do later), it's inconvenient, and you'll be asked for it frequently. Better to choose something that's easy for you to remember. You can learn more about using your Apple ID here.
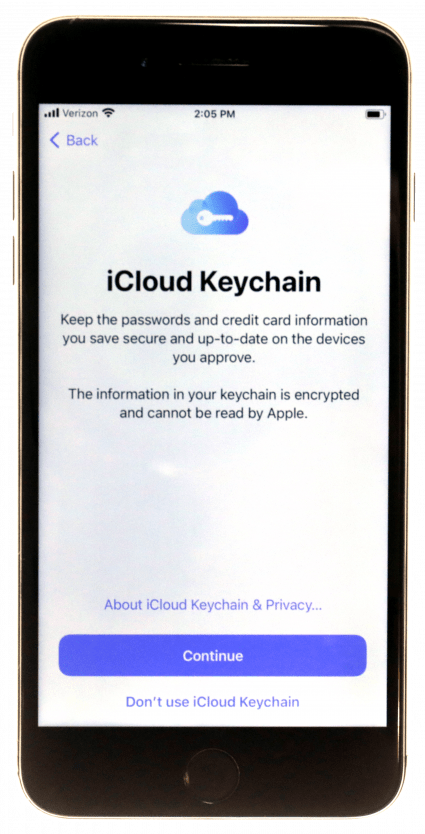
How to Enable Siri & Other Services
Finally, you'll be asked to enable a few more of Apple’s services:

- Apple's password manager: iCloud Keychain
- Apple's digital assistant Siri
- Apple Pay
- Screen Time
- Automatic app updates
- And more...
Set up whatever features you like. You can enable any of them later if you change your mind. And that’s it! You’ve set up your new iPhone. You’ll see your Home screen and all the built-in Apps. Some of Apple’s apps may have to download from the App Store, which they’ll do automatically. They’ll appear dark as they download, but in a few short minutes, your iPhone will be ready to go.
Now you've activated your new iPhone and set it up, next you can begin personalizing and using it as you please! Sometimes even after you finish setting up your iPhone, you will need to download an update. Updates are released often, so even a brand new phone might need one. Learn how to manually update your iPhone and turn on automatic updates here.
The iOS setup assistant can be really helpful when it comes to a new iPhone setup. If this isn’t your new iPhone, check out this article on how to transfer iPhone to iPhone after setup. If your previous smartphone was an Android, you can still transfer your data hassle-free.
Olena Kagui
Olena Kagui is a Feature Writer at iPhone Life. In the last 10 years, she has been published in dozens of publications internationally and won an excellence award. Since joining iPhone Life in 2020, she has written how-to articles as well as complex guides about Apple products, software, and apps. Olena grew up using Macs and exploring all the latest tech. Her Maui home is the epitome of an Apple ecosystem, full of compatible smart gear to boot. Olena’s favorite device is the Apple Watch Ultra because it can survive all her adventures and travels, and even her furbabies.
 Olena Kagui
 Rachel Needell
 Rhett Intriago
 Amy Spitzfaden Both
 Leanne Hays