How to Use the Accessibility Menu to Customize Your AirPods Settings


With over 10 years of experience in publishing, Amy specializes in Apple news and rumors, health and fitness tech, and parenting in the digital age.
Learn More With over 10 years of experience in publishing, Amy specializes in Apple news and rumors, health and fitness tech, and parenting in the digital age.
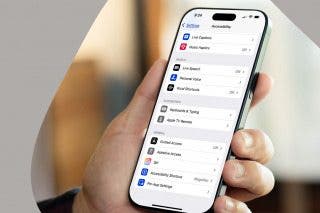
Learn MoreIn addition to the AirPod settings in your iPhone’s Bluetooth menu, Apple’s AirPods Pro have many features to explore in the Accessibilty menu that provide different ways on how to customize your AirPods and change the settings on your AirPods Pro. Whether it is adjusting your AirPods’ click speed, click duration, or noise cancellation features, you are one step closer to customizing your AirPods for your next long-distance run or lunchbreak at work. In the AirPods Pro settings in the Bluetooth menu, users can adjust Noise Control options and take an Ear Tip Fit Test, but in this article, we will teach you how to customize your AirPods and how to change settings on AirPods Pro through the Accessibility menu in your iPhone’s Settings.
How to Access the AirPod Menu in Accessibility Settings
If you'd like to learn how to make your AirPods' audio louder and more clear, we've written about how to adjust Headphone Accommodation settings. For more great Apple device tutorials, check out our free Tip of the Day. Now, here's how to access the AirPod menu in Accessibility Settings.
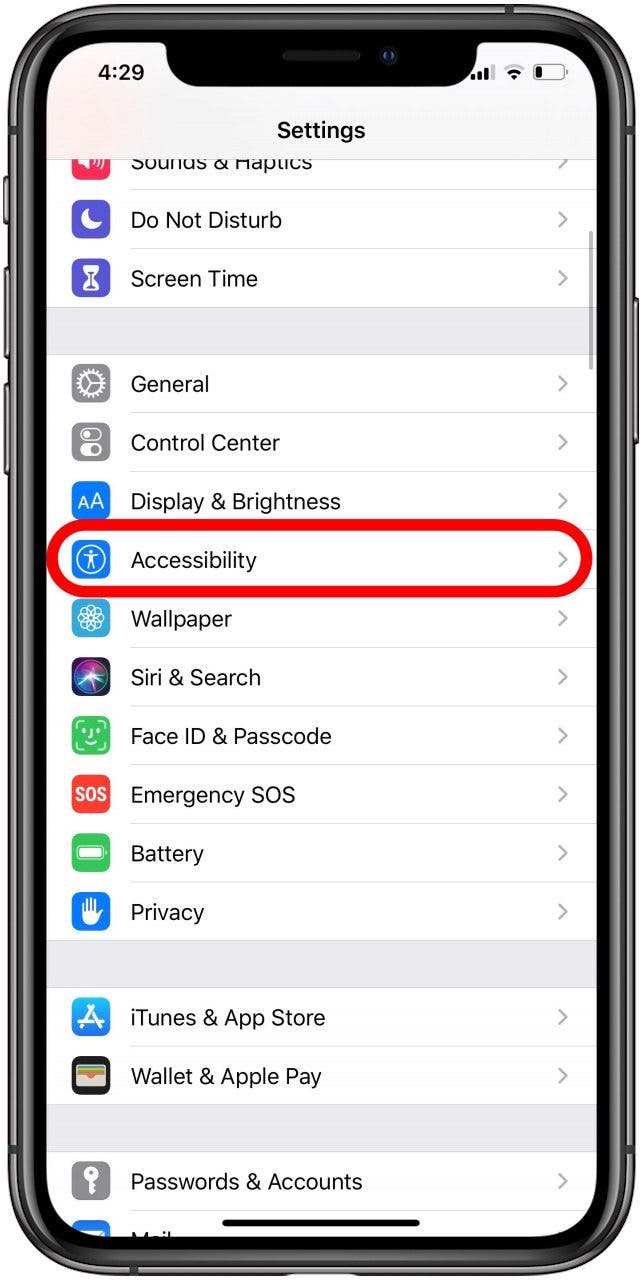
- Open the Settings app.
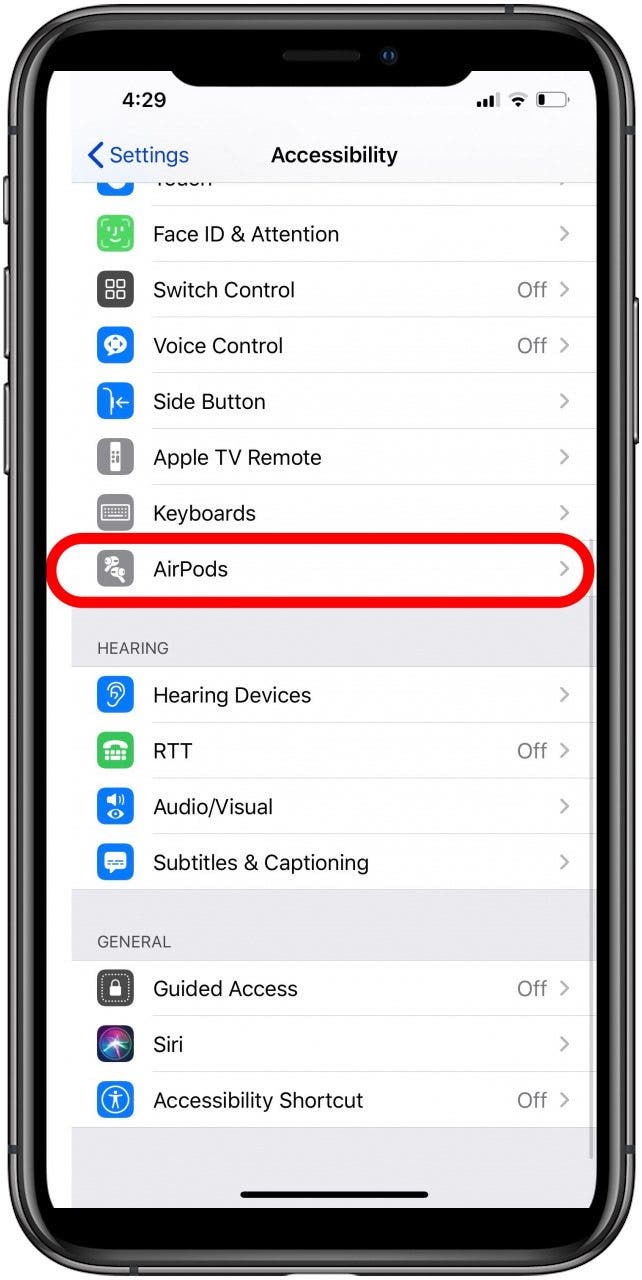
- Scroll down and tap on Accessibility.
- Scroll down and tap on AirPods.
How to Adjust Your AirPod Settings in the AirPod Accessibility Menu
To adjust your AirPod settings on your iPhone, you will see three additional sections of settings in the AirPods’ Accessibility menu: PRESS SPEED, PRESS AND HOLD DURATION, and NOISE CONTROL. Each section has a note describing how changing one of the features will affect your AirPods.
Under the PRESS SPEED section, you are given three options:
- Default
- Slower
- Slowest
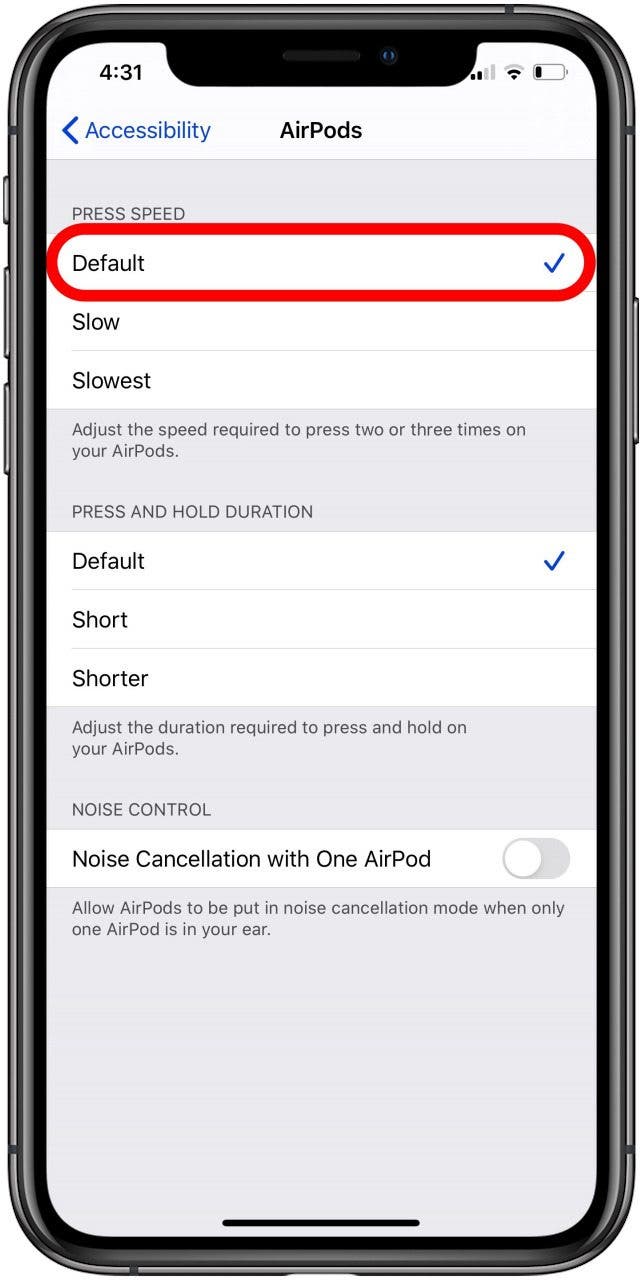

These different settings allow you to adjust the speed required to press two or three times on your AirPods, as your iPhone indicates. Once you tap any of these, a blue checkmark will appear next to the word on the right side of the screen, indicating that option is now selected.
Under the PRESS AND HOLD DURATION section, you are given three options:
- Default
- Shorter
- Shortest
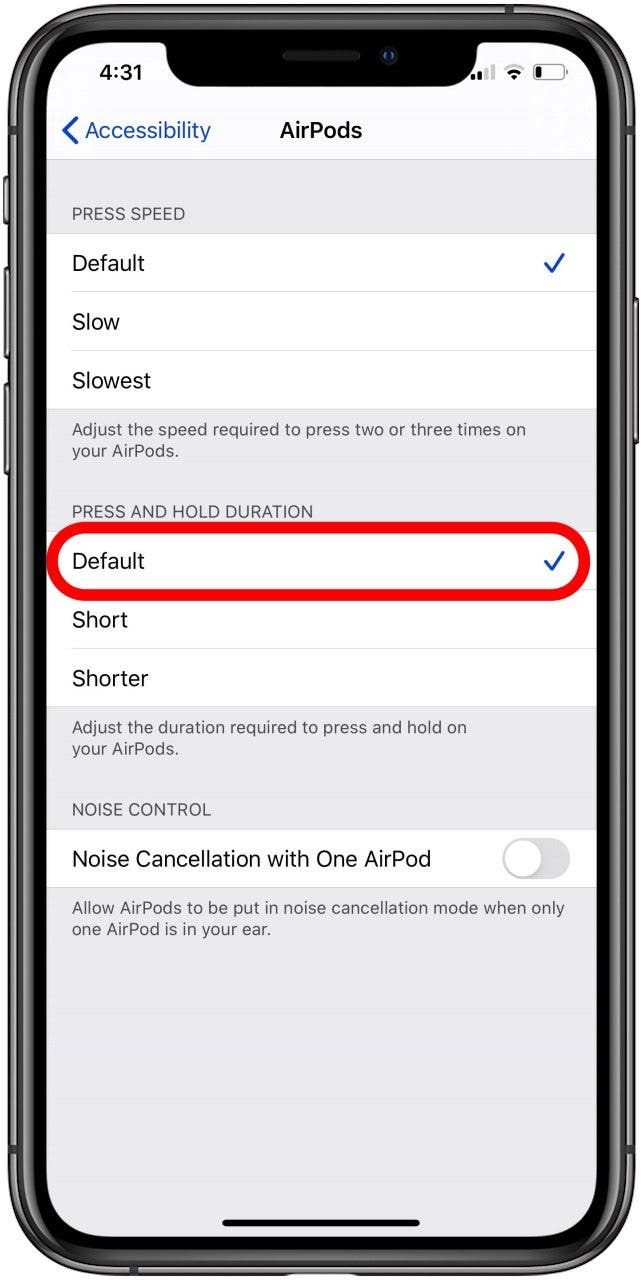
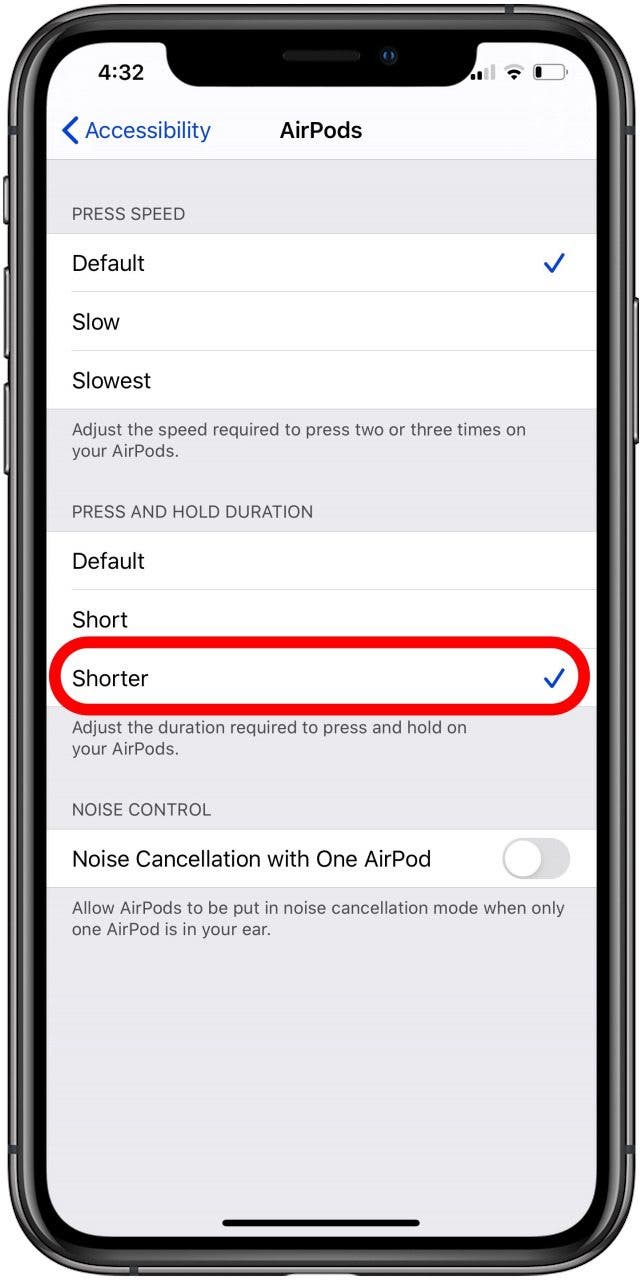
These different AirPod settings allow you to adjust the duration required to press and hold on your AirPods, as your iPhone indicates. Once you tap any of these, a blue checkmark will appear next to the word on the right side of the screen, indicating that option is now selected.
Under the NOISE CONTROL section, you are given the option to toggle on or off the AirPod setting which allows AirPods to be put in noise cancellation mode when only one AirPod is in your ear, as your iPhone indicates. When the toggle button is green, this feature is turned on.


Amy Spitzfaden Both
Amy Spitzfaden-Both is the Managing Editor for iPhone Life magazine and an award-winning novelist, with over 10 years of experience in the publishing industry. She specializes in Apple news and rumors, health and fitness tech, and parenting in the digital age. She graduated from MIU with a BA in Literature and Writing.
Amy lives in New Hampshire with her husband and daughter. When she’s not writing or glued to her iPhone, she enjoys hiking, traveling, and creating her own tea blends.

 Olena Kagui
 Amy Spitzfaden Both
 Susan Misuraca


 Rachel Needell
 Nicholas Naioti
 Leanne Hays
 Rhett Intriago


 Ashleigh Page