Unleash Your Inner App Developer Part 16: Tuning Up Core Data


Do you have an idea for an app but lack the programming knowledge to begin building it? In this weekly blog series, How to Unleash Your Inner App Developer, I will take you, the non-programmer, step by step through the process of creating apps for the iPhone, iPod touch, and iPad. Join me each week on this adventure, and you will experience how much fun turning your ideas into reality can be! This is Part 16 of the series. If you are just getting started now, check out the beginning of the series here. (This post has been updated to Swift 1.2, iOS 8, and Xcode 6.3.)
In my previous blog post, you learned how to add Core Data to a project and design entities in a data model. In this post, you will learn how to generate entity classes from the entities in a data model and use them within your app. You can get the latest version of the iAppsReview project at this link.
Generating Entity Classes
It's important to note that an entity on a data model is not an actual Swift class. You need to take an extra step to generate a class from an entity on a data model as outlined in the following steps:
- Open the iAppsReview project in Xcode;
- Select the iAppsReview.xcdatamodeld entity data model in the Project Navigator. You can view the model in either Table or Graph style;
- Press Command+N (hold the Command key down and then press the N key) to add a new file to the project;
- On the left side of the New File window under iOS, select Core Data and on the right side of the window select NSManagedObject subclass (Figure 1).
 |
| Figure 1 - Select the NSManagedObject subclass file template. |
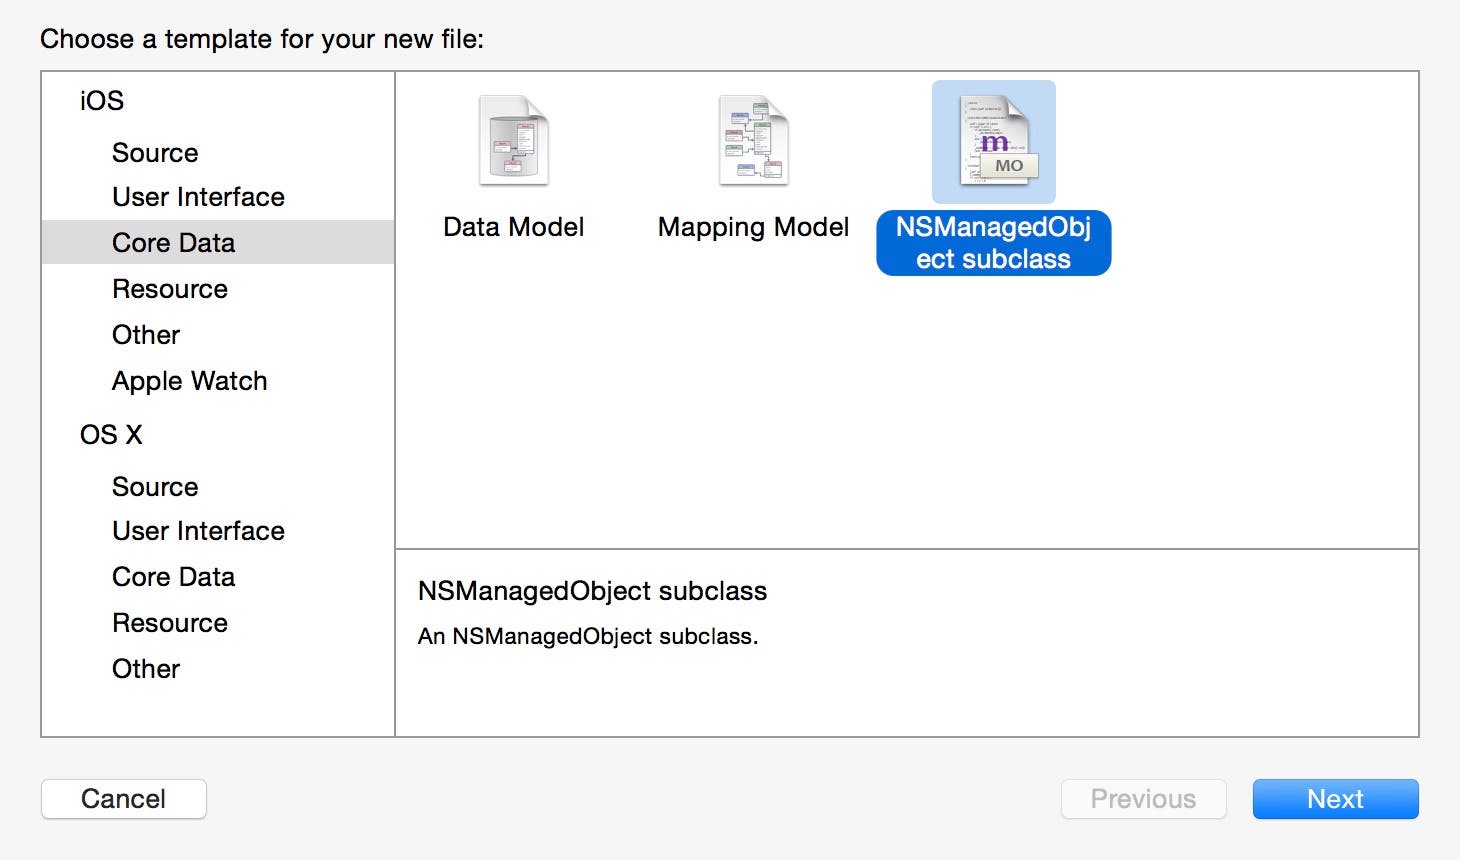
- Click the Next button. The next page of the window should display the entity data model with a check mark next to it (Figure 2).
 |
| Figure 2 - Select the data model. |
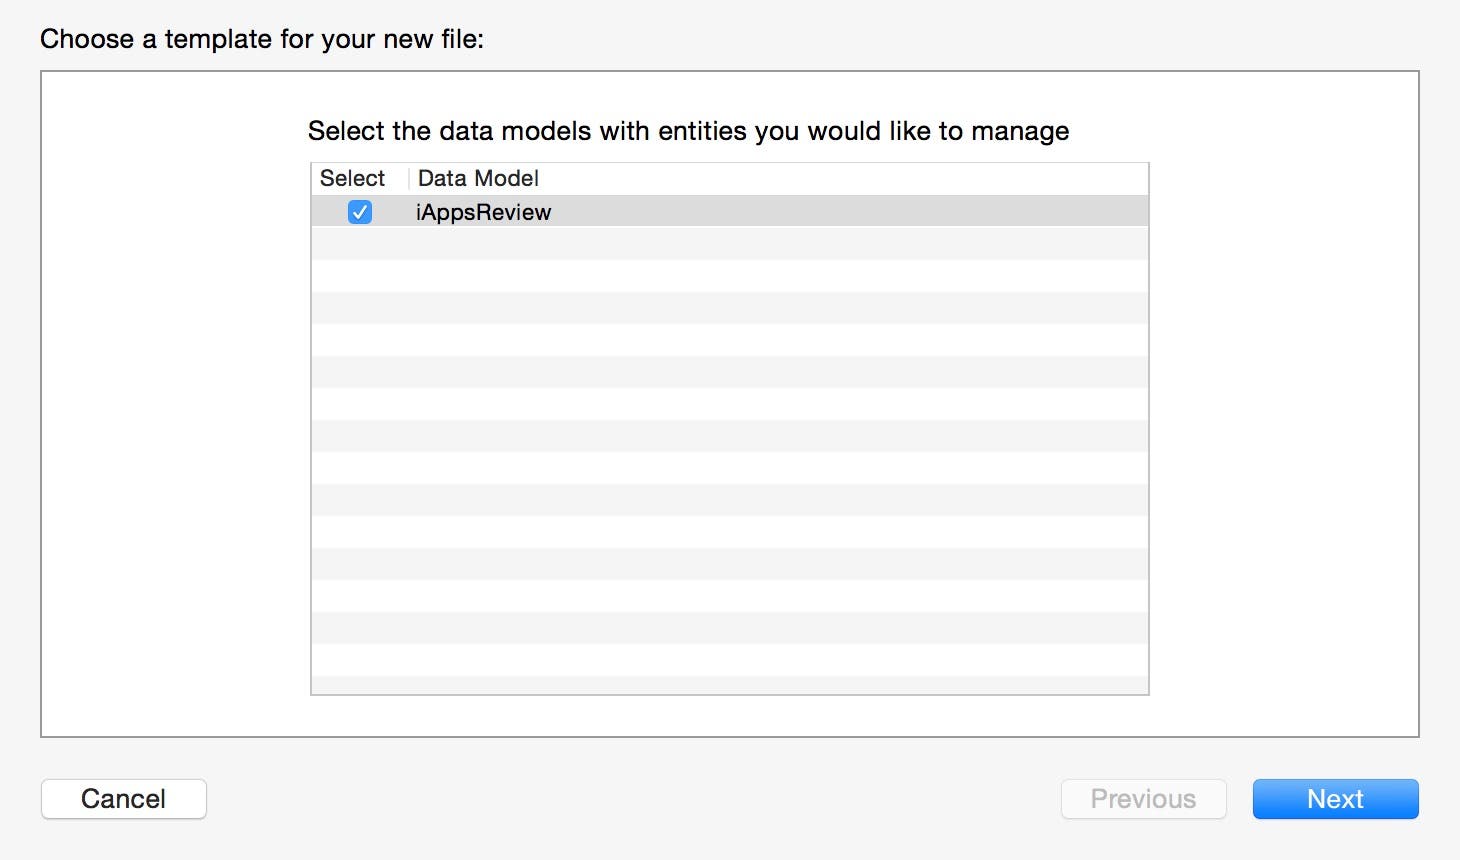
- Click the Next button. In the next page of the window all three entities in the entity data model are listed. Click the check box next to each of the three entities to select them as shown in Figure 3.
 |
| Figure 3 - Select all the entities. |
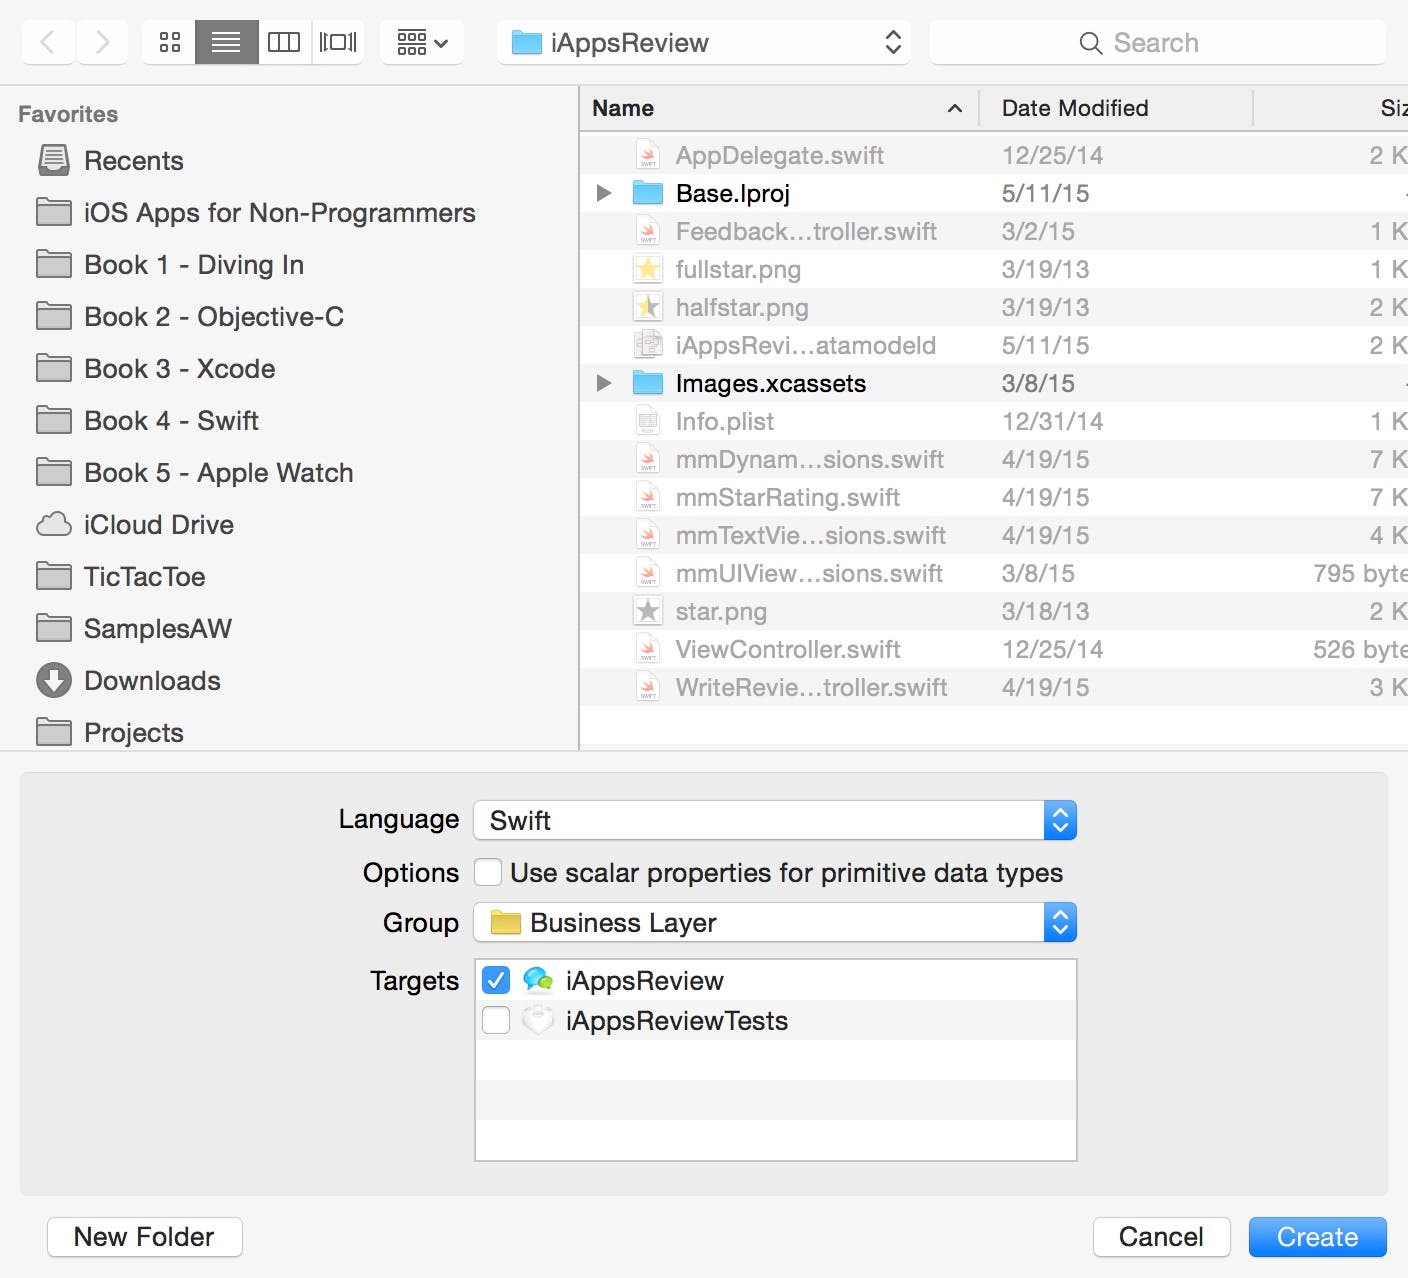
- Click the Next button to display the Save File window. Uncheck the Use scalar properties for primitive data types check box (Figure 4). When this option is selected, Xcode, generates properties for your entities that are scalar types (such as float, double, and so on). If this option is not selected, Xcode generates properties of the type NSNumber instead. There is no right or wrong choice for this check box. I prefer to use NSNumber because if I need to save my entities on Amazon Web Services, it's a requirement that they be of type NSNumber.
 |
| Figure 4 - Uncheck Use scalar properties for primitive data types. |
- Click the Create button. This adds the new entity class files to the Project Navigator shown in Figure 5.
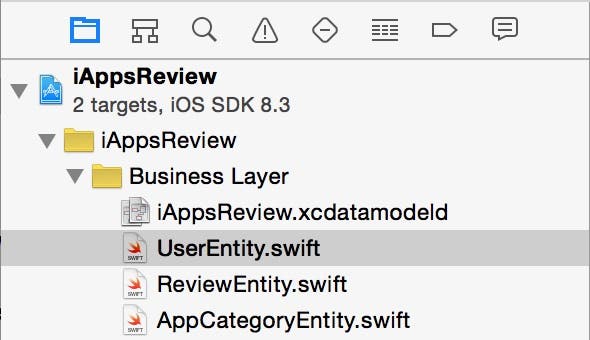 |
| Figure 5 - The new entity class files |
Let's take a closer look at the generated class files. In the Project Navigator, select the ReviewEntity.swift file and you will see the code shown in Figure 6.
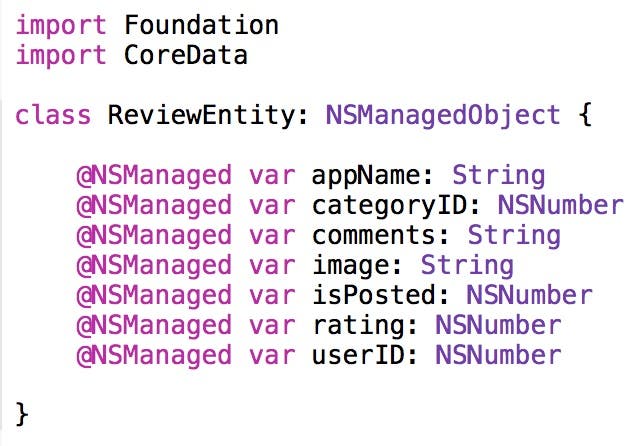 |
| Figure 6 - The ReviewEntity code file |
In this code, a Swift property has been generated for every attribute in ReviewEntity on the entity data model (for a discussion of properties, check out this earlier post in the series.) The class declaration indicates that the ReviewEntity class is a subclass of the NSManagedObject class just as you specified when generating the entities as shown in Figure 1.
Feel free to examine the UserEntity and ReviewEntity class files to see the properties that have been generated for these entities.
Retrieving Entities
There are several steps involved in retrieving entities from a data store. Figure 7 contains a code block that shows a typical example of these steps.
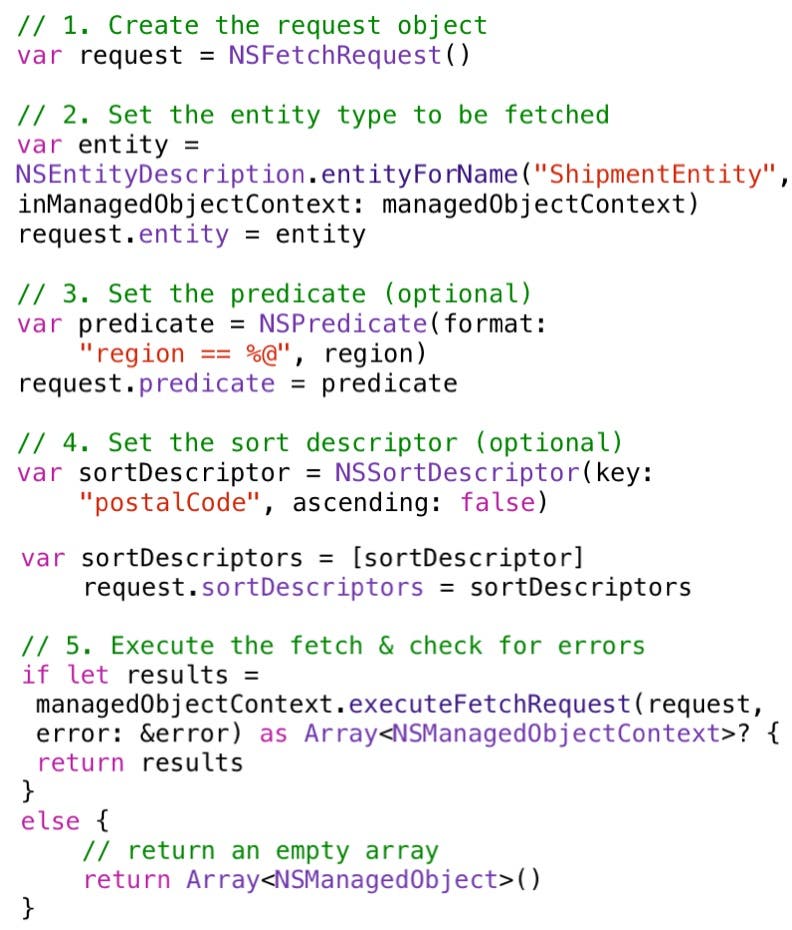 |
| Figure 7 - It takes quite a bit of code to retrieve entities from a data store! |
This code is definitely not trivial. Don't panic—I'll provide a much easier way for you to retrieve entities without writing all of this code, but here's an explanation of each step:
- Create the request object - This code creates an instance of NSFetchRequest. The request object is configured in the next few steps and then passed to the object context to be executed.
- Set the entity type to be fetched - This code may look complex, but all it does is configure the request object with the type of the entity to be retrieved (in this case, ReviewEntity).
- Set the predicate - This code specifies a filter, or search criteria that returns a subset of entities in the database. In this example, only ReviewEntity objects from a specified category are retrived. This step is optional if you want to retrieve all entities.
- Set the sort descriptor - This code specifies the sort order of entities retrieved from the data store. In this example, entities are sorted by appName. You can skip this step if you don't need the entities to be sorted.
- Execute the fetch - This code sends an executeFetchRequest: message to the object context, passing the request object. The entities returned from the object context are stored in an NSMutableArray, which is a collection that is mutable, or changeable.
Creating New Entities
Unlike most other Swift classes, you don't create an instance of a Core Data entity directly. To create a new Core Data entity, you call the insertNewObjectForEntityForName: inManagedObjectContext: method of the NSEntityDescription class as shown in the example in Figure 8.
 |
| Figure 8 - Creating a new ReviewEntity object |
In this code, you pass the class of the entity you want to create, as well as a reference to the object context the new entity is to be associated with.
Deleting Entities
Deleting a Core Data entity is pretty straightforward. All you have to do is call the object context's a deleteObject: method, passing the entity to be deleted as shown in Figure 9.
 |
| Figure 9 - Deleting an entity object |
Passing the deleteObject: message doesn't immediately delete the entity from the data store—it simply marks the entity for deletion. Entities that are marked for deletion are physically removed from the data store the next time the object context is asked to save changes to entities.
Saving Entities
To save all of the changes to entities that have been created and retrieved from a particular object context, you send the object context a save: message as shown in the example in Figure 10.
 |
| Figure 10 - Saving changes to entities |
This code first checks the hasChanges: property of the object context (there is no need to save changes if there are no changes to save.) If the object context has changes, the code calls the save: method of the object context. The object context returns true if the save succeeded and false if it failed. The if statement checks if the result is false, and if it is, stores the error code and description in the saveState and saveMessage variables. If you have an error at this level, it's most likely because of a setup issue versus a true database error.
mmBusinessObject to the Rescue!
It can be daunting when you first see the code you need to write to retrieve and manipulate entities in Core Data. After writing that same code a number of times, you might start thinking "there's got to be an easier way." This is where the mmBusinessObject class comes in. This is a custom class I have created for you that makes using Core Data much easier.
The mmBusinessObject class doesn't replace Core Data. It simply provides a "wrapper" around the Core Data classes that makes them easier to use, and allows you to write less code when you want to create, retrieve, update, and delete entities.
As shown in Figure 11, mmBusinessObject can be used as the superclass of all the business controller classes in your project. As discussed in my previous blog post, your business controller classes contain all of the code in your app that retrieves and updates entities. For example, all of the code that retrieves and updates ReviewEntity objects is placed in a Review business controller. All the code that retrieves and updates AppCategoryEntity objects is placed in an AppCategory business controller, and so on.
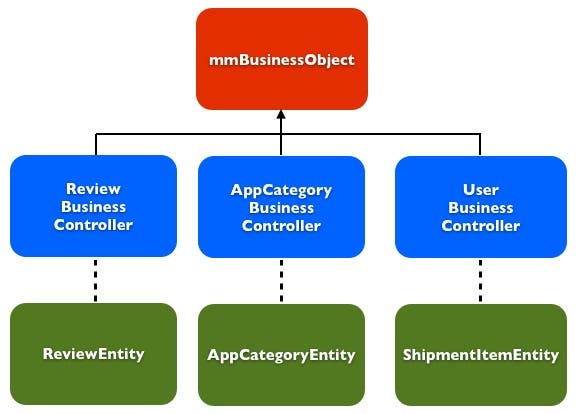 |
| Figure 11 - mmBusinessObject can be used as the superclass of all your business controller classes. |
I have included the mmBusinessObject class in the iAppsReview project code for this post. Let's take a close look at mmBusinessObject to see how it works.
mmBusinessObject Properties
If it's not already open, in Xcode, open the iAppsReview project. In the Project Navigator, select the mmBusinessObject.swift code file, and click on the button on the far right side of the jump bar (at the top of the code window) to see a list of properties and methods (Figure 12).
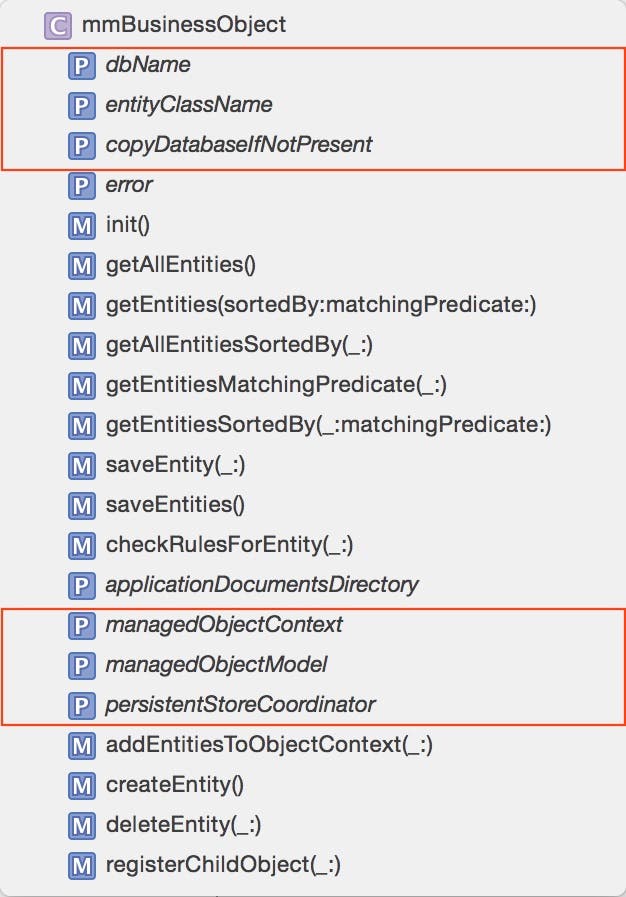 |
| Figure 12 - mmBusinessObject properties and methods |
As you can see, mmBusinessObject has these three properties that hold a reference to the key Core Data objects I discussed in part 14 of this series:
- managedObjectContext
- managedObjectModel
- persistentStoreCoordinator
Since these properties are on the mmBusinessObject class, when you create business controller subclasses of this class (such as the Review, AppCategory, and Shipment business controllers shown in Figure 11), they inherit these properties and therefore each have their own object context and associated Core Data objects. This means that each business controller can retrieve and update entities without affecting other business controllers!
As you will see later in this series, there are times when you want business controllers to share the same object context, and this is very easy to do.
The dbName property provides a place to specify the name of the database with which you are working. Since most apps typically use just one database, it makes sense to specify this in one place in your app, rather than specifying it in each of your business controllers. The easiest way to do this is to create an ABusinessObject class that sits in the hierarchy between mmBusinessObject and your app's business controller classes as shown in Figure 13.
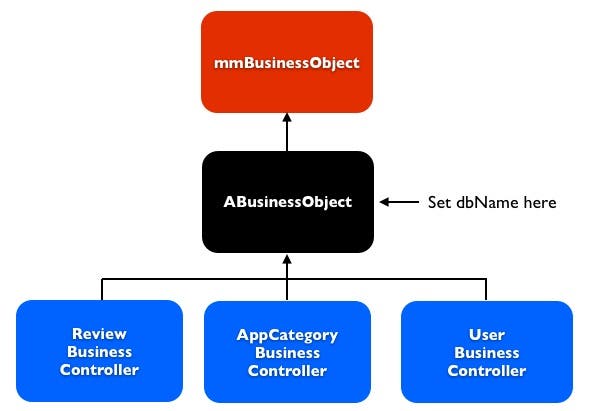 |
| Figure 13 - The ABusinessObject class is a great place to specify your app's database name. |
I have added an ABusinessObject class to the iAppsReview project. If you click on the ABusinessObject.swift file in the Project Navigator, you can see that ABusinessObject is a subclass of mmBusinessObject as shown in Figure 14.
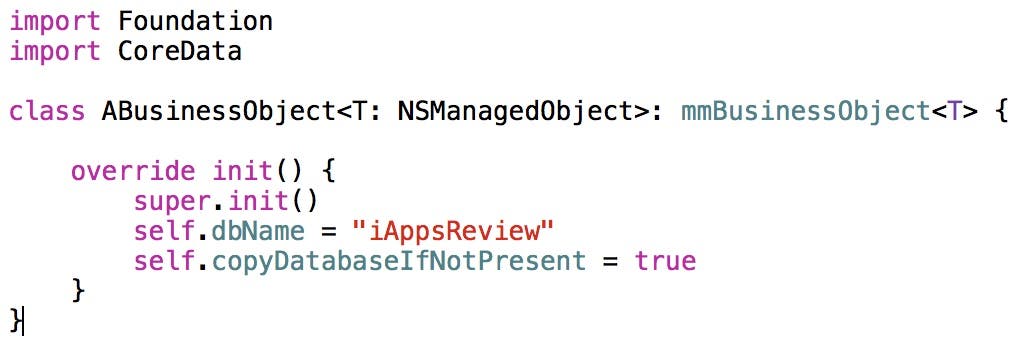 |
| Figure 14 - ABusinessObject is a subclass of mmBusinessObject. |
You can also see that within the init method, the dbName property is set to iAppsReview. Since there is only one database for this app, this is the only place where the database name needs to be specified.
Back in Figure 12, copyDatabaseIfNotPresent property specifies whether a database should be created on the user's device the first time the app is run.
mmBusinessObject Methods
Now let's take a closer look at the methods of the mmBusinessObject class. If you look a little further down in the mmBusinessObject.swift code file, you will see the methods shown in Figure 12 that allow you to create, delete, retrieve, and update entities.
You will learn more about these methods as you use them in upcoming posts in this series. However, if you want to take a quick look at the methods in mmBusinessObject.swift, you will find they simply contain the standard Core Data code you saw earlier in this post.
Conclusion
mmBusinessObject is a good example of something you should do in all of your apps. When you find that you are writing the same code over and over again, you should create a new class with methods that contain the redundant code. In doing this, you are creating your own custom application framework that can be reused in many different iOS projects.
At this point, the project is ready for us to create our custom business controller classes that we will use in iAppsReview. In next week's post, we'll create these custom business controller classes in the project and examine the associated SQlite database.

Kevin McNeish
Kevin McNeish is author of the new book “Learn to Code in Swift” as well as the “iOS App Development for Non-Programmers” book series (www.iOSAppsForNonProgrammers.com), winner of the Publishing Innovation Award. Kevin is also an award-winning app developer, software architect, and conference speaker in the U.S. and abroad. He has spent much of his career making difficult concepts easy to understand. Follow Kevin on Twitter: @kjmcneish.

 Rachel Needell
 Leanne Hays
 Rhett Intriago
 Amy Spitzfaden Both
 Susan Misuraca
 Cullen Thomas
 August Garry

 Olena Kagui