Unleash Your Inner App Developer Part 15: Core Data Next Steps


Do you have an idea for an app but lack the programming knowledge to begin building it? In this weekly blog series, How to Unleash Your Inner App Developer, I will take you, the non-programmer, step-by-step through the process of creating apps for the iPhone, iPod touch, and iPad. Join me each week on this adventure, and you will experience how much fun turning your ideas into reality can be! This is Part 15 of the series. If you are just getting started now, check out the beginning of the series here. (This post has been updated to Swift 1.2, iOS 8, and Xcode 6.3).
In my previous post in this series, I discussed some of the basics of Core Data, the technology that allows you to store and retrieve information on an iOS device. You learned about entity data models, databases, and how you can improve on Apple's default Core Data implementation.
In this post, we will apply what you have learned and add Core Data to the iAppsReview project. You can get the latest version of iAppsReview at this link. I recommend working through the steps outlined in this post on your own, but if you run into difficulty, you can get the completed projected from this link.
Adding Core Data to iAppsReview
As I mentioned in my previous post, I highly recommend not using Xcode's Use Core Data option when creating a new project. So how do you add the necessary Core Data components to a project? There are two main steps you need to perform:
- Add CoreData.framework to the project;
- Add an entity data model to the project.
The following steps provide detailed instructions for adding Core Data to the iAppsReview project.
- In Xcode, open the iAppsReview project.
- In the Project Navigator, select the very first project node (Figure 1) to display the Project Editor in the center of the Xcode window.
 |
| Figure 1 - Select the first node in the Project Navigator. |
- If it's not already selected, select the Project Editor's General tab, then scroll down to the Linked Frameworks and Libraries section and click the plus (+) button (Figure 2).
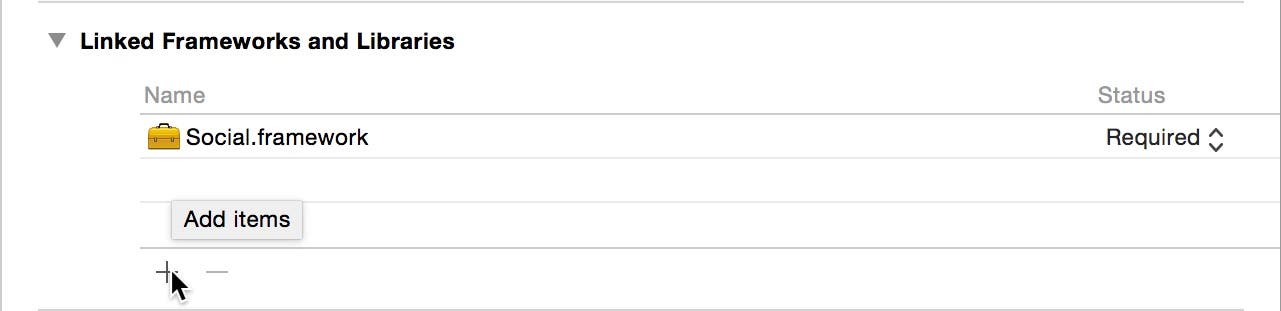 |
| Figure 2 - Click the plus (+) button under Linked Frameworks and Libraries. |
- In the Choose Frameworks and Libraries window, scroll down, select CoreData.framework, and then click the Add button (Figure 3) to add the framework to the project.
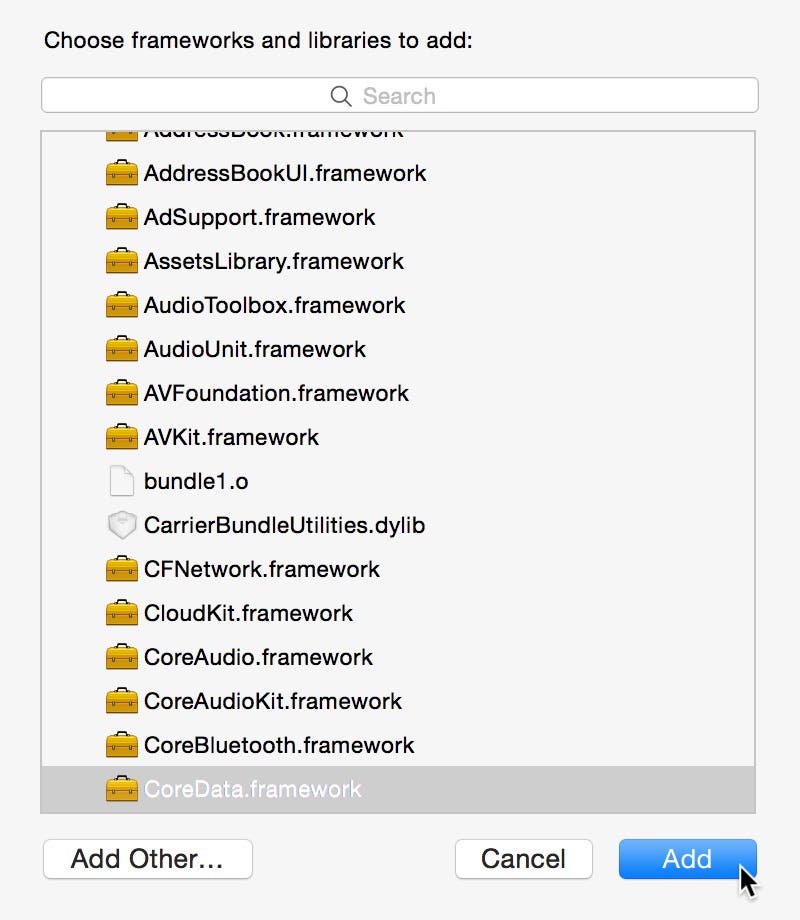 |
| Figure 3 - Add CoreData.framework to the project. |
- This adds CoreData.framework to the Frameworks group (Figure 4).
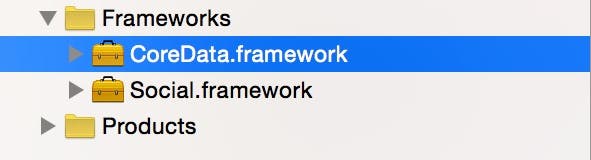 |
| Figure 4 - Move CoreData.framework to the Frameworks group. |
- Now let's add a Business Layer group to the Project Navigator, which will be used to store the entity data model, and eventually, the entity classes and other business layer classes. To do this, right-click the iAppsReview group folder in the Project Navigator, and then select New Group from the shortcut menu. This adds a new group to the Project Navigator (Figure 5).
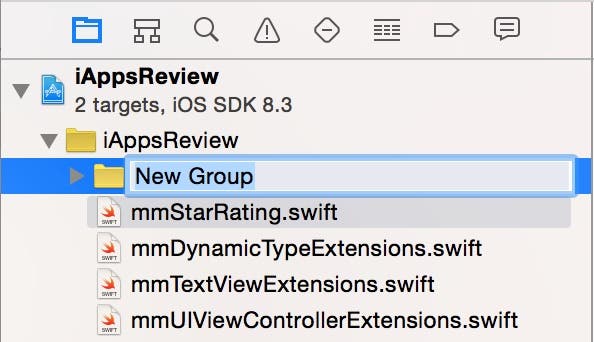 |
| Figure 5 - Add a new group in the Project Navigator |
- Next, enter the text Business Layer to specify the name of the new group and press return.
- Now let's add an entity data model to the new Business Layer group. To do this, right-click the Business Layer group and select New File... from the popup menu.
- On the left side of the New File dialog under the iOS section, select Core Data, and then on the right side of the dialog, select the Data Model template as shown in Figure 6.
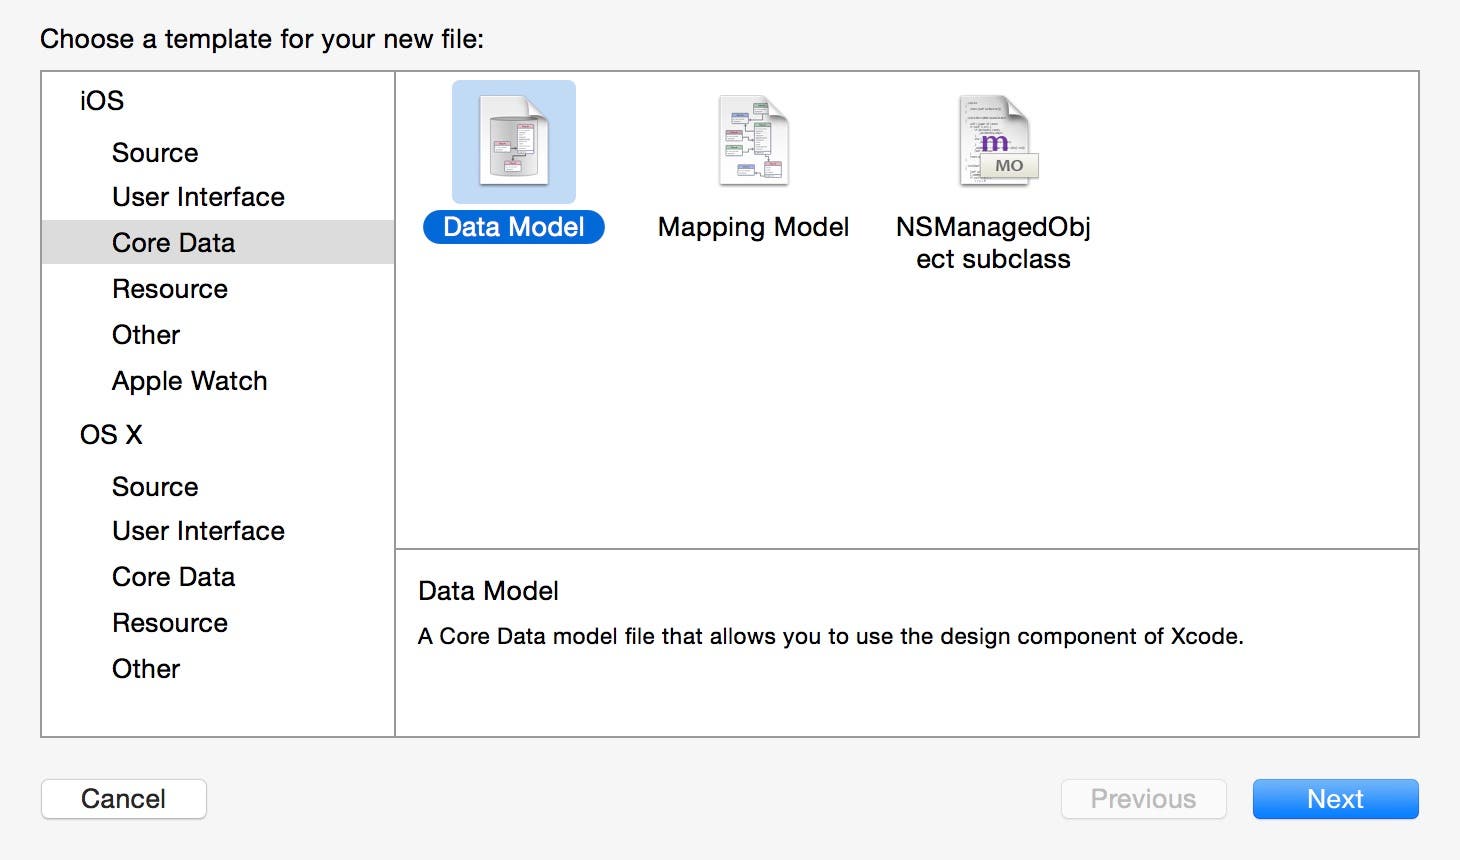 |
| Figure 6 - Add a Data Model to the project. |
- Click the Next button to display the Save dialog. Change the name of the new file to iAppsReview.xcdatamodeld.
- Click the Create button to add the new entity data model to the project. The new entity data model is displayed in the Xcode editor region (Figure 7);
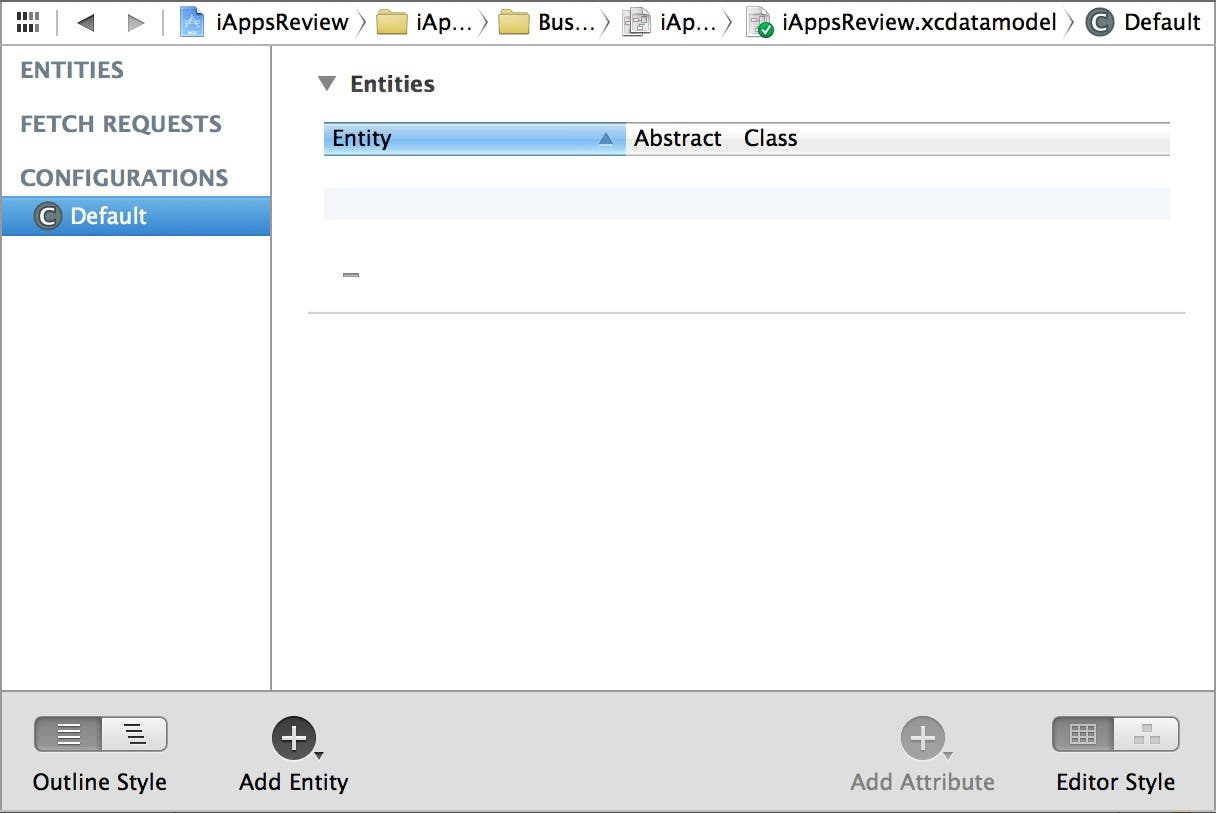 |
| Figure 7 - The new entity data model |
Designing Entities in the Data Model
By default, there are no entities included in the entity data model. In the toolbar at the bottom of the entity data model (Figure 7) is an Add Entity button that allows you to add new entities to the model. There is also an Add Attribute button that allows you to add attributes to the currently selected entity (the button is disabled if no entity is selected).
There is also an Editor Style button group that allows you to switch between Table and Graph styles. After we add some entities, I'll show you the difference between these two viewing styles.
Adding Entities to the Model
In our quest to turn iAppsReview into a working app, we will add a ReviewEntity to the model, which represents the reviews written by users. By way of reminder, Figure 8 contains the Write Review scene that shows the information we are capturing from the user for each review.
 |
| Figure 8 - The Write Review scene shows the information we are capturing for reviews. |
Follow these steps to create a ReviewEntity in the data model:
- With the entity data model selected in the Project Navigator, and the Entity Data Model Editor open in the design surface, click the Add Entity button at the bottom left of the entity data model. This adds a new entity under the Entities section in the panel on the left as shown in Figure 9.
 |
| Figure 9 - Add a new entity to the entity data model. |
- The Data Model inspector is automatically displayed for you on the right side of the Xcode window as shown in Figure 10. If you don't see the Data Model Inspector, you can display it by selecting View > Utilities > Show Data Model Inspector from the Xcode menu. Change the name of the entity from Entity to ReviewEntity and press return.
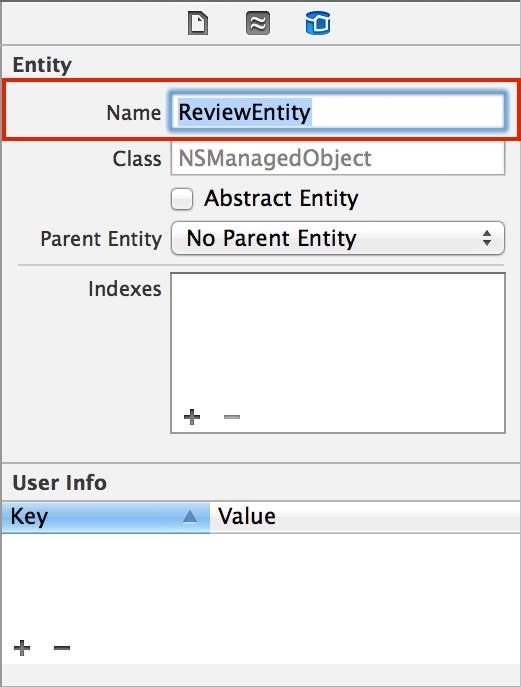 |
| Figure 10 - The Data Model Inspector |
- In the Data Model Inspector, set the Class to ReviewEntity. This specifies the name of the class that will later be generated from this entity;
- Now let's add an attribute to the ReviewEntity. To do this, click the Add Attribute button at the bottom of the entity data model. This adds an attribute in the Attributes section of the currently selected entity (Figure 11).
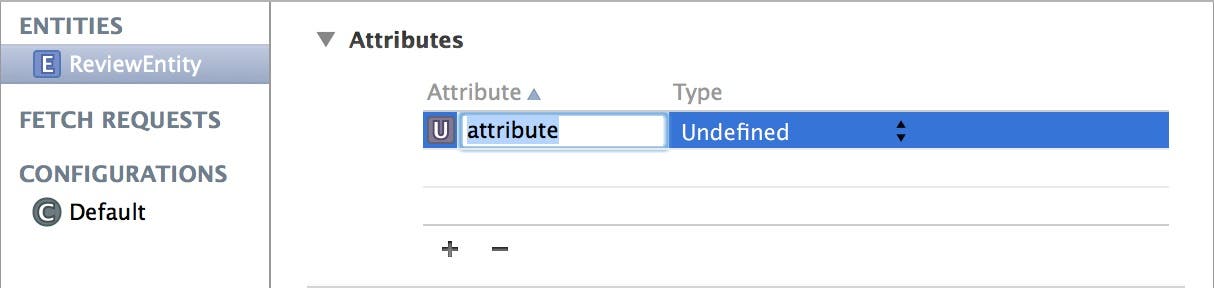 |
| Figure 11 - The newly added attribute |
Although you can change the name and type of the attribute directly in the model, I find it easier to set this information in the Data Model Inspector as shown in Figure 12. As you can see, it contains different settings when an entity's attribute is selected in the Data Model Editor.
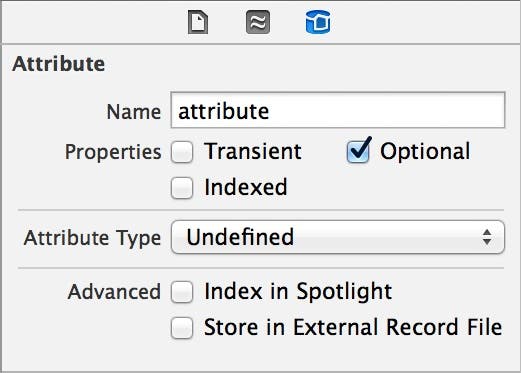 |
| Figure 12 - The Data Model Inspector for attributes |
Entity Attribute Settings
Let's take a brief detour to explain each of the entity attribute settings.
- Name - The name of the entity attribute. This should be camel cased (first letter lowercased and then the first letter of each word in a compound word is uppercased) since Xcode will generate a property on an entity class from this attribute.
- Transient - When this option is selected, it indicates that the attribute value is generated at run time rather than retrieved and stored to the database. For an example of using transient attributes, see this link.
- Optional - When this option is selected, it indicates the attribute is not required to have a value. For example, in an Address entity, you may specify that an address2 attribute is optional, since most addresses don't have a second address line.
- Indexed - Specifies if the corresponding database column is indexed. You should typically select this option for columns on which you need to perform searches. For more information on database indexes, check out this link.
- Attribute Type - Specifies the type of values the attribute holds. Some of the most common options are Integer16, Integer32, Decimal, String, Boolean, and Date.
If you select one or more numeric attribute types, you see additional Validation settings where you can specify the Minimum, Maximum, and Default values.
If you select the String attribute type, you see additional settings such as Min Length, Max Length, and Default value.
Creating ReviewEntity Attributes
Now that you have an understanding of the various attribute settings, it's time to add attributes to the ReviewEntity.
- Select the iAppsReview entity data model in the Project Navigator.
- In the Entity Data Model Editor, make sure the ReviewEntity is selected in the left panel, and select the attribute you added earlier in this post (Figure 13).
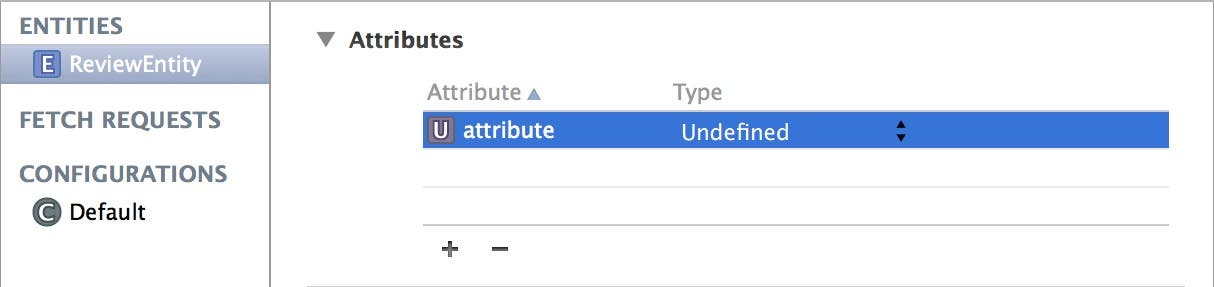 |
| Figure 13 - Select the ReviewEntity attribute. |
- In the Data Model's Inspector, set the following attributes as shown in Figure 14.
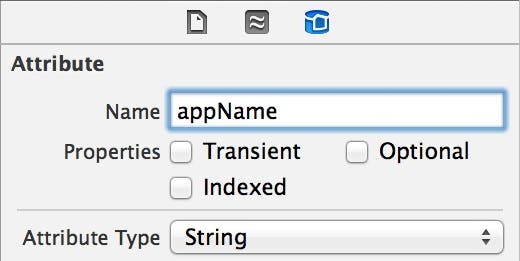 |
| Figure 14 - The address attribute's settings |
- Set the Name to appName, and press return.
- Uncheck the Optional check box.
- Set the Attribute Type to String.
- Let's add more attributes to ReviewEntity. When you're finished, the entity attributes in the Data Model Editor will look like Figure 15.
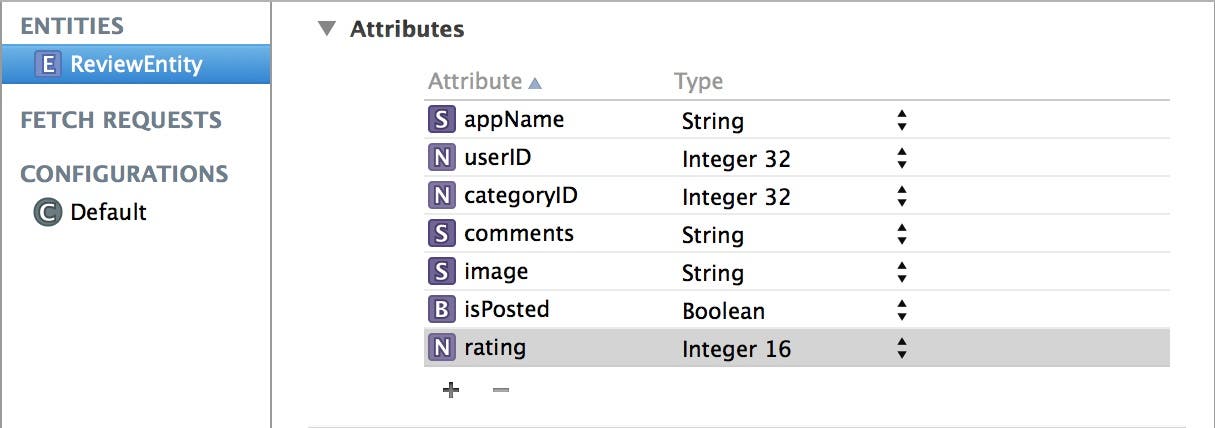 |
| Figure 15 - ReviewEntity attributes |
To add the attributes shown in Figure 15, first click the New Attribute button at the bottom of the Data Model Editor, then set the specified name and attribute type. Uncheck the Optional check box for all attributes except image, and isPosted, since these attributes are optional.
- As a final step, select the rating attribute, and then go to the Data Inspector and set the Minimum to 1, and the Maximum to 5 (doing this automatically selects the Minimum and Maximum check boxes). This sets up what we call business rules. We are specifying that the user must enter a rating of at least 1 and no more than 5.
Creating the AppCategoryEntity
As a reminder of how we are using app categories, you can see in Figure 16 that tapping the App Category cell at the top of the Write Review scene takes the user to the App Category scene where they can select a category for the app. Currently, this list of categories is hard coded in our prototype app. However, we want to change the app to display a dynamic list of app categories that we can add to in the future as needed.
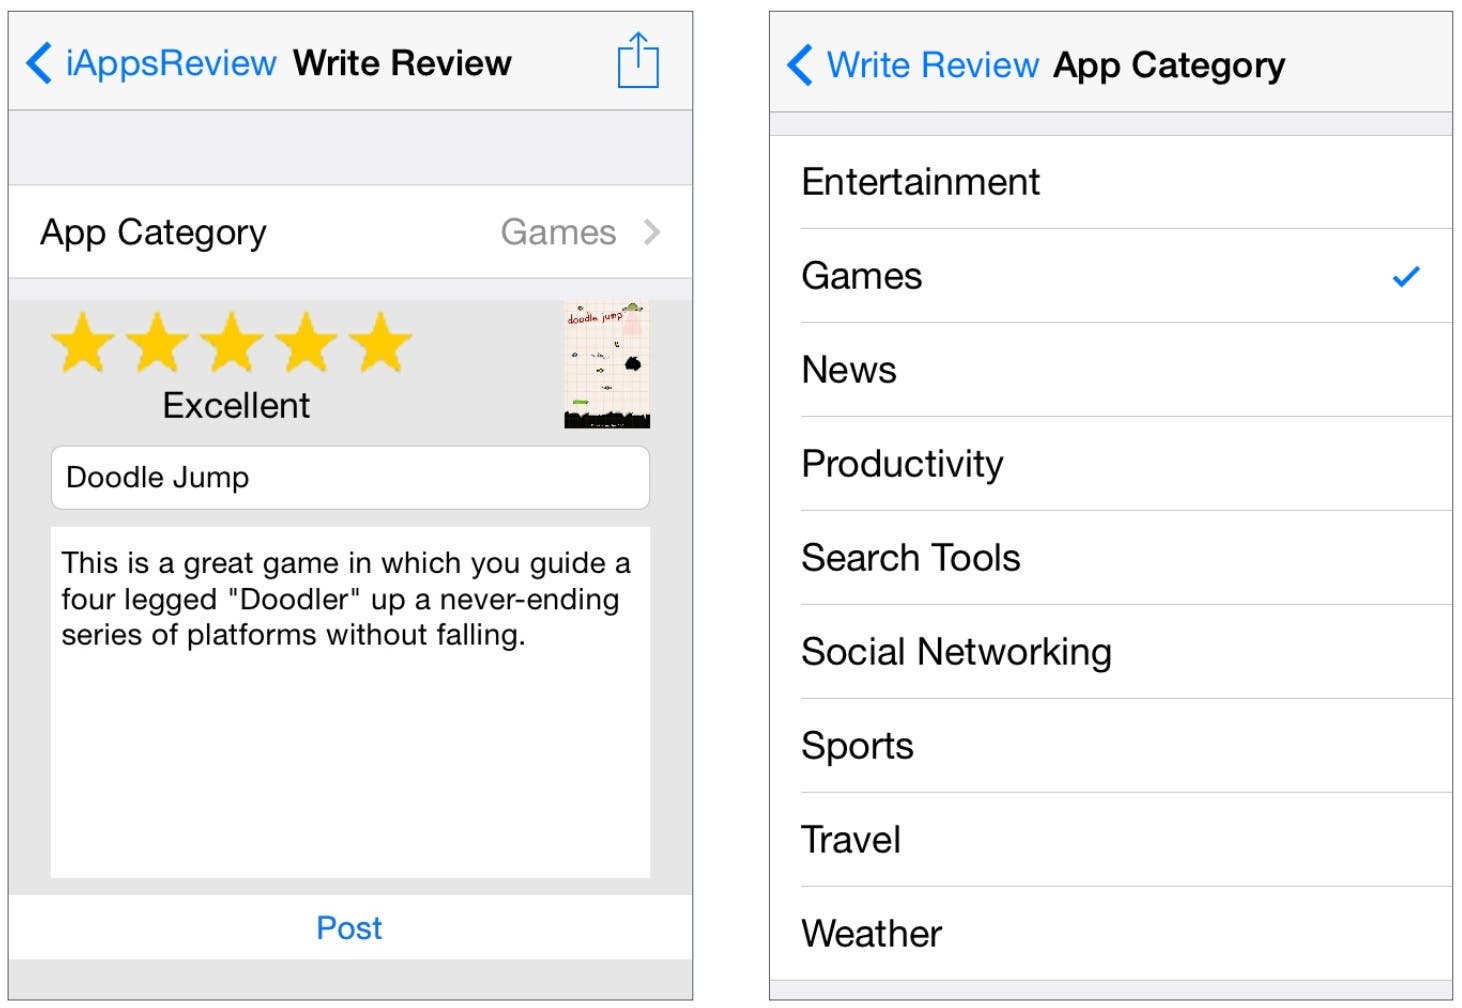 |
| Figure 16 - You can select a category from the App Category scene. |
To make this happen, we need to create an AppCategoryEntity that can be used to represent the different app categories shown in the App Category scene.
- At the bottom of the Data Model Editor, click the Add Entity button to add a new entity to the model.
- In the Data Model Inspector on the right side of the Xcode window, change the name of the new entity to AppCategoryEntity and then press return.
- Next, change the Class to AppCategoryEntity. Again, this specifies the name of the class that will later be generated from this entity.
- This entity only has two attributes, so it's very easy to add. With the AppCategoryEntity still selected, click the Add Attribute button. Afterwards, go to the Data Model Inspector and set the following properties:
- Set the Name to categoryID.
- Uncheck the Optional check box.
- Set the Attribute Type to Integer32.
- To add the second attribute, click the Add Attribute button again. Afterwards, go to the Data Model Inspector and set the following properties:
- Set the Name to name.
- Uncheck the Optional check box.
- Set the Attribute Type to String.
When you're finished, the Data Model Editor should look like Figure 17.
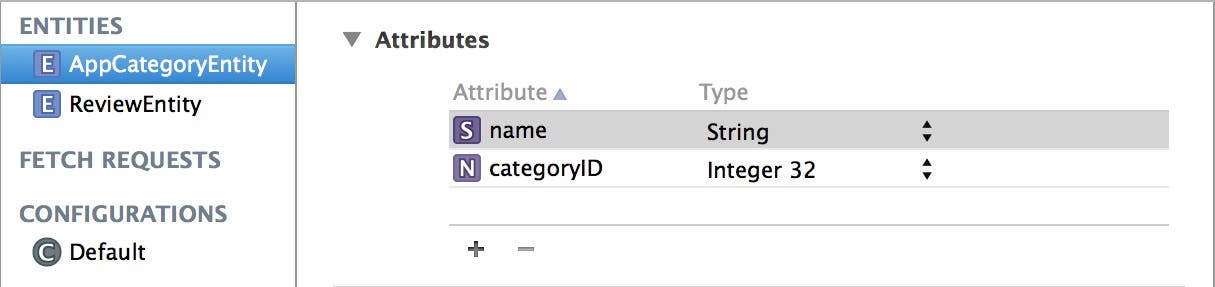 |
| Figure 17 - AppCategoryEntity attributes |
The name attribute contains the description of the category as shown in the App Category scene's list, and the categoryID attribute contains an integer value that uniquely identifies each app category. Often, you can let Core Data generate these unique integer values automatically by using entity relationships as I used in the entity data model in my previous post. When we discuss entity relationships in an upcoming post, I'll explain why I've created this attribute manually.
Creating the UserEntity
Now we need to create our final entity, the UserEntity. This entity is used to model users of our app.
- At the bottom of the Data Model Editor, click the Add Entity button to add a new entity to the model.
- In the Data Model Inspector on the right side of the Xcode window, change the name of the new entity to UserEntity and then press return.
- Next, go to the Data Model Inspector and change the Class to UserEntity.
- Now add the attributes with the specified name and data type shown in Figure 18 and as you do, uncheck the Optional setting for each attribute.
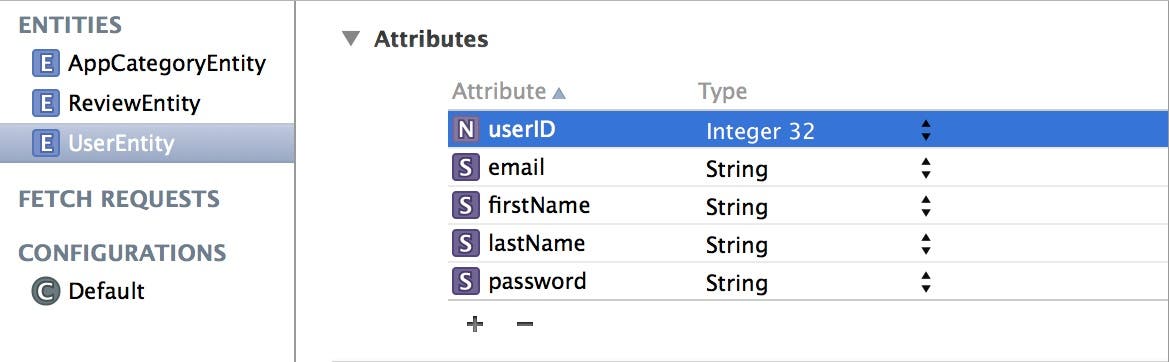 |
| Figure 18 - UserEntity attributes |
Data Model Editor Styles
Up to this point, we have done all of our work viewing the editor in its Table style. Now that there are three entities on the model, it's a good time to view the model in Graph style. To do this, click the right button in the Editor Style button group at the bottom of the Data Model Editor. When you do this, you will see the three entities overlaid on top of each other. I recommend dragging the entities on the model so they are positioned as shown in Figure 19.
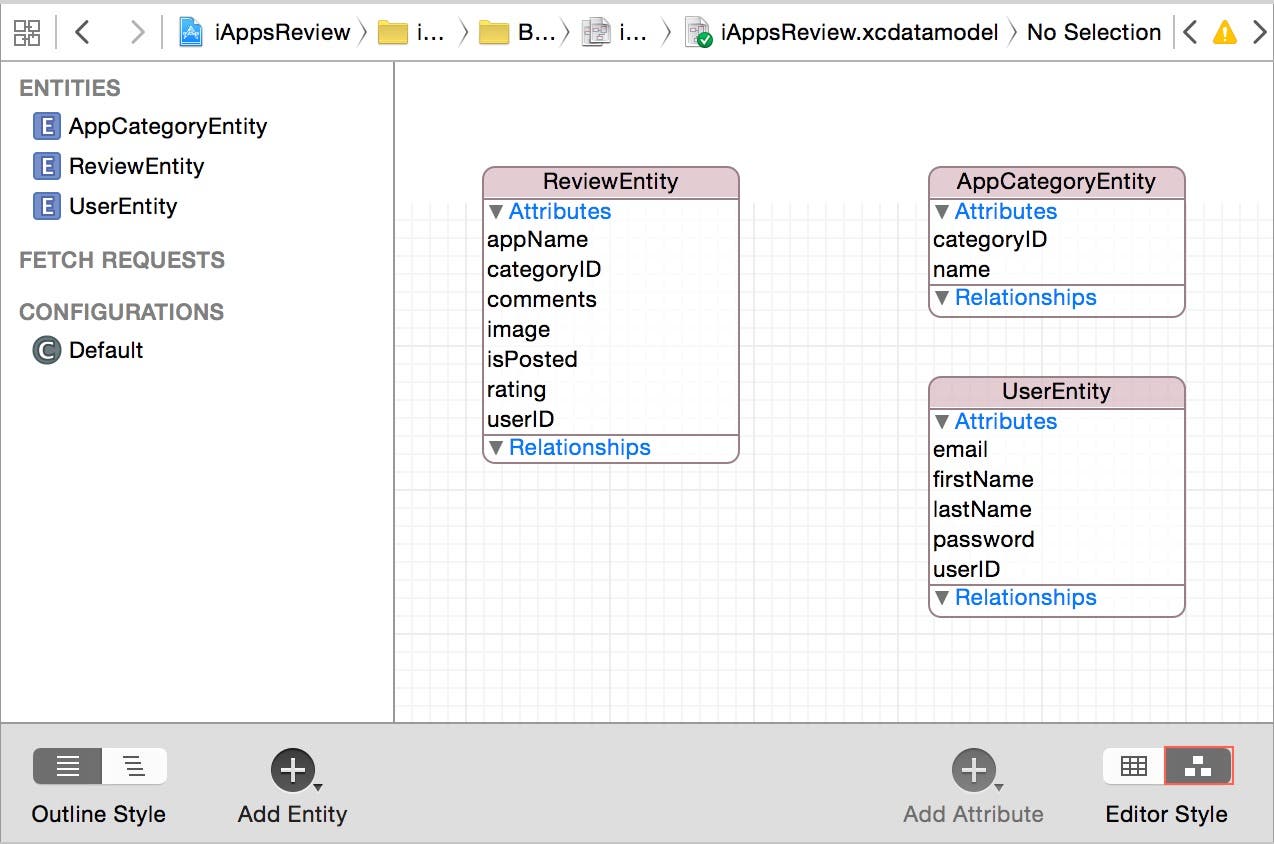 |
| Figure 19 - The Entity Data Model viewed in Graph style |
Congratulations! You have created your first entity data model!
Conclusion
In this blog, you learned a lot about modeling entities for your iOS apps. In my next blog post I will show you how to generate Swift classes from these entities and use them within the app!

Kevin McNeish
Kevin McNeish is author of the new book “Learn to Code in Swift” as well as the “iOS App Development for Non-Programmers” book series (www.iOSAppsForNonProgrammers.com), winner of the Publishing Innovation Award. Kevin is also an award-winning app developer, software architect, and conference speaker in the U.S. and abroad. He has spent much of his career making difficult concepts easy to understand. Follow Kevin on Twitter: @kjmcneish.

 Ashleigh Page
 Olena Kagui
 Leanne Hays
 Rhett Intriago


 Rachel Needell
 Amy Spitzfaden Both