Swift 101 - Classes, Variables, Properties & Methods


As promised, here is my first installment on learning to program in the new Swift language!
Defining Classes in Swift
The following code shows an example of a Swift class definition:
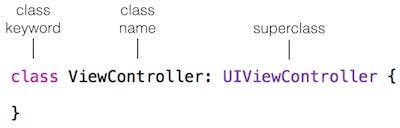
To declare a class in Swift, you use the class keyword followed by the name of the class. If it has a superclass, you add a colon and the name of the superclass. The beginning and end of the class are indicated by the opening and closing curly braces.
In Swift, classes are defined in a single .swift source code file as compared to Objective-C, where classes are defined in two separate files, a header (.h) file and an implementation (.m) file.
Declaring Variables
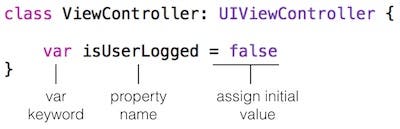
The following code shows an example of a variable declaration:
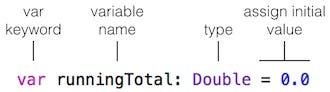
You begin a variable declaration with the var keyword followed by the name of the variable. Next, you add a colon, followed by the variable type. Afterward, you can assign a value to the variable using the (=) assignment operator.
In Swift, if you assign an initial value to a variable, you don't need to specify the variable type as shown in the following code:
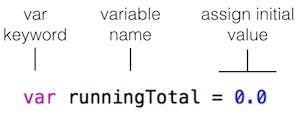
You can do this because Swift has something called type inference where it can figure out, or infer the type of the variable based on the value you assign to it.
In Objective-C you can declare instance variables at the class level and local variables within methods. In Swift, there are no class-level variables—only local variables that you declare within methods. However, you can declare properties at the class level (see the Declaring Properties section below.)
The End of the Asterisk
In Objective-C you use an asterisk to indicate that a variable holds a pointer to an object. In Swift, a constant or variable can contain a pointer to an address in memory (although not a direct pointer), but you don't ever need to use an asterisk in this context.
Declaring Simple Properties
The following code shows an example of a property declaration:
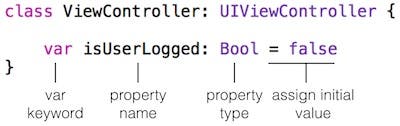
As you can see, it's very similar to declaring a variable, except that you declare a property at the class level rather than within a method.
As with variables, if you assign an initial value to a property, you don't have to specify the property's type. You can also initialize properties from within initializer methods (see the section below on Initializers for details.) The following code shows an example of declaring a property without specifying a type:
In Objective-C, properties typically had backing instance variables in which the actual value of the property was stored. Swift simplifies properties by unifying the concepts of properties and instance variables. Properties no longer have a backing instance variable. Everything about a property is declared in a single location.
In Swift, you don't have to use the self keyword to refer to a property unless the method in which you are writing code has a parameter with the same name as the property.
Declaring Computed Properties
Swift also has computed properties that have associated get and set methods as shown in the following code:
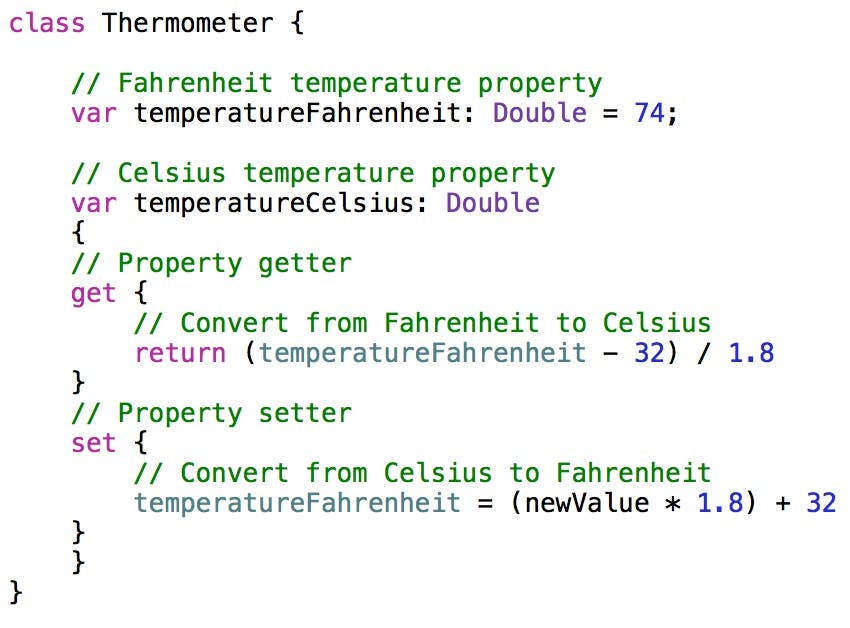
In this example, the Thermometer class has a simple temperatureFahrenheit property and a computed temperateCelsius property.
Notice that the get and set methods of the Thermometer class do not reference an instance variable, because there is no such thing as an instance variable in Swift!
In this case, the get method retrieves the value from the temperatureFahrenheit property, converts it to Celsius and returns the value. The set method takes the value passed to it, converts it to Fahrenheit and then stores the result in the temperatureFahrenheit property.
The value passed to the property's set method is stored in an implicitly named parameter called newValue. If you want to use a different parameter name, you can specify the name in parentheses after the set as shown in the following code:
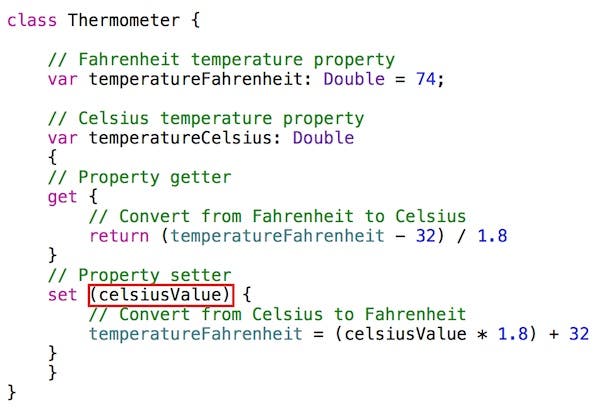
Specifying a parameter name can make your code easier to understand. In this example, setting the name of the parameter to celsiusValue makes it clearer that the set method is converting the value from Celsius to Fahrenheit.
Declaring Methods
The following code contains an example of a Swift method declaration:
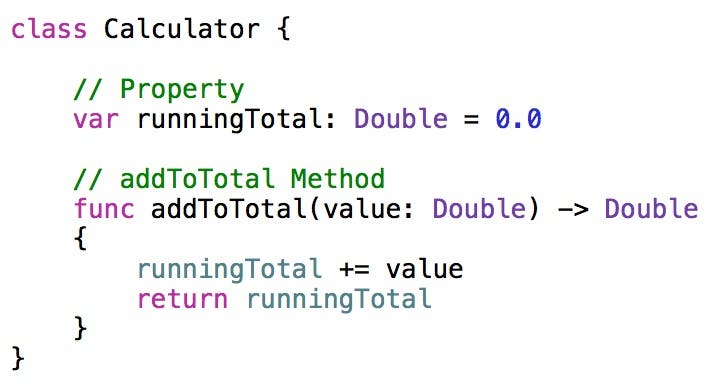
As with Objective-C, in Swift, you declare an instance method between the opening and closing curly braces of the class to which it belongs.
To declare a method, you first specify the func keyword, followed by the name of the method. If the method has parameters, you include them in the parentheses. For each parameter, you specify the name of the parameter followed by a colon, followed by its type. If the method has a return value, you then add a hyphen and greater than sign (->) followed by the type of the return value.
The following code contains an example of a method that accepts no parameters and returns nothing:
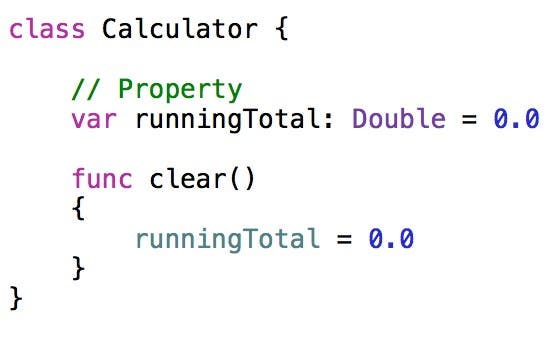
As you can see, parentheses are required after the method name even if there are no parameters. A method that returns nothing doesn't need the return value indicator (->) after the parentheses.
Initializer Methods
The following code contains an example of an initializer method that is used to initialize a class.
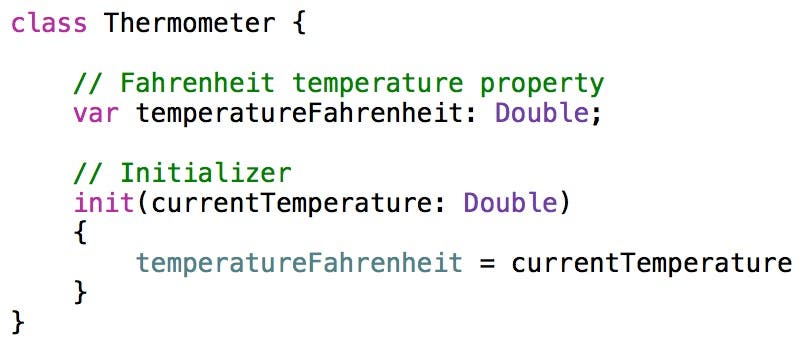
Initializer methods are always named init and, unlike Objective-C, never return a value. In the above example, the init method accepts a currentTemperature parameter in which you can pass the initial temperature. This value is then stored in the temperatureFahrenheit property.
You can create multiple initalizer methods as shown in the following code sample:
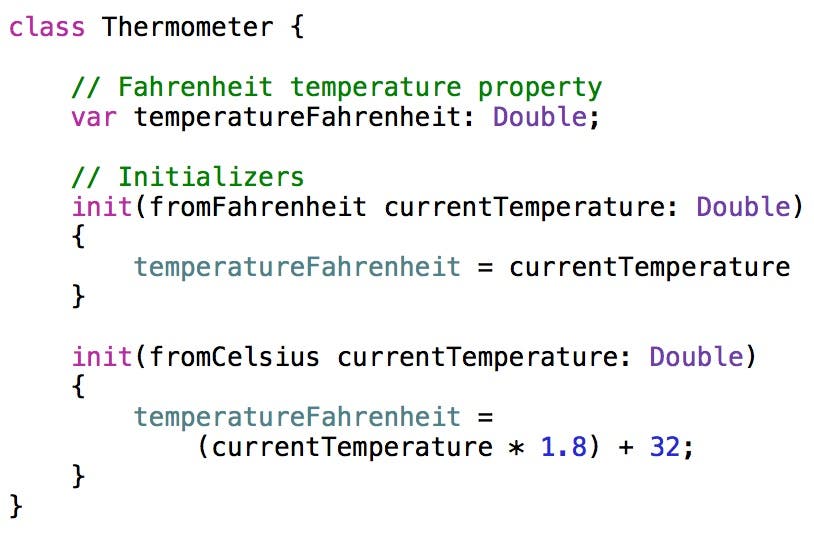
In this example, both methods are named init, so to make the names unique, an external name is assigned to the parameters—fromFahrenheit and fromCelsius. This makes the full method names init(fromFahrenheit:) and init(fromCelsius:) respectively.
It's worth noting that in Swift, init methods are not inherited. From a practical perspective, this means you shouldn't place any code in an init method that you want to be able to override in a subclass. If you have code that you want executed during the init phase of a class and want to be able to override that code in a subclass, you can create a separate method, place the initialization code in that method, and then call that method from the init.
Creating an Instance of a Class
Here is an example of how to create an instance of a class:

As you can see, to create an instance of a class, you declare a variable to hold a reference to the class, type an equal sign (the assignment operator) and then the name of the class followed by parentheses.
Conclusion
These are some of the very basics you need to know to get started with Swift programming. In upcoming posts I will dive deeper into the language to help you become proficient with Swift's new syntax and structure.

Kevin McNeish
Kevin McNeish is author of the new book “Learn to Code in Swift” as well as the “iOS App Development for Non-Programmers” book series (www.iOSAppsForNonProgrammers.com), winner of the Publishing Innovation Award. Kevin is also an award-winning app developer, software architect, and conference speaker in the U.S. and abroad. He has spent much of his career making difficult concepts easy to understand. Follow Kevin on Twitter: @kjmcneish.

 Cullen Thomas
 Rhett Intriago


 Rachel Needell


 Susan Misuraca

 Olena Kagui