How to Transfer Photos from an iPhone to a Computer (Mac & PC)
We’ll show you the best ways to download or import photos from an iPhone, iPad, or iPod touch to a PC or Mac computer.


Every iPhone, iPad, and iPod touch user needs to know how to transfer photos from an iPhone to a computer, whether they're using a Mac or a PC. This keeps your photos safe and frees up storage space on your iPhone or other Apple device. We'll show you the best ways to transfer photos!
Related: How to Transfer Photos from iPhone to iPhone—Easiest Methods!
Here are six answers to the question of how to get photos off of your iPhone. For more great Photos app tips, check out our free Tip of the Day.
How to Transfer Photos to a Computer (Mac & PC)
This is the tried-and-true method to transfer photos from iPhone to Mac or PC, and it hasn’t changed much over the years. Of course, for this method, you’ll need the USB to Lightning charging cable that came with your iPhone. The only difference between offloading photos onto a Mac versus a PC is the program you’ll use to import them. Let’s break it down.
How to Transfer iPhone Photos to Mac: Yosemite or Later
- Using your USB cable with Lightning Connector, connect your iPhone, iPad, or iPod touch to your computer.
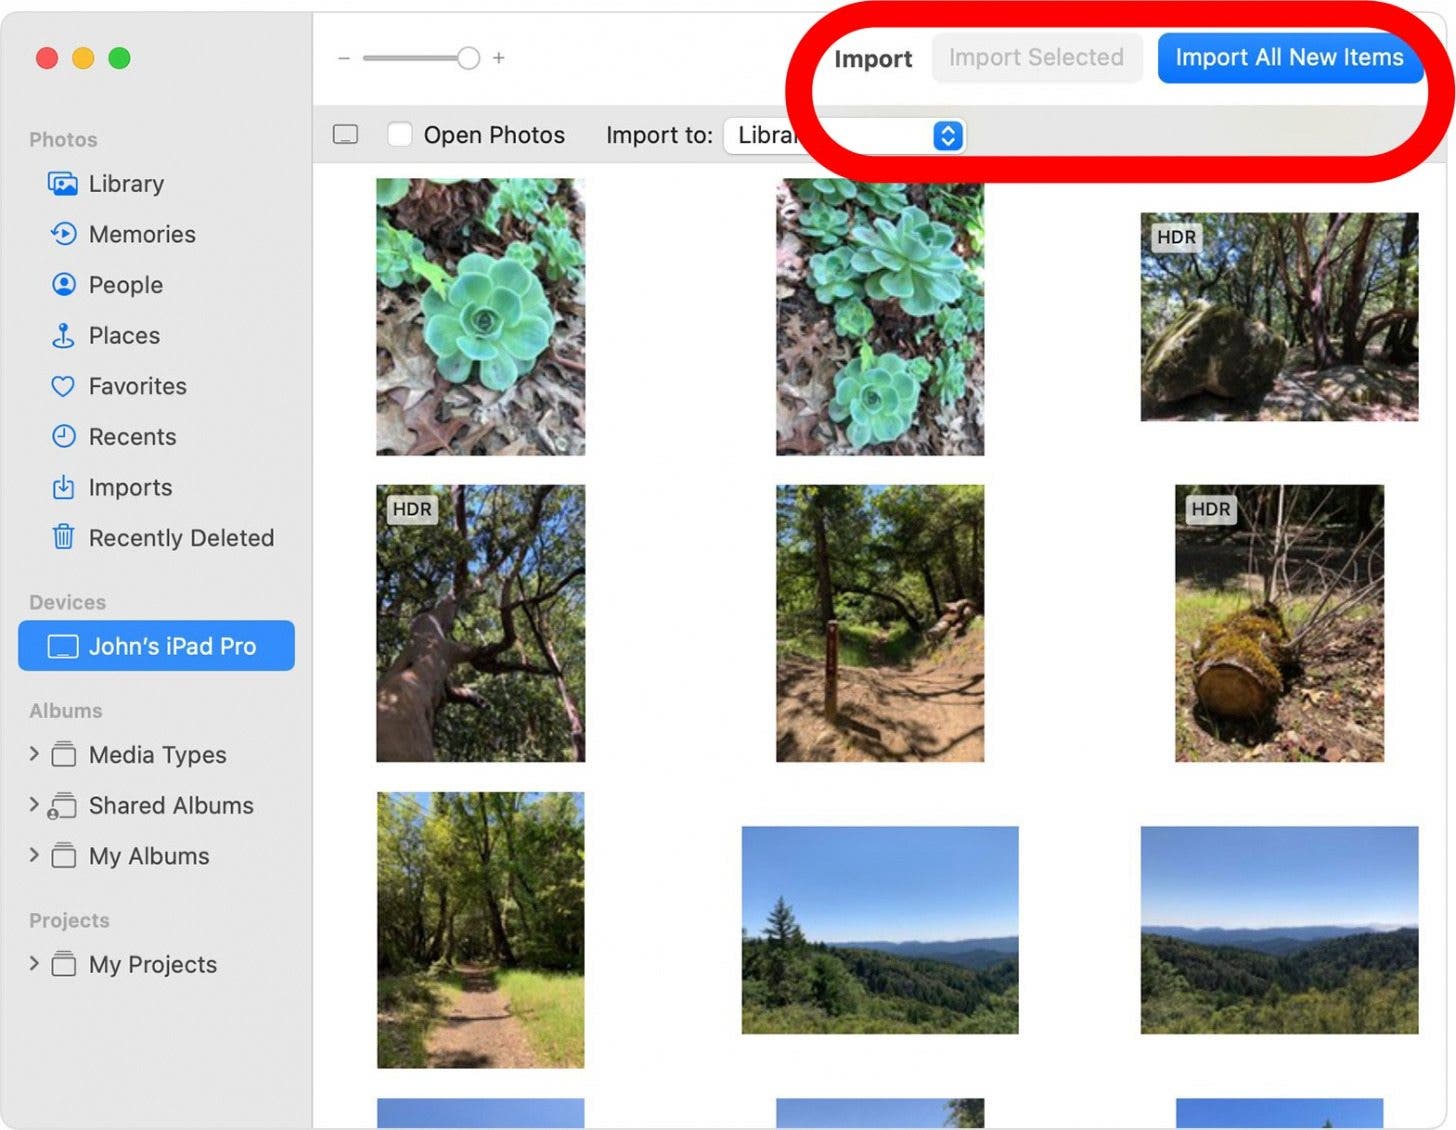
- Open the Photos app on your Mac.
- If your connected device is locked, unlock it.
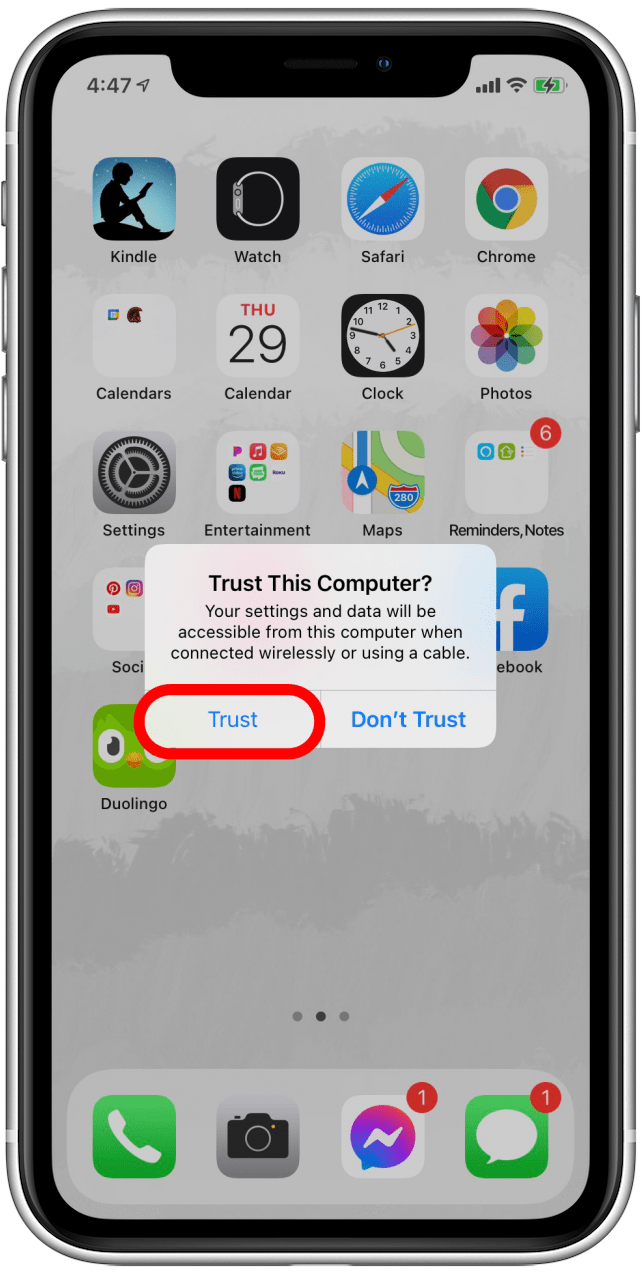
- You may see a prompt on your device asking you to Trust This Computer.
- If you see this, tap Trust.
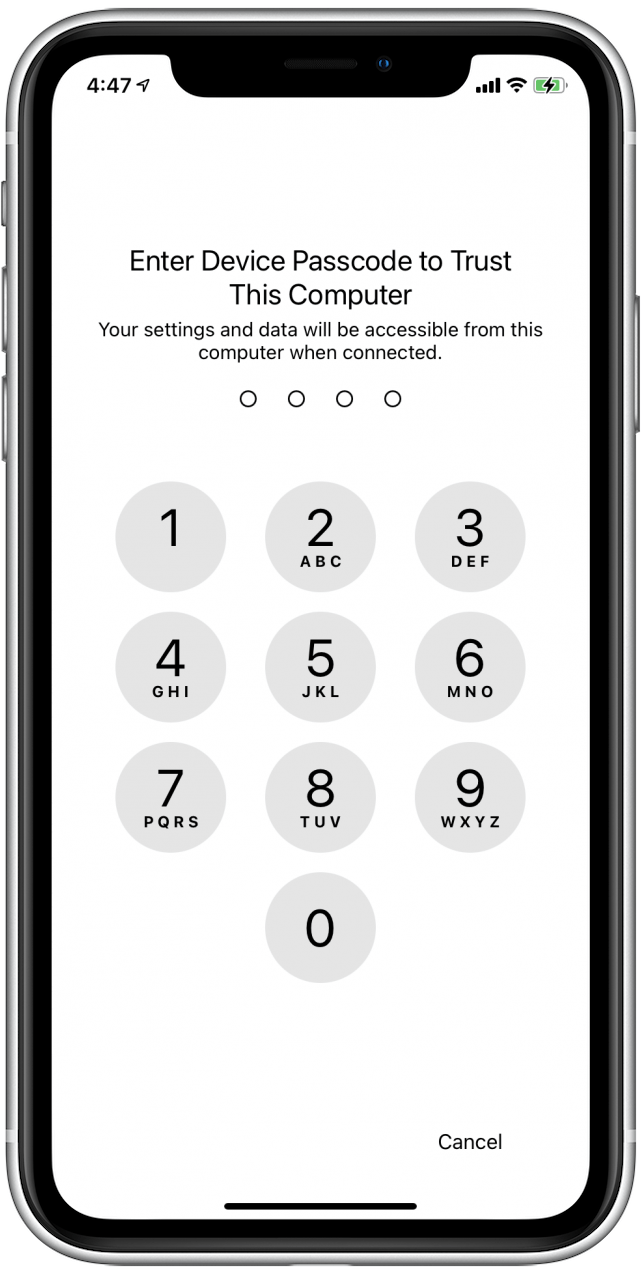
- You may also be prompted to enter your passcode to trust the computer. If so, enter your passcode.
- On your Mac, click on the photos you want to import then click Import Selected.
- To import all photos and videos on your device, click Import All.
PC: Windows 8 or Later
A computer running Windows 8 or later shouldn’t have any problems when transferring iPhone photos to a PC. The process is nearly identical to the Mac process, except you’re using Microsoft's version of the Photos app. However, if you are using a PC with an older version of Windows, AutoPlay will pop up and give you the option to import your photos.
- Connect your iPhone to your PC using a USB to Lightning cable.
- In Explorer, navigate to This PC.
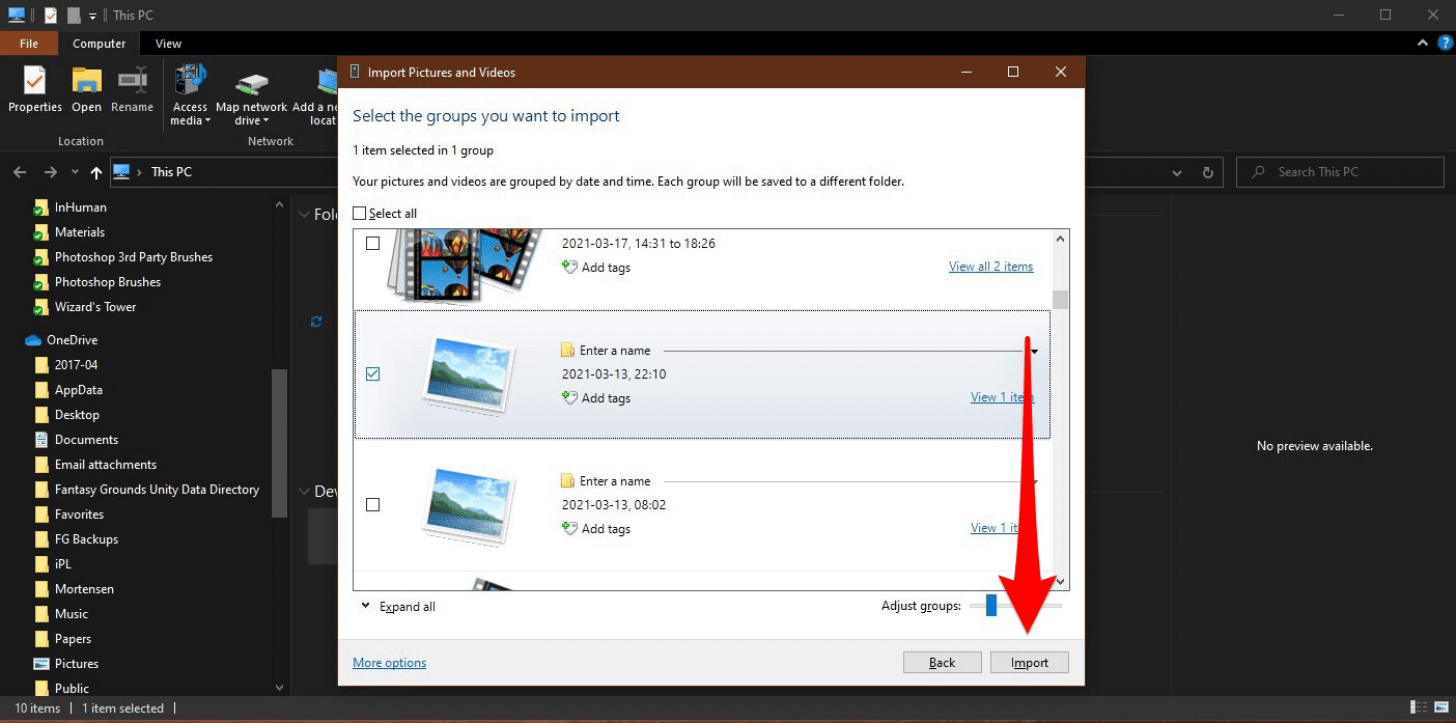
- Right click on Apple iPhone (or the name of your device if that's what appears) and select Import pictures and videos.

- Choose whether you want to import everything or just specific images or videos. In this example, we'll choose to import just one.
- Select the images or videos you want by checking the box next to each file or collection.
- Click Import.
How to Use AirDrop to Transfer Photos
One of the easiest methods for moving pictures, documents, videos, and more from your iPhone to your computer or other Apple devices is AirDrop. We've written a guide with everything you need to know about AirDrop, including what it is, how it works, whether or not your device is AirDrop compatible, how to turn AirDrop on, and how to AirDrop photos and other files from your iPhone, iPad, and Mac. I'll briefly go over how to turn on and use AirDrop on your iPhone here, but if you find yourself needing more help or information, please visit the AirDrop guide.
Before Using AirDrop
Before you begin, both you and the person or device you're AirDropping photos to need to have Wi-Fi and Bluetooth turned on, and be in range for both. If either of you has a personal hotspot, turn it off. If the person you're sending pictures to has AirDrop set to receive from Contacts Only, they'll only receive your AirDrop if you're one of their contacts, with your email, phone number, or both entered into your contact card in their Contacts app. Alternatively, they can change their receiving setting to Everyone.
Already familiar with AirDrop receiving settings and setup? Skip to how to use AirDrop to get photos off of your iPhone.
How to Turn on AirDrop on an iPhone
- If you have an iPhone with no Home button, swipe down from the upper-right corner of your screen to open the Control Center.
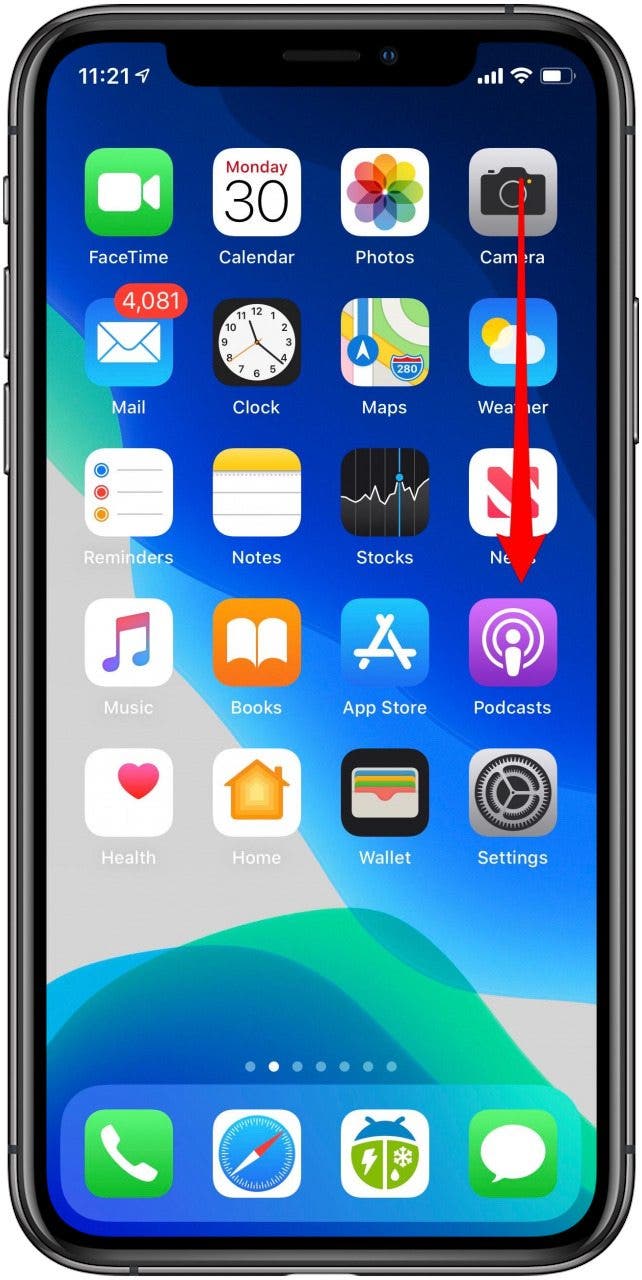
- If your iPhone has a Home button, swipe up from the bottom of your screen to open the Control Center.
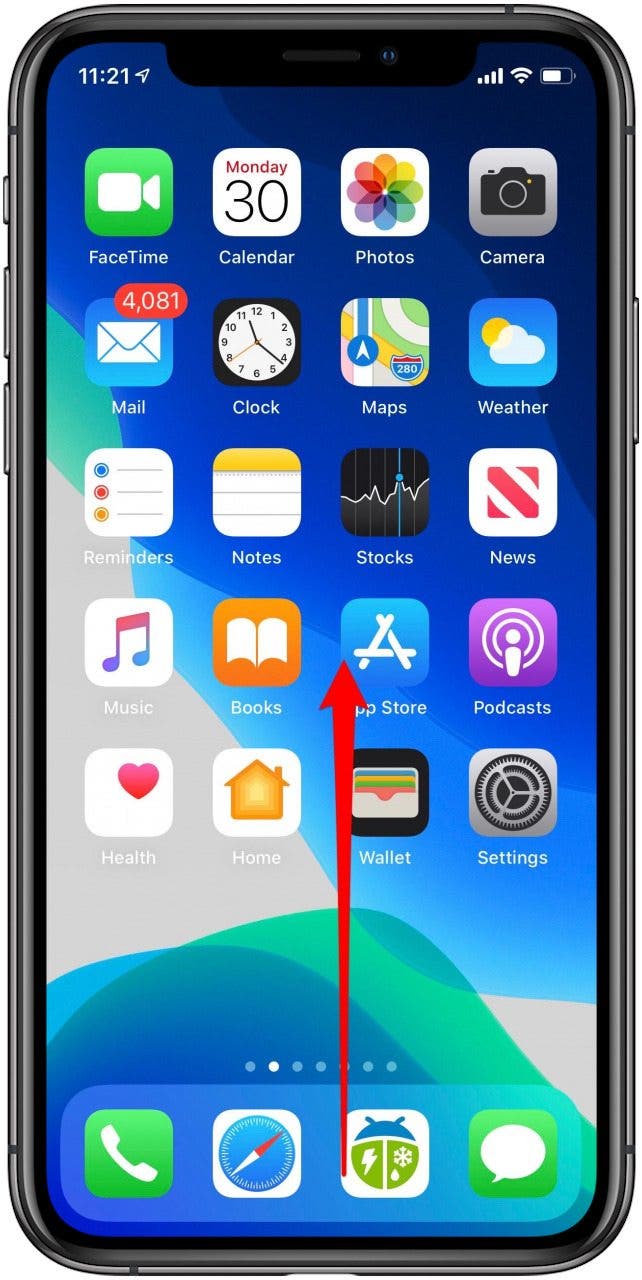
- Long press a blank space on the node that shows your Bluetooth, Wi-Fi, Cellular, and Airplane Mode icons.
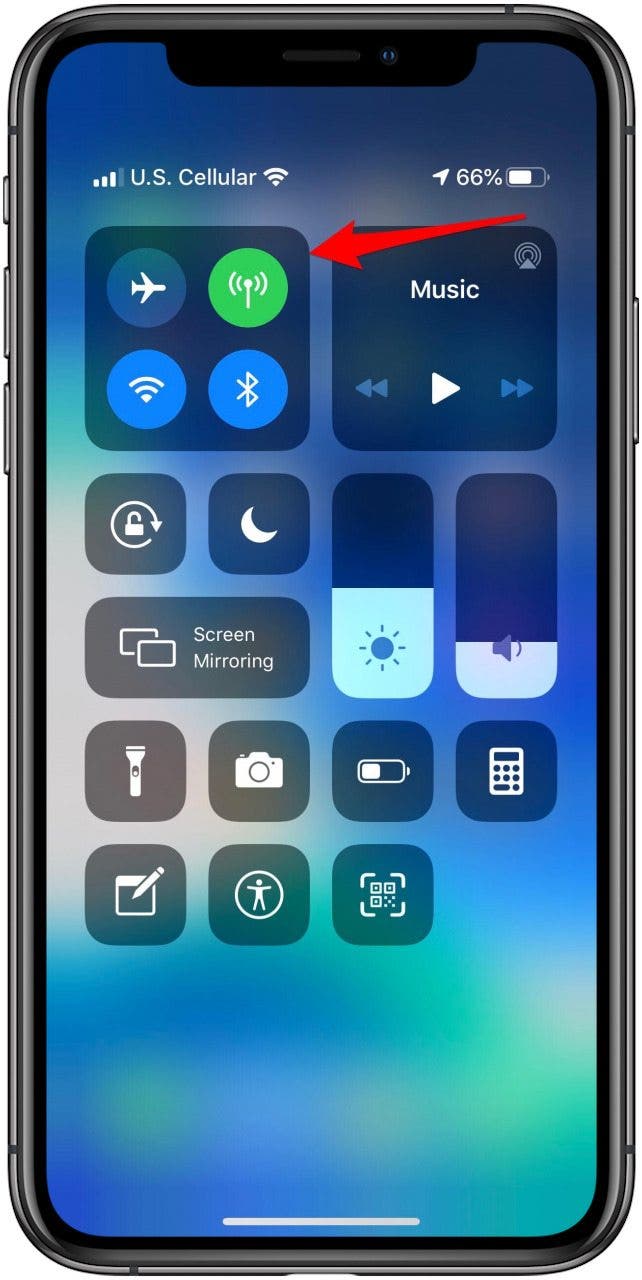
- Tap AirDrop.
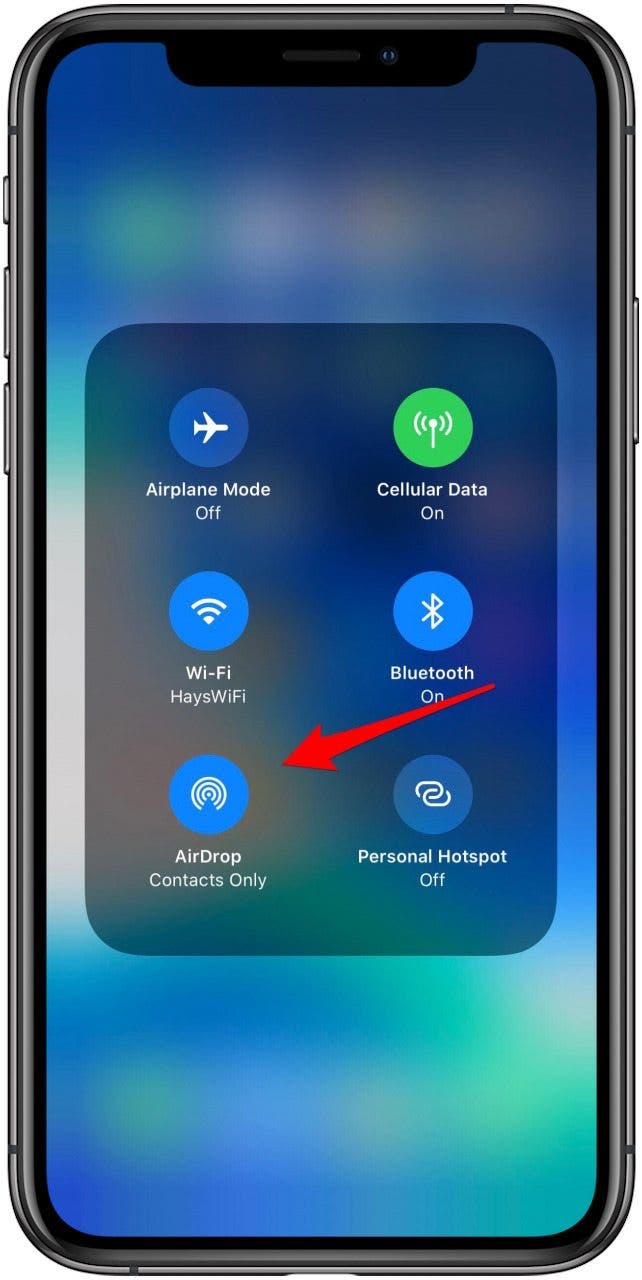
- You’ll see three options: Receiving Off, Contacts Only, and Everyone.
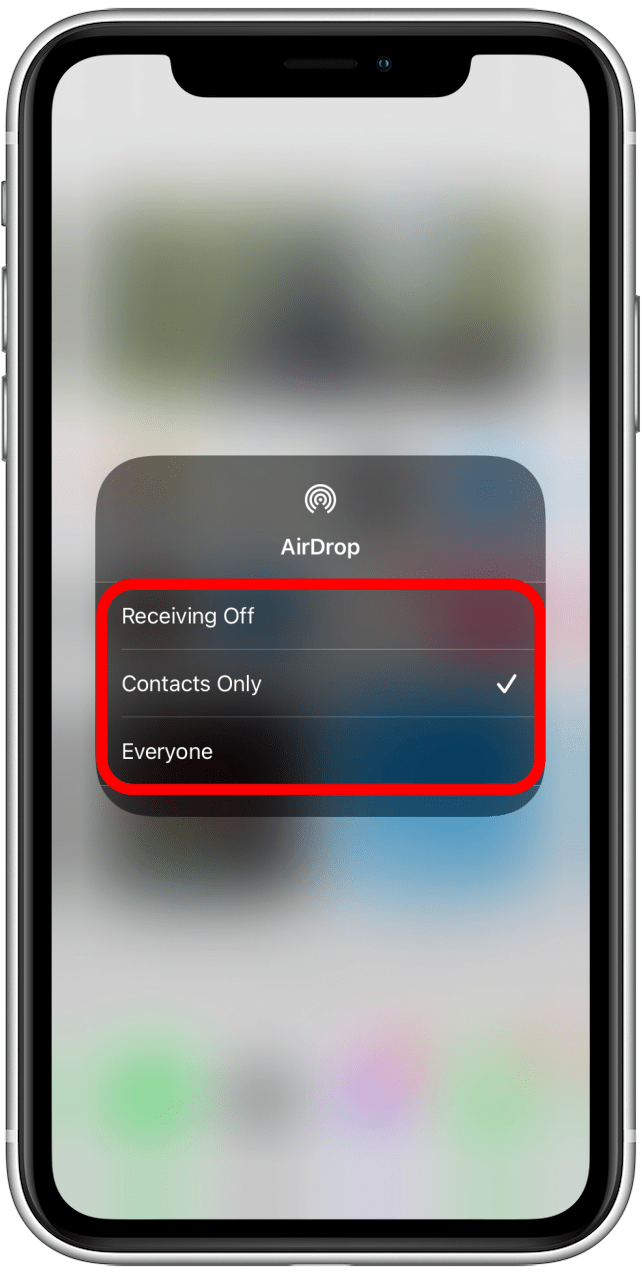
- To turn Airdrop off, select Receiving Off.
- If you only want to receive AirDrops from your contacts, tap Contacts Only.
- If you’re okay with receiving AirDrops from anyone nearby (you'll still have the option to accept or decline), select Everyone.
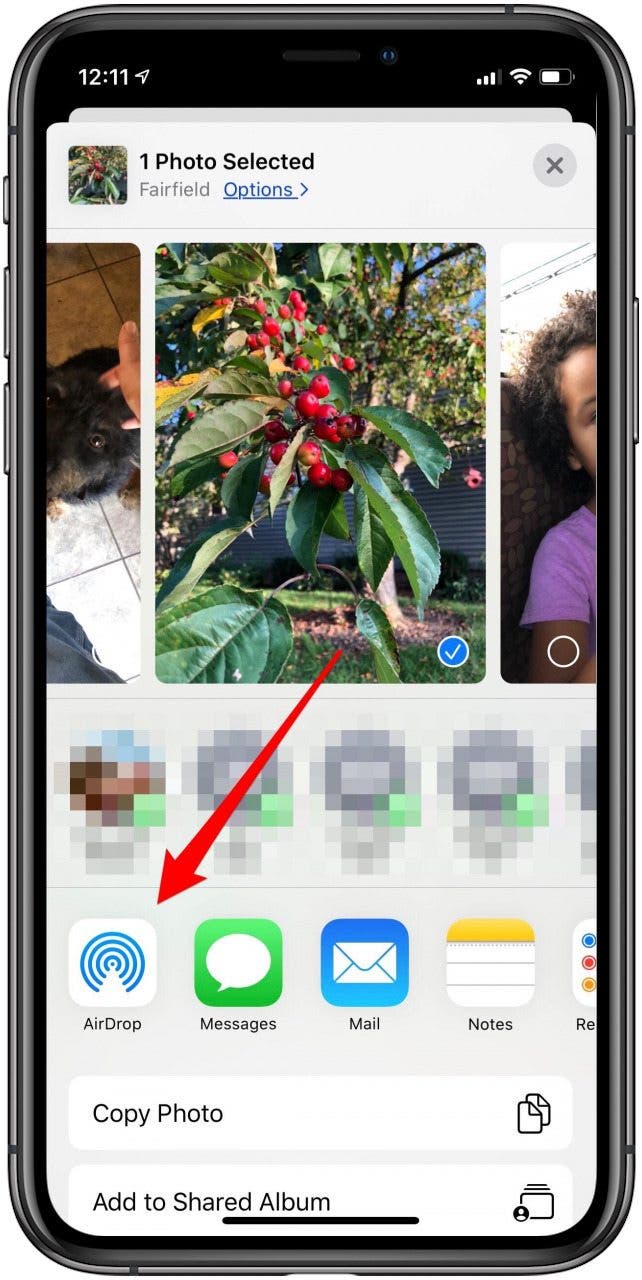
How to Use AirDrop to Share Photos from Your iPhone or iPad
You're probably already familiar with the Share menu on your iPhone, and that's where you'll find the option to AirDrop pictures (as well as files, documents, videos, and more). For this example, we’ll AirDrop photos from an iPhone to a Mac. It's also possible to AirDrop from iPhone to iPhone, or to an iPad that's either yours or someone else's nearby. When you send photos to one of your devices they’ll automatically download and save to the receiving device. If you’re sending pictures to someone else, they’ll receive a notification that you’re trying to AirDrop them something; they can then accept or decline it.
- Open the Photos app.

- Tap a photo you want to share.
- Tap the Share icon.
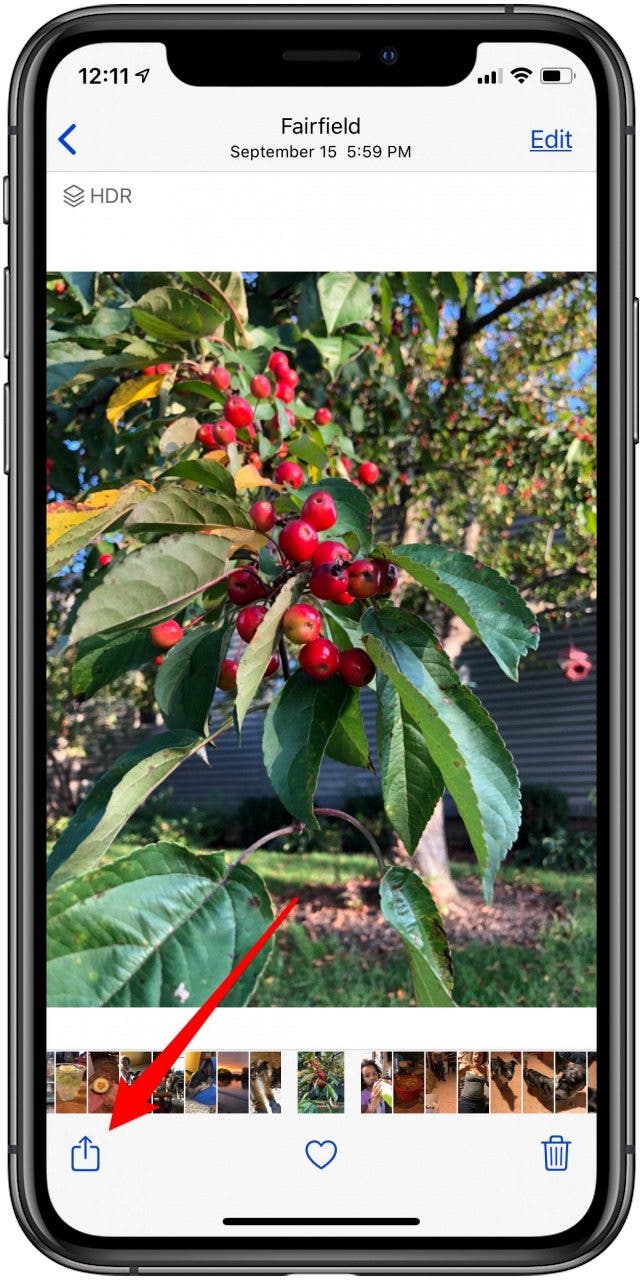
- Tap AirDrop.
-
Tap the device you want to AirDrop the photo to.
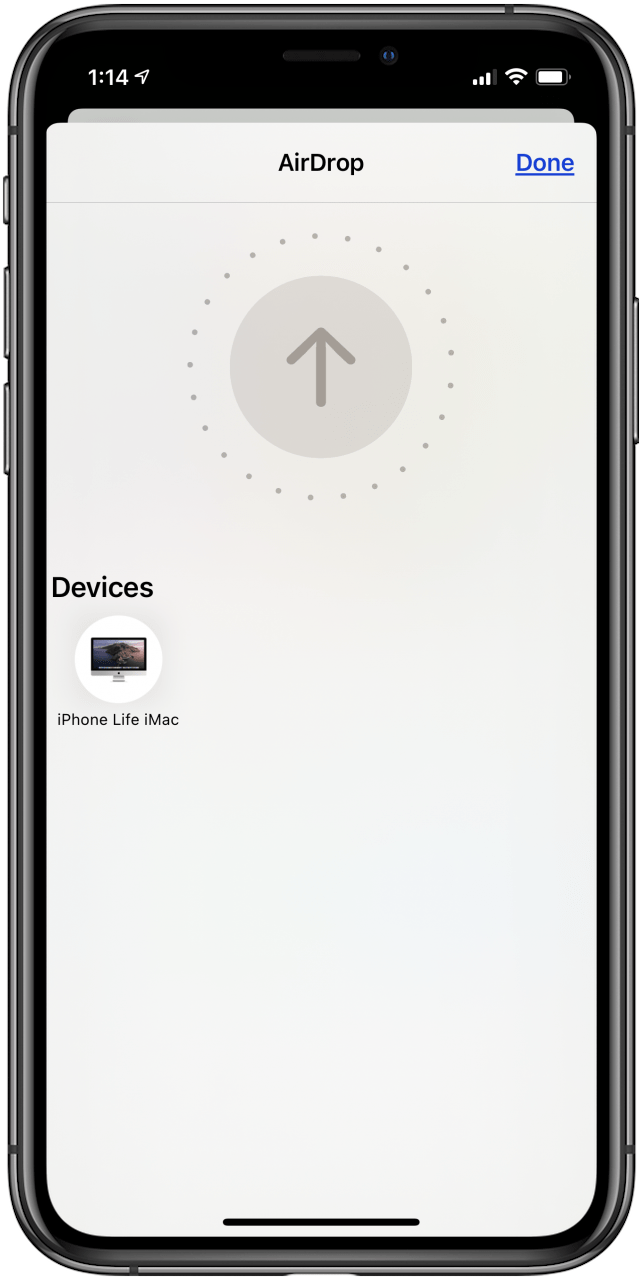
-
You'll see a notification on your Mac. Tap Open or find it in the Downloads section of Finder.

iCloud Photos: How to Automatically Upload Photos from Your Phone to iCloud
You can use iCloud to automatically transfer new photos to all of your iCloud devices when connected to Wi-Fi using either iCloud Photo Library or Photo Stream, although we recommend using them in conjunction if available (if you have a newer Apple ID, you may not have the option to use Photo Stream).
You get 5 GB of free iCloud storage, so if you’re going to use iCloud Photo Library, be aware that it counts toward that storage limit. You can upgrade your iCloud storage plan for more storage. You can also use Photo Streaming on its own if preferred, but these photos are only saved to iCloud for 30 days. Should you choose to use one over the other, simply check only iCloud Photo Library or Photo Streaming when prompted below instead of choosing both.
For both methods, when you take pictures outside of a Wi-Fi network, those photos will automatically transfer once you are in Wi-Fi range. To enable iCloud Photo Library and Photo Streaming on your iPhone:
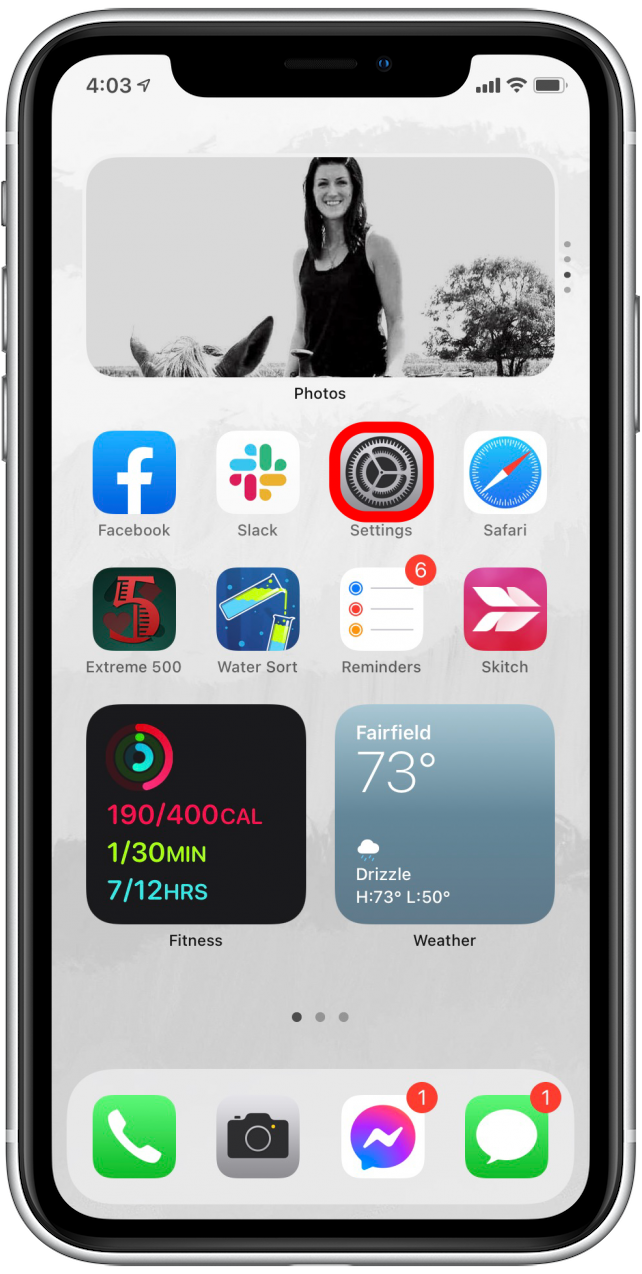
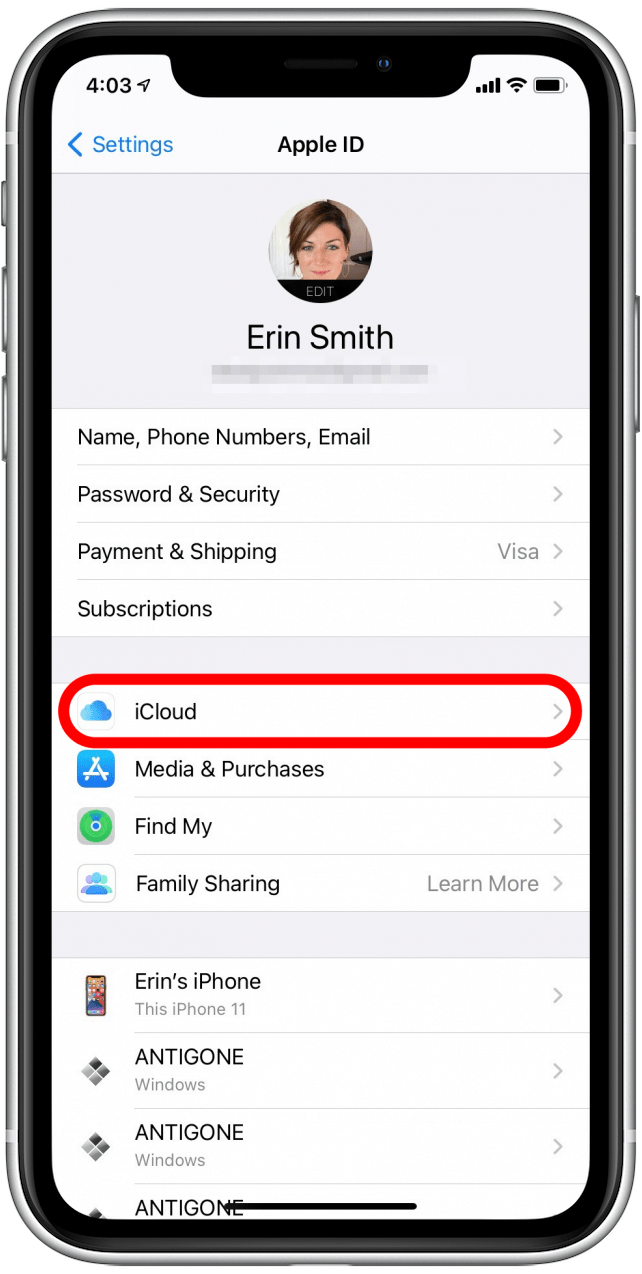
- Open the Settings app.
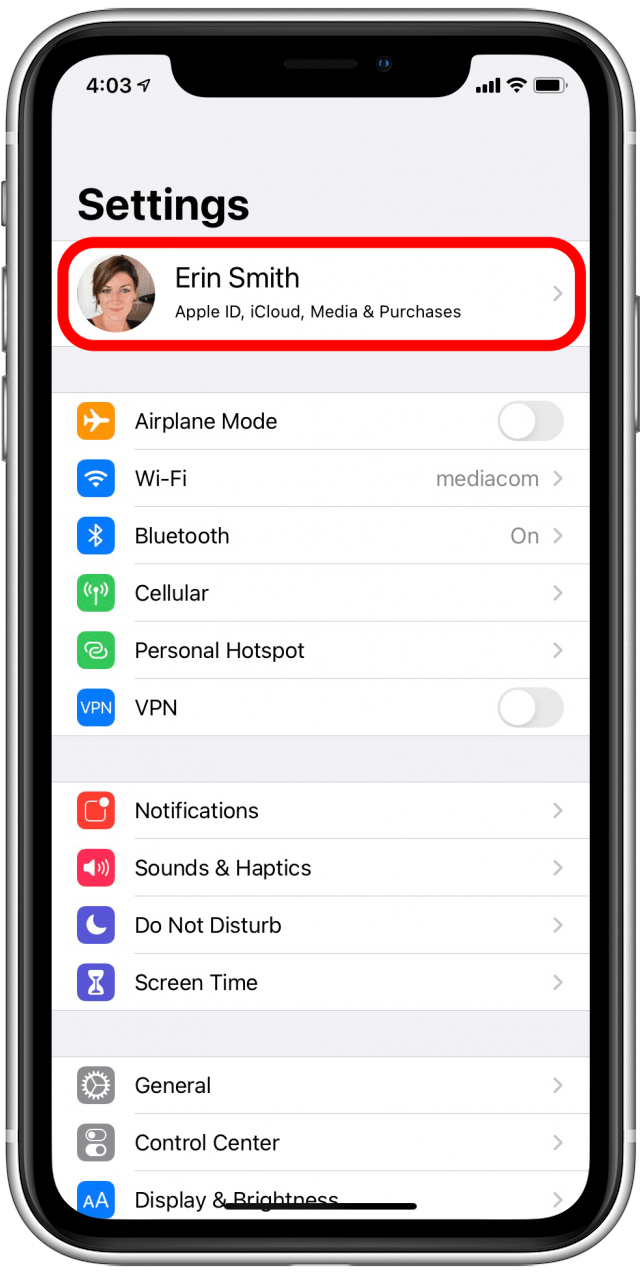
- Tap on your Apple ID profile at the top.
- Tap iCloud.
- Tap Photos.
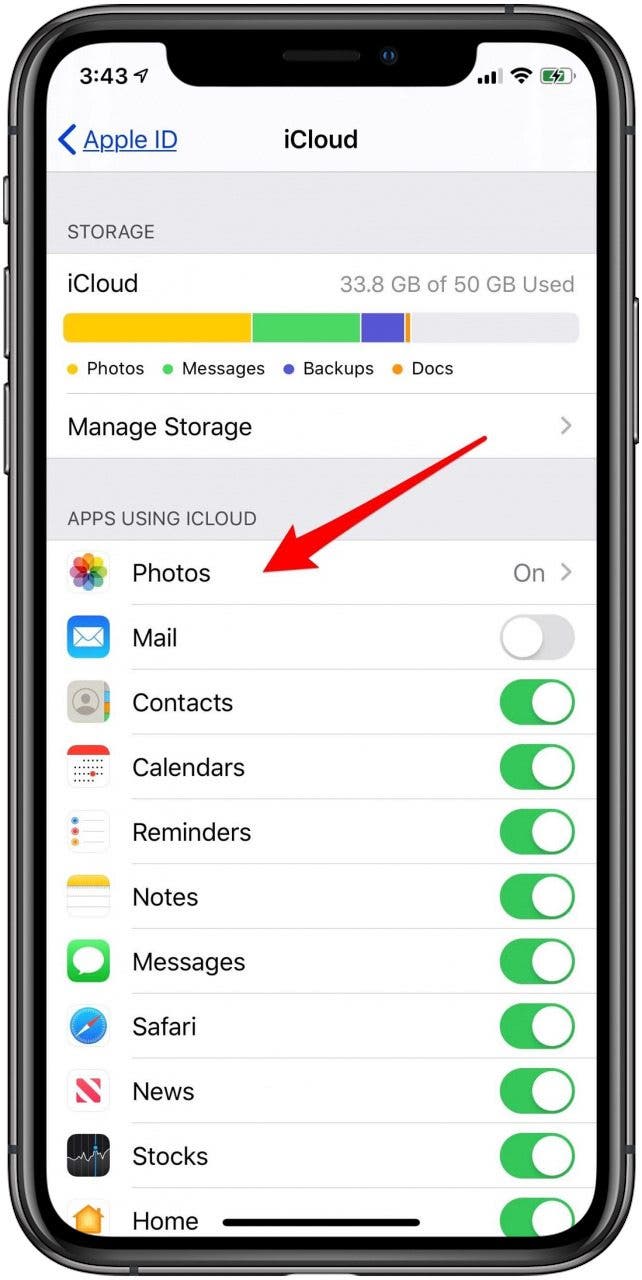
- Toggle on iCloud Photos and Upload to My Photo Stream.

- If you’re using a PC, download iCloud for Windows to continue. If you’re using a Mac, log in to iCloud on your computer.
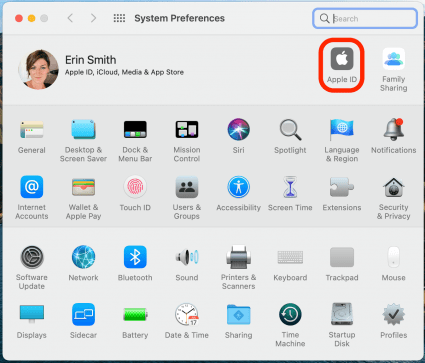
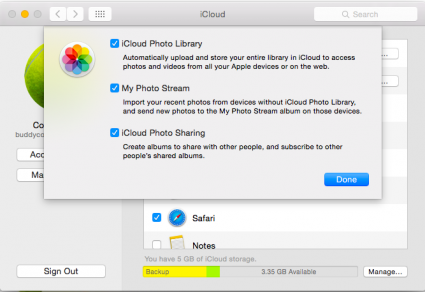
- Open System Preferences on your Mac and click Apple ID.
- Click iCloud.
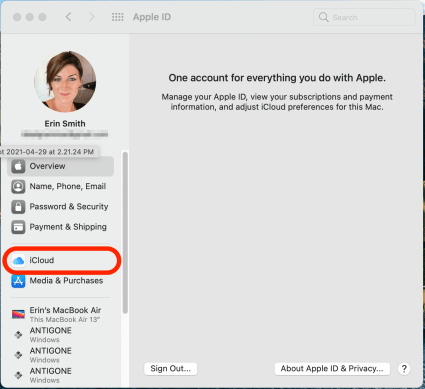
- Next to Photos, click Options.
- Make sure the iCloud Photo Library and My Photo Stream boxes are checked, and click Done.
- To view the photos in your Photo Stream, open the Photos app on your Mac.
- Click Library near the top-left corner.
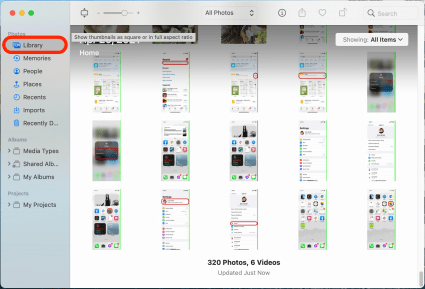
You’ll find your iCloud Photo Library photos in the Photos app on any of your devices as well. You can also access your photo library online.
Photo Stream won’t transfer videos you take, but iCloud Photo Library will. And remember that you need to connect to Wi-Fi before the most recent photos you’ve taken will appear. But when you have this set up, it’s a great way to transfer photos to your computer automatically.
How to Import Photos from an iPhone to a PC or Mac with the Mail App
If you have a small batch of photos you want to transfer from your iPhone, sharing them by attaching them to an email in the Mail app is a quick way to import them to your computer. To do this:
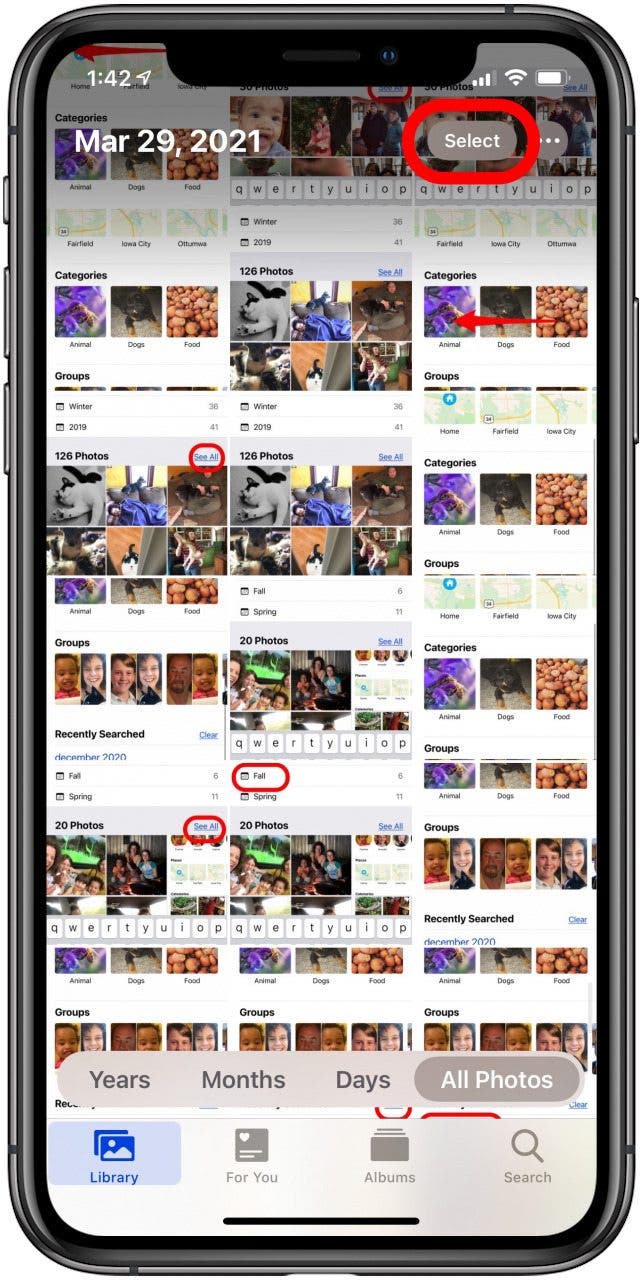
- Open the Photos app on your iPhone.
- Tap the Library tab, or choose an album from the Albums tab.
- Tap Select in the top-right corner.
- Tap the pictures you want to move to your computer, then tap the Share icon.

- Tap Mail.
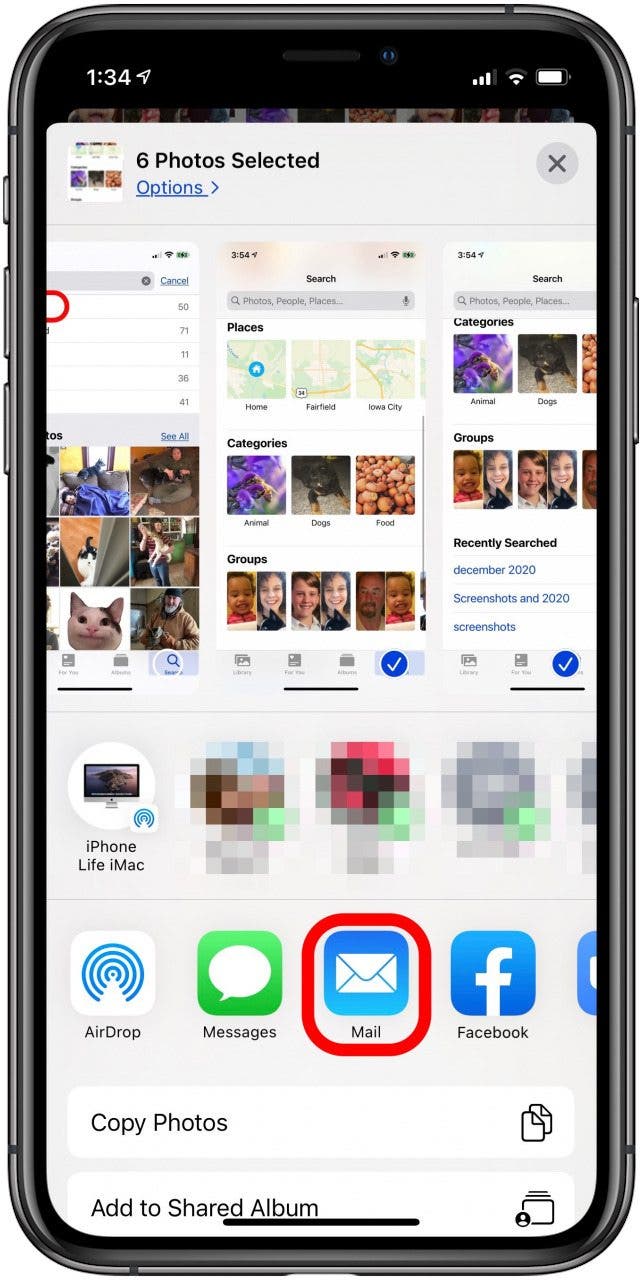
- A new message for email will pop up. Send the photos to your own email account and tap the Send icon.
- You'll have the option to resize them if needed.

- On your computer, open the email you sent yourself, then open and save the photos to your computer as you choose.
There’s no limit on the number of images you can send through Mail if your iPhone is running iOS 9 or later. For older operating systems, the maximum amount you can send is five. This isn’t the best option to select if you have a large number of photos to import, but for a select group, it’s one of the fastest (non-automatic) ways to transfer pictures that I’ve found.
How to Sync Photos between an iPhone & a Computer Using Dropbox
Dropbox is an awesome platform that allows you to easily access photos, documents, and more across any device with the Dropbox app or in a browser. You can also set up Dropbox to automatically copy photos to Dropbox, which means those photos are quickly accessed from your computer anytime. We’ll cover both manual and automatic options for Dropbox use below.
Upload Photos to Dropbox from Your iPhone (Manual Transfer)
- Download the Dropbox iOS app. If you don’t already have an account, create one and log in.
- Give Dropbox permission to access your photos.
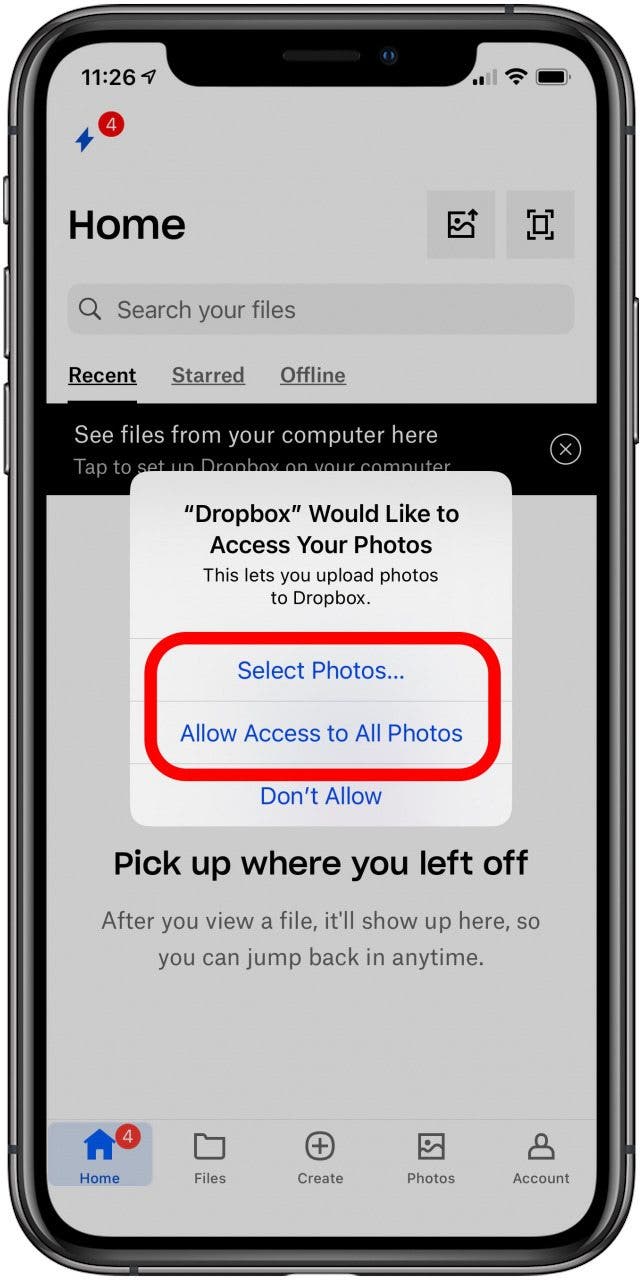
- Tap the Files tab, then tap the folder you want your pictures to go into.
- Open the Dropbox folder where you'd like to store your photos.
- Tap the plus icon at the bottom of your display.
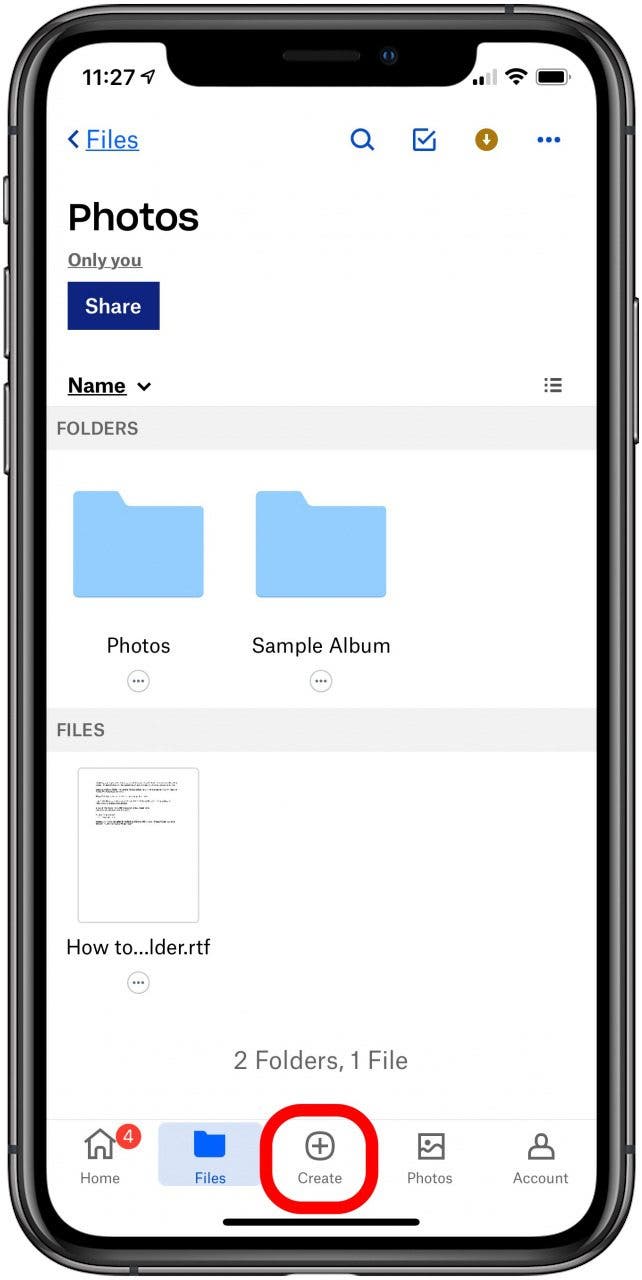
- Tap Upload Photos.
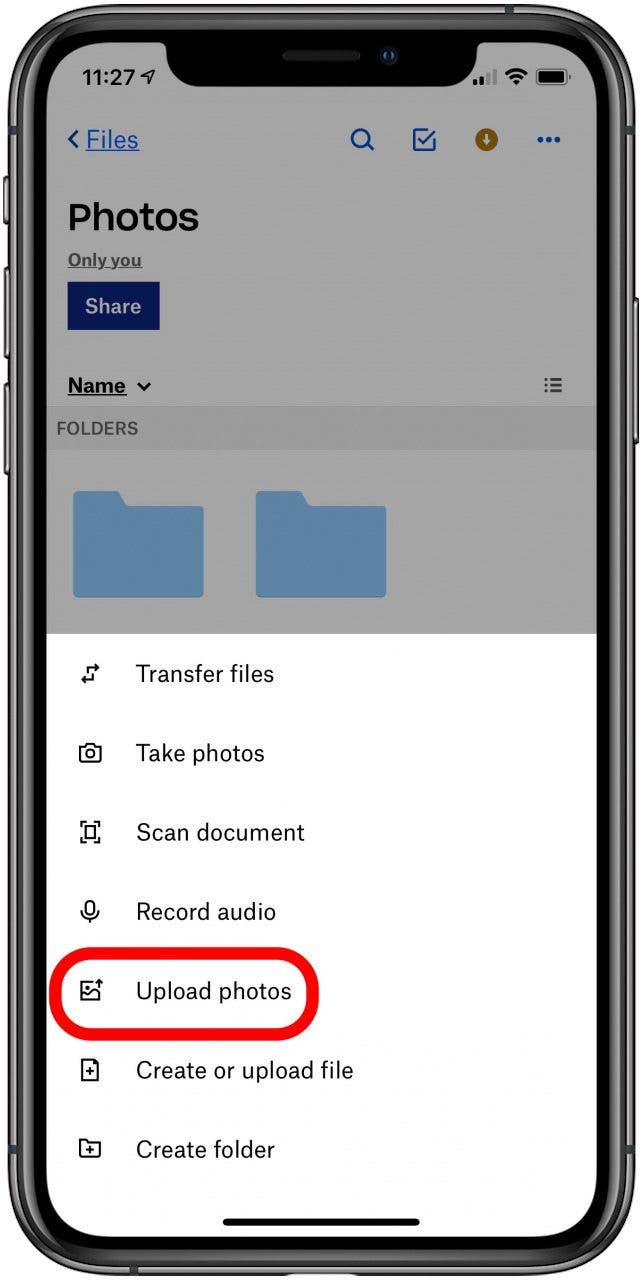
- Tap the photos you would like to upload.
- Tap Next, and choose where you'd like the files to be added.
- On your computer, either download the Dropbox app, or go to the Dropbox website in your preferred browser and log in.
- From there, navigate to the folder where you placed your newly synced photos.
You can download these photos from Dropbox to your computer if desired, or simply leave them to be stored in Dropbox.
Upload Photos to Dropbox from Your iPhone (Automatic Transfer)
- Download the Dropbox iOS app from the App Store on your iPhone. If you don’t already have an account, create one and log in.
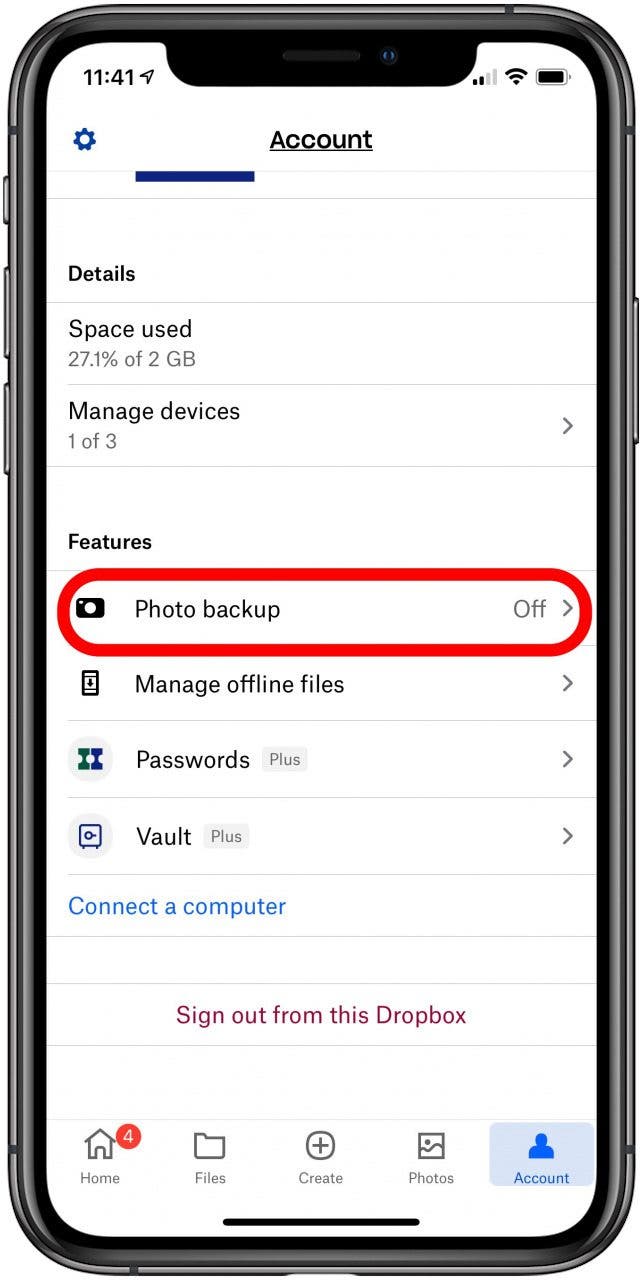
- Tap the Account tab at the bottom of your screen in the Dropbox app.
- Tap Photo Backup.
- Tap Back up to determine which photos to backup to Dropbox.
- Tap Include videos and select On to back up your videos to Dropbox.
- Toggle on Use cell data to back up to sync your photos and videos even when out of Wi-Fi range.
- Tap Back up my photos to save these preferences.

Dropbox offers limited space for free, so that’s something to be aware of if you plan to adopt this method.
How to Download Pictures to Google Photos on an iPhone
Unlike Dropbox, Google Photos gives you unlimited space for all of your pictures, so long as each photo is under 16 megapixels. Here's how to back up your iPhone photos with Google Photos:
- Download the Google Photos app on your iPhone.
- Open the app and log in.
- If it’s your first time using the app, it will ask to access your photos.
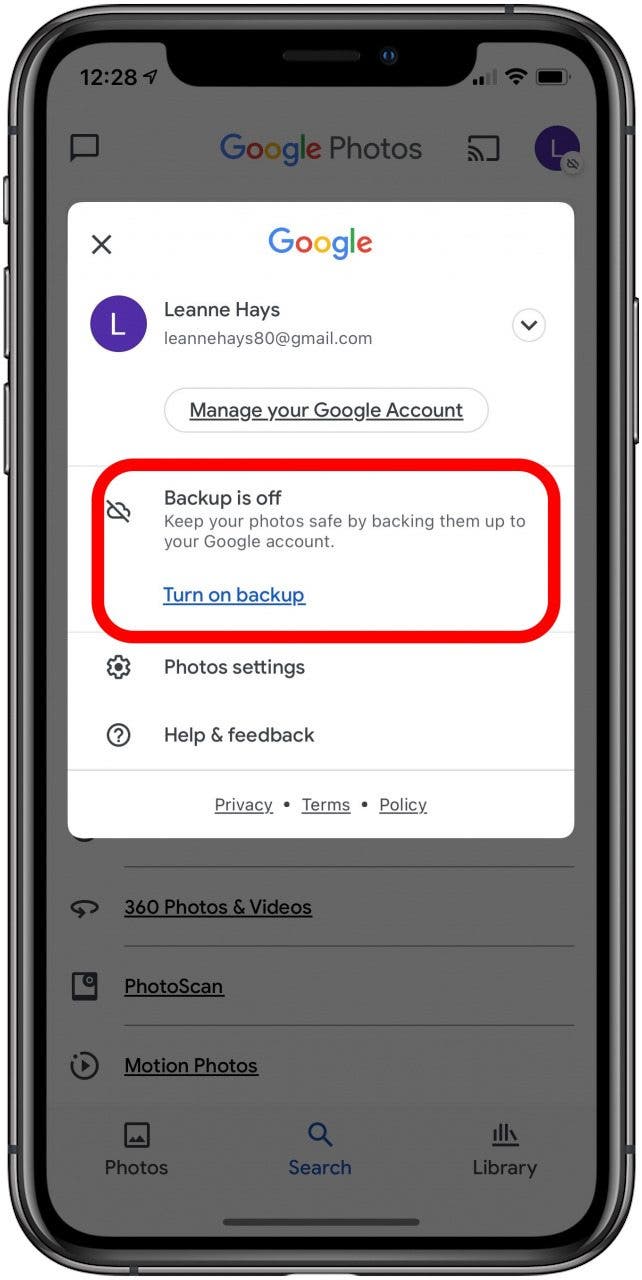
- Tap your profile icon at the upper-right corner of the screen.
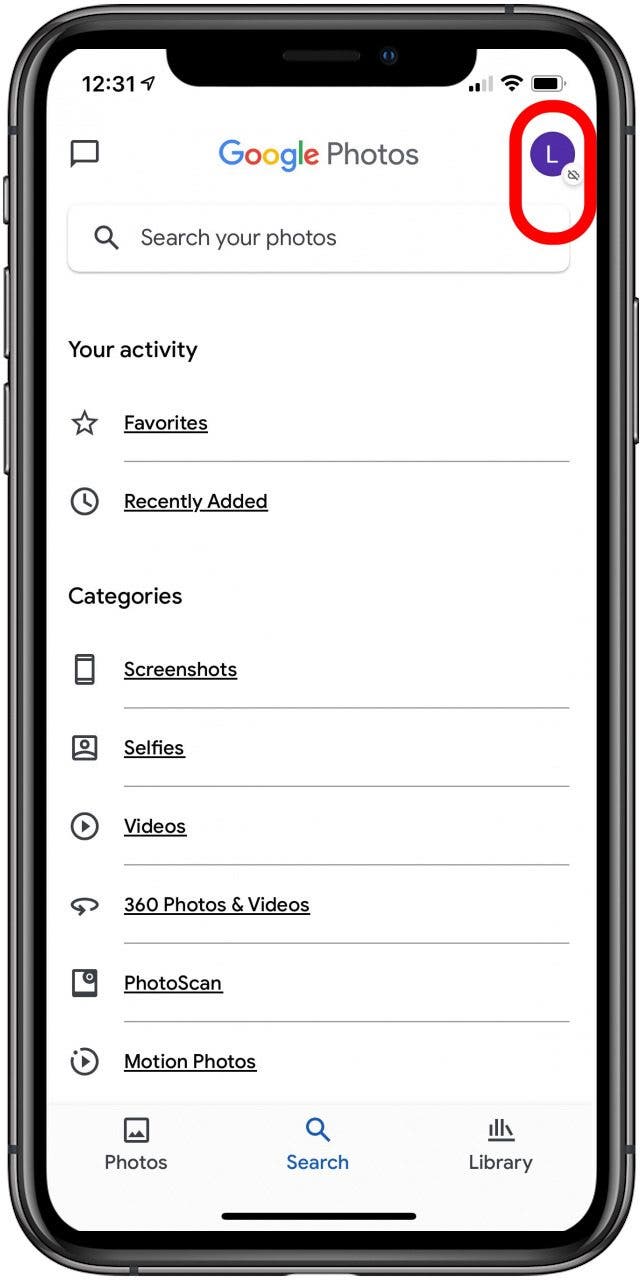
- Tap Turn on backup.
- All of your photos will begin backing up and syncing to Google Photos.
- Once all your photos are synced, you can access Google Photos on your computer and see them sorted by date.
If you want to make sure all the photos you take are available across your devices, this is a great way to go. When you launch the app, all your recent photos will back up as long as you’re connected to Wi-Fi. In your Google Photos settings, you can use cellular data to back up photos too, but unless you have unlimited data, I don’t recommend it since the process happens automatically and can burn through your data pretty quickly.

Conner Carey
Conner Carey's writing can be found at conpoet.com. She is currently writing a book, creating lots of content, and writing poetry via @conpoet on Instagram. She lives in an RV full-time with her mom, Jan and dog, Jodi as they slow-travel around the country.

 Olena Kagui
 Leanne Hays


 Amy Spitzfaden Both

 Susan Misuraca

 Rachel Needell
 David Averbach
 Rhett Intriago