Do you have an idea for an app but lack the programming knowledge to begin building it? In this weekly blog series, I will take you, the non-programmer, step by step through the process of creating apps for the iPhone, iPod touch, and iPad. Join me each week on this adventure and you will experience how much fun turning your ideas into reality can be! This is part 37 of the series. If you are just getting started, check out the beginning of the series here.
My last few posts took a bit of sidetrack as I covered appsworld 2014. In this post, I get back on track and talk about another option for outsourcing your iOS app's web processing, messaging, and data storage—Amazon Web Services (AWS).

Amazon offers a wide variety of services, but in this post I'll be focusing on their AWS Persistence Framework for Core Data that allows you to use Amazon's cloud database as a back end for Apple's Core Data Framework!
The bad part about Amazon Web Services is their documentation. It's seriously out of date. If you follow Amazon's most current documentation for setting up web services for iOS, you will end up frustrated (as I did, writing this post). If I hear back from Amazon about an update to their docs, I'll revise my statements here. Personally, I feel this is a real business problem for Amazon, as they try to lure iOS developers to their platform! That said, I've added enough information in this post that should allow you to get started successfully.
AWS Persistence Framework for Core Data
The AWS Persistence Framework for Core Data is a pretty big deal, because it makes it easy for iOS developers to move to the AWS platform.
Aside from a little bit of extra setup code, you can use the out-of-the-box iOS Core Data objects and entity data model in your apps, just as you normally do with local data. As shown in Figure 1, the persistent store coordinator talks to the AWSDynamoDBIncrementalStore object behind the scenes, which communicates with the AWS DynamoDB database to retrieve and update your app's entities.
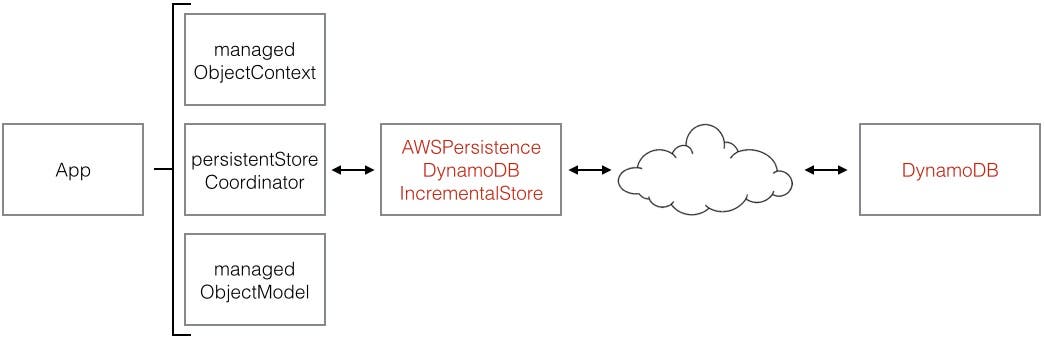 |
| Figure 1 - AWS Persistence Framework lets you use the out-of-the-box Core Data objects. |
DynamoDB is Amazon's NoSQL database service that provides fast data access (it runs on solid state hard drives) that scales as the number of app users increases. We'll take a closer look at how these objects work together later in this post. To find out more about Amazon DynamoDB, check out this link.
Signing Up for a Free Amazon Web Services Account
Amazon offers a Free Usage Tier, which allows you to get some hands-on experience with AWS. To find out all of the services offered by Amazon, as well as everything you can do for free, check out this link.
However, before you can get access to any of the free AWS services, you need to create a free account. To do this, navigate to this web page for mobile apps. Near the top of the page you will find a Get Started for Free button (Figure 2).
 |
| Figure 2 - You can create a free account for your mobile apps on AWS. |
When you click this button, you are prompted to either use an existing Amazon.com account or create a new account. You are required to enter credit card information even if you only plan to use the free services. After entering your credit card information, you are prompted to enter a phone number at which you can be reached. After entering your phone number, a four digit code is displayed in your browser. You will receive a phone call from Amazon, asking you to enter the four-digit code in order to continue the signup process.
Next, a Support Plan web page is displayed (Figure 3) that allows you to select the support plan for your AWS services. The first one in the list is the Basic, or Free support.
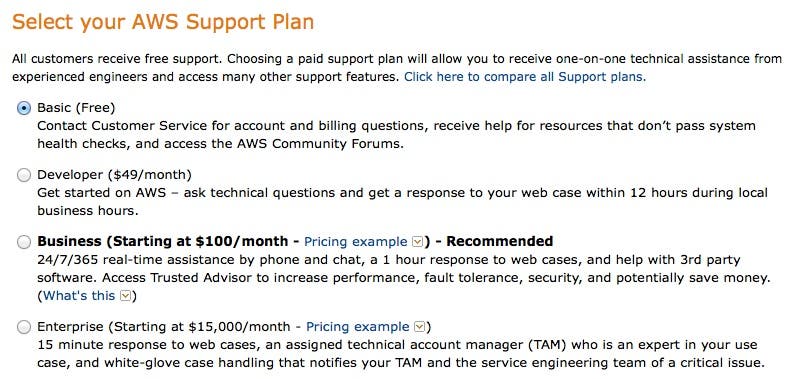 |
| Figure 3 - The Amazon Web Services support plans |
When you finish signing up, navigate to the AWS Account Console (Figure 4) and see a list of the services that are available to you.
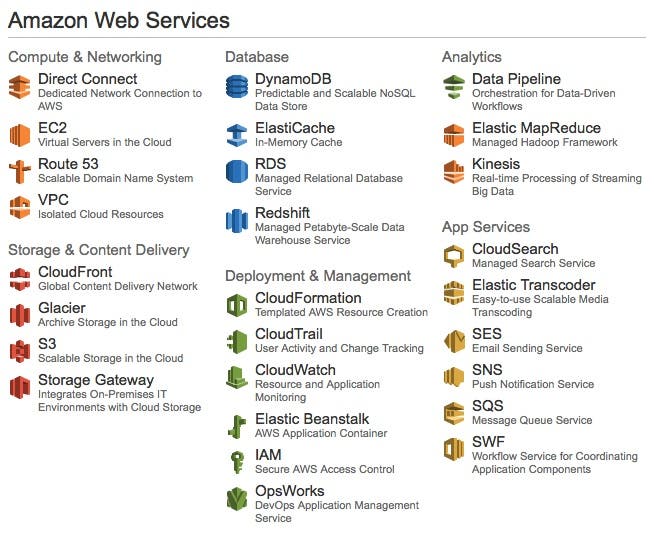 |
| Figure 4 - Amazon Web Services console |
Downloading the AWS SDK for iOS
So how do you integrate Amazon Web Services with your iOS app? The Amazon Web Services SDK for iOS, provides a set of frameworks you can add to your iOS project so that you can access Amazon's services from your apps. To download the AWS SDK for iOS, go to this link, which takes you to the web page shown in Figure 5.
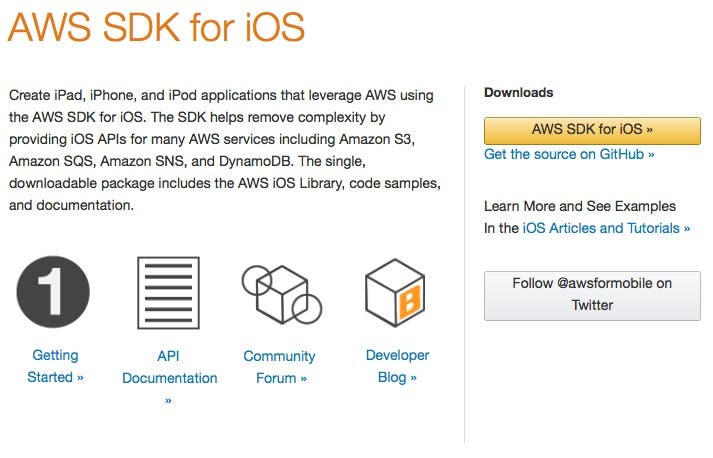 |
| Figure 5 - Amazon Web Services SDK for iOS |
Click the AWS SDK for iOS button, which downloads the aws-ios-sdk-1.7.1.zip file to your Downloads folder.
Downloading the AWS SDK iOS Samples
Amazon provides several samples that demonstrate how to access a variety of AWS technologies from your iOS apps. For example, if you want to see a project similar to the Google App Engine iOS sample app, you should check out the SNS_SQS_MessageBoard sample. In this post, I'm going to focus on the AWSPersistence_Locations2 sample app because it demonstrates how to use the AWS Persistence Framework for Core Data.
If you want to follow along with the step-by-step instructions in the following sections, you need to download these samples from GitHub at this link.
Understanding Token Vending Machines
If your app makes calls to Amazon Web Services, everyone who uses your app must have credentials for accessing AWS. There are a variety of techniques for accomplishing this, the worst option being embedding your own personal Amazon credentials in your app. This has "hack me" written all over it.
Fortunately, Amazon has an option called a Token Vending Machine (TVM) that allows your app to obtain anonymous, temporary credentials for your users behind the scenes. In fact, in order to run the Core Data sample app, you must first set up a Token Vending Machine as described in the following steps.
Step 1: Download the Token Vending Machine Sample App
Navigate to this link and click the Download button towards the top of the page. This downloads a zip file to your computer which expands to create an AnonymousTVM subfolder in your Downloads folder.
This is Amazon's Token Vending Machine sample application, which you will install on the AWS cloud servers in just a bit.
Step 2: Create a New User for the Token Vending Machine
Next, you need to add a new user to your AWS account that will be used solely for the Token Vending Machine. Everyone running your app will use this dedicated TVM user, but will retrieve different anonymous credentials for this dedicated user. This allows you to control the permissions and rights of all users in one place.
Follow these steps to add a new user for the Token Vending Machine:
- Navigate to this link and sign in if asked to do so.
- On the left side of the page (Figure 6), select Users, and then at the top of the page, click the Create New Users button.
 |
| Figure 6 - Select Users on the left, and then click the Create New Users button. |
- In the Create User dialog box under Enter User Names, enter the name of the user you want to create (Figure 7). I recommend something descriptive, such as TVMUser.
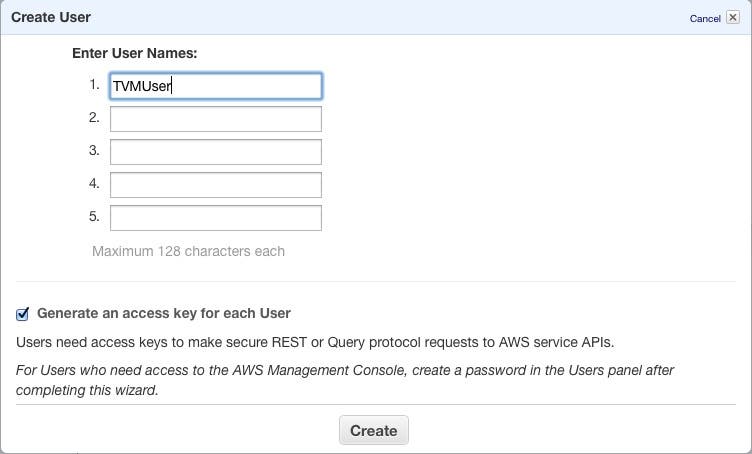 |
| Figure 7 - Creating the TVMUser |
- Make sure the Generate an access key for each User option is selected, and then click Create.
- In the dialog that appears next (Figure 8), click the Download Credentials button to download the user credentials to your computer.
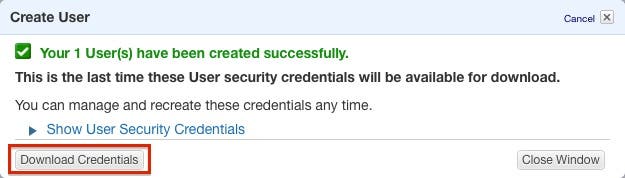 |
| Figure 8 - Downloading the user security credentials |
- After the credentials have downloaded, click Close Window, and you should see the new user in the User Console.
- Click the check box to the left of the new user, click the Permissions tab, and then click the Attach User Policy button (Figure 9).
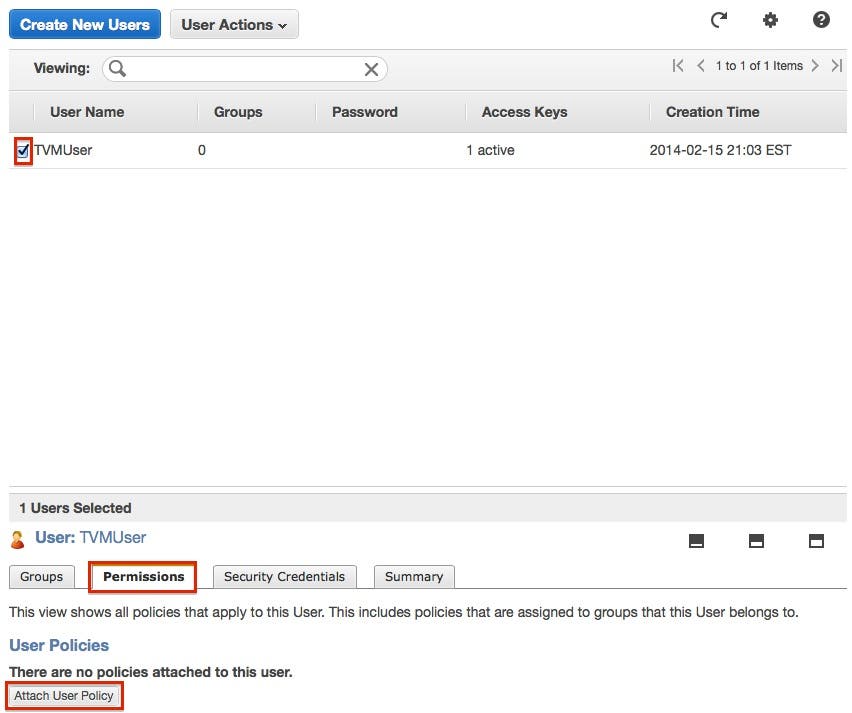 |
| Figure 9 - Attaching the user policy |
- In the Manage User Permissions dialog box, click Custom Policy, and then click the Select button (Figure 10).
 |
| Figure 10 - Setting a custom policy |
- In the Set Permissions dialog box, set the Policy Name to something descriptive, such as TVMPolicy (Figure 11).
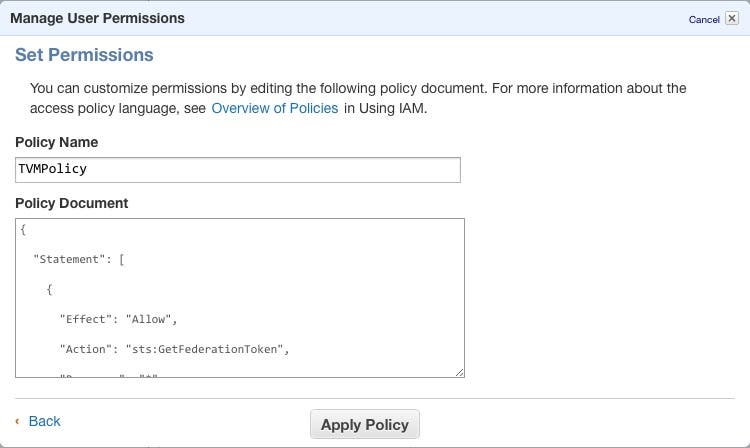 |
| Figure 11 - Setting user permissions |
- Next, copy the following policy statement and paste it into the Policy Document box:
{

  "Statement": [

    {

      "Effect": "Allow",

      "Action": "sts:GetFederationToken",

      "Resource": "*"

    },

    {

      "Effect": "Allow",

      "Action": "iam:GetUser",

      "Resource": "*"

    },

    {

      "Effect": "Allow",

      "Action": "sdb:*",

      "Resource": "*"

    },

    {

      "Effect":"Allow",

      "Action":"dynamodb:*",

      "Resource":"*"

    },

    {

      "Effect": "Allow",

      "Action": "sqs:*",

      "Resource": "*"

    },

    {

      "Effect": "Allow",

      "Action": "s3:*",

      "Resource": "*"

    },

    {

      "Action": "sns:*",

      "Effect": "Allow",

      "Resource": "*"

    }

  ]

}
- Click the Apply Policy button.
Step 3: Install the Token Vending Machine Using AWS Elastic Beanstalk
Now you're ready to install the Token Vending Machine web application. To do this, you're going to use a tool called AWS Elastic Beanstalk that Amazon provides to deploy and manage applications in the AWS cloud.
- Navigate to the Elastic Beanstalk Application page.
- At the top of the page, click the Create New Application link (Figure 12).
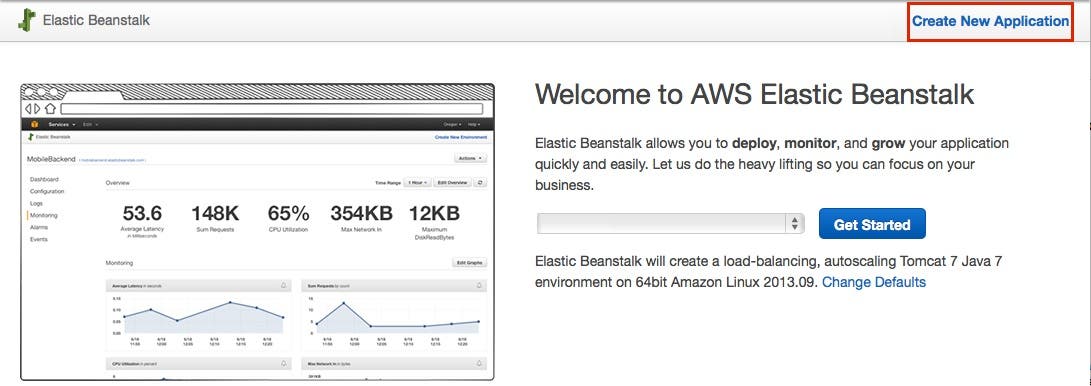 |
| Figure 12 - Creating a new application with AWS Elastic Beanstalk |
- In the Application Information page, enter an Application name (for example, Anonymous TVM) and optionally, a Description (Figure 13), and then click the Create button.
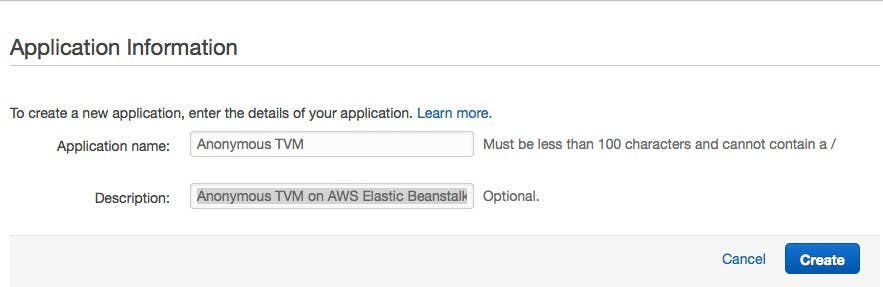 |
| Figure 13 - Specify the Application name and optionally, a Description. |
- In the Environment Type page (Figure 14), set Environment Tier to Web Server, Predefined Configuration to Tomcat, and Environment Type to Load balancing, autoscaling and then click the Continue button.
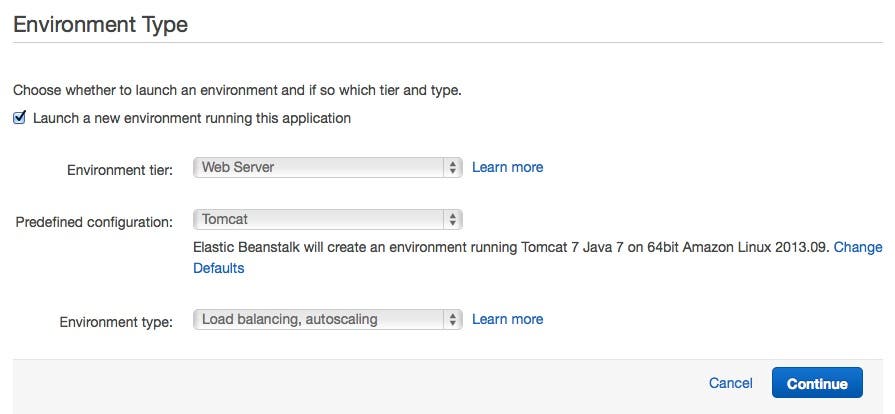 |
| Figure 14 - Setting up the Environment Type |
- In the Application Version page (Figure 15), select Upload your own, and then click the Choose File button.
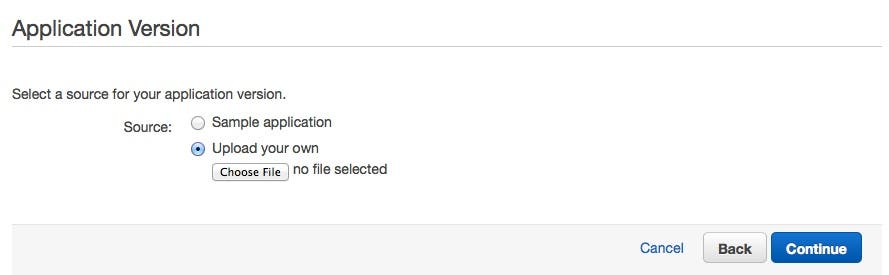 |
| Figure 15 - Selecting a source for your application |
- Navigate to your Mac's Downloads folder, expand the Anonymous TVM folder, select the AnonymousTVM.war file, and then click Choose. Afterwards, click the Continue button. You will see an activity indicator appear (rotating circular arrows) for a few minutes.
The WAR file extension stands for (Web application ARchive) and is JAR (Java ARchive) file that is used to distribute a collection of files that comprise a Java web application.
- In the Environment Information page (Figure 16), enter an Environment name. Note that this has to be unique. I recommend placing your company's web address as a prefix to ensure uniqueness. This automatically sets the Environment URL value, and you can optionally enter a Description. You can click the Check availability button to make sure your URL is unique. Afterward, click Continue.
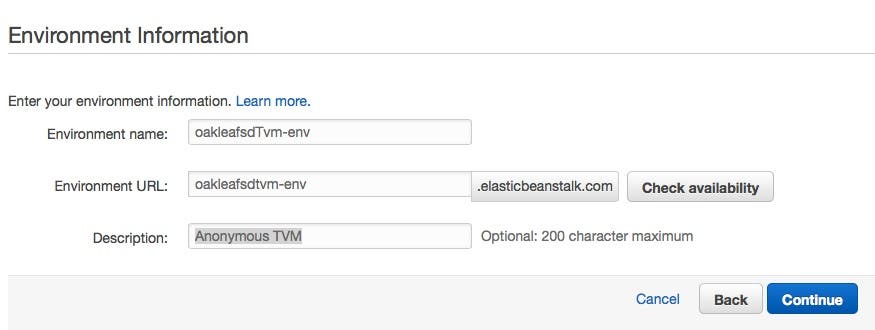 |
| Figure 16 - Specifying the environment information |
- In the Additional Resources page (Figure 17), leave both check boxes blank, and then click the Continue button.
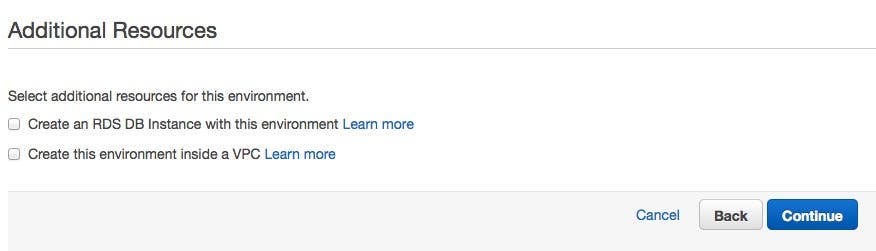 |
| Figure 17 - Specifying additional resources |
- In the Configuration Details page (Figure 18), set the Instance type to t1.micro. You can optionally enter an Email address to be notified about any major changes to your environment. Leave the other boxes with their default values and click Continue.
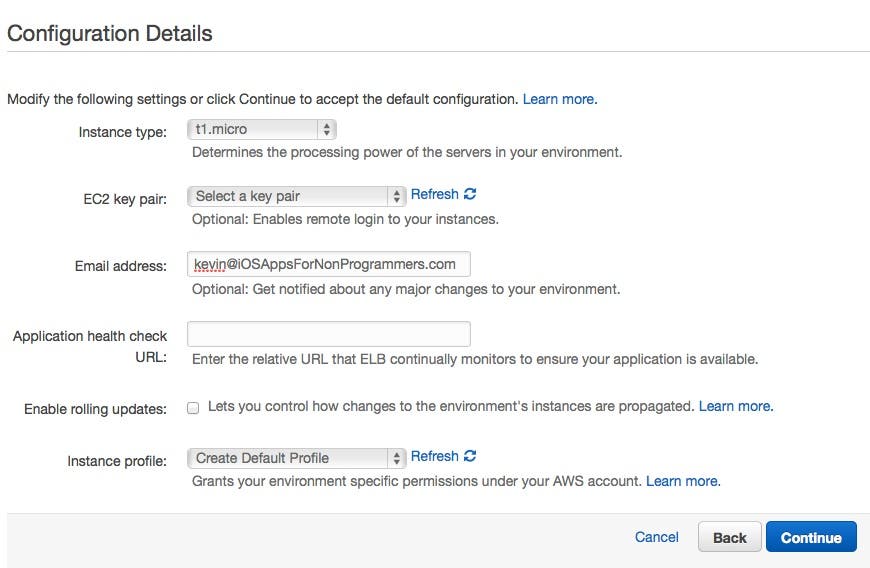 |
| Figure 18 - Specifying configuration details |
- A Review page now displays showing you all of your selections. Click the Create button. After several minutes, you will see a green circle containing a white check mark indicating the installation was successful (Figure 19).
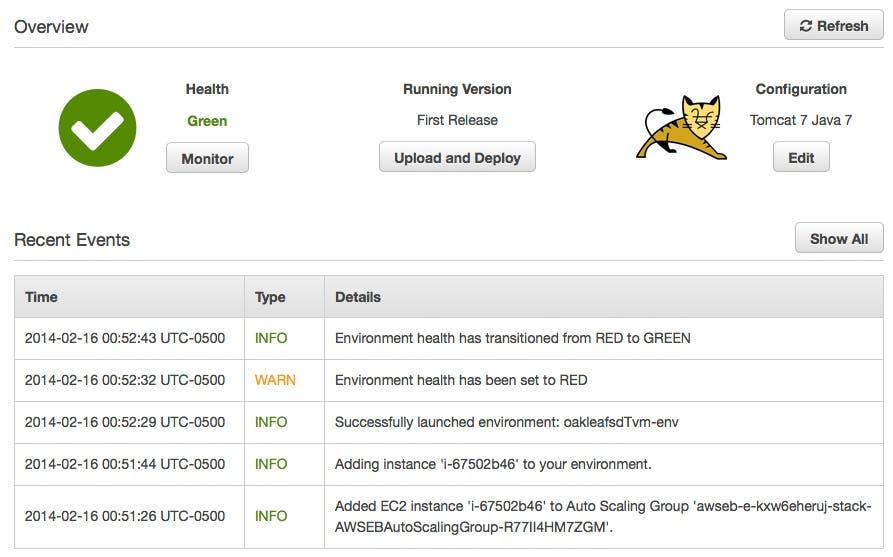 |
| Figure 19 - The installation of the Token Vending Machine web app is completed. |
Your Token Vending Machine sample applications is now running on the AWS cloud!
Step 4: Configure the Token Vending Machine
Now you need to associate the access key and secret key of the TVM user you created earlier with the newly installed TVM application.
- Go to the Elastic Beanstalk page and click on your Anonymous TVM application.
- On the left side of the Anonymous TVM web page (Figure 20), select Configuration, and then in the header of the Software Configuration box, click the gear.
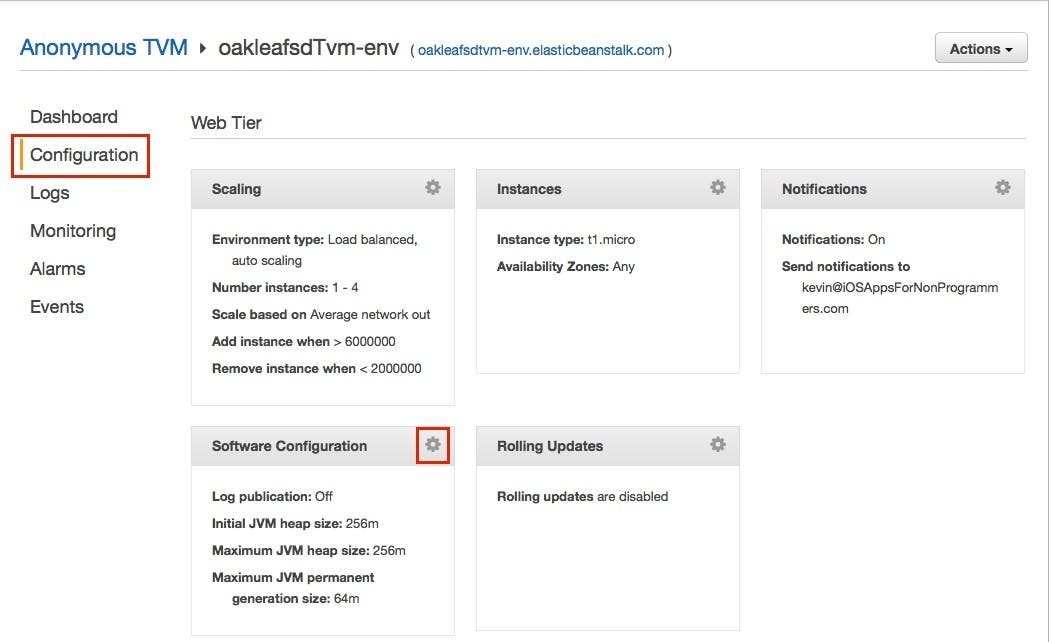 |
| Figure 20 - Configuring the Token Vending Machine |
- Scroll down to the Environment Properties section (Figure 21) and set the AWS_ACCESS_KEY_ID and AWS_SECRET_KEY properties to the values that were generated for the user you created in Step 2: Create a New User for the TVM. Remember, you downloaded these credentials to a file named rootkey.csv.txt.
|
| Figure 21 - Specify the access key and secret key of the Token Vending user |
- After entering the credentials, click Save.
Step 5: Running the Sample App
Now that the Token Vending Machine web app is up and running, you're ready to run the iOS sample app. You can either run it in the Simulator or on an actual iOS device.
- Open the Locations2.xcodeproj file in Xcode, which can be found in the AWSPersistence_Locations2 subfolder of the aws-sdk-ios-samples-master folder which you downloaded earlier in this post.
- In Xcode's Project Navigator, expand the Classes group and click on the Constants.h file to select it. Change the TOKEN_VENDING_MACHINE_URL to the url of the Token Vending Machine application you installed in the section Step 3: Install the Token Vending Machine Using AWS Elastic Beanstalk.
- Now you need to add the AWS SDK for iOS Frameworks to the sample project. To do this, in the Project Navigator, right-click the Frameworks group and in the shortcut menu, select Add Files to Locations2. Navigate to the location where you downloaded and expanded the AWS SDK for iOS, select the following frameworks, and then click Add:
- AWSRuntime.framework
- AWSDynamoDB.framework
- AWSPersistence.framework
- Now you're ready to run the app. Click Xcode's Run button, and when the app appears in the Simulator you should see the empty table view shown in Figure 22.
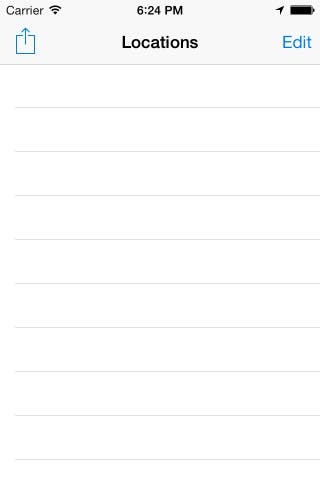 |
| Figure 22 - The Locations2 app at run time |
- To add a new location to the list, click the action button on the left side of the navigation bar. This displays the options shown in Figure 23.
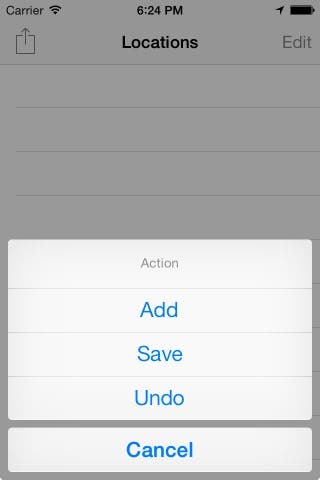 |
| Figure 23 - Location options |
- Click the Add option, then in the New Location dialog (Figure 23), enter Apple Headquarters (this is the default location in the Simulator), or if you are running it on an iOS device, enter a description of your current location and then click Done.
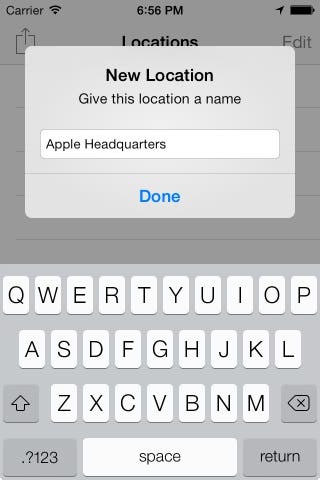 |
| Figure 24 - Add a new location. |
This displays the newly saved item in the Locations list (Figure 25). Note that this only adds the new location locally on the Simulator or iOS device! You need to take an additional step to save it to the DyanmoDB database hosted on AWS.
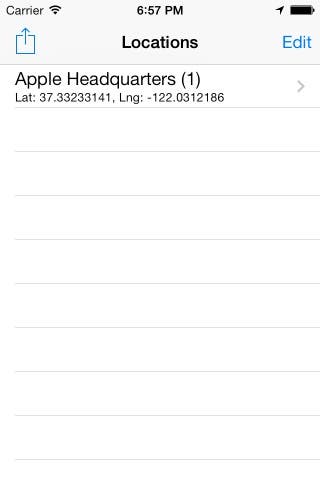 |
| Figure 25 - The new location is saved locally. |
- To save the new Location to the DynamoDB database hosted on Amazon Web Services, click the action button again, and this time select Save from the list of options. This displays the SUCCESS message shown in Figure 26.
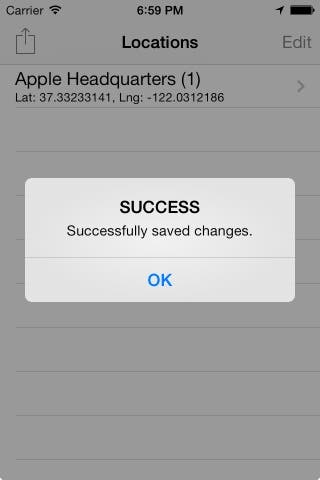 |
| Figure 26 - The new location is saved remotely. |
- To see a list of Check Ins associated with the location, click the location in the list and the app will navigate to the the list of Check Ins (Figure 27).
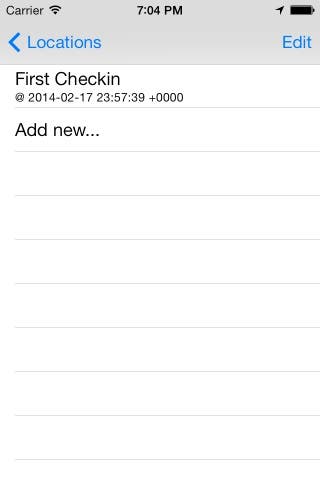 |
| Figure 27 - The list of Check Ins |
- To add another Check In for the current location, click the Add new... row in the table view. In the CheckIn Comment popup (Figure 28), enter a comment, and then click Done, which adds the new Check In to the list.
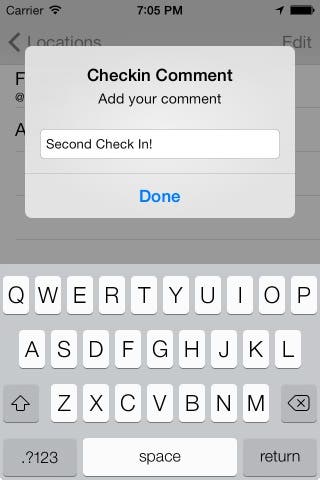 |
| Figure 28 - Add a new check in |
- You can edit the list of Check Ins or the list of Locations by clicking the Edit button on either screen. This puts the corresponding list in edit mode, which allows you to delete items in the list (Figure 29).
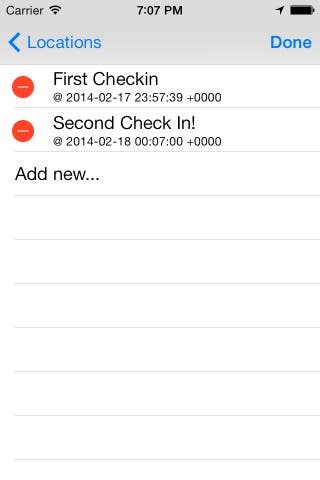 |
| Figure 29 - Editing the list of Check Ins |
Taking a Closer Look at the Locations2 Sample Project
- In Xcode's Project Navigator, expand the Resources group and click on the Model.xcdatamodeld file to display it in the design surface. As you can see in Figure 30, there is a Location entity and Checkin entity. As you might expect, there is a To-Many relationship from the Location to the Checkin entity. This is standard, Core Data technology.
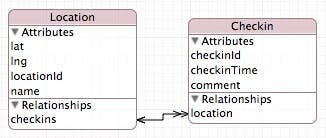 |
| Figure 30 - The entity data model |
- Next, notice the Location and Checkin class files in the Resource group that have been generated from the entities on the data model. Select the header file for each of these and notice that there are no scalar-value properties. It's a restriction of the AWS Persistence Framework for Core Data that entity properties cannot be scalar values.
- In the Project Navigator, click on the AppDelegate.h file and you can see the managedObjectModel, managedObjectContext, and persistentStoreCoordinator properties that are familiar in projects that use Core Data (Figure 31).
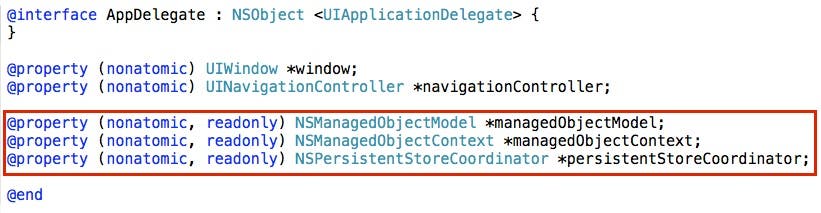 |
| Figure 31 - The standard Core Data properties |
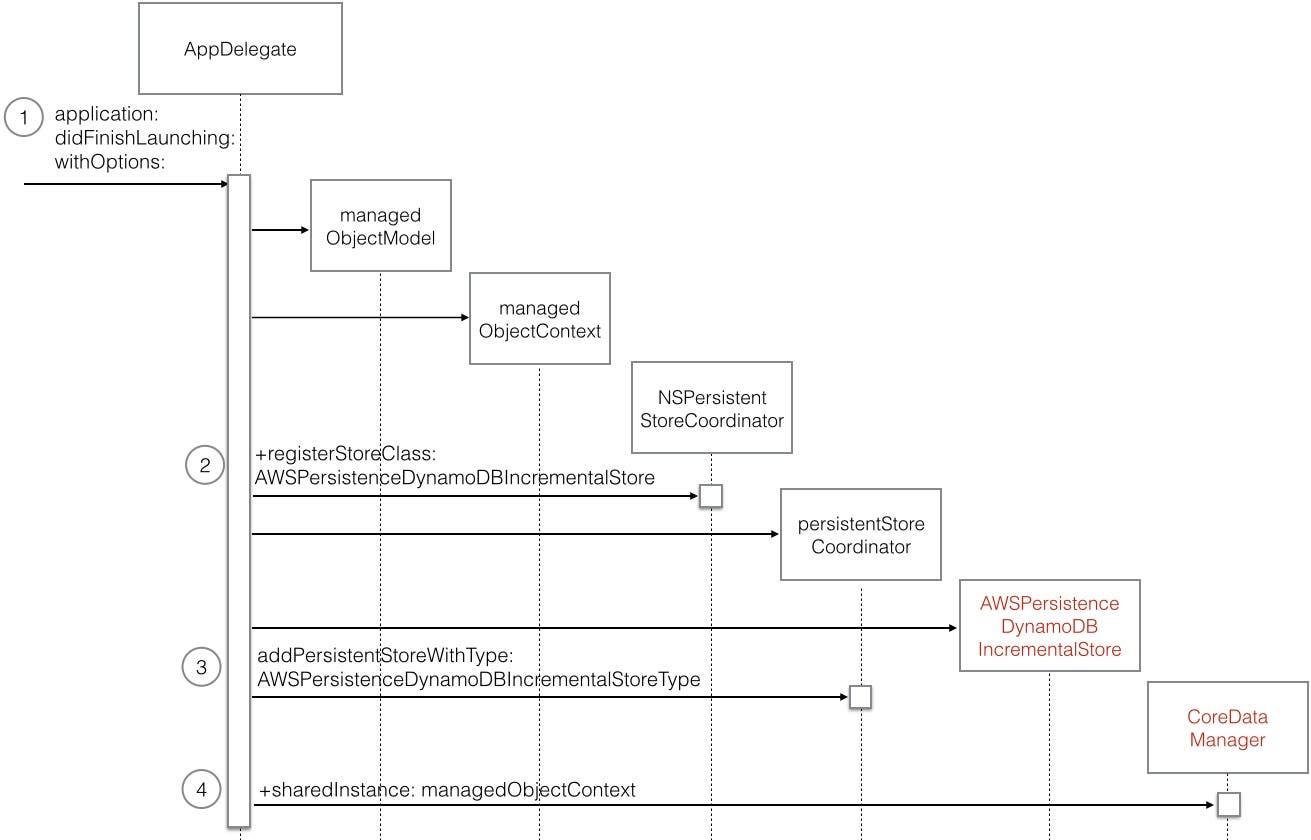
- To see what happens when the app first starts up, in the Project Navigator, select the AppDelegate.m file, and check out the application:didFinishLaunching:withOptions: method, which executes after the app has been initialized, but before the first screen appears. Figure 32 contains a sequence diagram that provides an overview of the creation and setup of the Core Data-related objects that occurs in this method.
 |
| Figure 32 - Startup sequence diagram |
As you can see in the sequence diagram, the usual Core Data objects are created, but notice in step 2, a registerStoreClass message is sent to the NSPersistentStoreCoordinator class, passing AWSPersistenceDynamoDBIncrementalStore as the class to be registered. Then in step 3, an addPersistentStoreWithType: message is sent to the persistentStoreCoordinator object. These two message calls tell Core Data to use the AWS DynamoDB as the data store rather than a local SQLite database.
Notice in step 4 of the sequence diagram, that a reference to the managedObjectContext is stored on the CoreDataManager. Let's take a closer look at this class.
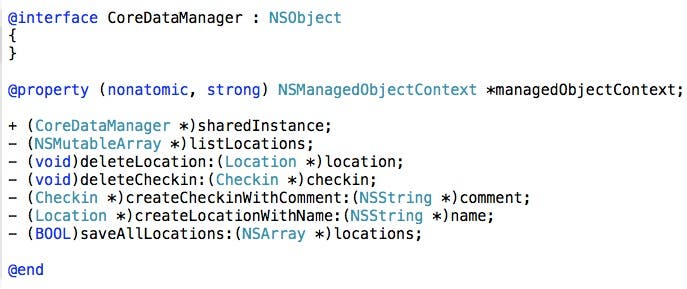
- In the Project Navigator under the Classes group, select the CoreDataManager.h file and you will see the property and method declarations shown in Figure 33.
 |
| Figure 33 - The CoreDataManager header file |
As you can see, the CoreDataManager possesses a reference to the object context and has various methods that allow you to retrieve, create, delete, and save Location and Checkin entity objects.
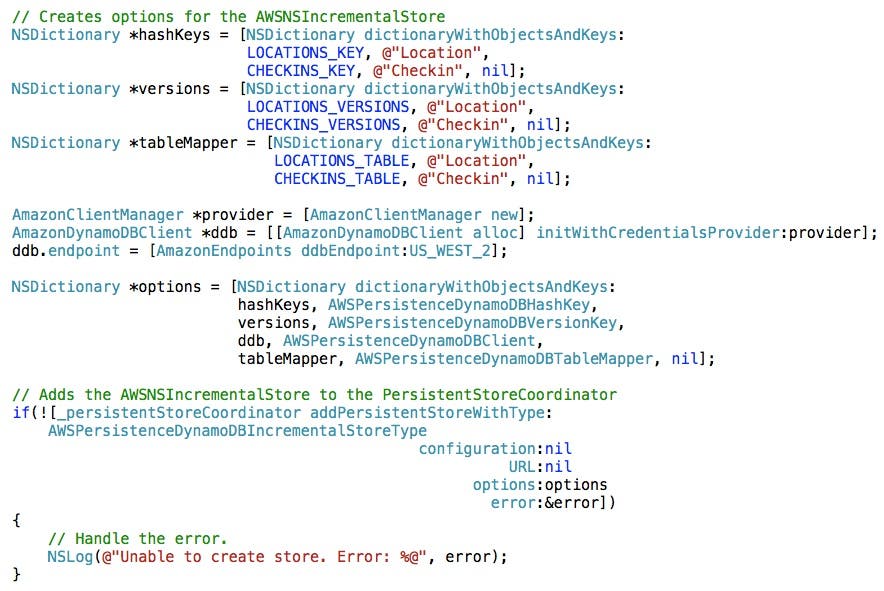
- There's one other important part of the setup code that you should take a look at. In the Project Navigator, select the AppDelegate.m file and scroll down to the persistentStoreCoordinator method shown in Figure 34.
 |
| Figure 34 - The Persistent Store Coordinator setup code |
This code tells the AWS Persistence Framework for Core Data the mappings between your entities and the tables in the database. For more information, check out Amazon's documentation at this link.
- Now let's check out the app's main view controller to see what happens when the first view appears. In the Project Navigator, select the RootViewController.m file. In the bottom half of the viewDidLoad method, you will see the code shown in Figure 35.
 |
| Figure 35 - AWS Persistence Framework for Core Data setup code |
Notice the references to dispatch_queue_t, dispatch_async, and so on. This is a bit more advanced Objective-C programming that enlists the use of dispatch queues to execute requests asynchronously. It's beyond the scope of this post to detail the intricacies of this code, but you can learn more about dispatch queues at this link.
- Check out the line of code where a setupTables message is sent to the Utilities class. This is the place where your AWS DynamoDB tables get created if they don't already exist. For more information on how this works, check out the setupTables method of the Utilities.m class as well as Amazon's documentation at this link.
Check out the view controller's loadFromCD method to see how entities are retrieved from the back end. Check out the saveAll method to see how entities are saved, and the undo method to see how to undo changes to entities.
Limitations of the AWS Persistence Framework for Core Data
There are a number of limitations you should be aware of when deciding whether or not to use the AWS Persistence Framework for Core Data. A few of these are:
- It doesn't support versions of iOS prior to 5.0.
- Scalar values for entity properties are not supported.
- Save operations are not guaranteed to be transactional.
For a complete list of limitations, check out the Limitations section of Amazon's documentation found at this link.
Conclusion
Amazon makes it tempting for iOS developers to jump on the AWS bandwagon by making it relatively easy to transition to cloud-based data storage. Despite the limitations of AWS Persistence Framework for Core Data, you will find that many iOS apps can still take advantage of this technology. That said, if this technology doesn't suit your needs, you can always opt to access Amazon's DynamoDB directly (rather than through Core Data) by means of the DynamoDB API. For more information on this option, check out Amazon's documentation at this link.