Do you have an idea for an app but lack the programming knowledge to begin building it? In this weekly blog series, I will take you, the non-programmer, step by step through the process of creating apps for the iPhone, iPod touch, and iPad. Join me each week on this adventure and you will experience how much fun turning your ideas into reality can be! This is part 36 of the series. If you are just getting started, check out the beginning of the series here.
In my previous post, I provided an overview of using Google App Engine to scale your iOS apps, and demonstrated how to get Google's iOS sample app running on an iOS device so that you can check it out.

In this post, I'm going to take a closer look at the technologies of Google's App Engine and provide insight on how the sample app works so that you can get a better grasp of what it takes to implement Google App Engine for your iOS app's backend.
Examining Google's iOS Sample App
There is a lot we can learn by taking a closer look at Google's iOS sample app. In fact, the structure of the sample app give you a picture of the different files you need to add to your project in order to integrate with Google App Engine.
If you don't have the sample app on your computer, check out my previous post for instructions on downloading it.
- Open the CloudBackendiOSClient project in Xcode. In the Project Navigator, the art group contains a number of PNG files that are used throughout the app.
- In the Project Navigator, drill down into the CloudBackendiOSClient > sample > support group (Figure 1).
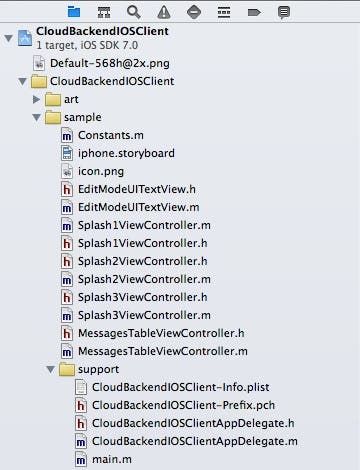 |
| Figure 1 - The sample and support groups |
The sample group and its support subgroup contain standard iOS app files that are familiar to all iOS projects, including a storyboard, view controllers, and other resources.
- The api group (Figure 2) contains classes that are specific to the backend you have created (or in the case of the Google sample app, the sample backend that Google created) as well as some standard Google classes. For example, the CloudEntity class represents any individual message that has been posted to the message board.
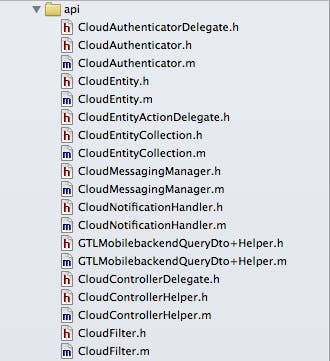 |
| Figure 2 - The api group |
- The gtl group (Figure 3) contains generic classes created by Google that you need in your project in order to integrate with Google App Engine. I describe how to add these code files to your project later on in this post.
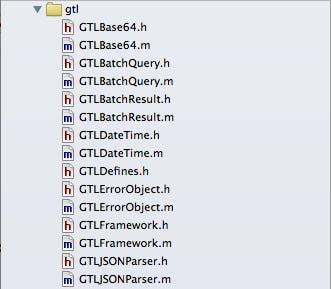 |
| Figure 3 - The gtl group |
- The endpoint group (Figure 4) contains code files that are generated by Google's ServiceGenerator app. I describe how to use this app later on in this post.
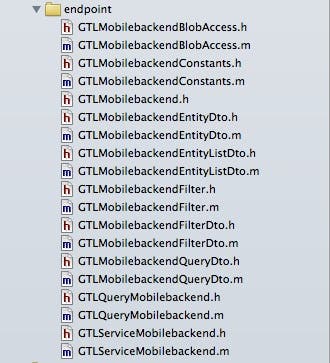 |
| Figure 4 - The endpoint group |
Now that you have a basic idea of what the purpose of the code files in each group are, let's take a closer look at some of the more important classes.
Taking a Closer Look at MessagesTableViewController
The main scene in Google's sample app is the Guestbook scene shown in Figure 5.
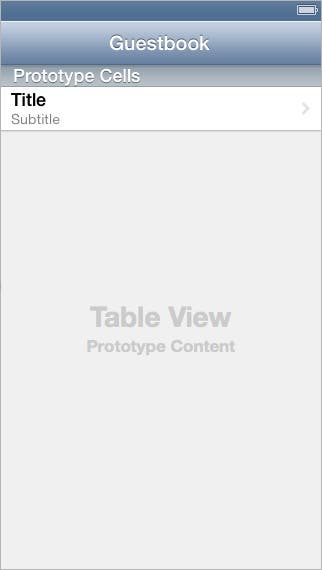 |
| Figure 5 - The Guestbook scene |
The view controller associated with this scene is MessagesTableViewController. Let's take a closer look at this view controller to help us understand how the sample app works with Google App Engine.
In the Project Navigator under the sample group, click the MessageTableViewController.h file to examine it in the Code Editor. As shown in Figure 6, you can see that, in addition to the standard UITextViewDelegate protocol, the class also implements these Objective-C protocols:
- CloudEntityActionDelegate
- CloudControllerDelegate
 |
| Figure 6 - MessagesTableViewController protocols |
Let's take a closer look at these delegates to discover their purpose.
CloudEntityActionDelegate - Responding to Backend Actions
In the Project Navigator, under the api group, select the CloudEntityActionDelegate.h file. At the very top of the code file, the comments tell us that this protocol:
"Defines a range of action methods that will be called when a cloud entity or a cloud collection is being created, updated, or deleted at the cloud backend."
Because of the web's latency (in this situation, the time difference between when you send a request to the backend and when you receive a response), you need to implement a delegate that contains methods that can be called when an action has been completed on the web. That's what CloudEntityActionDelegate is all about.
If you look further down in the CloudEntityActionDelegate.h file, you will see a variety of methods that you can implement in your table view controller that are called when specific actions have been completed in the backend (I'll exclude the method parameters for the sake of brevity):
- removeCompletedWithObject - Invoked when a cloud entity is deleted
- fetchCompletedWithObject - Invoked when a cloud entity is fetched
- insertCompletedWithObject - Invoked when a cloud entity is inserted
- putCompletedWithObject - Invoked when a cloud entity is updated
- listCollectionCompletedWithArray - Invoked after listing a collection of cloud entities
- insertCollectionCompletedWithArray - Invoked after inserting a collection of cloud entities
- removeCollectionCompletedWithArray - Invoked after removing a collection of cloud entities
- putCollectionCompletedActionWithArray - Invoked after updating a collection of cloud entities
- fetchCollectionCompletedActionWithArray - Invoked after getting a collection of cloud entities successfully.
Since all of these methods are marked as @optional in the protocol declaration, you can implement zero, one, or more methods in your table view controller on an as needed basis.
Understanding the CloudControllerDelegate Protocol
Now let's examine the other Google protocol implemented by the view controller. Go back to the Project Navigator and in the api group, select the CloudControllerDelegate.h file. This protocol contains several mandatory methods and one optional method (the last one in the list):
- signInWithCloudControllerHelper - Client class must define how to handler user sign in
- signOutWithCloudControllerHelper - Client class must define how to handle user sign out
- handleDeviceTokenNotification - Handles notifications received by the app
- presentingViewController - Contains a reference to the view controller where the authentication login dialog can be presented
- showAlertWithTitle - Displays a standard alert-style popup for the current view.
- onReceiveBroadcastMessage - Optional implementation if client wishes to handle broadcast messages directly
Notice that a few of the methods in the CloudControllerDelegate protocol accept an argument of type CloudControllerHelper. This is another important class that we should take a look at.
Understanding the CloudControllerDelegate
In the Project Navigator, select the CloudControllerHelper.h file. Near the top of the header file comments tell us that this class:
Provides built-in user authentication, push notification registration, and broadcasting functionality in a UIViewController. Any application client that desires these functionalities can instantiate this class and implement the CloudControllerDelegate protocol.
This class declares two properties:
- appDelegate - Contains a reference to the application
- cloudEndpointService - Contains a reference to the mobile backend service
This class also declares the following methods:
- startCommonServices - Starts common services for the application (i.e. Authentication service, Cloud endpoint service, APNS)
- initWithClientID - init method that initializes values needed for the class.
- listCollectionWithKind - List collection of data with the provided kind
- signIn - Allows client to sign in
- signOut - Allows client so sign out
Understanding the Startup Sequence of Events
Now that you have a basic familiarity with some of the main classes in Google's sample iOS project, let's take a look at how they work together when the app is first starting up.
Figure 7 contains a Unified Modeling Language (UML) sequence diagram that shows how messages are passed between objects at startup. This diagram doesn't show every object involved, but simply shows the more important objects in the startup process.
If you are unfamiliar with sequence diagrams, here are the key points:
- The rectangular objects across the top of the diagram represent objects at run time
- The dotted lines below each object represent the object's lifetime
- Arrows between lifelines indicate messages being passed between objects, with the arrow indicating the direction of the message.
- The text above each arrow indicates the name of the method being called on another object.
- Arrows pointing back to the same lifeline are message calls an object makes on itself.
- When an arrow is pointing to the side of an object it indicates the object is being created.
- The numbers in circles are not part of the UML. I have added these to help explain each part of the diagram to you.
Sequence diagrams are an incredibly powerful tool for quickly understanding how a set of objects works at run time. It would be great if Apple included sequence diagrams and other UML diagrams in an upcoming version of Xcode! For that matter, it would be nice if Google supplied sequence diagrams for Google App Engine! But I digress.
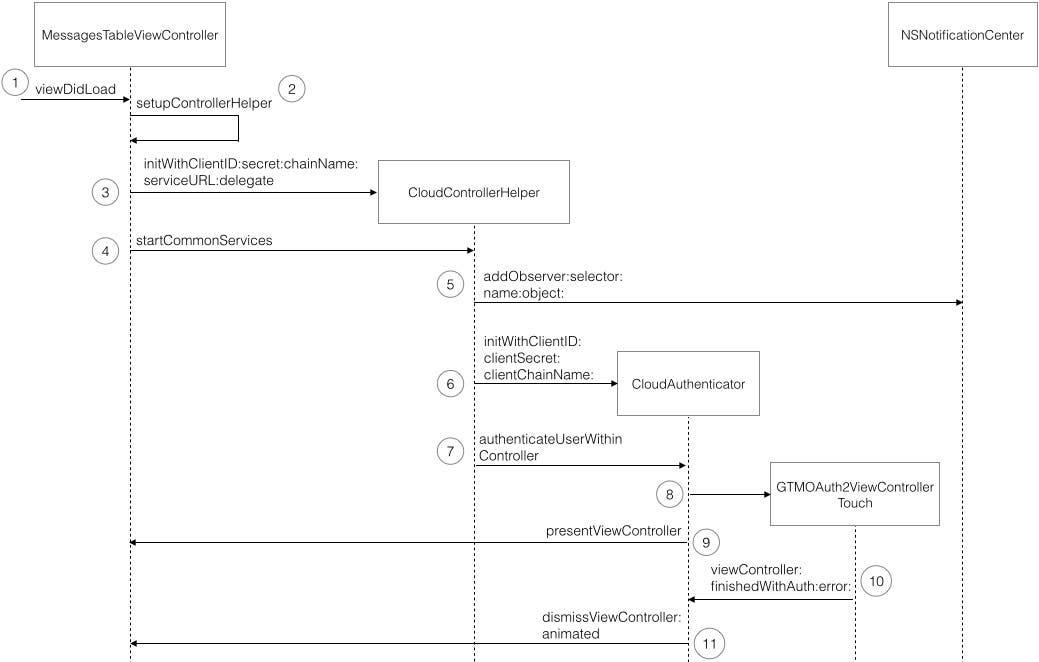 |
| Figure 7 - A sequence diagram that demonstrates how objects interact at startup. |
Here is a more thorough explanation of each message call in Figure 7.
- The viewDidLoad method of the MessagesTableViewController gets called.
- The MessagesTableViewController calls its own setupControllerHelper method.
- The MessagesTableViewController creates a CloudControllerHelper object, passing the client id, secret, chain name, service URL and a reference to itself as a delegate (see my previous post for an explanation of these items).
- The MessagesTableViewController passes a startCommonServices message to the CloudControllerHelper object.
- The CloudControllerHelper object sends an addObserver message to the NSNotificationCenter.
- The CloudControllerHelper object creates a CloudAuthenticator object.
- The CloudControllerHelper object sends an authenticateUserWithinController message to the CloudAuthenticator object.
- The CloudAuthenticator object creates a GTMOAuth2ViewControllerTouch object. This is the view controller in which the user enters their credentials to be authenticated.
- The CloudAuthenticator object passes a presentViewController message to the MessagesTableViewController object, passing a reference to the GTMOAuth2ViewControllerTouch object, which causes it to be displayed in the user interface.
- When the user has entered their credentials, the GTMOAuth2ViewController objecrt passes a viewController:finishedWithAuth:error: message to the CloudAuthenticator object.
- Assuming a proper authentication, the CloudAuthenticator object passes a dismissViewController:animated: message to the MessagesTableViewController object which causes the view controller to slide out of sight in the user interface.
Understanding the Message Retrieval Sequence of Events
Now let's take a look at how these objects work together to retrieve and display a list of messages as shown in Figure 8.
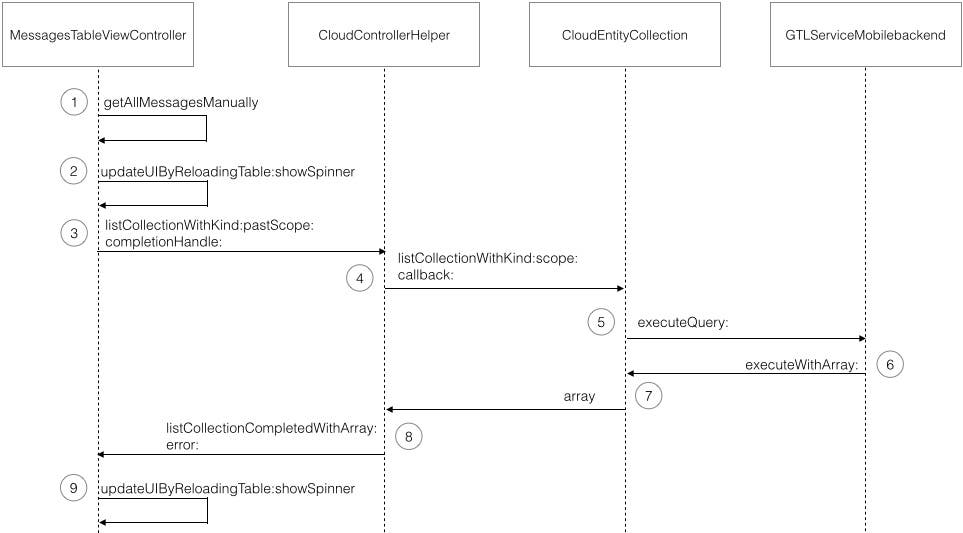 |
| Figure 8 - A sequence diagram that demonstrates how objects interact to retrieve messages |
Here is a more thorough explanation of each message call in Figure 8.
- The MessagesTableViewController calls the getAllMessagesManually method on itself (there are a variety of ways this method gets triggered).
- The MessagesTableViewController calls the updateUIByReloadingTable:showSpinner method on itself. In this case, this simply locks the table view so it can't be edited.
- The MessageTableViewController passes a listcollectionWithKind:pastScope:completionHandle: message to the CloudControllerHelper.
- The CloudControllerHelper passes a listCollectionWithKind:scope:callback: message to the CloudEntityCollection object. This object represents a list of message entities.
- The CloudEntityCollection assembles a query object and passes an executeQuery: message to the GTLServiceMobilebackend object. This object communicates with the mobile backend running on Google App Engine, which returns a list of entities.
- The GTLServiceMobilebackend object passes an executeWithArray: message back to the CloudEntityCollection, passing the list of entities.
- The CloudEntityCollection object passes the array back to the CloudControllerHelper object.
- The CloudControllerHelper object passes a listCollectionCompletedWithArray:error: message back to the MessagesTableViewController, passing the list of entities.
- The MessagesTableViewController passes an updateUIByReloadingTable:showSpinner: message to itself, and the new list of entities are displayed in the table view.
So, what about integrating Google App Engine with your own iOS app? There are several steps involved in this as outlined in the following sections.
Step 1: Downloading the Google Cloud SDK
The Google Cloud SDK contains tools and libraries that allow you to create and manage resources on App Engine, as well as other Google Cloud Platform technologies. This is an important step in getting your project set up to use Google App Engine.
To download the Google Cloud SDK on your computer:
- Launch Terminal by navigating to your Applications folder and selecting Utilities > Terminal.
- Copy the following command, paste it into the Terminal window:
curl https://dl.google.com/dl/cloudsdk/release/install_google_cloud_sdk.bash | bash
- When the following appears in the Terminal window, press return to accept the default directory or enter a different directory and then press return (I entered Documents, so the files are stored in my Documents folder):
Directory to extract under (this will create a directory google-cloud-sdk) (Users/kevinmcneish):
- When it's finished, you will be asked if you want to help improve the Google Cloud SDK, and you can reply Y or N.
- Next, you are asked to choose the language in which you want to write your backend code. The choices are:
[1] Java
[2] Python and PHP
[3] Go
[4] No App Engine (you can install App Engine tools later)
The default is [4] No App Engine, but if you know which language you want to use when writing a backend for your app, then you can choose it here. If you want some help in deciding which language to choose, check out the YouTube video interview of an engineer from the Google App Engine team at this link (if you don't watch the video, note that Go is not a fully released product).
If you are new to programming and are climbing the Objective-C learning curve, I recommend choosing Java since it is a C-based language (like Objective-C) and so its syntax will be more familiar to you.
- When the installation is complete (it takes several minutes), you will be asked a few questions regarding your system path and command line completion (I answered Y(es) to both).
- Quit Terminal, and then restart it. Afterward, run the following command in the Terminal window:
gcloud auth login
After several seconds your browser will be launched displaying a page that lists the permissions that Google Cloud SDK is requesting. If you agree, click Continue. Afterwards, you will see a page that tells you that you are now authenticated and contains a link to the Getting Started Guide (Figure 9).
 |
| Figure 9 - You are now authenticated! |
Step 2: Downloading the Google API Client Library Project
To download the Google API Client Library project:
- Launch the Terminal app.
- Enter the following command into the Terminal window (svn in the following command stands for Subversion, which is a software versioning and revision control system. The backslashes indicate the command continues on the next line. In this command you tell Subversion to checkout the project located at http://google-api-objectivec-client.googlecode.com/svn/trunk to the Documents/google-api-objectivec-client-read-only folder on your computer):
svn checkout \
   http://google-api-objectivec-client.googlecode.com/svn/trunk/ \
   Documents/google-api-objectivec-client-read-only
Step 3: Generating a Google Discovery Document
Once you have created a backend for your app and installed it on Google App Engine, you need to generate a Google discovery document. This document describes the web services you have created that can be accessed by your iOS app. Google's Endpoints command line tool can generate the discovery document for you in REST format, or RPC format (which is required for generating an iOS client).
Later on in this series we will go into the details of creating a backend for your iOS apps, but for now, you can check out Google's documentation at this link.
Step 4: Adding Required Files to Your iOS Project
Now you're ready to add some of the standard Google class files to your iOS project. Google has very specific directions on how to do this at this link under the subheading Adding required files to your iOS project.
Conclusion
At this point, you should have a basic feel for what it takes to integrate your app with Google App Engine. In upcoming posts I'll take a look at other cloud services and provide a comparison to Google App Engine to help you make an informed decision on which technology best suits your needs when it comes to scaling your app to meet a high volume of users.