18 Tips for Getting the Most out of Apple Music Features & Settings

Jim Karpen has been writing about technology since 1994 and brings decades of experience with Apple products, along with a Ph.D. in literature and writing.
Learn More Jim Karpen has been writing about technology since 1994 and brings decades of experience with Apple products, along with a Ph.D. in literature and writing.
Learn MoreWhether you use Apple's subcription music service or simply use the Apple Music app to listen to music you've purchased, here are 18 tips that will help you get the most out of the Music app, from creating music playlists to asking Siri to play the next track. Click on the headings for even more information about each Apple Music tip.
Related: How to Add and Listen to Music on Your Apple Watch—The Complete Guide
1. Create Apple Music Playlists
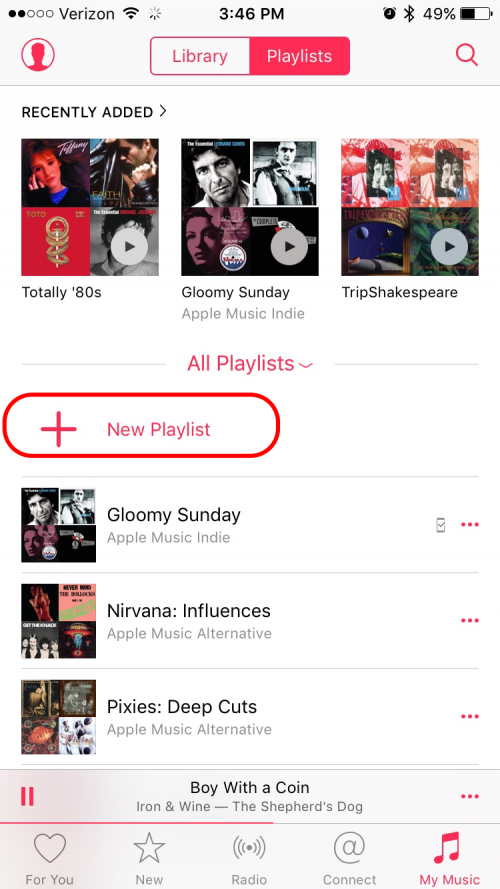
It's easy to create lists of your favorite songs in Apple Music. Open the Apple Music app, tap My Music, and then select Playlists at the top of the screen. (It's at the bottom of the screen on the iPad.) Now click New. You’ll be prompted to create a title and description for your playlist. Then tap Add Songs. You can choose from songs you’ve already downloaded by tapping on Artists, Albums, Songs, etc. or you can add music from your library or the entire Apple Music libary by using the Search bar and specifying which library to searh. Once you find the songs you want, press the little + sign next to the title. (Make sure you only press the + sign once though, as the song gets added again every time you press it.) Press Done when you're finished.
2. Choose More Music You Like in the Apple Music App
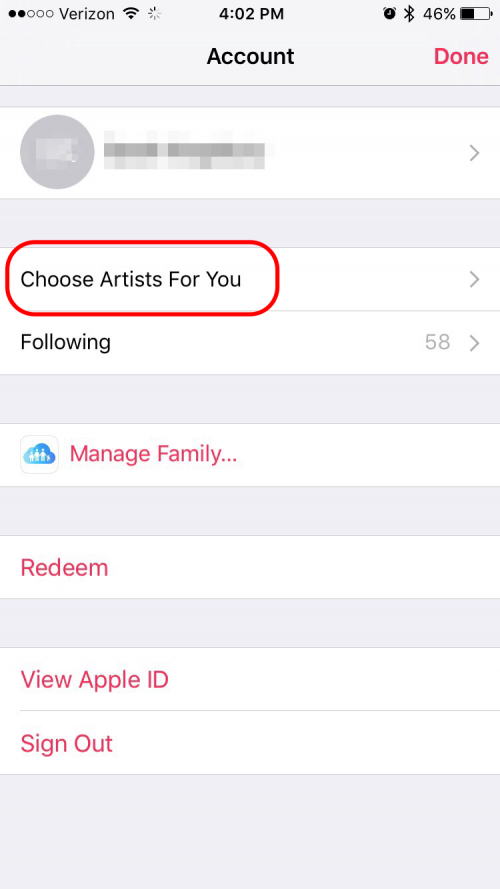
During the initial setup of the Apple Music subscription service, you have the opportunity to select the kind of music you like. If after the initial setup you decide you want to go back and add more of your favorite genres, click on the little icon of a person at the top left in the Apple Music app. This brings up a screen that lets you adjust your preferences. Click on Choose Artists for You. Then make additional selections, just as you did during the initial setup.
3. Adjust Music Playback in Apple Music
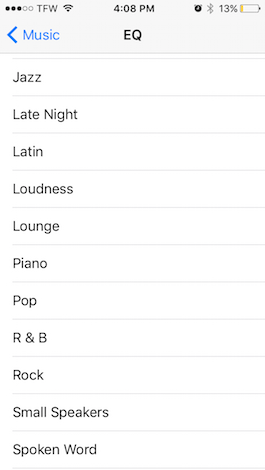
iOS has an equalizer that lets you adjust the balance of the frequencies according to your taste and according to the type of music. To use this function, go to Settings > Music and tap EQ. Apple has many preset options depending on the type of music you're listening to, such as Classical, Dance, Hip Hop, Jazz, and Latin. You can also choose to make specific adjustments such as boosting or reducing the bass, boosting or reducing treble, or boosting vocal. If you’re not sure which option to select, pick a song you like and select varying options while it's playing to see how it affects the sound.
4. Adjust Apple Music Streaming Quality
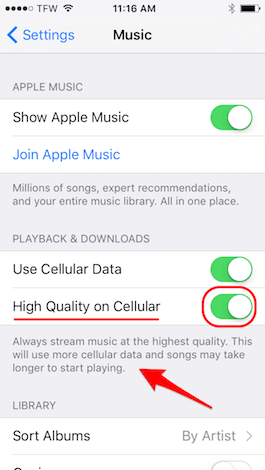
In the past, iOS automatically changed the quality of streaming music depending on whether you were listening via WiFi or cellular data, with WiFi giving you the best quality. However, you now have the option of streaming higher quality sound even when you're connected via cellular data. If you have unlimited or a large data allotment, you may want to adjust this setting. Go to Settings > Music and toggle Use Cellular Data on. The High Quality on Cellular tab will appear. Apple warns, “This will use more cellular data and songs may take longer to start playing.” If that’s okay with you, then slide the tab on.
5. How to Enable iCloud Music Library
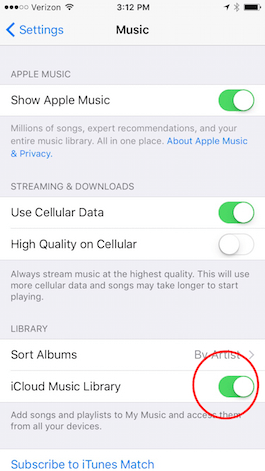
With a subscription to Apple Music or iTunes Match, you can use the iCloud Music Library, which is an easy way to have access to your music across all of your devices. When enabled, you can add an Apple Music song to My Music from your iPhone, then check your iPad and the song will be there. Go to Settings > Music > Library and turn on iCloud Music Library. Your device will prompt you with the option to Merge or Replace the songs currently on your device with those in the iCloud Music Library. Merging your music means the songs you’ve downloaded to your device should be safe and remain on your device. I recommend selecting Merge, but I chose Replace on my iPad since it’s my secondary music device.
6. How to Add a Song to Your iCloud Music Library
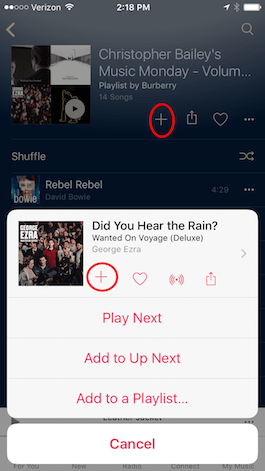
When you’re browsing through Apple Music songs and playlists, you’ll likely find music you want to download. If you want to make sure your songs are accessible across your devices, add it to your iCloud Music Library. Tap the three dots next to the song. Select the + icon. If you’re adding a whole playlist or album, you can press the + at the top. When you select the + icon, the music is added to My Music. Now, that song is available in Apple Music across all devices with enabled iCloud Music Libraries. Once a song or playlist is added to My Music, the + icon will change into a cloud icon. Tap the cloud icon to download the song or playlist to your device for offline listening.
7. Set a Volume Limit
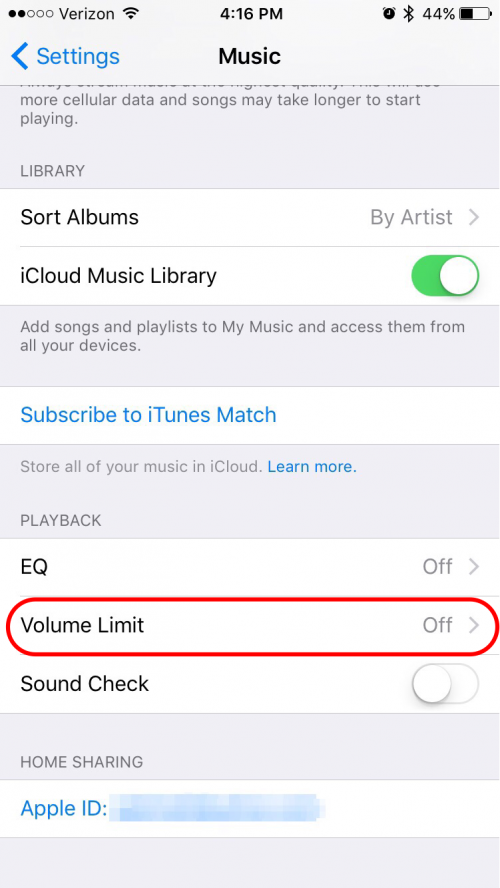
If you're concerned about inadvertently damaging your hearing by being exposed to music that's too loud, or if you want to control the volume on your children's devices, you can set a maximum volume. Go to Settings > Music > Volume Limit and adjust the slider to change the maximum volume your phone outputs through its speaker or through any connected headphones. In the main Music Settings menu, you'll see that Volume Limit now says “On” if you’ve set the limit to anything other than the maximum.
8. Make Songs Available Offline in Apple Music
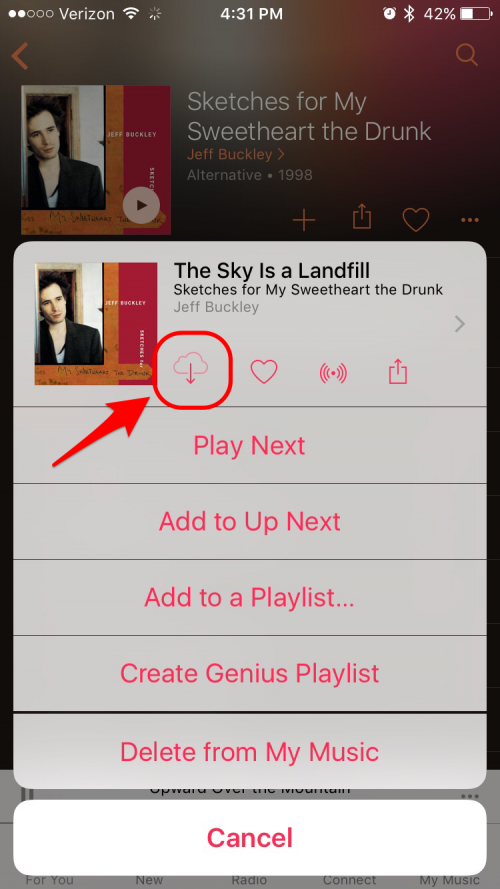
If you want to save data by listening to your favorite tunes offline rather than streaming them, you can save them to your iPhone or iPad. Open the Music app and tap My Music. Then tap the three dots (•••) located to the right of the song you’d like to save. A list of various options will appear. Tap the cloud icon that appears below the name of the song, and the song will download to your device. Note that if you have an Apple Music subscription and have enabled iCloud Music Library, you can also download any song, album, or playlist from Apple's catalog that is available for offline listening by following the same steps.
9. Make All Your Apple Music Available Offline
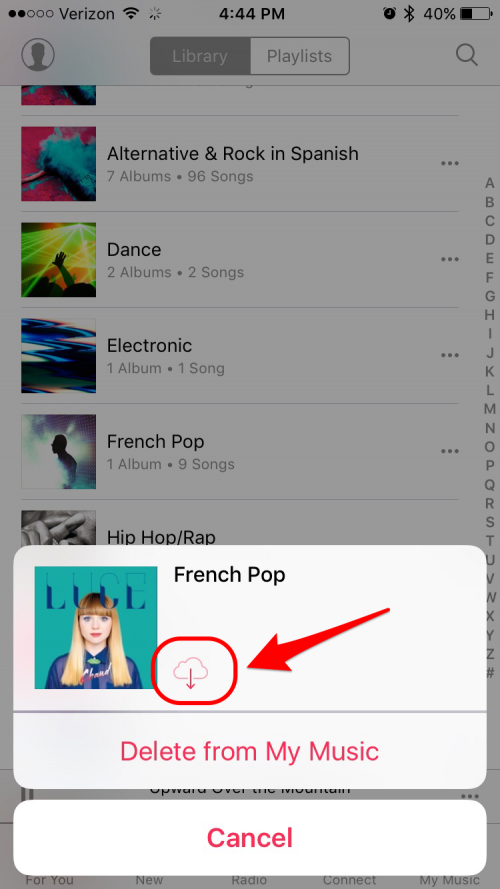
Currently in Apple Music when you sync your iPhone with iTunes, all your music transfers; however, it isn’t necessarily available offline. This means sometimes you’re using cellular data to play your own music simply because Apple is trying to save you phone storage. If you want to make all your songs available offline, there's no way to do it all at once. But you can save a lot of time by selecting entire genres. Go to Music > My Music and select Genres from the dropdown menu at center top. Tap the three dots next to each Genre and then tap on the cloud icon. (Note: some songs not owned by you are not available for download on Apple Music. This only works for songs available for download.)
10. Listen to Apple Music Offline
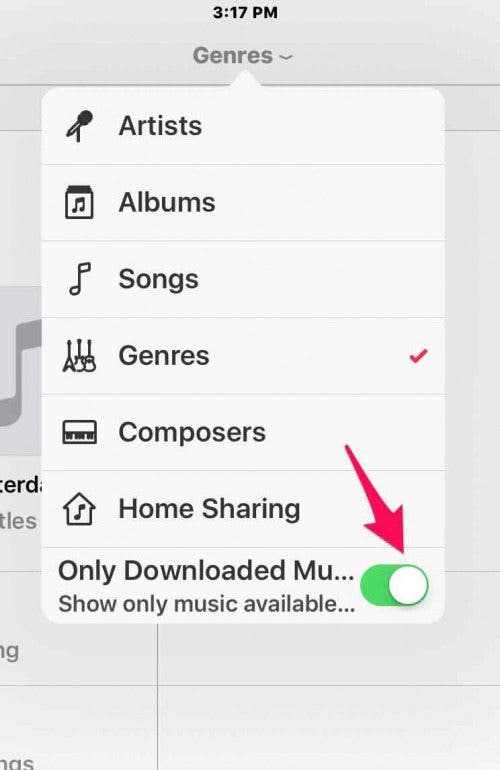
Apple Music can be kind of confusing because, as mentioned above, sometimes the songs in My Music in Apple Music aren't available offline. You may even have been using cellular data to play these songs without knowing you were doing so. To prevent this, Apple Music has the option to view Only Offline Music. (You can also turn off cellular data in Music settings.) To make this change go to My Music and tap on the dropdown menu at top center. Turn on Only Downloaded Music. Now in whatever music category you have selected, you will only see the music that is available offline.
11. Remove a Song from Your Apple Music Library
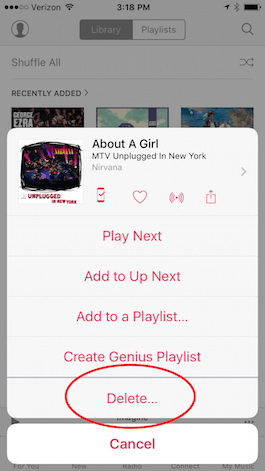
You can easily remove a song in My Music by going to My Music and finding the song you want to remove. Tap the three dots (•••) next to the song and then select Remove from My Music and confirm. (Note: If you want to remove the download but not the song, tap the Downloaded icon and then tap Remove Download.)
12. Purchase Music You Hear on Beats 1
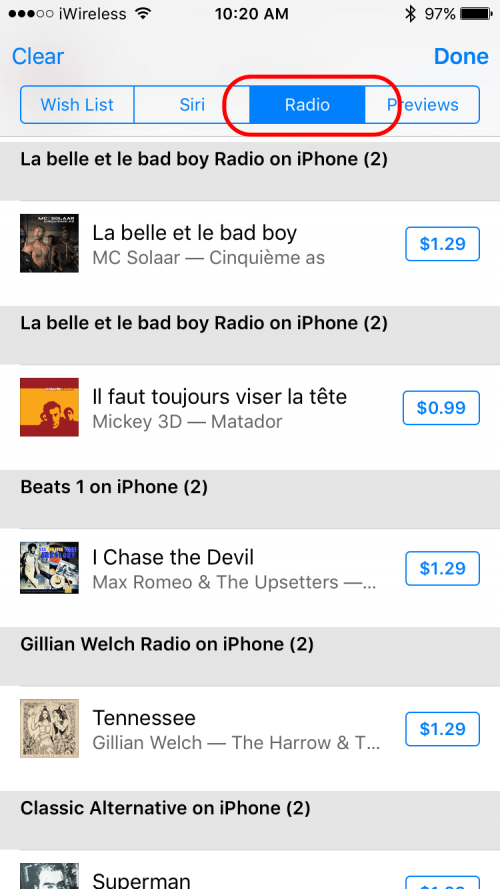
If you hear a song you like when listening to Beats 1, Apple makes it easy to purchase it, but through a somewhat circuitous route. Here's how to purchase music from Beats 1. Open the iTunes Store app and, at the top right, tap on the three lines just to the left of the search box. Then tap on the Radio tab. You'll see a history of the songs you've listened to on Beats 1 with a purchase button next to each song.
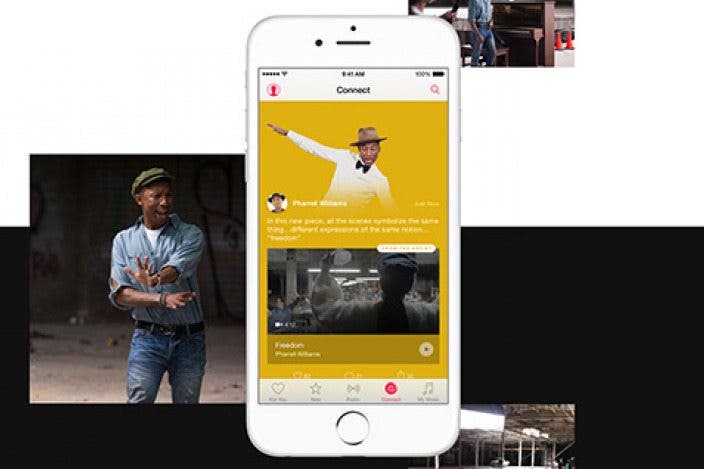
13. Unfollow Specific Artists

Apple Music's social networking feature, called Connect, lets you follow your favorite musicians. When you add songs to your music library, by default the artists are automatically added in Connect. But you may not want to follow some of these artists. Fortunately, you can change the default so that artists aren't automatically added. And changing this default will also remove all those automatically added. You can also unfollow selected artists that were added by default. And you can add new artists to your list of those you're following. To change the default setting or to change the artists you're following, in Apple Music tap on "see who you're following." In this window you can turn off the setting that automatically follows artists when you add their songs to your music library. Or you can unfollow selected artists. In addition, you can find new artists you'd like to follow by tapping Find More Artists and Curators. This brings up a list of artists and curators recommended by the Apple Music app. Tap those you'd like to follow.
14. Ask Siri to Play the Rest of the Album

If you're listening to a playlist or to shuffled music, or listening to Apple Music, and you hear an artist you like, you can ask Siri to play more from the album or more from that particular artist. If you want to hear the rest of the album, simply say to Siri, "Play the rest of this album." (If you're in the middle of a playlist when you make the request, Siri will play the rest of the album and then return to where you were in your playlist.) Similarly, if you want to hear more from this particular artist, you can say to Siri, "Play more from this artist."
15. Play Music on AirPlay Speakers or an Apple TV
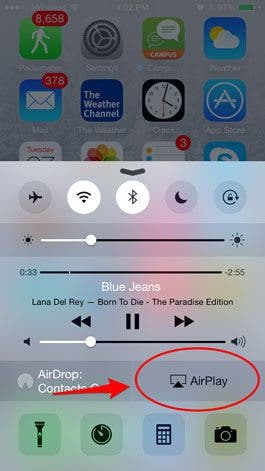
You can use AirPlay to stream your music wirelessly to AirPlay-enabled speakers or to your Apple TV. First, you’ll need to make sure your iDevice, Apple TV, or AirPlay speakers are all connected to the same Wi-Fi network. Then swipe up from the bottom of your iDevice’s screen to access Control Center. Tap AirPlay. Here you'll see the name of your speakers and/or Apple TV. Choose which one you want your music to play from.
16. Use Apple Music As an Alarm
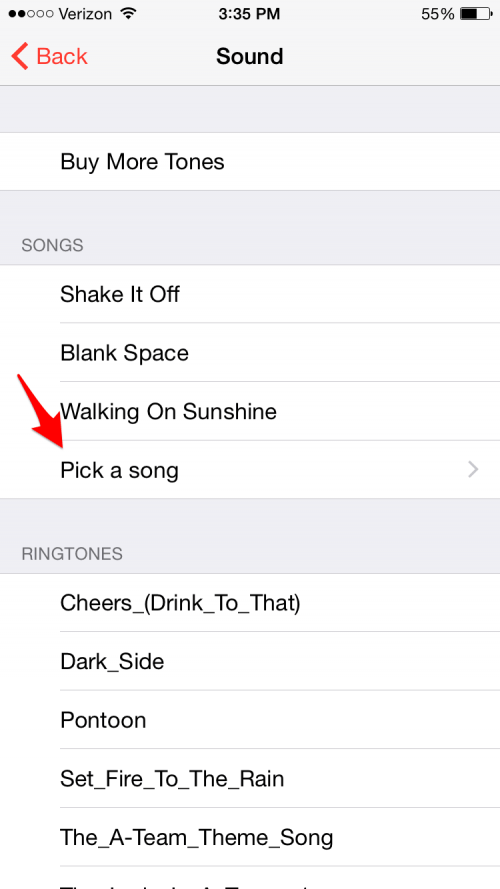
If you use your iPhone or iPad as an alarm in the mornings, you can choose to wake up to your favorite song. Open Apple Music and either find a song in your My Music Library or any song in Apple Music as long as you’re a subscriber. Then tap the three dots to the right of the song and select Make Available Offline to download the song to your phone. Open the Clock app and either create a new alarm (by tapping the + sign at the top right of the screen) or edit an existing one (tap Edit in the upper left corner and then tap the alarm you want to edit). Tap Sound > Pick a song, and then go to either Songs, Artists, Genres, etc. to select the song you downloaded.
17. Time Yourself with Music
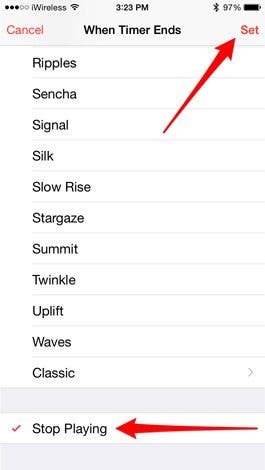
If you use the Timer on your iPhone or iPad to set time limits on specific activities, you can set it up so that your music stops playing when the timer ends. On an iPhone, open the Clock app and select Timer. Tap on When Timer Ends, scroll down, and select Stop Playing. Then tap Set in the upper right corner. On an iPad, open the Clock app and select Timer. Then tap on the icon below the timer that shows two musical notes. Scroll down to the bottom of the menu that pops up and select Stop Playing.
18. Avoid Automatically Being Billed When Your Free Trial Is Over
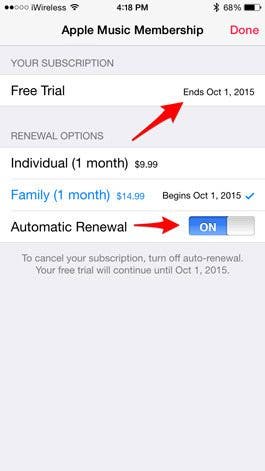
If you signed up for Apple's three-month free trial of Apple Music, you will automatically be billed at the end of the three months unless you turn off the auto-renewal setting. To turn off Apple Music's auto-renewal setting, open the Music app and go to your account by tapping on the head-shaped icon in the upper left corner of your screen. Next, tap on View Apple ID and sign in to your Apple account. Scroll down to Subscriptions and tap Manage. At the top of the next screen you will see the date your free trial ends, and at the bottom under Renewal Options you will see an option to toggle Automatic Renewal off. Once you have turned Automatic Renewal off, you will need to select a renewal option at the end of your free trial if you want to continue subscribing to Apple Music. Read next: How to link my Apple Music to Alexa.

 Rhett Intriago
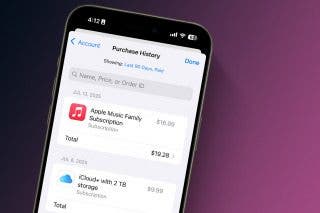
 Rachel Needell

 Olena Kagui
 Leanne Hays


 Ashleigh Page
 Linda Ruth

 Amy Spitzfaden Both