One of the most exciting features of the iPhone 13 is Cinematic mode. The new iPhone video camera got an upgrade. Together with AI technology, videos filmed in Cinematic mode can be edited directly on your phone to alter depth perception and more. This article will teach you how to shoot video in Cinematic mode and even do some basic editing.
What's in This Article:
- Cinematic Mode Filming & Editing Requirements
- How to Shoot Cinematic Video with iPhone 13
- How to Easily Edit Cinematic Mode Videos
Cinematic Mode Filming & Editing Requirements
Cinematic mode is a built-in feature on all iPhone 13 models that blurs the background and focuses on a subject, similar to Portrait photos. Cinematic mode also let's you transition between focus points while filming or during editing. It captures video in 1080p Dolby Vision HDR at 30 frames per second. The iPhone 13 Pro and iPhone 13 Pro Max are expected to support ProRes video in Cinematic mode in upcoming updates, although it isn't possible just yet. For more information, check out our review of the iPhone 13 Pro.
There are several ways to edit Cinematic mode videos directly on your phone. However, you can also edit Cinematic videos, including the level of background blur and depth of field (subject focus) on your Mac, iPad, or iPhone X and later as long as these devices are running the latest software.

In order to edit in iMovie, you'll need to make sure the app is updated to the latest software. You can do this on iPhone X and later models, newer iPads, and Macs. Remember that only iPhone 13 can film Cinematic mode videos, so you would have to transfer the video to an iPhone 12, 11, or X, or another compatible device to edit the footage on an older iPhone model. There may also be third-party apps that can edit Cinematic mode in the future.
How to Shoot Cinematic Video with iPhone 13
To film in Cinematic mode:
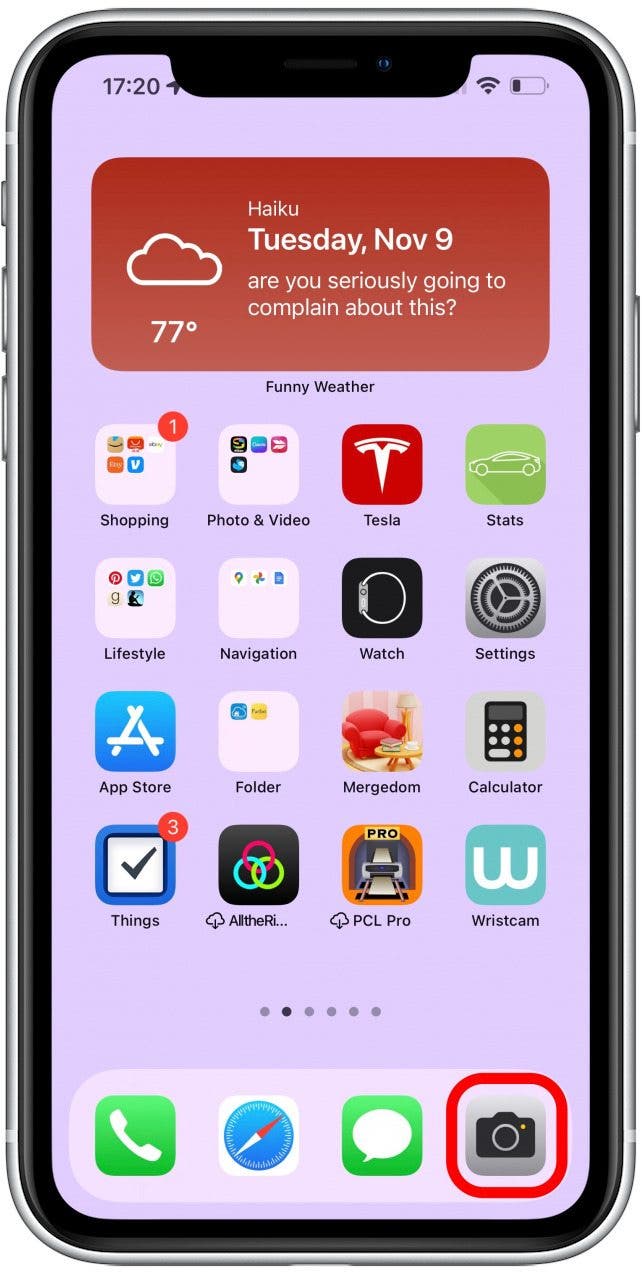
- Open the Camera app on your iPhone 13.
![Open the Camera app on your iPhone 13]()
- Tap on CINEMATIC or swipe from the default PHOTO until you get to it.
![Tap on CINEMATIC or swipe from the default PHOTO until you get to it - how to shoot video with phone]()
- Tap the subject once to focus on it. The focus will stay on it even if you move the camera to either side or even closer or further away.
![Tap the subject once to focus on it - how to focus a video on iphone]()
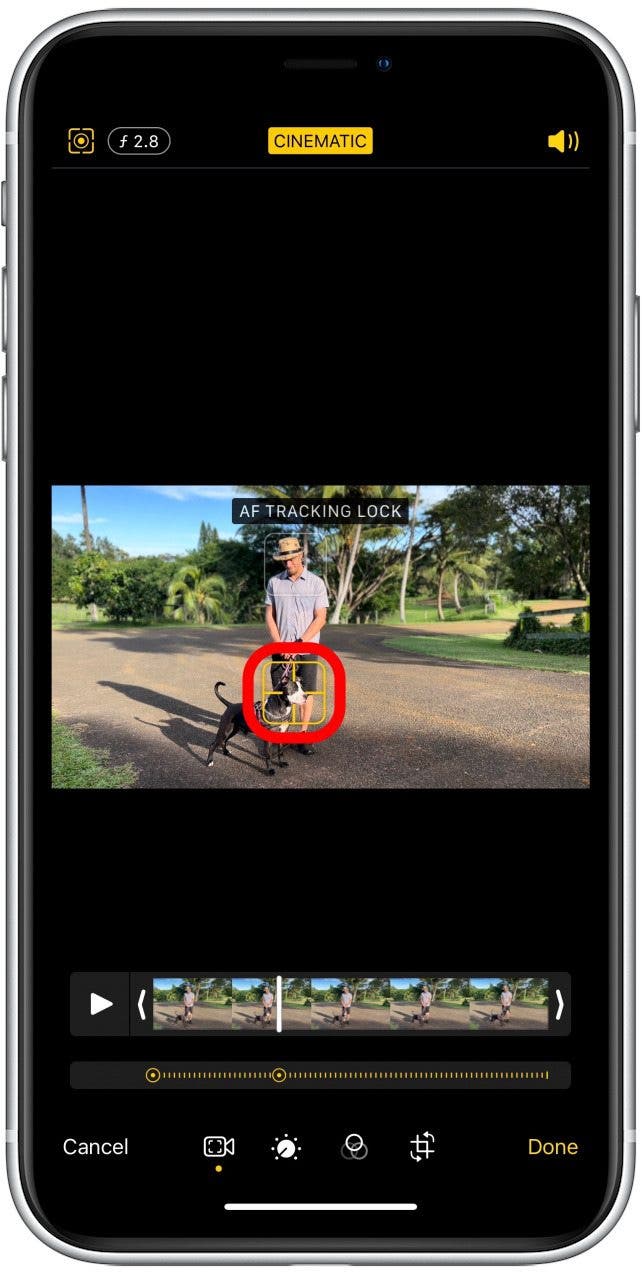
- Double-tap the subject to activate AF TRACKING LOCK. This means that your phone will track and automatically focus on the subject, even if it goes off-camera. This works best with people and faces as inanimate objects may be forgotten once they are no longer visible.
![Double-tap the subject to activate AF TRACKING LOCK.]()
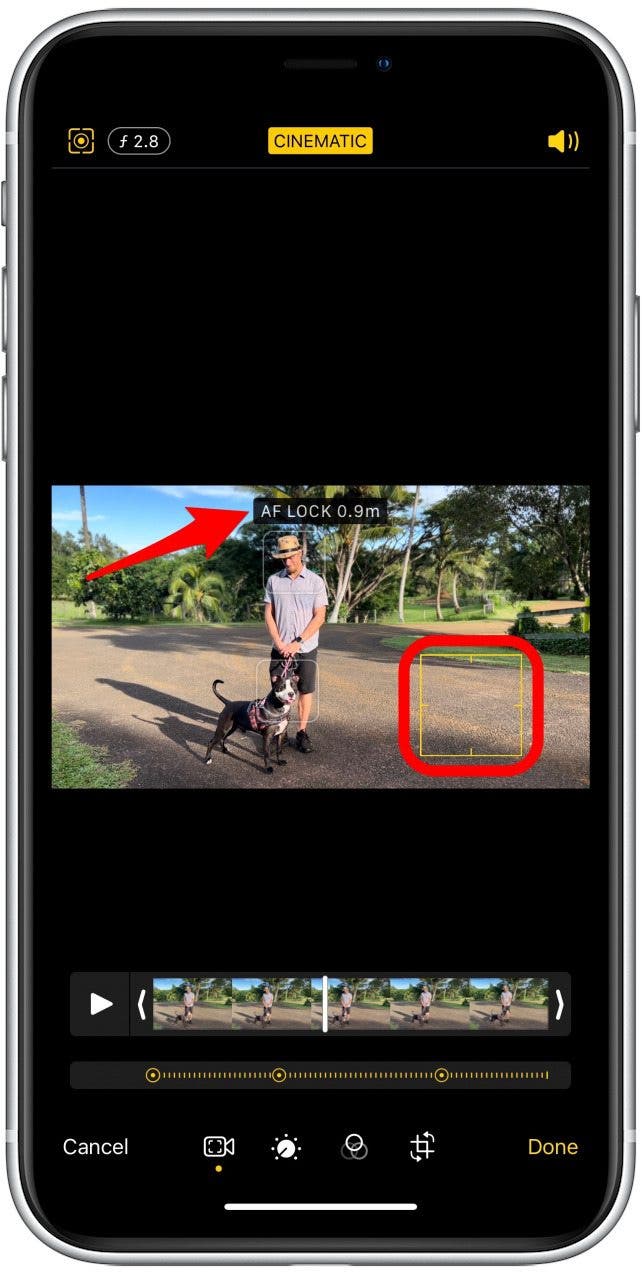
- Tap and hold the screen to activate AF LOCK. This means that the video will focus on a specific distance from the camera.
![Tap and hold the screen to activate AF LOCK.]()
- If you don't tap on anything on the display, your camera will focus on whatever is the obvious subject or is located in the center. It will automatically refocus when it locks onto a new subject if you move the camera or someone enters the shot.
![If you don't tap on anything on the display, your camera will focus on whatever is the obvious subject or is located in the center.]()
- Tap the Shutter button to begin recording the video.
![Tap the Shutter button to begin recording the video.]()
- Even if you have the tracking lock on or have originally focused on a subject, you can tap while recording to refocus. You can also change the focus when you edit the video.
![Even if you have the tracking lock on or have originally focused on a subject, you can tap while recording to refocus.]()
- Tap the Shutter button again to end the recording.
![Tap the Shutter button again to end the recording.]()


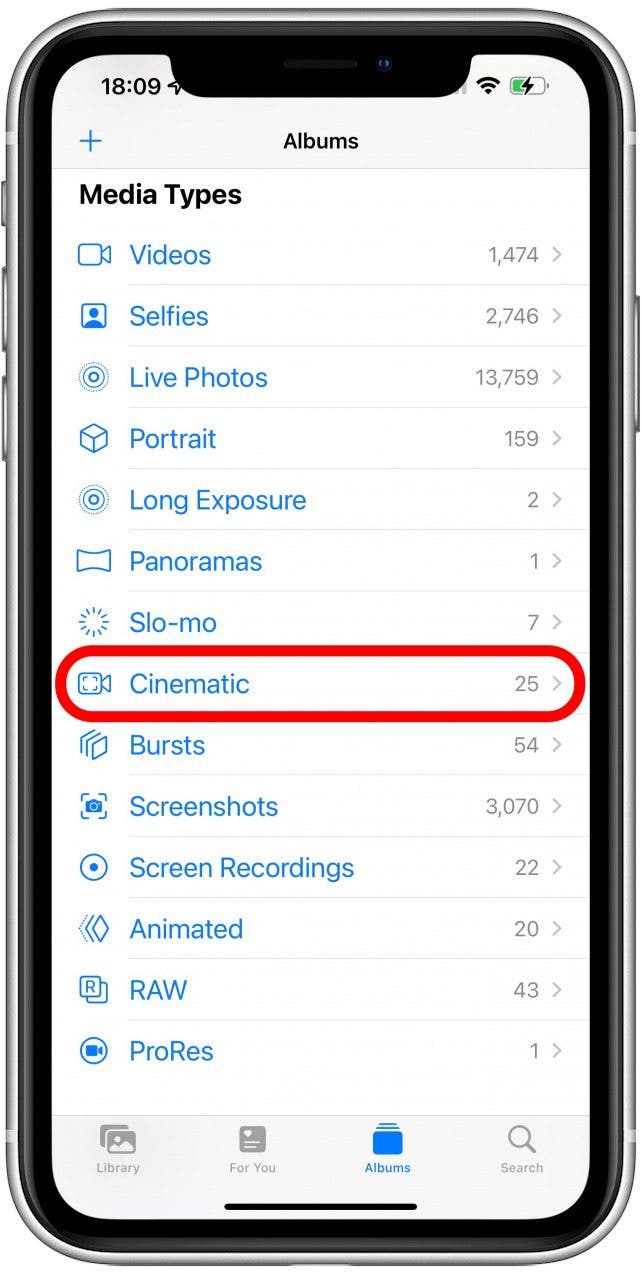
The Cinematic video will be saved in your Photos app just like any other photo or video you take. You will also be able to find it in an automatically created Cinematic album so that you can see all your Cinematic mode videos in one place. To learn more videography tips, such as how to turn live photos into videos, sign up for our free Tip of the Day newsletter.
How to Easily Edit Cinematic Mode Videos
The easiest and quickest way to edit Cinematic mode videos is directly in the Photos app on your iPhone:
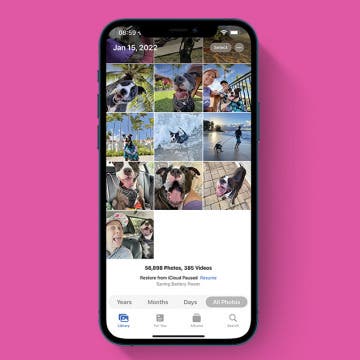
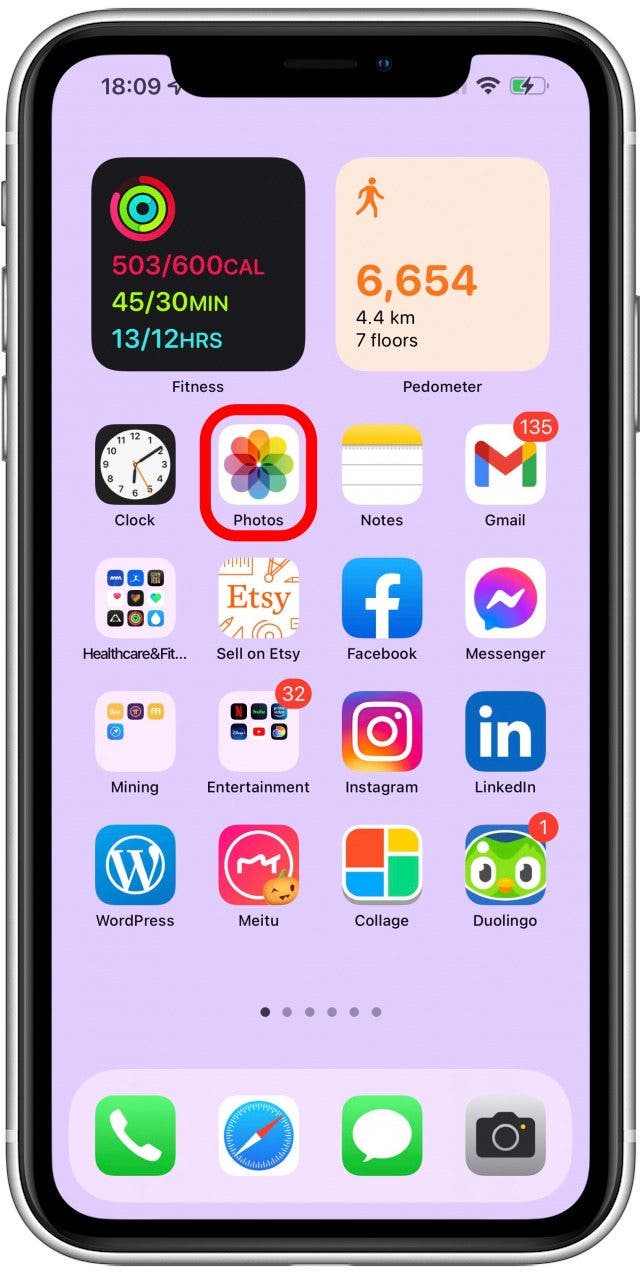
- Open your Photos app.
![Open your Photos app.]()
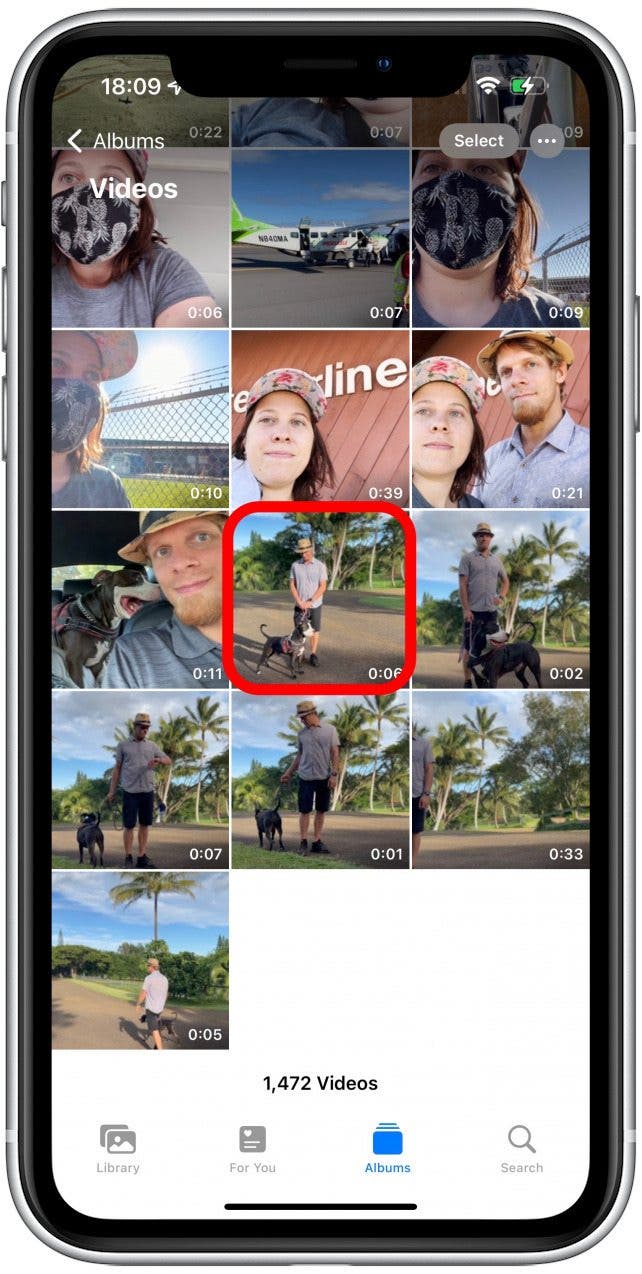
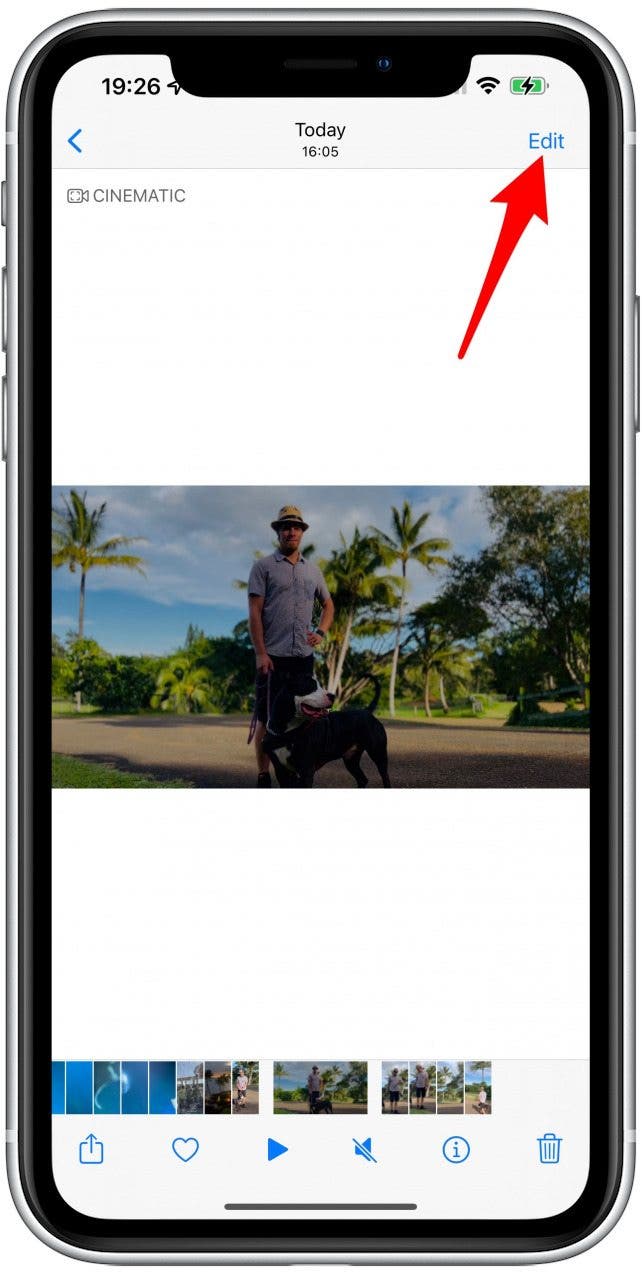
- Locate the Cinematic video you want to edit and open it.
![Locate the Cinematic video you want to edit and open it.]()
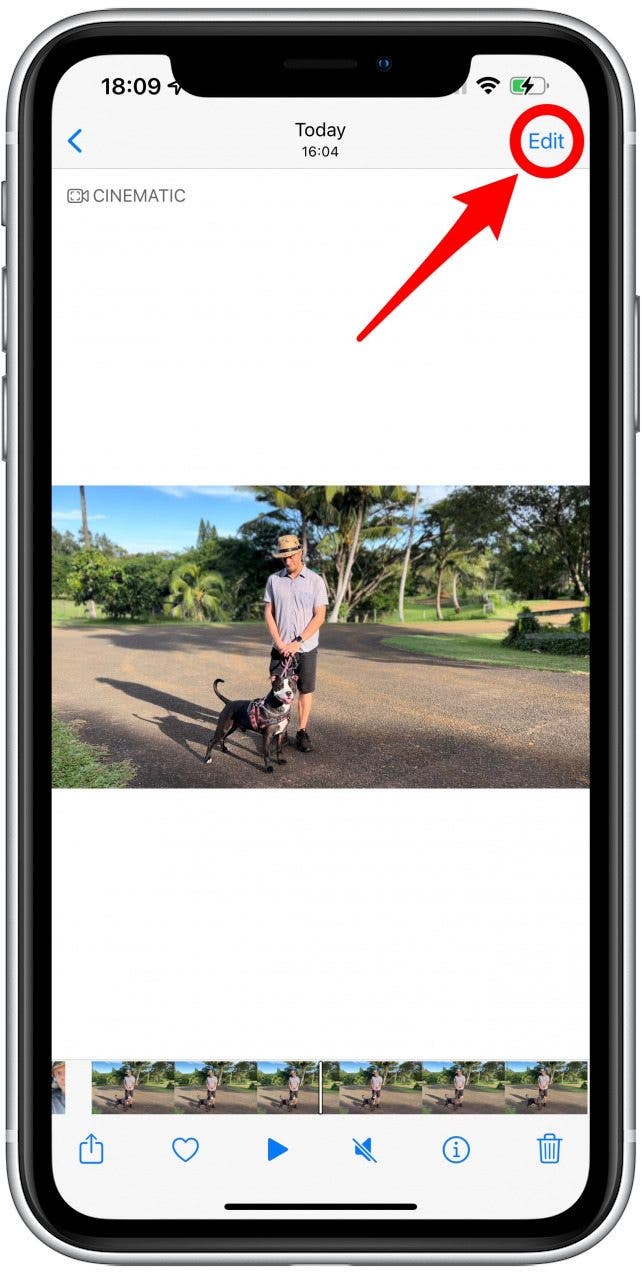
- Tap Edit.
![Tap Edit - how do you make a movie on your iphone]()
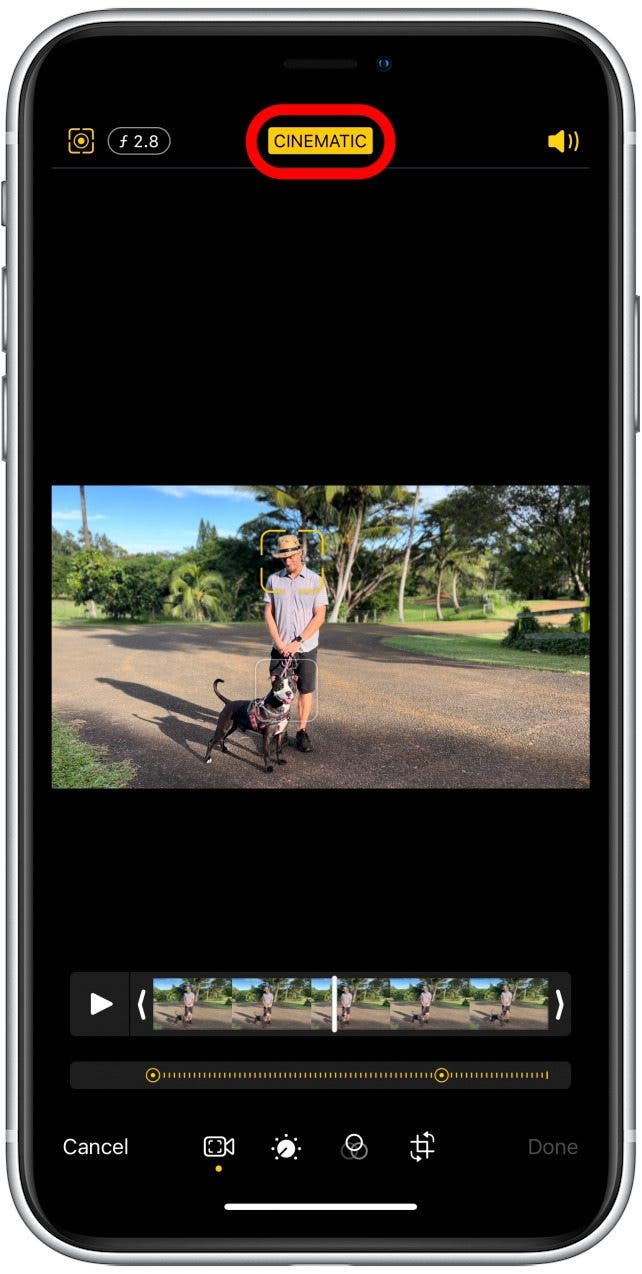
- To turn off the background blur completely, tap on Cinematic.
![To turn off the background blur completely, tap on Cinematic - how to create movie on iphone]()
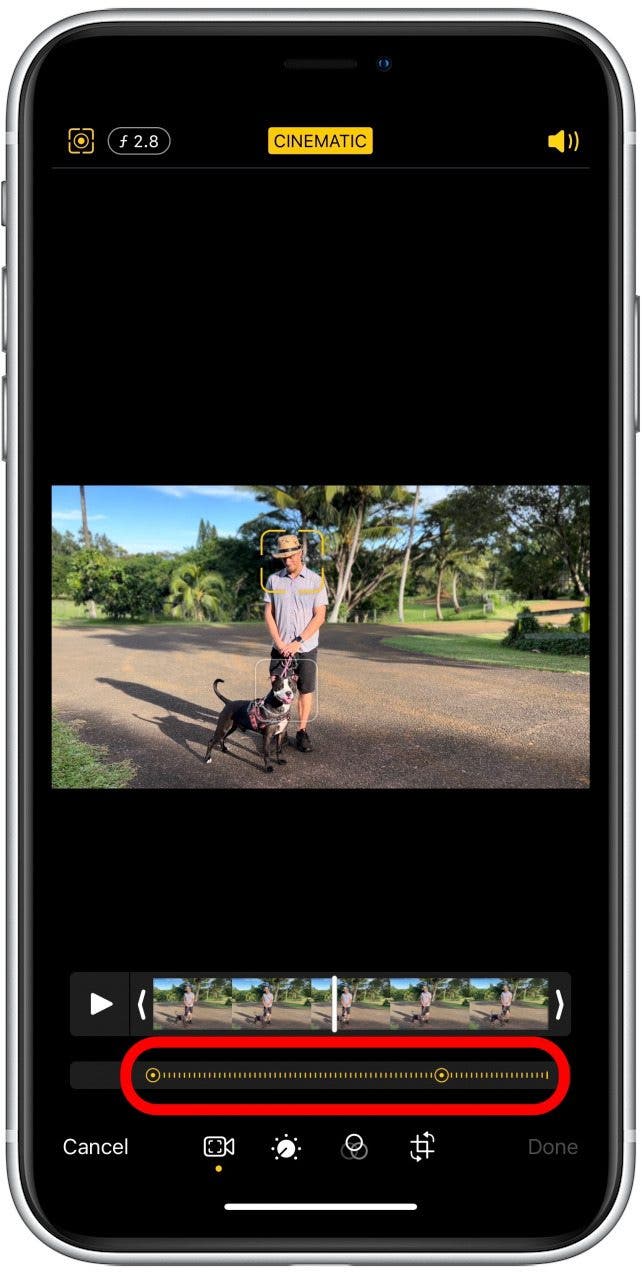
- Right under the frame viewer, you will see a series of dots. White dots mark automatic focus or tracking change while recording, while yellow dots mark manual changes.
![Right under the frame viewer, you will see a series of dots.]()
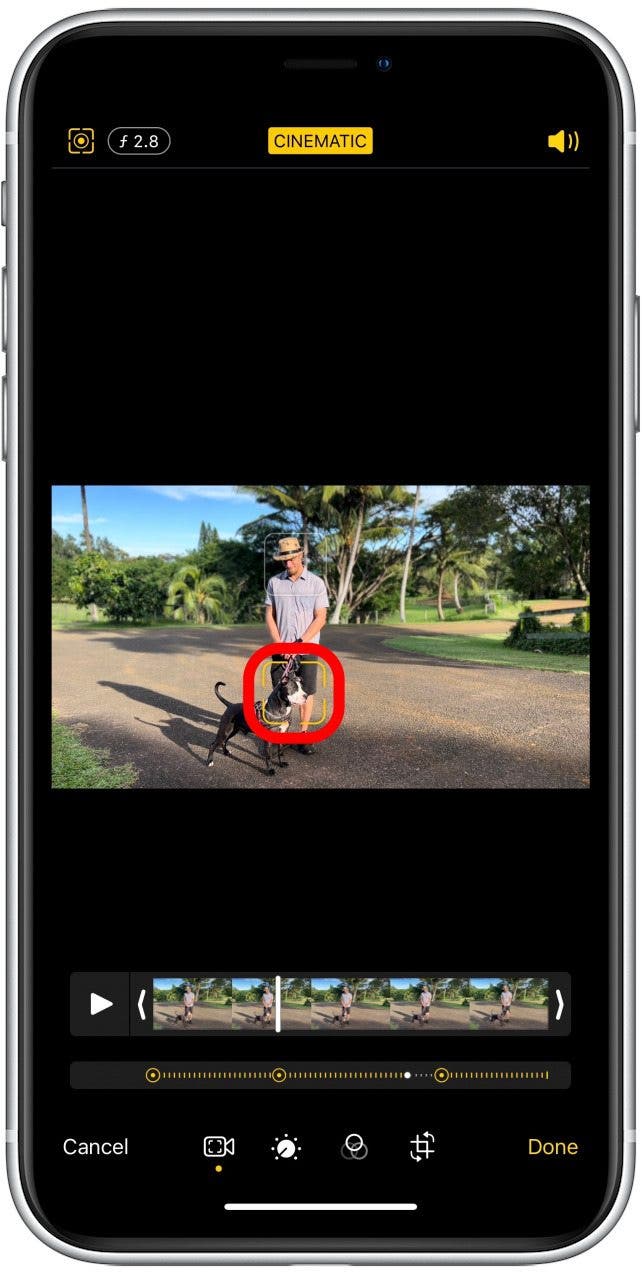
- To change the focus, tap the subject you want the focus to be on. You can pick a different subject in every frame.
![To change the focus, tap the subject you want the focus to be on.]()
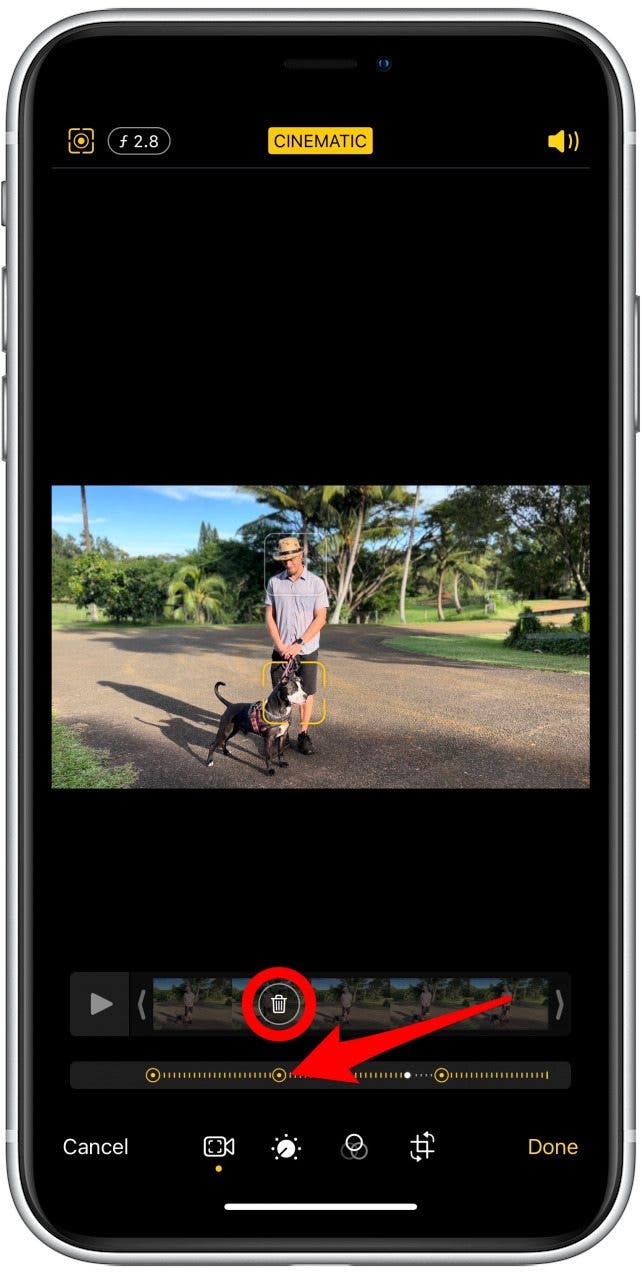
- When you change focus, a yellow circle with a dot in the middle will show up under the frame viewer. You can tap it to change the focus at that moment or tap the trash icon to delete it. Only the selected focus selection will be deleted.
![When you change focus, a yellow circle with a dot in the middle will show up.]()
- Double-tap the subject to have it be tracked. You can track a different subject at different times within the same recording.
![Double-tap the subject to have it be tracked.]()
- To lock the focus at a specific distance from the camera, you can touch and hold the screen until you see AF LOCK pop up.
![To lock the focus at a specific distance from the camera, you can touch and hold the screen until you see AF LOCK pop up.]()
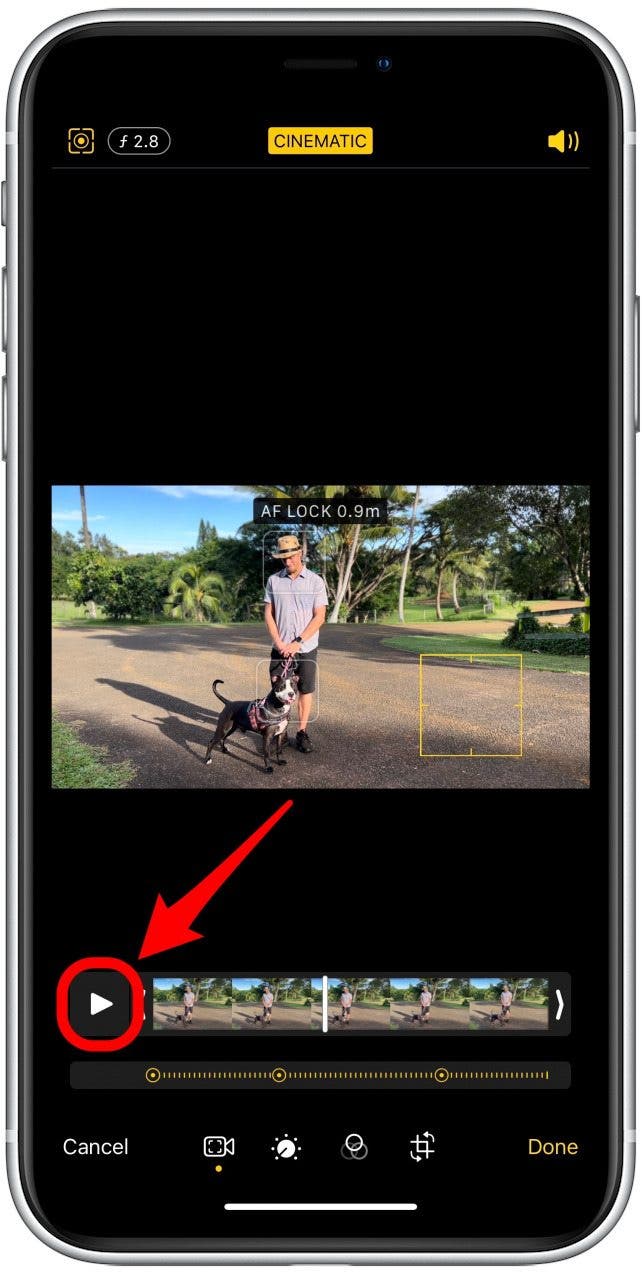
- You can play and pause the video to get to the moment you want to edit.
![You can play and pause the video to get to the moment you want to edit.]()
- You can also manually drag the white bar left and right to navigate the video.
![You can also manually drag the white bar left and right to navigate the video.]()
- Tap the Manual Tracking button (the square icon in the corner) to toggle between automatic focus tracking and manually selected focus.
![Tap the Manual Tracking button (the square icon in the corner) to toggle.]()
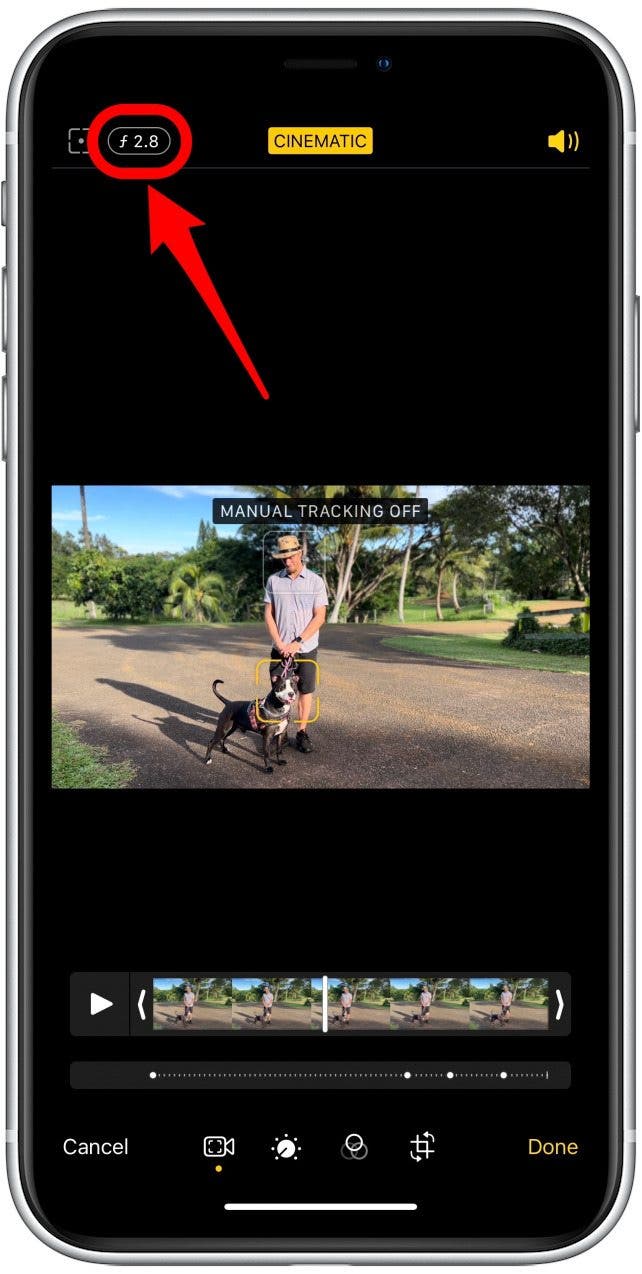
- Tap the f icon at the top of the screen to change the depth of field (the level of background blur.)
![Tap the f icon at the top of the screen to change the depth of field.]()
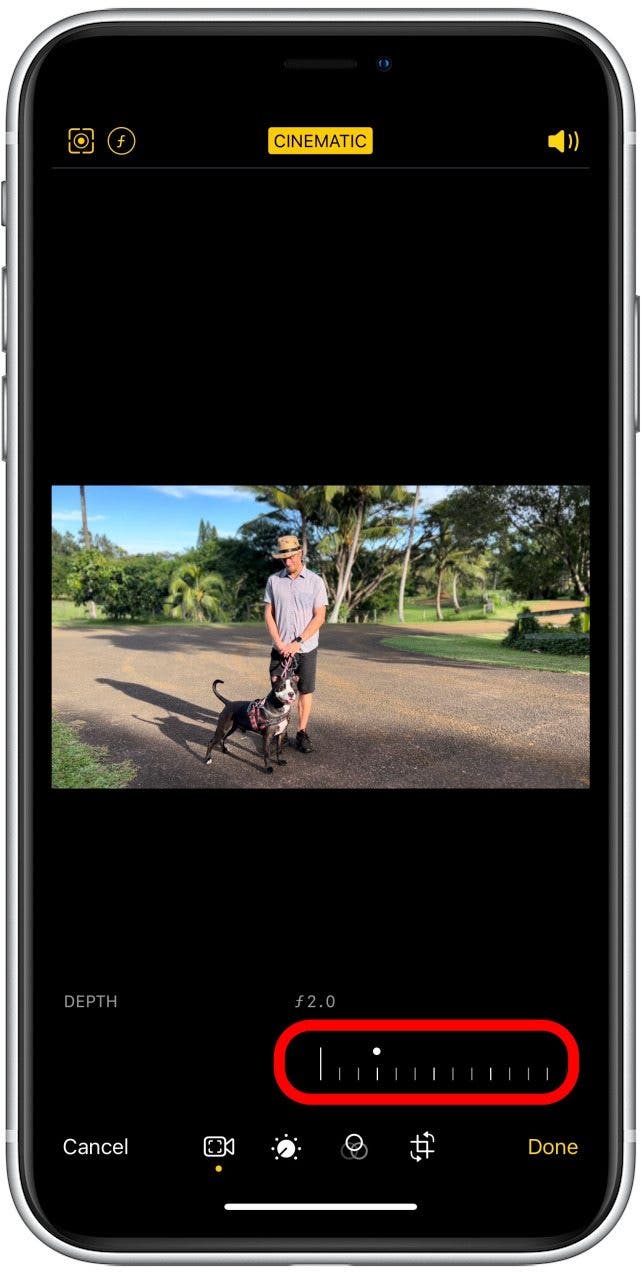
- You will see a slider that can be used to increase or decrease the blur while leaving the subject in full focus.
![You will see a slider that can be used to increase or decrease the blur.]()
- To remove audio from your video, toggle off the sound by tapping the speaker icon.
![To remove audio from your video, toggle off the sound by tapping the speaker icon.]()
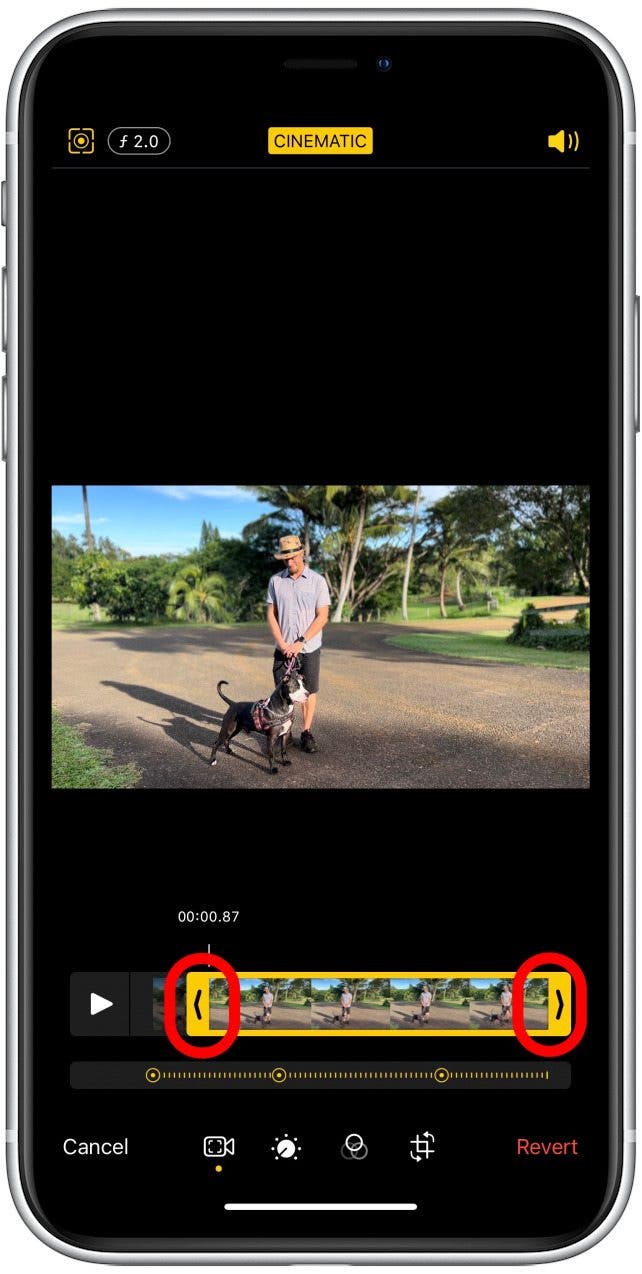
- You can shorten the video by tapping and dragging the arrows at the beginning and end of the frame viewer.
![You can shorten the video by tapping and dragging the arrows.]()
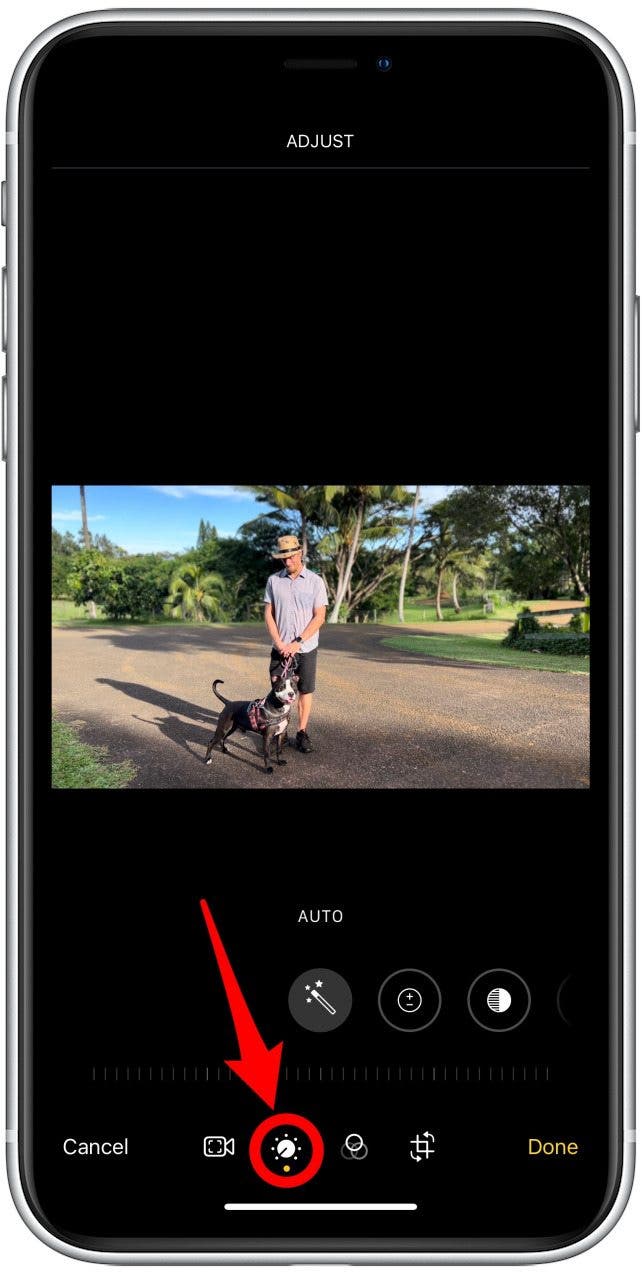
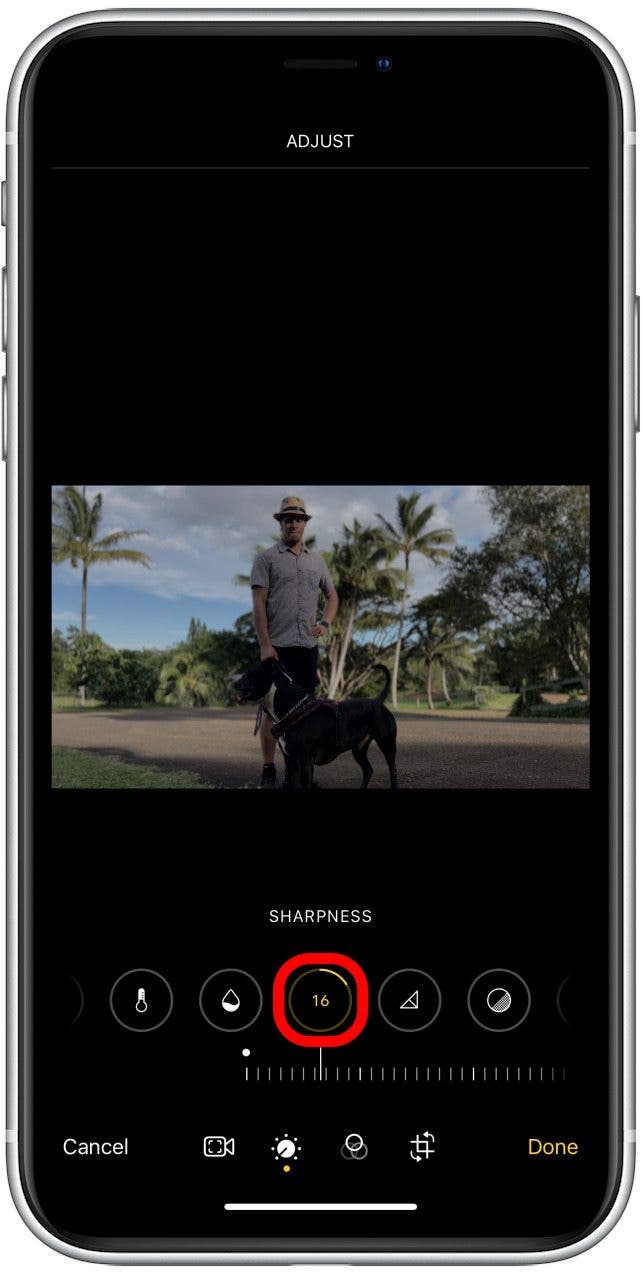
- You can also adjust exposure, highlights, shadows, contrast, brightness, black point, saturation, vibrance, warmth, tint, sharpness, definition, noise reduction, and vignette by tapping the Adjust button.
![Adjust button.]()
- You can double-tap the button used to make changes to revert the changes in just that category.
![You can double-tap the button used to make changes to revert the changes in just that category.]()
- The Filters button will let you select a filter for your video.
![The Filters button will let you select a filter for your video.]()
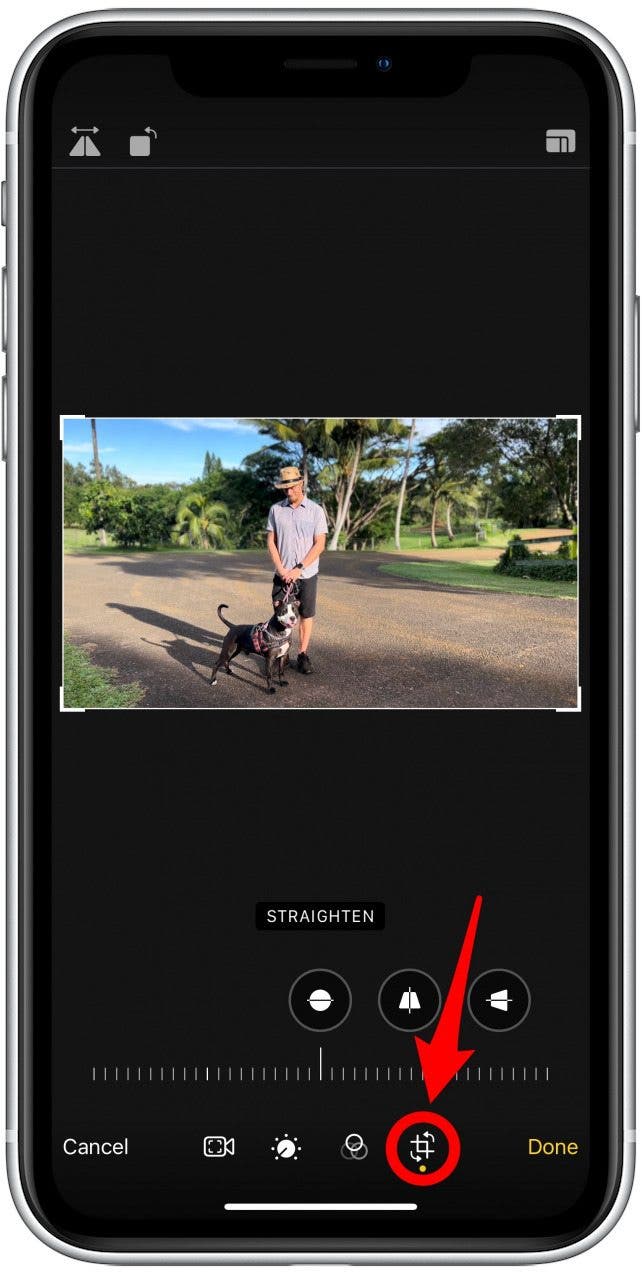
- Finally, the crop button will let you flip, rotate, crop, or resize the video.
![Finally, the crop button will let you flip, rotate, crop, or resize the video.]()
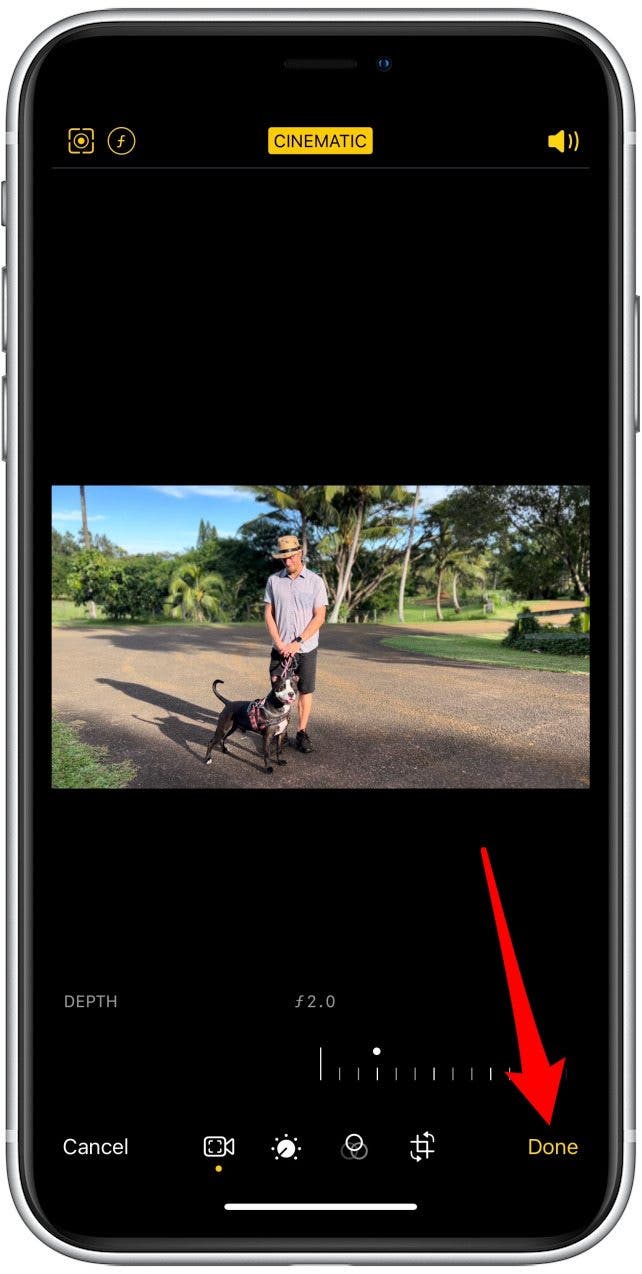
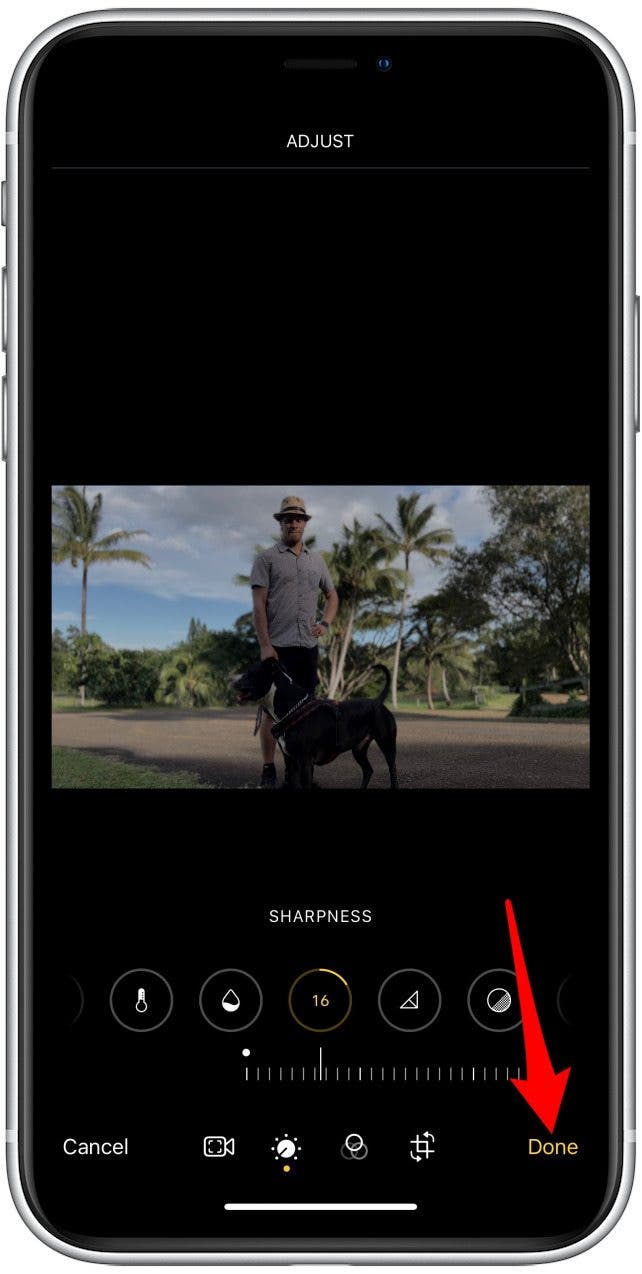
- Tap Done to save your video.
![Tap Done to save your video.]()
- If you don’t like the changes made, you can tap Edit again.
![If you don’t like the changes made, you can tap Edit again.]()
- Tap Revert.
![Tap Revert.]()
- Confirm to Revert to Original. This will remove all edits made to the video.
![Confirm to Revert to Original.]()


Pro Tip: Consider making a copy of the original video by tapping the share button and selecting duplicate. You can create multiple copies to experiment with different filters and editing options without having to keep reverting to the original.
Now you know how to shoot Cinematic mode videos on your iPhone 13 and how to edit these videos on various devices and apps. Cinematic mode gives you the tools to create cinematic effects. Understanding the new cinematic video features will get you a step closer to learning how to make a movie on your iPhone. Next, learn how to avoid blurry photos on your iPhone 13!