In previous posts I have touched on inheritance in Swift. In this post, I'm going to be diving deeper and giving you a fuller picture of how inheritance works in Swift, and how you can use it to create apps that are easy to extend when you need to add new functionality. Along the way, you will also learn about the important concept of polymorphism and learn how to use Xcode's new playgrounds!

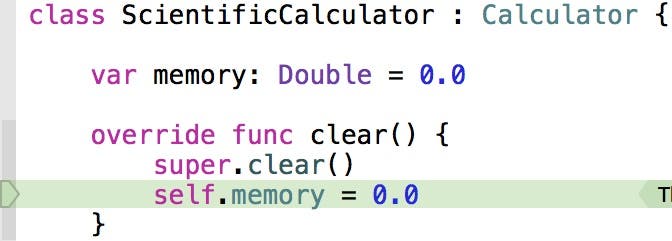
Inheritance allows you to create new classes based on other classes. For example, Figure 1 shows a ScientificCalculator class subclassed from a Calculator class. In this relationship, Calculator is the superclass and ScientificCalculator is the subclass.
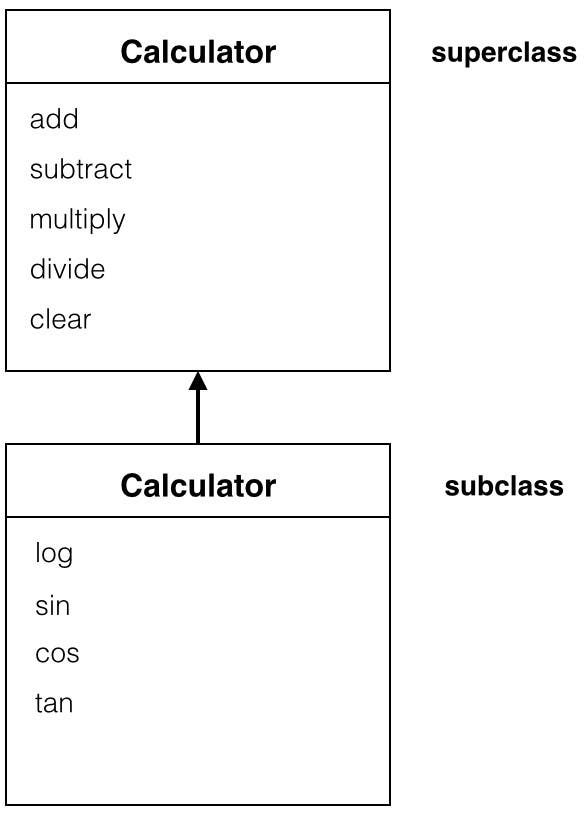 |
| Figure 1 - ScientificCalculator is a subclass of Calculator. |
Specifying a superclass is optional, but you can specify a superclass in the class declaration:

A class with no superclass is known as a base class.
The beauty of inheritance is that you don't have to create every class from scratch. You can create a subclass from an existing class, inherit all its properties and methods and extend it to suit your needs.
In this example, the ScientificCalculator inherits all the functionality of its Calculator superclass, including add, subtract, multiply, divide, and clear methods. You don't have to rewrite these methods for the ScientificCalculator class. They are simply inherited. The, you can add methods to the ScientificCalculator class—such as log, sin, cos, and tan—that extend its functionality and specialize it.
Overriding Methods
At times, you may need to override a method or property inherited from a superclass. To override an inherited member, declare a new implementation of that member in a class file and mark it with the override keyword.
Overriding an inherited member allows you to:
- Extend the member by doing something additional in the subclass
- Override the superclass member by doing something completely different in the subclass.
To access a superclass member such as a property or method, use the super. prefix followed by the member name you are overriding.
Let's check out an example of inheritance. In order to follow along, download the sample project from this link.
- Open the AdvancedSwiftDemo project you just downloaded.
- In the Project Navigator, drill down into the AdvancedSwiftDemo node to see the Calculator and ScientificCalculator classes.
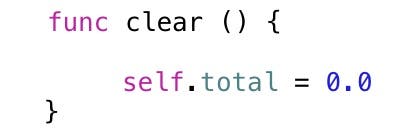
- Select the Calculator.swift code file in the Project Navigator and take note of the clear method in the Calculator superclass:
- Select the ScientificCalculator.swift file to see that it is a subclass of the Calculator class:

- Notice there is also a clear method that is inherited from the Calculator class:
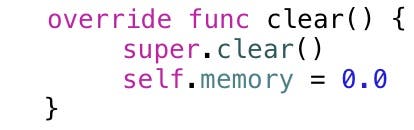
This method overrides the clear method in the Calculator superclass. Remember you override an inherited method by adding a method with the same signature in the subclass and marking it with the override keyword, as shown above.
In the first line of code is a call to super.clear, which calls the clear method in the Calculator superclass. This is very common. When overriding a method, you often make a call to the superclass method in addition to the custom code that you have added. This allows you to extend the existing functionality of the method because you are still running the method in the superclass, and you are doing something extra in the subclass.
When the method is executed in the subclass:
- First, a call is made to the Calculator superclass clear method that clears the total property.
- Execution moves to the ScientificCalculator subclass clear method and the memory property is cleared.
To see this at run time:
- Expand the AdvancedSwiftDemoTests node in the Project Navigator and then select the AdvancedSwiftDemoTests.swift code file.
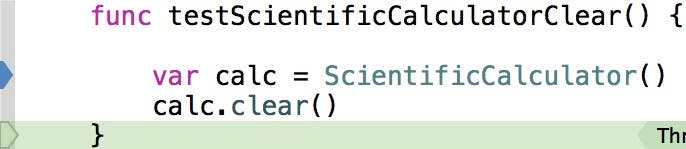
- Add the following test method before the closing curly brace of the class:
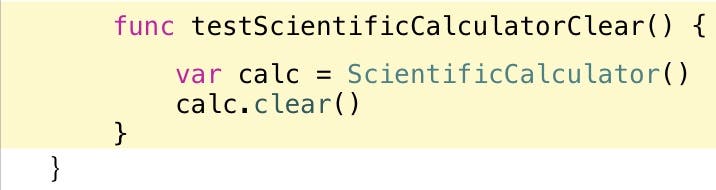
Although not a true unit test, this code creates an instance of the ScientificCalculator class and then calls the object's clear method so we can see how this works at run time.
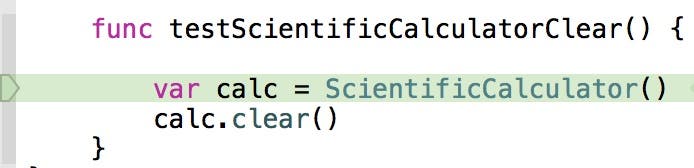
- Next, set a breakpoint on the first line of code in the new test method by clicking in the gutter to the left (Figure 2).
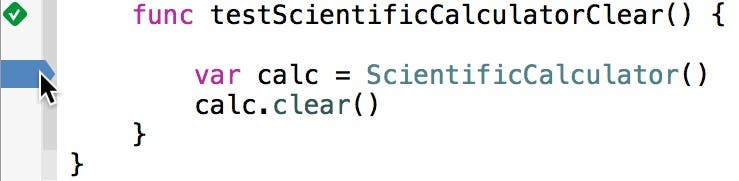 |
| Figure 2 - Set a breakpoint. |
- Press Command+B to build the project.
- In the Navigator toolbar on the left side of the Xcode window, click the fifth button from the left to select the Test Navigator and then click the run button to the right of the testScientificCalculatorClear test method (Figure 3). Note: If you don't see the this test, just click the run button to the right of the AdvancedSwiftDemo tests folder.
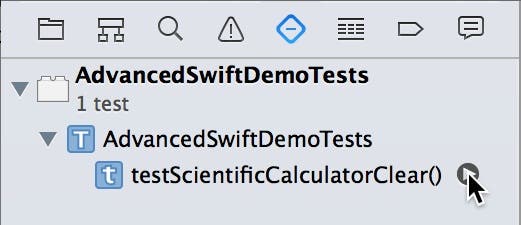 |
| Figure 3 - Run the testScientificCalculatorClear test. |
- This causes you to hit the breakpoint in the test method (Figure 4). As you can see, the code that creates an instance of the ScientificCalculator class is waiting to be executed.
 |
| Figure 4 - The breakpoint is hit. |
- In the Debug toolbar at the bottom of the Xcode window, click the Step into button to execute this line of code. This begins the process of creating the object and takes you to the initialization of the ScientificCalculator's memory property (Figure 5).
 |
| Figure 5 - Initializing the memory property |
- Press the Step into button again. This takes you to the initialization of the Calculator class's total property (Figure 6).
 |
| Figure 6 - Initializing the total property |
- Click the Step out button and you will be returned to the first line of the test method. Press the Step over button and the initialized ScientificCalculator object that is returned by calling ScientificCalculator() is stored in the calc variable (Figure 7).
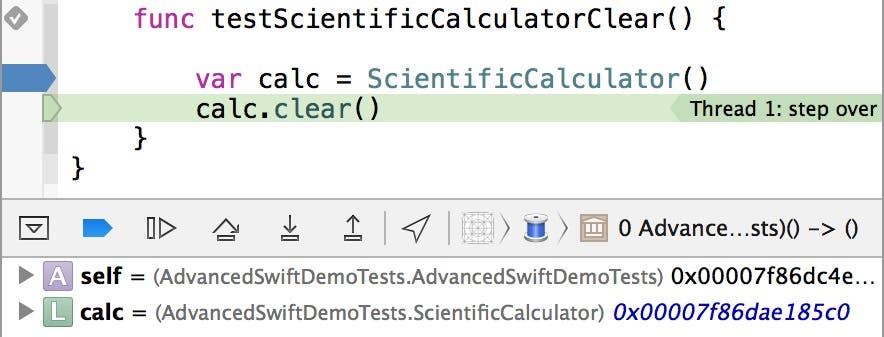 |
| Figure 7 - The ScientificCalculator object is created. |
- With a fully initialized ScientificCalculator object, you're ready to run its clear method. Click the Step into button and you will be taken to the first line of code in the ScientificCalculator object's clear method (Figure 8).
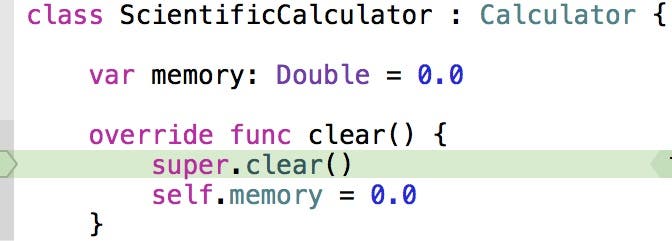 |
| Figure 8 - Running the ScientificCalculator object's clear method. |
- The code that calls the superclass clear method is waiting to be executed. Click the Step into button and execution is taken to the Calculator's clear method, which is getting ready to store 0.0 in its total property (Figure 9).
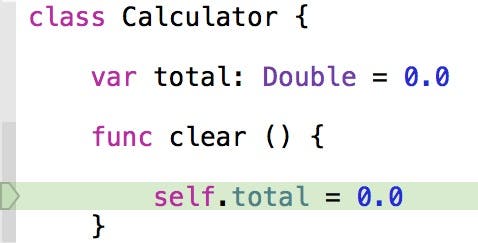 |
| Figure 9 - Running the Calculator's clear method |
- Click the Step out button and you will be taken back to the ScientificCalculator object's clear method, which is waiting to execute the line of code that stores 0.0 in the memory property (Figure 10).
 |
| Figure 10 - Getting ready to clear the memory property. |
- Click Step out and then Step over, and execution will move to the end of the test method (Figure 11).
 |
| Figure 11 - Back in the test method |
- Click the Continue button in the Debug toolbar to finish running the test.
A few additional notes on overriding—when you override a method, you can choose to add custom code before the call to super, or after the call to super (or both). For example:

Also, if you eliminate the call to the superclass method, you completely override the code in the superclass, because that code never executes. it's more common to extend a method by including the call to super.
Overriding Properties
Although it's more common to override methods, there may be times you want to override properties of a superclass to add new functionality to the subclass. Let's look at step-by-step instructions to see how it's done.
- Start by creating a new Playground. Select File > New > Playground... from Xcode's menu.
- In the Create Playground dialog, change the name to InheritancePlayground. Make sure the Platform is set to iOS, and then click Next.
- In the Save dialog, select a folder to save the playground and then click Create
- Delete the "Hello playground" sample code at the top of the playground.
- Add the following code to the playground that declares a PatientEntity class with three properties:
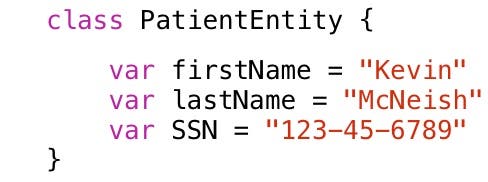
This PatientEntity class contains a social security number, which is sensitive information. Add the following code to the playground below the class declaration:

This code creates an instance of the PatientEntity class and then accesses its SSN property. This displays the information show in Figure 12 in the Results sidebar.
 |
| Figure 12 - The PatientEntity social security number |
In most cases, people viewing this patient's information shouldn't be able to see their full social security number. So let's create a more secure subclass.
- Add the following code to the playground below the code you just added:

PatientSecureEntity is a subclass of PatientEntity and overrides the inherited SSN property. Some important things to note about this code:
- To override a property, you must use the override keyword and then you must specify both the name and type of the property. This helps the compiler verify that you are overriding the correct property.
- In the PatientEntity superclass, the SSN property is a stored property. In Swift, you can override any property, whether it's stored or computed.
- The code in the get method fires whenever the SSN property is accessed. This code returns a series of asterisks and dashes followed by the last four digits of the social security number.
- In the get method, you can access the property's value using the syntax super.propertyName.
- If the superclass declares a property as read-write, you must provide both the get and set methods in the subclass. However, if the superclass declares a read-only property, you can make it read-write in the subclass.
- If you declare a set method in a subclass, you must also declare a get method. If you don't want to do anything in the get method, just return super.propertyName.
- The code in the set method gets fired when a value is stored in the property. As the sample code shows, you can access the value being saved to the property using the newValue argument.
- Now add the following code below the PatientSecureEntity to test the property overload:

This code creates an instance of PatientSecureEntity and then accesses its SSN property. This display the information in Figure 15 in the Results side bar.
 |
| Figure 13 - The PatientSecureEntity SSN |
Although the first line in the Results side bar shows the internal state of the SSN property, anyone referencing the SSN property in code will see only the last four digits as shown in the second line.
- You can effectively create a read-only property by not adding any code to the set method. Since this is the secure version of the entity, you may not want to allow change to the patient's social security number Let's make sure it can't be changed. Comment out the code in the set method as shown here:
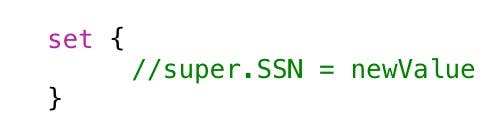
- Now let's see what happens if we try to assign a value to the PatientSecureEntity object's SSN property. Add the following code below the code you added in the previous step:

Check out the Results side bar and you will see the value of the SSN property has not changed!
Preventing Overriding
At times, you may want to prevent someone from overriding a member of a class or an entire class. Do this by using the final modifier.
For example, if you don't want anyone overriding the SSN property of the PatientSecureEntity class, you can mark it with the final modifier like this:

You can prevent the entire class from being overridden by marking it as final:

And here is a method marked as final:

Polymorphism
Polymorphism is one of object-oriented programming's core principles, and you really need to understand it well to write the most effective code.
So far, whenever you have declare a variable of a particular type, you have always stored an object of that exact same type into the variable. For example, the following code declares a variable of type UITextField, and then creates an instance of UITextField and stores it in the textField variable:

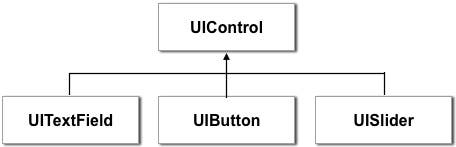
No surprises here. However, in Swift, when you declare a variable of a particular type, it can also hold a reference to any subclass of that type. For example, take the class hierarchy shown in Figure 14, which shows UITextField, UIButton, and UISlider, just a few of the subclasses of the UIControl class.
 |
| Figure 15 - When you declare a variable of a particular type, it can hold a reference to any subclass of that type. |
The word "polymorphism" means "many forms", and in this example you can see the UIControl class can take many different forms—a text field, a button, or a switch.
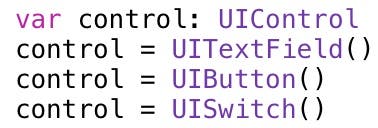
Given this hierarchy, you can declare a variable of type UIControl and then store a reference to the UITextField, UIButton or UISwitch object in this variable:
Polymorphism allows you to write more generic code that works with families of objects, rather than writing code for a specific class. In this example, regardless of which class you instantiate, you can access all the properties and methods declared in the UIControl class that are inherited by all the subclasses.
For example the UIControl class has an enabled property, so you can write the following line of code:

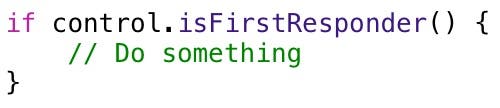
The UIControl class also has an isFirstResponder method, so you can call the following method on the control object:
Conclusion
Over time, as you write more iOS apps, you will find plenty of uses for inheritance and polymorphism in building generalized code and class libraries that can be reused in many different apps. You will also need to make many changes to your app during its lifetime, so it's important to use these tools to make your apps flexible and extensible!